Designer
-
Posts
1,758 -
Joined
-
Last visited
-
Days Won
182
Content Type
Profiles
Forums
Events
Everything posted by Designer
-
Joe, I checked it out and the centerboard is a bit too wide . You could take a 5/8" slice out of the mold and glue it back together or we can just cut another one out. I will be cutting a centerboard mold, you can borrow that one.
-
B&B's first annual "Capsize Camp" July, 20-22
Designer replied to Alan Stewart's topic in B & B Yachts Forum
Yes, it is still on. -
We want to borrow your elves. Kidding aside you did a superb build. I hope that you get to keep this one and can find the time to enjoy her.
-
Wasserboot, I did not know that they made anyone that tall. It is important that can sleep comfortably so I take back my statement that nobody would need a bunk that long. If scaled lengthwise another 5% the midship berths would be 2.16 and the quarter berth would be 2.774 and the length of the boat would be 7.825 long.
-
Wasserboot, The berths on the MF246 are 6'9" or 2.057 long. The quarter berth is even longer. I would not scale it any more because the volume increases too fast. It could be scaled by different length , beam and height factors but it rapidly becomes a new design. You surely do not need any more length in the bunks so moving bulkheads starts to get more complicated. As for windage, less is always more desirable. I think that it is still a reasonable trade off as the extra power gained from the stability helps to overcome it.
-
Hi Fred, Fortunately it is an easy fix. For the hull bottom, you need to grind the glass back to the bottom of the crack and same for the delamination, then relaminate it back. Kevlar has great abrasion resistance which I would consider if I was intending to be scraping the bottom on rocks. The local loading can be considerable when a boat is lowered gently onto a rock but in a dynamic situation I am surprised by how little damage there is even if it appeared to be not a heavy duty situation. You certainly mitigated the damage by jumping into the water, I am glad that you did not get damaged. As for replacing the inside with kevlar, I don't see the need to go beyond glass. Even with a much stronger inside skin, if it delaminates you do not have anything. Grinding back to sound wood and relaminating back with glass should be good. You can add some extra layers of glass if you like as it won't cost much or be hard to do or add weight where you do not need it. As for the board, you do not need to replace it. I would grind down say 1/4" at the joint to a 20 : 1 taper and build it back up with layers of glass until it is fair. Carlita's butt join in her board is still going strong. Good luck with the repair.
-
Joe, A wood centerboard is the most expedient way for the home builder to make. On the MF I wanted the toughest board that we could make. By machining two half molds out of MDF, it gives Jay a simple way to to lay up a solid glass board that should be practically indestructible. There is no wood to swell and there is no need for a lead tip. Not to mention that it will be a perfect foil. We made the rudders on the big cat this way and they have been through a fair bit of abuse so far without any issues. If Jay can get his to pop out of the mold without damage, you could lay yours up in the same molds.
-
Hi Morley, We recently had a builder bring his CS17 over to the shop to sell for him as he is getting older and no longer uses it. She was built in my boat building class under my supervision by a tool and die maker using the best of materials. All of his joints were perfect. The boat was lightly used. The boat pictured is the one that followed his construction in the class and this owner copied his color scheme except that it has a varnished deck. It is in mint condition. All paint is AwlGrip. If you are interested you can email me.

-
Wasserboot, I am glad that you like our MF 234 and 246. I think that she will be an excellent boat for your waters. We have similar conditions here in Pamlico Sound which is large and shallow. Alan and I went through a list of boats to add to our web site yesterday. Alan has taken on the web site and has done a great job but we have been overloaded with work lately but digging our way out so expect to see some changes soon. Yes we will be listing the plans on the site.
-
Ken, No Ken, you tower over me by an inch. There is just 6' headroom in the 234 version under the cabin crown line, so you should be okay. The bunks are 6' 6" long. The 246 version is naturally 5% larger in all dimensions. The air draft is 28' 4" so you will have to lower the masts to pass under the bridge which is not a big deal with them both in tabernacles.
-
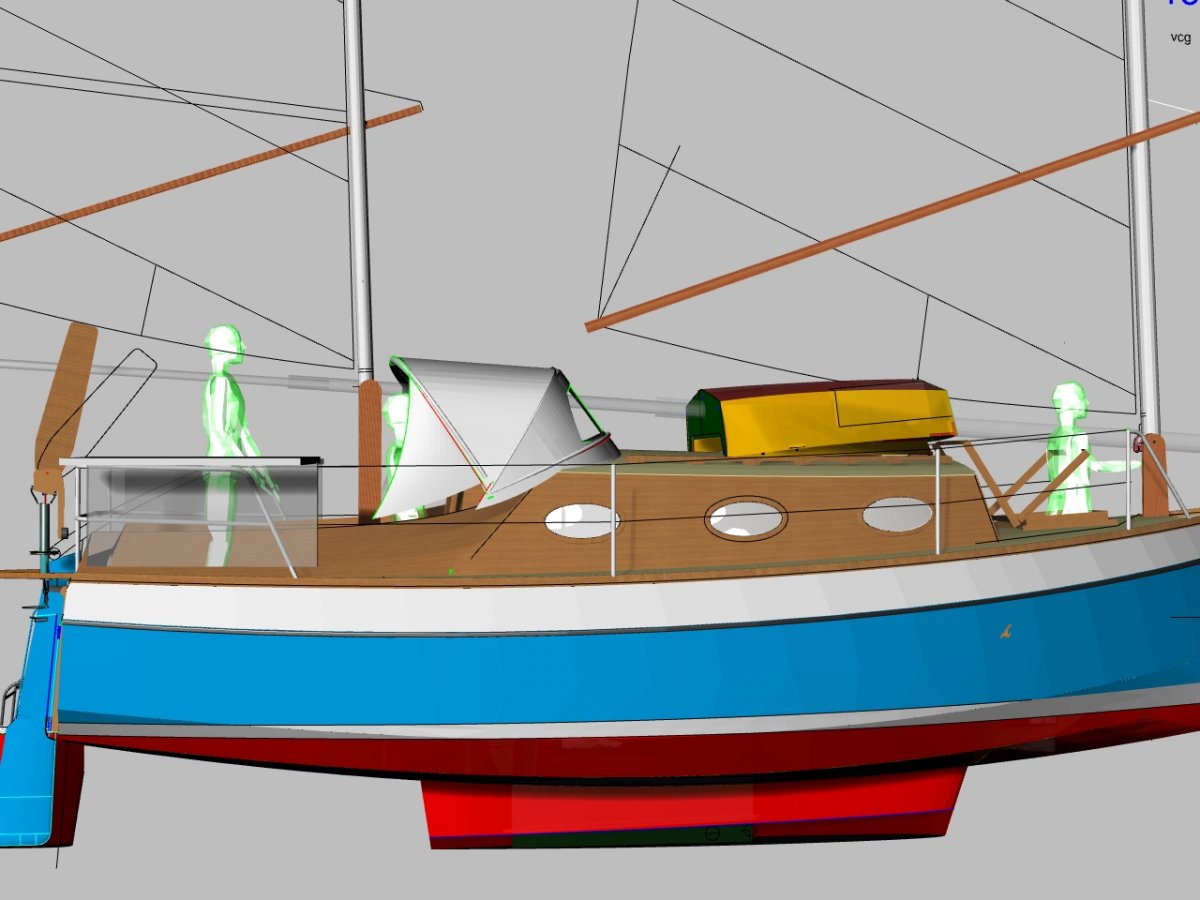
I have been designing the Mathew Flinders for myself for more than a decade off and on, long before we did the Mk3's. What I was trying to achieve was to design the ultimate small voyaging boat that could easily be trailed behind a reasonable size vehicle and yet be be capable of crossing any ocean. She had to be built tough and live well for two people with room for a third person. She is not intended to replace the mk3's as they are great boats, but for anyone who wants to go up to the next level. I went through hundreds of iterations till I finally got it and I am very pleased with final outcome. As you can imagine I am really excited to see her come to life with Jay and Carol. I started at 22 feet and it finally grew to 23'4" as I massaged the ergonomics. When Jay ordered the boat, I did a lot of thinking about his comfort plus I had some interest from people who are a lot larger than me so at the last minute I scaled her by 5% to give 6'4' headroom with the final length at 24'6". If anyone has to have 6'6" headroom they can raise the cabin sides. The trailing weight will be around 4000" depending on how they load it. I am still planning to build the 23'4" version. One of the things that I worked hard on was the range of stability. She has positive stability to 180 degrees which more than meets the EU ISO rules for ocean sailing. I have attached one of the many stability curves that I made with the red and blue curves showing a best and worst case vertical center of gravity. That is to allow for builders to make their own modifications and still meet the high range of stability. I was also able to calculate the Flicka A well known small cruising boat, @ 20 degrees for comparison.


-
Ben, your boat is looking good. The gunwales give the top half of an open boat lots of strength. Another function is to give the top of the boat a finished look as it defines the sheer line. The reason that I stand the gunwales above the sides at the ends of the boat is twofold, it is more aesthetically pleasing if the gunwales are tapered slightly at the ends. You will notice that the sides have more flare at the ends, especially at the bow. If the top edge of your gunwale is 90 degrees to the sides which is normal, the top outboard edge continues to angle down below the plane of the bow transom as it goes forward. I like the knees to follow the camber of the transoms and the gunwales top edge to follow the camber of the transoms. After installation, it is easy to dress off the top with a plane using the bow and stern transoms as a reference to get the angle just right. I dress off the transom beam tops to the gunwales at the same time. I always enjoy this part as it really brings the boat to life. At the stern transom centerline I leave the top edge square which matches an outboard bracket if I will be using one. From the outboard pad I plane a twist as I work out to the quarter knee You must glass the keel line on the outside. Plane a 3/4" wide flat the whole length of the keel before glassing so that you will have a landing for the keel. To keep the flat horizontal, I monitor the flat as I go by setting my plane centered across the flat, I can see if the gap is larger at one end and then plane a bit more on the appropriate side to keep the flat horizontal. You may be more comfortable using a small level as a guide but make sure that it is square to the boat when checking.
-
Alan and Paul's secret weapon for the Everglades Challengec
Designer replied to Designer's topic in B & B Yachts Forum
Hi Joe, I like it. It is still a work in progress. I am happy with the deign but I have not solved the production procedures. I am now making the body out of Uhmw plastic which we can cnc cut. I made up a cutter to machine the scores for the bearings. That all works okay, the issue is the stainless steel center. Our lathe is old and it takes a lot of time to make to the precision that I want. We do not have a mill so I have to grind the flats by eye and drill the shackle holes. Maybe if I switch the center to bronze it would be easier to make and accept that it will tarnish. If we could find a machine shop that could crank out a few at a reasonable price would be good. Alan used Carlita's swivel in the EC and it held up well. Work has got in the way of play and I have not used on Carlita this year. -
Hi Ben, You do not need to bevel the ply. We prefer leaving that gap so that it will fill with epoxy when you lay in your fillet. The bevel for cutting the stiffeners can be taken from the quarter knees. Most people do not even bother with beveling the stiffeners just filling the gap with thickened epoxy. I like to bevel them but if you get it wrong and have too much bevel you will have to trim it off which can be difficult because it is across the grain. I find that a mini grinder with a sanding disc will allow you to trim it easily. On the same note; when you screw the sides to the transom stiffener, you need to just draw in the screw until the sides just touch the transom. If you tighten the screw it will pull in a fish tail when viewed from above. I need to look at that plan to be sure that I give correct advise because there have been some options, the way I intended it was as you interpreted it. The 1 x 2 should be fitted round the vertical reinforcing. Because the transom rakes, you need to bevel the top edge of the 1 x 2 so that the ply top will sit flat.
-
I remember having a hard time getting Carlita off the trailer while I was at Port Townsend. I have worked on my rollers since and they all turn smoothly. The forward roller is grey but it is not in contact when the boat is being pushed due to trailer flex. The next two are yellow and the aft one is one that I made out of uhmw plastic and it rolls very well. I usually launch Carlita at the shop and use the tractor where I can keep tilting the trailer until the boat has no choice but to roll off. I had a really difficult time launching Carlita at the ramp in South Carolina. I started with the wheel bearings clear of the water. It became very clear that there was no way that I could get it off without going deeper. I cannot remember how many iterations I went through including climbing on the boat twice to make sure that it was not he centerboard causing the problem. The exhaust was almost in the water by the time I floated the boat off. I had spent a good deal of the previous day on the trailer lights and hated to have to submerge the trailer. I want the boat to roll off easier than Petes trough as I am still not keen on submerging the wheel bearings. On Friday evening I refined my version of Pete's trough but with 10 home made PVC rollers. Wish me luck. I will let you know how well or bad it works.
-
Core Sound 20 Mark 3 Build - Chesapeake, VA
Designer replied to AmosSwogger's topic in B & B Yachts Forum
It is true that we were off sailing instead of attending cup holding classes but we elected to leave the builders to personalize their boats their own way. Carlita does have a cup holder along with a paper towel rack. This is the fun part, the boat is done and there is no pressure produce, now you can play and make the boat live how you want. God work Amos. -
Don, I am at about 80%. I still have the chores to do before I can go but the weather here tomorrow is perfect so with a bit of luck I will get them done. I am sorry that Chick cannot go but I would not go that far for one day. I will try to go to Buck Hall and get there Friday afternoon, launch and go the creek that they named after me. If you email me your cell # I will catch up to you. I am depending on your research. I have been through there twice in the last two years but have never cruised the area.
-
I am not interested in going that far for one day. I would want to stay until Sunday.
-
Hey Chick, Are we still on? Friday is looking like there will be about 60% rain. I have plenty of shelter on Carlita but It might not be fun on the open boats. I have a few chores to get done but I should be able to make it.
-
Repairing Split / Cracked Hull Panel
Designer replied to NowWeTryItMyWay's topic in B & B Yachts Forum
I enjoyed watching your time lapse video, you are doing a great job. I am sorry about your little glitch. It is not a big deal and will not compromise the boat. Unfortunately it is right around the maximum curvature where the ply is under the most stress and will cause a slight outward bulge. It needs to be epoxied back into place but you need to apply force to get the cracked veneers back to the fair shape. I would cut a piece of 6mm ply about 9" long and 7" wide with plastic sandwiched between the ply and the hull and screw it over the damaged area to force the hull back to its fair shape until the epoxy cured. Because the 6mm ply bottom that you are screwing into does not have enough thread bearing area to absorb the force needed to draw the cracked area back to a fair shape, you need to use some blocks to screw into, like 1 1/4" squares of 3/4" ply. Put some duct tape on the underside of the blocks. You should do a dry run to check that it works like you want. If it does not quite bring the surface back to fair, try thicker ply. I presume that you will glass the outside of the hull before painting. I would glass a patch on the inside and you will be back to full strength. -
Steve, I like to glass tape the nesting bulkheads to the hull halves which crosses the centerline under the keel so that it can all be cleaned up prior to adding the keel. It is not hard to cut though the keel after the epoxy has cured to re-separate the hull halves.
-
What we are trying to achieve is to create a vapor barrier over the wood. Epoxy is the best vapor barrier that we have but it is not 100%. As with all vapor barriers thicker is better and a layer of glass as Steve mentioned is a guarantee of an even thick coating. However I subscribe to the three coats of epoxy for everything above the bilge because I think that life is too short for that level of detail. While playing musical motors with my OB20 that Chick built more than a decade ago I decided put in a new larger fuel tank under the cockpit sole. I cut out a long narrow section of the sole which gave me a perfect opportunity to inspect an almost impossible area to view. Fortunately Chick did not paint over the epoxy so that I could see in an instant that there was no discoloration anywhere under the cockpit. There is no glass anywhere except at the chines and transom and stringers but there looked to be about three coats of epoxy over all of the wood. The bilge area has not been well treated over its life as there was plastic hatch in the outboard well. It took me a while to find out where that water in the bilge was coming from. I got rid of the hatch and put ply cover with caulk over the hole. I always parked the boat bow high with with the bungs removed but the boat often spent a good while in the water with no way to ventilate the bilge.
-
This is getting exciting, certainly better than watching grass grow. Alan is in charge now, he has opened up better than a mile and is exactly on course. The Highlander is well north of the correct course. There is a northerly route called Crocodile Dragover but it is too early to head north yet.
-
The winds have now gone west so they now have a nice fair wind. Windy is now showing 9 knots. It will be fair for the next couple of days. If I was near the rear of the fleet I would want to get a hustle on to cross the Bay before it turns foul. Florida Bay is wonderful in a westerly. The Thistle and Highlander have very large rigs which suits this light air. Greybeard is approaching check point 2 in his mk3 and Bones and Pink dog in their CS17 M3 and 1 respectively are approaching Marco Island. I do not know what happened to Swimboy in his CS17 but he returned to the start on the first day.
-
Alan and Paul's secret weapon for the Everglades Challengec
Designer replied to Designer's topic in B & B Yachts Forum
It is a good idea to add extra sail area for those light weather days. You can either run the staysail or the spinnaker. There is just not enough room for 4 sails on the boat for all of them to set well at the same time and have a nice slot between them so that they can all draw efficiently. The staysail is a docile easily handled sail that will boost your speed nicely. It is easy to hoist and retrieve. It can be used on a close reach to a broad reach. It can be set with the the working sails wing and wing on a fairly broad reach but not straight down wind because the sails start to blanket each other. Tacking down wind in a narrow channel is annoying because the staysail has to be removed for the main to gybe. I have never used the staysail on Carlita because I have the spinnaker and being bigger I will opt for it making the staysail redundant for me. I have experimented a flat cut sail like a jib and a radial tri cut spinnaker. Naturally the flat cut will allow you to carry it closer to the wind but you cannot carry it close enough for windward work. Because it is hard to change spinnakers under way especially solo I typically opt for the spinnaker giving up being able to sail as high with it. It is a lot larger which means that I will have to furl it up sooner than I would with the smaller sail so everything is a compromise. The prices are for the sails only.