Designer
-
Posts
1,758 -
Joined
-
Last visited
-
Days Won
182
Content Type
Profiles
Forums
Events
Everything posted by Designer
-
Core Sound 20 Mk 3 -- #4 "Chessie" . .
Designer replied to Pete McCrary's topic in B & B Yachts Forum
Pete, The idea is to not put the trailer in the water past the tires so the boat has to run free. It is easy to undo the winch after you back the boat down the ramp. If the friction is low it will be easy to winch the boat back up again without dunking the trailer. Yes the rollers are set to follow the keel rocker. It will be a bit fiddly to get it right but one advantage is that if one or two rollers are at the wrong height, you can just redrill the bolt hole at the correct height an inch from the old hole and you will be good to go. I intend to install side bunks to guide me when retrieving and to help keeping the boat on the trailer. -
Core Sound 20 Mk 3 -- #4 "Chessie" . .
Designer replied to Pete McCrary's topic in B & B Yachts Forum
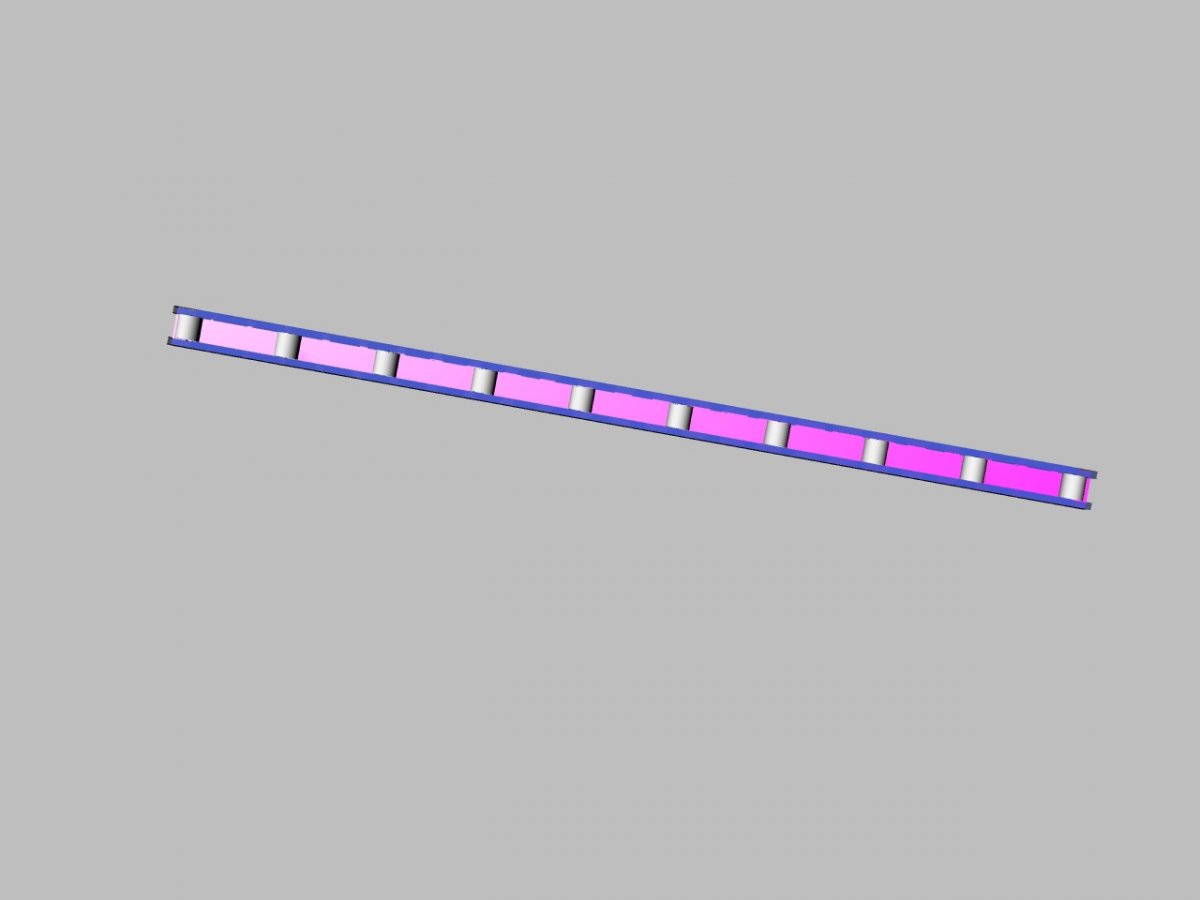
I do not care for Chick’s trailer setup. I also prefer to put the weight of the boat on the keel and use the bunks to keep the boat upright. The last few days we have been playing musical trailers to get Alan to the EC with Southern Skimmer. I have Carlita on S S’s trailer and she is well setup except that there is too much friction on the rollers to launch and retrieve without dunking the trailer. Marissa’s trailer was about to be setup for the OB20 so we decided to use it for SS just for this trip. Marissa’s trailer has been used and submerged occasionally for 8 or 9 years and while the frame is sound, we have had to replace about everything else but the hitch and fenders due to rust. The key to getting the boat to roll of the trailer easily is to add more rollers to lower the load on each roller. Because there are not enough frames across trailers to have enough rollers it is hard to get enough roller on a typical trailer. With SS sitting on Marissa’s Trailer we needed to raise the aft roller 1/2” to get her right. We did not have any more U bolts and the current roller brackets were welded on and in the way of a bolt on bracket. We started looking for a roller that we could cobble up that was 1” thicker than the standard roller and we would be good to go. We found that 3” PVC was exactly right size. We cut some 3/4” ply bushings and put it all together and it worked. Remember that it has to do 1 trip and the trailer will be converted to the OB20. This success got us brainstorming and we agreed that maybe we could make up a wood U channel and put a lot of PVC rollers that were positioned to fit the keel rollers. If we need more rollers we can just drill some more holes and add as many rollers as we need to roll smoothly. I based the width on 6” x 3/8” SS bolts and the wood rails are 5/4 - 1” thick actual size. Carlita has the metal strip under the keel which should be fine sitting on PVC rollers. Here is my first attempt to try out.


-
It is a long way off but if I do not have job conflicts I would like to cruise the area in more depth.
-
Hi Dimitri, Welcome to the forum. I can't speak for Chick but I feel that I know him pretty well and I believe that he will be just as pleased as I will be to hear how you will use SB and follow your adventures together here and elsewhere on the forum. Carlita has given me a lot of pleasure and I am sure that SB will do the same for you.
-
Jan, I notice that you kept the outside keel high all the way to the transom. The reason why we drew the keel ending .331 from the transom and tapering to its full height well forward of the transom is to prevent cavitation during turns while planing. As you have built the keel you should be ok at planing speeds running straight and long slow turns. It will cavitate when turning at speed. I normally like to do the keel as you have built so that I can support the boat as far aft on the trailer as possible. I find cavitating more annoying, not to mention what it may be doing to the engine.
-
Okay Ken, I did not want to hijack this string but you goaded me into it. The story is indeed true, on my first crossing of Florida Bay in the Everglades Challenge in my CS17 I ran out of water. No problem, I will just jump overboard into the 6” of water and spin the boat around and head back to deeper water. Wrong! I instantly sank down to my knees in mud. I struggled back on board humiliated and had breakfast. Having time to think, it was obvious that I needed to improve my pounds per square inch of force on the bottom, snowshoes would be great. As snow shoes were not in my standard kit, in fact I don’t believe that I had ever seen them in real life. I did have a pair of slatted floor boards used for sleeping. I put one overboard and stepped on it. It was a miracle, I could walk back and forth as easily as walking around Vandemere during a flood, except that I only had 3’ of travel. No problem I had a second one and by leap frogging them we easily worked the boat back to deeper water. The snow shoes idea stayed in my mind and I took a pair with me on a later EC on my EC22. When I arrived at the Chocolosky checkpoint to sign in, it was low tide and is famous for it’s nasty mud, here was my chance to see if the snowshoes work. As I struggled ashore wearing the shoes someone said “man are you lost”. They were hard to use without any experience but they were better than nothing. After leaving the last checkpoint at Flamingo we got into the difficult east Florida Bay crossing. As fate would have it there was a honking east wind blowing. Not only is this a head wind, making tacking in the very narrow passes almost impossible, it lowers the water level by blowing the water out into the Gulf which cannot be replenished quickly enough by the few passes between the keys. We made it to Tin Can Pass and ran out of water. I put on the snowshoes and climbed down from the bow. I had my arm over the bowsprit to hold the boat. The wind was shearing the boat back and forth. The boat started to blow me to port so I naturally tried to take a step to port to keep my balance. Wrong! While I had not sunk deep into the mud, it had a firm grip on the shoes and I could not lift my feet. As my CG went way past my support I had no alternative but to fall into the foot of water. As I fell there was a huge splash as I landed on a 4’ shark who was just as surprised as I was and thankfully his immediate need was to escape. I could see that I wold have to improve my technique. I eventually found that if I could keep about half of my weight on the bowsprit, keep my feet moving like in a slow jog and do it pigeon toed to stop walking on my other shoe. I could make forward progress. It soon failed when the pain in my heels brought back on board to see what the problem was. There is grit in the mud that got into my wading shoes and had rubbed my heels raw. They sort of worked but they were no panacea.
-
Steve, We do have a better idea. Jay and I used three small zip ties 120 degrees from each other every 2 feet along the wire. It is light, cheap and offers little resistance to pull it up inside the mast. It does not slap or make any noise.
-
Mark, If you look at the cradle plan in profile view you will see that bulkhead 6 sits over the aft cradle. Good luck with going 3d.
-
Steve, I think that I figured out why the enlarged view gave the 4" measurement. The enlarged view was scaled by 2 and the dynamic dimensioning turned the 2" into 4". We have had some issues with sprits being too short. We have been adding hardware along the way to make rigging quicker and each link we add requires a few inches more sprit. Because the sprit slopes down aft at about 30 degrees, if the snotter is higher on the mast or the sail is not hoisted to the top, it makes the sprit angle down more which requires a longer sprit. I think that we had lengthened the sprits by the time that plan sheet was drawn. I would finish rigging the sprits as you have them and go sailing. If you cannot flatten the sails enough, I would just scarf some wood on the aft end.
-
Steve, Good catch. I did not see the 4" but I did see the 2" and commented that it should be less. I like to put the clew eye strap as far aft as I can as long as the aft fastener cannot pull out of the end grain,.There is no point in carrying around extra sprit for nothing. The exception is Carlita's mizzen sprit that was extended for the mizzen sheet to clear the wind vane. By moving the eye straps as far aft as possible will give you as much sail adjustment as the sprits will allow.
-
Jan, I like that thin layer of glass on the inside of the planking. It helps to prevent water from getting into the ply and it adds stiffness to the skin and adds to the impact strength. Yes the 120cm wide fabric will be perfect. Hightechmarine brings up an important point. I do not know what radius your fabric will wrap around without bubbling so I would do a test sample. I tell everyone that the round of a pencil is the minimum that you need. It is really annoying to see bubbling on either side of the chine corner. If it does happen, I have been able to save it with peel ply. If you do not have peel ply some clear plastic is worth a try. It does not always work but when it starts to bubble there is nothing much you can do but repair it later and wished that you had made a bigger roundover. The down side is that the sharper you can make that chine edge the more efficient and drier it will be. I build the rounded over chine corner back to a sharp edge with colloidal silica thickened epoxy. If you have any milled fibers, I would add some to the mix. The rounded corner allows the water to wrap around the chine instead of breaking away clean. Dave, My guess is that being about half the weight and thickness, the ding resistance will be about the same as 10 oz glass. While we are on the subject, sheathing the outside does not add much to the stiffness to the planking. Glass on the inside does and adds to the impact strength but does nothing for ding resistance. The reason is that the forces are generally inwards putting the planking under tension. Glass fibers have much more tensile strength than wood fibers. Sheathing on the outside will be in compression and the thickness of the glass is quite thin so does not add much extra thickness to the planking. Thickness increases stiffness in all materials.
-
Oyster makes good points. I have never had much trouble wetting out carbon but the thing that bothers me is that it does not change color like glass and you never know for sure if it is properly wet out as it is still black. I just over work it to make sure that it is done. fortunately at 5oz it wets out easy.
-
Maybe Chick missed the point. These are copies and are not printed on B&B printers. But on the other hand Chic has already received the help on his previous boats without the formality of a coupon.
-
Seeing that I designed the boat and specified the sheathing material I thought that I should comment. There are three main considerations that I wanted to meet for sheathing the hull as well as the cost and weight and availability. I specified 10 oz (400 g/m2) finish cloth which meets all three points adequately. This does not mean that is the only choice. I see that our builder has gone up scale and bought a more exotic cloth. I do not have the mechanical properties for it except that it is half the weight and we know that it is stroger thickness for thickness. My guess is that it will be strong enough. The most important part is the chine joint which holds the boat together. I specified two layers of 10 oz glass (400 g/m2 inside and out over the chine joint by 2 1/2" (6cm) including the chine flats. This gives an adequate safety margin allowing for the variables of home built and qualities of glass and epoxy. I felt that it would be practical if the bottom was glassed 2 1/2" passed the chine first, the edge sanded to a taper and then the sides were glassed down over the chine and chine flats br 2 1/2". Laying the glass this way would meet the strength requirement of the chine and have no seams to fair and later print through on the shiny sides. I see that the spec. sheet shows that the fabric is a meter wide. It is just a bit too narrow to reach 6 cm up the sides and lap the keel in the center of the boat, I would lap the chine by 6 cm and patch the gap at the keel line. The second consideration is ding resistance. I think that this fabric should as well as the 10 oz glass. The third factor is keeping the moisture out of the wood. Wood does not rot if the moisture content is kept below about 22%. Epoxy is the best vapor barrier that we have but it is not 100% vapor proof. With all semi permeable membranes more thickness is always better. Keeping the wood dry under the epoxy also reduces movement of the surface which reduces print through in the paint. So how does our carbon kevlar fabric stack up against our low tech glass fabric? I think that it is equal or maybe a bit better in 1 and 2 and is lighter which is always a good thing. I think that glass comes out a bit ahead in three. It does cost more but some of this is offset by using less epoxy. Kevlar does not feather well, it just fuzzes up when you grind it. Fortunately it is not too thick and you may just have to fair it just with fairing compound. If I inherited this boat I would be happy with the choice. If I was building the boat I would choose glass. I agree with the previous post and lay the fabric dry and wet out through the fabric. This allows you to keep the thread lines nice and straight which is important foe maximising the mechanical properties. It is easier because the fabric is perfectly and trimmed in advance so that once you start mixing epoxy it takes less time and there are no distractions.
-
Chick, Yes the coupon is valid and will be honored by B&B for members of the family which includes you. You just need to present a valid coupon printed on a B&B printer.
-
Building a Two Paw 8 for Trailer Camping
Designer replied to Don Silsbe's topic in B & B Yachts Forum
Don, I use anything that will hold the panels in place until I can get some epoxy into the joint. Just because we show the ties nicely spaced, you do not need to put in a tie if you do not need it. We will double up the wires in the forward most holes in the chine where there is a lot of force. The transom to bottom joint has no force at all so anything that will hold it together until the epoxy dries is good. Just use your judgement. -
Bill, You are making us jealous, it has been cold and wet over here. I was just thinking about Petunia the other day and wondering if you were back in Baja.
-
Core Sound 20 Mk. 3 #22 - Essex Fells, NJ
Designer replied to NowWeTryItMyWay's topic in B & B Yachts Forum
You are welcome. I would rather you ask these questions rather than guess wrong and mess it up. It also helps us to see where we might need more clarification. We agonize over wording and where to put emphasis. I am like most people that if an instruction is too wordy or difficult to understand I will try to work it out for myself. -
Core Sound 20 Mk. 3 #22 - Essex Fells, NJ
Designer replied to NowWeTryItMyWay's topic in B & B Yachts Forum
You are way overthinking this. Dowels will be on the neutral axis when there is any side loading on the joint and therefore do not contribute much. In fact I can think of situations where dowels are weaker. The two layers of glass contribute way more strength to the joint. The object of the thickened epoxy is mainly to hold the lead tip and the board together so that you can work on it. It also fills any mynor gaps or voids. Because the lead surface being bonded is smooth, it is always a good idea to sand the surface to improve the bond. You have to glass the wood part of the board, it is no extra work to carry the glass about 4" or 5" past the lead joint. You could call it done and you should be fine but we added the extra 6" wide layer just as a safety factor. The exact overlap is not critical, just make sure that bottom edge of the glass sheathing is about an inch below the 6" tape lower edge. In case you are skeptical, Southern Skimmer has used that same centerboard joint in many Everglades Challenges and many other sails. The joint looks as good as the day it is done except that the leading edje shows a history of hitting the bottom. This is why you should not glass all around the tip like a footie. Lead makes a wonderful chafing or wear tip whereas glass is not very good. When I bond the lead to the board, I clamp the board vertically so that the lead can sit on top. I clamp 2 pairs of small pieces of wood vertically, one pair forward and one pair aft on the board so that they stand up past the lead. The lead is tapering and the wood temporary clamps will not fit tight to the lead but it makes sure that the lead cannot fall over or move out of position but more importantly you can measure the gaps between the wood clamps and the lead on each side to make sure that the lead is straight. Just be sure to put some tape or plastic on the wood clamps near the joint so that you do not glue them to the board. Clean up the squeeze out. The only other tip I can think of, be careful if you use a grinder to shape the lead to the wood after it is bonded. I did this once and the transfer of heat into the lead was instantaneous, the epoxy softened and the tip fell off. This should not be a problem for you as I recall that your lead is a pretty good fit. If there is any mynor fairing to be done at the joint, it is better to hand sand and or fair the joint with epoxy. Good luck with the project. -
Congratulations Steve. It is great to see her outside at last. What people do not understand is that if you have what it takes to get this far you surely have what it takes to get the boat out. At the beginning, it reminded me a little of that old British song from the 60's, just kidding but it is fun.
-
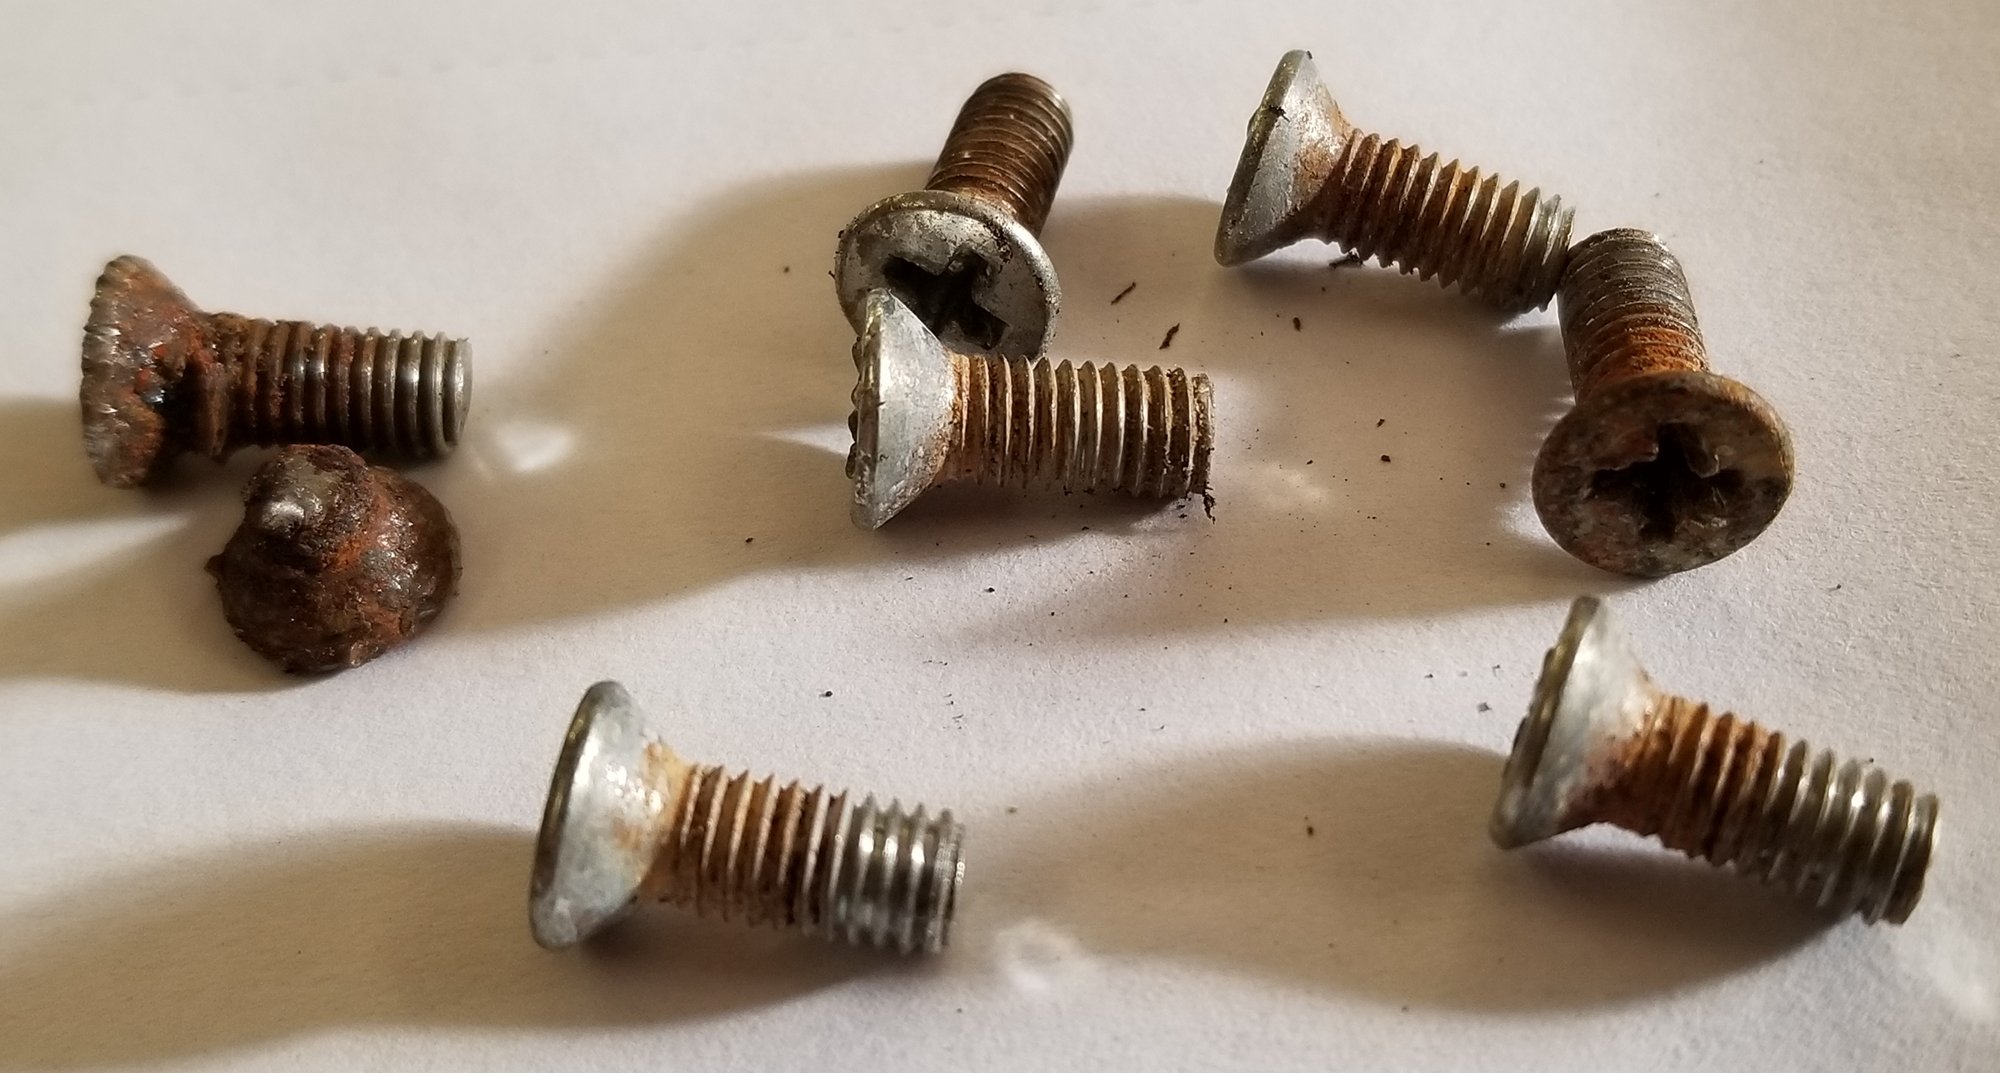
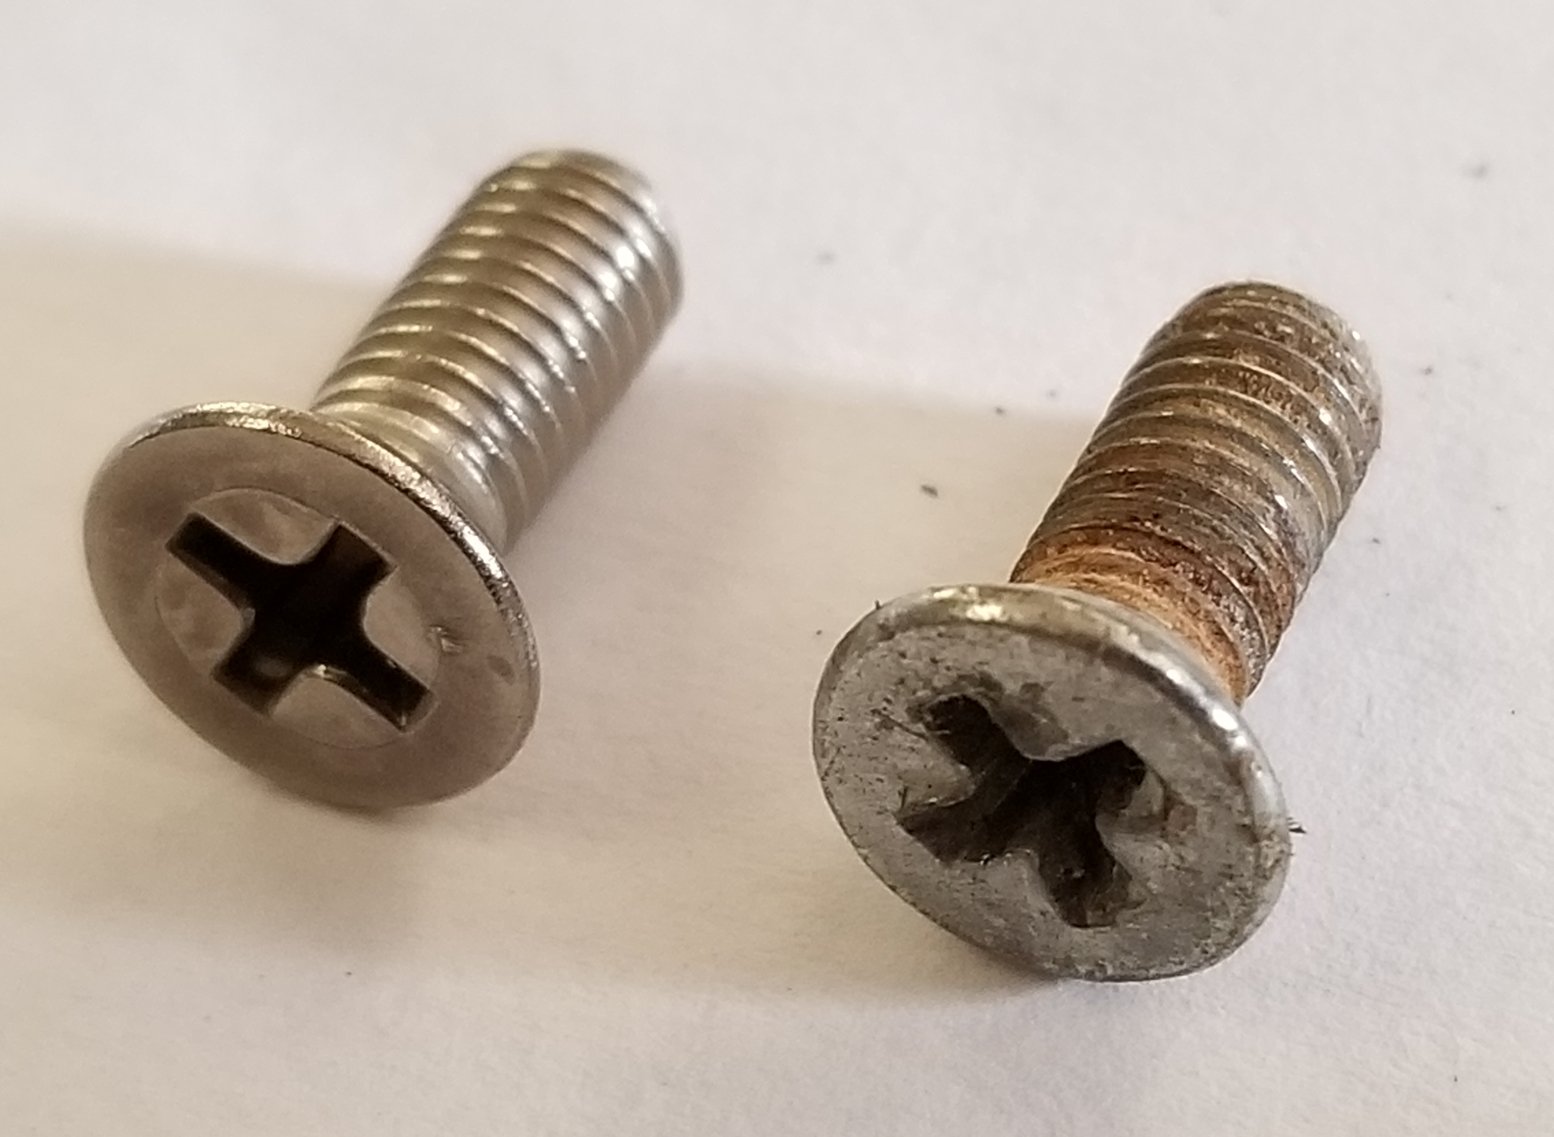
As has often been seen in this forum, many of the builders share their mistakes unabashedly with the world. In most cases it is just a matter of making a few adjustments or redoing a job and at worst, some time and materials have been wasted. It does help to educate the builders who follow and it is well taken by experienced builders who have made their share of mistakes with a “brother’s in arms” attitude and often share some of their mistakes. In the spirit of sharing information here is one of my screw-ups. As a professional, we don’t make mistakes! I wish that that was true. We just make different mistakes. One of my short comings is being too familiar and do things for myself that I would never do for anyone else. I am currently redoing my inside port rings on Carlita. I love the design and they have worked perfectly and look really good. For some reason our marine wholesaler who supplies most of our marine fasteners does not carry #10 x 32 flathead machine screws. They have to be that size to fit the rivnuts already installed. I did not get around to outsourcing the screws until I was rushing to get ready for the Everglades Challenge. I asked Carla to pick some up for me at the local Ace hardware and installed them. By the time I got back from the EC I noticed that a couple of screws were starting to rust. I replaced them in time but last year I noticed some more were rusting and put it on my mental list to do. While rushing to get ready for my Port Townsend trip I forgot to change them out and planned to do it when I got back. The screws kept nagging at me and I finally got serious about them before the last messabout and discovered that I could not unscrew four of them. I put it off until after the messabout because I did not want to risk putting her out of commission. I tried to unscrew them again last week without success. I sicced Alan onto them with the same result. My last resort was to remove all of the willing screws and pry out the ply rings forcing them to break at the seized screw and then grab them with vicegrips. It worked well until the very last screw which twisted off. Luckily I made the original cut files for the ports and it was only a matter of putting some 9mm scrap on the CNC machine and I cut out a new set of rings. They now need their inside edges to be rounded over with 5/16” roundover bit, sand them and epoxy coat and varnish before installing. I still have to solve getting out the sheared screw first. I ordered up some 316 grade machine screws because I do not want to do this again. We magnet tested the old screws and the rusted screws jumped to the magnet. The rest of them were mildly magnetic. Of course the new 316 grade screws were not attracted to the magnet. Had I bothered to magnet test the original screws, I could have taken the bad ones back and had them replaced. You can see the two left screws were steel with the lower one sheared off. The right screw was also steel. The next pictures shows one of the original with a new 316 grade screw. The other picture is the broken out ring. I do not know why so many screws were bad but they were in self service bins and perhaps some steel screws were returned and put in the wrong bin.


-
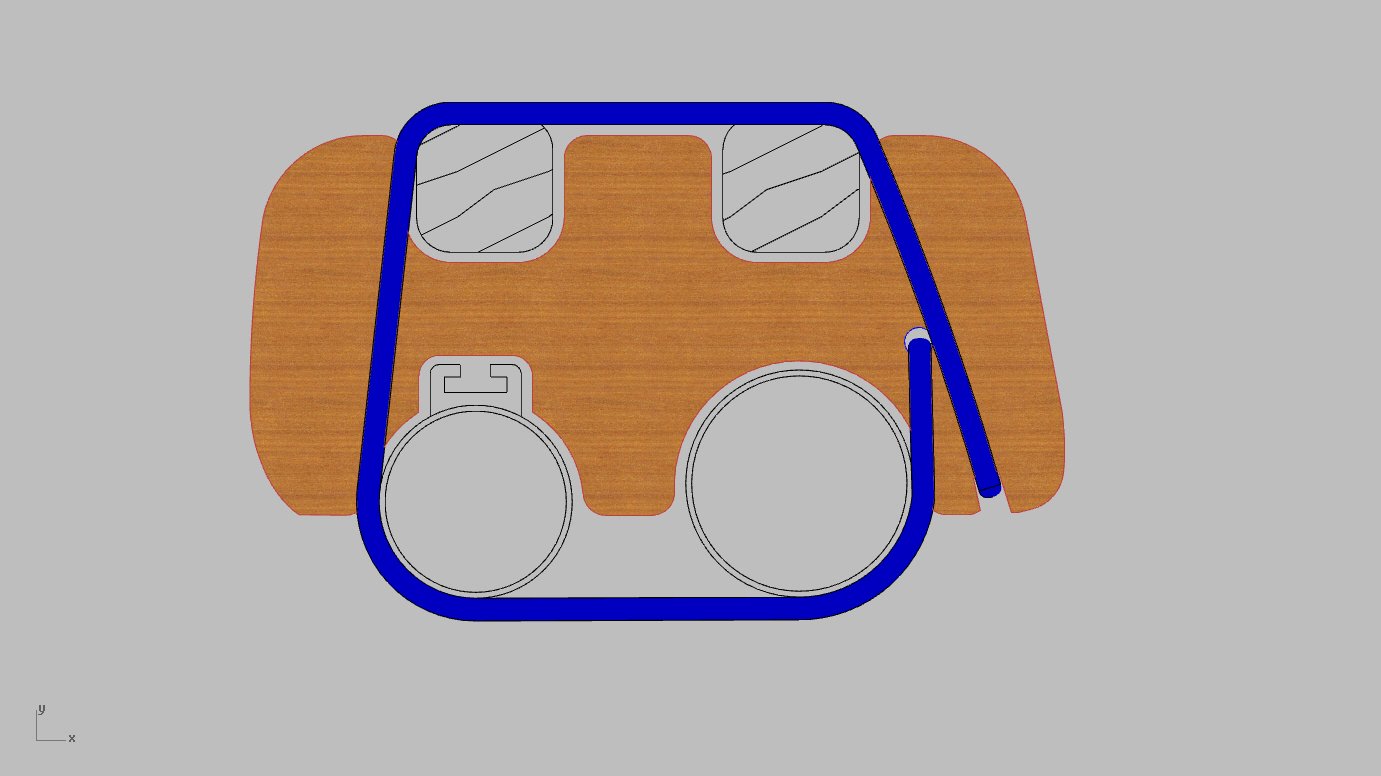
I have been wanting to do this for a long time to speed up my packing up and unpacking the boat but other jobs had priority. I watched Jay packing up his rig and he inspired me to get it done. I measured the gap between my two masts in their trailing position which turned out to be 1 1/4". The main mast being in the tabernacle puts the track down and head aft. I elect to stow the mizzen mast with the track facing up and head forward. This makes the masts about level athwarts where the crutches need to be for stowing the sprits even though the tracks are on opposite of the mast. This is because the mast diameters are apposite where each of the sprit crutches need to be. I made the crutches out of 3/4" ply and it takes about 3 feet of 1/4" shock cord for each crutch. It takes just seconds to move the loop of shock cord under the masts while gathering the rigging and passing over the top of the sprits and putting the loop into the slot. There is no tendency for the crutch to fall over and the setup is very firm when both shock cords are secured. Like Jay and Chick, I leave all of the lines attached except for what I need to undo to remove the sails. Where I differed is not pulling the sprits up the masts but let my snotters go to the stopper knots. This puts them on the deck making the masts easier to lower. If anyone wants I can email them a pdf of the crutch shapes, they can adjust it to their mast stowage setup. I have not sealed them yet. I will pad the bearing surfaces when they are coated.


-
Hi Jan, Welcome to the forum. You are doing very nice work. Thanks for sharing the pictures. I am looking forward to watching her grow.
-
Hugh, You can come and camp whenever you want. Oyster, Damn! Why didn't suggest everyone should do some sanding earlier, we do not have anything ready.
-
Core Sound 20 Mk 3 -- #4 "Chessie" . .
Designer replied to Pete McCrary's topic in B & B Yachts Forum
Peter, She looks like a proper yacht tied up in the slip at St Michaels. I look forward to seeing you both this weekend.