Peter HK
-
Posts
619 -
Joined
-
Last visited
-
Days Won
29
Content Type
Profiles
Forums
Events
Everything posted by Peter HK
-
I think what is meant is the same thing you mean when you said sleeve. I'd extend the top where there is no concern about strength as there may be with an extension at the bottom. If I could get a piece of al tube that fitted inside the current piece I'd use that...if not I'd use the same size tube and cut it longitudinally and compress it a bit to fit inside the topmast and the piece of tube you want to extend the mast with and rivet it all in place. Cheers Peter HK
-
The mechanical properties do vary quite a lot between alloys and tempers. As an example a common alloy for tube here in Australia is 6060 T5 which has an tensile strength of 150 MPa whereas 6061 T6 (the standard alloy for marine use) has a tensile strength of 260 MPa...over 70% stronger. Cheers Peter HK
-
I have 139 sq ft of sail on the standard CS17 (according to the sailmaker's computer program) as I ordered sails with battens and quite a large roach. I don't feel it's overpowered. I'm sure the ballasted boat will need all of the extra area. Cheers Peter HK
-
I marked the varying bevels, which I took from the plans and checked on the boat, as a line on each side of the keel batten and marked the centre line on the batten itself and then attacked it with the power plane (caution- some experience with power planes advised) and finished with hand plane /sander. Took a bit of time to accurately mark it and 10 mins to shape it. I had taped the centre seam first (which is not actually necessary) which meant I could screw through the tape from above to hold the batten in place which was a bit easier than crawling underneath and was easy to do single handed. The fit will never be perfect so plan for plenty of thickened epoxy when gluing it down. Cheers Peter HK
-
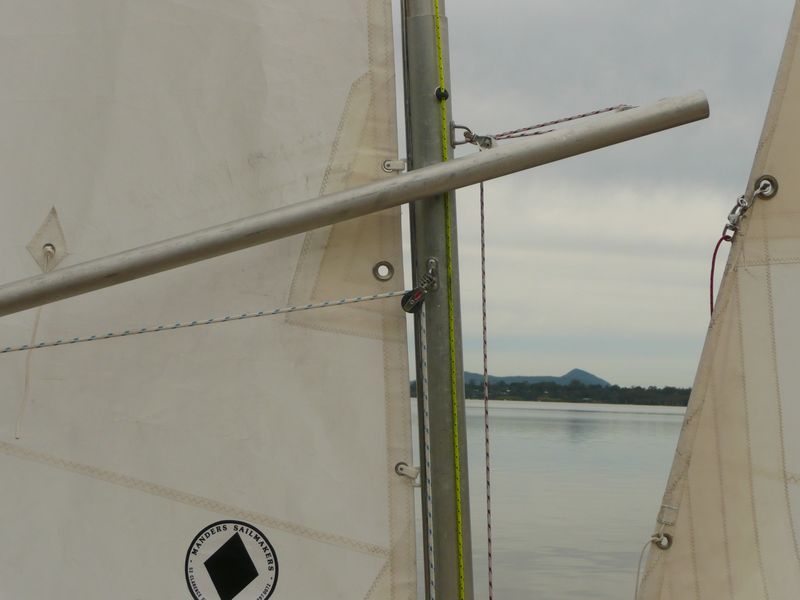
To add my 2c worth re reefing a small dinghy, I have a few suggestions: 1 A standing lug is quite a good choice and reefing is relatively easy...see the photo below of my shortened Welsford Golden Bay dinghy and the link to a short video of demonstrating the reefing system. https://www.youtube.com/watch?v=pvCr8EBKS64 2 Zippered luff can be done 2 ways. One way was the way I did it on my Bolger folding schooner which was based on Wharram's soft wingsail. With this the luff pocket is large so it acts partly like a wingsail with an aerodynamic entry, but also is large enough to compress down on itself forming a lot of little folds. Thus it can be dropped/reefed without any unzipping. The downhaul and halyard are best attached to the sail at the front of the mast. Here are a few photos The top photo shows the dropped sails with the luffsock compressed, the second photo shows the size of the luff socks (and that we needed more luff tension that day) and the third photo is from a Wharram site showing how the large luff sock collapses when reefed - this is the 4th reef. From memory I think Graham chooses a zippered luff with only a small luff pocket and unzips up to the reef point when reefing. Another alternative is to have a sock from head to reef point and one or 2 loops around the mast below the reef so the sail can drop easily. No doubt there are other alternatives. Cheers Peter HK


-
Hi Fishman38 As I see it the bow eye needs to accept force in more than one plane. For example it needs to accept the winch force when first being pulled onto the trailer...this is usually with the bow being lifted up high until the trailer can tilt (if a tilting trailer) or until enough of the boat is pulled onto the trailer to line up the boat with the winch line. Also it might be used for towing at some stage with commensurate side forces. I follow the view that it needs a big enough U bolt set into enough timber and backing plate that any foreseeable pull will not result in failure. Also drilling bigger holes and filling them with high strength epoxy/filler and redrilling to the right size is a good idea as the timber is not subjected to the forces directly and is extremely well sealed from moisture. I usually finally seal with Sikaflex as it remains flexible and is very durable. HTH Cheers Peter HK
-
304 is typically used for bolts/threaded components as it is slightly stronger and better with respect to wear compared to 316. It does tarnish however whereas 316 stays bright. Cheers Peter HK
-
Hi Wojtek I'll add my 2 cents worth The crease at the inner end of the battens could be excessively stiff battens but could only be determined with pressure under sail- do you still have a sharp transition when sailing? The luff creases are common when the sprit is to leeward and there is no tension in the sail- if still present when sailing then more snotter tension and more sheet should fix it by inducing mast bend. If not then is the mast too stiff (or the sail might have too much luff round). The creases at the foot of the mizzen I'm not sure about. ?more snotter tension needed ?more luff tension. Cheers Peter HK
-
Just to add another point with respect to reefing the main- if you set your boat up with reefing in mind there is never a need to go onto the foredeck (a common misconception) as it can be easily done from the cockpit as I showed in this old thread (with you tube video). I leave all my lines permanently run and simply clip on with snaphooks so rigging is little different in time compared to rigs without reefing lines. There is no need to run the control lines down both sides as reefing the main is done head to wind anyway. http://messing-about.com/forums/topic/7063-reefing-cs17/?hl=%2Breefing+%2Bcs17 Cheers Peter HK
-
The only objective figures I have was from a day when I plotted a polar diagram for my CS17. There was a steady 6 knots of breeze on a lake with negligible tidal effect. The figures I obtained on GPS were; At 50 degrees to the true breeze boat speed was 4.9 knots...this was when it felt like I was going to windward well and any higher into the breeze would have resulted in significant loss of boat speed and indicates a tacking angle of 100 degrees. The next readings were 5.1 knots @ 60 degrees, 5.6 knots@ 70 degrees, 5.8 knots @80 degrees and 6.1 knots @ 90 degrees. Off the breeze the speed fell to a low of just under 4 knots and a best VMG downwind at 140-150 degrees, without staysail. I do have battened, roachy sails with a total area of 139 sq ft. Obviously more data points from multiple attempts would be needed to claim any great accuracy, but 4.9 knots at a 100 degree tacking angle in 6 knots of breeze isn't too bad. While on other boats I usually motor up the channel in my usual boat harbour when it's to windward, but I usually tack up to ramp in the Core Sound (partly because of the ease of tacking in a cat ketch but also as it seems to sail quite nicely to windward) Cheers Peter HK
-
My advice here is to make sure you sand them enough to remove the sharp points especially at the edge. They tend to catch on things and tear them, including your hands when you are reaching for something in the locker, which I know from experience. Cheers Peter HK
-
Hi Fred I just checked my Twopaw 8 (nesting version of Catspaw 8...I presume the same dimensions) and measured across the bow gunwale to gunwale. Total width with untapered 3/4 inch rubrails is 640 mm (25.2 inches). By tapering the rubrails you might gain half an inch. HTH Cheers Peter HK
-

fractured plywood bottom panel ..... help
Peter HK replied to striperick's topic in B & B Yachts Forum
A photo would help with recommendations but remember there is no problem that can't be fixed with epoxy and glass. Usually if you can fill the crack with thickened epoxy and glass either side there will be no problem...it would likely be stronger than the original ply Cheers Peter HK -
If you're going to have a motor the open plan is a better choice. Cheers Peter HK
-
Mainsheet cleat position on Spindrift 11?
Peter HK replied to SteveKos's topic in B & B Yachts Forum
There is a bit more friction with the extra blocks but the only time it is annoying is in very light conditions especially when off the breeze- the force in the sail is not enough to pull the sheet through all the blocks. I sometimes find myself having to pull some sheet through from the aft end of the boom to ease the boom out. It heavy conditions I don't notice any increased friction as it's minimal compared to sheet tensions (not that sheet tensions with a spritboom are ever very high). Cheers Peter HK -
Mainsheet cleat position on Spindrift 11?
Peter HK replied to SteveKos's topic in B & B Yachts Forum
I think you might not have fully understood my explanation. Essentially on a spritboom the sheet can be led to a cleat aft on the boat (as in my example with a block and cleat on the tiller) or a cleat forward by running it along the boom, down the mast and to a block or fairlead with a cleat within reach of the skipper so that he can handhold the sheet when necessary and cleat it when it is appropriate to do so. I generally prefer my sheet to be led forward if I can ...it feels more comfortable to me than reaching aft to a sheet...but either can work. What doesn't work on a spritboom is the sheet led to the centre of the boom and down to cleat near the centre of the boat as the sheet interferes with the sail on one tack. Of course this method works well on a standard boom. Cheers Peter HK -
Mainsheet cleat position on Spindrift 11?
Peter HK replied to SteveKos's topic in B & B Yachts Forum
See above photos The sheet goes from traveler to end of boom , along boom, down the mast and finishes at a swiveling cleat. In a Spindrift 11 you'd have to then run the sheet back aft to a cleat somewhere- not sure how that would work. Cheers Peter HK

-
Mainsheet cleat position on Spindrift 11?
Peter HK replied to SteveKos's topic in B & B Yachts Forum
On one boat of mine ...a Welsford Golden Bay dinghy...I ran the sheet from the aft end of the sprit boom to a stand up block on the rudder above the pintles (so as not to bias the weather/lee helm) and then onto a clam cleat on the top of the tiller. It works OK and If needed I can go to 2 purchases as I have a block on the boom end and a becket on the stand up block so I can attach the sheet to the becket. On my CS17 I run the sheet along the sprit boom and down the mast to a swiveling cleat at the mast base. Overall I prefer having a sheet forward. Cheers Peter HK -
I bought a second hand one. Most will need some adjustments as the trailer will probably be designed for a (much heavier than a CS17) power boat with a big outboard. The axle will be too far aft and the springs too rigid. I found one with a movable axle and put lighter springs on and it works quite well. The trailer is heavier than the boat however which makes it a little awkward to move around manually. Still it only cost me $400. Prices for a new one here in Australia were a lot more. Cheers Peter HK
-
It'll certainly be a different boat on the Saigon river. When I was last in Vietnam (2011) I went by car to the Mekong delta for a cruise but I saw there were boat trips from HCMC. How far is that and how long would you take in an OB 20? I had a great time in Vietnam...friendly people, great food, even great wines in Hanoi given the French influence. I was staggered at how they seemed to get over the effects of all the wars in the last 100 years. I loved the description of communism from one of our guides- It was the bottle but it didn't affect the contents Cheers Peter HK
-
I glassed my CS 17 on the outside. I spoke to the designer about this when he was here in Brisbane in about 2006 and I was about to start the build. His comment was that about 50% of boats were glassed, that it added a little weight but that the abrasion resistance was much better. Make your own decision based on expected usage. If it's not going to be hauled up beaches and only go from water to trailer then glass is probably unnecessary. If you take it to a rocky beach then glass it. As to weight- it's not that much. Assuming 6 oz (close to 200gsm) then a spindrift 11 wouldn't use much more than 5 sq metres of glass, which at 200gsm equals 1 kg. As hand layups can't really exceed a 50/50 resin to glass ratio the weight of the resin is also about 1 kg...so 2 kg overall. If you only glass the bottom you're at about 2/3rds of these figures on weight. Overall it's not much- might be important for racing but not so much in a homemade boat. Cheers Peter HK
-
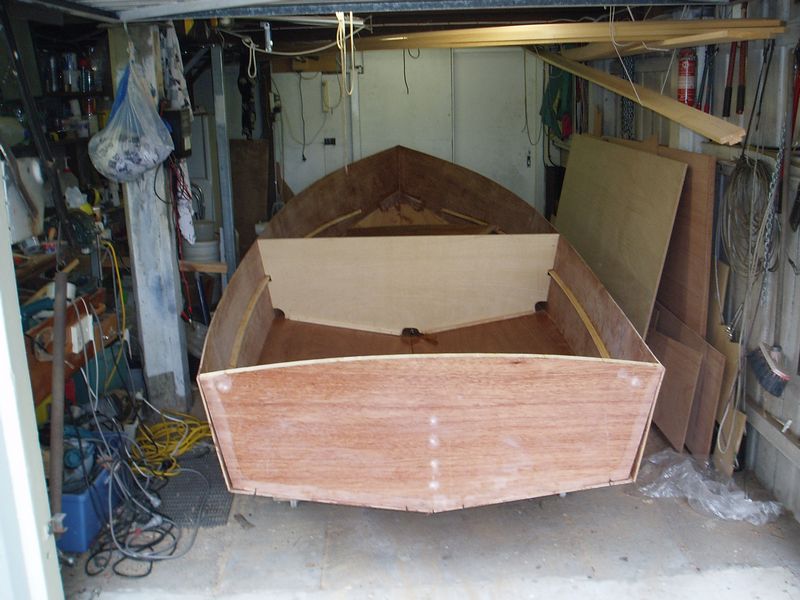
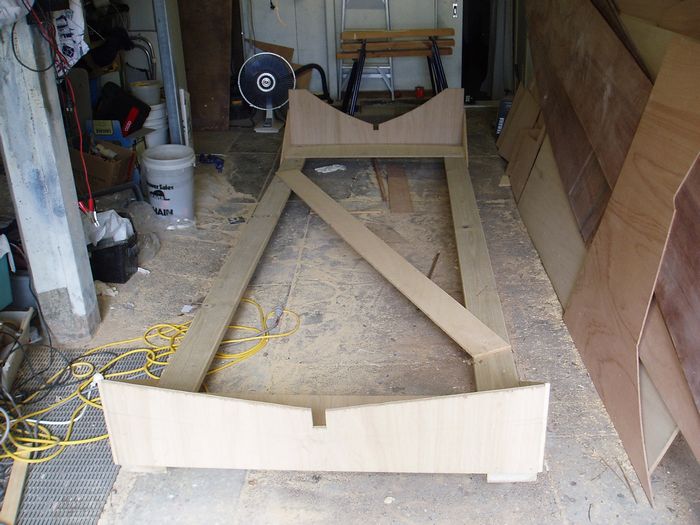
I'd certainly also recommend an hour or 2 of thought into the best building sequence. I built a CS 17 between 2006-2009. I had a small garage in which to build it - length 19.5 ft. You can see why I didn't build a CS20 I also realised that when I had a hull in the garage that I would have little or no space to build all the other stuff- wooden topmasts, rudders, rudder box/tiller, centreboard, hatches etc. I decided to make a decent table out of a couple of sheets of exterior half inch ply to do the lofting and scarfing of the hull panels on and then build the cb/rudder etc on it. When that was done I used some of the half inch ply sheets to build the mobile cradle which held the hull until completion. I remember that a good table and work area was great for the little stuff and it was also a good feeling to pull all the pre-prepared stuff out of a corner and just fit on the hull when it was ready. I know a spindrift 11 is a much smaller project and maybe you have oodles of workspace but I'm sure a bit of careful thought will save some time/energy and frustration (why didn't I do that before!) Have fun with the build...I love the finished product but really enjoyed the journey. Cheers Peter HK


-
Why not another CS17 Build Thread? Here's #366
Peter HK replied to mattp's topic in B & B Yachts Forum
I fitted the centrecase by cutting a hole large enough to fit the case through then scribed with a pencil (which took about 30 secs), cut off the excess, and was ready to glue/glass it in. As you can see from the photo at this stage the seat uprights, keel batten and bottom stringers were all in place so the hull was very rigidly held. I'm sure the hull didn't move/shift or distort to any detectable extent. I'd do it the same way again. Cheers Peter HK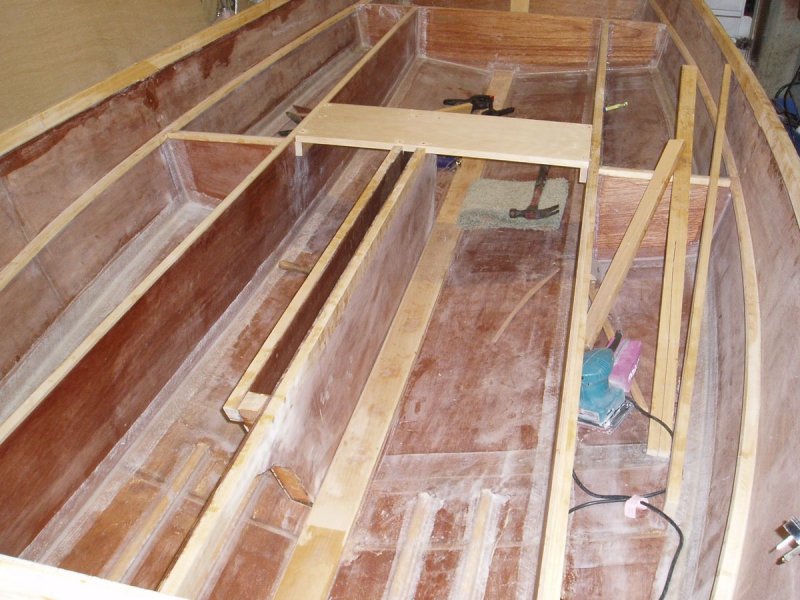
-
Mine also start on the first stroke but they run out of gas pretty quickly Cheers Peter HK
-
The lower section of a laser mast is about the right spec. Maybe a birdsmouth wooden topmast on the lower section ( a 2 piece mast instead of a 3 piece) would work well. Cheers Peter HK