Paul356
-
Posts
795 -
Joined
-
Last visited
-
Days Won
103
Content Type
Profiles
Forums
Events
Everything posted by Paul356
-
a great day
-
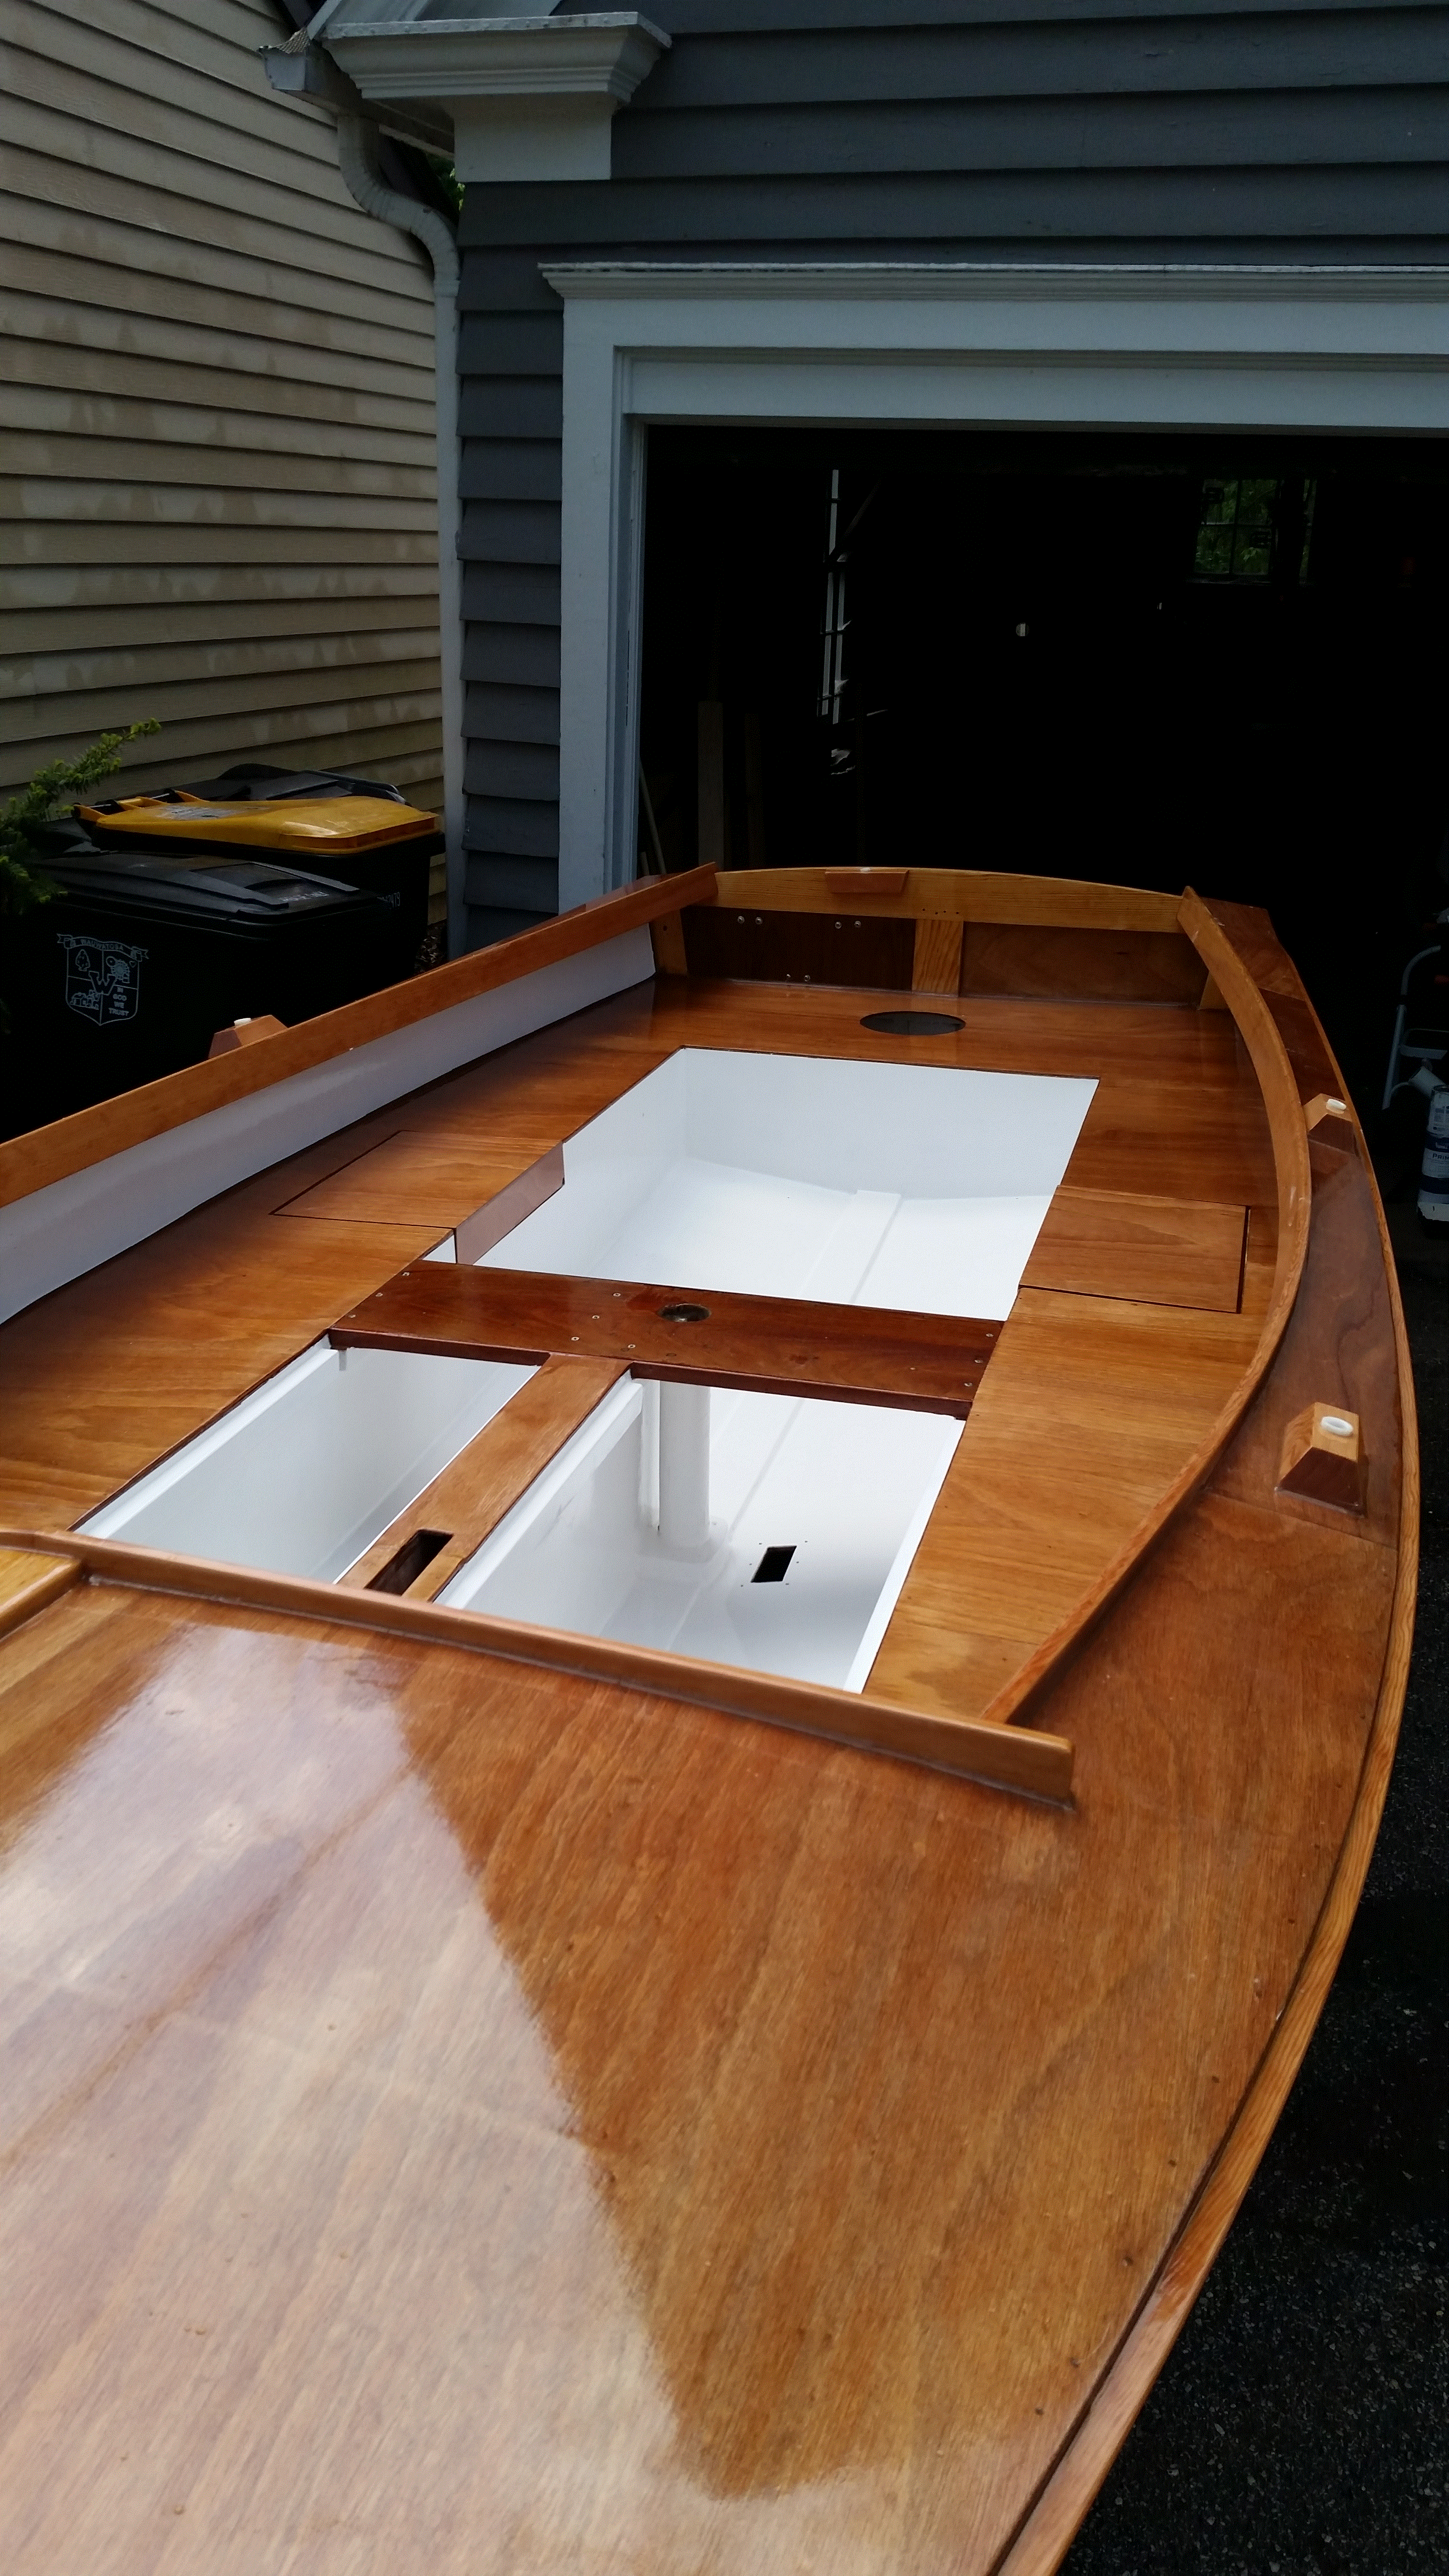
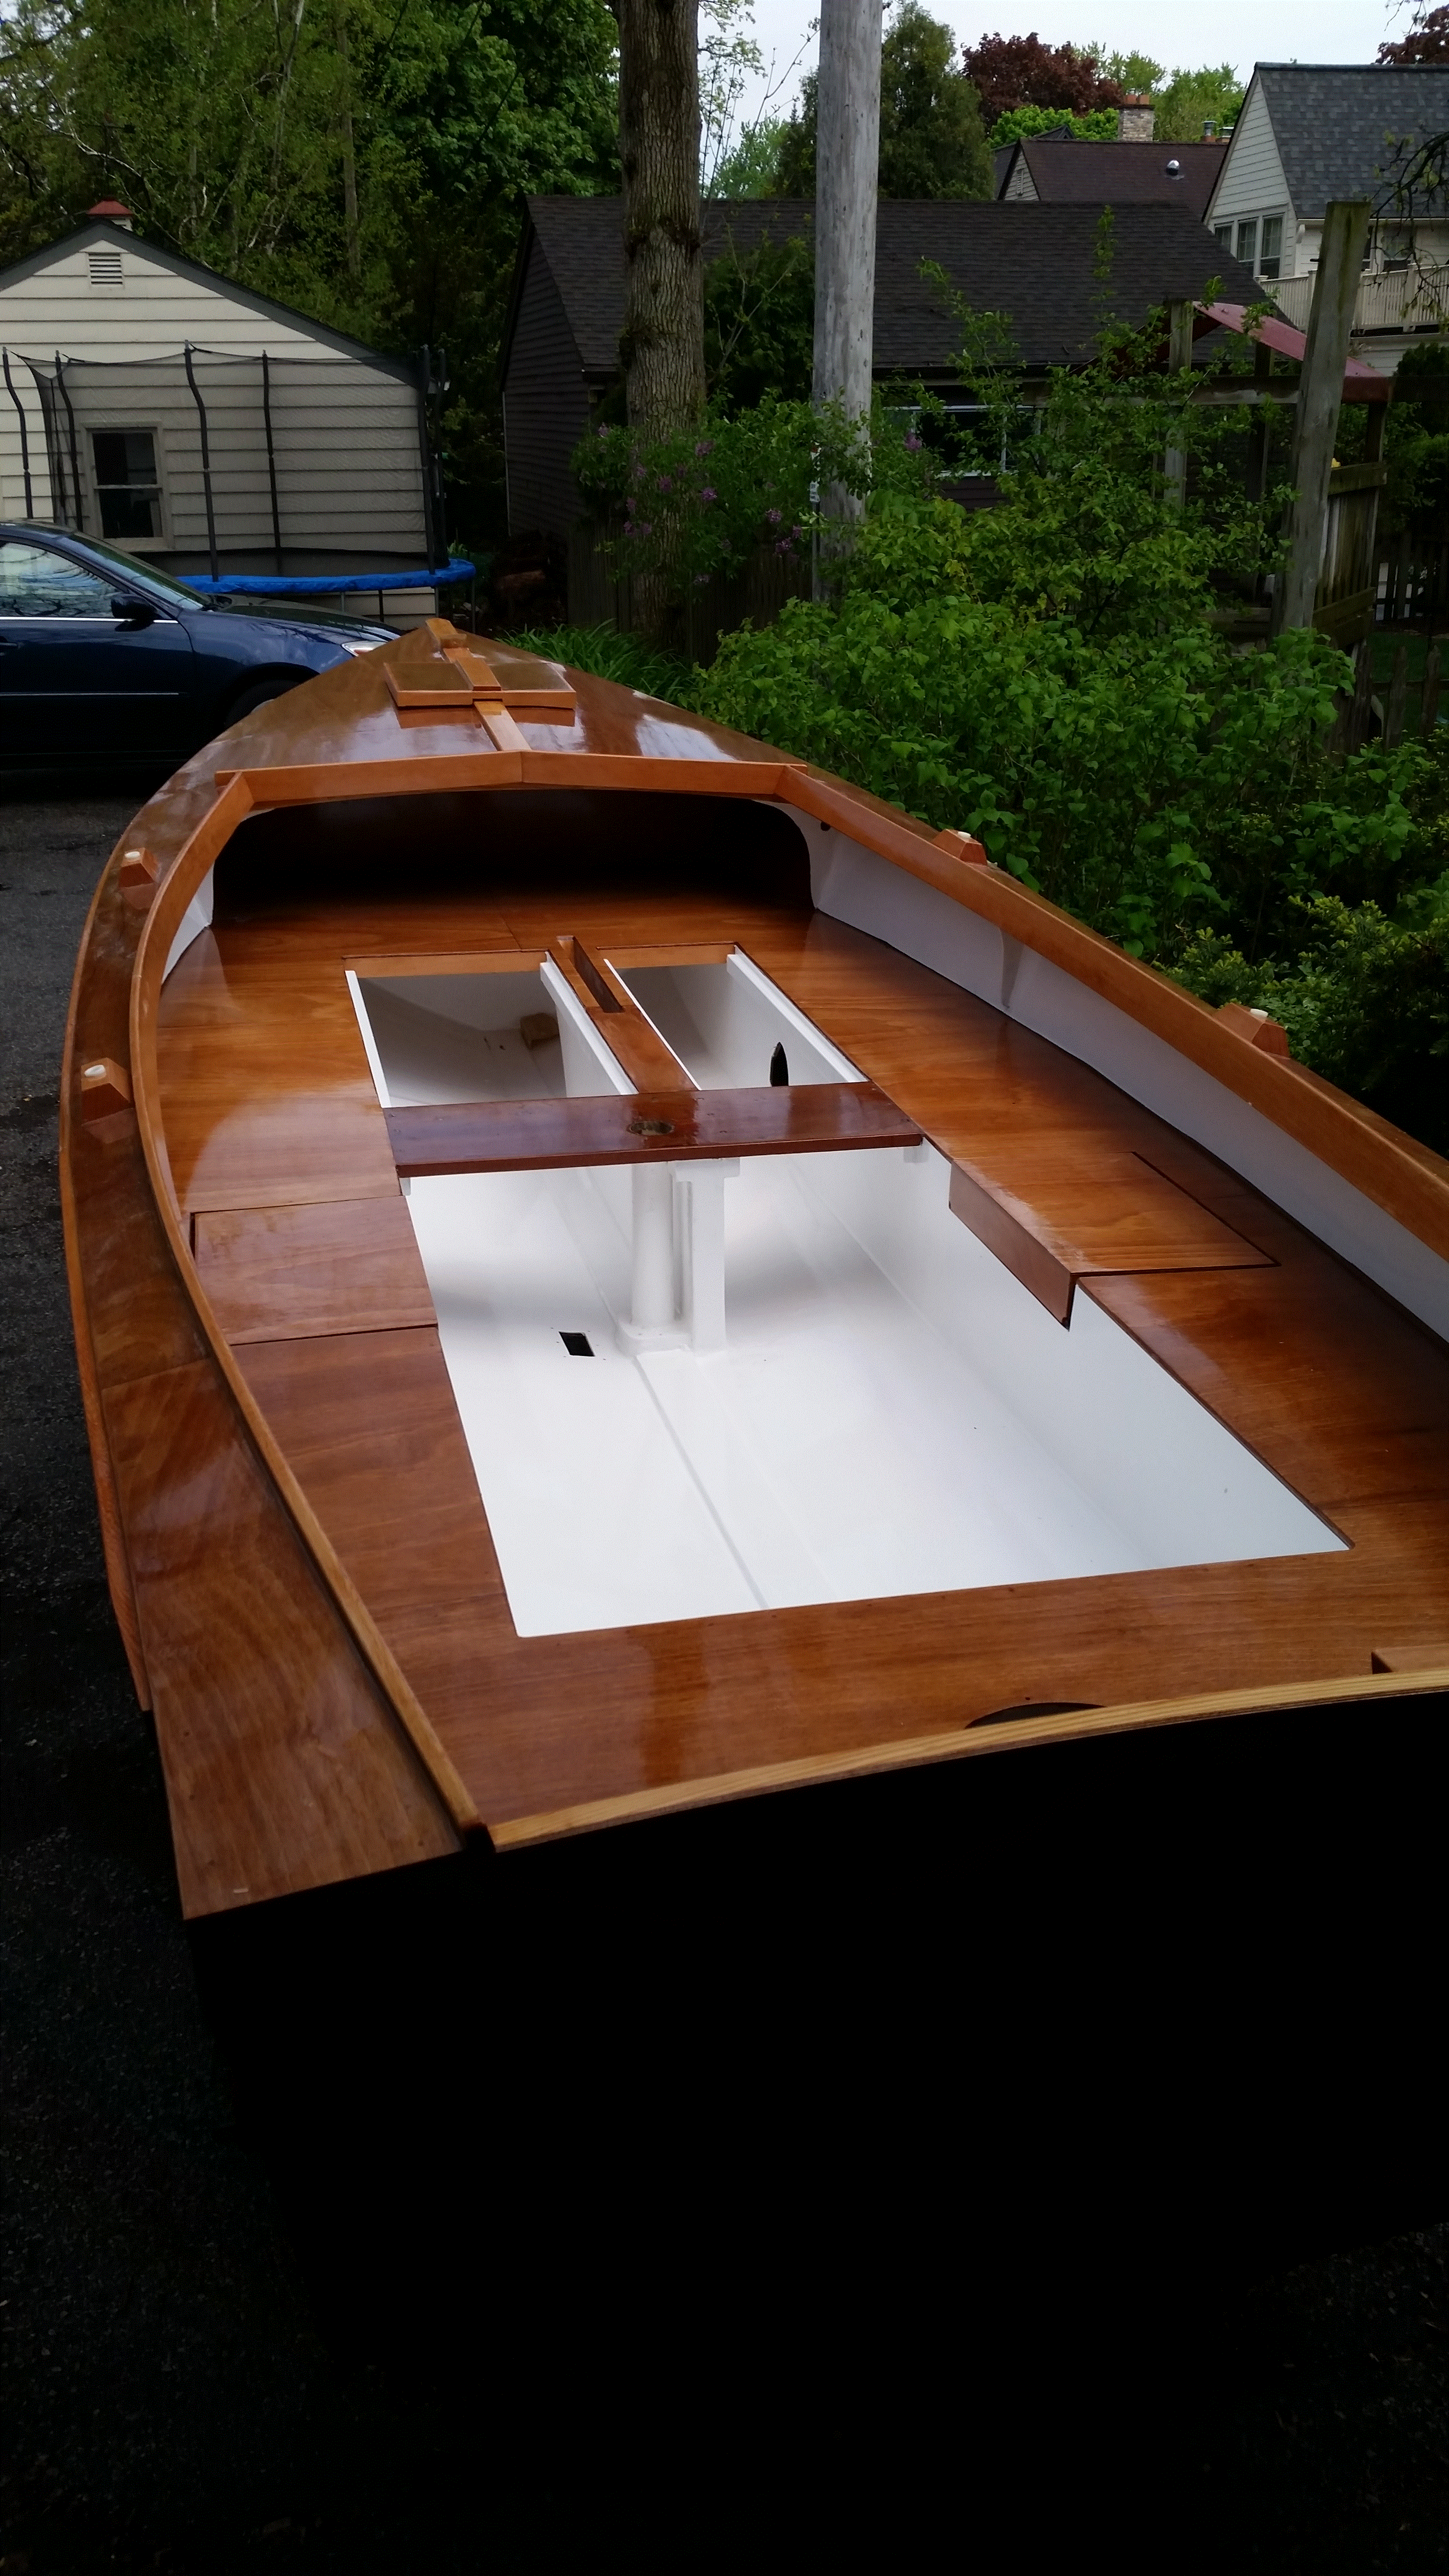
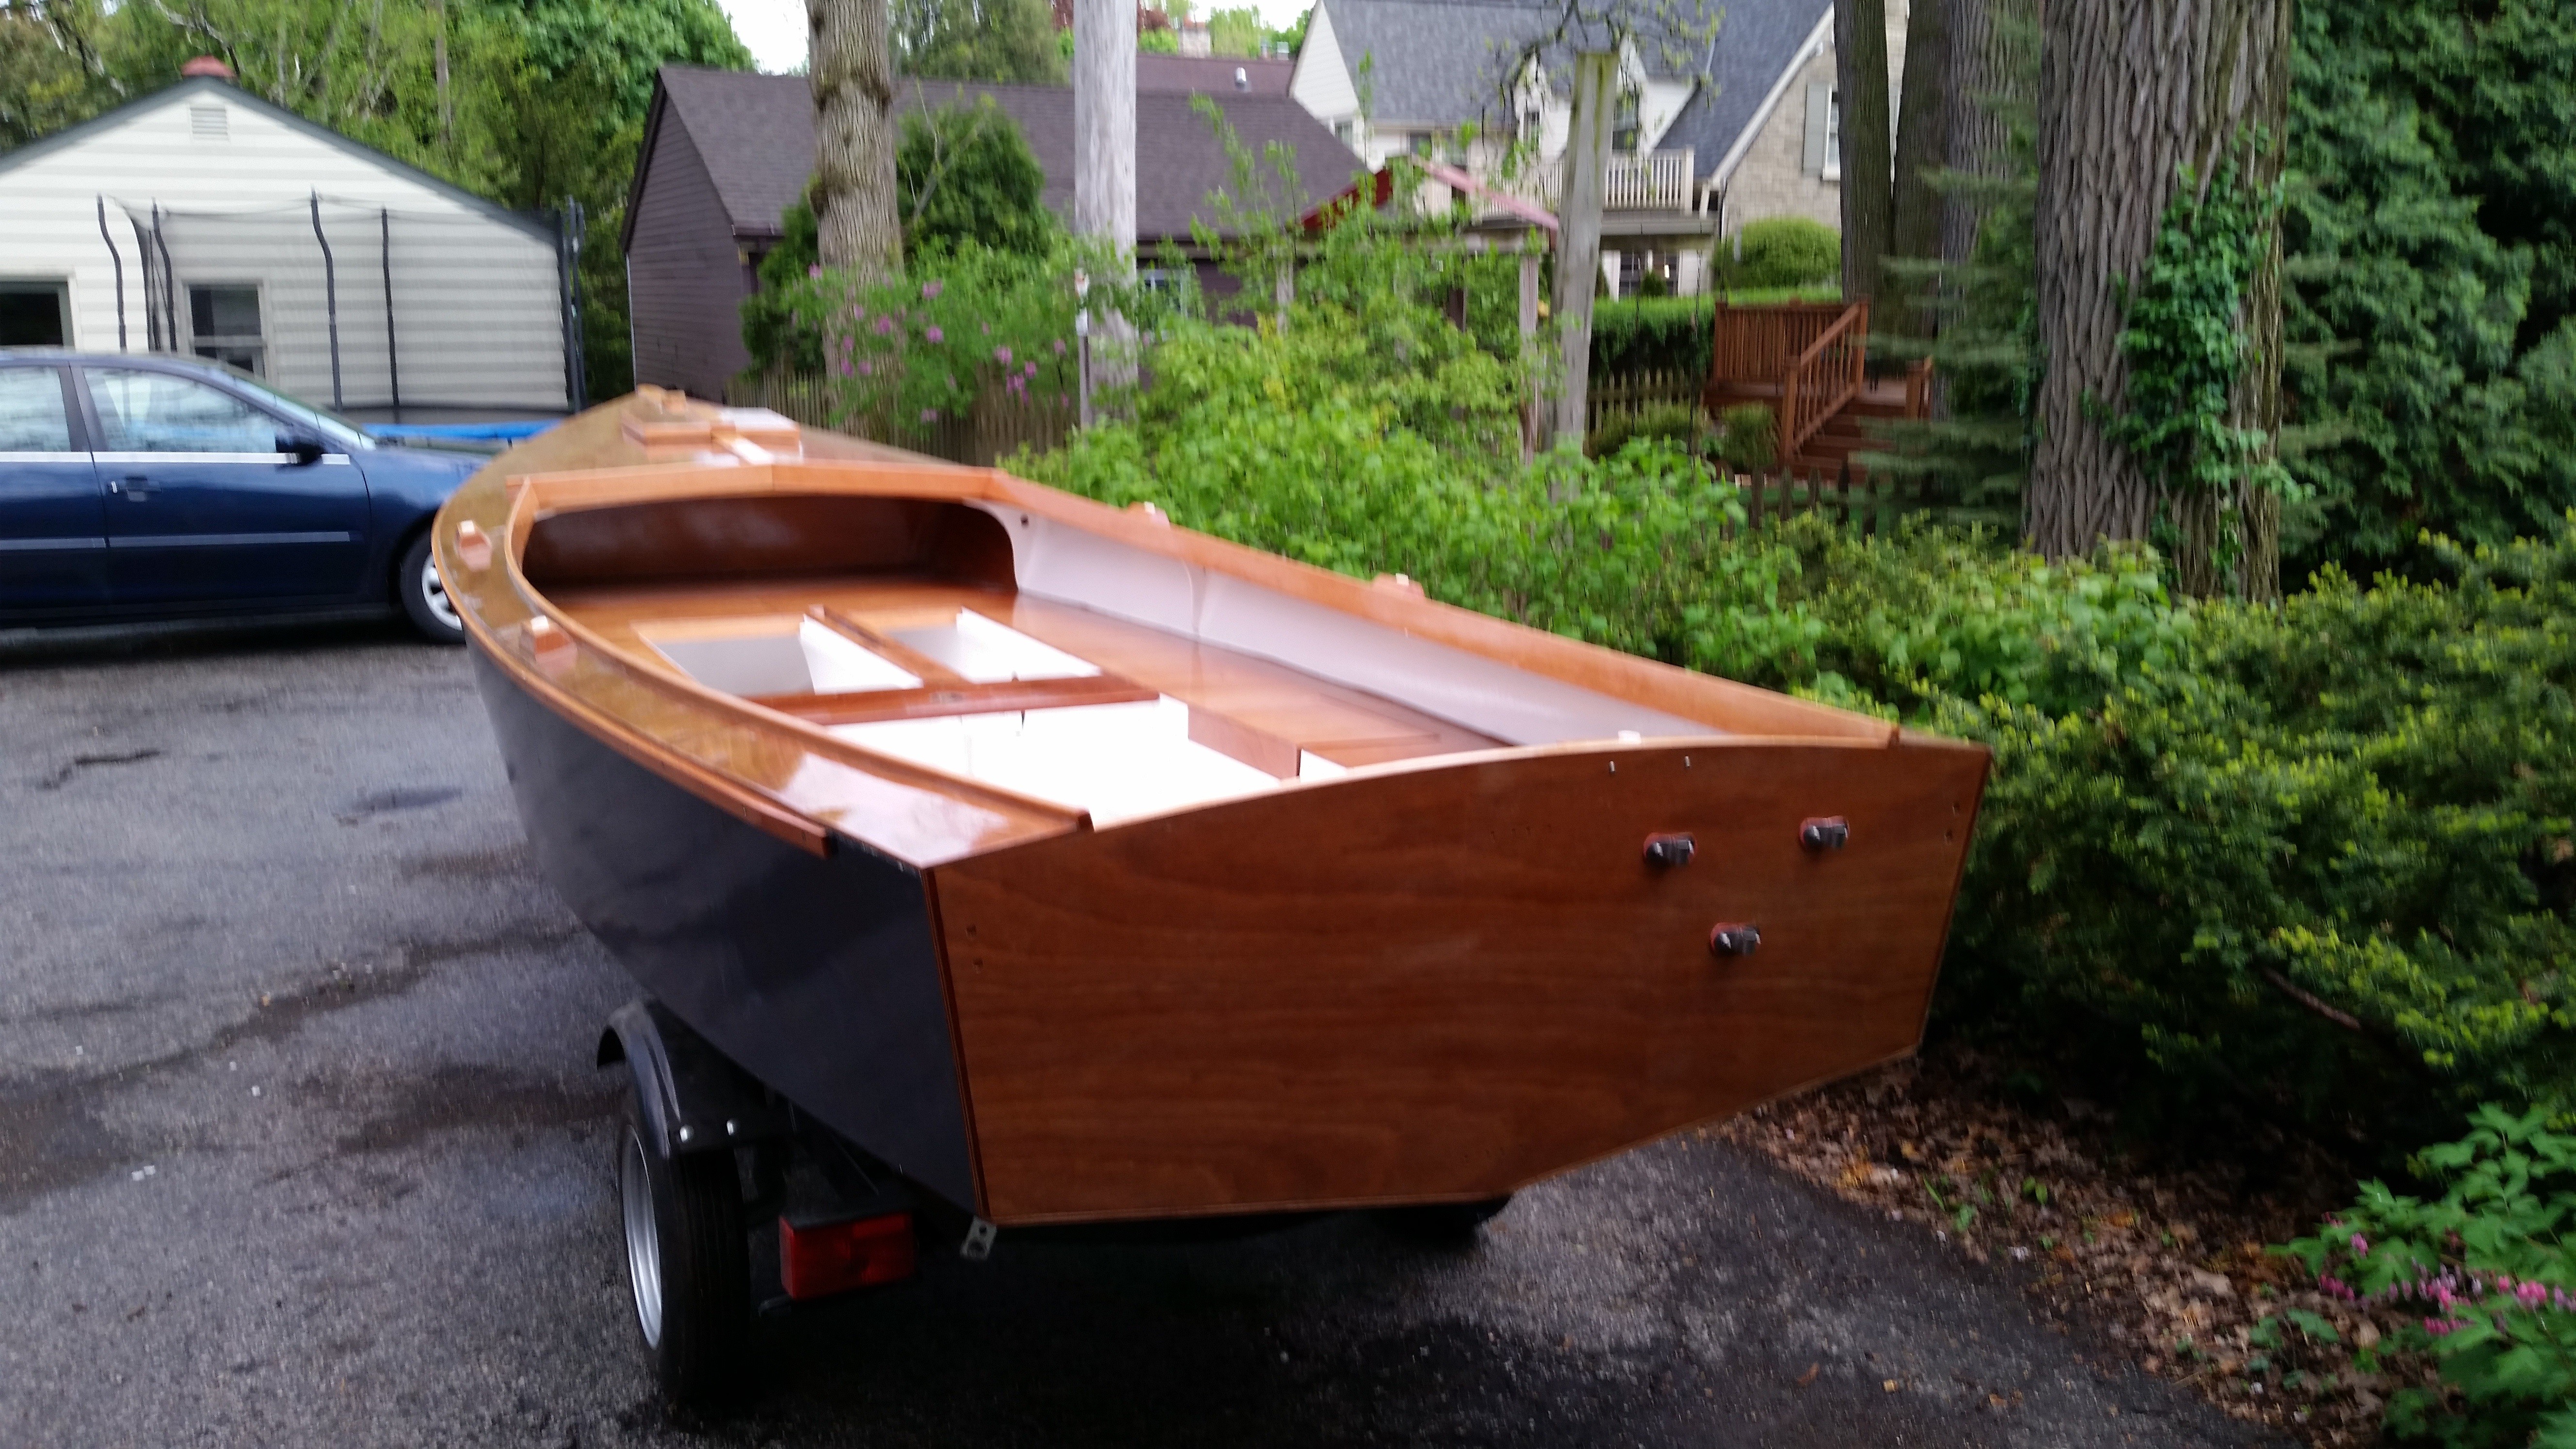
At last, cockpit paint and varnish are done (for now), as is deck varnish. Motor-mount brackets are installed and bracket adjusted so outboard will fold up and stay put. Keel half-rounds are installed. Now it's finally time for the fun stuff, like installing the centerboard and all the hardware and rigging for sailing. My aforementioned drop-dead, do-or-die, swear-on-a-dead-cat May 20 launch date was tied to a family event which has since been postponed, but I'm not far off. It feels great to be done with the cockpit paint. Don't look too close or you might see a few runs in paint/varnish.


-
A guy in Good Old Boat wrote recently that there's never a final coat of varnish, only the most recent coat waiting for a sanding before the final coat. I'm with him.
-
re " 1" 10 PH screws"... As Alan said, 1" is the length, "10" is the screw shaft diameter size (vs 8 or 6, both smaller), PH means pan-head (head above the surface), as opposed to FH or flat-head (countersunk, head flush with surface). Thanks for fotos, Alan.
-
Probably not what you had in mind, but I stopped my rub rails short of the bow and just tapered them off. The bow will have to fend for itself, I guess, literally. The main reason was that I had 16-foot stock and the boat is 17 feet long. Looks fine, but I think you're going for a different look. Radius your outside corners?

-
I painted my hull dark blue, which I like, but if it gets a scratch, the white primer shows through. I guess if the topcoat was white or the primer dark, the scratch wouldn't be so obvious. So the moral of the story might be to use primer and finish coat that are the same color. Except I really like dark blue.
-
Just saw PAR's response, which was posted as I was typing. To my mind, the load on the sheet blocks is not in sheer, or at least it can be at a substantial angle. I'm happy with the thrubolt arrangement here.
-
The plans show thru-screws/bolts for the eye straps that hold the sheet block and clew line aft and snotter block forward, so that's what I used. I plan to use wood screws for jam cleats and such once I fit them to the boat. I feel better knowing it's thru-bolted. Photo shows the aft end. Two bolts serve both eye straps.

-
That looks really sharp. People don't realize how much work that involves. Good trick running the king plank across the hatch opening in one piece.
-
Sanding gussets and such one final time before interior coats go on. I need to clearcoat some raw edges, screw holes, the bailer opening, etc., too. Is there really such a thing as "sanding one final time"?

-
that's amazing. very neat.
-
Thanks, guys. Greendane, the trailer is a Karavan. I see there is a dealer in Tacoma. Let me know if you're looking for more info. This was the lightest model.
-
Just got back from winter storage! I hope the next photos will be trial rigging, or something else that actually looks like sailing. It won't be long now. Unless there's a hailstorm in a gale with lightning coming out of funnel clouds, formal christening is May 20.

-
this might be it?? comes in white and other colors http://www.softsandrubber.com/softsand.html
-

Newhttp://messing-about.com/forums/topic/10202-new-cruise/ cruise
Paul356 replied to Designer's topic in B & B Yachts Forum
The perfect trip for your fine little ship. -
Congratulations. Looks great!
-
I grabbed a photo of the sprit ends last night. I realize the sprit and mast pairs are different lengths, but on my 17, both masts will drop into tubes, so there is no difference in the heels. As long as I was painting them anyway -- toward PAR's point of styling -- I figured they might as well be different colors, and there will be one less point of confusion during rigging. And like Hirilonde says, lines will be color coded as well. Temps here (Wisconsin) are inching toward 60s. Can't wait to get the final work done. As far as varnish and epoxy, belt and suspenders? I've never had an issue, maybe because the sun is not as much a factor here. I feel like the epoxy provides a very solid base for the varnish. Each to his own.

-
I epoxied them and then varnished. Mine are Douglas fir, and they look very nice finished that way. I also put a 6 inch color band on each, blue for mizzen, white for main. They match color bands on the masts. Otherwise I figured I'd always be holding them up to see which was longer.... And that way I can also tell the masts apart quickly. Maybe that's just me. But it looks kind of neat. I think some builders have put a leather collar where the boom might hit the mast, but I figured I'd wait a season and see if chafe is a problem, and also see where it would actually need to go. Launch date is coming in May -- I hope! Varnish over epoxy worked well on fir spars I built for previous boat.
-
Core Sound 20 Mk 3 -- #4 "Chessie" . .
Paul356 replied to Pete McCrary's topic in B & B Yachts Forum
it's ok. we all like looking at pictures. -
Core Sound 20 Mk 3 -- #4 "Chessie" . .
Paul356 replied to Pete McCrary's topic in B & B Yachts Forum
I was just thinking yesterday, I wonder if Pete's ok? Well it sounds like he's been busy working. Congratulations. It will be great to see that boat on the water. -
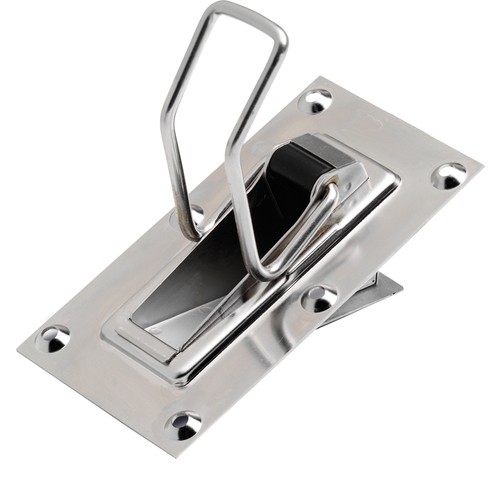
Plans for my CS 17 call for the large Andersen bailer. Any thoughts on whether the inside or outside mount is preferred? This is the original 17 (mk I?), so the bailer is for actual bailing, not for filling water ballast. Photo is of outside mount. Thanks. --paul
-
The pix of the original Stars I've seen looked like gaff rigs but apparently were gunters. This is from the Wikipedia article Starboard cited: "Stars were originally rigged with a large, low-aspect-ratio gunter mainsail and jib, which was replaced by a short bermuda rig in 1921, before the current tall bermuda sail plan was adopted in 1930."
-
x2 on Pete's advice. The level shown in the window seems able to vary quite a bit depending on whether the motor is straight up or angled, and whether it is rotated on the vertical axis as for a turn. So, taking Pete's advice a step further, it would be a good idea to drain the oil, then refill with the 0.4 quart, then find the orientation in which the window shows "min," and use that as future reference position. Thanks for info.
-
Finding centerline of mast/attaching hardware to masts
Paul356 replied to acreew's topic in B & B Yachts Forum
I used a chalkline for the initial lineup, but then put the sail track out and eyeballed it straight, held it in place with clamps, drilled/screwed a few holes, unclamped, re-eyeballed, re-clamped, drilled a few more. I found the track could tend to wander as I was drilling holes if I did not stop and re-align and reclamp every so often. There are still a few variances from dead straight, but no more than 1/16 inch or show. It shows up looking down the length of the mast, but I don't think it will make any difference to either hoisting or setting the sail. I used #6 stainless pan head sheet metal screws. I got that idea somewhere, can't quite remember where, but I think it was from the sail track specs. I drilled the smallest hole possible, and then essentially self-tapped the screw in. I could use a smaller hole if I drove the screw with the power driver, set on high torque, than I could driving by hand. You need to use care, of course, or you'll end up with a half-driven screw and a busted head or a ground-out phillips slot. I used a slightly larger hole in the thicker aluminum in the lowest mast section, then smaller holes in the lighter aluminum aloft. I laid the track on a layer of plastic tape, and I dipped each screw in sealant before driving. Each 69" section of track took me at least an hour to install. as someone mentioned, I paid special attention to making sure the track ends match at joints. I'm curious to see how the sails will hoist; may need to do some addl smoothing. This is the old traditional Schaefer flat track, not the new B&B track. I have the luxury of sailing almost exclusively on fresh water (nearest salt 1,000 mi away) so did not paint the entire mast. I painted only the areas around the fiberglass ramps and collars. (Color coded so I can tell main from mizzen at a glance; sprits with a color band to match.) If I find somehow that I will be on salt water, I'll explore priming and painting. I used the delrin caps that B&B provides, they're slick. For other hardware such as cleats and straps, I used s.s. #10 pan head or flat head sheet metal screws where no access is available (middle of mast) and 10-24 machine screws with locknuts where it's possible to get in back to put a wrench on the nut. Most of that is shown on the plans. Also used tape and sealant to try to seal the hole and isolate the stainless. I base this in part on using similar methods on aluminum mast on the big boat with good results, again in fresh water. Finally, for the little "keeper" at the bottom of the sail track, I tapped a 10-24 hole (#25 drill) and will use a ss machine screw, with locktite. Seems to be what the plans want. Edit: I uploaded this picture, linking it showed more than it does. Here I have the mizzen, with its track, in the main step, and I'm using the partially assembled main to help position the foot of the mizzen step. So, picture doesn't really have anything to do with the question at issue, but I couldn't find a way to delete it.
-
Graham and Alan setting up tonight and getting ready for Everglades Challenge start tomorrow are here among the photos here https://www.flickr.com/photos/aireheads/sets/72157677482456024 But there is apparently the possibility of a small craft warning in the a.m. that could delay the start.