smccormick
-
Posts
292 -
Joined
-
Last visited
-
Days Won
21
Content Type
Profiles
Forums
Events
Gallery
Everything posted by smccormick
-
Here's the photo I was going to post last week. Frank fixed whatever was wrong and I'm back on track... on the photo uploads, not the boat construction.
-
I've looked at your little island via google, looks like a great place. I will get to the area at some point, when I drag the wife on a couple year global cruise at some point. Really want to spend time in the pacific islands diving and looking around. You shouldn't need to reduce the size of the photos. I load 3mb photos and the forum software creates small versions (thumbnails) for the page and shows the full resolution in the lightbox.
-
From the looks of his progress he may be fishing on new years day.
-
Very nice work. You sure are making fast progress.
-
Good luck with your build. Look forward to following along.
-
Making great progress. Looking nice.
-
Here's where I am today. One compartment left to glass, the aft, mid. Some pumps and valves being dropped from my supplier on Wednesday. Then I'll poke some holes in the bottom of the boat, move the core away, glass, fill, glass, mount a groco bb-1 and fab a couple pump mounts. Oh, the joy of moving on to something else. I'll never forget to glass the stringers and frames before installation again.


-
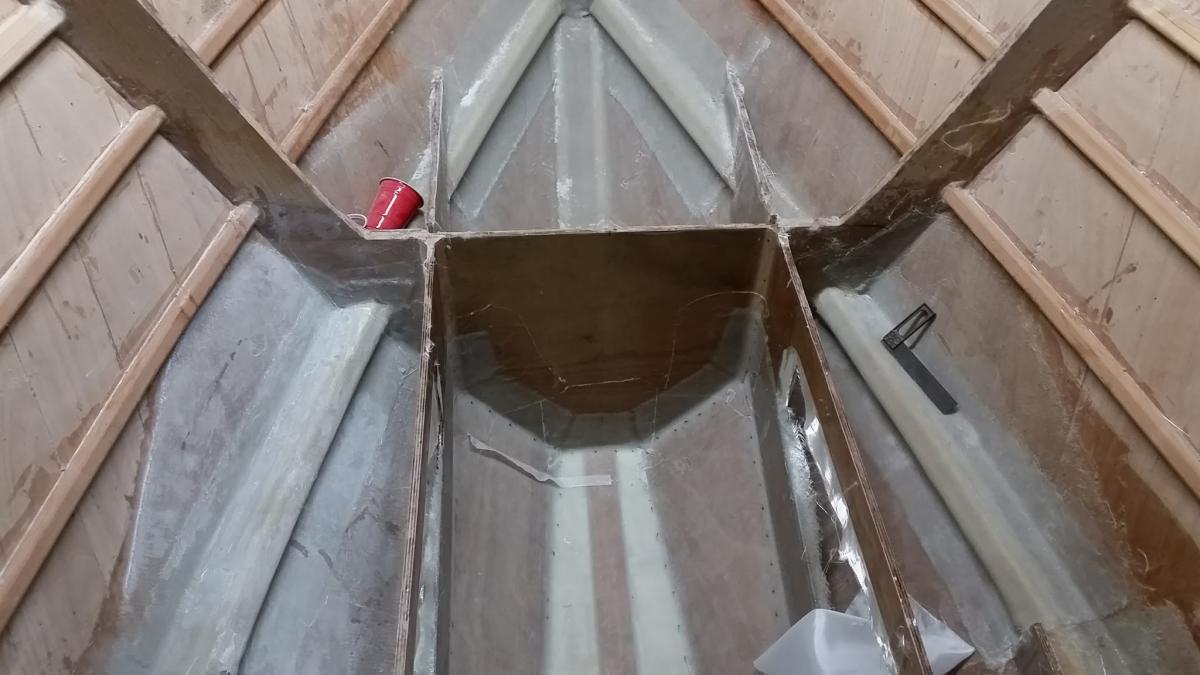
I sure did. Up forward in the storage area i filled with structural foam all the way to the top of the keel. I don't like small areas for debris or water to accumulate. It also makes the storage area more functional for me. I considered doing that all the way aft, but realized that beside all the work and weight it added, I needed a channel for water to run aft and not contact or be blocked by the tanks. My compromise was to fill with some .750 ply I had as drop from the bracket transom. So I ripped up the scrap with a 16° miter (except the first 2 or so feet where the keel turns up a bit), fitted it and glued it in. I really like the result, a 3 inch wide flat flanking the keel giving a nice drain channel and an easy to clean and dry area. This will also allow the bilge pump to remove more water getting the suction port closer to the bottom. As for the space outboard of the log, I'm still thinking about that. When I was glassing I realized what you have already, there is no way for that area to drain. Theoretically, water shouldn't be able to get there, but as we all know water gets everywhere. The only viable solution for that area that I can come up with is pour foam and glass to create a "water tight" area. I haven't decided how or if I will address this area.
-
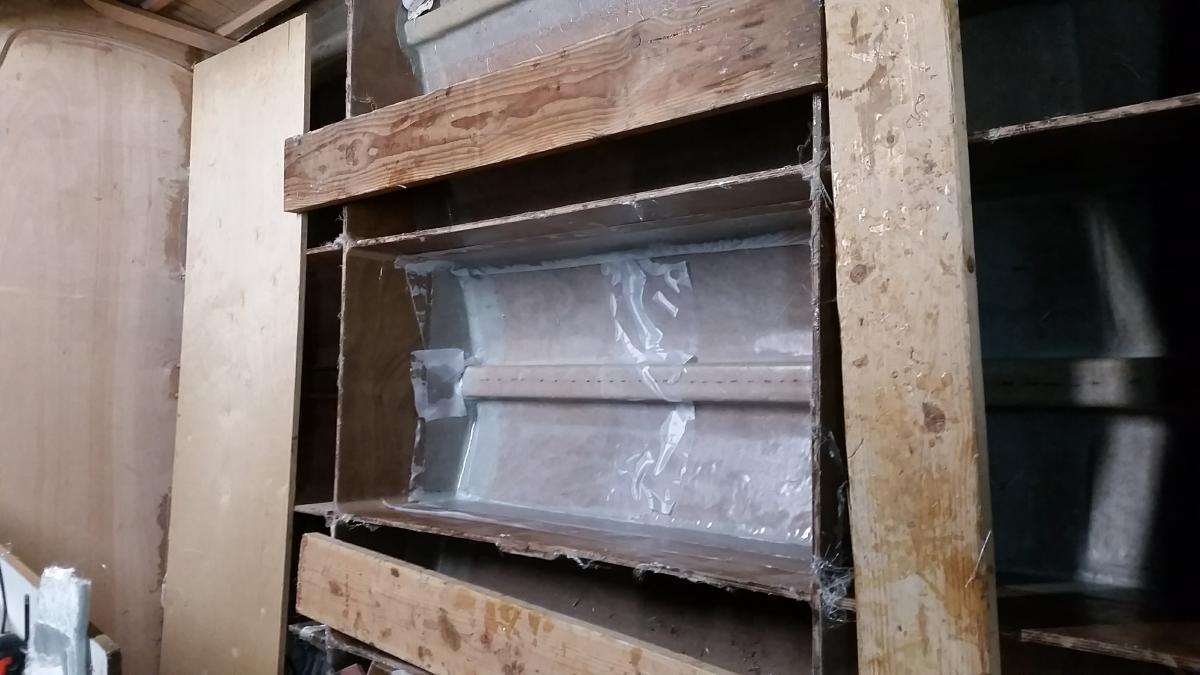
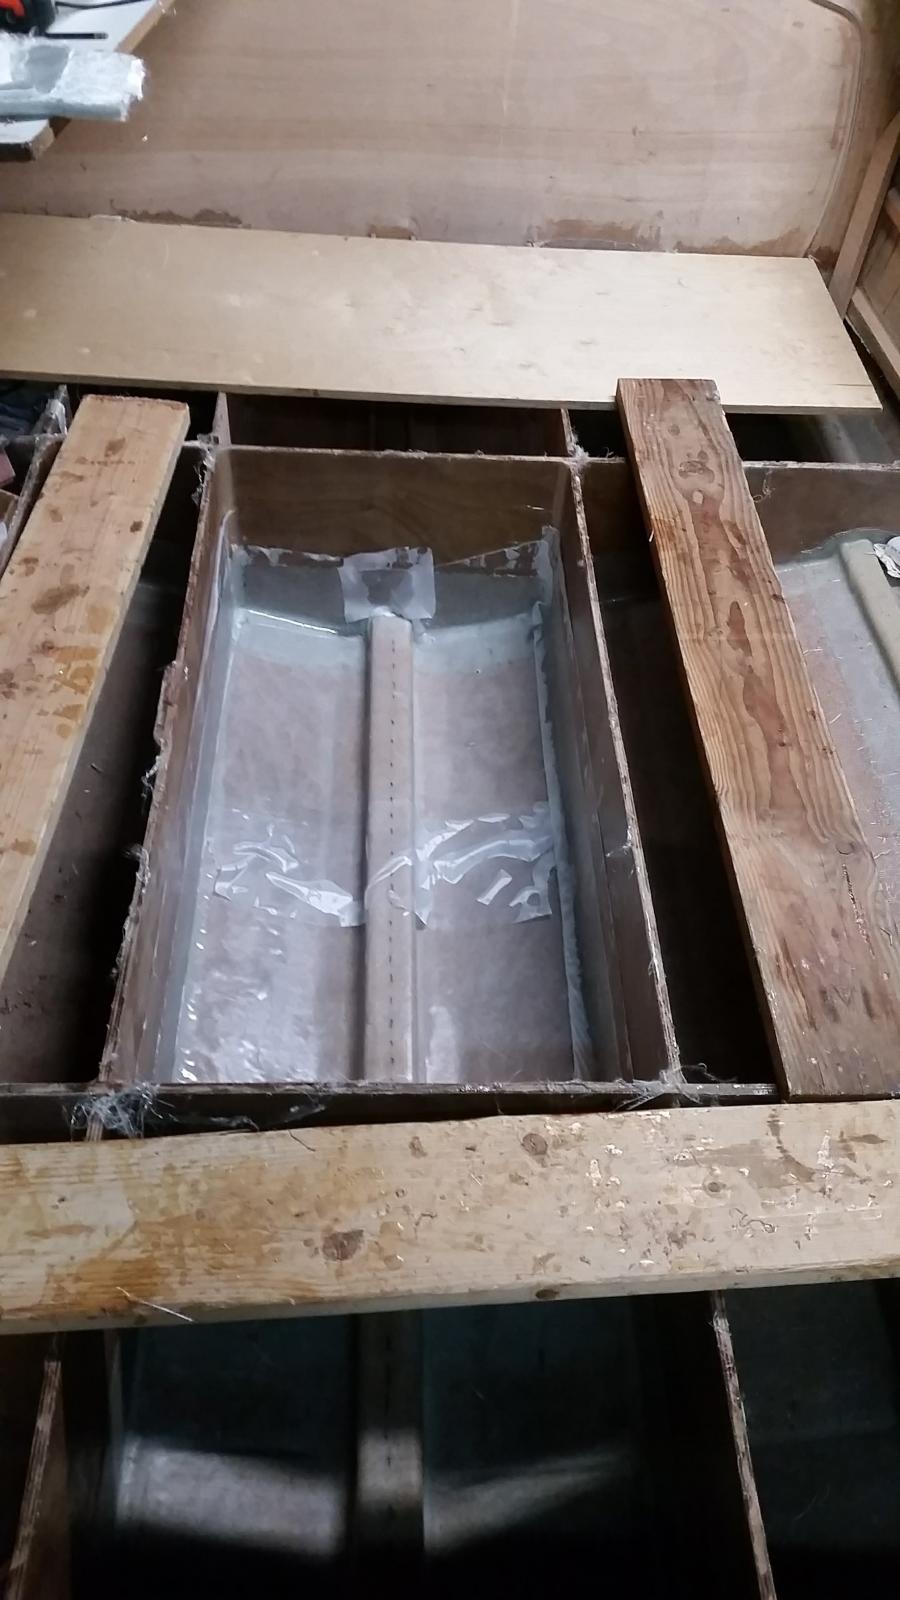
Soooo, I'm not sure what happened to my last post. Was it too risque, with all that boat porn. Anyway, here for a second showing is what I have been doing for the last 6 weeks... On the boat. Glassing all the little boxes created by the frames and stringers. I have 22 of 25 boxes done, just the 2 center aft and the anchor locker to go. I should be working on it right now instead of typing this, but I'm procrastinating.


-
Very nice work. I'm always fascinated by seeing how others envision the end product.
-
Very nice work. Summer can be trying for epoxy.
-
I would call that carvel planking, longitudinal planks edge butted with a rolling bevel. I believe ashcroft specifically called for planking diagonal to the center line. Having said that, I think the concept is correct, two layers with planks overlapping the previous layers' joint.
-
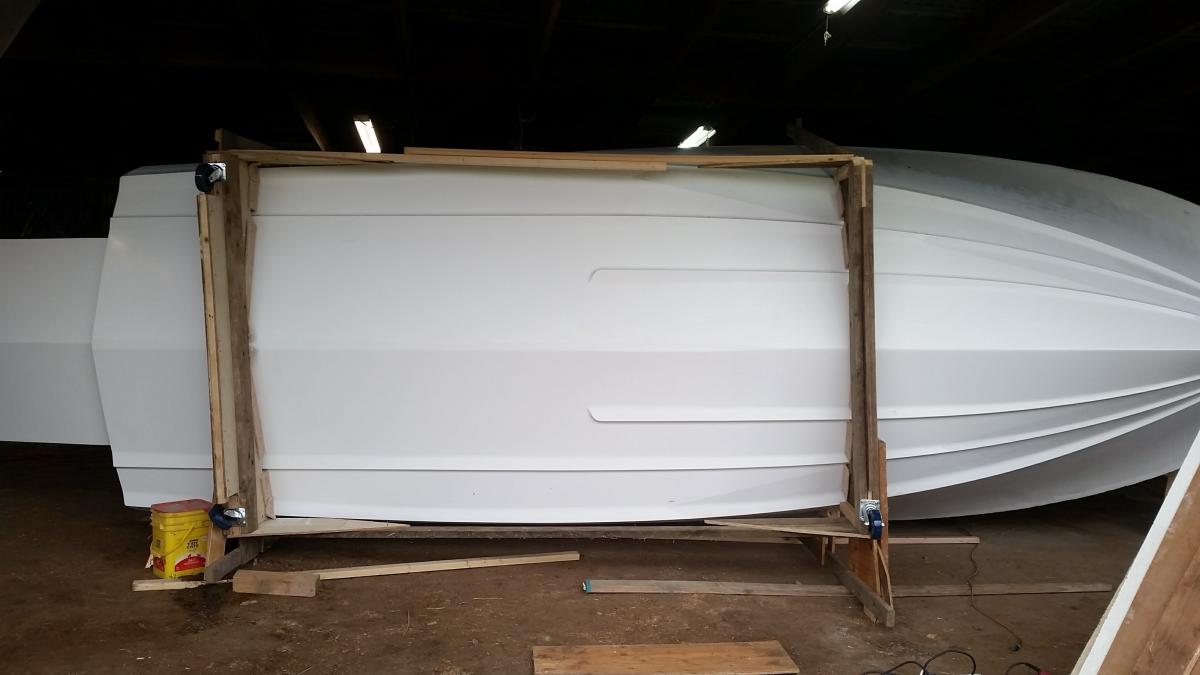
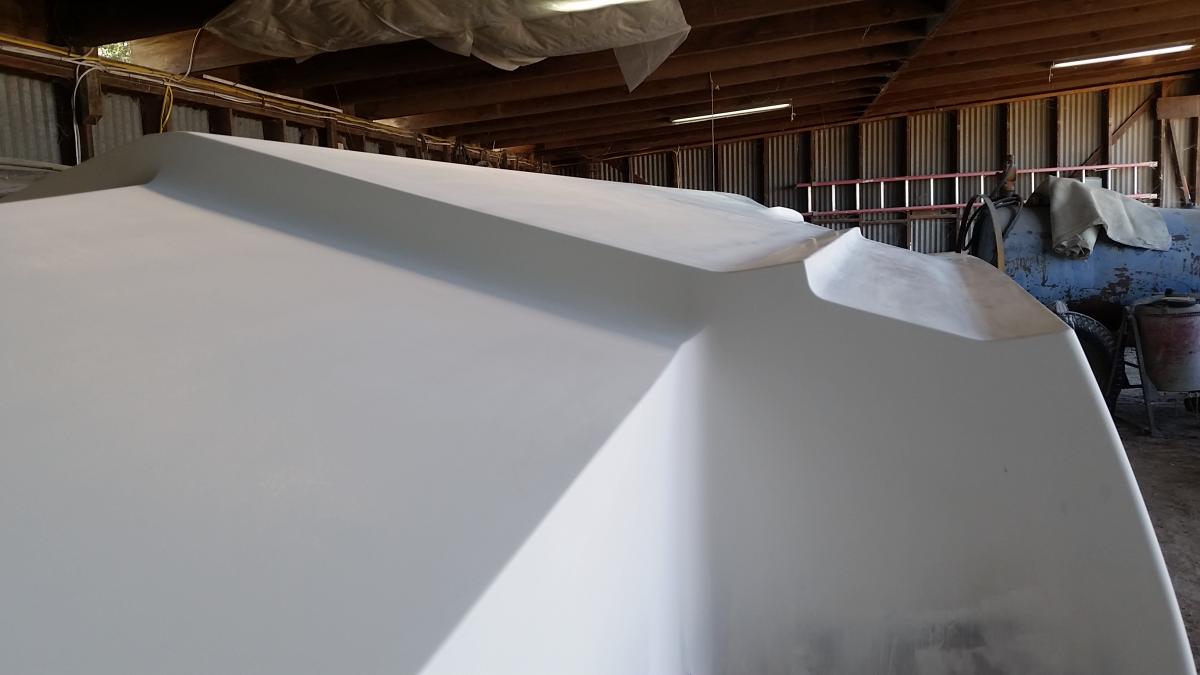
So the big day came and went. The boat is turned over. Like so many things in our lives, it didn't go according to plan. My intent was to hook the whole thing to the backhoe and drag it outside, then use the bucket to flip it. Well the rains came in this week and the ground outside of the barn is mushy (not paved). With more rain predicted over the following 5 or so days and then a couple more before the ground would firm up, I needed to go at it a bit differently. So plan B was implemented; manual flip inside the barn. That caused some rafter clearance issues and some small chainsaw modifications to the roll cage. Not a big deal just took a bit more time like everything else. More evidence that a plan never survives contact with the enemy.


- 228 replies
-
- 1
-

-
- cold mould
- cold mold
- (and 3 more)
-
I love the cover. Inexpensive but very nice looking, hard to get that combination. Just a heads up. Epoxy doesn't like to be exposed to sunlight.
-
Burnishing the bottom paint and building a cradle and roll cage. Probably a couple days out.
-
Alexseal primer sealer sanded and ready for bottom paint Interlux VC performance bottom paint applied.


- 228 replies
-
- 1
-
-
- cold mould
- cold mold
- (and 3 more)
-
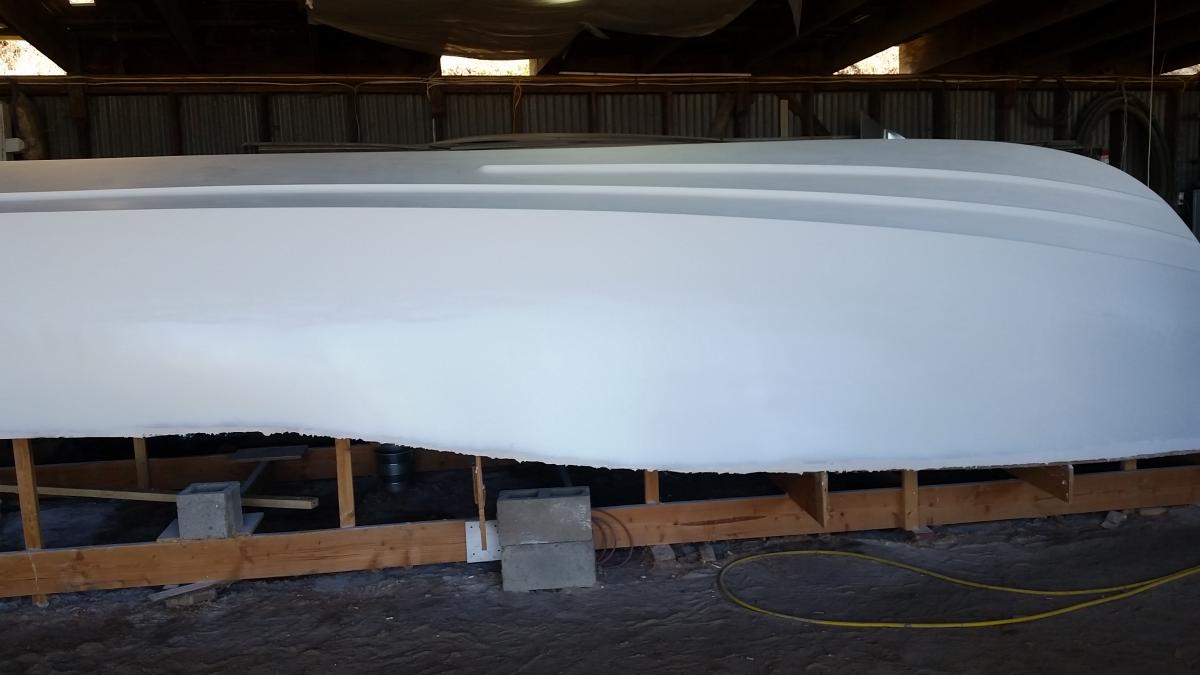
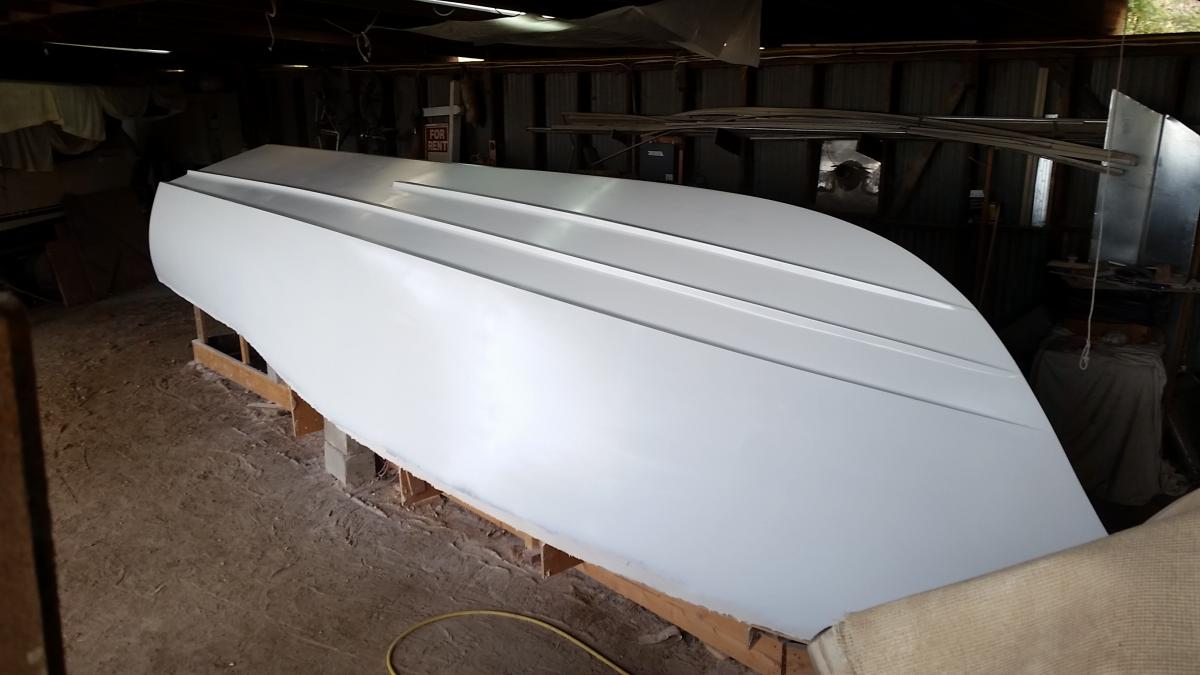
Here's where we are as of today. I really have been working on this thing even though it may not look like it. When I got back to working on the project I had to fill lots of 36 grit scratches and not quite filled depressions. Apparently a leopard can change its spots. After 3 weeks of sanding and 3, progressively smaller spot filling sessions, I sprayed the entire hull with high build primer. Will sand below the chine tomorrow and then apply finish primer/sealer. Then on to the bottom paint which will be VC Performance.


- 228 replies
-
- 1
-
-
- cold mould
- cold mold
- (and 3 more)
-
Wear strips should be last, they are considered sacrificial and should be easy to replace. 10oz glass would be a good idea over the chines for impact resistance. But everything is a compromise, add weight and strength or go for light? Keep in mind that 10oz cloth is not very much glass and will not survive a good wallop on a rock. I would put glass under my feet for additional wear resistance but that is a personal preference and not for the weight conscious. Actually, I have looked into this and the densities of glass and resin are close enough that when a surface calls for 3 coats of resin only, I will always add 6 or 10oz cloth, there is no weight penalty to speak of. There are some accounts of resin only coatings failing in freezing conditions. The boat may not live in those conditions on build, but you never know where it's going to end up over it's long life. Definitely glass the hull, then add the keel. If you damage the keel the hull core remains water tight. Epoxy undercoats are going to be the most expensive but probably the best performing. I have used both single part (interlux pre-coat) and epoxy (alexseal 442 and 302 and others) I like both and they both have their place. If your top coat is 2 part then an epoxy primer is required. 2 part topcoat will be harder and more durable, therefore will show less wear under similar conditions. Keep in mind that I run my stuff hard and sometimes make decisions that are not in the best interest of my equipment. So I build with this in mind, erroring towards the tougher side rather than the light weight side. When I build boats that would be used by less aggressive users and I would back off a bit.
-
That photo looks like just inside the Charleston Breachway.
-
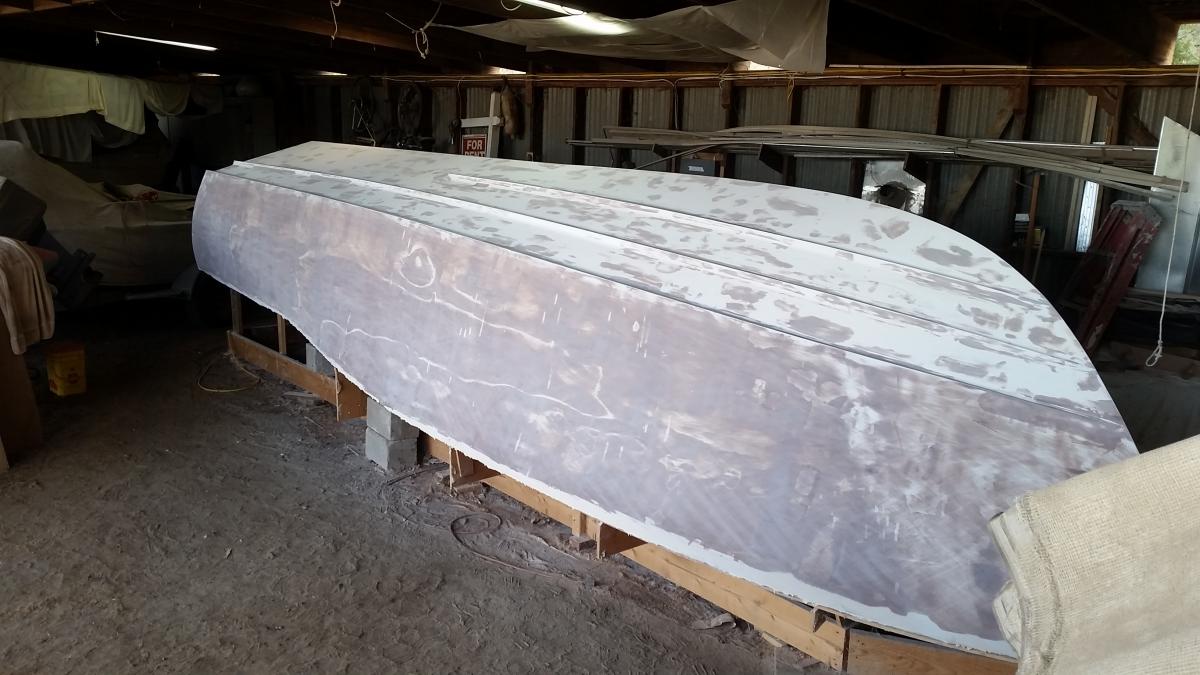
Got back to the construction this week with more sanding. Knocked all those nice sharp corners off, boarded the entire hull with 80 grit, sanded all those inside radii. Got to thinking about shooting high build primer when the thought came to me, "why shoot high build on the bottom, it's straight and ready. Maybe just shoot sealer and top coat. Well I'm so glad I didn't. When I started shooting high build the contrast and shinier surface highlighted so many imperfections in my "ready for paint" surface, I was horrified. Boarded one half of the bottom today, looking much better. Should have it top coated by... well some time.
-
Like Howard, I'm in the camp of mixing my own adhesives from resin and fumed silica (IE: cabosil). I do this for a couple of reasons; First I am cheap, I want quality but if I can achieve similar mechanical characteristics and save money then that's a winner. If you're willing to use other epoxies, you can get you're per gallon cost to around half of what gelmagic costs. Second, by mixing my own, I can vary the viscosity to meet my needs. Peanut butter like for fillets, mayo for planking, a little thicker when it's hot, a bit thinner when it's cold. As for applying planking with unthickened epoxy, If I could guarantee my parts fit up and where clamped perfectly I might consider it, but I can't, so I would be very concerned about incomplete bonding. Straight epoxy will run out of joints with ease potentially leaving hollow areas or just as bad, starved areas in the planking. Most (pro) builders will use glass or fumed silica on glue lines to hold the resin in the joint and provide some excess to completely join the planking where parts are not held together perfectly. In the final analysis, I would prefer to have a little extra material (weight) in the joint and be relatively sure it was complete and sound.
-
May I suggest winding sticks that are much larger in cross section than .75", especially if they are pine. That size will be more prone to sagging and when the SFO fog starts rolling in, warping . If you want to make a pair to use on multiple projects (they are good for more than boat building) get some 8/4 (1.5" and rip 1 or 1.25" strips) red oak or sapele. If you are going to use once and throw away then some KD 2x3's from HD will work, but all of these will need to be flattened and parallel on the working sides. Easiest way to mill is with jointer and planer, but can also easily be done with a hand plane. The more accurate your tools the more accurate your boat. You can also use 6' levels for the same purpose. https://paulsellers.com/2014/05/making-winding-sticks-by-hand/
-
Can't agree with you more on this. <.002 or I start to freak.
-
Nice progress with your project. Look up "winding sticks" for judging and correcting your twist.
-
Thanks Robert, twice as long as I thought it would take.