smccormick
-
Posts
292 -
Joined
-
Last visited
-
Days Won
21
Content Type
Profiles
Forums
Events
Gallery
Everything posted by smccormick
-
Nice work on the glassing. It's hard to get the scale on the dingy. 7' maybe. Will the oc20 be on a mooring? It's pretty.
-
You're making such great progress. Love the engine selection, can't wait to see it in the water.
-
Met Graham, Alan and the whole (most of) B&B crew at the Mystic wooden boat show yesterday. Wife and I had a pleasant chat with Graham, Alan was busy chasing around 12 or so builders constructing 6 boats during the show. Everyone was diligently spreading goo and sticking parts to their soon to be boats. Checked back at the close of business (for the day, 2 more to go) to see how far they got. Graham was happy with the progress. Boats where looking like boats.
-
Other than handling around the trailer, bigger is always better. I can also confirm that the jump in build time from 20 to 24 is very small. To look at the build process in it's most fundamental form, each model has exactly the same parts, there a just some that are a bit longer in the 24. Time and material increase is nowhere close to the 20% length increase. From my experience the hull materials cost increase would be around 3-5% +/- for the longer model. This is why the big custom builders prefer to build +40ft boats. I was just chatting with Graham about this exact subject yesterday.
-

almost finished my marissa eco18 need answers
smccormick replied to driver758's topic in B & B Yachts Forum
Sounds good, look forward to seeing your photos. Wow that's a long trip for Materials. Can you have them shipped? -
almost finished my marissa eco18 need answers
smccormick replied to driver758's topic in B & B Yachts Forum
Do have more photos? Like to see more, much more. -
Looking good.
-
Glad you posted this, I thought it was Thursday through Sunday. Would have been mighty disappointed on Thursday.
-
almost finished my marissa eco18 need answers
smccormick replied to driver758's topic in B & B Yachts Forum
Looks like that engine would be getting 6 to 8 MPG in the midrange cruise rpms, so you can do some guestimating from there. Here are some performance bulletins. None for the exact boat but it gives you an idea. click on performance test on this page. https://marine.honda.com/outboards/motor-detail/BF40-50 No 40hp tests but a hand full of 50s to give you some close data. https://marine.honda.com/outboards/performance You can always throw in a second tank for the longer days. -
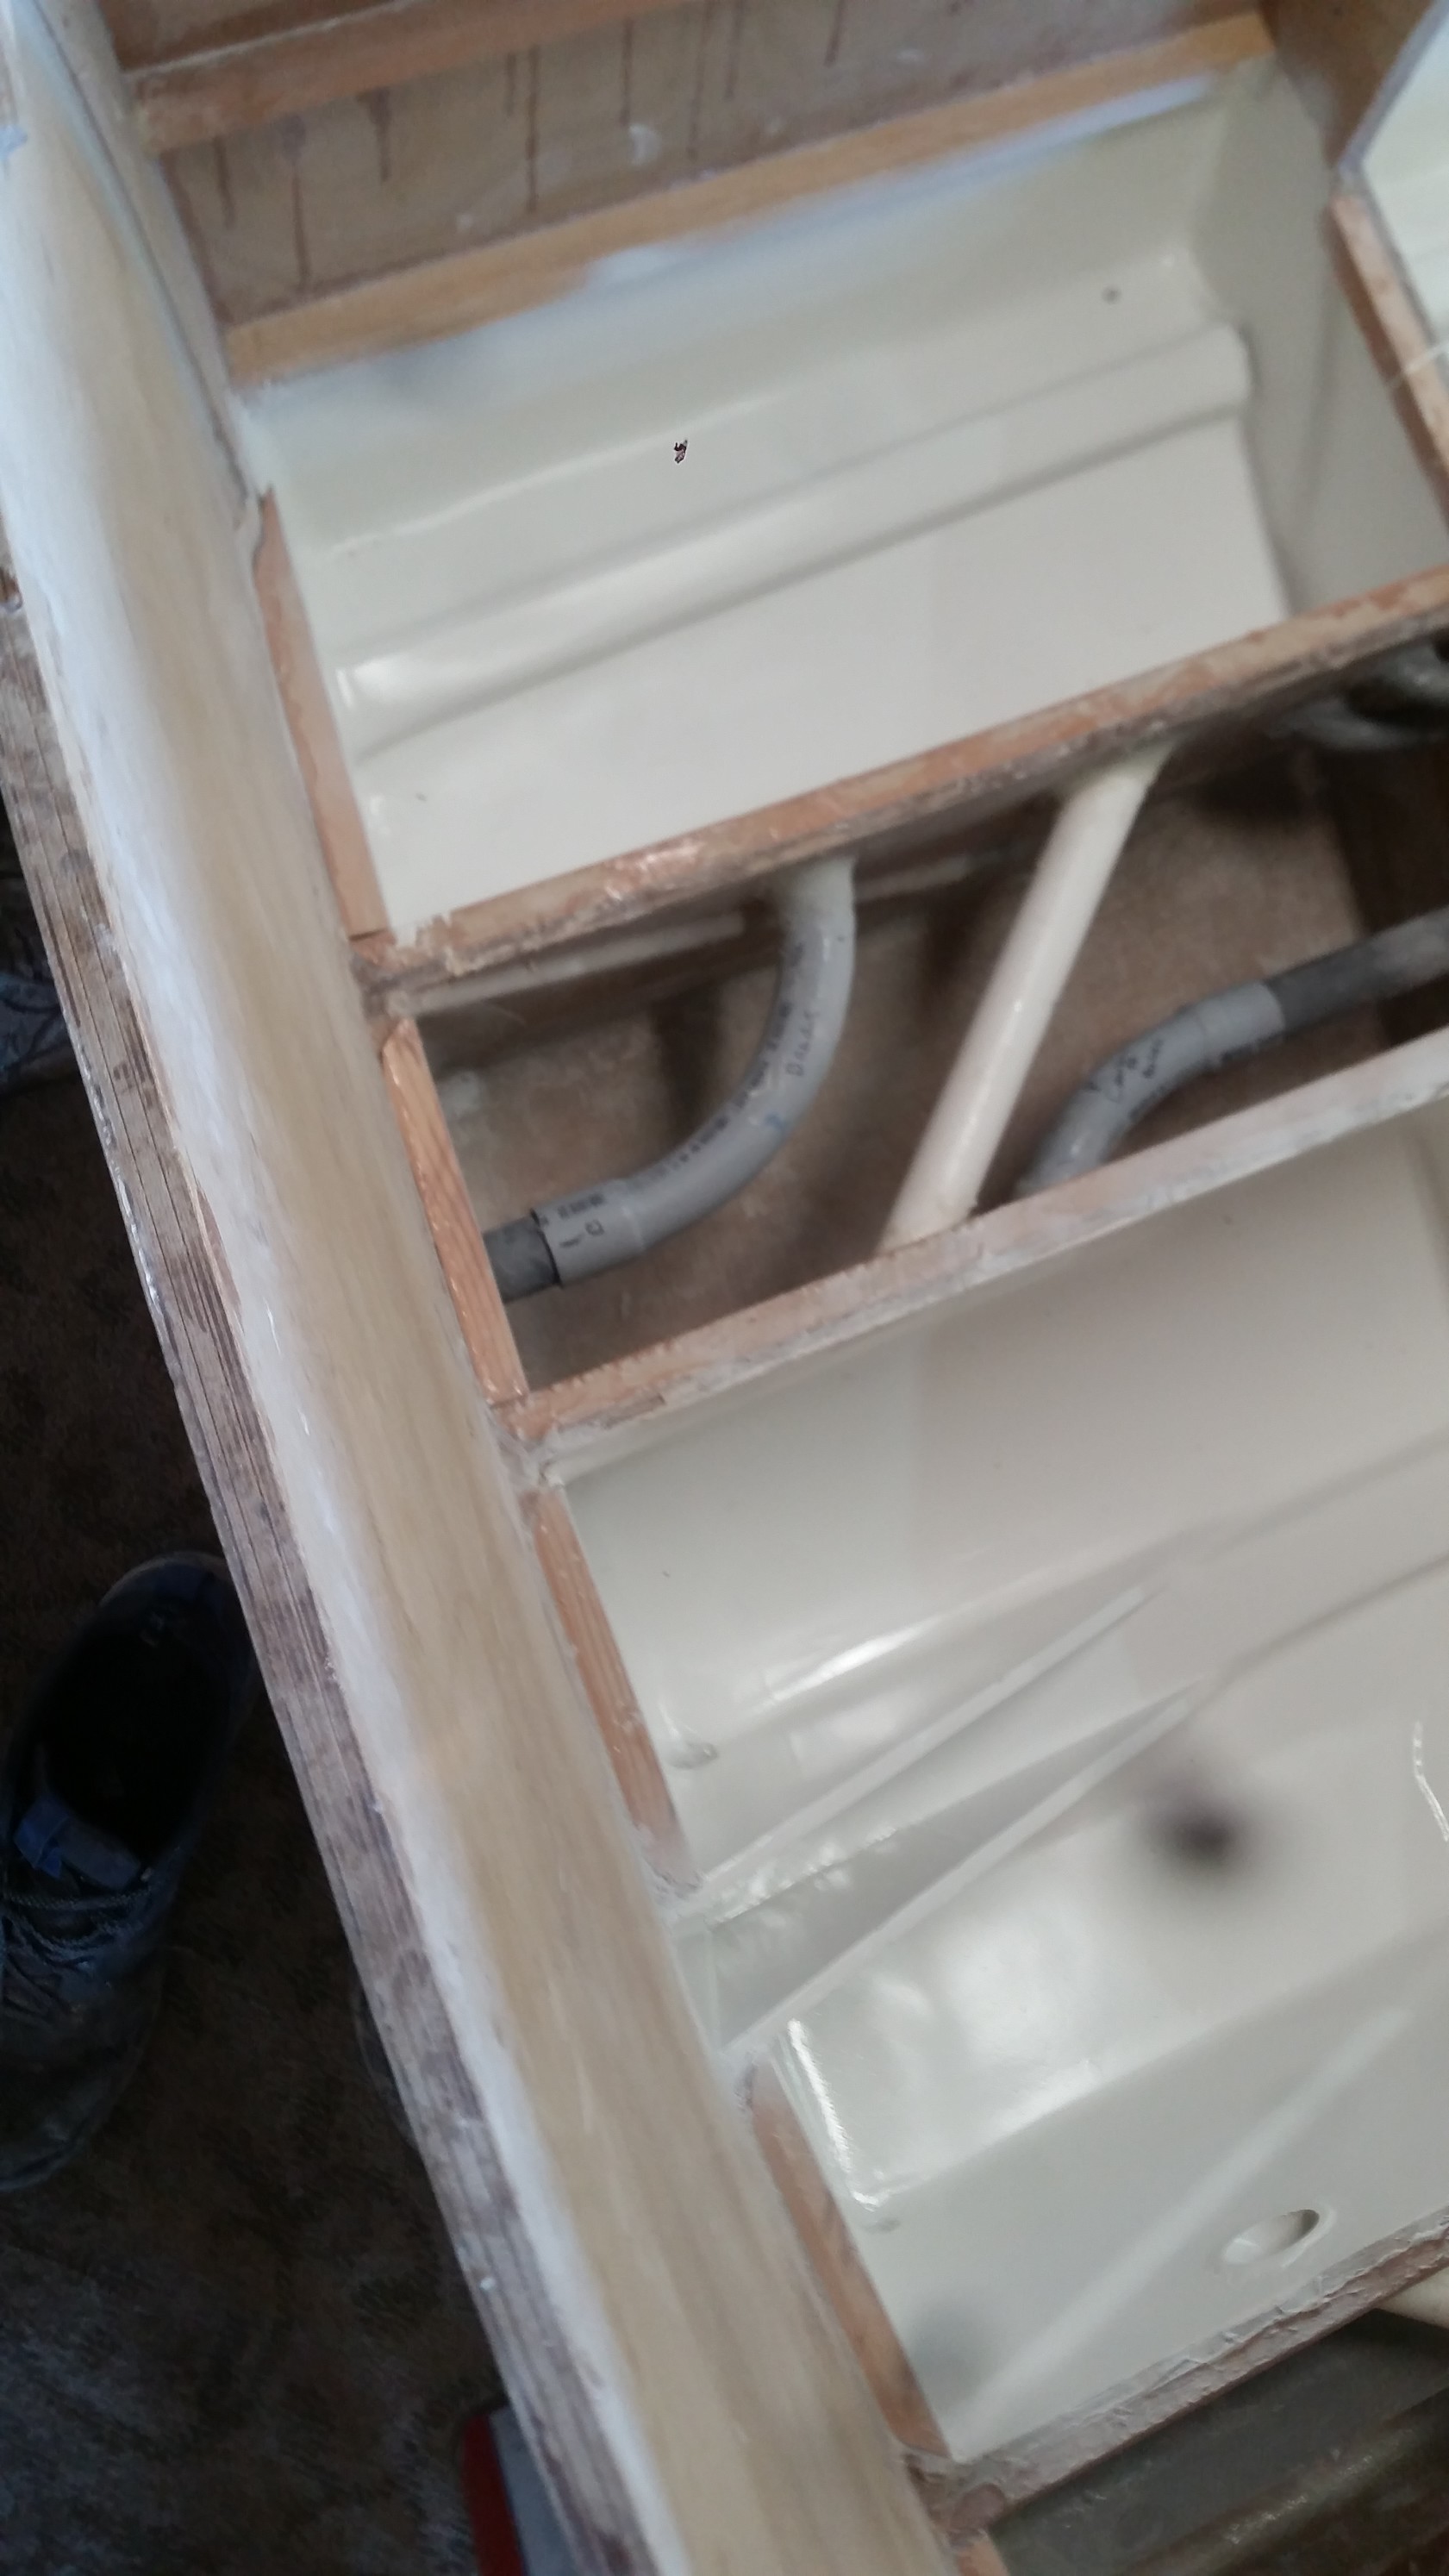
All wire ways and plumbing passages glued into place, final coat of high build in compartments. Getting close to putting the sole down; sand primer, shoot top coat, install flotation, install tanks and plumb them.


-
Love the teak.
-
Thanks for posting photos. Your build is coming along nicely. There may be a pixel width and height restriction as well. When I rotate a photo 90°, I sometimes run up against this on other sites.
-
Fitting wire chases and plumbing


-
Looks like you will be the first in the water. Congratulations! Don't hold back on the photos.
-
Great progress, the hull looks very nice. I really like the video. Took me a few minutes to figure out I needed to mouse over the picture to get it to play.
-
Great progress, looks amazing.
-
Aft bilge. Wouldn't let me upload last night.

-
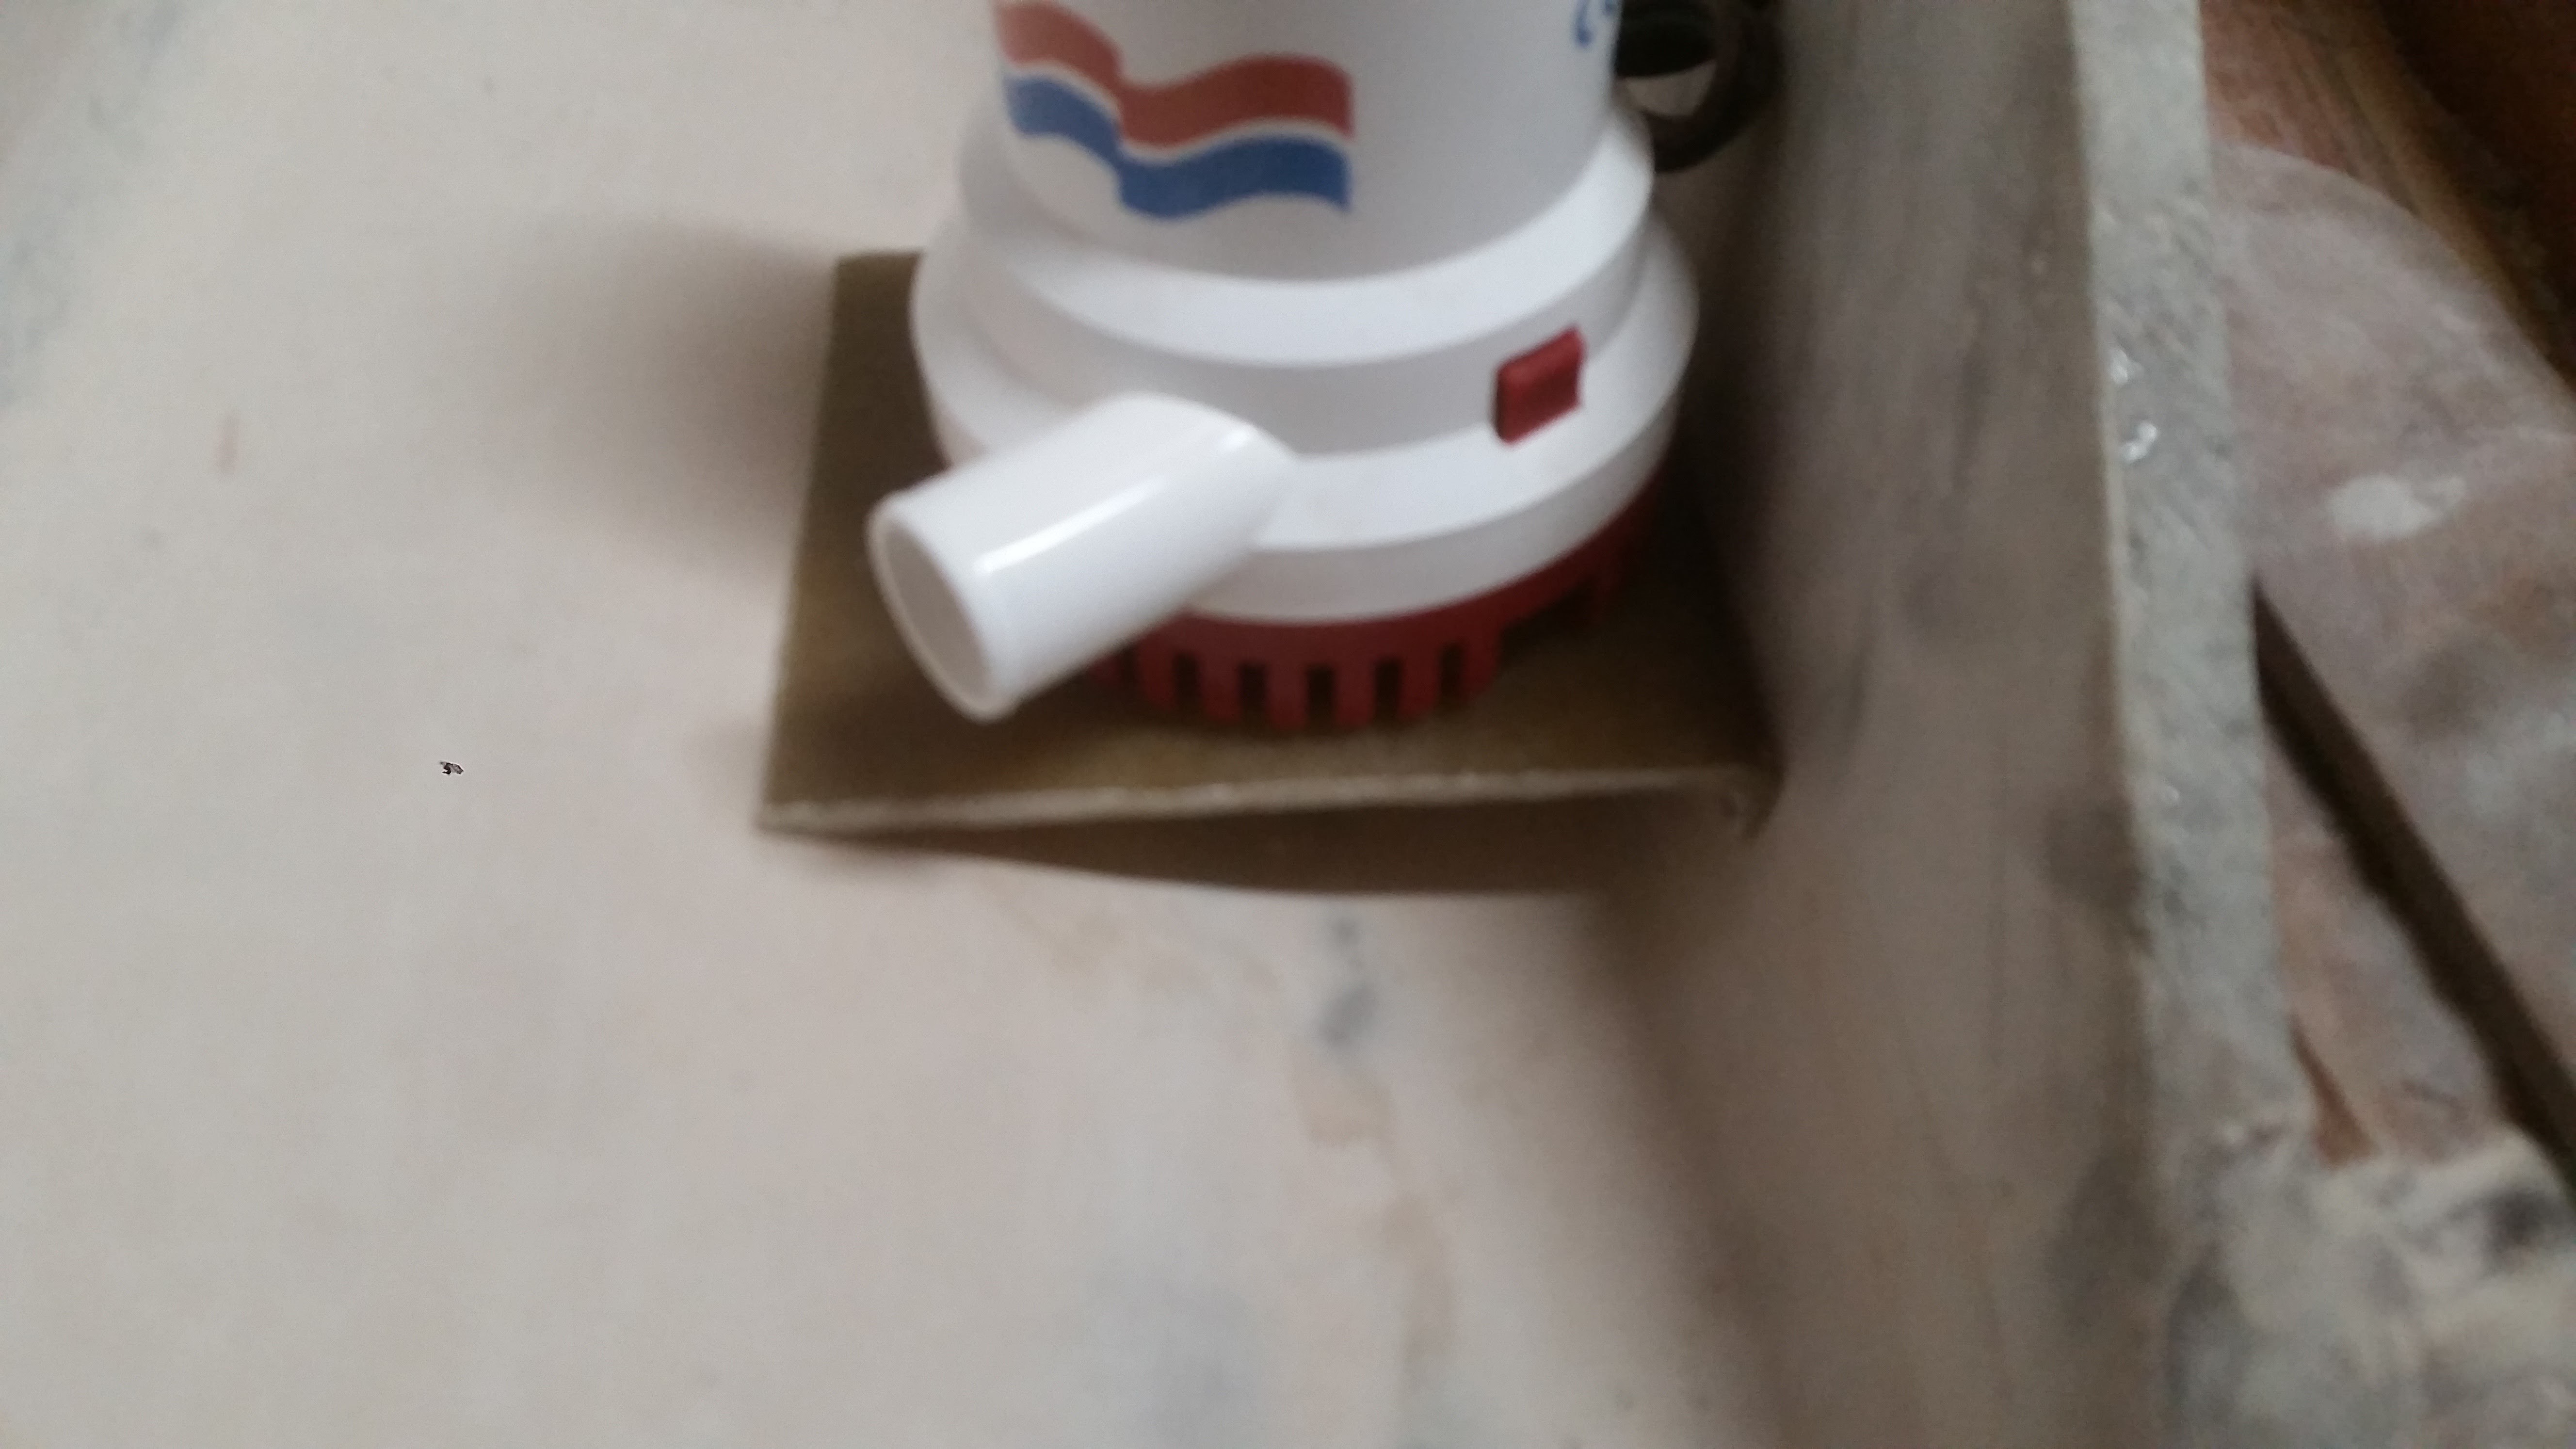
Compartments faired and primed. Sanding primer and adding wire chases and plumbing runs. Quick (like about 5 minutes and people make fun of my scrap pile) mould and a part to mount the backup pump onto.


-
I had a bit (.125 +/-) of waviness in the planking at the shear clamp along the cockpit that was created by the planking pulling (tumble home) on the shear clamp. Possible causes may be my material selection or the span. I let Alan know what I found and sent photos. I'm sure they have a fix in place already. Below is my preferred solution. Incorporate the covering board and the clamp in one piece. This has it's own perils, but fairly minor.

- 228 replies
-
- 1
-

-
- cold mould
- cold mold
- (and 3 more)
-
I've spent more time working the egg crating on this build than anything else. Couple of items that I could have done differently to speed this along for those of you who are considering a build of this sort and for my future reference. Clean your glue joints up nice and neat and tight. I thought I did a decent job but it has caused some extra time. Glue seeps between the seams of the planking in the first layer when you add the second, sounds obvious right? Not at the time of doing battle, never even thought about it. Add the stiffeners/bearers whatever you call them at the tops of the stringers and frames before assembling them. Glass the stringers and frames before assembling onto the jig. Use peel ply on every glassed surface, not just the ones you think you'll be bonding to. Much better for finishing and secondary bonds If you can't glass it, hot coat it before you start planking. Don't allow surface intersections that create a thin deep slot to remain. Fill them. I did fill beside the keel but left the forward bottom planking and stringer intersection creating a difficult area to work. Cockpit shear clamp needs to be more robust Don't be in such a rush to have a chemical bond on the outside glassing. Would be better to do one strip, cure, then bevel the edge to accept the next sheet so it can all be ground flat. Ease fairing immensely and reduce the amount of fairing materials used and time and labor. I did do a couple things right Fill beside the keel. Worked out very nice. Lifting strakes were a pita, but I like what they provide. Filler sheet at the stem to fair the bottom planking to the topsides planking worked nicely Fairing all outside corners to a sharp edge. Sand, sand and sand some more. The joy of being done will be forever diminished by the sight of an obvious blemish that could have easily been removed. I still like double diagonal planking. I'll have more as I think about this.
- 228 replies
-
- 1
-
-
- cold mould
- cold mold
- (and 3 more)
-
I've been moving this project ahead working all the interior sub-sole areas, sanding, filling, fairing, grinding, glassing for way too long. It's time to begin wrapping it up. Compartments are all faired and I have reached the point where I'll begin painting spaces that will remain accessible. Hopefully tomorrow . Begin adding wiring and plumbing chases in the next couple of days. Glued in the first of 4 storage tubes below decks that will provide locking storage for 4 rods or handled tools. Water tank table ready to install after I have painted underneath. Tank beds complete Have all the plumbing for the tanks... except the 1.5" fuel fill hose. Back ordered at my supplier. Need to nail down routing for all the systems below deck and there are a lot of them I thought I had photos with all the tanks in place and everything else looking done, but I guess not.
-
I've been sanding/fairing my project for a year. Figure I'm about 60% done with that operation.
-
I'm going through the platform for the same reasons. I'm thinking I can hug the bracket transom with the steering penetration and i have an idea about the rigging tube that I need to run by a rigger. I'm thinking if I turn the deck fitting 90° so it's discharge is parallel to the platform and point it outboard I can move the whole deal much closer to the bracket transom.
-
Looking very nice. Thanks for keeping up on the photos.