smccormick
-
Posts
292 -
Joined
-
Last visited
-
Days Won
21
Content Type
Profiles
Forums
Events
Gallery
Everything posted by smccormick
-
Scarfs aren't all that hard to do once you get going. Only need a hand plane really. Power planer would be faster, but you can make mistakes faster too. I suppose you can use a payson joint. Bevel depth to accommodate your desired glass thickness, layup, grind flat with the ply surface.

-
If you're coming through northern california, you're welcome to stop by and stay a day or two. Some great sailing in the bay and delta. You can critique my work too.
-
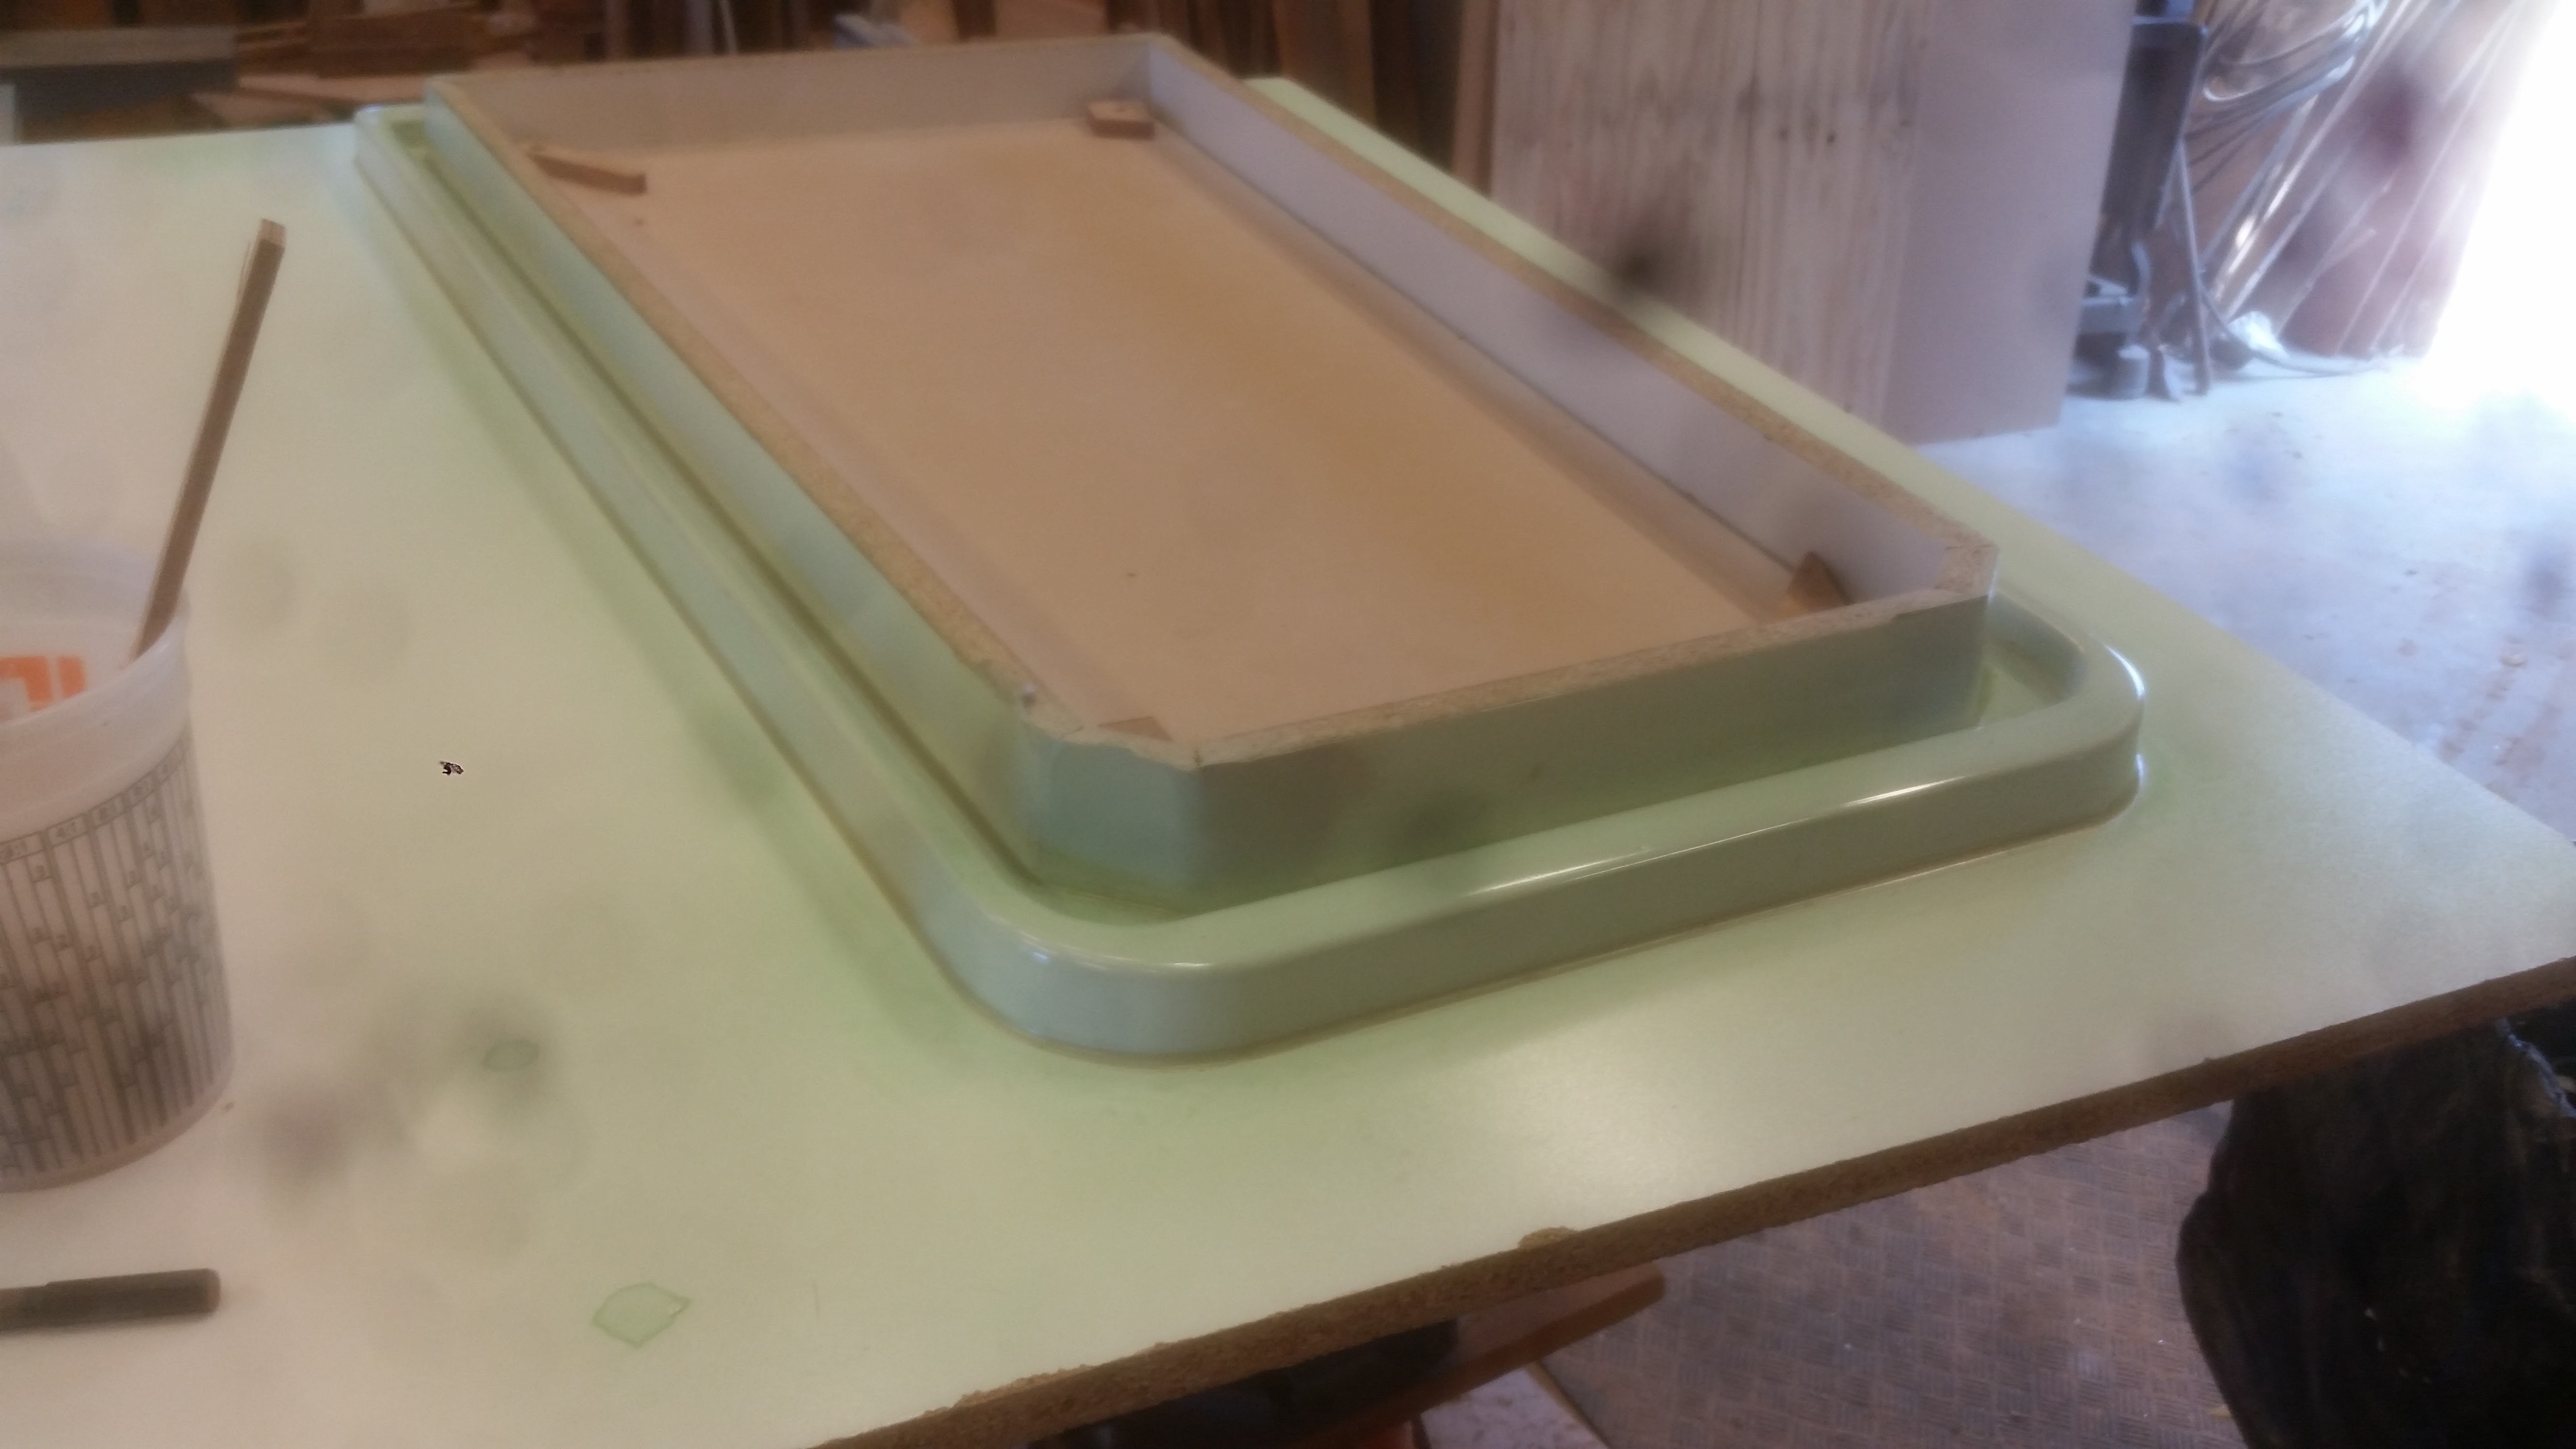
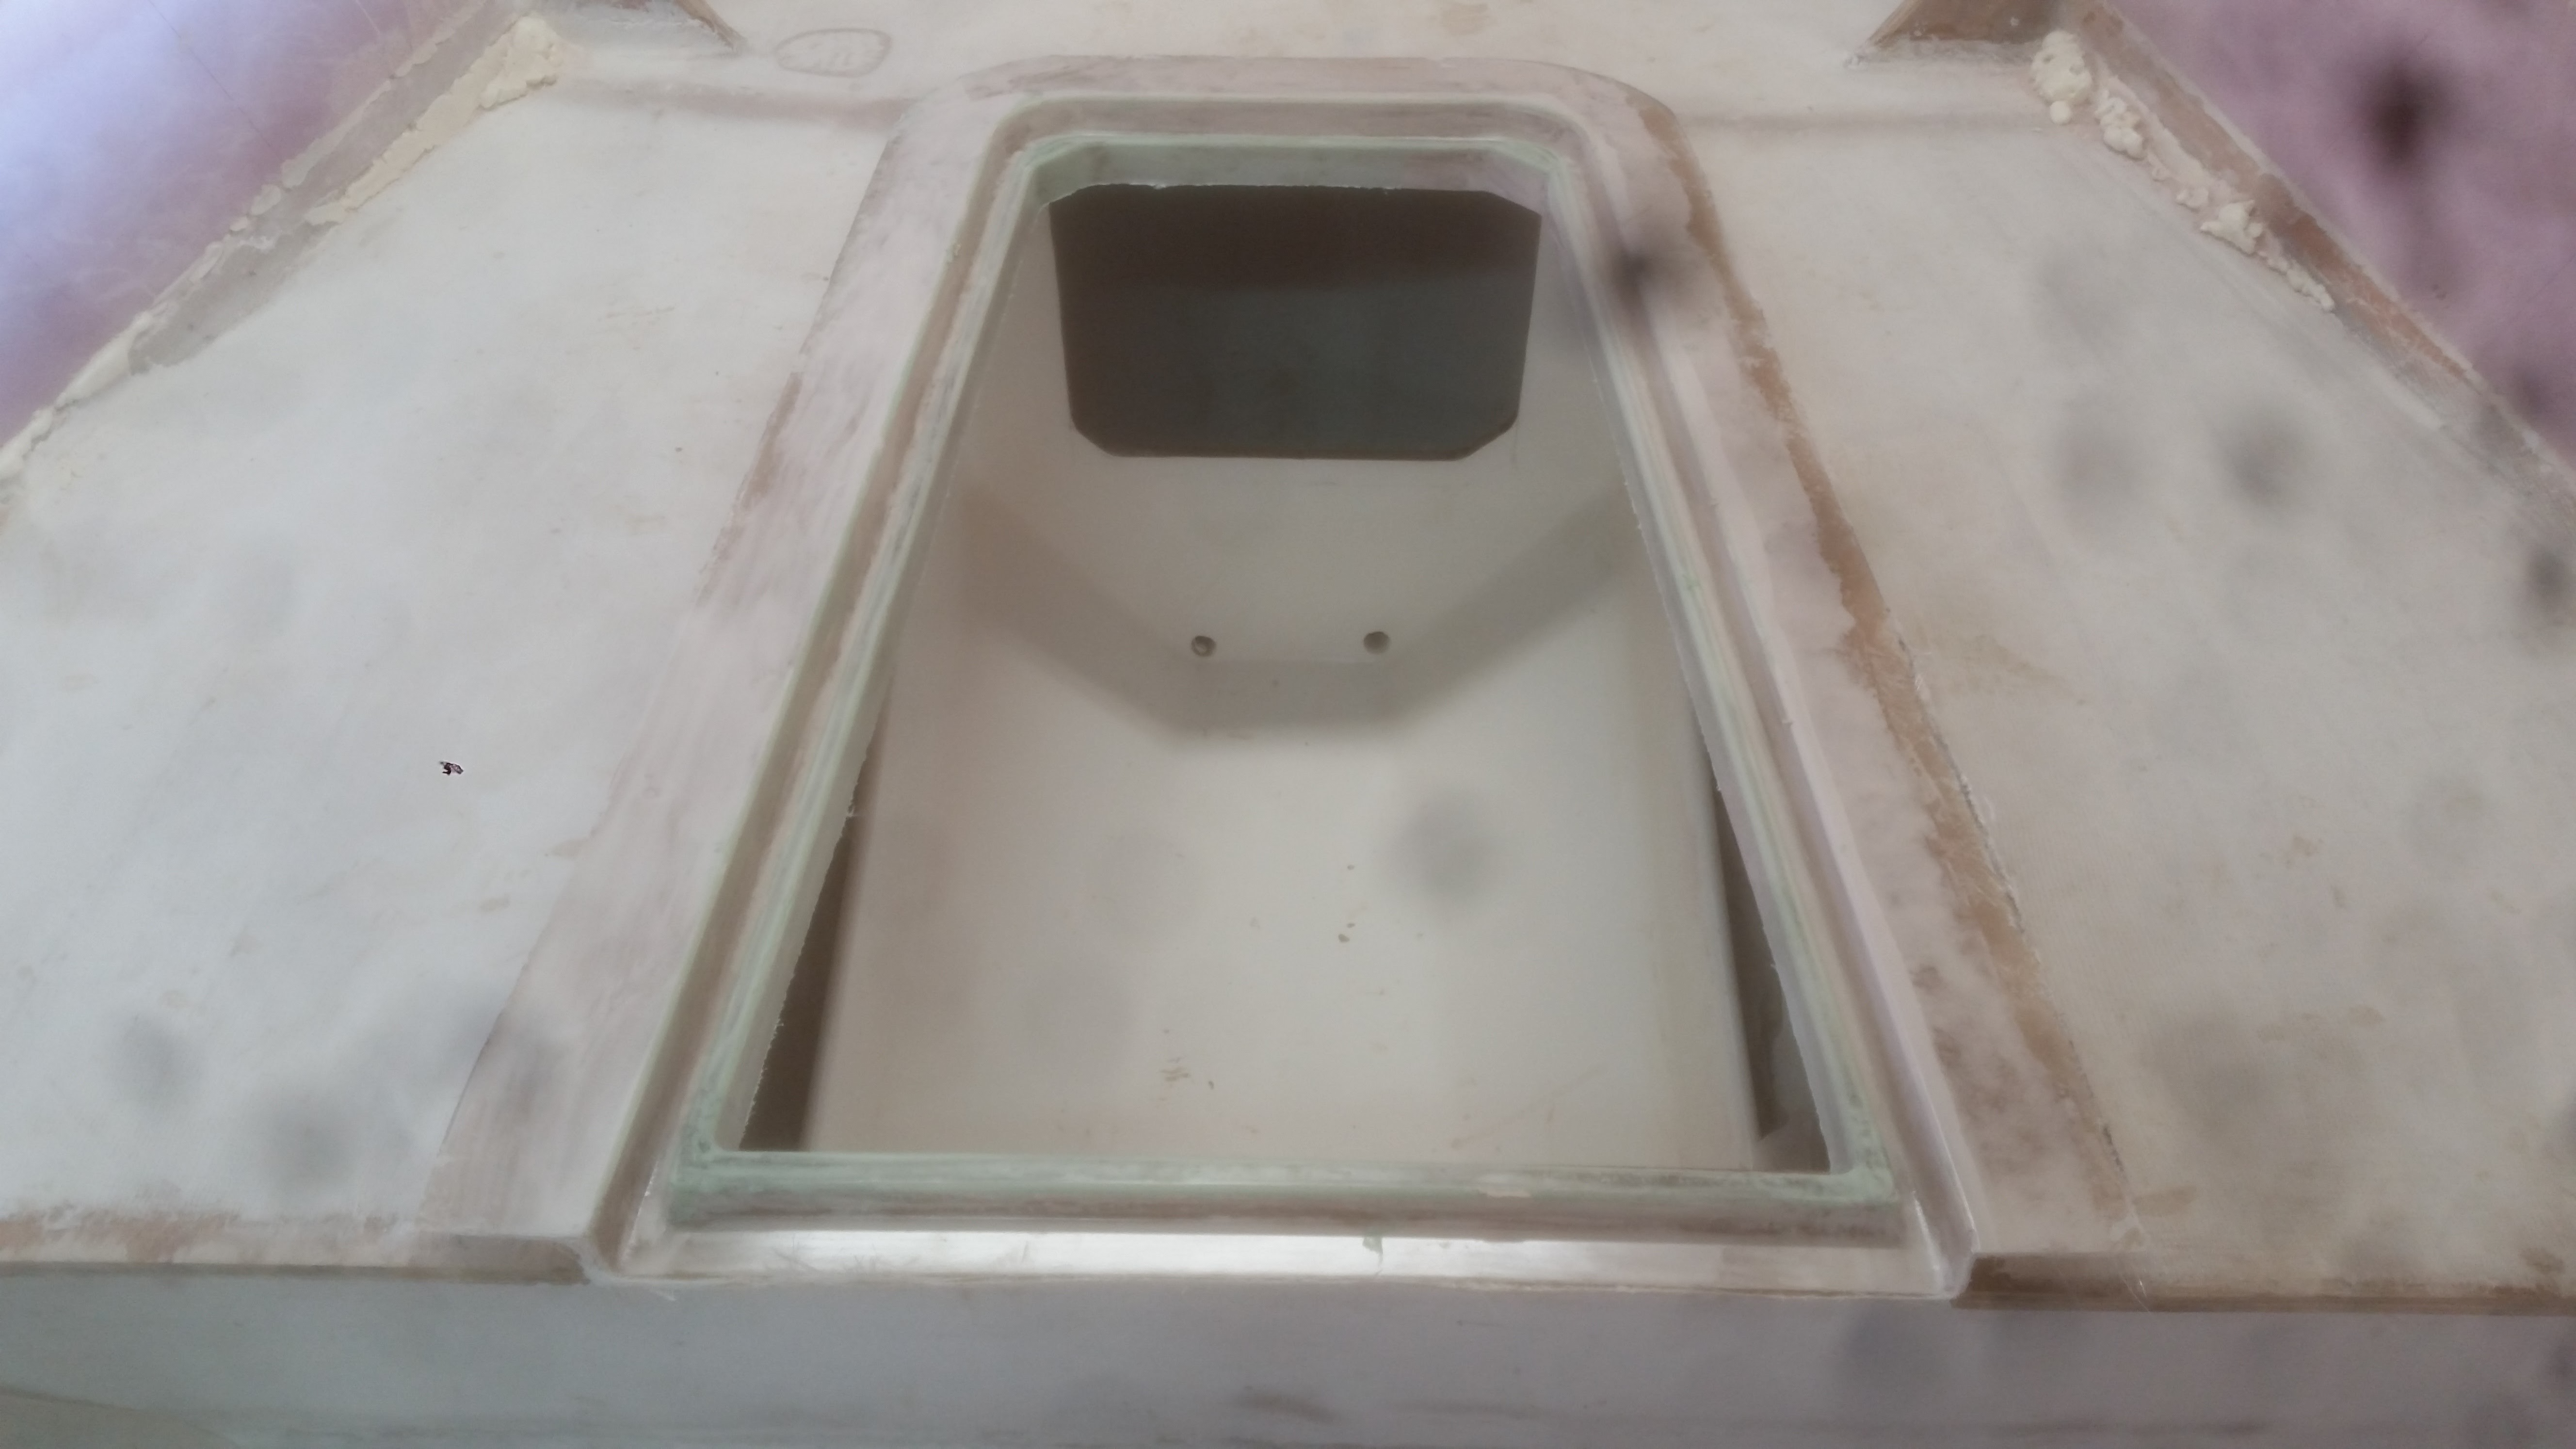
Mold, layup and part for forward hatch ring/gutter.


-
Beautiful work.
-
Going back and looking closer at what you explained here I think there isn't enough twist in the ribband in the bow section which caused the face of the ribband and the edge of the frame to not be planar. The ribband should also twist enough so that it's outside surface is in plane with the keel bevel. Now that I'm on the same page, I agree, you'll need to glue some material to the face and back of the part before you fair.
-
There have been a bunch of these models built and I haven't heard of any problems with the part strength. I'm sure if there was, Graham and Alan would have already addressed it in the design, so I would recommend leaving as is.
-
Some sweet lines on those boats... I mean that boat.
-
Good progress.
-
Welcome aboard and good luck with your build. Sorry, can't help with the strongback dimensions.
-
<embed src="https://3dwarehouse.sketchup.com/embed.html?mid=fe50996d-a643-4f26-ab96-585436fd30f4&width=580&height=326" frameborder="0" scrolling="no" marginheight="0" marginwidth="0" width="580" height="326" allowfullscreen></embed>
-
And then it was.


-
Love to see how others envision the same product. You've done a great job you should be proud.
-
So close to installing sole.


-
Can't see any screw-ups from here. Nice work.
-
Lenm, I've seen it both ways. Smooth is the look I want, so I'll be installing ceilings. It's the last large scale fairing project and honestly, I'm not looking forward to it.
- 228 replies
-
- 1
-

-
- cold mould
- cold mold
- (and 3 more)
-
Argh, last couple of days that's been about right. But usually I do my thinking when I'm suppose to be working on it. I can turn a five minute job into 3 days with all my obsessive need for perfection. I never achieve it, just aim for it.
-
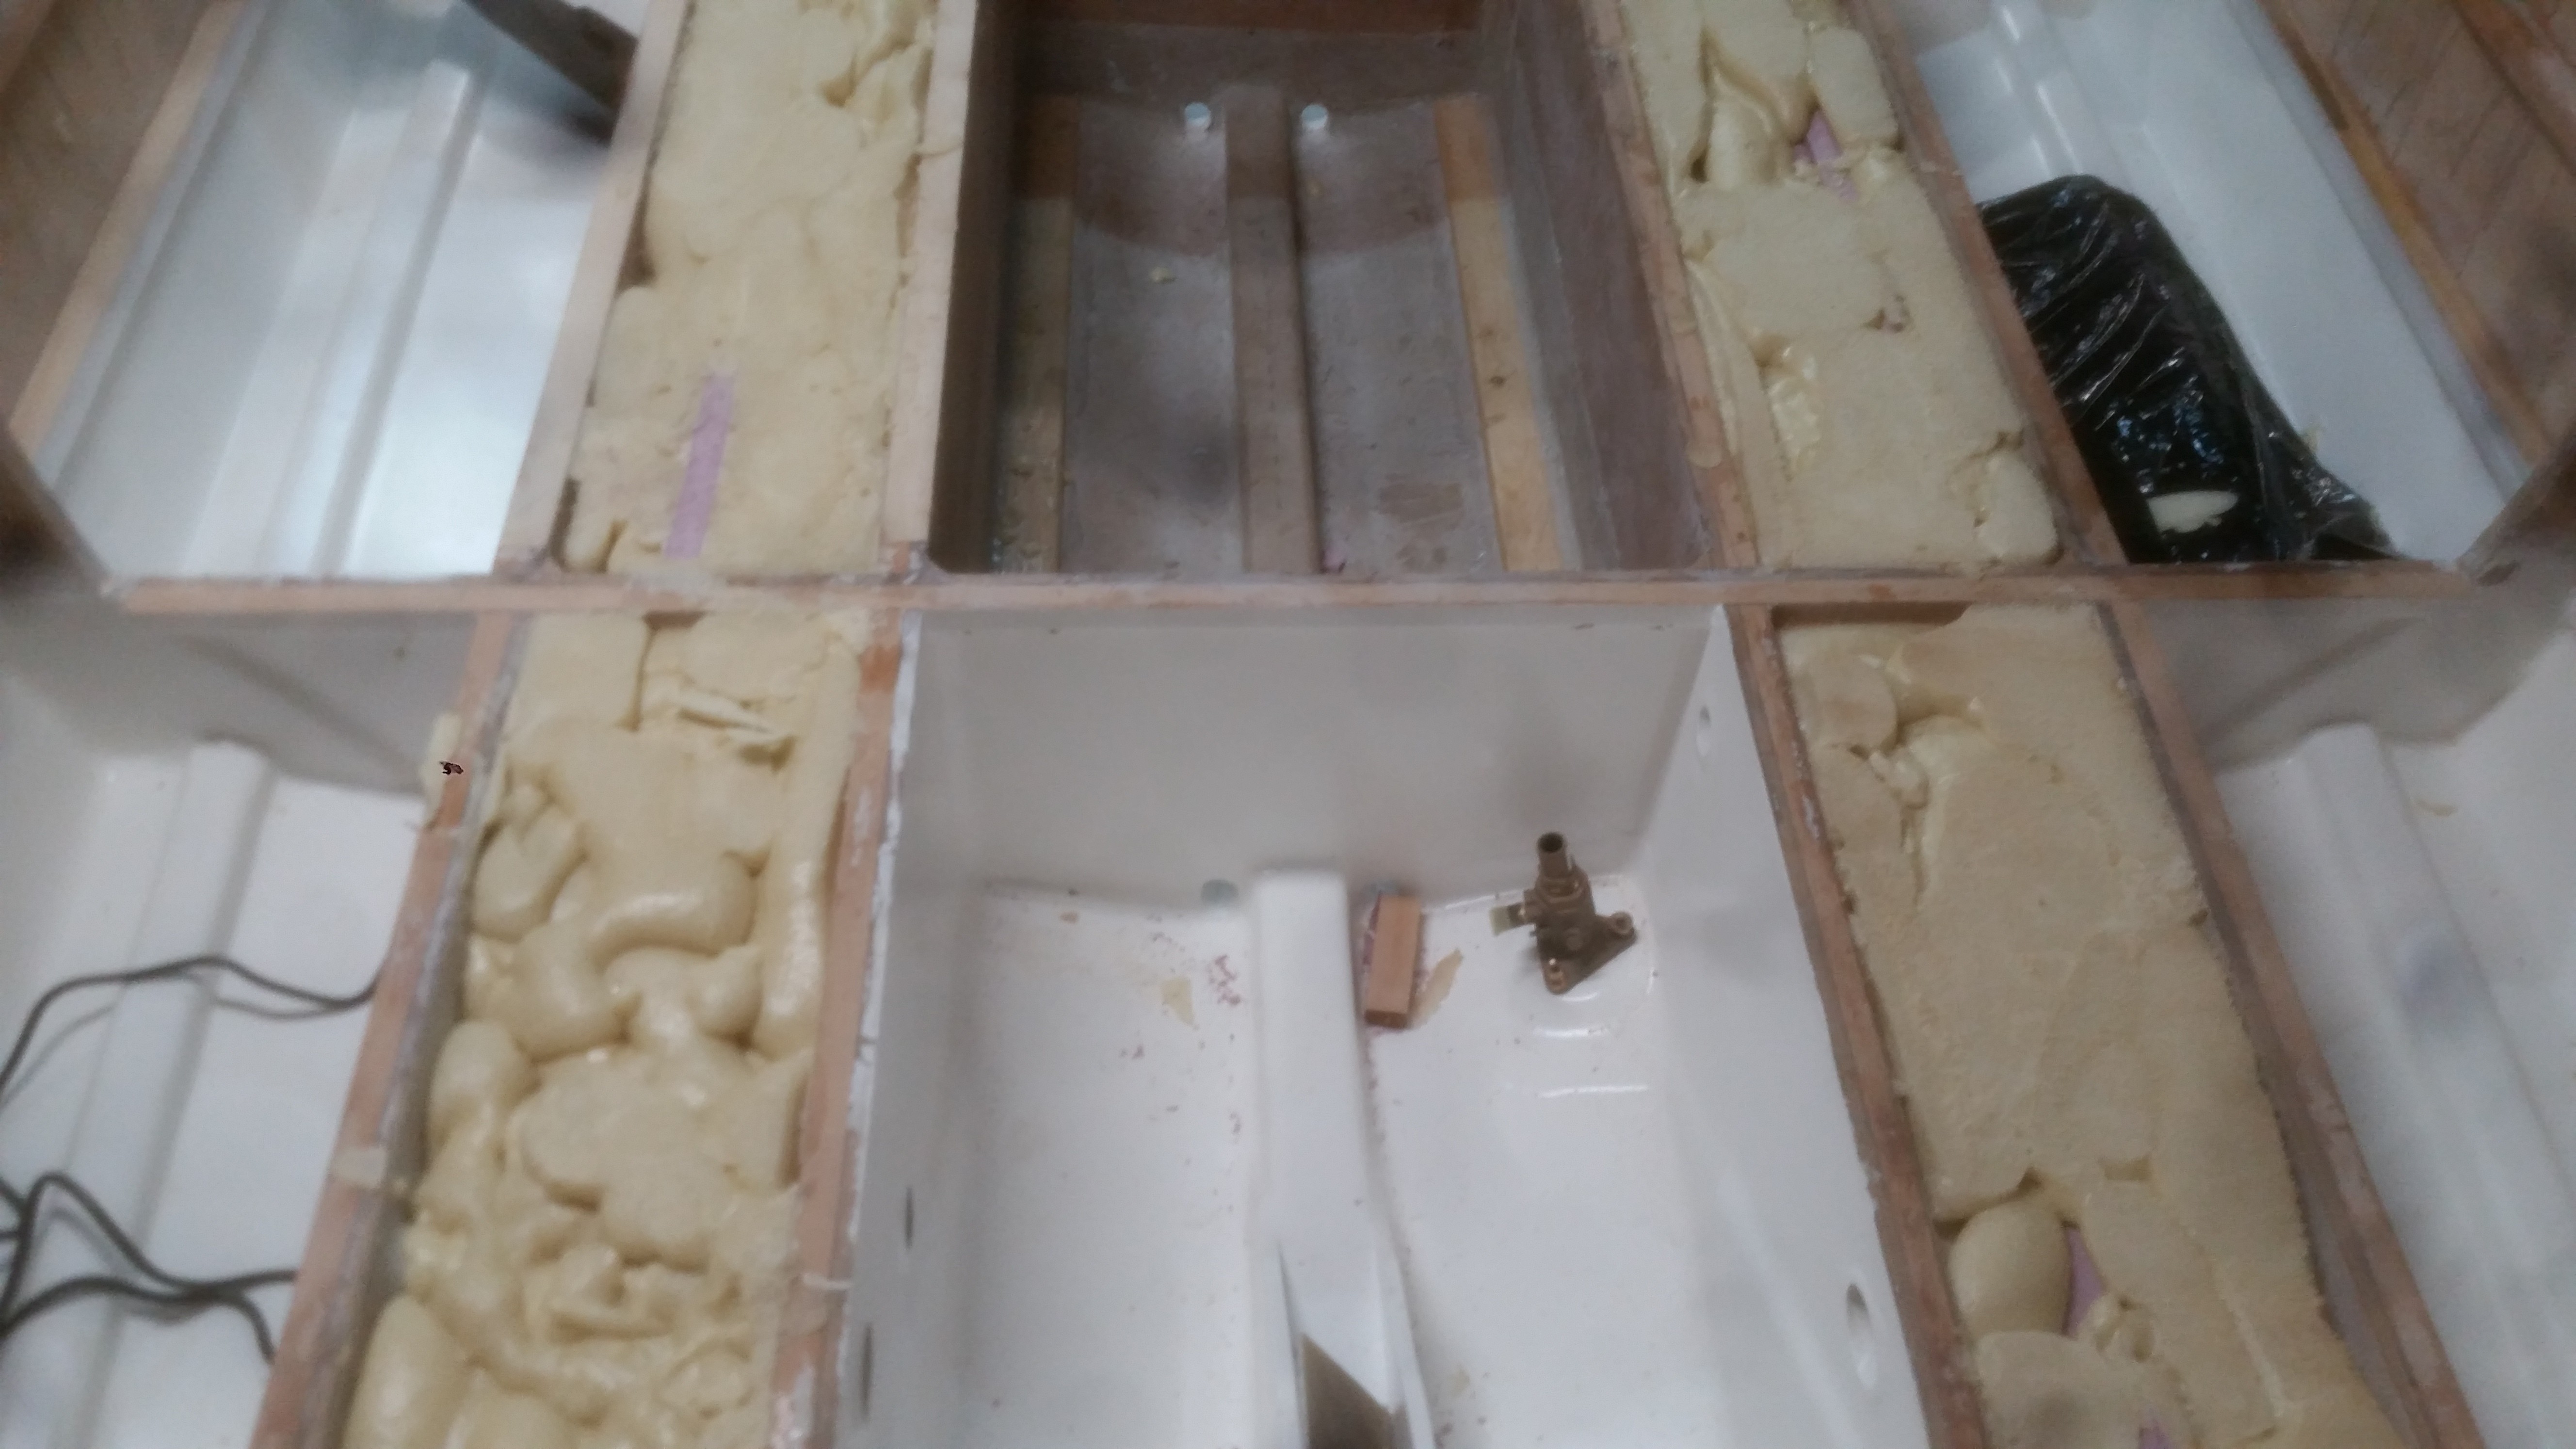
Thanks Kennneee, They are going every which way. I need to do an as built drawing for future reference. Meant to do it before I covered everything. Excluding tank fill/vent plumbing, everything else that passes through the foamed areas will be housed in a conduit. Keeps the water out and if I have to add or change a system, the process is easy.
-
Chris, Just pm'd you about visiting the build.
-
Installing flotation foam. One more thing that should only take a couple hours but somehow takes 2 days. The B and B guys recommend rigid foam glued to the bottom of the sole, but with all the piping below there was just no way to make that work. I really struggled with leaving it out entirely. Ended up pouring obviously, but left channels connecting the limbers to maybe allow drainage. If something happens do I want the boat back? Would I rather have it go to the bottom? I know all the positions on floating boat easier to see, blah, blah.


-
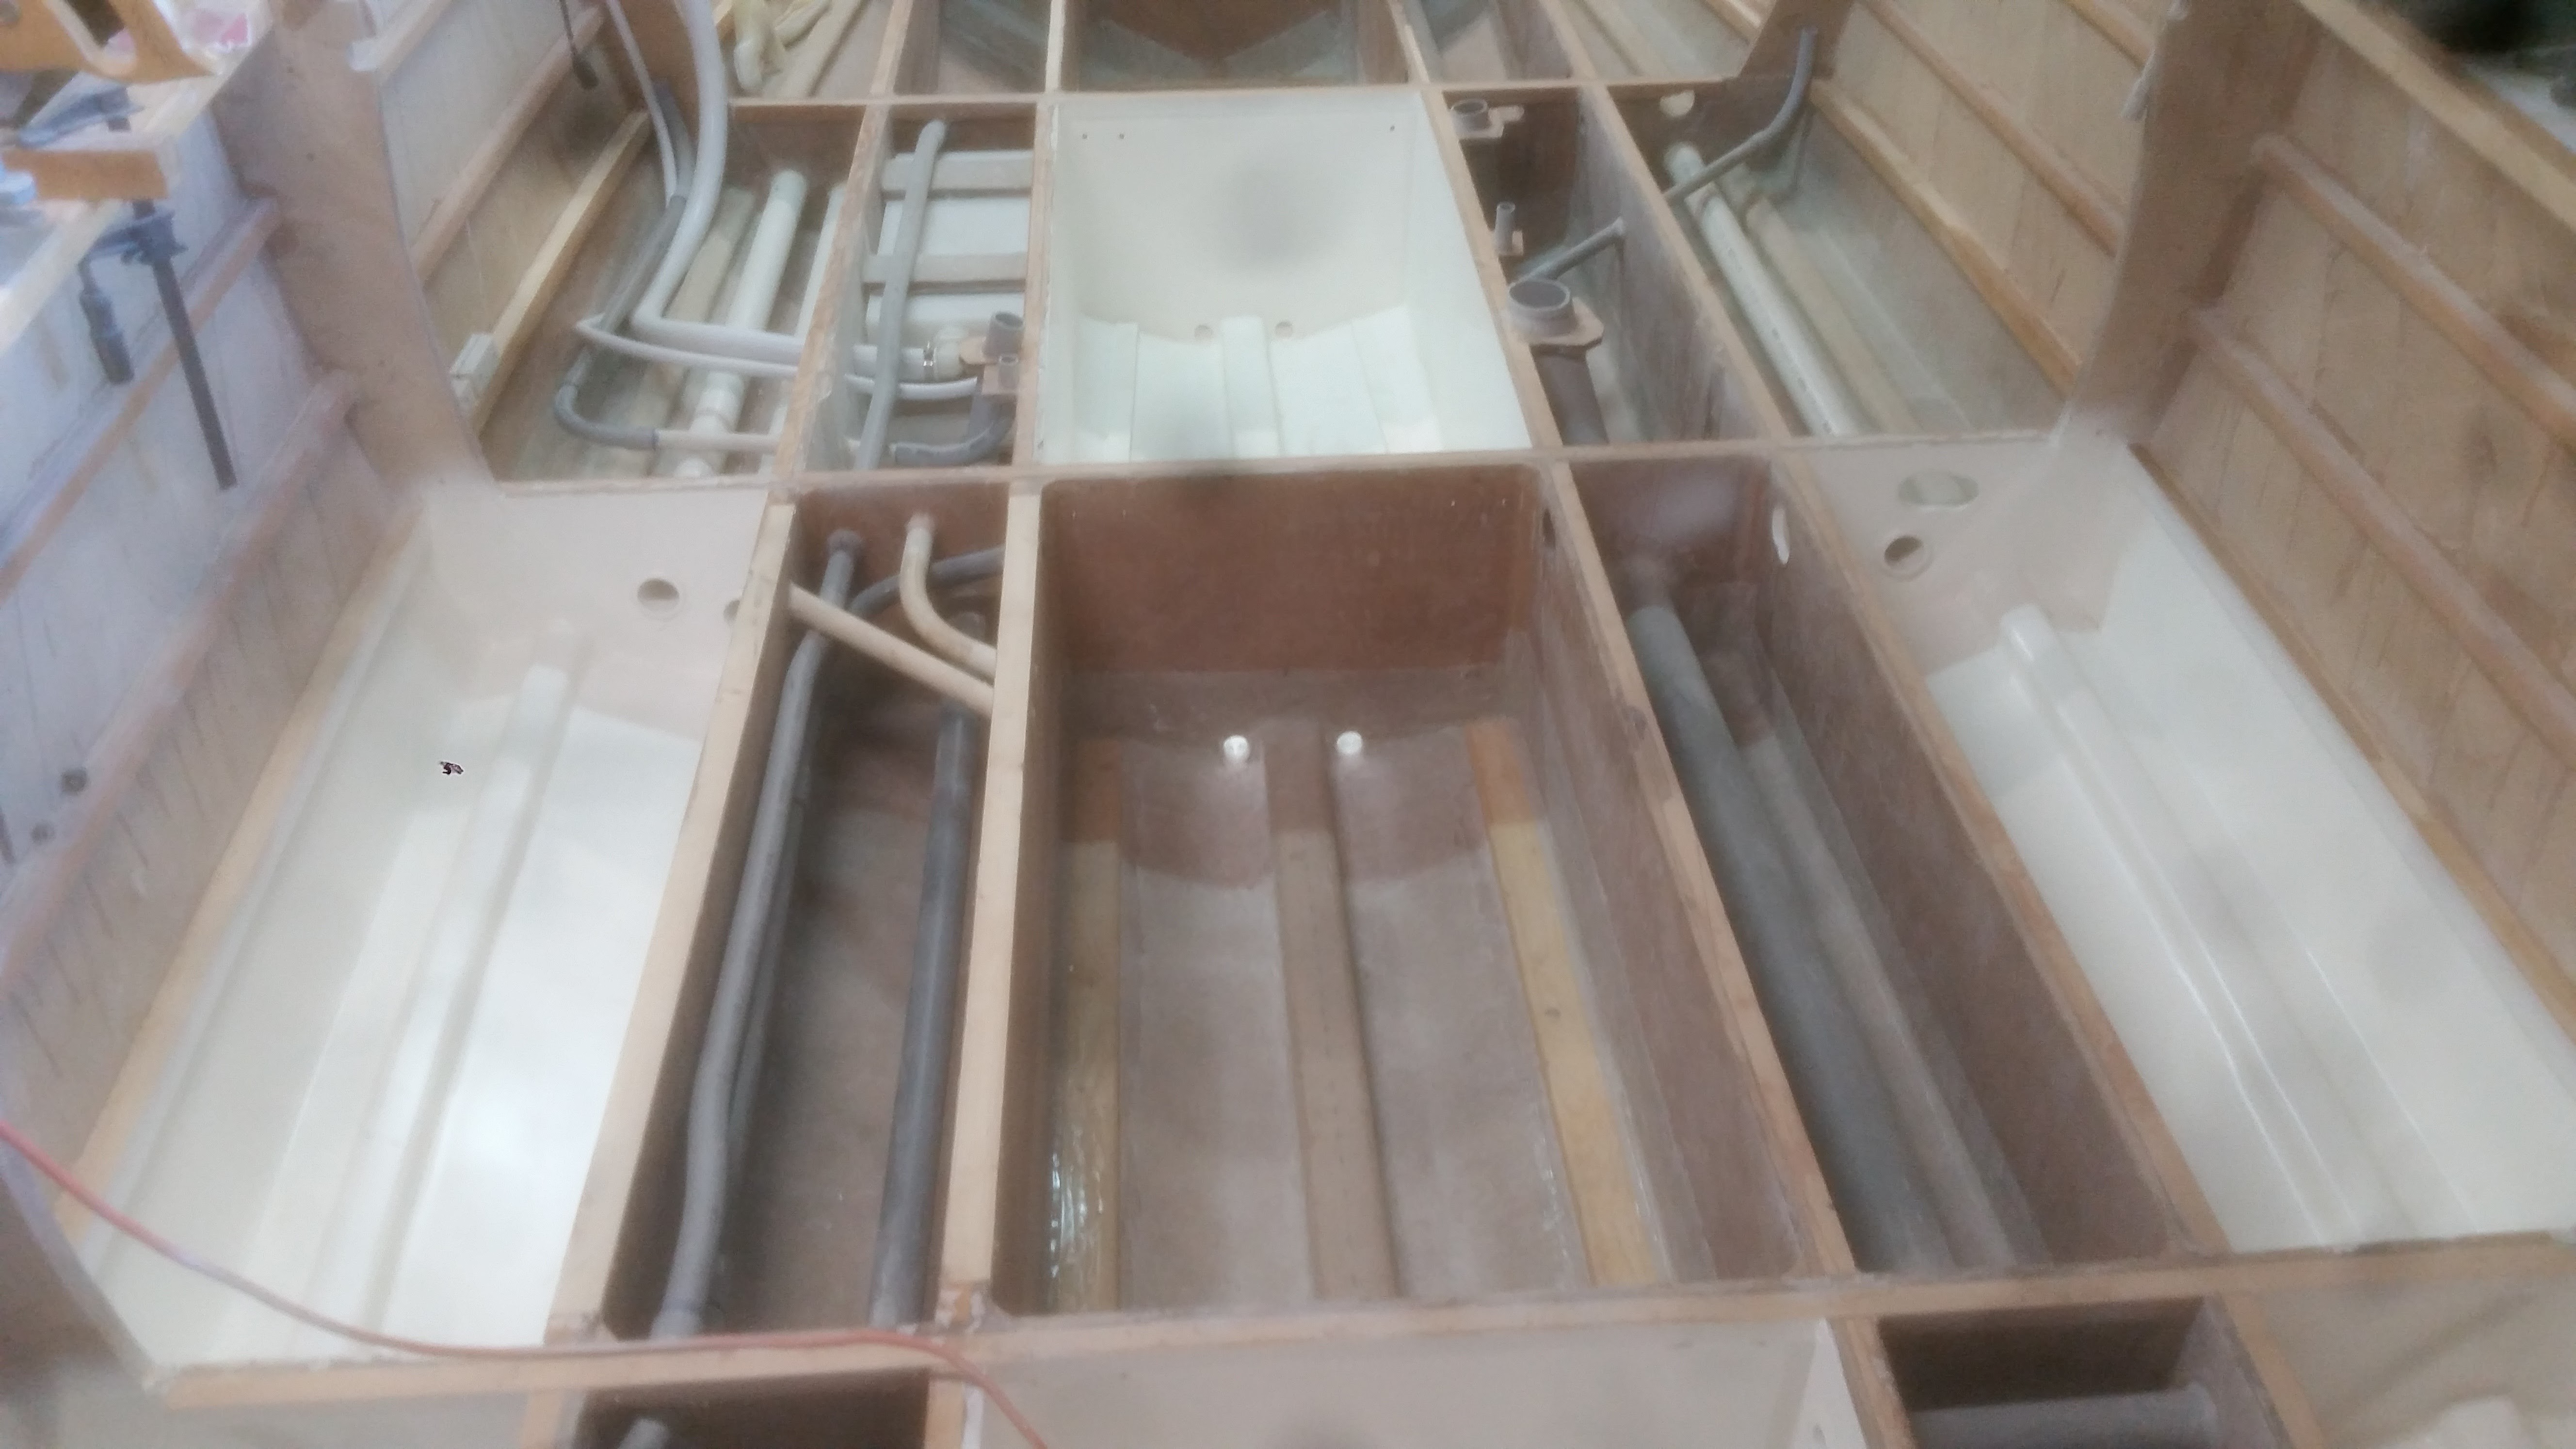
Compartments finished painted, all the conduits complete.


-
Nice work on the furniture pieces. I would use tenons (loose or sawn) on that work too. Not the place for biscuits.
-
I've considered trying that method too, particularly around the areas where you are blending glass overlaps. Just sanding off peaks in the application should produce much less work and less material usage in that area. Possibly using smaller v-grooves in the field. In the end I was worried about secondary bond strength in the unsanded valleys so I've never tried it.
-
Making great progress. Nice workmanship. I like the domino's too, just could never get past the price on festool machines. I stick to biscuits.
-
Really coming together. Can't wait to see the power installed.
-
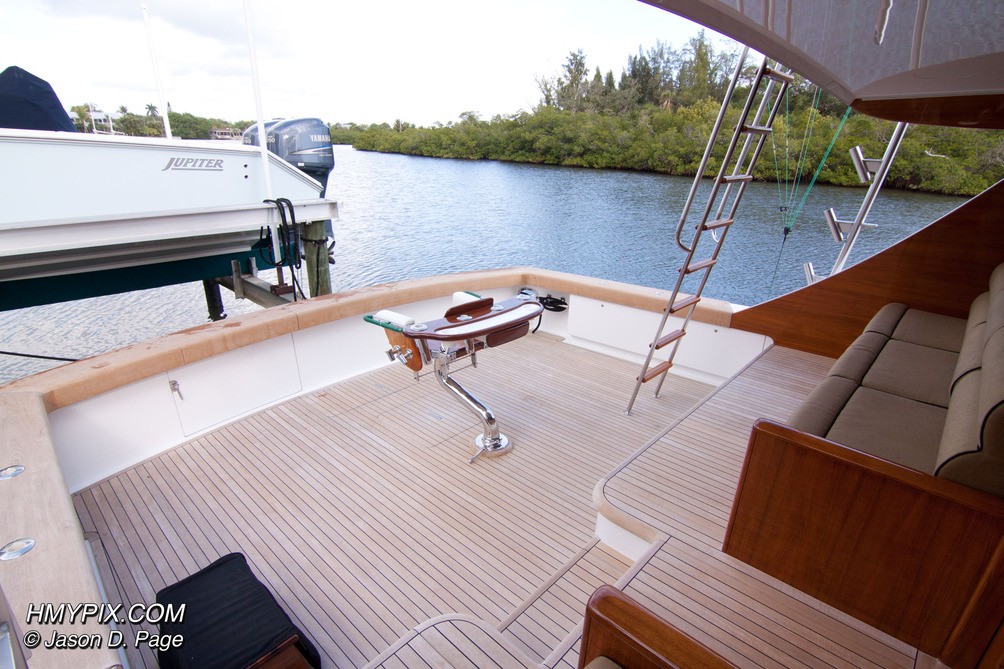
Are you still going with a bracket mounted engine? There's a lot of ways to finish that up depending on your use, expectations and aesthetics. I like plenty of toe space at the transom so when leaning against the bolster i'm not angled any more overboard than I have to be, so I wouldn't put a bulkhead at the transom. Others want storage and mechanical systems space back there, so they determine the machinery and layout then build to house it with room for maintenance. Here's a couple of cockpits transoms laid out the way I prefer them . Even though these are much larger boats they still incorporate functional design that can be adapted. These all have tuna doors rather than storage.