Paul356
-
Posts
795 -
Joined
-
Last visited
-
Days Won
103
Content Type
Profiles
Forums
Events
Everything posted by Paul356
-
You're a lucky son of a sailor. 21 guns and a tot of rum here. I think we all aspire to an obit like that.
-
Another testament to the genius of the 17 hull and rig design.
-

Core Sound 20 Mk 3 -- #4 "Chessie" . .
Paul356 replied to Pete McCrary's topic in B & B Yachts Forum
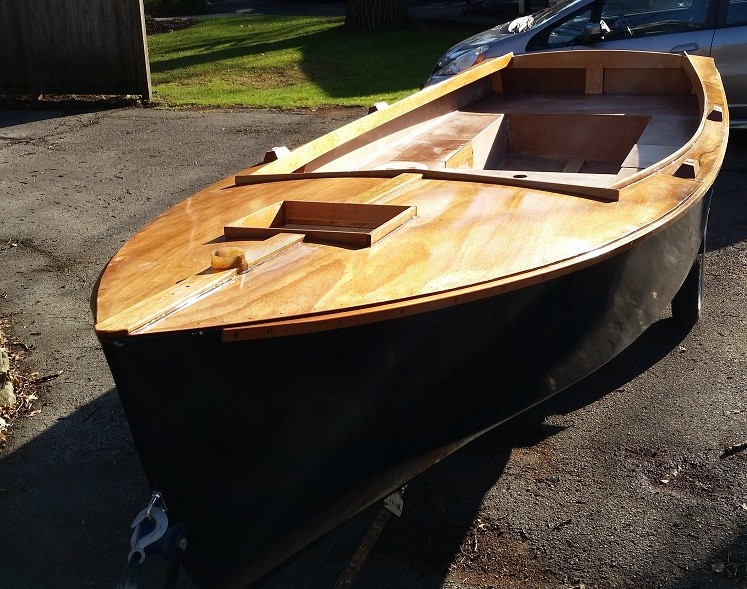
I'm finishing my decks and cockpit seats bright. There are filled holes and other imperfections. To me, they're character. To my family, the finish is beautiful. To anyone 6 feet away (other boaters), no dings can be seen, and people seem amazed to see real wood grain and the warm varnish glow. 4 coats of varnish to start is the same as two coats of primer and two of finish paint, and I don't have to worry about fainting while I apply. I will need to varnish in the future, but it's a couple of hours/yr. And I like to varnish. The picture is just the first coat of varnish on the decks. I got one more coat on, then I had to put it away for the winter. Cockpit not quite ready to be varnished yet. And it doesn't have to be perfect, at least mine doesn't. See the filled screw holes? Me either. But I like navy, too.
-
I'm with Paul on this one.
-
Core Sound 20 Mk 3 -- #4 "Chessie" . .
Paul356 replied to Pete McCrary's topic in B & B Yachts Forum
My masts lined up almost exactly like yours. I can't think there will be any effect on performance, let alone appearance. -
Core Sound 20 Mk 3 -- #4 "Chessie" . .
Paul356 replied to Pete McCrary's topic in B & B Yachts Forum
Pete, your paint plan makes sense, given the decision to use Awlgrip primer. As usual, I learn something from hearing you think out loud. Thanks. -
I routed a groove in the edge, too. The rope is half buried. I used a centering jig on the router, two brass pins that screw into the base.
-
Core Sound 20 Mk 3 -- #4 "Chessie" . .
Paul356 replied to Pete McCrary's topic in B & B Yachts Forum
Curious: Why did you decide to go to the spray shop for this batch of primer? I thought your own paint job on topside, etc., had turned out pretty well. Looks good from Wisconsin, anyway. Conversely, why stop at primer, why not have the spray shop do finish coats, too, as long as you're there? -
Good for Graham. Good for going, good for learning all he did, good for going home to build on all that and get ready for the race. It's been great traveling along.
-
fitting first and second sections of masts CS17
Paul356 replied to acreew's topic in B & B Yachts Forum
I used a small drum sander on a drill extension, standard Stanley stuff from the hardware store. I used the coarsest grit, 60 if I remember, but maybe 80. I chucked it in the electric drill, and the extension was long enough to allow me to get inside to the required depth. I just kept grinding away, back and forth, in and out, turn the tube, grind some more, try to keep it even. It took probably an hour or more of grinding on each of the big tubes. I did find that if I applied heat to the larger tube, it helped get it over the small tube and saved some grinding time. The epoxy helped lube the joint some, too, I found, and what had seemed like a tight fit dry actually slid in more nicely once it was epoxied and I worked it around some to find the best lineup. Of course, you have to make sure it will dry fit first. But try the heat gun on the larger tube, since that may help reduce the amount of grinding needed. I got my tubes "raw" from B&B before they were doing any work on them, so your grinding time may be less. -
Graham is on his way there now, no doubt he'll have some thoughts for you.
-
You made my day. Best wishes to Graham. Such a neat boat. He has packed so much into such a small space. Thanks for the tour.
-
I carved a little channel where the downhaul line exits the rudder head, painted it with epoxy, smoothed that. It will be more than sufficient for the downhaul to run in. On a prior boat, that sort of "sheave" was all I had for the main halyard, and it was fine. For something that gets used only once a trip or so, polished wood works well. Not as fun as imbedding a a sheave, I'll admit.
-
Fwiw, I have not glassed the cockpit floor on my 17 and don't plan to. Assuming you mean glass cloth. I certainly epoxied it. I did not use cloth on my previous boat and never had an issue with wear and tear. I am, as Chick noted, using non-skid. So, it will be paint over epoxy.
-
Spindrift 10N help needed - outboard pad and fwd bulkhead question
Paul356 replied to Rdubs's topic in B & B Yachts Forum
In addition to what Chick said, I'm not sure how you'd get a good bond trying to wrap cloth around the sharp bends of the keel. If you wanted a tougher bottom on the keel, you could add a narrow shoe of a layer or two just on the bottom edge. Otherwise, I did it the way Chick described, screws and sealant, with the idea the keel can be sacrificial if needed. -
Terrific idea. We're all jealous. Send many updates.
-
It was about half a quart can to put two coats of varnish on the decks you see there plus the transom. Then the weather caught up to me, and I had to put it away for the winter. It was too cold on the day I put the second coat on, so I'll probably put two more on in the spring, sanding more than usual to get the second coat smoother. I'm using Zspar by Petit, mostly because I've used it for years and feel like I know how it will go on. I used the same approach on my previous boat, a Bluegill, and it lasted far longer than it should have, given the neglect that boat endured in later life.
-
2 or 3 coats of B&B. work the first coat into the ply with a spreader, like a bondo spreader. keep subsequent coats light, either using spreader again for 2d or a brush, but not rolled. wash between coats to remove amine blush, and sand between coats as needed to keep things smooth. sand the final coat smooth with 120, maybe up to 220. finish with spar varnish, 2 or 3 or more coats. photo shows 1st coat of varnish on decks.

-
Core Sound 20 Mark 3 Build - Chesapeake, VA
Paul356 replied to AmosSwogger's topic in B & B Yachts Forum
Looks like the little guy has found his hiding place. -
the pictures are great. really neat to see it come together from the start.
-
I bedded mine with sealant on the off chance it might need to come out some day.
-
As I've mentioned elsewhere, my Suzuki piston filled with oil lying flat on the "correct" side for a lengthy period. One reason seemed to be that the crankcase had been filled to the max, rather than just to the minimum. Fixing it was, unfortunately, not easy and required a trip to the dealer. The dealer, in turn, who admittedly has a self-interest, was unable/unwilling to describe to me how I could fix this on my own. I did manage to do it later, when it locked again -- grrr -- but it took a lot of oil spilling, tipping and drying time over a period of days. A weekend trip likely would have been ruined if I had needed the motor. Hence my resolve to make good oars. I am now storing the motor straight up, clamped to a sawhorse, with less oil, and at least it is not hydrolocking. When I stow it in the boat, I plan to position it as Graham described, horizontally with the rear of the motor up, rather than on its side. Bottom line, it requires a lot of thought and care. I think, for example, it makes a difference whether, when stored on the "correct" side, it is tipped slightly forward or slightly back. Both options are available. (But I'm not planning to use either.) I think any of the new four-cycles are susceptible to this problem, although there is a rumor of a new one coming out that supposedly has licked the issue. I am skeptical. I guess my bottom line is plan to keep the engine vertical as much as possible, such as on the transom, and be very leery of storing it on it's side, despite the mfrs' representations. -
-
Very sweet.
-
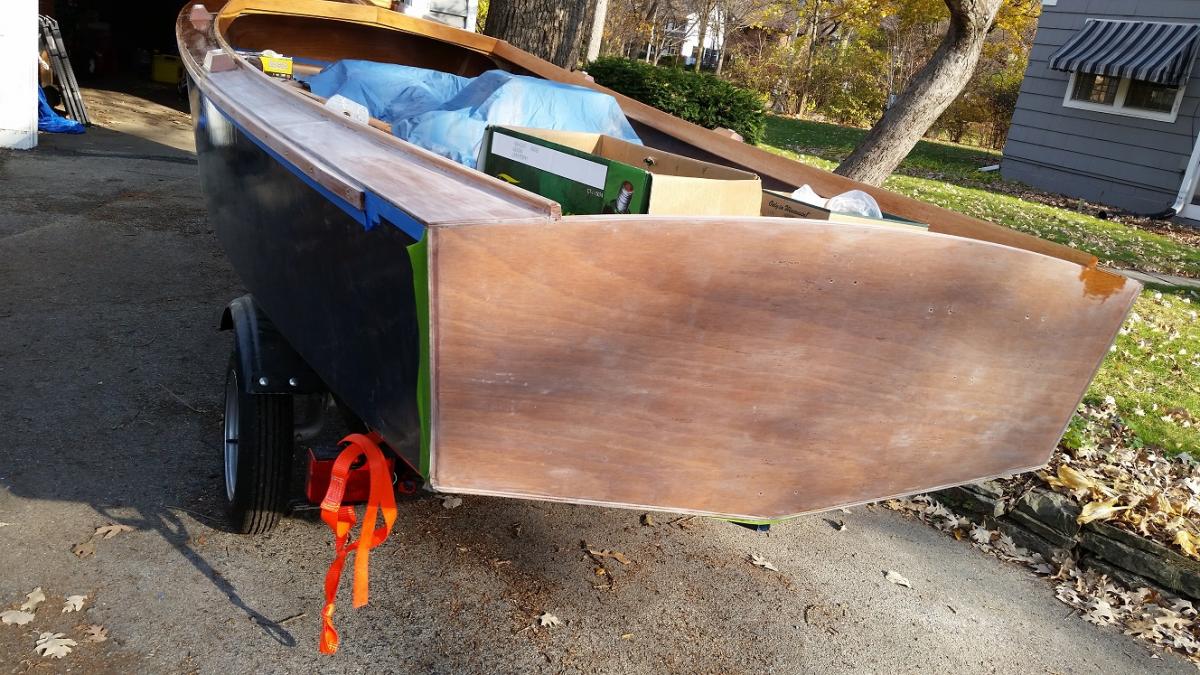
I've been making a bit progress in past weeks. It seems like a lot of progress to me, given the time spent, although I'm not sure how much the pictures show. I was able to do some additional filleting, filling and sanding in the cockpit. More notably, I finally trimmed the outside edge of the deck to size, gave the edges a roundover, re-epoxied those raw edges and other bare spots, finished off the forward hatch frame, installed the center trim strips on the foredeck and installed the rubrails. I also re-filleted the coamings, since the initial fillet seemed lacking in spots. All of that was followed by much sanding, up to 220 grit, on decks and transom. And then came the magic of the first coat of varnish. All of that hazy whitish surface turned sparkling, just in time to show the Thanksgiving visitors. It never ceases to amaze me how the grain comes shining through on that first coat. I really like the fir and dark contrast. I'm even happy with the splotchy transom, which I guess got that way due to putting a layer of cloth on it and I don't quite now what else. There will be enough lettering, rudder, motor mount and other doodads on the transom that it will still look good this way to my eye, I think. Now that it's apparently cold again for good, new launch ETA is spring 2017. Sigh.


-
You're making great progress.