Designer
-
Posts
1,758 -
Joined
-
Last visited
-
Days Won
182
Content Type
Profiles
Forums
Events
Everything posted by Designer
-
Hi JR, Here is a view of the OC 20 in a 21 x 21 foot net building. As Lotus said, we have been finishing up a 16 degree version. As long as you do not effect the structural integrity of the boat and the boats center of gravity, you can customize the boat for your needs. We have a spreadsheet with the weight study so that you can keep an eye on the CG. For instance, twin screw installations will be heavier and therefore moves the CG aft versus a single, outboard bracket or transom mount etc..

-
Congratulations John. Bring her by when it is convenient and we can go over the rigging/ reefing sailing details.
-
Adding vertical wood blocks at stringers/bulkheads ???
Designer replied to striperick's topic in B & B Yachts Forum
You can fillet or fit vertical wood triangles at the bottom stringer frame/ bulkhead intersection. Wood is quicker and just as strong as long as you do a good job and have tight glue lines. I often see gaps in the glue lines which reduces it's effectiveness and creates a path for water ingress. There should be no need to re-fillet the joint if the corner is smooth and gap free. -
Trev, I usually go with heavier than 6 oz. for the cockpit sole. You do not want it to be punctured if someone drops something heavy or sharp. I typically use 10 oz. or about 350 gsm.
-
Core Sound 17 or Core Sound 17 Mark III?
Designer replied to mystrwizard's topic in B & B Yachts Forum
Hi Reese, It all depends on what you feel that you want to do with the boat. I tried to make the mk3 perform about equal to the mk1. While the there is more weight and windage in the mk3, it has more stability and more sail area. There is a lot more work in building the mk3. It is more a micro yacht than a dinghy but with the advantages of a dinghy. She can be knocked down and recover whereas once you reach the down flooding angle in an open boat, you are over. That said, I have logged a lot of open water miles in the mk1 without ever capsizing, but it can. I like having the cabin for shelter as well as the large cockpit and the electrical system with it's solar charger . I have lived on mine for about 2 weeks so far and I will be spending a lot more nights on board. I will be fitting mine with a cockpit dodger as well as a cockpit awning. I am currently cutting down a trolling motor for an electric outboard. -
Core Sound 20 Mk 3 -- #4 "Chessie" . .
Designer replied to Pete McCrary's topic in B & B Yachts Forum
We have been working very hard on new and better drawings from what we have learned on the cabin top and hatches on both the 17 and 20 mk3. We will send them out to everyone who needs them when they are done. There are also some rigging sheets being finished up. -
CS 17 #339 modifications and varnish questions
Designer replied to acreew's topic in B & B Yachts Forum
Don't. -
CS 17 #339 modifications and varnish questions
Designer replied to acreew's topic in B & B Yachts Forum
Will, The inwale is supposed to be 3/4" thick. -
Steve, You are technically correct. As I do a lot of single handing, I cannot always keep a perfect watch, I want to be seen. From a distance at night my boat looks pretty big. It is satisfying to flick on that masthead light as it is getting dark and know that it is working perfectly. All of the temporary lights that I have displayed are like glorified flashlights, they work okay at first but after they age, it is a lottery whether they are going to work or if I am going to have to fiddle with it in wet dark difficult conditions. Randy Smythe while sailing his 22' trimaran a few EC's ago was stopped by the Coast Guard for exceeding 7 knots while displaying an all around white light.
-
Dumbest butterfly opening question, ever. (Spindrift 10N)
Designer replied to Rdubs's topic in B & B Yachts Forum
Dubs, There have been over 1000 Spindrifts built so far not to mention more than half that number of Core Sounds which adds up to a lot of experience. The main point of the concept is that it uses the length of the boat for leverage to fold the boat. If you turned the construction around and wired the boat from back to front, you could not apply enough force at the very front of the bow to bring it all together in the nice bow shape that we want. We did not develop this concept at the first try. It came from a lot of trial and error. With boats as short as the S10, there have been some failures in the bottom when folding. For insurance I recommend putting a hot wet towel on the bottom forward 2 feet inside and out for half an hour before folding. We were having a high incidence of bottom failures in my boat building class at the Community college but it almost never happened at my shop. We realized that it usually took a month or two for the students to scarf, mark out and cut the hull panels, make the transom, bulkheads and join the panels etc. The ply was in an air conditioned low humidity environment which reduced the moisture content making it stiff. Our shop is in the humidity capitol of the world and the hulls folded easily. We now soak the bottom panels on Spindrifts and the problem has pretty much gone away. -
Jeff, I try to avoid drilling holes in the mast near where it exits the deck as that is where the mast has the highest load. For a CS17 mk1 I think that I might consider going with a Navilight tricolor masthead light. They run on 3 AAA batteries. It would save you all of the wiring and having a battery in the boat, I have seen them as low as $50.00.
-
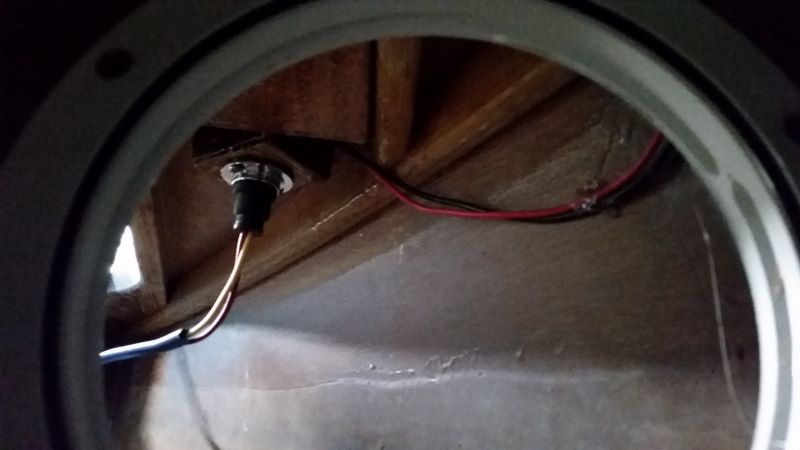
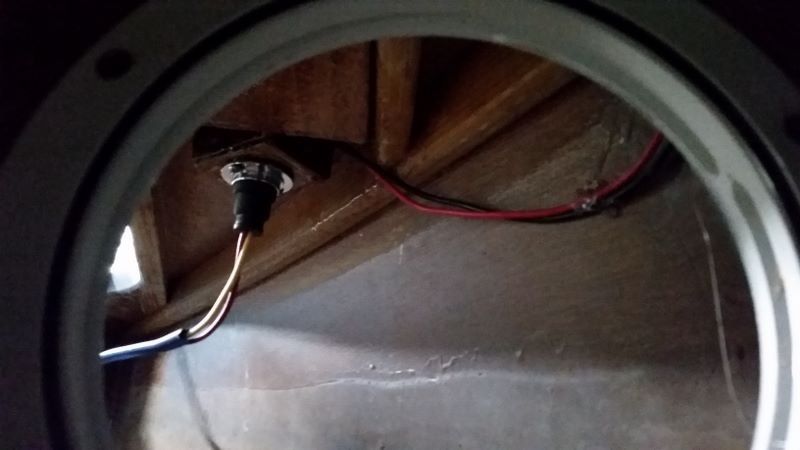
Chick, You may recall that I opted to go with fixed ports in the hull and put in a 6" inspection port in the upper starboard corner of bulkhead 1. The picture was taken looking forward through the port into the anchor well. That light triangle in the mid left of the picture is the anchor well opening. The wire comes out of the bottom of the mast. The wire does not need to be unplugged to raise or lower the mast. The solid wood piece that runs diagonally through the picture is the inwale. The hazy panel in the lower part of the picture but inside the white port ring is the sheer strake. The wire goes through bulkhead 1 just under the inwale and runs under the inwale until it reaches bulkhead 2. The wire runs down the forward side of bulkhead 2 against the hull and passed through the shelf. It then runs under the starboard bunk and comes up behind the companionway bulkhead and into my electrical panel.
-
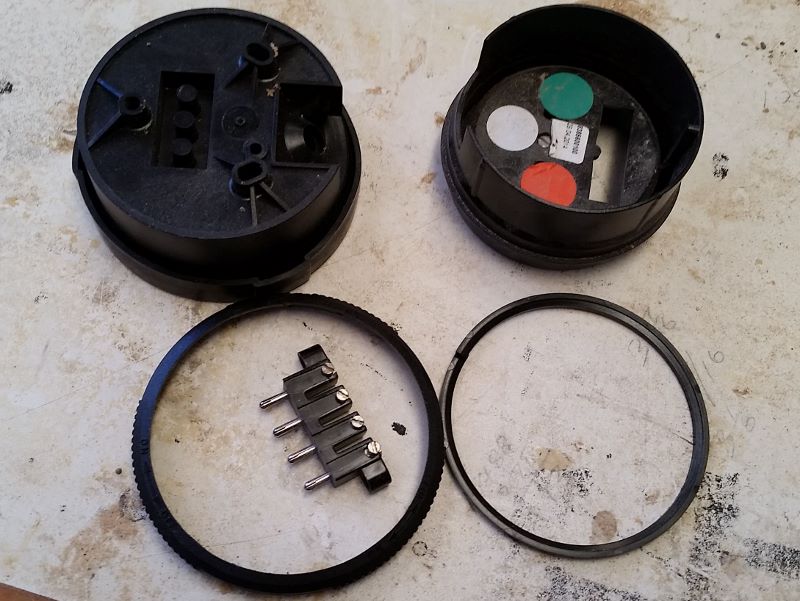
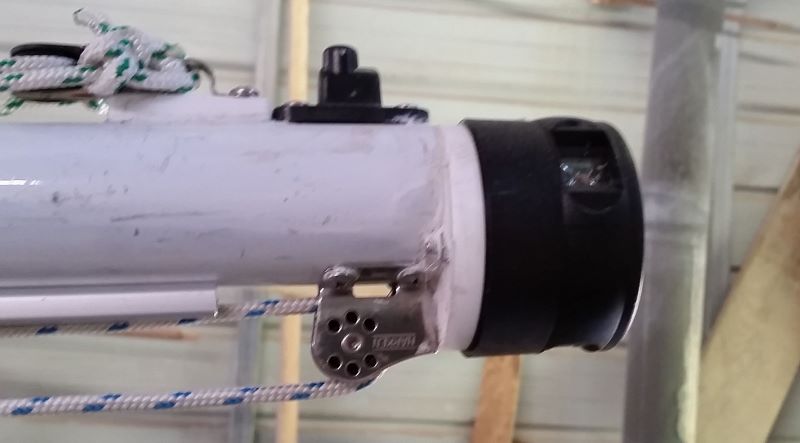
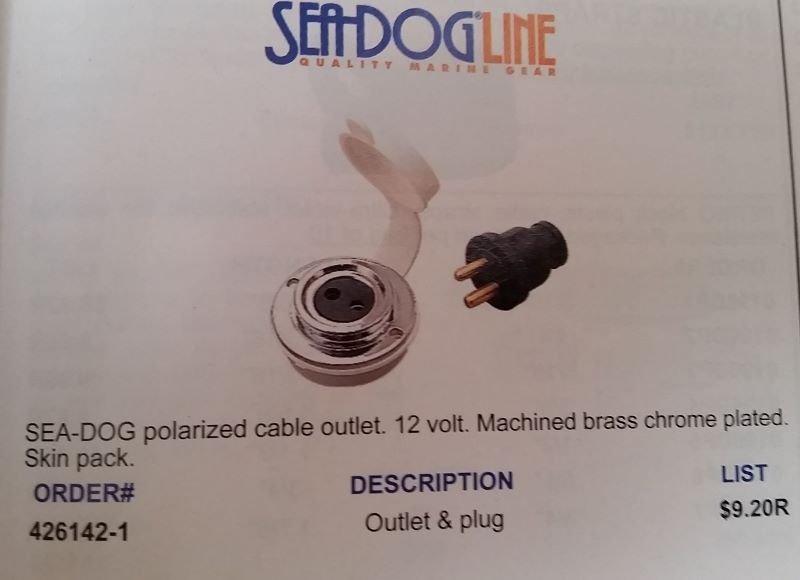
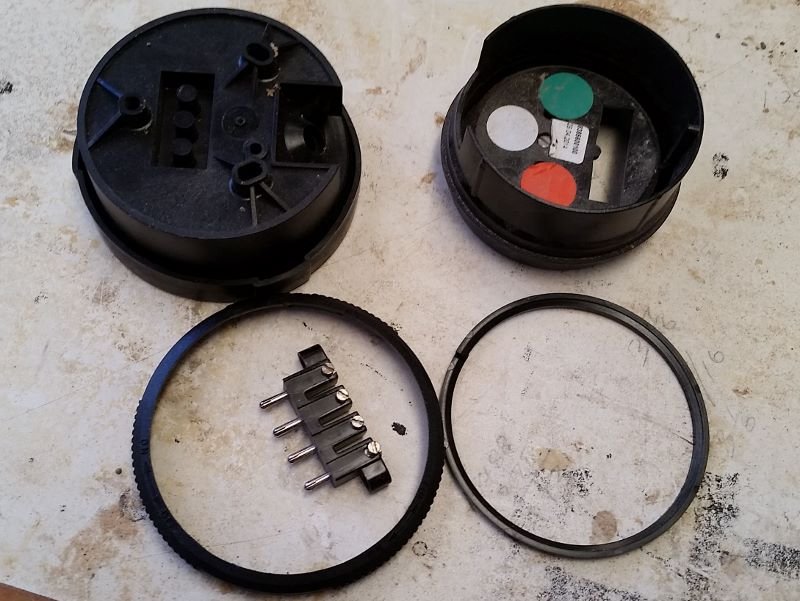
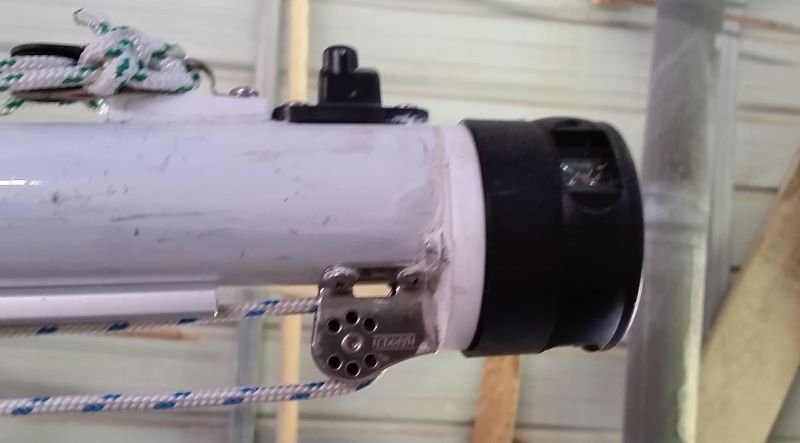
Fred asked me to show him my setup for the masthead light and mast heel plug so I thought that I would share it with everybody. The tricolor light is from Aqua Signal , I stripped it down to save weight and windage. I machined the mast cap out of 1" plastic so that it has a 3/8" base to support the light and a plug 5/8" thick to insert into the mast head. The two lower fasteners of the halyard block are through bolted to the mast and the two upper fasteners are screwed into the mast cap. There is about a 1" gap between the port and starboard LED clusters which allowed me to install the Windex wind indicator on center without blocking the light. The unit appears to be well made, the LED clusters and circuit board are potted in epoxy and apparently water proof. I needed to be able to disconnect the wires whenever I removed the main mast from the tabernacle so I used a Seadog two pin plug. I never trust waterproof deck plugs so I put mine upside down under the foredeck. The plug has one larger pin so that it is impossible to reverse the polarity. I used a scrap of 3/4" ply to mount the plug base. This was not thick enough for the wires so I glued another piece of 1/4" ply to the base with a generous gap for the wires. I put a loop in the wire so that if I had to remove the plug base for service, there would be enough slack to get the plug out where I could undo the wires. I hot melt glued the wires against the hull in a loop so that if water gets to that area, the loop will encourage the water to drip away from the plug. I also coated the plug and wire ends in dielectric grease. To help me plug in the tail pin blind, I installed the pin holes exactly athwartships with the large pin inboard. The first picture is the plug. Second picture shows the installed plug with wire loop taken through the inspection port in the forward bulkhead. Third picture shows what I stripped from the light. Fourth picture is the installed tricolor light. The main halyard block is underneath. The Windex mount is the black block on top and the Spinnaker halyard is to the left of the Windex block.
-
What I feel is interesting is that there is very little bright work. The gunwales are ipe and finished bright. That leaves only the tiller and the sprits. She is about the nicest CS17 that I have seen.
-
Bill, She was fitted with a main mast tabernacle form the start. I think that you saw her under construction.
-
No 229 was launched this week. She was meticulously built by Bill in my boat building class.
-
No 229 was launched this week. She was meticulously built by Bill in my boat building class.


-
Here is a shot of Chick getting downright agricultural. Is he in the rice paddies? That is Richard in the upper right of the picture.

-
Here is the picture.

-
Here is a shot of Chick learning how to load the boat from the Bass Boaters, see the big prop wash. Chick, "that is 2.5 hp not 250 hp".
-
I plan to leave Friday morning, it will be about an 8 hour drive.
-
The bunk tops are horizontal or parallel to the WL. The cockpit seats are pitched down aft for drainage.
-
Chick, I was just relieved of my commitment for the last weekend in April. There might be another conflict coming up but right now I am going to try to make the Mountain Messabout. Carlita will still be in stealth mode so you might not be able to find her but I will find you.
-
Steve, The reason why the lazerette cover is flat along the bottom is to allow for a length of piano hinge. There is room for a 1/8" soft gasket. If you look at Carlita pictures that cover that area you will see that I fitted an eyebrow in my cockpit seat to give the hatch some rain protection. I did not have time to fit the gasket for the EC. I was expecting to have to bail out the lazerette at some time. To my amazement, it never got a drop of water in there. As soon as I finish painting the cockpit I will fit a gasket. I used some scrap 6mm Lexan to make my turn buttons. They worked out well.
-
Fred, I was very happy with my hatch setup. When I anchored in the pass, I tried in vain to pull the anchor from on deck as I had not yet wrapped my mind around working through the hatch and could not do it. The combination of a thin anchor line, pitching waves, a strong wind, poor ergonomics and no anchor cleat. It finally dawned on me to work through the hatch, it worked well. It never leaked a drop. We are now going to make my hatch design the new standard. It is designed so that it can be customized if the builder prefers.