Designer
-
Posts
1,758 -
Joined
-
Last visited
-
Days Won
182
Content Type
Profiles
Forums
Events
Everything posted by Designer
-
Core Sound 20 Mk 3 -- #4 "Chessie" . .
Designer replied to Pete McCrary's topic in B & B Yachts Forum
I have always put the lower tabernacle bolt through the lower bulkhead facing forward. While brainstorming the main the mast design with Alan, he said "why don't we flip the bolt around so that the wing nut can be spun on while raising the mast through the hatch?" We worked through the various issues and it seemed feasible, so we went with it. Doug has demonstrated that it works for him. While building Carlita I had a lot of time think about which way I will do my bolt. One of the reasons we switched the bolt directions was that so many people said that they did not want to have to go over the deck to raise the main mast. That has never been an issue with me, I have raised the march larger Southern Skimmer main mast so many times, walking over the cabin, holding it in position and spinning the wing nut on. The other issue was that the fore hatch would have to slide rather than hinge. Because seaworthiness and a totally dry cabin was a priority with me, I opted to walk over the cabin to raise the mast. Therefore I went with the lower bolt facing forward and a hinging forward hatch. The hatch will be gasket-ed and dogged down. The forward facing bolt is fixed through the bulkhead and therefore easier to seal. As the mast heel is swinging through an arc the bolt hole has to elongated vertically to prevent the bolt from binding. With the aft facing bolt, the elongated hole has to be in the bulkhead rather than in the mast when the bolt faces forward. Pete, because you already have the bolt done, and done well, why don't you leave it for now and change it later if you do not like it. I do not believe that you will need extra mechanical assistance to hold the mast in position as discussed earlier. You can go back and check Doug's posts, I recall that he posted on raising the main mast and that it worked well for him. Admittedly he has a trench hatch. I am having a memory lapse but I cannot remember any issues with raising Jay & Carols mast. Perhaps he will chime in. -
Core Sound 20 Mk 3 -- #4 "Chessie" . .
Designer replied to Pete McCrary's topic in B & B Yachts Forum
Drew, We use the Anderson New Large bailer. Anderson was bought out by Ronstan so you will not have any problem getting the same bailer as we use. -
Dale, I have discussed the tank fill on the side of the console with the Coast Guard inspectors like Chick has. Because it is an open self draining cockpit they reluctantly say that it is okay. I do not recommend the battery and open terminals in that compartment, I have mine under the seat in front of that compartment. I like having complete access to the hoses and clamp so that they can be monitored for degradation or looseness rather than buried under the sole. I also like the fact that I can clean up small gas spills rather than dumping it in the water. One of the first things that they teach at Fire Behavior school is that fuels like wood and gasoline etc. do not burn. It is the gasses that they give off that burn. One of the down sides is that gas vapor is heavier than air and will therefore sink, so it is important that they not be allowed to get below the sole. You can see from the text below that a spill into the cockpit will soon be dispersed by the large volume of the cockpit and quickly get below the 1.4% air to gas ratio, and even quicker if there is some breeze. Having watched quite a few videos of boat fires and surveyed boat fires, it is almost always gross negligence or stupidity that blows boats up. Inboard gas installations have much more potential for accidents because any fuel leaks go right into the bilge. Anyone with an inboard gas installation should poke their nose in the engine compartment to sniff for gasoline odors before they even switch on the exhaust blower and only then after a reasonable length of time should they hit the ignition switch. While I do not want to be cavalier about safety, but I would not expect anyone with common sense to light up a cigarette or hit the ignition switch while refueling. The flammability range of gasoline is between 1.4 and 7.6%. If the ratio of gasoline to air is less than 1.4%, then the mixture is too thin to burn. The mixture cannot burn when it contains more than 7.6% gasoline because it is too rich to burn.The vapor density is the weight of a vapor relative to the weight of air. The vapor density of gasoline is heavier than air and therefore will sink when in air. .
-
I had never heard of Five Oceans. The stuff looks pretty good on line and the price seems too god to be true. It certainly looks worth investigating.
-
I have made some good progress on the cabin hatches. The companionway hatch slides and the fore hatch hinges aft. I am very happy with the position of the fore hatch. Standing on the bunk, I can reach all of the anchor locker. I know that I cannot open the fore hatch enough with the mast down to be able to raise the mast but I have found on the much larger Southern Skimmer that it is not hard to walk forward on the deck raising the main mast. Alan and I did some experimenting and found that we could raise the mast enough with a temporary prop so that I could open the hatch and finish raising the mast from there if I needed to. I will mostly use the former. I need a solar panel to do the EC and later for cruising but there is not a lot of real estate on the deck, the fore hatch is it. I found a 50 watt solar panel by Renology that measures 24.8" x 21.3" x 1.4". I widened the span of the hatch rails and it all fits. I wanted the fore hatch to line up with the main hatch rails. The wider gap between the hatch coaming and the hatch rails will allow me to carry the panel wiring back aft. I increased the thickness of the butt blocks for the fore-deck joint to 3/8" which will allow me to mount all of the hardware to, to lead the lines aft from the mast. See all of the clamps on the picture. If you look hard at the picture you should be able to see the ply web and reinforcing for the anchor sprit. The lead weights are holding the plywood hatch top down to the frame while the glue dries, this should eliminate any chance of a twist in the hatch while the glue dries. The frame was also glued in place sitting on plastic to prevent it from gluing to the deck.


-
Hey Scott, No offense to the girls but I do not expect that the anchor will be down long enough to get that fouled, I usually clean the mud off of the anchor before stowing. I am planning an anchor sprit where the anchor will be stowed when cruising.
-
The cabin top went on today. I put a small heater in the cabin and the epoxy was starting to kick by the time I quit. I spent a good while in the cabin cleaning up the epoxy I am really liking the cabin.

-
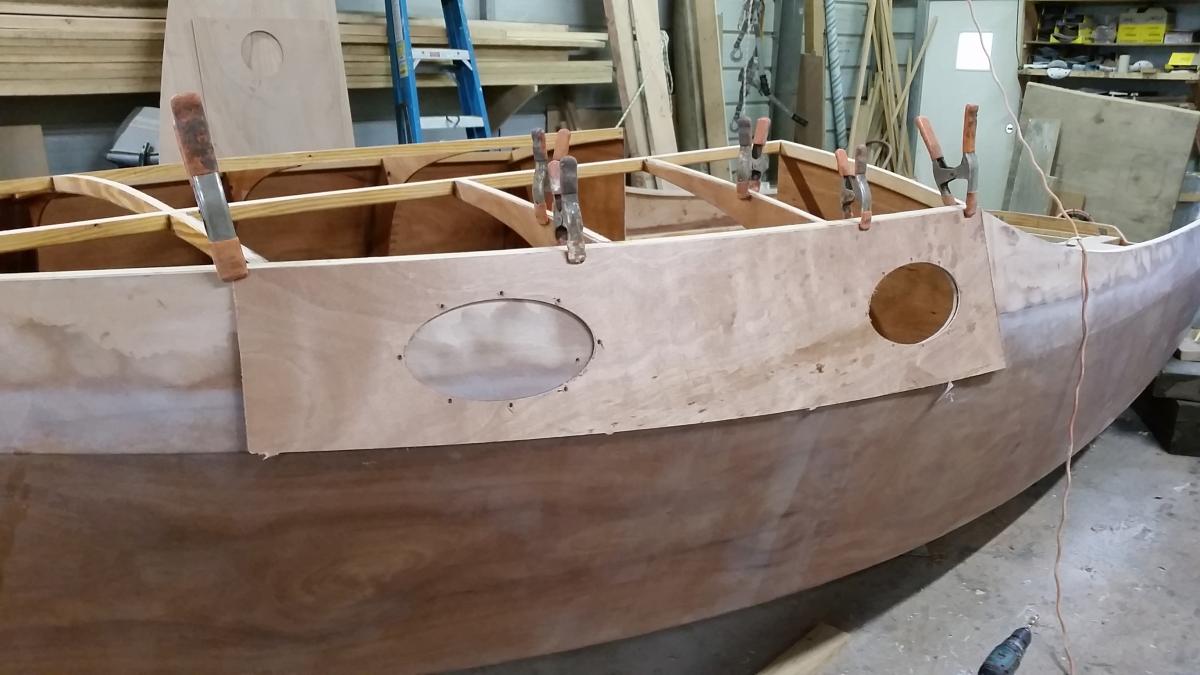
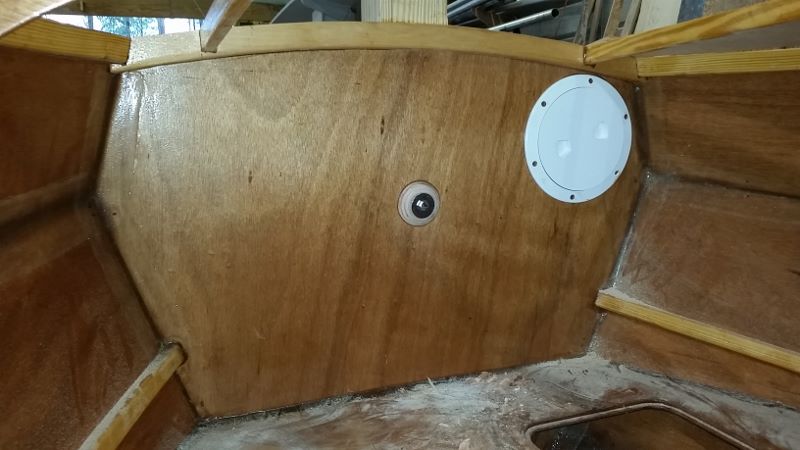
The EC start date is getting ever closer, I am working hard to get the boat sailing by the end of this month. This will give me one more month to ready the boat for the race. A lot of progress has been made since the last post. The cabin top will go on today if yesterdays epoxy had cured enough in the colder weather. I have finished as much of the boat as I could before putting the lid on. The main mast has been fitted to the tabernacle, plumbed and rake set. The ports are in. The anchor locker is all finished. Hatch decision has been made and framed. I decided that $500 plus for four plastic ports was more than I wanted to spend, I could put that money into sails and hardware. I feel that elliptical ports suit this boat better. I followed Jay with homemade fixed ports. To improve ventilation I put a 6" Beckson screw-in port on the upper starboard side of the forward bulkhead. I can unscrew the port and get some air through the anchor locker. Being protected by the foredeck, I should be able to leave it open in all but hard driving rain. At anchor, it should send in a nice amount of air. As the boat will have a dodger, I should be able to leave the main hatch open while sleeping. While we have been using Rivnuts on masts; Jay showed me that he was using them successfully on plywood. He glued on his ports with some super caulk and he gave me some to try. As good as the tape seemed, I felt that the port that he removed to correct a small leak came off easier than I would like as the only means of of support. I decided to go old school with a new twist. Having a CNC machine featured largely in the decision. I sized and positioned the ports to my liking on the hull model and put in the Rivnut spacing on the ports, expanded out the sheer strake and cut out a template on scrap ply. I clamped the template on the boat, marked the ports and drilled for the Rivnuts. One of the pictures shows the template in place and another shows the Rivnuts installed set in epoxy. If you look hard you will see that I have inserted some caulk in the Rivnuts to prevent epoxy from filling the threads when the outer ring is glued on. The outer ring is 6mm okume ply which was CNC cut with holes counter-bored for the Rivnut heads. The inside ring was cut from 9mm ply and drilled for the inside of the Rivnuts and for the 10 32 machine screws that hold the ring and 6mm Lexan. There is another picture of the completed port. I will not caulk in the Lexan until the boat is all painted. Having test fitted one complete port I am very satisfied with the results. In future kits we will cut the ports and frames at no extra cost if the builder requests them. For current kit builders, I have the template which could be mailed to the first one to respond, maybe they could pass it on. For our overseas builders we could print the parts full size on some used Mylar for free, just pay the postage. It was far easier to install the lower section of the mast before the cabin top went on. Being to be able to reach both sides of the bulkhead saved me untold trips into the boat and eliminated a helper. As I have mentioned earlier, I decided to go with the more watertight two hatch solution rather than the trench. I am still agile enough to duck under the deck and come out of the forward hatch. I have tested for mast raising and I think that it will work well. I can reach any part of the anchor locker while standing on the bunk. Yesterday I fine fitted the cabin top and screwed it in place, marked for the beams and removed the top. I laid it upside down and glued on the two permanent butt blocks and two temporary butt blocks at the two hatch cutouts. I then gave the underside two coats of epoxy. You can install the cabin top one side at a time but I prefer to do it this way as it eliminates a potential peak down the centerline join. The deck can be fastened down tight around the sheer line and into the beams where necessary. The hatches will be cut out after the epoxy dries. This helps to eliminate any tendency for the deck to develop a flat where the tension has been removed by cutting out the hatches before bending. I can crawl inside before the main hatch is cutout to clean up the glue.


-
John T, The plans version has been modified from the kit. Just follow the full size templates. You do not have to cut dovetails or notches along the chine joint, they are for alignment not strength. While they are nice to have, with a little extra care with alignment your hull will end up no different from the kit version.
-
I think that I will use that line next time I screw up.
-
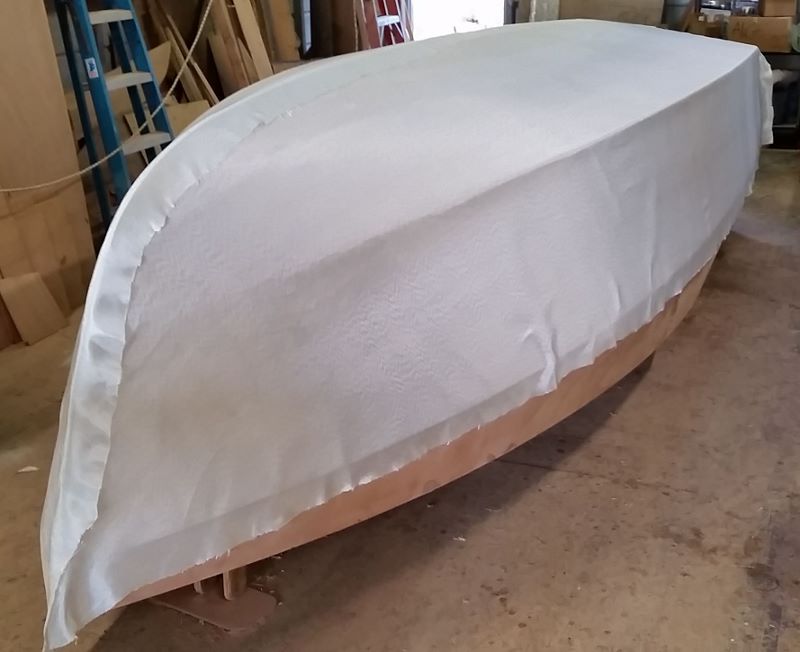
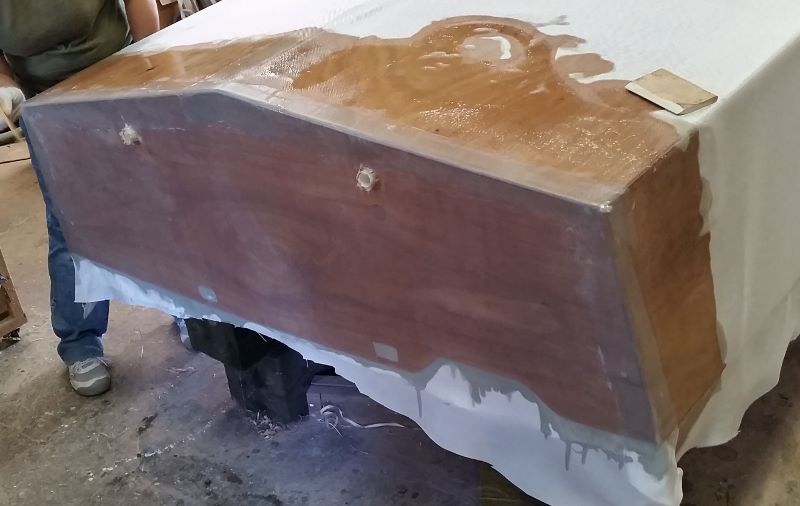
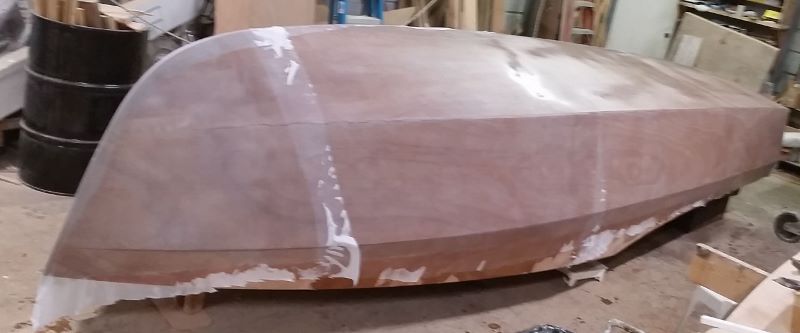
After a great Christmas I got to glass Carlita this afternoon. I decided to go for broke and glass the whole boat in one shot after Beth very kindly offered to help. We laid out all of the glass and cut the peel ply. We glassed the transom first and applied the peel ply. You can see that we worked forward 5 feet at a time so that we could lay the peel ply before the epoxy could kick and move onto the next section working all of the time with fresh epoxy. It took 5 hours to complete the epoxy work. She looks good, all of the glass is filled and there will be very little sanding or fairing. The transom was partially kicked as well as the first section by the time we were finished.


-
Carlita is now upside down, the hull cleaned off and epoxy filled. Tomorrow the epoxy filler will be sanded ready for glassing. The rudder is made. I am going to try a tripod leg for a telescoping tiller extension. It is quite short when stowed and allows me to steer from anywhere in the cockpit when extended. Alan suggests that I carry a piece of PVC pipe for the race as a backup.


-
The advantage of the wind vane is that I can trim for speed rather than balance. There are times when I need to adjust the balance some to steer a better course but the boat will usually be faster than steering purely by sail balance. Another advantage is that it is quicker to set the course rather than waiting to see what course the boat will steer, readjust and then wait to see if you guessed right.
-
Tom, Seeing that we live in the country we both should qualify, I don't know about Paul though .
-
Jay, For running backstays we just attach a pair of 3/16" lines to the same eyestrap as for the spinnaker halyard block. I am not at looking at the plans right now but you attach a pair of eyestraps about 3-4 feet abaft the mast p & s and as far outboard as you can. Each deck eyestrap is for a becket block. On the bottom of each running back you put a single block. You then add a clam cleat on the foredeck where you can reach from the cockpit. This gives you a 2 : 1 purchase. You just use the windward one. You need to restrain the running backs when not being used as they will flail around and catch things and be downright annoying. It is a matter of preference how you corral them. One way is to have a short length of line on the rail just forward of the mast that attaches to the running back. Tighten the line at the aft cleat and they will be nicely out of the way. The problem with this method is that you have to go forward to release the running backs. This could be annoying if you do a lot of gybing. You could run the restraining line back to another cleat. Another way is with use shock cord but it has to have enough travel to come out to where it needs to be when in use and have enough tension the keep the running backs snug when not needed. On racing dinghies we would route the shock cord around the bow to the other running back so that there would be enough tension when not in use but enough elasticity to stretch out when one is employed. I guess that if enough people are interested in the wind vane, we could draw up plans. I used wind vanes during all of my voyaging years and would not cross the harbor let alone an ocean without using it. They have fallen out of favor these days with boats being ever more electrically complicated and with cheaper auto pilots. In fact it is cheaper to buy an auto pilot. The problem with going electric is feeding them and keeping the water out of them. They use a lot of amps and have a high mortality rate. If the go bad in the middle of a passage you are screwed. A broken wind vane can be more easily diagnosed and a cobbled up repair made than with a burned out drive motor. The downside with wind vanes is that they do not slavishly follow a compass course, this can be good and bad. They do hunt more than an auto pilot and they need to be fiddled with a lot, balancing the boat, tweaking the helm and adjusting the course as the wind oscillates. If you get into fast planing or surfing conditions, the apparent wind changes with the speed of the boat which can cause major course changes. When conditions are not suitable I will be steering. I see it as a third hand to keep the boat on course while I tend to the sails, go about my daily functions, have a rest when conditions allow and save my precious amps for the GPS, cell phone and lighting etc..
-
Peter, According to Carla's records for the CS20 mk3, Doug is #1 Jay and Carol #2, Steve is #3, you are #4, Drew is #5, #6&7 are in the Philippines and #8 is in Australia. If We have missed anyone out, please let us know.
-
Drew, You are hull # 5.
-
Steve, There will be running backstays on the main mast. The pole tube stops at the forward bulkhead. There is a drain hole at the bottom of the tube which drains into the self draining anchor locker. The pole just fits into the black tube and is pulled out to stow. I have used the system in Southern Skimmer for years and it works well. The pole is made of two pieces of tube. I think that I will leave it in two pieces for easier stowage. I have installed the pole underway but is is easier to insert the pole on the beach. The pole pieces will be indexed so that the top can only point up. The boomkin is for the self steering. I will attach the mizzen sheet to the aft end so that it will clear the vane. This could solve mizzen sheet fouling issues on outboards etc.
-
Hey Par, thanks for correcting me. I guess that I have been working too hard and just spelled it phonetically. We are in the country so I guess that it is legal.
-
Here is another shot. We could not resist looking at Carlita's new spinnaker. We borrowed a Mk 1's mast for the hoist. It should be colorful.

-
Here is some more work going on. Carlita gets some appendages. There is the bowsprit and the bumkin.


-
Time is ticking away and the EC deadline is approaching fast. We have been making steady progress but it got real cold yesterday with temps going below freezing. We have to keep pushing on. Here is the tent over the boat as we put a heater in the cabin to help the first coat of epoxy kick. You can see the plastic turning into a hot air balloon as it lifted up against the cold air. The bunk tops were not fully kicked being down low. The higher up the boat the harder it cured. The second picture shows the cabin after the first coat. She will get a second coat tomorrow. The rest of the week shows temps reaching around 70. I will turn the boat and get the hull glassed and back upright with this weather window.


-
The CS17 and the CS20 have the same freeboard.
-
mbowser, The least freeboard on the CS20 is around 16 1/2"
-
Thanks for pulling this up, I had forgotten that we did a build blog. It was great fun to read this again. With hindsight I feel that the optimism has been validated. She did win the EC overall and set a course record plus a number of class wins, not to mention many other races and is still going strong. She is entered in the next EC with a different crew. It also reminds me of my current race against time to have Carlita finished for this years EC.