paul_stewart
-
Posts
277 -
Joined
-
Last visited
-
Days Won
8
Content Type
Profiles
Forums
Events
Everything posted by paul_stewart
-
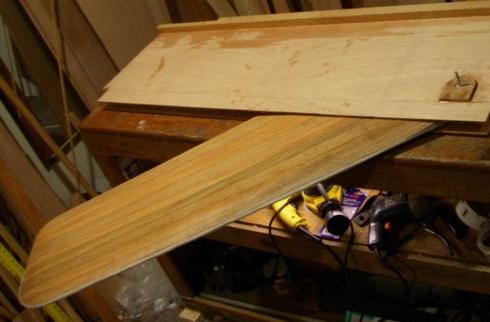
I can't quite put my finger on it, but there is something different about the daggerboard and rudder on this boat...... hmmm....

-
Gordy, In theory, a strong bungee in the downhaul tackle does the same thing as weight in the CB (and has better behavior when turtled) but in practice the bungee behaves differently than weight in one situation: when there is heavy side pressure, pulling on the downhaul just stretches the bungee and the CB does not move so then you have to grab the handle to try to move the board; whereas, with a weighted CB instead of bungee, pulling on the downhaul moves the CB (if it will move). Of course, in either case rounding up into the wind reduces the side pressure. Interesting point about curving the edge of the CB for shallow-water advantage. --Paul And just for fun, here is one with a "Centerboard Extension Spring" ....

-
Graham, Thank you for the comments! Centerboard configuration is a fascinating topic as it involves so many design considerations; e.g., ergonomics, shallow-water strategy, foil shape, control line tackle, engineering/physics, design pros- and cons-, improving sailing skills to make the most of it. Looking forward to seeing what you do (I don't have access to Princess board plans): "I am going to try a different board design. Gordie has been urging me to use a ballasted tip instead of a downhaul for years. I hate to add an extra 20# to the boat but it will allow me better access to the cabin and eliminate any possibility of water slopping through the trunk at high speed. It will be like a Princess board. ... The new board design will move the board forward 6" for the same draft which will help a lot. ... .... going to the ballasted board is because of the lee helm." It's moving the board forward 6" that addresses the lee helm, while the ballast in the board has other advantages. (Right?) --Paul
-

North Carolina Maritime Museum's anual Wooden Boat Show
paul_stewart replied to Designer's topic in B & B Yachts Forum
"Graham set to the oars while I steered" Tom, I hope ya'll cleaned up those oars before you put them away: flushed out all the fuel, cleaned the fuel injectors, checked the water pump, turned off the battery switch, checked for fuel or water leaks, lubricated all the moving parts, checked for water in the fuel, etc. It would be a shame if that pair of oars didn't crank right up next time you need them. --Paul -
Paul, Many thanks! "jumping around": I think Tom is probably referring to the fact that the plan (version 2.0) shows only a bare pivot pin --the plan does not show the hardware (e.g., gudgeons, brackets, whatever) that would hold the two ends of the pivot pin. Yes? "increased the tackle amount 2 times over": on the other hand my current (standard) up haul and down haul have each have a block or two, so the doodle is twice as much tackle as in version 1.2 /2.0 but just slightly more than my current. "down haul ... as continuous loop from up haul": Would you care to elaborate on how that would look? bi-directional winch: A winch is certainly a complication but for an unweighted CB system it seems like it might be advantageous when trying to make adjustments but the CB is hard to move due to heavy side pressure (e.g., when on a reach). Sometimes you'd love to not have to round up to relieve the pressure so that the CB can be moved. "losing contact with the stringers": I see what you mean. The standard handle stays in contact with the stringer for lateral stability, but if it is cut off then the upper part of the CB could bear against the side walls of the trunk --which currently are not designed for that pressure. "new forward kingpost": lengthening the trunk would be tedious, but apparently is the price to be paid --along with building a new CB. Any thoughts on dealing with the behaviors of the weighted CB in a knock-down (turtled) ? --Paul
-
doodles..... ....unweighted CB .... ... side-by-side tracked uphaul & downhaul (using symmetric whip tackle) both routed to a single winch. ... The winch has two spools on a single axis: uphaul comes in as downhaul goes out, or uphaul goes out as downhaul comes in. ..... ? .....

-
Still thinking about centerboards. Paul Riccelli's CS17 post was intriguing:
-
North Carolina Maritime Museum's anual Wooden Boat Show
paul_stewart replied to Designer's topic in B & B Yachts Forum
Graham, Wow. Thanks for the details and photo and great story. Wow, "we tore up the centerboard" was dead-on accurate, CB resting in pieces. Jaw-dropping account. We haven't split any CBs but we have had some similar experiences otherwise: crew complaints about difficulties adjusting the CB just right; hyper-rotated the CB a few weeks ago when we sliced into mud in the west end of Thorofare Canal and then drifted backwards. We made our CB handle an inch too short which allowed the over-rotation beyond vertical. (Trip report here ... http://sandybottomkayaker.blogspot.com/2009/04/sailing-lesson.html) So some kind of CB revision is on my to-do list. I'm very interested in hearing and seeing the details of your new CB design. For a while I've been inconclusively mulling over and over again exactly the same pros- and cons- you mentioned regarding a weighted CB: "I am going to try a different board design. Gordie has been urging me to use a ballasted tip instead of a downhaul for years. I hate to add an extra 20# to the boat but it will allow me better access to the cabin and eliminate any possibility of water slopping through the trunk at high speed. It will be like a Princess board. ... The new board design will move the board forward 6" for the same draft which will help a lot." In our case I could compensate by trimming 20# off the captain. --Paul -
North Carolina Maritime Museum's anual Wooden Boat Show
paul_stewart replied to Designer's topic in B & B Yachts Forum
Marty, Jim, Graham, Any photos of the wooden boat show? Graham, We would love to hear more details of your trip. --- Winds were southwest ? --- "Tore up the centerboard" sounds kinda bad. Is it fixable damage from sharp oyster shells or what? Ouch. --- "Near the James River" could mean Beaufort harbor, or it could mean shoals south of the James River's channel, or it could mean you sailed up into the mouth of Harlowe creek. --- Did you get to sail from your dock down to Core Sound and around Harkers Island into Beaufort's Taylor Creek? -
reducing waste when building with epoxy
paul_stewart replied to sscoville's topic in B & B Yachts Forum
We used disposable vinyl gloves during construction of CS20 #103. Purchased in boxes of 50 for about 10 cents per glove at a local drug store. They are comfortable and were 'tough enough' for the tasks that involved epoxy, more epoxy, sanding epoxy, and some primer and paint. We used mostly B&B epoxy and some System Three epoxy. I like wearing the vinyl gloves much better than latex gloves. I found this quote from http://www.epoxysafety.com/chemicals.htm ..... "Different chemicals require gloves of different materials for best protection. The kind of glove required is hard to pick when so many safety data sheets say to use "appropriate" or "impervious" gloves. Many of you are going to be buying gloves in your drugstore, supermarket, or hardware store. The latex or rubber glove made in Malaysia or some other remote country is reasonable protection against epoxy resins and acetone, but not good with polyester resins, toluene, lacquer thinner, and most paint removers. Vinyl gloves will protect against epoxy resins, but are poor with most solvents; especially acetone. Heavier gloves of rubber, neoprene, or nitrile rubber give better protection but are more difficult to work in and are much more expensive. The thin disposable gloves of polyethylene are resistant to most materials but are so clumsy and so easily punctured or torn that they are not of much use. Medical examining gloves come both in latex and vinyl; the latex variety offers protection and they are relatively easy to work in, but, for me, the tight fit makes my hands sweat profusely even in cool weather." The System Three rep said ... "We recommend disposable vinyl gloves. This is what our plant workers wear and they've experienced no adverse effects, handling epoxy resin and hardener materials on a daily basis." ... which is a strong recommendation for vinyl gloves being adequate: they recommend them, they use them, they report no adverse effects, and also (assuming their worker safety protocols are satisfactory to OSHA) doesn't it imply that OSHA is in agreement? In regard to reducing waste (used gloves) when building with epoxy : We went through a lot of vinyl gloves. The best I could do to minimize the dead glove count was to plan their use carefully. I know I wasted some gloves due to unforseen problems. For example, suppose you're halfway into a tricky molding or joining task, epoxy all over the gloves, epoxy-coated parts sliding and slipping, and then you see that the clamping strategy isn't going to work. Quickly you think up a new clamping strategy but it requires grabbing some tools, rolling out some tape, finding some bolts/screws, sawing some blocks of wood, etc. And, you have to take the gloves off to do all that. Ready to go again, but no time to fiddle with trying to put that first pair of goopy gloves back on. So you put on a new second pair of gloves to finish the task. To anyone who is a first-time builder I would offer this: for the non-trivial epoxy tasks it helps to dry fit parts first, have all pieces and tools handy, think all the way through how that wooden/molded part is going to be clamped in position, count on everything being slippery, figure out if you might need an assistant during the task --just in case. By the way, at the local grocery we found some bio-degradible, disposable, clear, smooth-sided, drinking cups that worked well for use in mixing epoxy (or paint). Often re-usable. They were made from corn. --Paul -
For man overboard practice on Jordan Lake we like to start with retrieving a giant inflatable floating head, and then work our way down to recovering smaller and smaller inflatable floating heads. Giant head, fender, other floats, ...., anyway you do it practicing overboard drills is an important part of learning to sail. --Paul

-
More Information Regarding the NC Challenge (from www.watertribe.com) On Thursday, April 16, 2009, Roo (Designer) wrote: "I have a friend who runs his power boat through those bridges so there is more than 6" of water. When I interrogated him about bridge clearance he thought that the bridges had 6'-8' vertical clearance and at least 12' wide. Water levels in this area are dictated by wind like Florida Bay. South west winds bring low water and northeast winds bring high water. The winds also dictate current, think about a north east wind bringing water from the outer banks and forcing it up the Neuse River, the Harlow canal acts like a relief valve and the south going current can be strong. I hope to go through there in early May and will take more precise measurements." On Friday, April 17, 2009, SandyBottom (DawnS) wrote: "I dumped the pictures we took while scouting the Harlow last weekend, we stopped at all 3 bridges. We didn't do any measuring. Bridge heights appeard 6-8' as Roo says. Paul didn't think he'd have problems with our CS20 on the Canal based on what we saw. KiwiBird and I plan to paddle it, we won't have time to take measurments, but we can check depths and conditions." http://picasaweb.google.com/SandyBottomWebShots/HarlowCanal?feat=directlink And, on Monday, April 20, 2009, SandyBottom (DawnS) wrote: http://sandybottomkayaker.blogspot.com/2009/04/harlow-canal.html

-
Jeff, Thanks for sharing your experience. When I eventually get around to putting a battery in our CS20, I'll be sure to think about how many holes I want in it. BTW, it occurs to me that the mess-about School of Hard Knocks has two parts: the out-of-classroom practical experience part, and the in-the-classroom online Forum part. It's a good curriculum design; we all learn a lot. --Paul
-
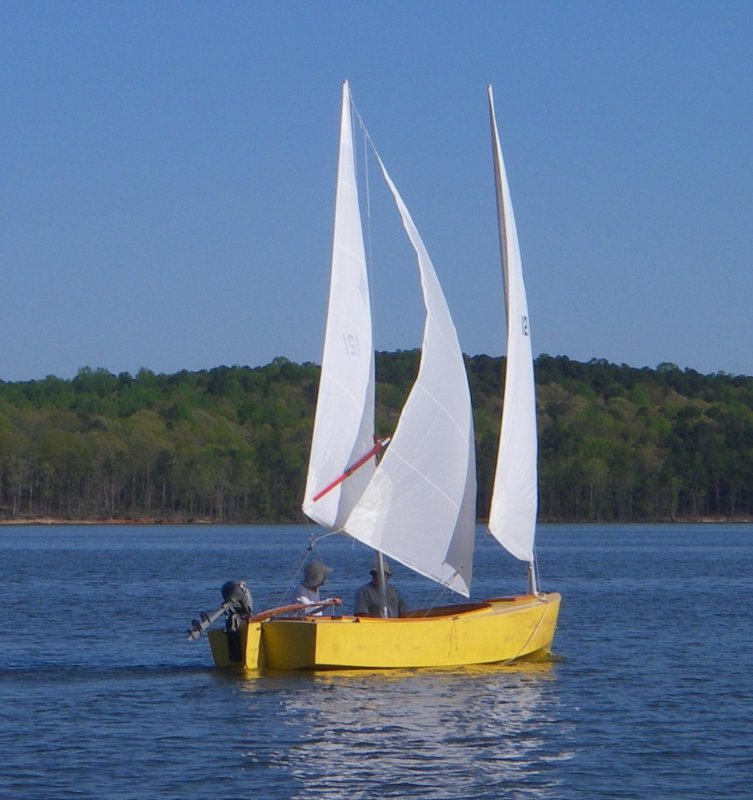
Ken, Here are a few more photos of your CS17 stays'l. http://picasaweb.google.com/lh/sredir?uname=danceswithsandybottom&target=ALBUM&id=5325922112046667265&authkey=Gv1sRgCKqqjfHN-NXarQE&invite=CP7svrgH&feat=email --Paul
-
Ken - Motor, what motor? You mean the 11' oars? Oyster - Just give us your GPS coordinates....
-
Lapwing or CS 15 for around Florida race
paul_stewart replied to Doug Cameron's topic in B & B Yachts Forum
Doug, If you did go class4, say modified BRS, if you were a crew of two some of the difficulties of portaging / dragging / etc. might be ameliorated; don't you think so? Where's GreyBeard when you need him? The long portage could look like this: 2 wheels midship, 1 wheel under the rudder for steering, you in the boat steering with the tiller, GreyBeard towing the boat up the road. --Paul -
Lapwing or CS 15 for around Florida race
paul_stewart replied to Doug Cameron's topic in B & B Yachts Forum
Doug, And we can't forget that there are a few rapids, usually portaged, on the upper Suwannee River. That portage route is narrow and steep. Kayaks sometimes run the rapids rather than taking the portage route. In a previous year during a WaterTribe "Cross-Floriday Challenge" there was no water in the upper St. Mary's and the kayaks/krugers had to be dragged over rocks in the streambed for many miles. I believe ManitouCruiser or Chief could tell you the correct facts first-hand. --Paul -
Lapwing or CS 15 for around Florida race
paul_stewart replied to Doug Cameron's topic in B & B Yachts Forum
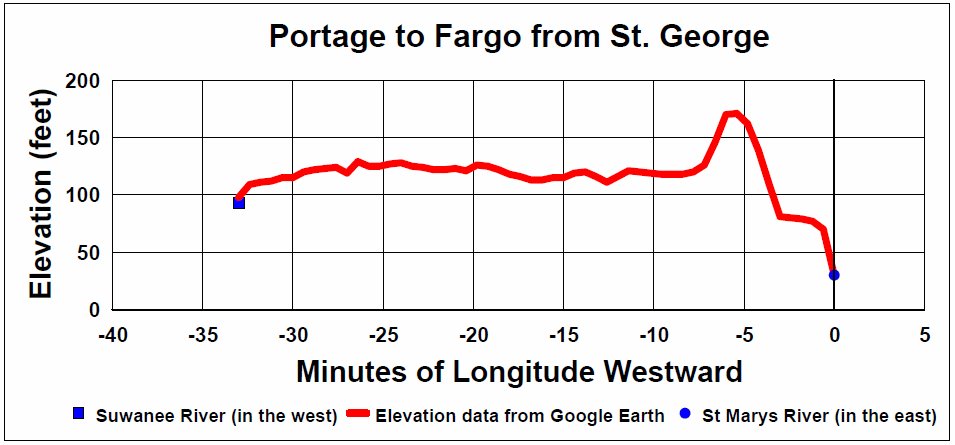
Doug, Here is the altitude data for the UFC portage... (Guess where the cellphone tower is.) --Paul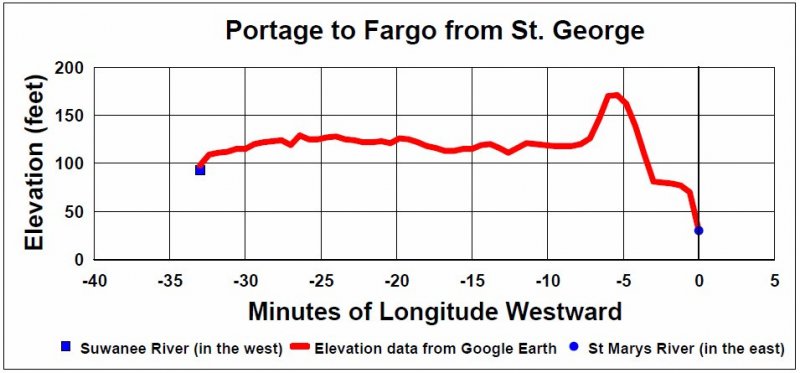
-
Indeed Sukie. Sometimes it can even be a Kodak moment....


-
John Gardner dory skiff - started new project
paul_stewart replied to jan nicolaisen's topic in Main Forum
Jan, tell us about your clamps. -- Paul -
Russ, try following the race at www.WaterTribe.com. Zoom in on http://www.watertribe.com/ChallengeViewer/ChallengeMapperContent.aspx SandyBottom is tracked there. She is also tracked here http://share.findmespot.com/shared/faces/viewspots.jsp?glId=0ggfiiudDlSq9j1ZzAq9rT9xxqgdKzVja and here http://sandybottomkayaker.blogspot.com/
-
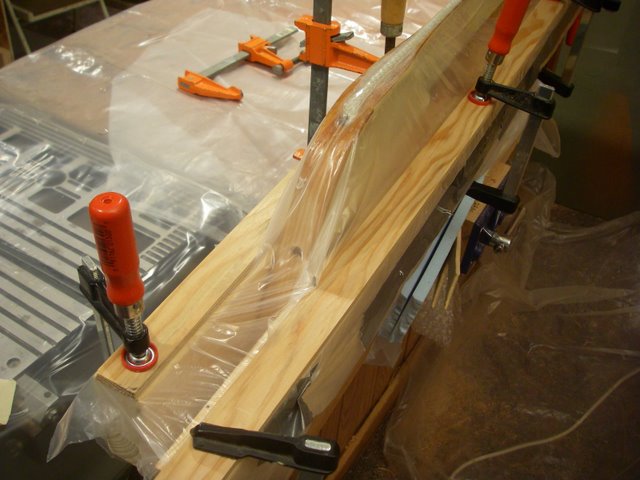
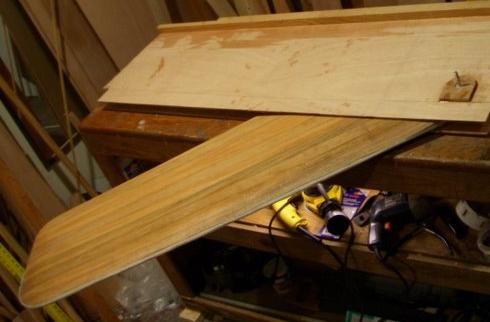
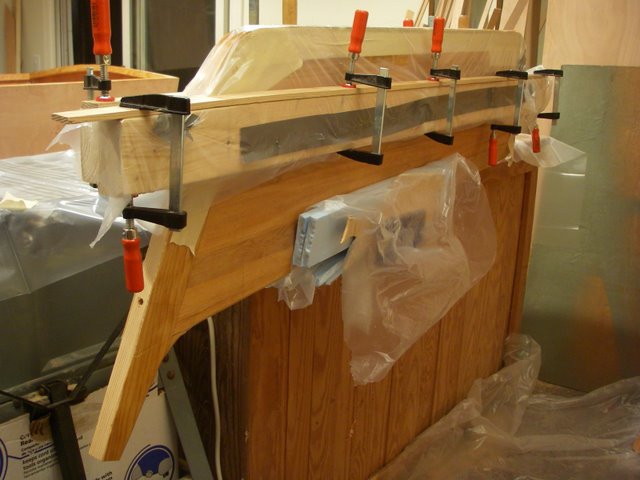
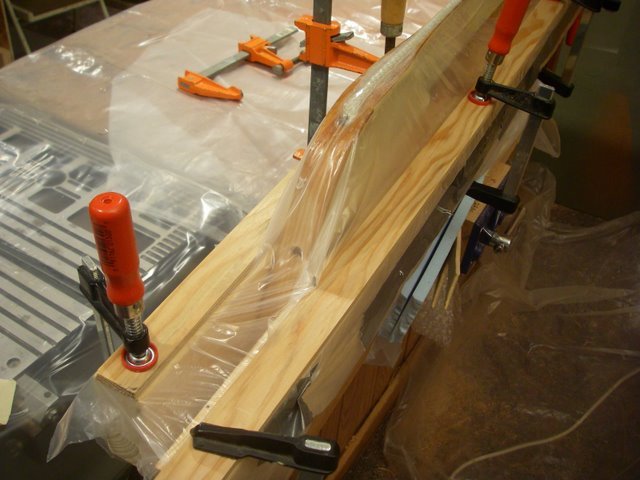
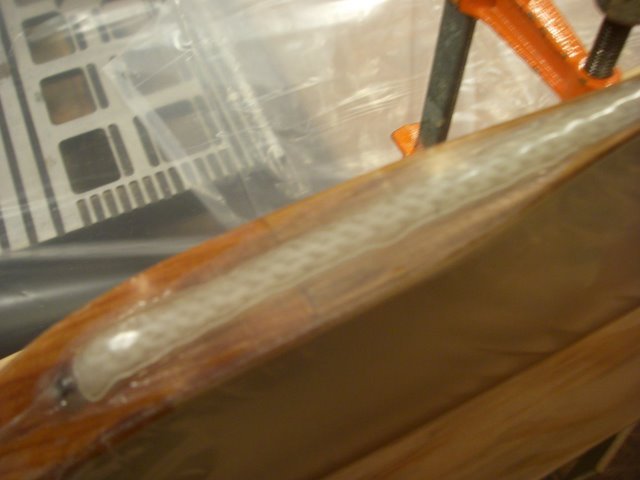
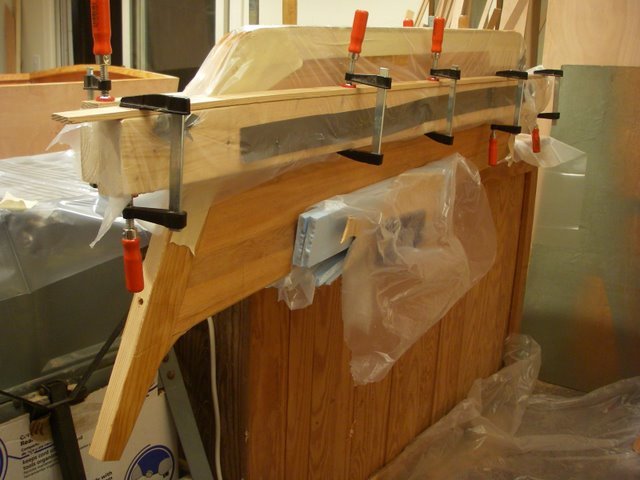
Randy C., The rope armor on the edge of the CB is worth doing. Very cool project as described by Tom and others. A few pics of the rope-epoxy work on the CB of CS20 #103 can be found here... http://picasaweb.google.com/alanosauras/Centerboard_CS20# and a few pics of the completed CB are here... http://picasaweb.google.com/alanosauras/CS20_christmas# Nylon rope soaks up epoxy very well and very quickly if you submerge a coil of it in a container of freshly mixed epoxy. Someone had suggested that air bubbles would emerge from the submerged rope if the container was placed in a vacuum. We actually did that and found it unnecessary; apparently there were no bubbles inside the submerged rope. No need for a vacuum. Have fun soaking your rope. ;D p.s. We had already glassed the sides of the CB when we learned about the rope-epoxy idea, so we cut a groove in the edge between the two glass layers. Cutting a groove should not be necessary if you put the glass cloth on -after- the rope. As Tom noted, you can put the rope on "a small flat on the leading edge to match the diameter of the line I want to use." --Paul

-
The rope armor on the edge of the CB is worth doing. Very cool project as described by Tom and others. A few pics of the rope-epoxy work on the CB of CS20 #103 can be found here... http://picasaweb.google.com/alanosauras/Centerboard_CS20# and a few pics of the completed CB are here... http://picasaweb.google.com/alanosauras/CS20_christmas# Nylon rope soaks up epoxy very well and very quickly if you submerge a coil of it in a container of freshly mixed epoxy. Someone had suggested that airbubbles would emerge from the submerged rope if the container was placed in a vacuum. We actually did that and found it unnecessary; apparently there were no bubbles inside the submerged rope. No need for a vacuum. Have fun soaking your rope. ;D p.s. We had already glassed the sides of the CB when we learned about the rope-epoxy idea, so we cut a groove in the edge between the two glass layers. Cutting a groove should not be necessary if you put the glass cloth on -after- the rope. As Tom noted, you can put the rope on "a small flat on the leading edge to match the diameter of the line I want to use." --Paul

-
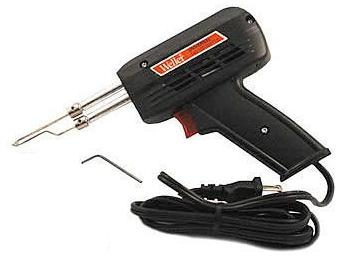
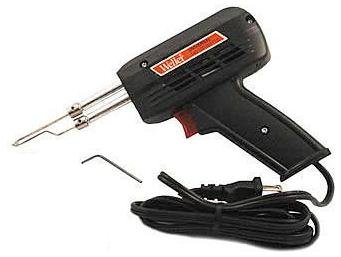
Holding a hot soldering iron against one end of the wire also works. If using a soldering gun, you can even remove the 2-pronged heating element and let the wire play the role of heating element --if you desire a red-hot wire.
-
Very cool project, Jeff. Some kind of cabin on the CS20 is a great idea; "how to do it" is the big puzzle. About all I have to offer is encouragement. Go Jeff ! I'm glad to hear that anyone of us is pushing the limits of the envelope and trying new ideas for the CS20. Designing shelter on the CS20 is a fascinating puzzle. So may pros and cons. Decisions, decisions, decisions. Fortunately, you know what you want in terms of function. The pop-top design you built is really cool. Very creative and well executed. Windows, snaps, flexibility, hatches. But I can understand downsides such as extra set-up time, etc., as you mentioned. I hope Graham will eventually add one of his cabin designs as an option in the CS20 plans. I'm sure his cabin design would be outstanding. But I know that regardless of the design specifics, the functionality of a cabin on the CS20 is wonderful. We absolutely love all the many benefits of the permanent hardshell cabin we built on the 'Dawn Patrol'. My to-do list still includes some finish work in our cabin. Still puzzling out some of the small details. By the way, we did not really expect to be able to put any weight on the cabin roof. But we have come to realize that it is actually very strong. Stand on it, sit on it. No worries. We treat it well and I would never jump up and down on top of it, nor even stand on it unnecessarily, but in terms of ordinary activities when sailing and trailering its strength is just fine. Sounds like you are thinking of a semi-permanent removable hardtop. I have to say that listening to your descriptions, it sounds like you really want a permanent cabin but may be hesitating to commit to that. It sounds like the only reason you would remove the "removable / semi-permanent cabin" would be because you decide you don't like the design. Is that true? ....after you built it, if you were really happy with a particular hardshell design and the way it looked and functioned, then you'd probably never remove it? For your consideration I would offer the suggestion that there probably is some 'permanent cabin' design (that only you can discover) that you will love once it is constructed. I'm thinking you could do some full-size exploratory mock-ups using cardboard walls, for example, to aid in the discovery process. Ken Potts recently let me have a very brief peek at his copy of plans for the EC22, and the "cabin plans" page was a treat to see. (Well yes, -all- the pages were at risk of being drooled upon.) I expect there would be some similarities between those EC22 cabin plans and hypothetical CS20 cabin plans. Of course the EC22 is a distinctly different boat, but even so it might be possible for you to rescale, adapt, and use that "cabin" page of the EC22 plans as the essential basis for an adaptation to the CS20 --could provide ideas for construction strategy in any case. You might discover a plan that is perfect but seems to involve more work (e.g., extra bulkhead separating sole of the cockpit from the sole of the cabin). But maybe not more work in the long-run if going in that direction is actually a shortcut to where you're eventually headed. I hope this is encouraging. Trying new ideas and modifications is one of the very best things about wooden boats. A CS20 cabin is a good idea. How to do it is a puzzle. Enjoy ! --Paul