paul_stewart
-
Posts
277 -
Joined
-
Last visited
-
Days Won
8
Content Type
Profiles
Forums
Events
Everything posted by paul_stewart
-
Jim, Would you be the father and son that Alan and I met on the beach at the starting line of the EC'08? Regarding time requirements: For CS20 #103, Alan and I worked at a brisk pace for 133 days (or 19 weeks). We made good use of the holidays. Toward the end we pulled a few all-nighters. We started on a Saturday and finished on a Saturday. We had a specific deadline: October 10, 2007 -- received plans in the mail from Graham & Carla Byrnes. October 19, 2007 -- first of many fun visits to Lowes for tools and supplies (Oh Boy!) October 20, 2007 -- visited Graham & Carla to purchase all plywood and some epoxy ... March 1, 2008 -- the finished boat sitting on the starting line for Everglades Challenge March 4, 2008 -- arrived at the finish line. As a first-time builder, it seems easiest to talk about the time requirement in terms of "days". Hard to say how many hours it took us. Very very roughly, I would guess that we put in about 20hrs per week. This is roughly in the neighborhood of the 400hrs that Ray noted. It would be difficult to count the hours as they included time in the workshop as well as time spent purchasing supplies and tools, researching questions, planning, discussing options (e.g., colors of paint), cleaning up, thinking up solutions to problems while driving to work... etc. Also, there may be times when you are waiting for a part or supplies to arrive, or are waiting for epoxy to cure (e.g., you want epoxy on brightwork to become inert before starting to protect it with varnish.) Having a partner (or two) definitely makes the work go faster and is more fun. Perhaps a couple of "first-timers" can work together to finish a CS20 in roughly the same number of days that it takes a professional builder to do it ? Having a kit would make a difference, too. In regard to the placement of the hull-shaped supports (cradle) under the hull during the early building stages, we used three: one about 2' forward of the transom, another mid-ship under the temporary bulkhead, and one under the forward bulkhead. --Paul
-

Lumber needs??? Fir vs ???? CS 20 104
paul_stewart replied to Maria CS20 104's topic in B & B Yachts Forum
Jim, Good luck with #104. Sounds like you and I might have a few things in common. One of the very best experiences in my life was building and sailing CS20 #103 with my 22 year old son --who was the expert one explaining this "wood working" stuff to me-- and with my wife who put in long hours on the priming and painting efforts. A CS20 is a great project for the family. Talk about "quality time"; this is the best! Plus, your wife is already up to speed on the radial arm saw! --Paul ----------------------- http://www.messing-about.com/forums/index.php?topic=5825.0. ... http://www.messing-about.com/forums/index.php?topic=5825.60 ----------------------- -
Jan, Wow. Beautiful boat! So very elegant. What kinds of wood did you used for the rub-rails, trim, etc. ? Will the rear oval-shaped hatch stay open all the time (vs. hatch cover) ? Would love to see more photos of the final details. Thanks! --Paul
-
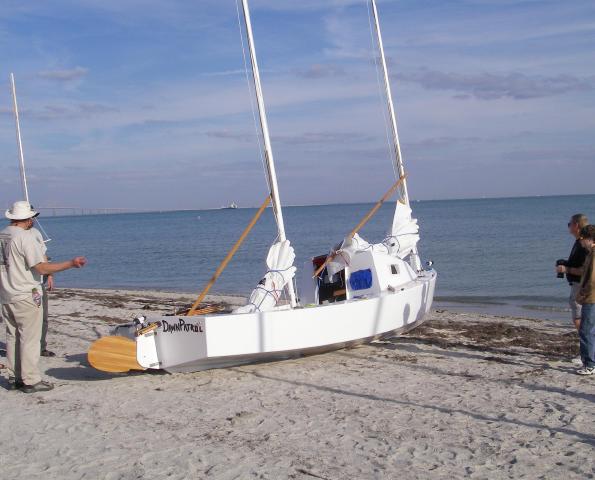
Andrus, Welsome! A cabin of your own design is an option on the CS20. You can see in the photos the cabin we built on CS20 #103 "Dawn Patrol". In the Everglades Challenge '08 our ride was extremely dry --which is one of the main advantages of a hard cabin or soft canvas dodger. You can see 'worst-case' spray deflected in the following video from our EC'08 run: http://sailnaway.blogspot.com/search?updated-max=2008-03-07T02%3A26%3A00-05%3A00 --Paul
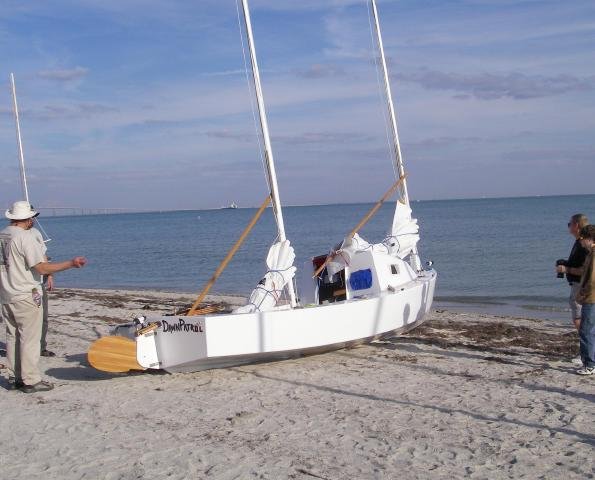


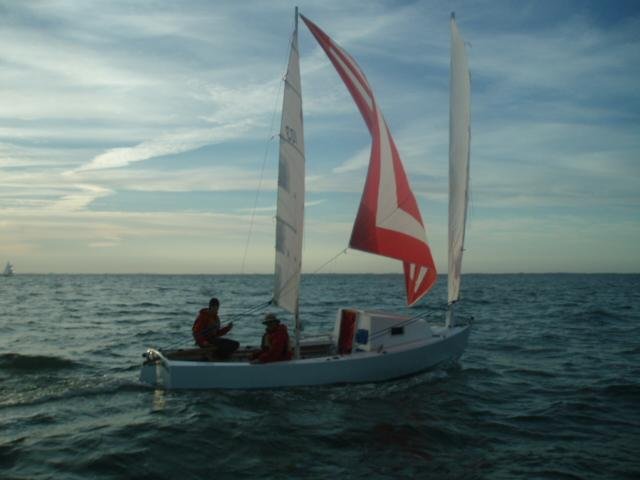

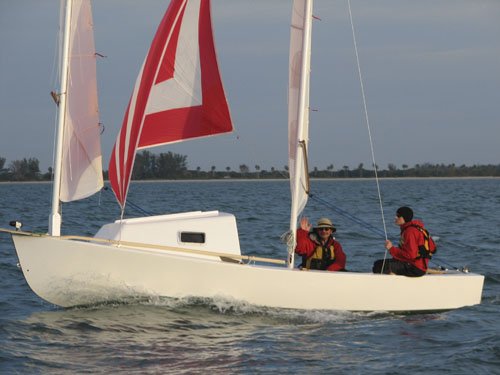
-
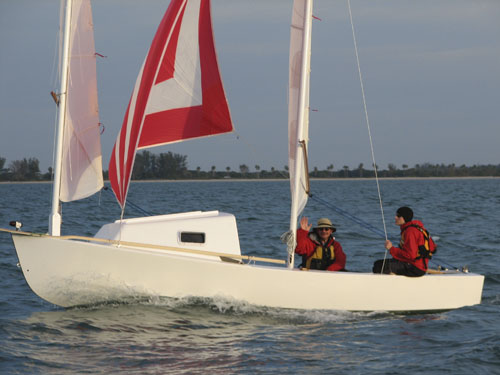
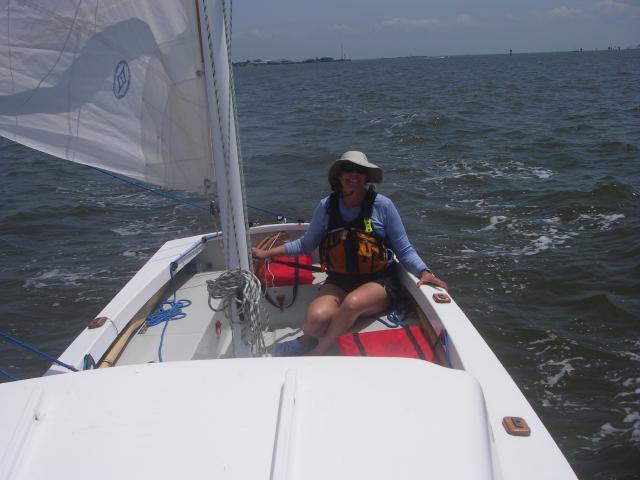
Ken, Thanks for sharing the great pics. Looks like you had lots of fun. Good winds? Motor much? Hey let's get together for a sail; maybe Jordan Lake if any wind. Our CS20 "Dawn Patrol" has been in the water only 3 times since its 03/01/08 completion: EC'08 (Alan&Paul), CedarKey'08(Dawn&Paul), and JordanLake (Dawn&Paul). Needs much more time on the water! --Paul


-
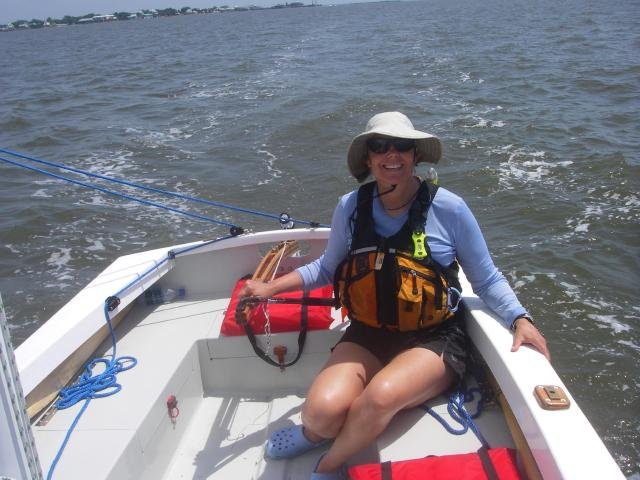
Ken, Thanks for sharing the great pics. Looks like you had lots of fun. Good winds? Motor much? Hey let's get together for a sail; maybe Jordan Lake if any wind. Our CS20 "Dawn Patrol" has been in the water only 3 times since its 03/01/08 completion: EC'08 (Alan&Paul), CedarKey'08(Dawn&Paul), and JordanLake (Dawn&Paul). Needs much more time on the water! --Paul
-
Wow! That is cooler than cool. Well done Oriental!
-
Wes, See this previous post on the B&B forum... http://www.messing-about.com/forums/index.php?topic=5825.msg50077#msg50077 ...regarding the solution that Alan and I used on CS20 #103, "Dawn Patrol": We used locknuts embedded at the bottom of oversized epoxy-filled holes along the keel. That post discusses the testing we performed. I would add that we found that relying on "threaded epoxy" alone to hold the screw was not successful. In contrast, embedding locknuts was successful. The general idea is that the nut is started part-way up the screw and then the nut+screw and epoxy are placed in the hole. After 10 hours the screw is removable but the nut will stay in place. I would recommend these steps: wet out the hole with epoxy so that there is a 1/16"deep pool of epoxy in the bottom of the hole; after a few hours half fill the hole with epoxy and squish in the screw+nut; the epoxy should be near level with the top of the hole; as it cures the epoxy may shrink/settle down so that a little more epoxy is needed to fill the hole to the top. When tightened, you do not want the bottom end of the screw to penetrate through the epoxy into raw wood; rather, you want the entire screw+nut assembly to be encapsulated in epoxy. Do your own tests on some scrap wood. We used slightly thickened epoxy for our keel guard holes, but some of our later work on the "Dawn Patrol" indicated to us that unthickened epoxy may be stronger than thicked epoxy. Because of minimal thickness of the bow section, we used shorter screws with plain nuts (not lock nuts) in the bow. We used longer screws with locknuts midship and aft along the keel. Below you can see a photo of some early testing we did in scrap lumber. (For this illustration the wood was carefully cut away with a saw and a sander.) When Alan over tightened the screw with a washer in place, the washer deeply crushed into the top of the wood and the nut+epoxy never moved.

-

-
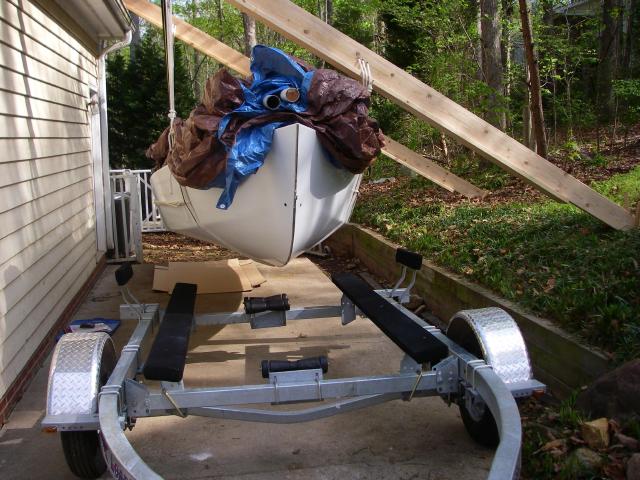
Wes, in regard to your post about trailers for your CS20... Our trailer arrived the day before we were scheduled to start our trip to the EC'08 starting line on Mullet Key in Tampa Bay. It turned out that the EC'08 was the first time our CS20, "Dawn Patrol", was in the water. If I had known how long it would take to acquire a trailer I would have started looking for one the day the CS20 #103 plans arrived in the mail. Initial plan was to find a cheap used trailer. Easy! But used trailer pickin's turned out to be very slim. Better to buy a new one! The state of online info and online shopping for new trailers is rediculously poor. (Don't they -want- to sell their trailers?) In regard to knowing what we needed or would want, I was clueless. Read all old posts in the forums. Eventually received some expert recommendations about features and brands. So we aimed for a longer version of what turns out to be the same trailer you have Ken -- made in NC by the "Long Trailer Co." But at the time the company was experiencing extreme delays in their deliveries due to new management / reorganization. Eventually, we ordered a bunked galvanized trailer for skiffs from "Load Rite Inc." via helpful sales rep David Katzenmeyer at WaterWorld Marine Inc in Durham, NC. Delivery from Load Rite took a week longer than usual and then the trailer seemed to vanish for a few days when the delivery trucker unloaded it at WaterWorld in a hidder spot at o'dark thirty and then was unreachable because his wife delivered twins. While we were waiting for the delivery, WaterWorld loaned us a new much more expensive trailer so that we could move the CS20 out of our basement and into the driveway. Features: 1650 lb capacity, leaf springs, 90" wide, 13" tires, 20' length, jack, spare, and 3 keel rollers between the bunks. Trailer weighs 480 lbs. For Load Rite trailers, the difference between a 1650 lb carrying capacity trailer and, say, a 2260 lb carrying capacity trailer of the same model had nothing to do with softer/harder riding springs -- the difference was entirely in the ratings of the tires! WaterWorld generously adjusted the bunks and rollers. And, they threw in a another keel roller because Load Rite had installed 2 rollers as a pair on the rear transverse beam and installed 1 roller on the middle transverse beam. That does add up to 3 rollers, as requested, but I had wanted one of them to be on the tongue. Good luck with your trailer, Wes.


-
Wes, good luck with your trailer. I posted some comments here:
-
Way to go Norm! Lookin' good! Thanks for sharing the photos and narratives. I want to toss in my 2cents worth of encouragement. Your photos show a lot of good work and plenty of can-do determination. Very impressive. BTW, the snow photos and the shed damage by the gail force winds made be realize that I deserved a good dope slap for each of those times I ever complained about building CS20 #103 is a cramped basement space; plus there were two of us. [insert dope slap here] You are clearly un-stoppable. I know you're going to have a beautiful boat sailing this summer.
-
Doug, We have a few bubbles, perhaps 4, above the waterline. The other bubbles are below the waterline. There are about 100 bubbles with 1/8" diameter, about as many with diameters ranging down to a pin point, and perhaps a dozen in the 1/8" to 1/4" range. In the three bubbles we dissected, we found that the gas (no liquid) in the bubbles was above the epoxy layer and below both the primer and paint layers. No separation between primer and paint. Yes, osmosis could occur below the waterline but wouldn't that tend to separate the paint from the primer? My amateur guess is that the epoxy layer was not perfectly inert or was not perfectly cleaned. I other words, I think the gas in the bubbles is residual solvent / blush / whatever and not water vapor. The hull was in the water for ~ 1 week: Saturday 7am to Saturday afternoon. During the 3.5 days from Tampa Bay to Key Largo the water termperatures were reported to vary from about 70 degrees to 80 degrees. Then the boat rested tied to a dock in (warmer?) shallow non-tidal water most the time during the other 3.5 days. If I had checked the hull on arrival in Key Largo I'd know better when the bubbles appeared. Prior to applying the System Three (S3) water reducible "Topcoat" paint the word from a S3 tech rep was that that paint would be fine for a trailered boat and that a bottom paint would only be needed if the hull was left in the water continuously for more than several weeks -- two or three weeks should not be a problem. Primer used: water reducible S3 Silvertip Yacht Primer. The bubbles are not fragile, being a composed of unified paint layers and primer layers. The bubbles are very flat. The bubbles are not uniformly distributed. Most are on the port side, and few on the forward half of the hull. I am considering repairing the bubbles one-at-time: that is sand down each bubble and then go forward with several steps of painting and sanding. Comments? Recommendations? All suggestions would be appreciated!
-
Gordy, Thanks for posting those pics. No matter how you cut it, Graham's Core Sound 20 design is easy on the eyes. I never tire of admiring the lines of his EC-22. You captured some lovely lighting there --- good job! I heard your camera took some damage in the EC while you were helping us all out at checkpoint 3 / Flamingo. I hope it survived. Thanks a million for "being there" for all of us. You did a great job!!!!!!!!!!!!!!!!!!!!!!!!!!!!!! --Paul
-
Doug, Well done! in both races with your CS20: the race to build it in time, and the EC'08 race from Tampa Bay to Key Largo! You've been an inspiration to Alan (SOS) and me (DWSB) throughout both races. Our EC'08 experience was unforgettable. It was a tremendous pleasure to hear about the experiences of all the other challengers and to get to know you and your crew, Michael (GrayBeard). As usual for the EC, we saw some amazing new records set, were awed by boat building innovations, and shared some great new stories --for example, FrontalLobatomy's boat pulled over for speeding near Sanibel, Roo and Tinker experimenting with snow shoes in Florida Bay, Lumpy and Bumpy jetting to the finish in < 36 hours, sea kayakers overcoming non-stop headwinds, Trader and TroutHearts succeeding in an open canoe, and 3 CoreSound boats among the first 5 finishers. Some of the old stories were a hoot to hear too --hurling dead horseshoe crabs at a platoon of raccoons... hahahahaha. With CS20s now finished, we're almost ready for the EC'09. See you on the water, --Paul (CS20 #103)
-
Beautiful work, Scott. Also, I really like your windows/ports. What kind are they? --Paul
-
Mike, please see reply in "Re: Core Sound 20: Hull #103". http://www.messing-about.com/forums/index.php?topic=5825.msg50077#new
-
Mike, Correct. Oversize holes with epoxy fill was Alan's idea: so the screws and SS stips are removable and the screws do not touch any wood. We had made the holes deep enough so that there should be 1/8" layer of epoxy below the bottom tip of the screw. The diameter of the hole was 1/16" larger than the diameter of the nut. We drilled and countersunk the SS strip first. We put all the screws in the SS strip, put all the nutes on the ends of the screws, dry-fitted everything into the holes as a check. With the hardware removed out of the way we wetted out the holes with thin epoxy, then filled the holes with honey-thick epoxy (cabosil). Each hole was filled to within about 1/8" from the top of the hole. Next we squished the screws/nuts into the holes --screws/nuts still being through the SS strip. Having the strip in place insured that the screws were correctly positioned. Let cure for 8 hours. Then removed all screws and removed the SS strip to check results. A couple of flaws were touched up. We let the epoxy cure longer before putting it all back together, with a thin layer of silicone calk between the keel and SS strip. After it was cured we cranked down on the screws for tightness. Preliminary testing in a small scrap block of white pine 2x4: with either PVA release agent or machine oil on just the screw, the screw released easily 8-10 hours into curing. I suspect the PVA or oil was unnecessary. When fully cured, we put a washer on top and cranked down on the skrew as hard as possible. The result was that the washer crushed into the surface of the white pine and the nut stayed firmly anchored down in the wood. We used 8-32 SS screws with lock-nuts. Screw length varied consistent with 4/8" deep holes in the bow, 5/8" deep holes in front end of keel, 6/8" deep holes in keel back to the stern. The several shorter screws in the bow required regular nuts instead of (taller) lock-nuts so that there would be a thick-enough layer of epoxy above those nuts. A theadlocker goo can be applied to the threads whenever lock-nuts are not used. Pictures: http://picasaweb.google.com/danceswithsandybottom/CS20_keel_guard__20080122
-
Mike, Yes that's exactly right. The unpolished flat stock (3/4" x 1/8" x 6', type 304 SS) came from McMaster-Carr for about $3/foot. Initial sticker shock at JD strongly suggested that we should use this unpolished flat stock and drill, counter-sink, bevel (half-oval), and polish it ourselves. Sure, why not. In a moment of insanity I gave in to temptation and bought one section from JD (1/2" x 1/8" x 6' half oval) for the bow. The other 3 sections came from McMaster-Carr. During the installation we abandoned the idea of beveling and polishing the flat stock (for now, anyway) --only because on further thought it didn't seem necessary! That's the story, for whatever it's worth. I'm speaking from genuine inexperience here. The forum and all comments and suggestions are much appreciated !!! There's no way I'd get this boat built if I were doing it alone. Fortunately, my son (Alan) and I make a good team -- he's a budding boat builder/designer, experienced sailor, and engineering student at NCSU. And I contribute something too, but I can't recall what it is. We're having a great time on this project. Icing on the cake if she floats.
-
Great discussion, rich in ideas, points of view, experiences, and pros & cons; much appreciated! Regarding... Ray, on the CS20 #103 we recently installed a stainless steel keel guard from bow to stern (3/4" x 1/8" x 22' in 4 sections). Type-304 stainless steel is certainly has greater resistance than copper, but.... Could this metal strip also serve as a grounding plate, I wonder. Given that it is there anyway, would it be pointless to connect it to a copper strip running up each mast? Any thoughts about that? A half-baked idea that could leave us ... umm... half-baked? I can see it now: a stike on the main mast, the keel guard on the bow flashes to 5000 degrees, the epoxy in the bow seam vaporizes, ... oops. Picture at picasaweb.google.com/danceswithsandybottom/CS20_Flip__20080123/photo#5158900109286544658 http://picasaweb.google.com/danceswithsandybottom/CS20_Flip__20080123/photo#5158900109286544658
-
Ray, Have you built (/planning to build) lightning protection into any Core Sound boats? Any thoughts on design details for lightning protection for the CS20? --Paul
-
in defense of water based paint
paul_stewart replied to jan nicolaisen's topic in B & B Yachts Forum
Thanks, Jan. Very helpful. Primer: When I called S3, the friendly sales lady there explained that WR-155 has been discontinued and Silvertip Yacht Primer is the new version. No more WR-155. Topcoat: Will the new 1-part Silvertip Yacht Enamel replace the old 2-part WR-LPU? "No", she said. And she added that the new enamel is still "under review" and not yet being sold. Rather than truck it across the whole continent, I ordered a gallon of the new primer from E-boat, Inc., in Florida. They had only 1 gallon ($84) and a few quarts left on the self, according to Joel, but they were expecting a new shipment soon. According to the S3 rep, a gallon of the new primer covers 250-350 sq ft at 3-4 mils thickness which dries to 1.5-2.0 mils thickness. I estimate that our CS20 #103 has about 450 sg ft of painted (yet to be done) surface area which would suggest that 3 gallons would be needed for two coats. Joel at E-boat was fairly certain that 1 or possibly 2 gallons would be plenty for the entire project ---if we don't sand it all off ! ;D Jamestown Distributors' sales rep implied that their current stock of WR-155 was the last they would be receiving from S3. She did not yet have any of the new primer in stock, yet. -
in defense of water based paint
paul_stewart replied to jan nicolaisen's topic in B & B Yachts Forum
Scott, as far as I know WR-155 is -not- being discontinued. The S3 website description claims that "WR-155 contains corrosion inhibitors". In what little info there is available, this claim is not made in S3's description of the new Silvertip Yacht Primer (SYP). However, the S3 website states that either primer can be applied to metal. So the availability of SYP does not necessarily make WR-155 obsolete. It seems that SYP is aimed specifically at boats that do not need a primer that contains corrosion inhibitors. Just a wild guess.... perhaps it was omitting the corrosion inhibitors that facilitated the development of a "better" primer. -
in defense of water based paint
paul_stewart replied to jan nicolaisen's topic in B & B Yachts Forum
Joe and Scott, thanks for the comments. Scott I'm curious to know if that means you are using WR-155 primer and then the WR-LPU paint; or, are you going with the Silvertip Yacht Primer and then WR-LPU paint? Boatbuildercentral.com is the only vendor I've found that is selling the Silvertip Yacht Primer (~$84/gallon for gray). Jamestown Distrib. sells WR-155 at about $91/gallon for gray. For whatever it might be worth, I found the following post on the forum sponsored by www.boatbuilderscentral.com: (http://forums.bateau2.com/viewtopic.php?t=14830&start=0&sid=6beb7b0cbb664a4abb81262467ffffa6) Joel wrote... "System Three has changed their epoxy high build primer. I have tested the new primer [silvertip Yacht Primer] several times in the last week. Here are my impressions [relative to the older WR-155]: - much higher build in 1 coat (this is now a true "high build" primer) - cures much quicker. Now we can paint in one day, no more waiting for the primer to cure for a week before top coat - its still water reduced and clean up is super simple - opaqueness: one coat covers completely There is an induction time of 15 minutes. After mixing, you let it set for 15 minutes before application. I noticed this made a big difference. If you roll it on without waiting the full 15 minutes, there tends to be air bubbles left behind. If you give it the full induction time - it lays out very well. The only downside I see is that the primer is only available in light gray (no more white). The new primer will be available in November, in the mean time, we still have the WR-155 in stock. ... It [silvertip Yacht Primer] is more expensive than the old WR-155, which we always sold well below the MSRP. Compared to other epoxy high build primers, it is priced lower" And a follow-up post said ...."I looked at Joels' test this morning and it is more white than gray, let's call it off-white or very light gray. It looks like an excellent all purpose color but I agree with everything else Joel writes, it is a major improvement, a real good primer." And Joel added... "They (System Three) told me that the new primer will spray much better. Better spraying was one of the goals going into the re-development". -
in defense of water based paint
paul_stewart replied to jan nicolaisen's topic in B & B Yachts Forum
CS20 #103 under construction will soon be ready for Alan and his old dad (me) to apply primer and paints. I assume those of you that have used System Three's water reducible (WR) primer and paint used the WR-155* primer and WR-LPU* Topcoat paint. Have any of you tried System Three's new WR primer called "Silvertip Yacht Primer" ? There is also a "Silvertip Yacht Enamel" and it is apparently not a linear polyurethane and is not 2-part. Anyone tried that? I'm wondering if I should be concerned about using these products on the bottom. We plan to store the CS20 on a trailer and do frequent day-sailing, but it could be in the water (salt or fresh) for up to a week on any given trip. =============== I've read every relevant post on the forum I could find. The comments are sometimes confusing to a novice boat-painter (me), so here are the specifics for the products I'm considering.... * Silvertip Yacht Primer --- is a waterborne, two-part marine epoxy primer specifically formulated as a sandable base for System Three WR-LPU and SilverTip Yacht Enamel. Yacht Primer can be applied over polyester or epoxy resin surfaces, and properly prepared wood, metal, and cementitious surfaces. Use Yacht Primer as a base coat for anti-fouling paints, or over epoxy or vinyl ester barrier coats before topcoating. It will provide performance equal to its solvent-borne counterparts, in corrosion protection, film-build, and sandability. In addition, it is non-flammable and contains no highly-hazardous(HAPS) solvents or heavy metals. Although Yacht Primer was formulated to provide a smooth, uniform surface for the System Three topcoats, it is compatible with most other marine coatings which are normally applied over a two-part epoxy primer. Yacht Primer dries by evaporation and then cures in a temperature-dependent resin/hardener curing reaction. It may be recoated with additional primer after it is dry to the touch but it should not be topcoated until after it cures. Curing takes about a day in warm temperatures and longer in cool weather. Test for cure by wetting a finger and rubbing it on the primer. If your fingertip picks up some primer then it is not cured. The film will not be water-resistant until it is cured. Rain or moisture from dew or condensation can damage the film. The primer cures as a relatively rigid film, so is not recommended for use on flexible substrates like fabric or thermoplastics. ------------- * SilverTip Yacht Enamel --- is a high gloss water-based marine finish and is the newest part of System Three's innovative SilverTip Marine Series that brings the marine professional and the do-it-yourself boat owner the very latest in formulated epoxy adhesives, coatings, and putties. SilverTip Yacht Enamel is the ideal choice for most topside applications where apprearance, durability, and ease of application are important. There is no fire risk with SilverTip Yacht Enamel and because it is a low VOC formulation, concerns for air quality and disposal are greatly reduced. Yacht Enamel is available in 12 factory-tinted colors. -------------- * WR-155 Primer --- is a high-build, waterborne two-part epoxy primer specifically formulated as a sandable base for System Three Resins