Designer
-
Posts
1,758 -
Joined
-
Last visited
-
Days Won
182
Content Type
Profiles
Forums
Events
Everything posted by Designer
-
I originally designed the deck construction to be built like Chick is building his CS17. I got concerned about the kit builder getting the sheer curve wrong when viewed from above which could mean that the deck panels might not fit the boat. Doug's CS20 was drawn this way also. He elected to fit the inwale to the deck first, this made the deck fit the hull but the inwale did not fit tight against the hull. The new way forces the deck to fit the hull exactly as drawn and eliminates the complex beveling. If the builder pre-cuts the glass tape and wets the glass out down hand on the bench, rolls it in place on the boat, covering it in peel ply and rolling it out with an air roller (grooved metal roller) he will have a neat strong deck to hull joint. The tape will fit between the hanging knees which means that we are dealing with short lengths of glass and done this way. Glassing upside down this way is easy and should be quicker to build than going the inwale route. Chick has plenty of experience and I know that he can wing it if he has to.
-
Blkskmr, I think that the track has potential for all kinds of sliding applications. I just wish that they would get it done.
-
Unfortunately, we will not be at Port Aransas,it clashes with our Messabout.
-
We looked up our records and found that BRS # 46 was indeed from NC. In fact the hull was built in my boat building class. I remember the build but not the small details. We built with marine quality products but back then some builders used fir, meranti and okume ply or a combination. She was started in 94 but the builder took a long time to finish her once she went home. He was a fisherman and never put a sailing rig on her. I met the builder later on at a regatta at Blackbeard's Sailing Club and he let me take her for a spin. I recall that she was rigged with a Honda 9.9.
-
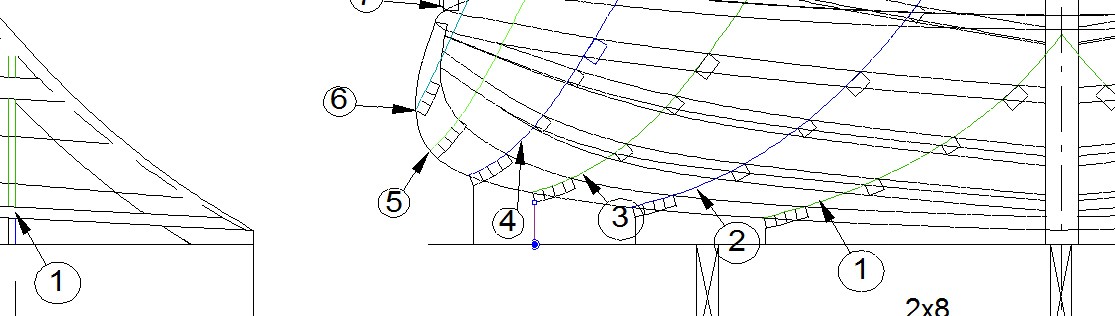
Len, The model was a good idea, it looks really sweet. There is one exception; it appears that the sheer clamp passes over the stem. We had a builder over here that did that on the full size boat which led to a lot of work to rectify. Remember that the bearding line marked on the stem and keel is the line that shows where the planking meets the outboard edge of the stem/keel. As the stringers and sheer clamp are on the inside of the planking, they must not be outside of the bearding line. The outside of the stringers/ clamp must not be proud of the bearding line. Because of the twisting force required, the upper edge may be end up proud of the bearding line, it is okay to plane that off. There is a lot of bending and twisting of the stringers near the sheer line and the intermediate sheer. I have been redrawing the intermediate sheer on this boat to make it easier to bend by taking out some of the twist. The framing is fair and if the stringers lay tight to the framing, the surface will be fair. I have lowered forward end of the intermediate sheer at the stem about 6" (.150) so that it will take some of the twisting out of the operation. The stringer above and below have also been dropped forward to to evenly fill the space. I am going to recommend tapering the intermediate sheer down to stringer width at the stem to ease the bending.
-
Bill, I have sailed around the Charleston area and you described the conditions perfectly. I think that you would be better off with the 20 if you want to sail with that many people.
-
Chick, At this point I think that it will be Alan, Nat and I.
-
The B&B team will be at the annual WoodenBoat Show at Mystic Seaport next Friday through Sunday for the Family Boatbuilding Program. If you get the chance please come by and say hello.
-
Farmboy, The closest design that I have done to your request was a 28 foot workboat. She was to have a pair of bunks and a head forward with headroom. A pilothouse with galley and as much deck aft as I could fit. The hull should be simple to build with each panel to be developed so that they could wrap around the hull in one piece. She was built, and turned out to be a very good boat. She had a Mercruiser Bravo 2 inboard outboard with a Chevy 350 and could reach 30 mph wide open.

-
Chick, I held off on your sails until I was sure that it would happen. You will get the right slides.
-
Travis, It is not hard to drill out the rivets to remove the old track and it is fairly easy to remove the old slides and sew on the new ones but it is tedious. The expedient way would be to just shackle the slides to the sails, I prefer the webbing method. That being said, I do not expect everyone to rush out change their tracks because it does work, just not as smooth. I am going to change out Southern Skimmer's track, I am using the excuse that it is R&D. David, I think that it is a good idea to supply the rivets with the track. We are sending one of our rivets to the machine shop to make sure that it is a match. Howard, I do not think that aluminum rivets are strong enough. I know that you are thinking about corrosion. If you put some goop on each rivet it helps. SS and aluminum are not far apart on the galvanic scale. You always want the fastener to be slightly more noble than the mass so that it will be protected. Aluminum on aluminum will corrode if it stays wet. I will be caulking the track to the mast as well just to keep moisture from corroding under the track.
-
Floyd, The track will set you back $150 for a CS17 rig. The slides come with the sail. There is no difference in the sail cost, you just specify which track you have so that you will get the right slides.
-
We got to test the boat motoring the other day. She got to 7 knots using all 14 horse power. She will cruise all day at 6 knots at 2700 rpm or about 10 hp. The picture shows how small the wake is at 6 knots.

-
It has been a long time coming. I have never been happy with the stainless steel external track. Until now it was the only track available. Many years ago, I used to be able to get 5/8 and 7/8 internal track. I have searched long and hard over the years and finally got back to the company that had the original die, but I could not justify the huge cost to do a run. I do not even think it exists anymore. I even modified some cutters and machined some track out of Starboard. It worked very well but was labor intensive and it was a bit bulky. Alan contacted about 10 aluminum extruders and so the work began. We decided that over the years we have used enough track to make the big investment. We began to list all of the properties we wanted and probably drew hundreds of versions before we committed. We wanted it to be strong enough for a 30' boat, but light enough for a Core Sound. The last weekend that I worked on it I was able to save a few more hundreds of an ounce per foot. We realized that we had better get it right or we would have the worlds most expensive recycling. We took a deep breath and invested in having the die made. The company just sent us a 3 foot trial sample, to evaluate before we make the big run. We are really happy with it; it is everything we wanted and hoped for. It is made of 6061 T-6 aluminum which is the same as the spars, so there is no galvanic interaction. It weighs 2.7 oz per foot. The track is clear anodized and pre-drilled for 5/32" countersunk rivets, or #8 flat head machine screws. It also has a V-groove down the center, so if you want/need to add and in-between fastener; or an end of section faster, because your cut length is not at the end of a standard length. It is has a radius on the back side to fit from 6" down to 1 1/2" round spar tubes. It has flat on each side of the edge on the back, so it will also fit flat on a wooden mast, with round or flat sections (box sections). It is much stiffer and straighter than the SS external track and it fits true to the surface (doesn't tilt off), which makes it easier to install. The corners are well radiused to prevent chafe on the sprit. It takes standard 5/8" internal nylon sail slides. The slides slide more easily than on the external track. The best thing of all is that with all these features and advantages it will cost less to our builders (or others) than the ss track. We expect to be able to sell it for about $35.00 per 8' length; vs. $39.00 for a slightly under 6' section of ss 5/8" track. After a lot of soul searching, we decided on 8' lengths so we can ship FedEx. The picture shows the track on a 1 1/2" tube with a nylon slide.

-
Here are some more pictures of Peter's boat. The water was very low, so we launched 4 miles away and motored to the slip. I was very pleased, you can see that she floated perfectly and handled beautifully under power. She will be rigged over the next couple of weeks and we can give her a real test. My compliments to Peter who did a superb job of the build. He was emotionally used up by the time he went home. https://www.facebook.com/190417410979750/photos/a.904002709621213.1073741828.190417410979750/947830138571803/?type=1&permPage=1
-
Mike, Congratulations, she looks great. It is a tease to show the stern in the water. How about the rest of the boat in the water.
-
Ricardo, I am glad that you like our P26 design. The sharpie form has been well proven over the years as a seaworthy shape. The P26 was designed to be lightweight for trailering and shoal draft. To cross the Atlantic, she would be loaded down with stores and safety equipment, even for a crew of two. I would prefer a greater range of stability, as Howard mentioned, you cannot pick your weather once you are a week or two offshore. The heavier boat would require increased scantlings to handle the higher loads. The under water volume would need to be increased to carry the higher weight. The rig would have to be increased and made stronger. Suddenly it is complete redesign. Steve and Margo Wolf sailed a 24' Piver Nugget trimararan with 2x4 folding beams around the world in the 70's. I think that this was an outstanding piece of seamanship. Steve was smart and went to extremes to keep her light. His auxiliary power was a paddle. It was pre GPS which meant that navigation was with a sextant, plastic because it was lighter. Steve would not carry a whole almanac but carried only a few pages and extrapolated for the rest. Two sets of clothes and a windbreaker were all that was allowed. I redesigned his beams into laminated box beams and eliminated the folding mechanism which saved lot of weight. We gave her more beam and raised the amma's which gave more stability and reduced wetted surface area. I mention this because there have been a lot of outstanding voyages in the most unlikely boats, because they sailed very smart or were very lucky. There have probably been as many disasters that we do not know about. I
-
I do not think that you will have a problem structurally. I am concerned about how it will fair with the deck and the rub rail. You do not want it to droop or get thick as the bow comes to a point. You might be able to glue some ply between the top stringer and the sheer on the inside and true it up on the outside with a grinder. With some careful shaping and some glass and epoxy, you should be able to recover.
-
John, This is a very difficult bow to build and get it just right. The sheer clamp should have been flush to the stem . Your planking had to start out almost horizontal to almost a crease before it turned. If you look at the drawings, you will see that it is an easy curve. It appears that your 1" square laminations run over and sit on top of the stem rather than but into the stem.


-
Jay, It will just be a rain-out. You would think that it would have the good taste to wait until hurricane season.
-
18 8 stainless steel or type 304 is the most common stainless steel used in fasteners and most boat hardware. I would never use it on the outside, especially under water of an ocean going boat. It suffers badly from crevis corrosion. I have had good success with type 316 SS under water. It is not as readily available as 304 and it is a lot more expensive. On small boats I use lots of 304 and it works well enough. Bronze as has been mentioned is good but not as readily available and quite expensive and you have to be extra careful driving screws as it is fairly soft. I still have some monel screws which are the best if you can find or afford them. We have CS20 hull # 1 in the shop for a minor refit. She was built using all 304 fasteners. We pulled the centerboard and the pin was perfect. The rudder pivot bolt twisted the head off, it was eaten almost in two. The other fasteners that we have seen so far are OK. I think that replacing the odd fastener over the years is a reasonable trade off as the boat is over 16 years old and she has been used exclusively in salt water.
-
If you send me an email I will attach a drawing of the bow roller if you would like.
-
Hal, I was referring to the video of folding the new CS20 mk 3 that Alan posted last week. We demonstrated drawing out the bottom to line up with the side with a screw and pad.
-
I am glad to see that Hal was careful about pulling the cabin top flush to the sheer strake and getting the panels fair and tight before gluing. Remember that once you glue it, you own it. It is worth spending a little extra time fussing before you glue. If you watch the video of the CS20 mk3 going 3d, you will see a faster way of pulling the sheer strake out to the line of the cabin top. After the pre-drilled holes are wired, there will be places where the sheer strake will be inside the line of the cabin top. Gently run a screw from the outside through a ply pad, up close the top edge with the screw going into the side and the pad pressing against the top so that it will draw the side out to the top. The gently part means that if you run the screw with a heavy hand, you will strip out the thread in the 6mm side. It is best to pre-drill the pad and draw the screw in until the the side just comes out to position and STOP. The video shows the bottom being drawn out to the side but it does the same job. Do not worry about more holes in your pretty cabin, they will be filled as you are filleting the inside joint.
-
When designing the CS17 I recall that my target cruising displacement was 1150#. This does not mean that there is a wall that you hit and the boat is suddenly unsafe. It was simply the median displacement where I optimized her hydrostatics. I have rarely seen good boats that are better by carrying more stuff, with common sense she will carry all that two people will need to cruise for a week or so before replenishing. It has pleased me to no end to see how many good cruises have now been made in her.