Starboard
-
Posts
61 -
Joined
-
Last visited
-
Days Won
7
Content Type
Profiles
Forums
Events
Everything posted by Starboard
-
I have a 6hp Tohatsu I use for both my Spindrift and my J/24 sailboat. Obviously we sail whenever we can on the J/24 but there have been plenty of times when the wind has died coming back from Catalina and we would rather motor than drift for hours. We can easily motor at 5-6 knots with the 6hp Tohatsu. It's a 15" shaft which is great on the Spindrift. On the J/24 we have a height adjustable auxillary motor mount that also works for a 15" motor. On a sailboat you can lock the tiller on the outboard and steer with the sailboat tiller- I'm not sure how that would work on a powerboat. I picked up the Tohatsu on Craisglist for about $500- it's a 2005 4 stroke, and I made sure to get a high thrust prop for it- sometimes they're called elephant ear props. It's meant to push slow heavy loads that won't be planing, which is perfect for the J/24. I accept that maybe the Spindrift will be a little slower as well, but it's not really a planing hull either. I recently acquired an old Boston Whaler 15 Sport, and you better believe I'll be rigging it with an aux motor mount for the 6hp Tohatsu. Just knowing that you won't be stuck out there is worth a lot.
-
Nesting dinghy as a tender- decisions, decisions!
Starboard replied to Aphers's topic in B & B Yachts Forum
I built a Spindrift 10n to use as a tender on a pretty small J/24 for cruises from Marina del Rey to Catalina in Los Angeles, California, so no long distance voyages. The nice thing about a nesting dinghy compared to a Zodiac or other inflatable is how fast you are ready to go when you arrive at your location. While I usually have help dropping each half overboard, I've have done it by myself a few times as well. I hop in and join the two halves while in the water- I built mine so that there are no holes below the water line- it connects with two stainless steel brackets I designed. I also put a metal keel strip on so I could drag it onto rocky beaches. As for sailing, I simply re-used my old Laser rig, which is very similiar to the plans anyway. If you build it with a Laser rig in mind you can save a huge amount of time, especially if sailing it will be just for fun. I love how the Spindrift motors as well as rows- I go much farther than I ever did in the old 9' roll up Zodiac. I have a 6hp Tohatsu which is the outboard for both the J/24 as well as the Spindrift and I'm very pleased with its performance on the Spindrift. It's also the coolest looking boat at the dinghy dock, you'll always get a lot of questions about it. Thanks to Graham for designing such an amazing little boat. -
Nidaplast and carbon Spindrift N11 build
Starboard replied to ForthBridge's topic in B & B Yachts Forum
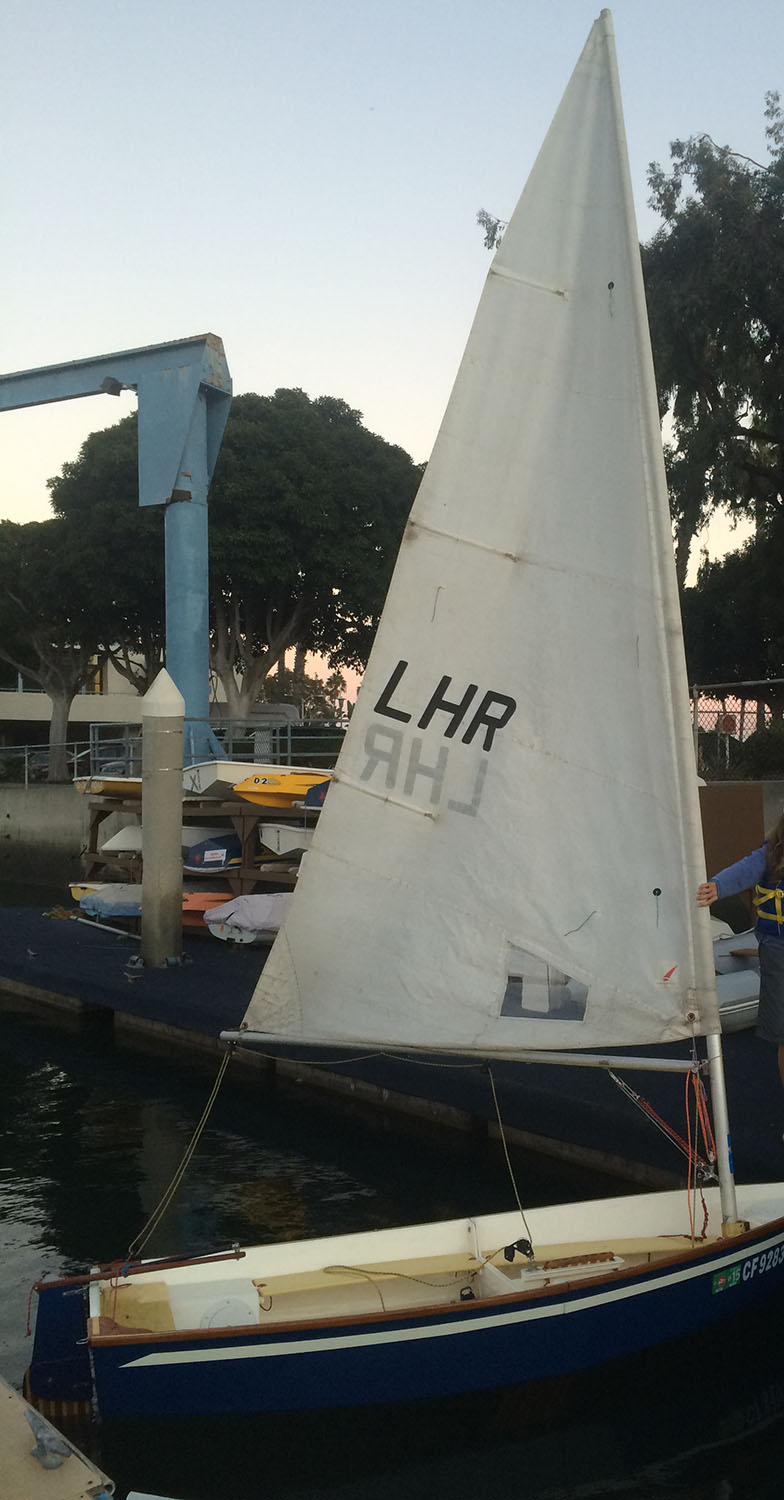
I chose to use my Laser rig as well. It's a full sail, though, since I don't have a Radial lower section. In a breeze the full Laser rig is tough handling by myself- I capsized after struggling with it for a while and the nesting version just doesn't have enough side flotation in the bow to keep the hull far enough out of the water to prevent it from scooping in a ton of water and pretty much fully swamping the boat. Of course I was probably taking risks on a very windy day that most wouldn't go out in- I assumed I'd just sail it like my old Laser. I plan on building in permanent forward benches/flotation chambers to keep the bow up in a capsize. That will replace the removable benches I designed but will still allow it to nest just fine. Using a Laser rig saves a lot of time and lets you get it on the water sooner. I pretty much rigged it just like a current Laser with the outhaul and cunningham brought down to the base of the mast, through two blocks, and cleated close to the daggerboard. I also have the mainsheet pretty close to where it would be on a Laser- though I did add a cleat on the main block more like my J/24. I have a tiller extension and hiking straps in the cockpit too. I've sat up on the gunwale plenty of times to hike out but it's not the most comfortable thing to do. I've since sold my Laser and while I had extra spars for the mast I didn't have an extra boom, so I may make one from spruce for fun. Or just dig around the scrap pile at the yacht club and see if there's an extra Laser boom in there. That's probably pretty likely. I love the idea of using the Nidaplast and CF for the hull, plus a little wood for fair measure. You'll have to post some photos carrying around each half of the hull in each hand showing off how light it is. Good luck with the build. -Starboard
-
Building a Two Paw 8 for Trailer Camping
Starboard replied to Don Silsbe's topic in B & B Yachts Forum
I installed inspection ports in my nesting Spindrift so I’d have a more or less waterproof chamber to store a few lightweight items like a small first aid kit, the registration papers and the very rarely used AA battery powered navigation lights that clip on the bow and stern. I wouldn’t load them up as it would defeat the purpose of a flotation chamber. The inspection ports are pretty pretty cheap and easy to install, but you can always do it later if you choose. -
I made a piece for the bow of my Spindrift that may work and look nice on your boat.


-
Looks great! It feels like the most harrowing moment of the build but after the cut it's so satisfying seeing the bow section happily sitting in the stern.
-
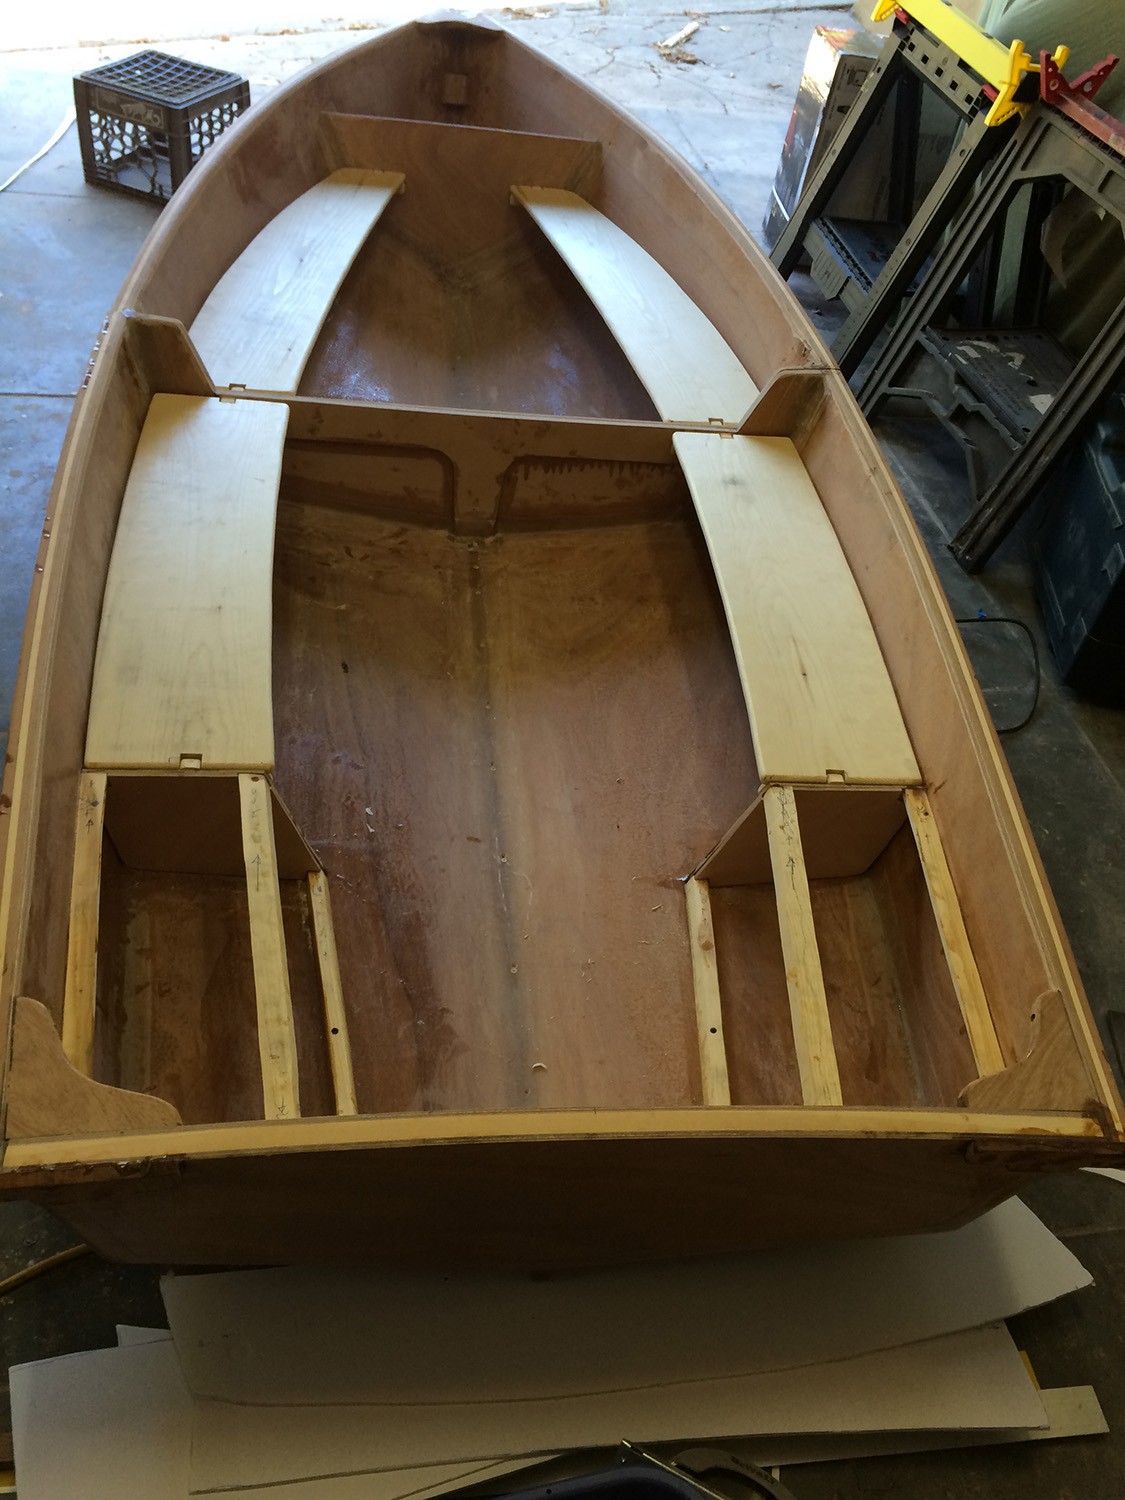
I built extensions for the aft section as well as the forward section- the result is a bench along each side. This post has a few more photos that show my build process:
-
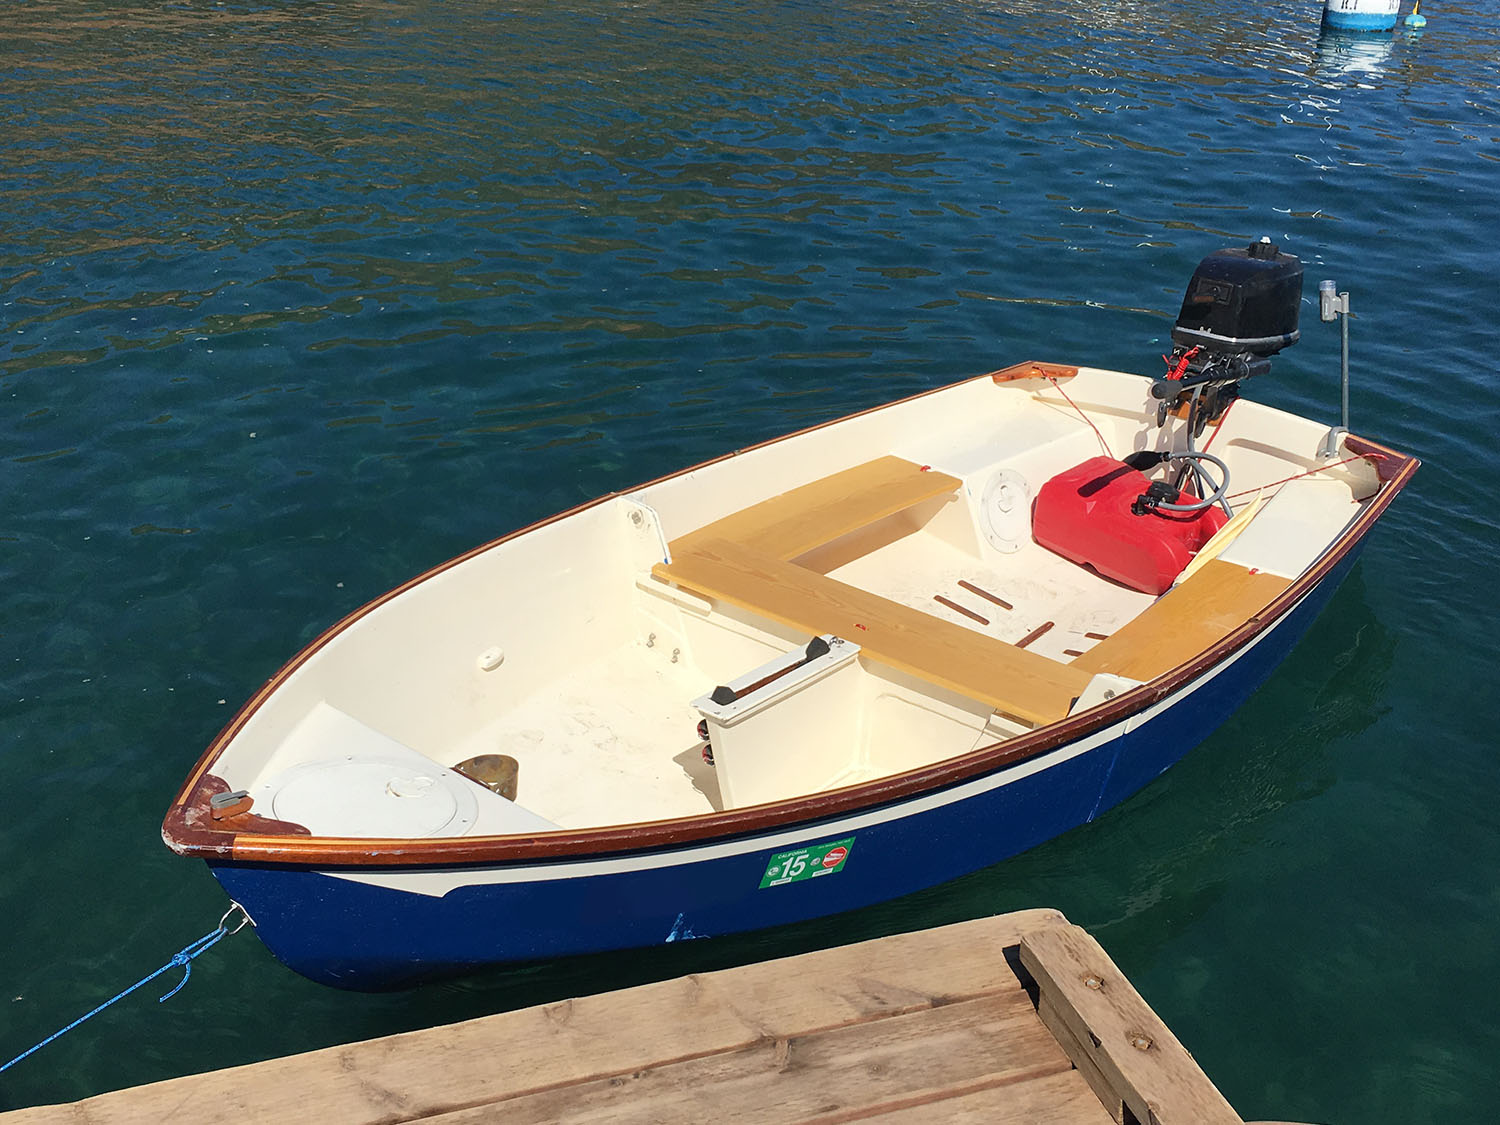
I found a photo from last fall- the gunwales are a little banged up from the hard dock i rubbed up against a while ago, but it would probably be pretty easy to brighten it up with a little sanding and varnish. One of the reasons I built my nesting Spindrift is to go on the deck of my J/24 out to Catalina and zip around the island once I get there. It's hard to beat this view of Blue Cavern Point!


-
The bright finish has held up fine. The boat is stored hanging from the rafters in the garage, and it hasn't seen a lot of use since i built it. I'd say the paint on the hull is in worse condition from the bangs and scrapes. The gunwales get as much contact as anywhere else, right? I'm really happy that I kept a few areas bright, but I don't think I would have liked the results if I'd tried to to the whole boat that way- too many imperfections. It the first boat I've built after all. Yours looks great so far. It's a lot of fun seeing another nesting spindrift getting built- every boat is just a little bit different.
-
I also used mahogany for my breasthook and gunwales, with a strip of spruce in the middle. It's a fairly hard wood and looks great. Are you planning on leaving it bright?

-
All I could think of while looking at the renderings was that is almost looked like a mini-Star. 14 feet vs 23 ft- change a few bulkheads and fully enclose for flotation when you capsize. Add hiking straps and thicker gunwales for comfort. You could use a Laser rig (cat rigged) like I did on my Spindrift or go nuts with a Bermuda rig like on a Capri 14.2. Maybe scale it up just a little to 16 or 17 feet to make it a little easier on the two man crew. It should still be around a hundred pounds- not including the rig, sails, daggerboard and rudder. Skinny and long it'll be a blast to sail, but it'll take a lot of skill and hiking out to keep it upright. Just for sport I'd add a motor mount for my cranky old Nissan 3.5 two stroke. You could still paddle like a canoe too. Do I have room in my garage to build something like this? Would my wife even remotely tolerate me building another boat? I did just finish completely renovating the guest bathroom for her... Hmm... Here's info about the Star: https://en.wikipedia.org/wiki/Star_(keelboat)
-
Looking good! The block plane ended up being my favorite tool during my build- there was nothing more satisfying than peeling off perfect curls of wood. It looks like you're getting close to pulling out the old saw and chopping 'er in half! That was a pretty fun day for me.
-
Walt, I just used clear glossy spar varnish for everything I left bright, so the mahogany and spruce are their natural colors. I carved my own oars from some extra spruce I got. I found some basic oar plans online and modified them to what I wanted. The photo doesn't show it well but I carved the shaft in an octagonal shape. This photo was taken before I wrapped the handles with twine at the grip and the sleeve. I really debated making two part oars but in the end I did not. I made my Spindrift to stow on the small foredeck of my J/24, but there's no problem having long oars belowdeck alongside the spinnaker pole, etc. And once the Spindrift is assembled it's not a problem keeping the full length oars on the little boat either.

-
Hugh, I shaped a piece of mahogany for the bow. Since we start bending the gunwales at the bow I was able to dry fit the strips with a fair amount of precision, which made shaping the bow piece easier. I doubt that this is the most common way, but I like the look and I wanted a nice hard piece of mahogany at the bow.


-
Spindrift 10N help needed - outboard pad and fwd bulkhead question
Starboard replied to Rdubs's topic in B & B Yachts Forum
I haven't installed curved stringers like that yet, so it's a question I have as well. I shaped the aft stringers with a plane, so in fact they weren't bent, they were a perfect fit. I could easily do the same for the forward stringers if I simply cut up the forward seats which are already pretty close to the correct shape, or I could cut strips and bend them like others have done. I'd like to avoid putting screws through the painted exterior hull seeing as how this is a retrofit. -
Spindrift 10N help needed - outboard pad and fwd bulkhead question
Starboard replied to Rdubs's topic in B & B Yachts Forum
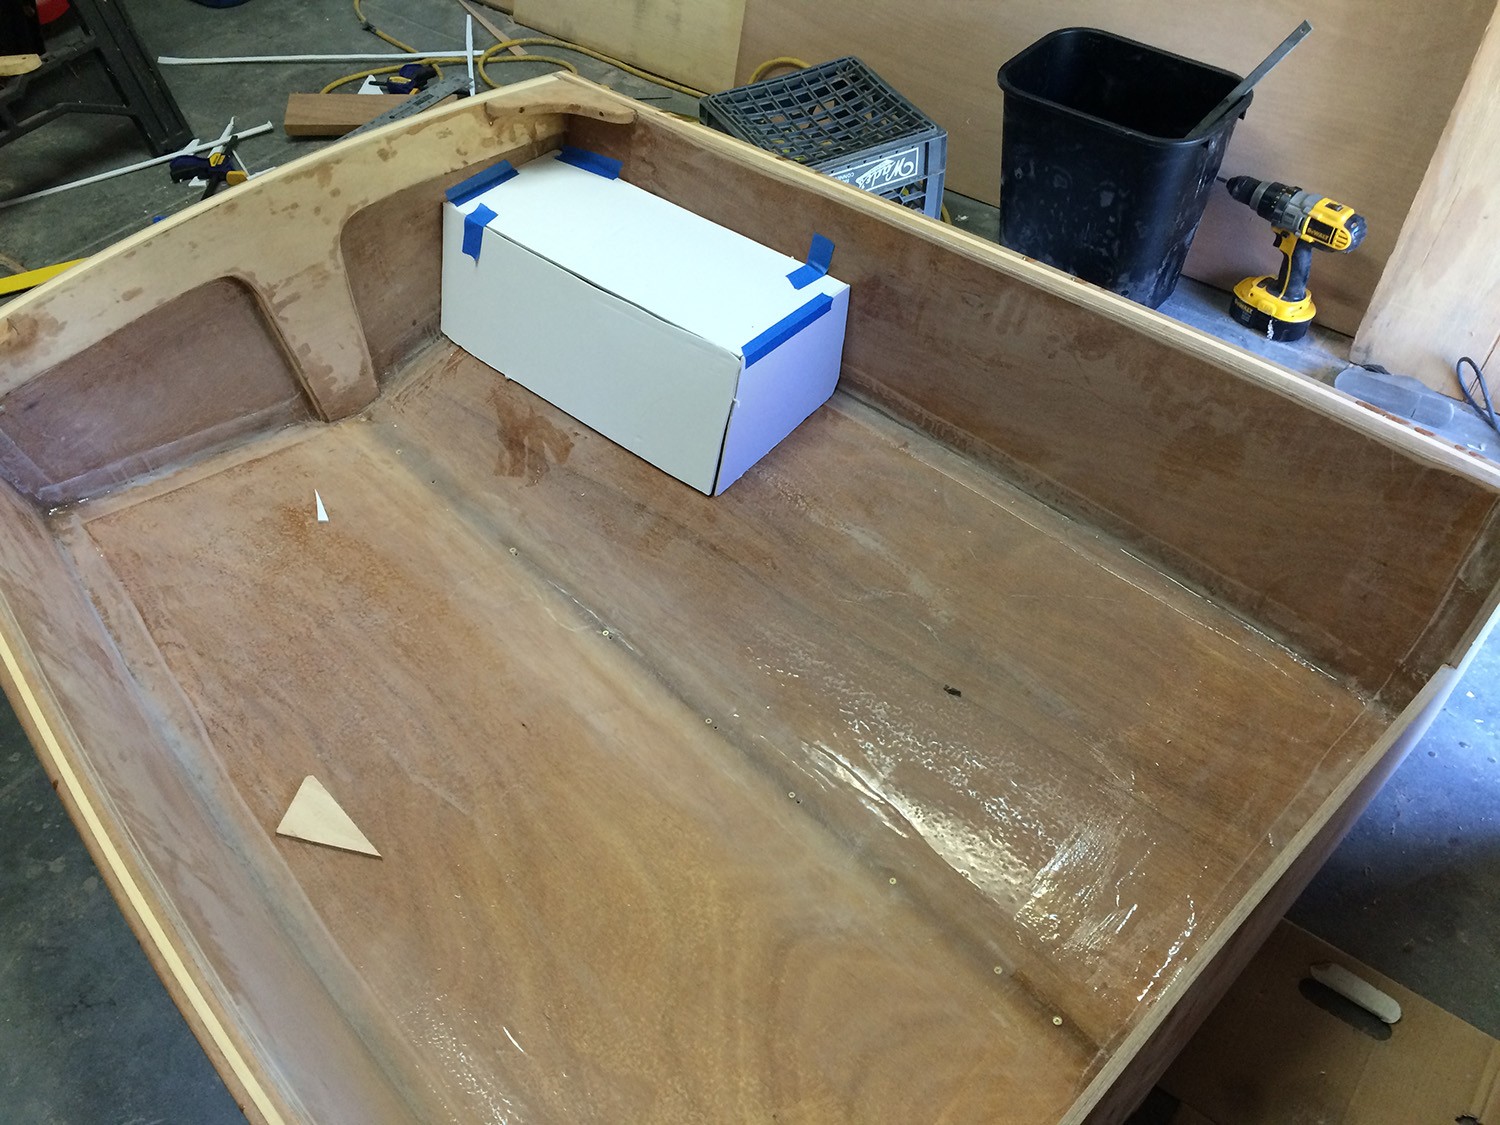
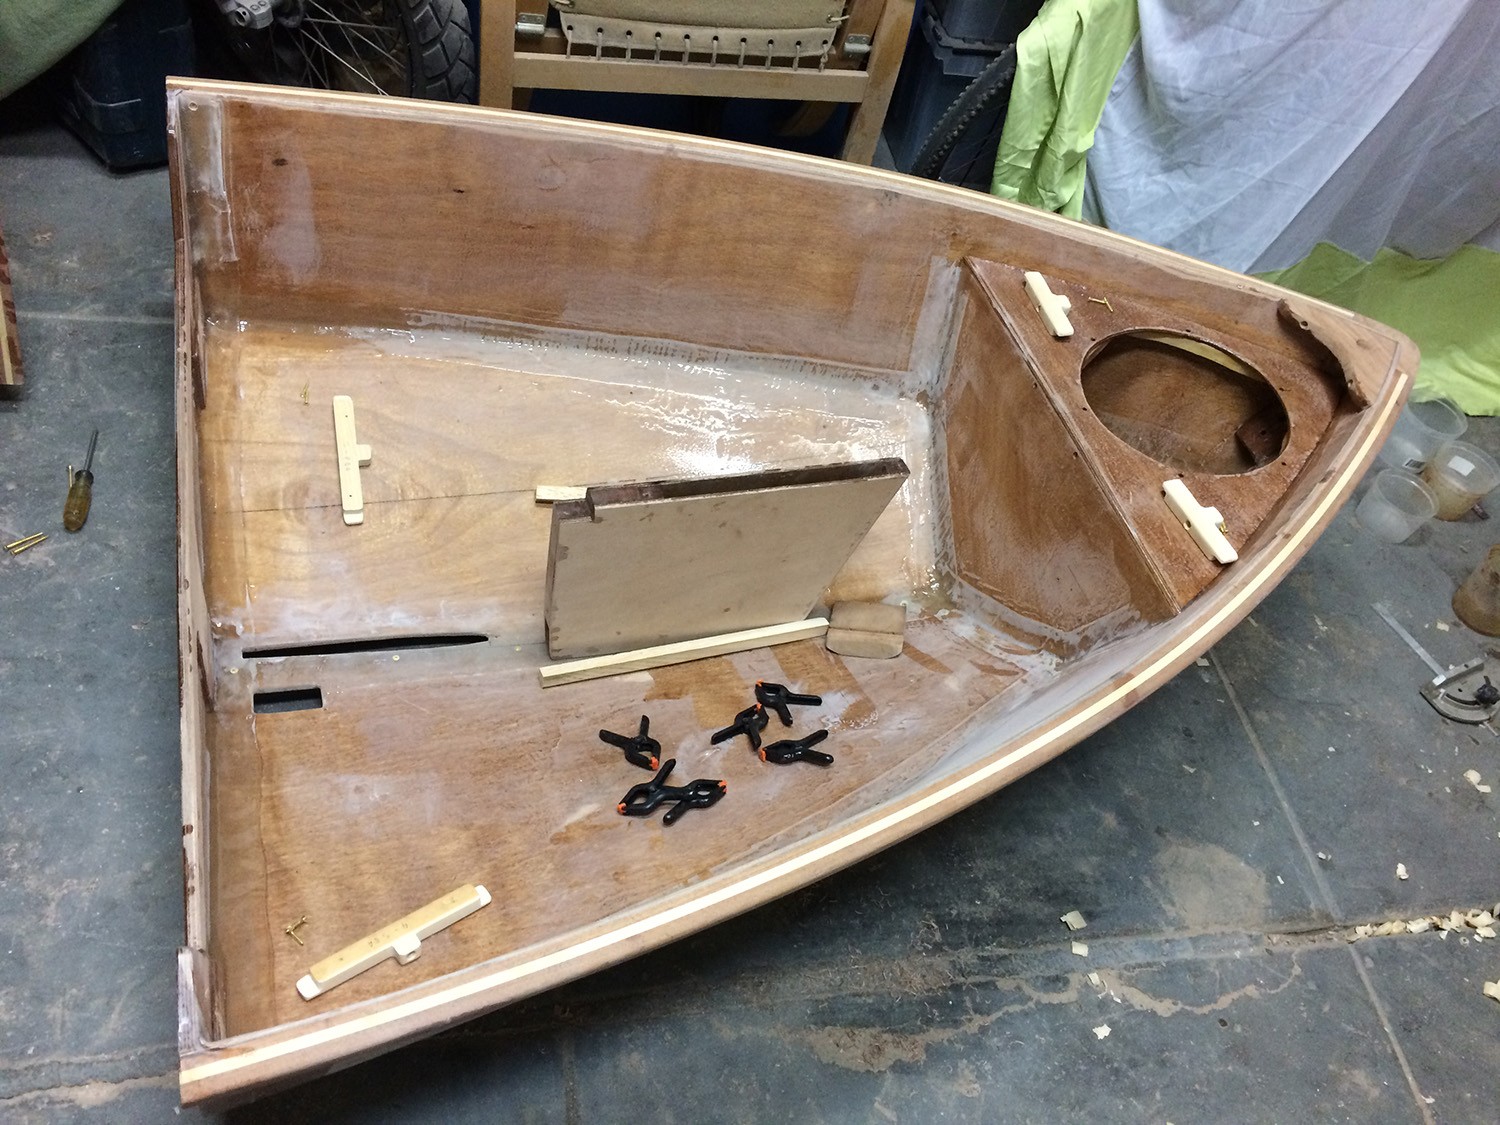
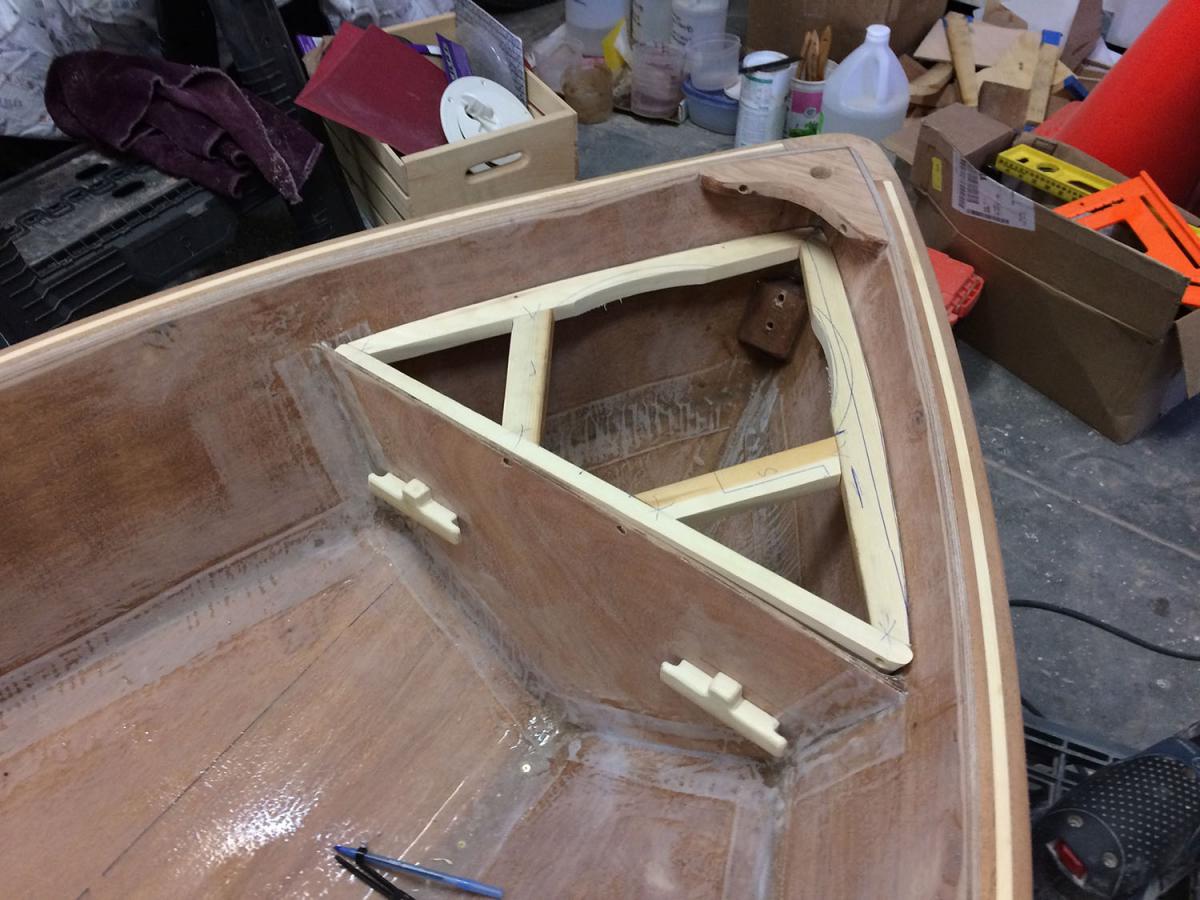
Your Spindrift looks great so far, keep up the good work! I cut my Spindrift before I did much to the interior. The outer hull shape was pretty much defined by then and didn't change much after that. It was also important to know exactly how much space I had for the aft benches/flotation chambers- the tolerances on my boat are very tight. I don't think I did a full fiberglass layer on the outside of the hull- just tape on the seams. Moment of truth! I made templates for the aft benches out of foam core and cardboard, and installed the stringers before the flat panels. I could then make templates for the removable benches. I built the daggerboard box in one piece to make sure it fit the daggerboard properly, and I cut the hole as close to the actual size of the daggerboard before I installed the box. You can also see the hole for the Andersen bailer.


-
Spindrift 10N help needed - outboard pad and fwd bulkhead question
Starboard replied to Rdubs's topic in B & B Yachts Forum
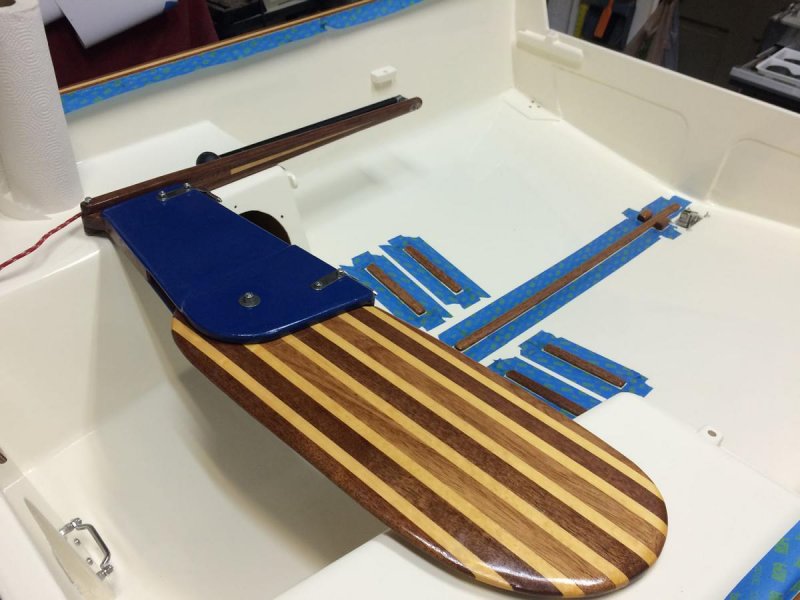
1. Here are a few photos with the seats removed. I came up with a way to secure the seats with one line and a stopper knot through a bowline. It's keeps them down but they're not really strong enough to grab hold of to right the boat in a capsize or when climbing back in the boat after swimming- I use the centerboard trunk for that. 2. I used a long straightedge to figure out what was 'level' in the boat and where to place my blocks, but that was partly based on the plans from B&B. The boat didn't go in the water until it was done. Is it absolutely perfectly level when sitting in the water? I have no idea- it looks pretty good to me, however- besides, level will be different if there's an outboard vs. empty vs. sailing rig. One thing I will say is that there isn't enough flotation forward & high for my liking with the removable forward seats, which is why I'm going to build them in and enclose them at some point in the future. It may weight a little more, but that's OK by me. When the boat is on its side the forward compartment definitely floats, but it's too close to the centerline of the boat to keep the Spindrift up high in the water. The built-in compartments on either side of the bow would probably float it a foot higher and prevent a lot of water from scooping in when you right the boat. The stern flotation compartments are fine so far, but could be extended a little but more if needed. Other dinghys I've sailed have full waterproof compartments along their sides and they don't take on much water when you right them after a capsize. 3. The large deckplate in the forward storage are gives pretty good access to that compartment. I have a folding anchor, a long line, and a few other things I can stow in there. It's a pretty good deckplate, I like how easy it is to remove. It leaks a very small amount, but not enough to cause any trouble. I designed a special subframe to distribute the loads of the mast which is a little different from Graham's plans. It is bonded and screwed both to itself but also shaped precisely and also screwed and bonded to the hull as well. I made a custom mast collar from brass instead of wood in the plans. Will this setup take the same loads as the original plans? I'm not really sure, but I don't sail the Spindrift as much as I motor it- most of my sailing is done on the J/24. So far so good, however. 4. It turns out that the sailplan and rigging for the Spindrift are pretty close to that of a Laser, which I already own. I decided to save a lot of time and money and just use my Laser rig. Laser practice sails from Intensity are only $135 and $10 for battens- a true bargain. http://www.intensitysails.com/prsaforla.html A used Laser rig can be purchased on Craigslist for a couple hundred dollars. So rigging the sail is pretty fast for me, and all of the controls and lines on my Spindrift are run the same way I'm used to. Maybe some day I'll build my own rig and sew my own sail, but I doubt it. The fact I could use my Laser gear was one of my main deciding factors for choosing the Spindrift. You can't reef a Laser sail like you can with the one on the plans, but if you find the 'full' laser rig to be overpowered the Laser Radial rig is almost 2 feet shorter. It just uses a shorter lower section (the Laser mast is in two pieces) and a lot of people have both rigs and two sails since it's just one different piece. The limited rowing I've done has been fine where the seat is positioned. If anything the seat feels a little high to the oarlocks- the oars hit my knees sometimes. I'm not much of a rower, however, so I don't know what a great setup would be.


-
Spindrift 10N help needed - outboard pad and fwd bulkhead question
Starboard replied to Rdubs's topic in B & B Yachts Forum
I made a center seat for my 10N that also fits at the stern when sailing. The side seats are removable but I'll be replacing the forward seats with built in waterproof compartments as the boats swamps too much when you capsize in sailing mode. It doesn't sink, but it sure takes on a lot of water. The built in seats will keep the sides floating higher when the boat is on its side. and won't scoop in as much water when bringing it up. The photos aren't fantastic but you get the idea. The center seat is shaped to fit in the stern, but sits on top of the side seats in the middle position.

-
choosing Spindrift nesting size and other questions
Starboard replied to samj's topic in B & B Yachts Forum
I built the 10N so I could both hang it in my garage in a small space and stow on the deck of my J/24 when I sail to Catalina. Both have worked very well so far. I built mine so it could be assembled in the water- I lower each section into the harbor and hop in the stern to bring both halves together. Not 100% dry, but not too bad. It is certainly a hassle having two sections to bail, and while I have Anderson bailers in both sections they require a fair amount of boat speed to actually work- either sailing relatively fast or motoring. They don't work for me while rowing. Building it will be more work too- I designed and built my own lower latch mechanism and that took quite a bit of figuring out. As for sailing, I simply used the rig from my Laser, so that makes it a lot easier to get into sailing mode as I'm pretty quick with that rig. I can stow the mast and boom belowdeck on the J/24 while crossing to Catalina and stow them abovedeck when I get there. The boats sails well in light wind but was a bit overpowered for me a few weeks ago when it was gusting over 15 knots with a full Laser rig. I capsized, as often happens, and while the boat was easy to right and climb into, it did take on a lot of water which made it difficult to recover from. I plan on increasing forward flotation- right now the front benches are not built in, but will do that this fall. If I didn't have the specific need to stow the Spindrift on the small foredeck of my J/24 I would have been fine with the non-nesting version. I'm glad I built the 10' version- I think the 9' would have been too small. I was a little tempted by the 11', but it would have been just a little too big to stow on the foredeck. I've had three in it while motoring but only two adults in it sailing. I'm pretty sure an adult and 2 kids would work though- it was two big guys when we went out. -
I got the first coat of varnish on the struts and with the unusually tropical weather we're having here in California, I'll just have to expect North Carolina summer drying times. Normally the first thinned out coat is dry to the touch in a couple of hours. Not today with this humidity! Since the bimini top hinge bolts tend to stick out dangerously, I found got some rounded off cap nuts today that should prevent snags and injuries. I fabricated all the hinges from leftover brass bar stock I had. It looks really good and it easy to machine with the basic tool shop I have. The bench grinder/buffing wheel has been my best investment recently- from rounding off metal edges to polishing small parts. I have a little Sunbrella material left over so I'm thinking about making a bag for the bimini. Unfortunately I'll be traveling this weekend which will slow my progress and also prevent me from putting the boat in the water to test it all out. Rick- The fore hatch is as big as I could fit. It's a quick release- not a screw-on deckplate. It's mostly waterproof, which is waterproof enough. I wanted to have easy access to a small folding anchor and rode, and a couple of other items. It required a minor re-engineering of the forward structure plans to support the loads of the mast while sailing upwind, but I think it's as strong or maybe even stronger than the original design, and distributes the loads from the mast collar and my Laser rig. There's quite a bit of a load while sailing close hauled- you need to induce a bit of mast bend to get the proper sail shape with a full size Laser sail. Speaking of sailing, I have made provisions for a hiking strap but I haven't gotten around to it yet. The last time we sailed it, we had about 12 knots of wind and it wished we had them. Has anyone else installed hiking straps in their Spindrift?
-
Since I use my little Spindrift for motoring and rowing in addition to sailing, I decided to design and build a bimini sunshade using some of the leftover spruce and plywood from the Spindrift project. I had a typical stainless steel tube bimini on a previous boat, but I though the wood would look nice on this boat. The configuration is very standard for a bimini top- two arches of similar size, and a shorter middle arch to rise in the center of the cover. The one additional element of this top is that I placed hinges at each top corner so that the entire bimini could be folded to a compact size. I've never seen one with that design before since they're usually stowed in-place, but with the multi use Spindrift I want it to be removed easily. Here's the Bimini deployed in the workshop but before varnishing. The attachment lines are temporary until I get better line. There is only one attachment point at the bow with a single clip. I think this will be sufficient since the boat doesn't go very fast, even with the motor. At the stern I clip to the stern u-bolts that are part of the original build. A view from below: Here's some of the mechanism I designed and fabricated from brass. It needs polishing and a few extra brass screws and hardware. The primary bracket attaches to the gunwale through to holes I drilled long ago, about a foot in front of the oarlocks. When stowed, the bimini leaves plenty of room to operate the motor. It would have to be removed to row when it's stowed, but when deployed it leaves plenty of room to row. The whole package will fold up and fit in a bag. It's pretty lightweight as well, since it's mostly spruce sticks. I can't say it will be as durable as stainless steel, but I'll try to be gentle with it. I made the top from Sunbrella and stiched it with a standard household sewing machine. I was concerned it would be to heavy of material for the machine to handle but it worked just fine. I haven't used a sewing machine in years, but I'm pleased with how it turned out. I may need to add a couple of straps at the center arch, but even if I don't it will still work just fine. I can't wait to varnish it and put it on the water for a test ride. It's been hot and sunny this week!


-
Core Sound 20 Mk 3 -- #4 "Chessie" . .
Starboard replied to Pete McCrary's topic in B & B Yachts Forum
On my Spindrift I used a portable LED navigation light that uses AA batteries. It's not the brightest in the world but it does the job. I'm pretty sure I got it on Amazon. It came with a flimsy plastic bracket but I used a small scrap of mahogany to make a custom block that fit into a hole in the breasthook. On the stern light I use the bracket it came with with but I plan on doing something nicer at some point. On my J/24 I have a U1 size 12V AGM sealed deep cycle battery. It's much smaller than a car battery or a regular deep cycle boat battery, but has plenty of power to run all of the nav electronics, house lights, and even the auto-tiller when we use it. It weighs around 27 pounds and fits in the smaller size battery box you find at West Marine. U1 dimensions: L: 8.31" W: 5.13" H: 7.25" I have a 5 watt solar panel we set up when we're not sailing, and it keeps the voltage over 13.0 throughout the year. I installed a charge controller to keep it from both overcharging the battery and balancing the top of the charge cycle.
-
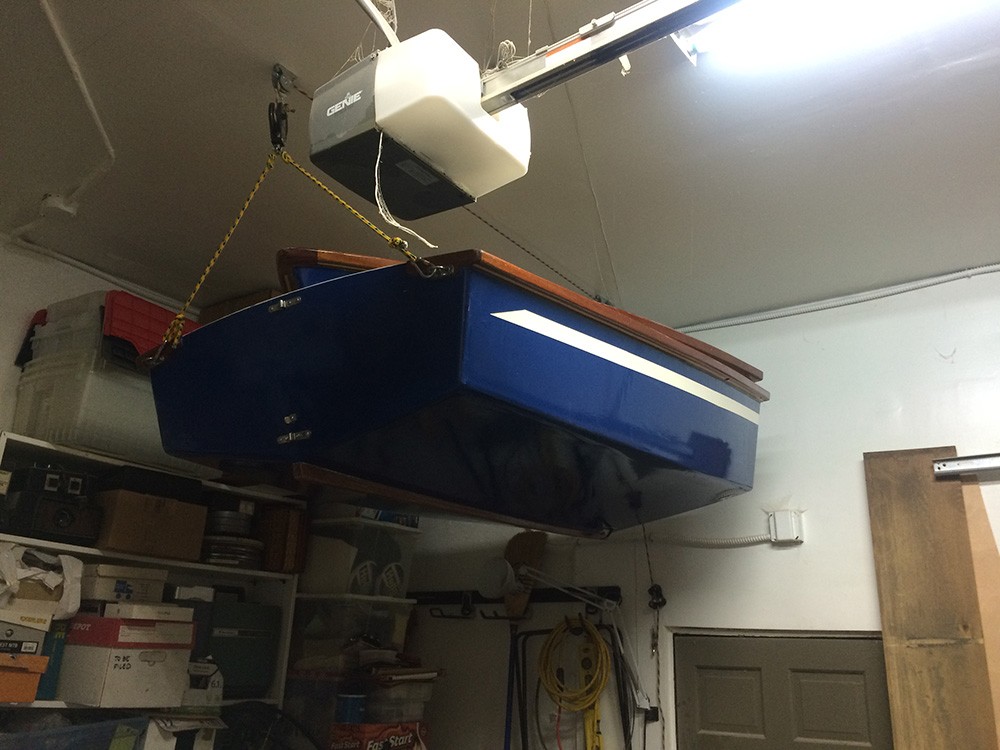
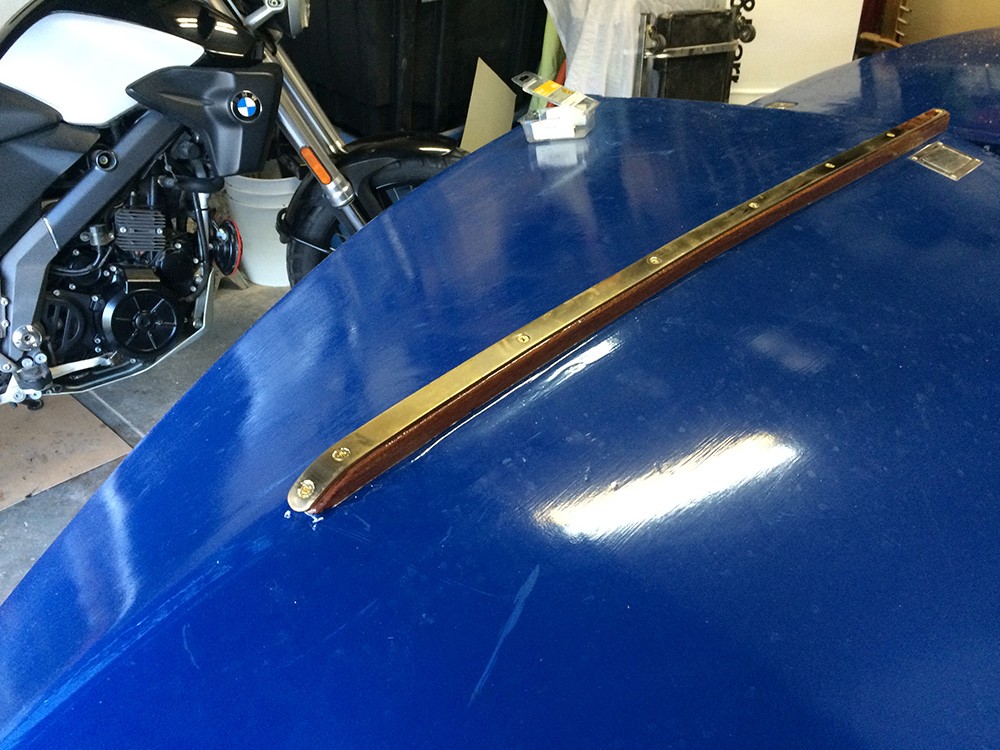
Although I launched my Spindrift back in October, there were still a few more tasks to finish up. As you all know, life got in the way for a couple of months. I never got around to installing the brass keel strip- one of the brass screws snapped in half when I was doing my dry fitting, and it took a while to find reverse-thread drill bits so I could extract it. Another layer of epoxy and newly drilled holes, and this is what I ended up with: We'll see how long that shine lasts. It's the same stock I used for the mast collar, and it still looks good so far. I'm lucky that I get to store the boat indoors. Although it's nesting it still takes up a fair amount of floor space in an over-crowded garage. Here's my solution: It's pretty easy hoisting it up and down. I wouldn't mind better quality blocks with bearings, but it will do for now. I'm using a cam cleat from my J/24 on the wall to help hold the line while raising and lowering it, though I still have a proper horn cleat for added security. I picked up another little project for the Spindrift. While I have a nice little Nissan 3.5 outboard I saw this on Craigslist and I couldn't resist. It's a little 1.3hp Neptune outboard built in Muncie, Indiana in 1939. There's not a single bit of plastic on it- almost all metal. Copper pipes, bronze downtubes, it's heavy duty. I love that the float in the carburetor is a cork. This is the 'before' photo. It's significantly improved since then, but I'll wait until I get a few more replacement parts in before I post the 'after' photo.


-
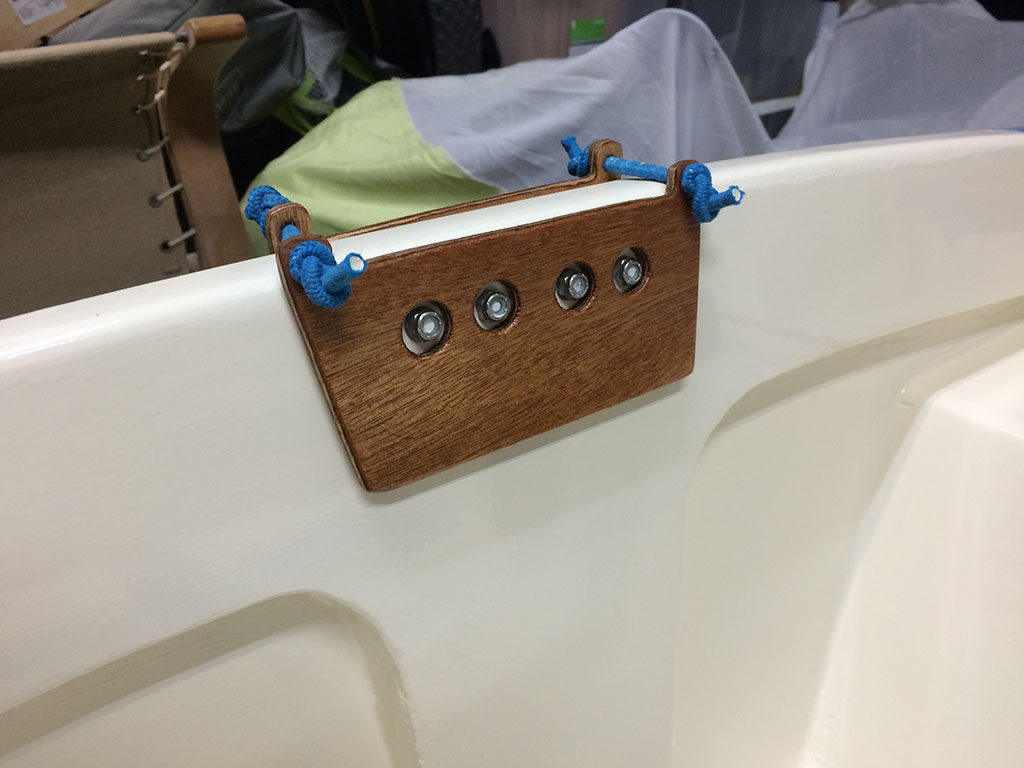
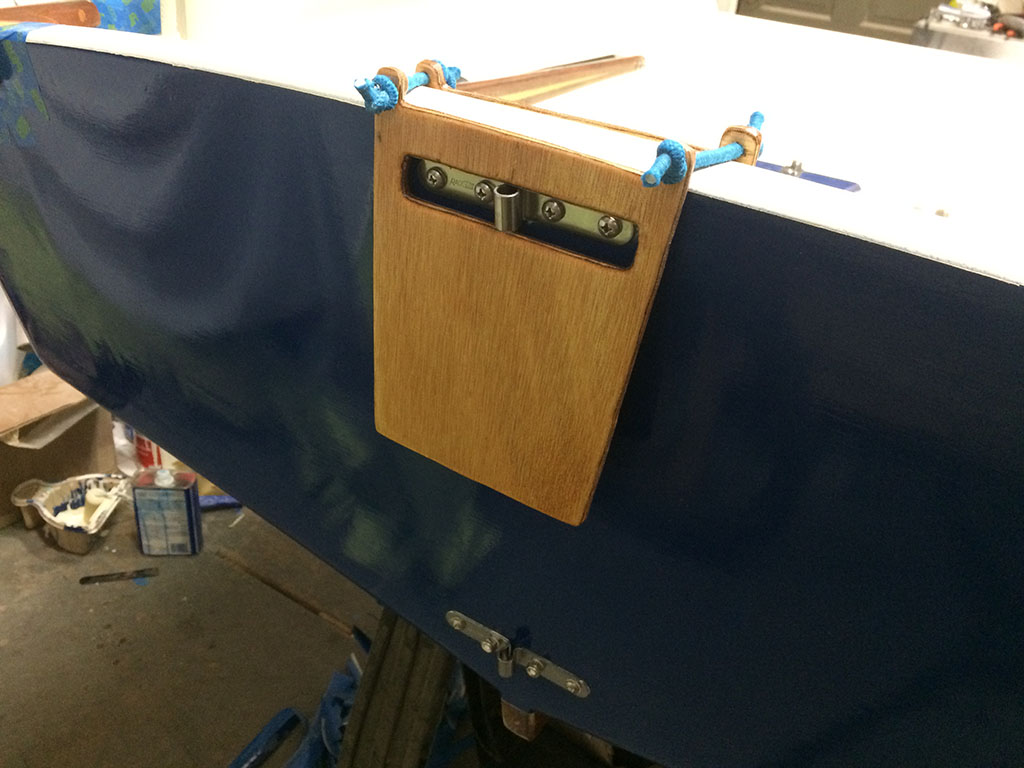
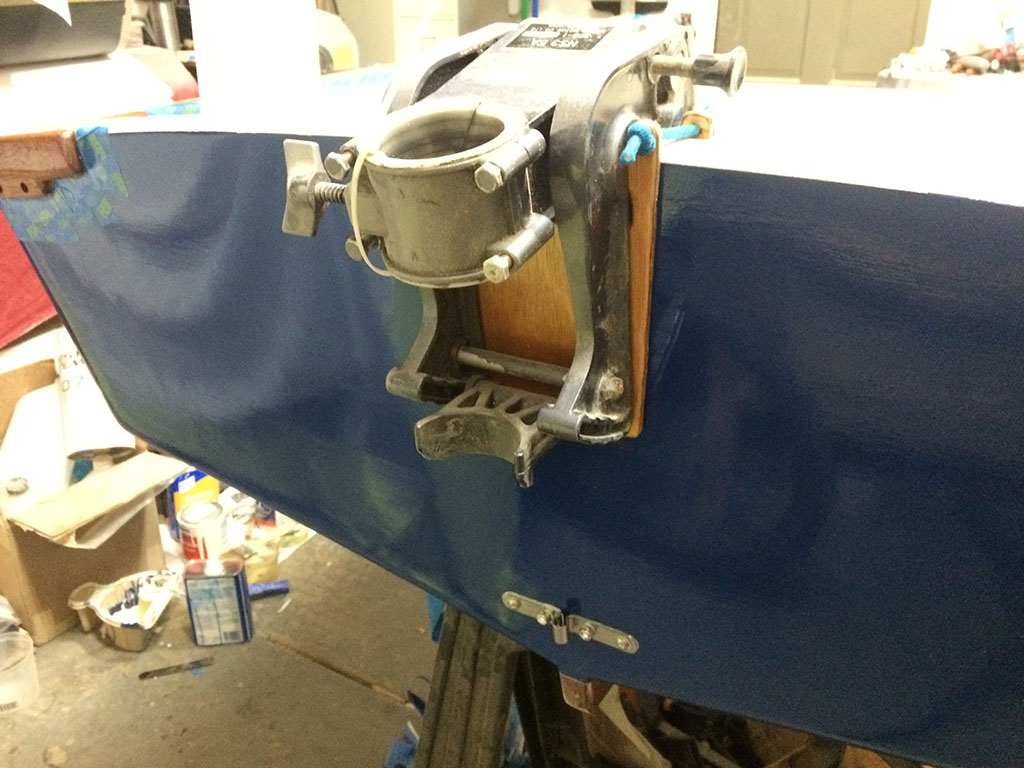
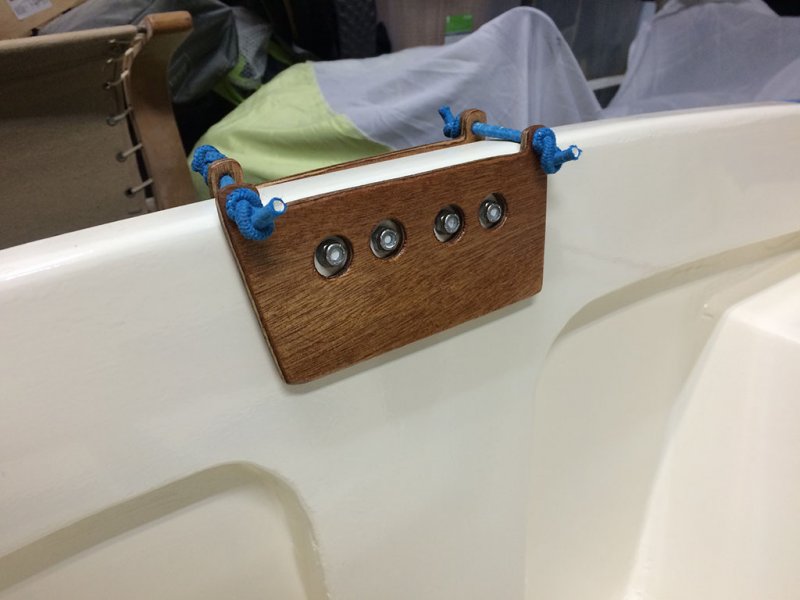
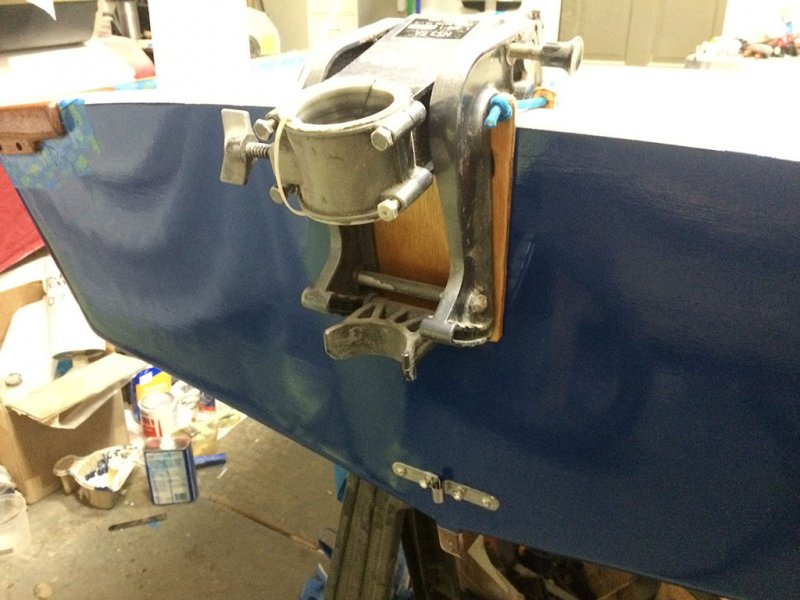
I also ran my Spindrift 10N with the same Nissan/Tohatsu 3.5 two stroke this weekend for the first time. I think she motors beautifully and while I'd like a motor with a little more power, that would increase the weight. I guess we won't be waterskiing behind the Spindrift! We did use it as a snorkeling platform in Catalina, however. It's easy to drop over the side and then pull yourself back in. While I had the same issue of the water coming in the daggerboard case, I was prepared for this and my friend had a PFD he held over it while we were motoring. I'll build a plug for it soon. I agree with the others that the rudder and daggerboard are not desirable for motoring. On my transom I doubled up in my lateral stiffener. The plans call for 3/4 pieces that act as the transom stiffener, and then a smaller piece of plywood that is on the centerline. I made that plywood piece the full size as the rest of the stiffener. You can see that in the photos below. As for the motor not working on the centerline due to interference with the rudder gudgeons have a look at the little plates I made that fit over the stern (and are sized perfectly for the Tohatsu as well)

-
I have to adjust the mast step a little bit as the laser mast wants to get loose while going downwind. It popped out yesterday on the maiden voyage, in fact. That sheared a couple of brass bolts on my brass mast collar, but I have already made a fix and I'll be installing it this afternoon. I just made a riser out of 3/4 mahogany so it won't come out. I actually made my the step removable so I could adjust as needed, unlike the plans which show it epoxied in place. The Laser rig is actually very similar to the Spindrift plans already, so little needed to be done to accommodate. I did mount my mainsheet block right behind the daggerboard as you can see in one of the photos, it's a good spot for it. That meant I had to move the center rowing seat aft a few inches, but I don't think that will make much of a difference. My tasks today are to repair the mast collar, upgrade the mast step, and test my new oars. I also plan on running her with the 3.5hp Tohatsu motor.