Pete McCrary
-
Posts
692 -
Joined
-
Last visited
-
Days Won
40
Content Type
Profiles
Forums
Events
Everything posted by Pete McCrary
-
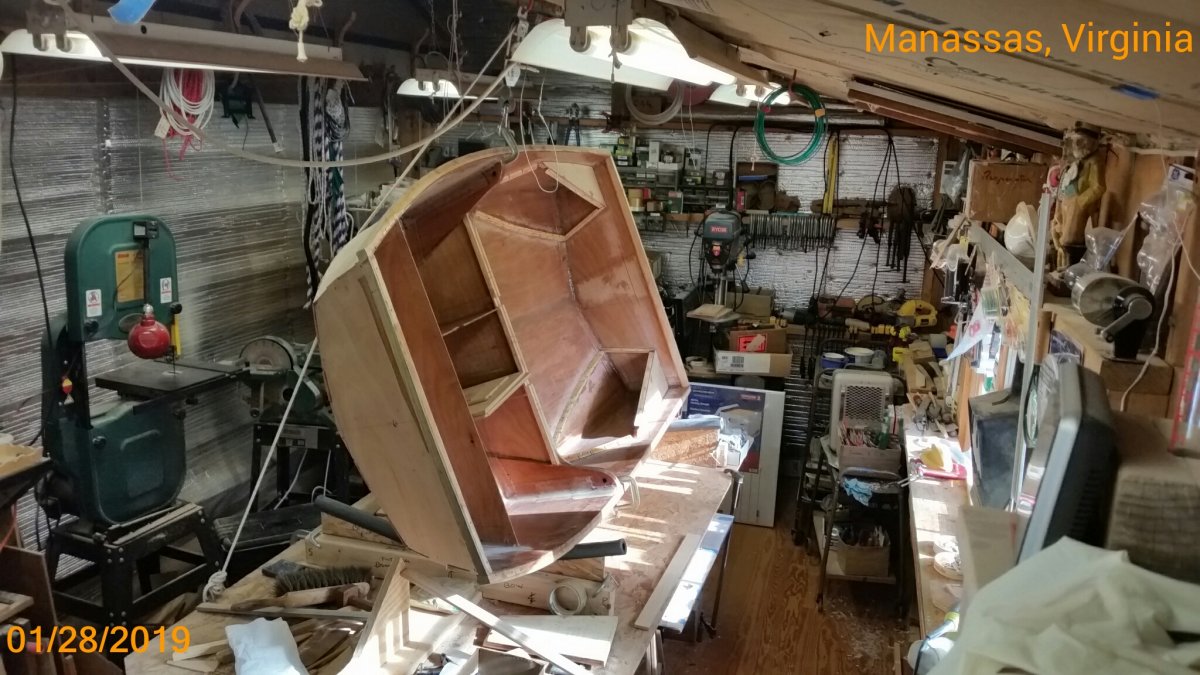
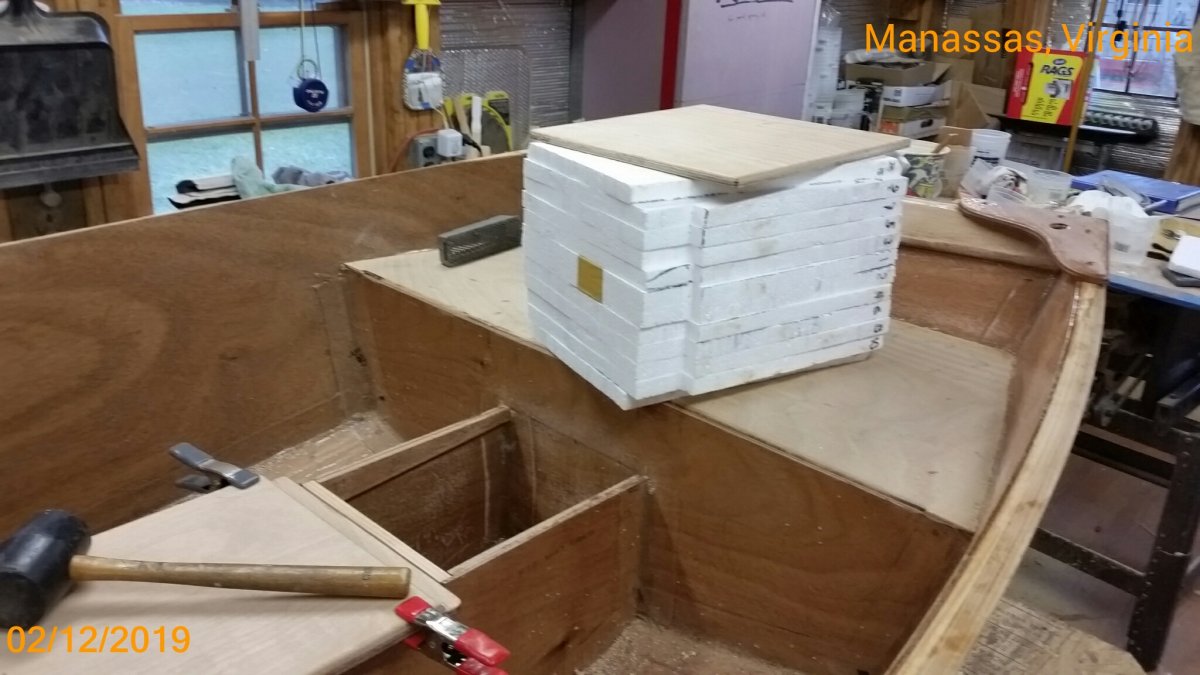
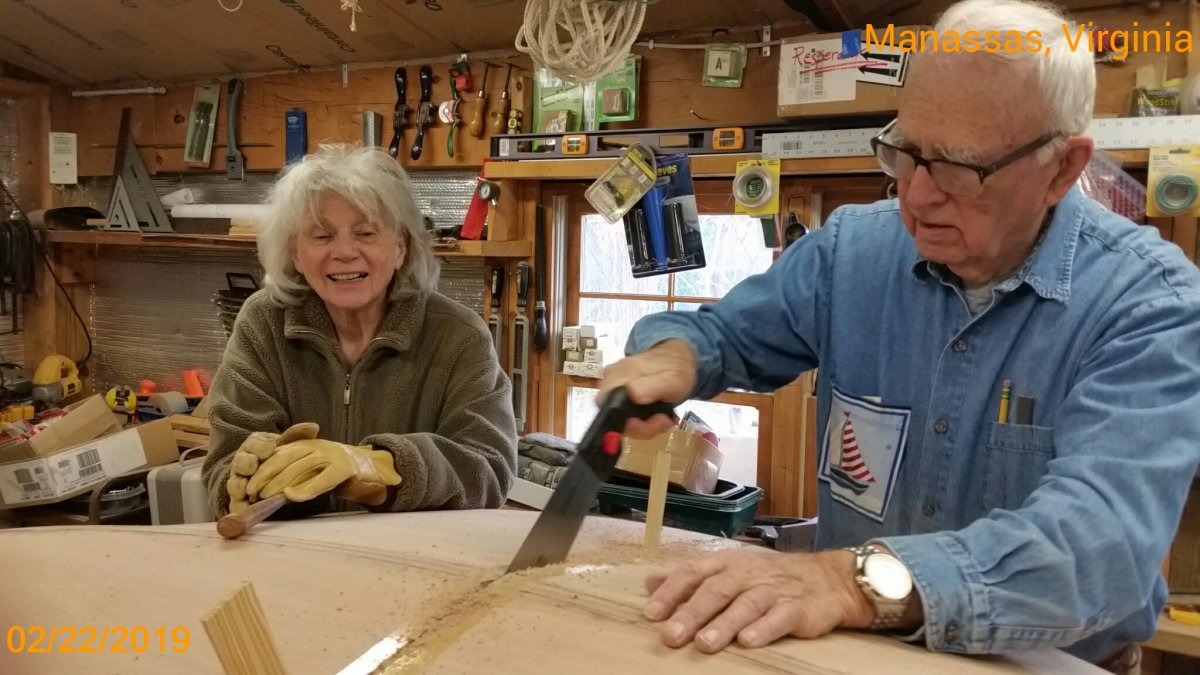
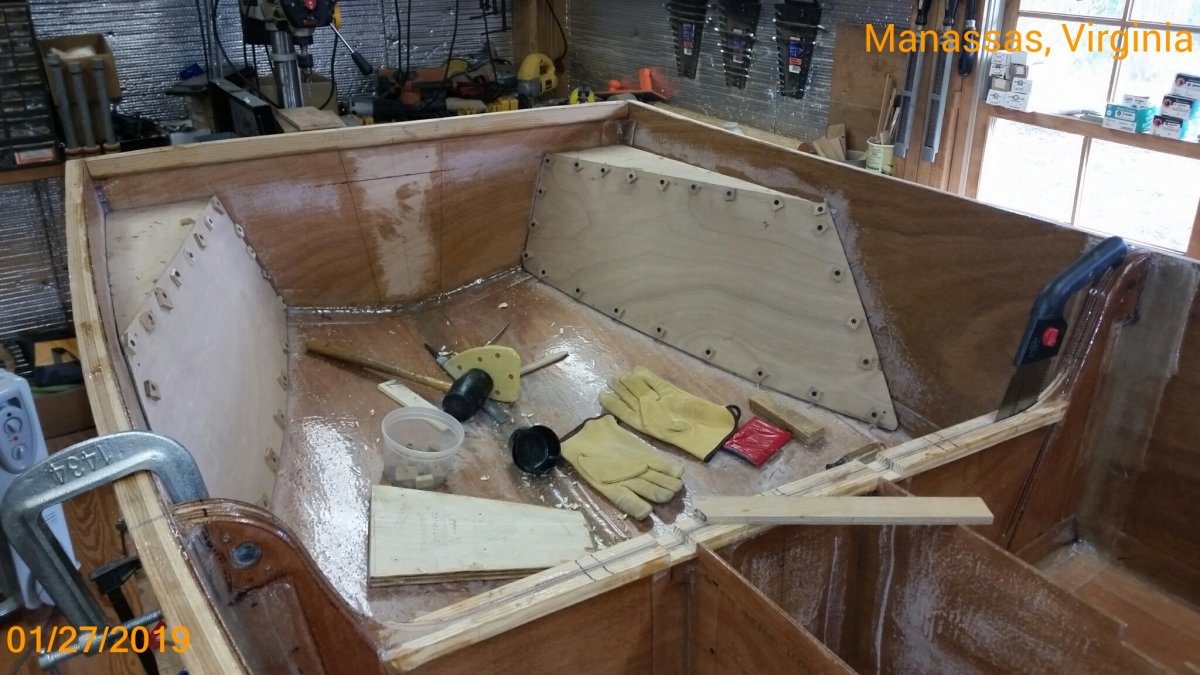
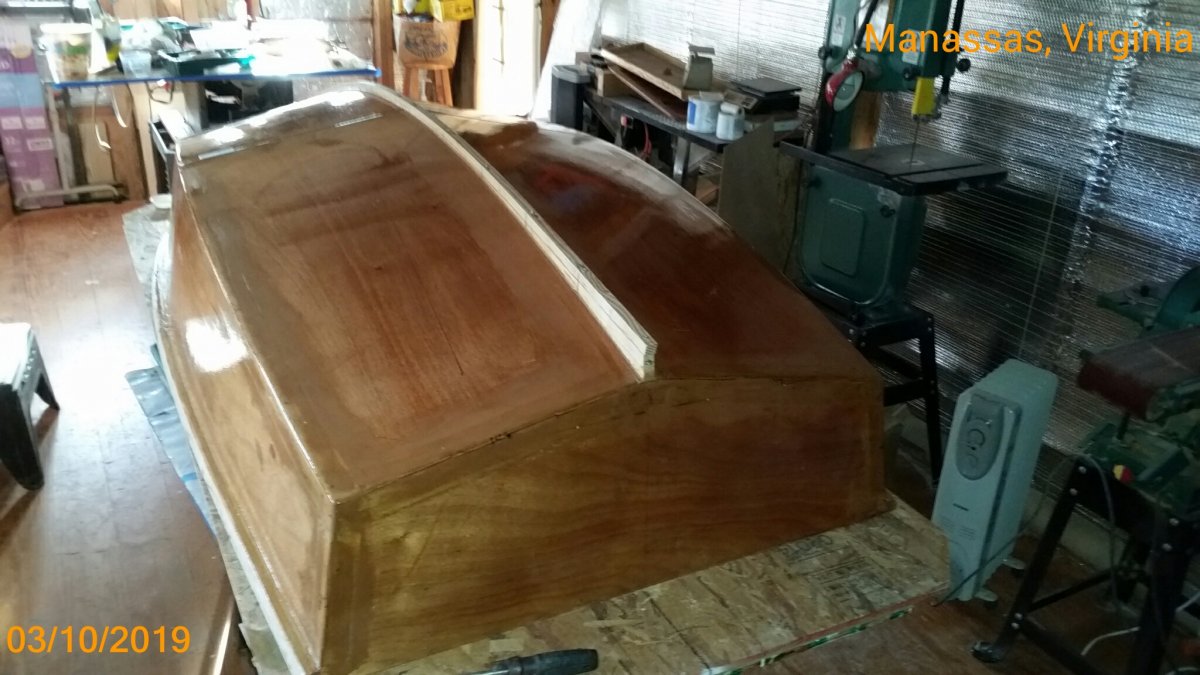
Here are the rest of the photos. I tilted her so I wouldn't have to fight gravity while gluing on the tank sides. Cleats ready for the tank sides. A place to stow stuff in the tank and still be useful for flotation. The aft seat will be held in place with a bungee cord. The styrofoam will go into the open space under the mid-ship seat. It's hard to get at anyway. The space under the removable seat is still available for stowage. Annie, ready to help with cutting Catnip in half. Note the hold-down bungee at aft end of the keel. Turned her over. Annie is so pleased -- she signals "no hands" now. This is the last cut. The nesting Blks were spaced with small pieces of 1/16" cardboard. I used a Japanese "pull saw" with a thin blade. But they are so sharp I had to be especially careful to keep it from "drifting" and cutting into the Blks. But the glue used to place the cardboard pieces was harder (than the Blk wood) and there was a little "drifting" of the blade. That was later corrected with fairing compound. IMG_1838.mp4 The video shows Annie and I "nesting" the two halfs. Press the "arrow" to view the 30 second video. I don't know why there is no "postage-stamp" image.


-
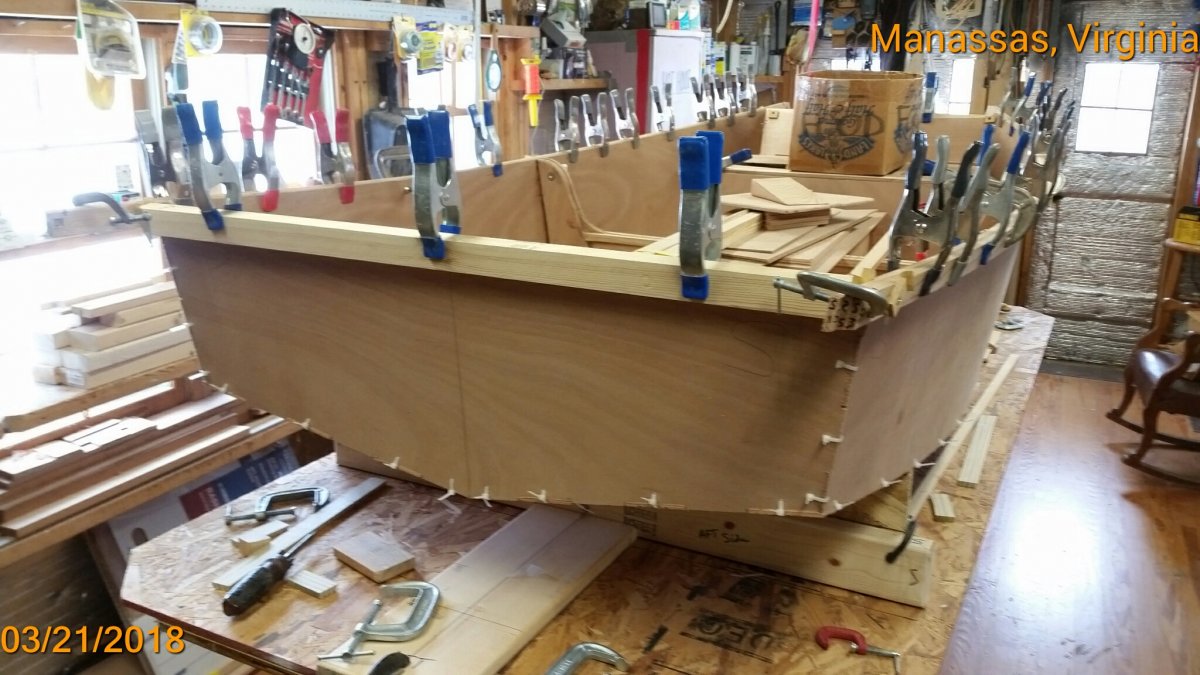
The Two Paw 7 was started back in early 2018 and was interrupted by that year's sailing season. Her name "Catnip" was suggested by Steve Warfle as the intended tender to my CS20.3 -- named "Chessie" after the C & O RR's sleeping kitten -- which previously was named after our beloved Chesapeake Bay. Here are a few of the "build" photoes that were accidentally deleted. The nesting bulkheads. Cradle and build setup. Going 3-D -- the first step. 3-D complete. Getting ready for the bottom. The all-important gunwales. Port & Stbd glued at-the-same-time to preserve semmetry. The end pieces are temporary to provide purchase for the extended gunwales. The kit provided pressure treated 1/4" strips to be x3-laminated for each side. But they became (over time) severely warped -- so I found some cedar clear of enough knots to rip 6 eight foot pieces. Hopefully, the cedar will hold up over time. Ready for trimming. Flotation tanks and aft seat supports. More in the next posting.


-
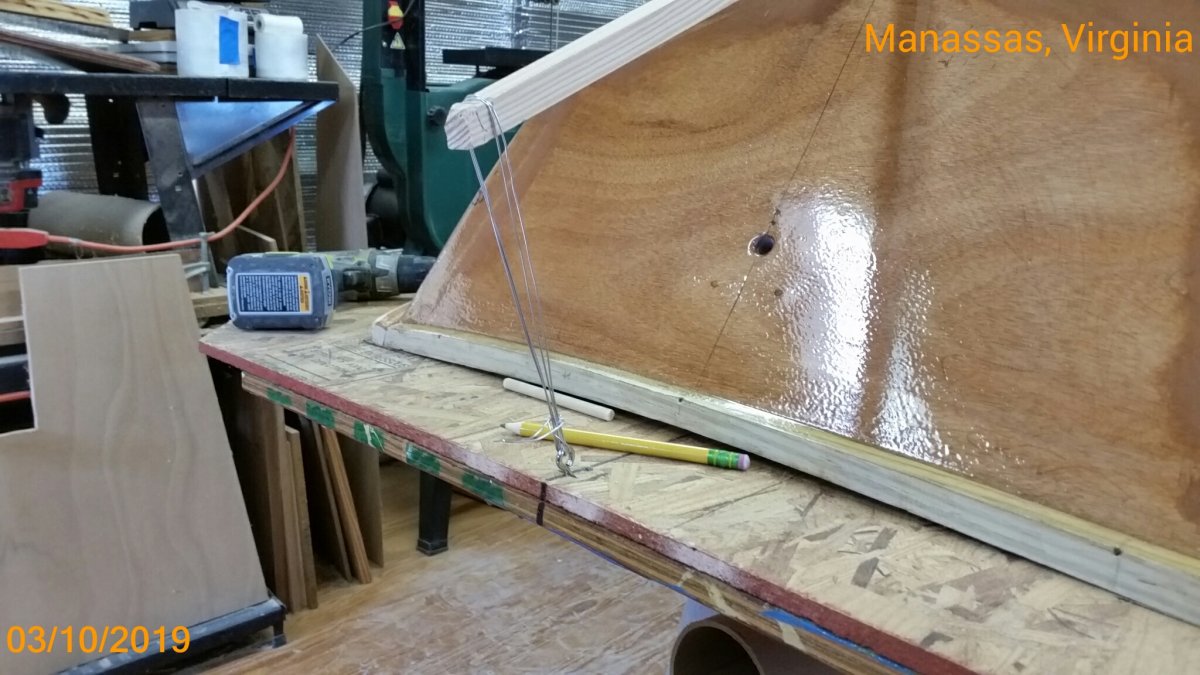
Hey guys! I just accidentally deleted the previously existing build. Later I'll replace the most interesting photos. But here is an "update" to the most recent progress. Nearing completion and the end of epoxy work -- the keel was installed yesterday and the 2nd coat of neat epoxy applied. Note that the hulls have been "faired," and she's now ready for primer and paint. Fairing completed, ready to join for keel. Aft end dry-fitted with screws -- the extended fwd end held in tension with wire loop slipped over its end. At this point screw pilot holes were drilled and the screws installed firmly indexing the keel's location. Next remove keel, separate the two parts, and prep all faying surfaces for gluing. After gluing: Next the keel will be cut and the ends trimmed.


-
Chessie, my CS20.3, has two Bailers like Amos'. Works fine for me. And you can really notice the difference filled vs empty. Mine empties to almost dry when I'm sailing solo. But with three adults aboard it takes a lot longer. On one occasion I forgot to empty prior to recovery. Very hard to crank her onto the trailer -- later, to "relieve" herself (when I opened the bailers), she just did it on the ramp parking lot. No sandbox. I think the tank volume is about 5 cu-feet, or a little over 300 lbs down very low. That could cause some damage to trailer and/or boat hitting a big bump at highway speeds.
-
It sure looks very nice, Steve. Looking forward to sailing along side Jazz Hands this coming season.
-

Core Sound 20 Mk 3 -- #4 "Chessie" . .
Pete McCrary replied to Pete McCrary's topic in B & B Yachts Forum
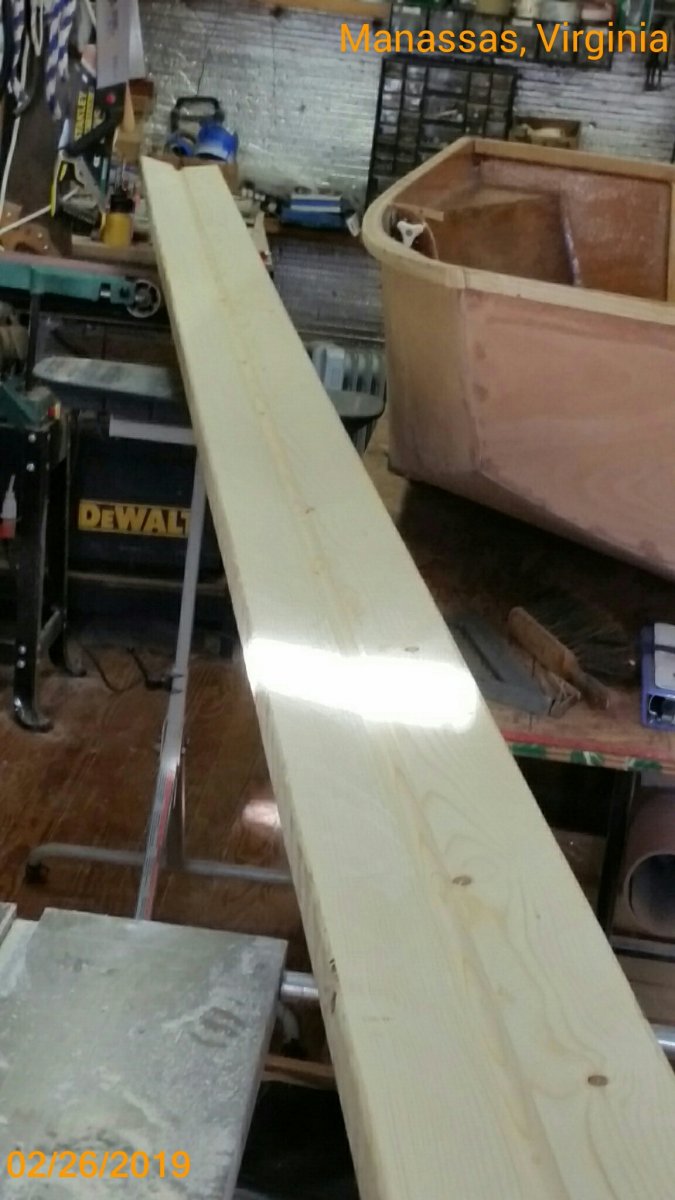
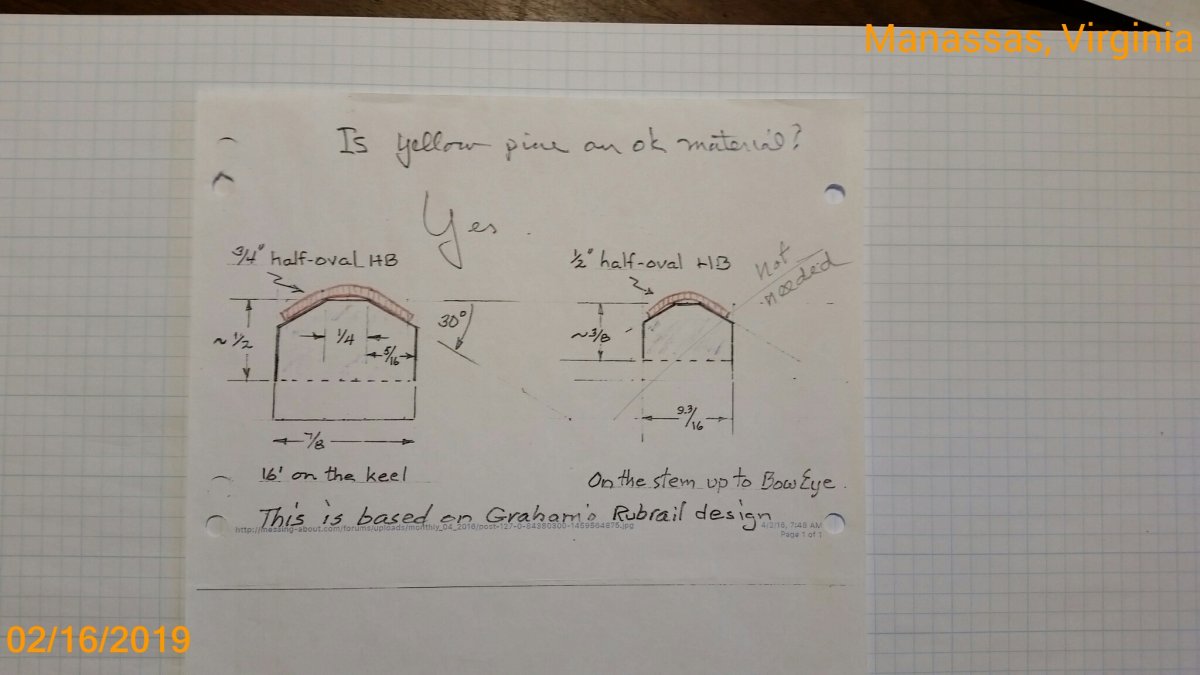
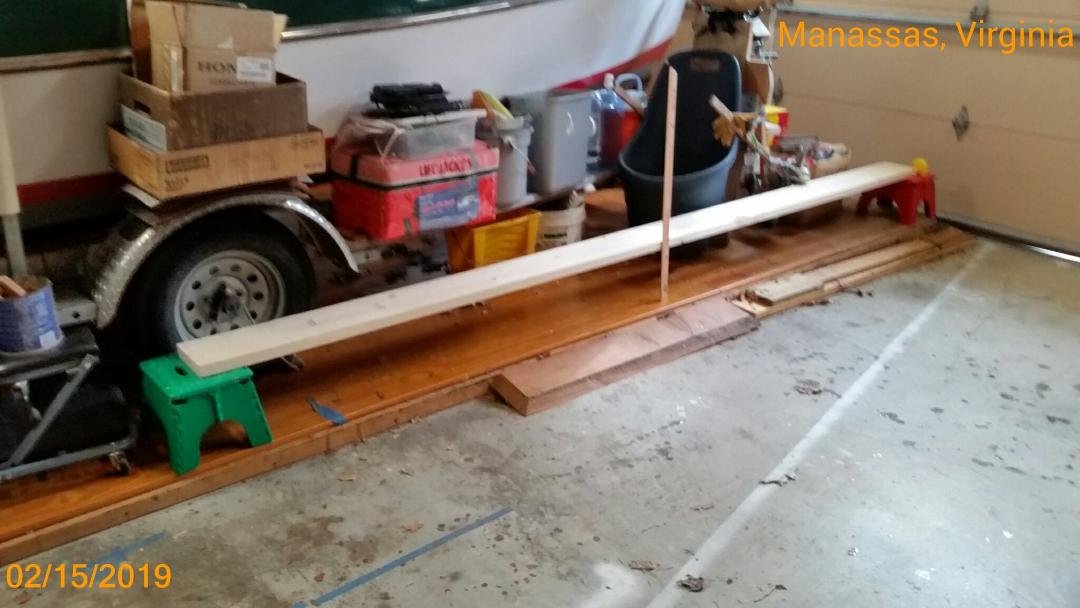
On February 16 I posted some ideas on how possibly to ease loading stress on hard keel-line rubber rollers used to transport, launch, and recover our trailer-sailor boats. Having good experience with "keel-troughs" for two boats (a CLC PocketShip and a Com-Pac Eclipse), I decided to replace the 3 rollers on "(Chessie's trailer) with a wooden trough milled out of a sixteen foot 2x8. Today Annie and I rigged up my 50 yr-old Craftsman 10" table saw, a step ladder, and an adjustable support -- and then sprayed dry silicon lub on all sliding surfaces [saw table, ripping guide, step ladder, and remote support]. Five cuts later we had the trough roughed out. And we both still had all 10 fingers. Here's what it looks like: This shows almost the entire 16 feet. It will be mounted on the trailer with blocking on three cross members -- with the fore & aft supports just 11' apart. The excess overhang will be trimmed to avoid dragging at the dip at the end of my driveway. A better view of the centerline one-third-circle trough. That sharp edge will be softened to reduce loading stress. Also the surface will be sanded smooth. This more clearly shows the trough X-section. I feel fairly confident that the shallow "V" will keep the keel well centered. To guard against the wood splitting, I will coat the bottom with two (partially overlapping) layers of 4" epoxied FG tape. I'm open to suggestions as to treatment of the top surface to make it slippery. But not too much. I'm saving the rollers just-in-case ?? I'll post the results.


-
I have a different approach to these rigging problems. Bear in mind that I originally used a set up similar to Graham's, but Chessie's mizzen mast was (and is) stepped by hand. This required transport crutches forward (for mizzen) and aft (for mizzen & main). The sprits were supported on crutches (like Graham's) over the masts. And I stowed the sails in separate (light-weight & not waterproof) sail bags with the battens installed. For transport, the sail bags were stowed in the cabin. Attaching the sails to the sprits with all the leech reefing lines properly rigged was a hassle. Basically, the rigging [of the reefing lines] had to be done on deck and not until the sails were bent to the masts and sprits. My attempt to ease this problem was to keep the reefing lines and sails on their sprits (properly rigged) -- and then stow ALL [sail, installed battens, rigged reefing lines, and sprit] in a SunBrella canvas zippered bag. The two bags won't fit into the cabin, so I transport them securely lashed to the port-side seat of the cockpit. The mainsail's sprit (in the bag's extension beyond the luff) overhangs the transom by about 18". When bending each sail, I just lay the sail bag on the port-side "walking board" with its zipper up, lift it all (out of its bag) to the cabin roof (sail ties & all), then attach the snotter, topping lift & sheet to the sprit -- and (while standing on the "walking board") attach the halyard and start slipping the sail-slides into their track. The reefing downhauls have been left in place and are now hanked into their cringles. The leech reefing lines have not been moved since the last "takedown," so they just need adjusting. I've only been using this approach since late last season -- so it's not yet smooth out. But so far, I like it. And I've noticed advantages other than not having to mess with the leech reefing lines -- especially reducing the up [into] and down [out of] the cockpit with sprits and sails. Also, when Chessie is stowed on the driveway or in the garage, it is easy to lift each sail bag from the cockpit seat and move them onto their wall-rack in the garage. After Chessie is out of her garage I'll post some photos.
-
Core Sound 20 Mk 3 -- #4 "Chessie" . .
Pete McCrary replied to Pete McCrary's topic in B & B Yachts Forum
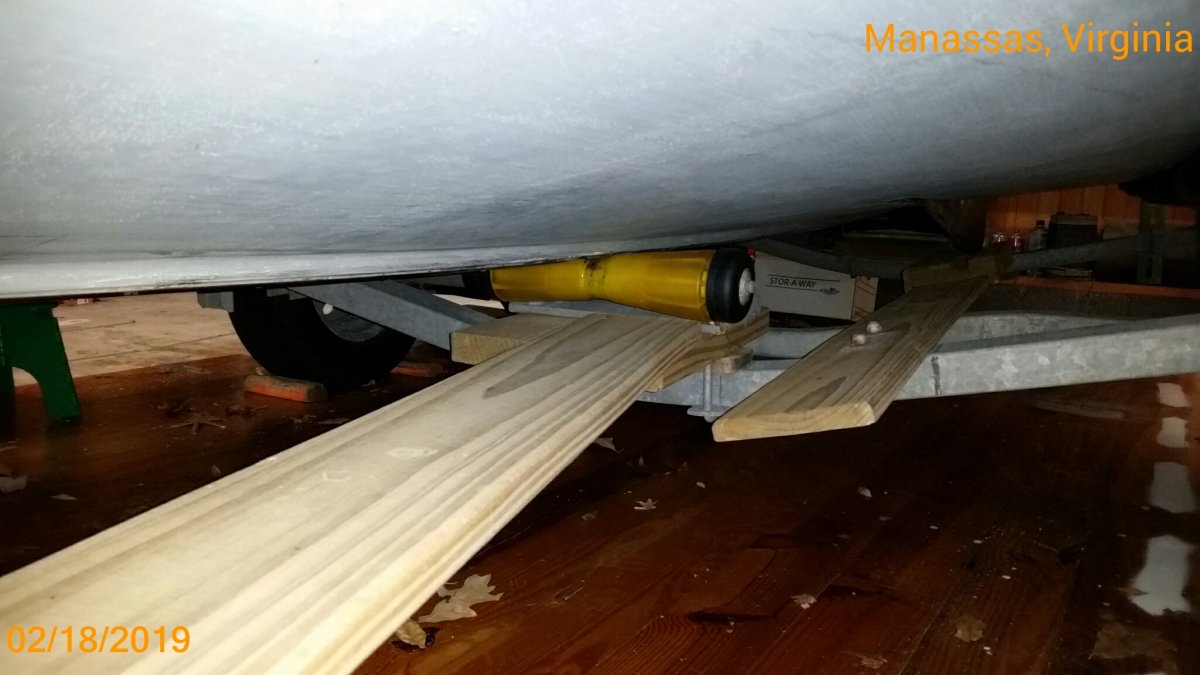
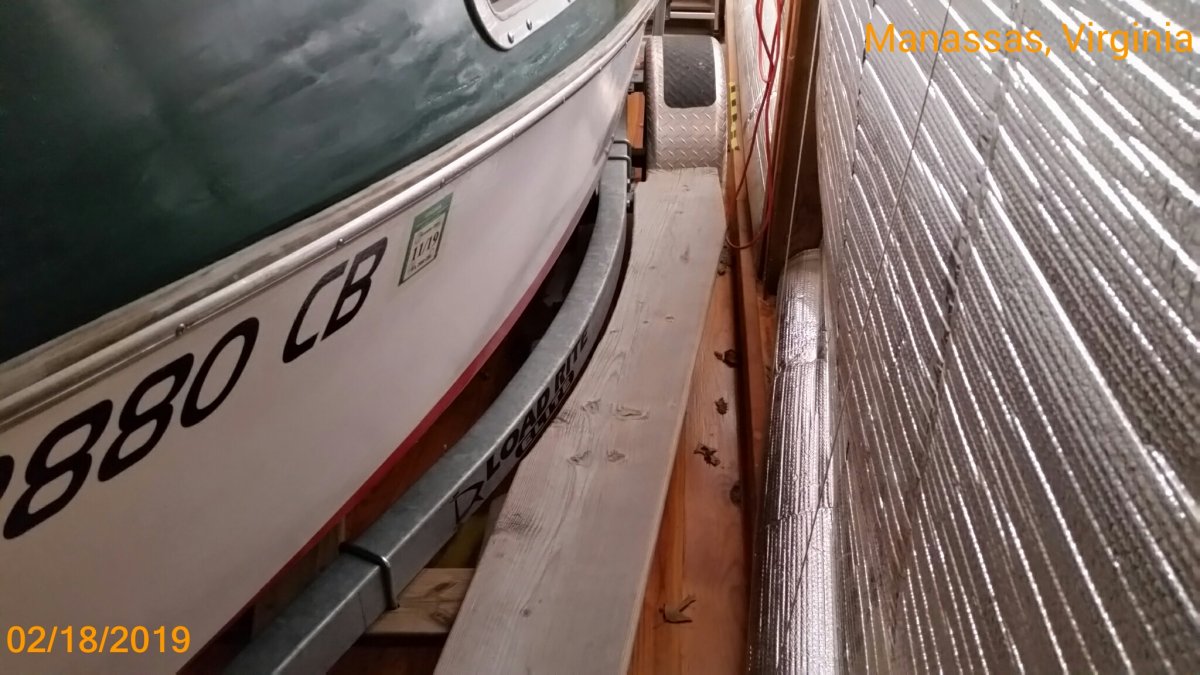
Jay asked about my "Walking Planks." Chessie is on her trailer in the garage -- so these were about the best pixs that I could get. The main planks are 2x12 (1.5" x 11.125"). They add some weight to the trailer, mainly on the tongue. But I find them very useful. The one on the starboard side is shorter so that the hinged tongue can fold all the way back against the side of the hull. You can see from the next photo that the planks don't add any width beyond the fenders. The planks are high enough so that (while standing on the plank I can reach high enough on the mast to slip the mains'l slides into the sail track. I can also reach to the bottom of the anchor well. Also, the forward ends provide a nice place to lay out either sail onto its open "sail bag," sit to change wet socks, or just a place to rest out-of-the sun (unless at high noon pointing south). Looking aft, this shows the walking plank that runs diagonally from the port-side of forward roller cross-beam back to the midship roller. When recovering and the boat's bow is near the center roller, I use this plank to walk back with the winch hook and secure it to the bow-eye. The plank you see to-port is the CB catcher. When trailering, I ease off the CB pennant so that the CB just touches the plank. I'm thinking that by doing that I've extended the useful life of the pennant. If the CB is "bounced" up by a highway jolt, it be stopped with a rubber cushion placed at the top inside the CB housing. This shows the forward end of that diagonal plank where it is secured to the cross-timber supporting the forward roller. The lumber is from Home Depot -- but not PT. And not their Douglas Fir (which is their best quality). Their clerks are usually helpful in helping me find nice straight pieces. Hope this helps you visualize the details of the "walking boards>"


-
Core Sound 20 Mk 3 -- #4 "Chessie" . .
Pete McCrary replied to Pete McCrary's topic in B & B Yachts Forum
As soon as I finish Catnip I'll rip that 2x8 so it will have the trough x-section that I want. I'll also put a 60 degree slope on the aft end and (over the last 8" or so) deepen the [trough] sides so as to guide the keel's 3/4" half-oval into the groove (1/2" radius) at the bottom of the trough. And I'll try launching and recovering Chessie with the trailer backed only down the ramp so that the end of the trough is about 6" under water. That just might keep the trailer wheel bearings out of the water. Better yet, (looking at my diagram [posted on 2/16/2019]), I think I'll return the 12 foot 2x8 for a 16 footer -- and make it as long as it can be (and still clear the dip at the end of my driveway). Maybe I'll even be able to meet Graham's goal of keeping the trailer wheels dry! I'm considering covering the bottom of the trough with two overlapping (at the centerline -- knitted edges outboard) 10 oz 4" FG tape over the entire length. And treating the rest of the surface with some kind of penetrating oil. Maybe something like Tung Oil -- to resist moisture penetration and add a bit of lubrication. Maybe that'll be enough protection considering that it will be under the boat most of the time and in a garage off-season. And the surface could be easily retreated from time to time. Comments, anyone? -
Core Sound 20 Mk 3 -- #4 "Chessie" . .
Pete McCrary replied to Pete McCrary's topic in B & B Yachts Forum
Wow! That's beautiful. If Chessie's 2x8 trough has too much friction, I just might have go the multiple-roller route. The last photo looks like you have the roller heights matching a keel profile -- is that right? Wouldn't you need to be careful to always have a safety chain or winch hook on the bow eye right up to the point of launch? The trough on "Tattoo's" trailer had a backward slope of 2 or 3 degrees -- which when added to ramp slope -- made her very easy to slide right off. I was careful to keep the winch hook on until we were in deep enough water. The extra slope also made cranking her back up harder -- but I managed it OK. For Chessie, recovery should be easier because the winch crank has two speeds. -
Core Sound 20 Mk 3 -- #4 "Chessie" . .
Pete McCrary replied to Pete McCrary's topic in B & B Yachts Forum
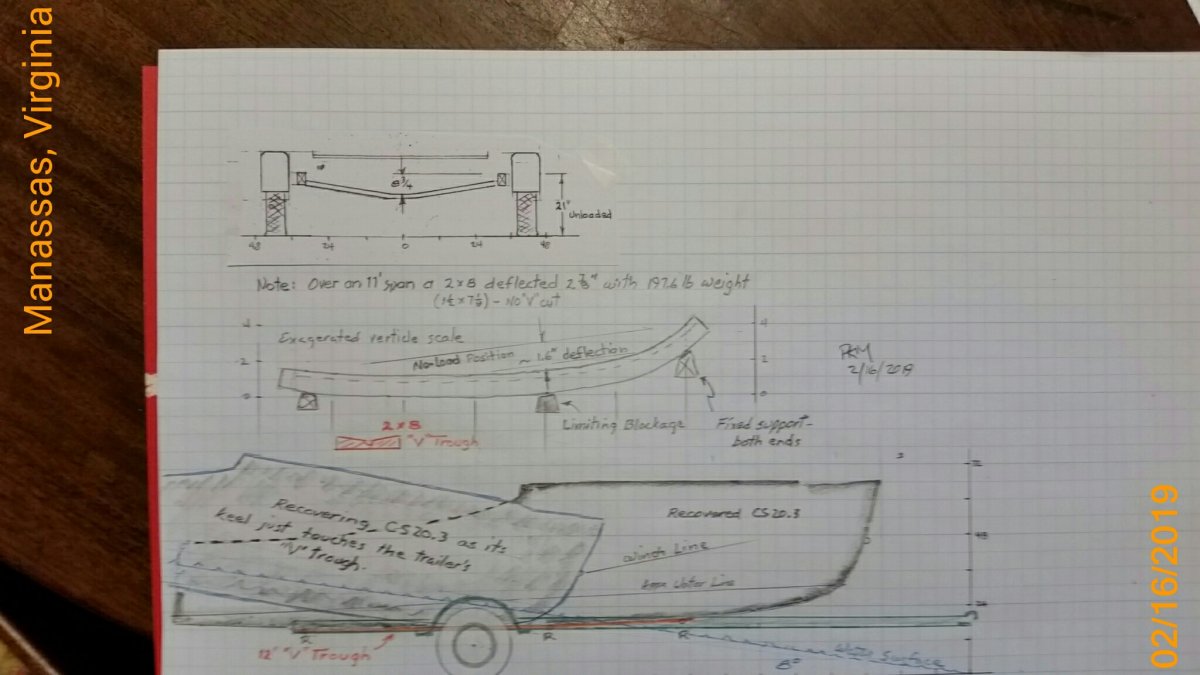
I keep thinking of jobs for "Chessie," even though she's still in the garage. Spring fever, I guess. Alan and I have exchanged a few emails and ideas about problem-rollers on our trailers and the damage they suffer from the loads they support. Less than 3sq" of hard rubber (on three rollers) supports as much as 1,500 lbs of weight. And much heavier loading when the trailer hits highway bumps! Alan is considering a loading trough instead of rollers for his CS20.3. That reminded that the trailer for Tattoo (my CLC PocketShip) used a trough -- and it worked like a charm. Here are several pixs: Notice how high she sits on the trailer. Tattoo had a straight keel/CB and I worried about the load shifting on the trough -- thus the 2x3 cheeks. When recovering, Because the trough had to be so high (on the trailer), Tattoo's straight-stem wouldn't easily go over the end of the trough -- so I had this roller to ease the stem over the edge. The trough was lubricated and that made launching very easy. I kept the hook on to keep her from sliding off before the trailer was in deep enough water -- then unhooked her. With a little backward motion and taping of the breaks -- she just slid right off. So I've decided to replace the rollers with a trough made from a 12' x 2 x 8. It's not PT. The Home Depot clerk warned me that if PT it would warp as it dries out. I stood on the middle (11 ft span). That 197.6 lbs displaced the center down by 2.875". Here's the design sketch of the trough x-section. I don't plan any cheek strakes. I think the keel will be held firmly in the center half-round (1/2" radius) cut -- which is a good fit for Chessie's 7/8" keel protector covered with a SS 3/4" half oval. My plan is to mount the trough on blocking that will replace the existing rollers. I'll firmly attach the ends on blocking at the heights of the replaced rollers. And I'll install blocking under the trough at the position of the third roller such as to LIMIT the downward deflection to just 2". Alan provided me a profile of the keel that I used (on an exaggerated verticle scale) to determine how much the deflection should be UNDER a line pulled between the fore and aft ends of the trough. Here's a sketch of how I did that. We think that when loaded, the CS20.3 will easily displace the trough to closely conform it to its own keel -- distributing the load over the entire length of the trough. Perhaps not evenly -- but certainly without any high concentrations of load. I think the boat will have a much gentler highway ride. And launching, and especially recovery, will be easier. Here's a sketch of the geometry of a typical recovery. This shows a ramp of 8 degrees of slope. The trailer has been backed to the point where the water just comes to the hitch ball. And the boat has been manouvered into position where its keel (just aft of the stem) is touching the trough. Then the skipper can step from dry ramp surface onto the trailer's running boards -- walk down a "walking" plank with the winch hook and secure it on the bow-eye -- and return to the winch to crank her up the trough. The angle of the winch cable and the still-floating stern ease the force required. Or, so I say. We'll see. Notice that we souldn't need a roller at any point. Also note that the trough need not be lubricated except on about its fward two-thirds. I haven't started the project beyond this phase -- critical comments and suggestions are welcom. PS -- I'll cut that half-round groove with a 50-some year-old Craftsman molding bit on a 50-year-old Cradtsman table saw. That all folks.


-
The changes Alan and Taylor (and B & B's design) have incorporated into their #15 CS20.3 are really great improvements -- design and fabrication. Especially the tank assembly, icebox, battery stowage & step, motor well, and cabin roof beams & the assembly of the cabin roof structure. And the mizzen tabernacle! For my Chessie stepping the mizzen is a challenge -- but so far manageable. But at 85 I'm not sure how many more years I'll be able to do it solo. Ditto for raising/lowering the mainmast. The icebox makes the best use of that starboard-side space. Question: Will the lining have an outboard drain so you could use block ice? In the same port-side space I've found that the box drawers work very well -- especially for stowage of galley type things: stove, wash basin, cooking fuel, towels, spare blankets, etc. The drawer is easily removed for access -- but keep it light weight. But the rails have to be installed before the sheer strakes, cockpit deck, & sheer cabin roof panels are installed. Almost impossible [to do] afterwards. I use the space--under for spare-water bladders (doubles as more ballest down low). The surface over the battery box is useful for a galley stove or wash basin. Just forward of the step (over the battery) is the only place (in the cabin) with unlimited head-room. If the hatch (on Chessie) opened just a little more -- it would make standing [at that spot on the cabin sole] a little more comfortable for washing, shaving, etc (using the garage top as a counter top). Also for reefing the mains'l, scanning the horizon, etc. If you spring for a dodger, be sure to have the canvas guy provide for a zippered opening in the panel over the companionway. My guy didn't want to do it -- saying it might not be water-tight. But I insisted, and he has agreed that it was a good idea. Very little leakage -- and what-of-it, if the hatch is easily closed. I really like the motor well. It puts the OBM out of the way and there is still lots of stowage in the other cockpit lockers -- as well as under the mizzen partner for fuel & water bottles. But I'd do it just for a better looking boat. Just hate that ugly look at the stern. I would try to mount the motor (now an IBM?) on a faux transom that can be raised/lowered on a track. On my Whitholz 17' Catboat (built by Cape Cod Shipbuilding) the OBM was mounted on a faux transom outboard of the actual transom. Raising and lowering was done with 1/4" line and x4 tackle. No reaching way overboard to tilt heavy motor out on the water. I really enjoyed the video. On another posting I'll bring up issues that you might want to address with respect to trailering.
-
Greetings fellow mess-a-bouters, A fun evening on Saturday! With Chessie on level ground, retired early planning on a 7am Sunday departure. But nature called at about 4am -- really dark as a "black hole" after the moon had set, but very bright stars. On the road by 5am and home safe by noon (333 miles). Here are some photos of the good times: Steve at Chessie's helm. McCrary at the helm. Friday was very nice sailing. Saturday too, with more wind and some rain. Two old guys and two youngsters. Pre-race maneuvers . . After the start. Thanks so much to Alan and Graham and all at B & B for hosting such fun events each year. By-the-way, the left-over lasagna was delicious! Chessie and I will do our best to be there next year.


-
Core Sound 20 Mk 3 -- #4 "Chessie" . .
Pete McCrary replied to Pete McCrary's topic in B & B Yachts Forum
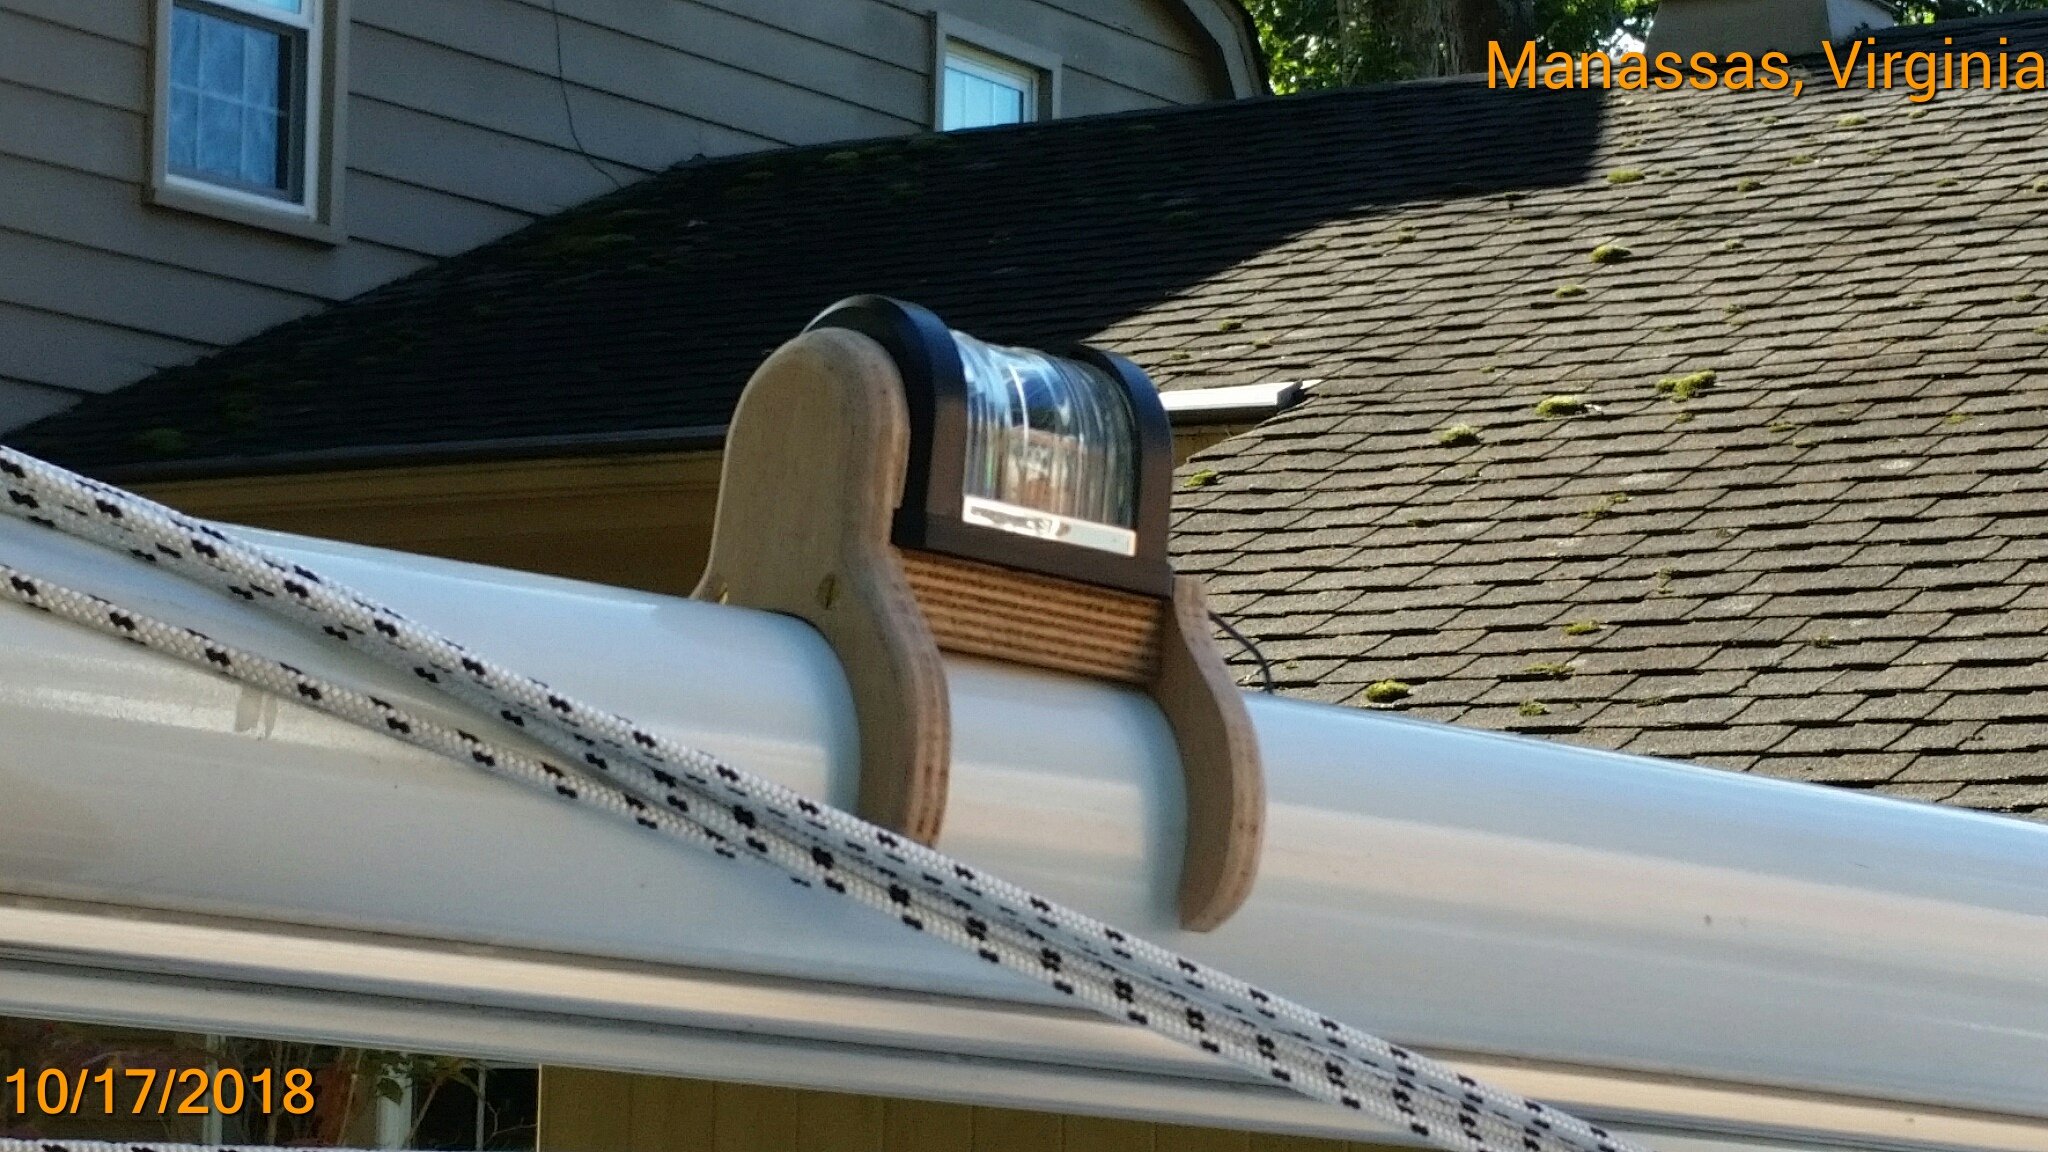
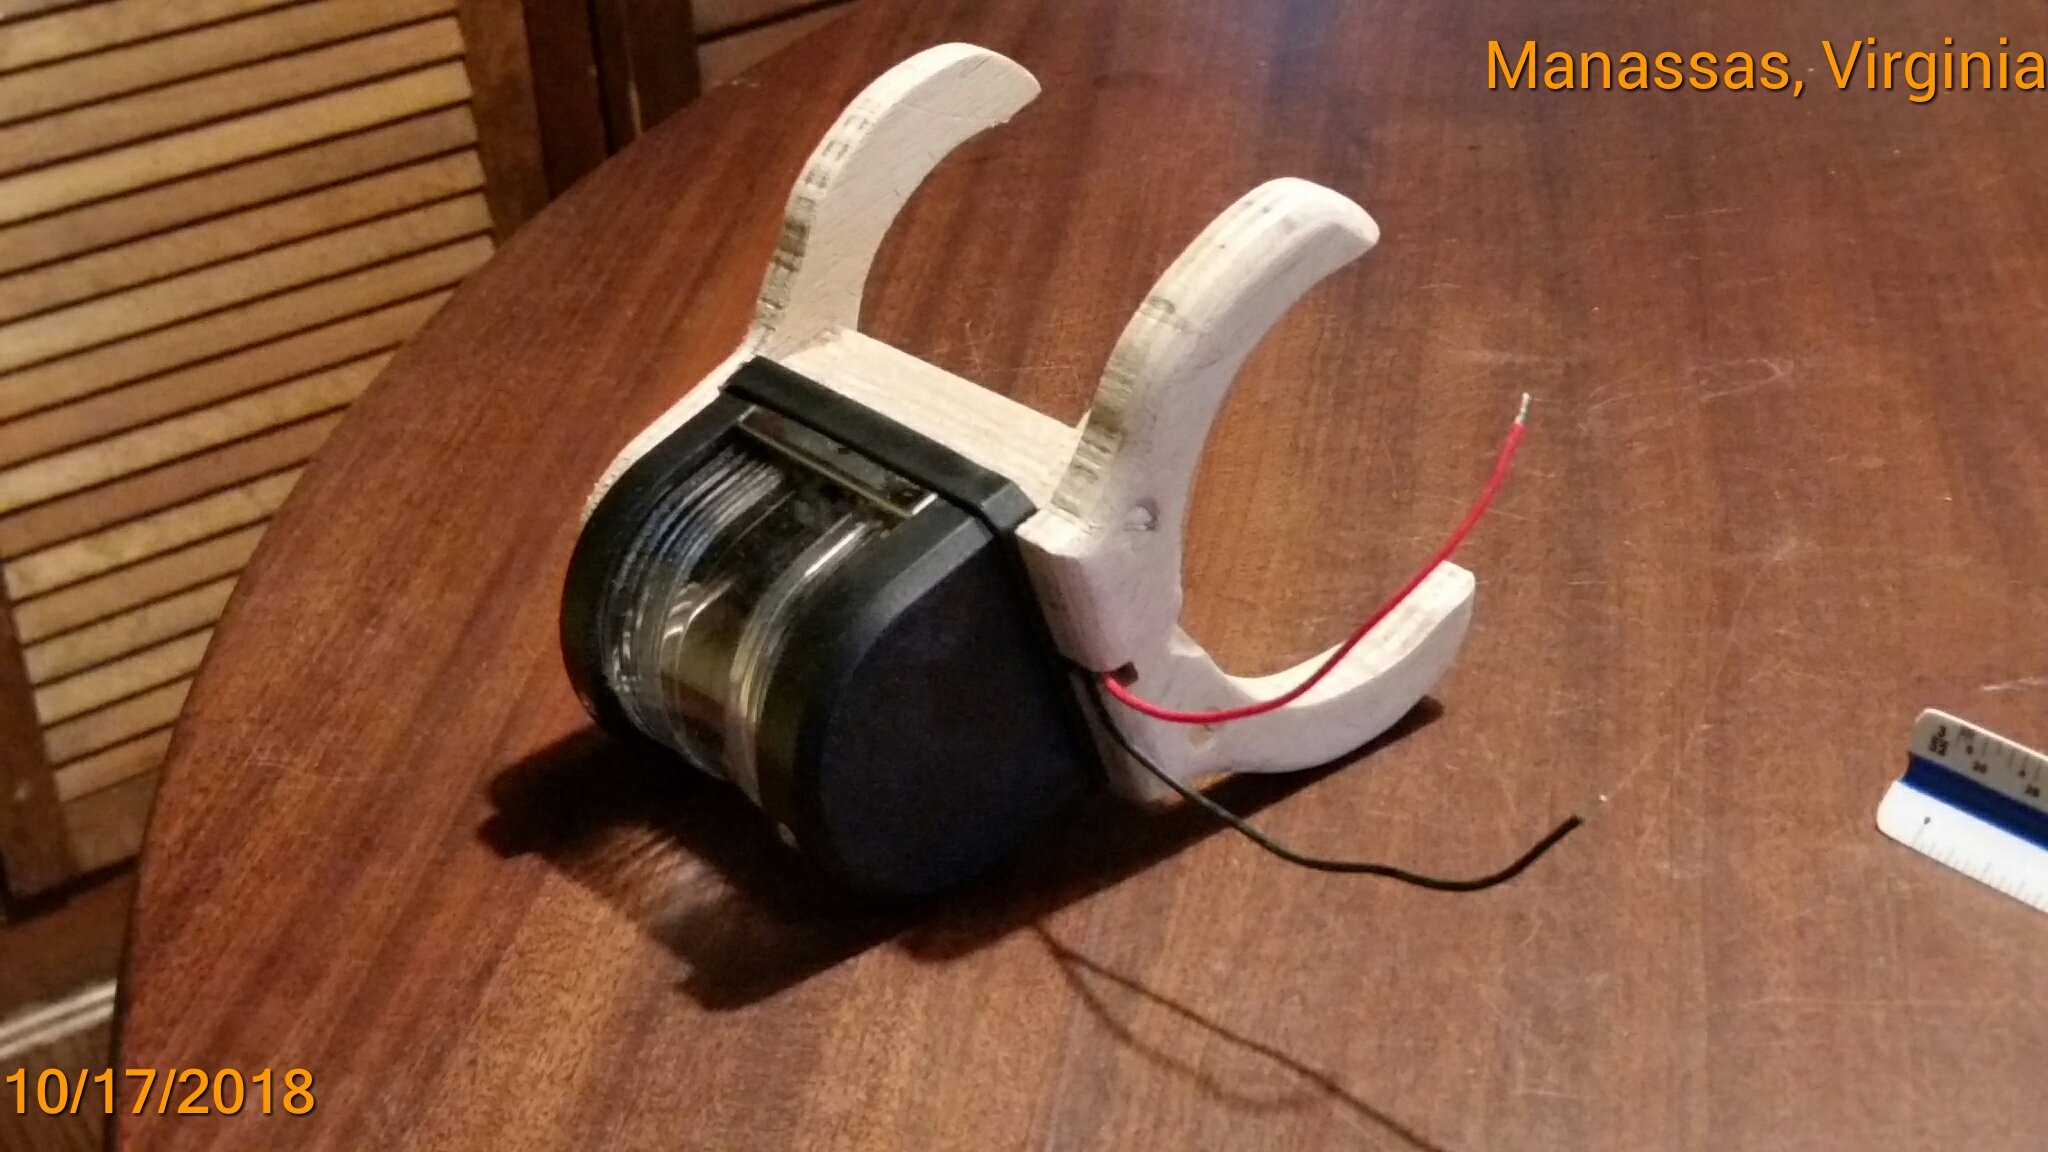
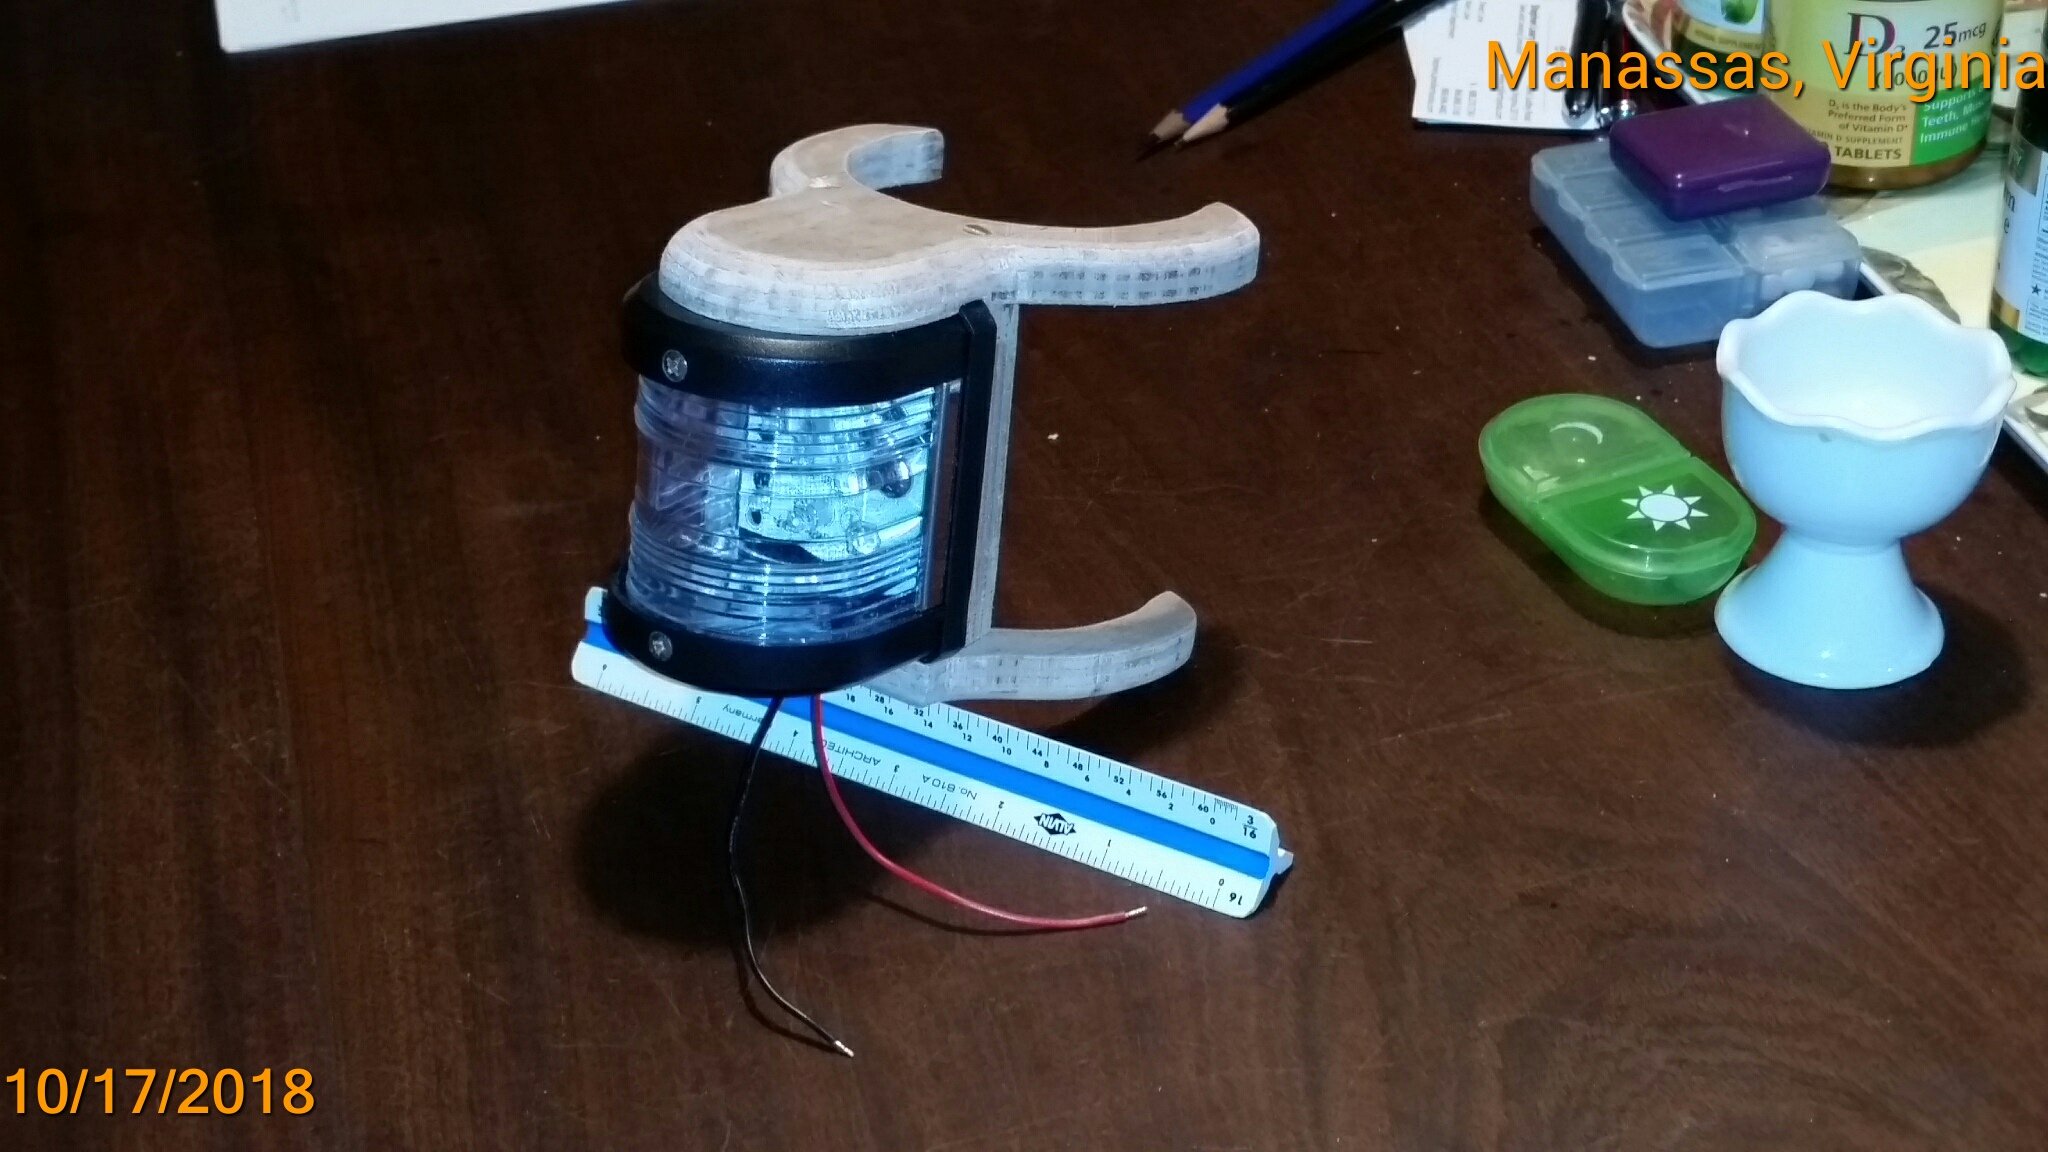
One more essential for Chessie: a Masthead Light. The Coast Guard requires a 135 degree forward facing white light when under way by power at night in addition to the other navigation lights (port-red, starboard-green, aft-white). This is sometimes called a "steaming" light. It's supposed to be mounted (something like) at least one meter above the top deck. Recent rule changes suggested that a 360 degree light (like an anchor light) could be used as a substitute. Chessie has such a light (removable) that is mounted on the starboard side of the cabin roof at Blk 3. It can "telescope" to a height of almost 8' clearing well above the dodger and/or a furreled sail. However, if Chessie motored at night, the 360 degree light would blind the helmsman looking forward. So, I needed a "steaming" light on the mainmast. But the only times I've cruised at night was for an early departure (or late arrival) for a crossing -- and I've only needed to do that twice in 10 years of cruising. So I've designed and fabricated a steaming light that I can keep stowed and mount it on the mainmast only when needed: The "claws" are 6mm marine ply, the separator & mounting bracket is 12mm marine ply. The claws flex just enough to firmly clasp the assembly to the 3" diameter mainmast. This last photo shows the light pushed onto the mast in its transport position. The assembly will be kept [up and facing forward] in position by a 10-32 machine screw tapped into the aluminum mast just below the height where I'll want the light. The power cord will be a flexable "roll-up" cord used for household vacuum cleaners. There's a dedicated 12v power outlet in the anchor well on Blk 1. The whole thing (light assembly with cord and plug) will be stowed in a canvas bag or cardboard box -- probably in the forward locker between Blks 1 & 2.


-
Core Sound 20 Mk 3 -- #4 "Chessie" . .
Pete McCrary replied to Pete McCrary's topic in B & B Yachts Forum
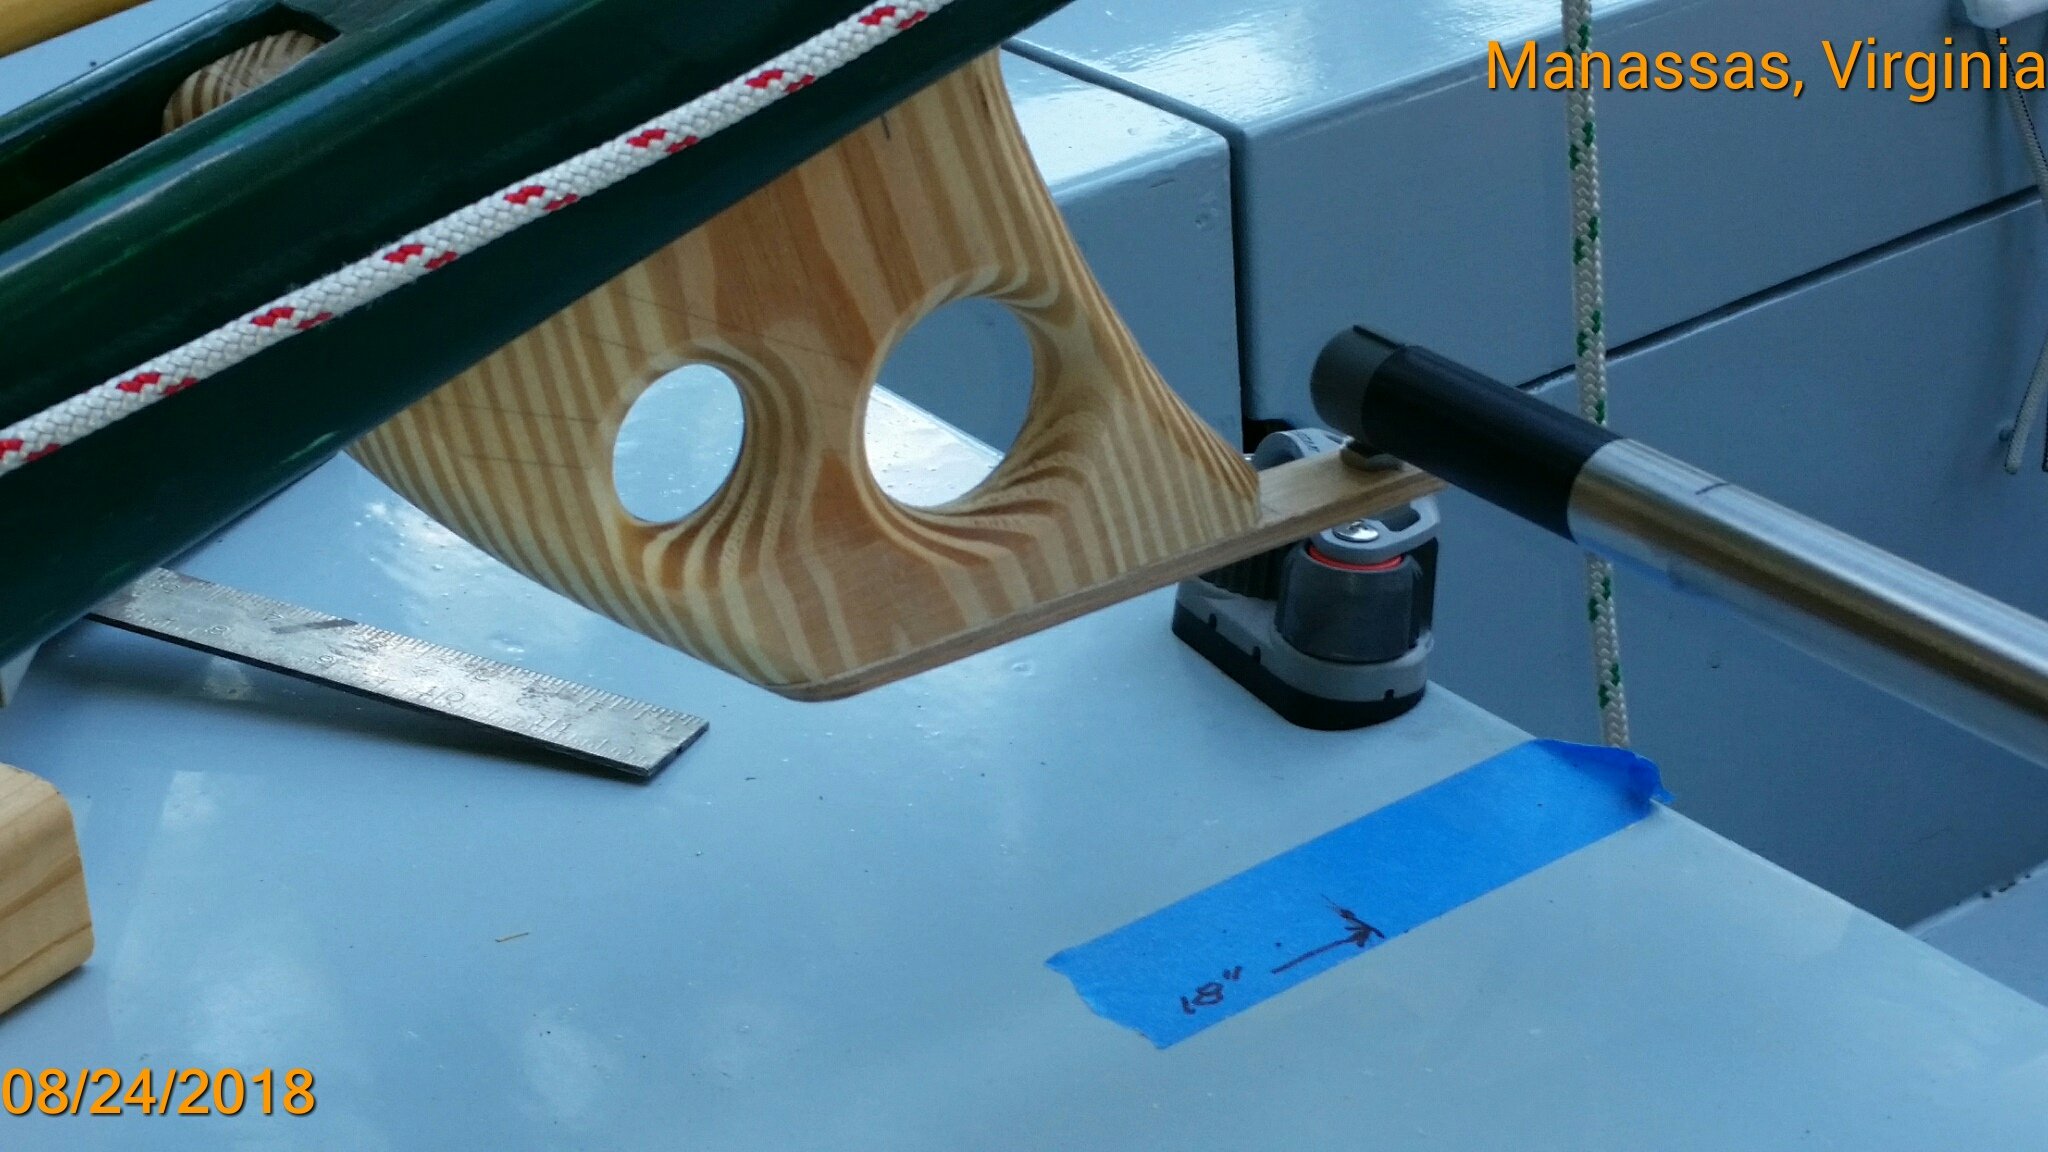
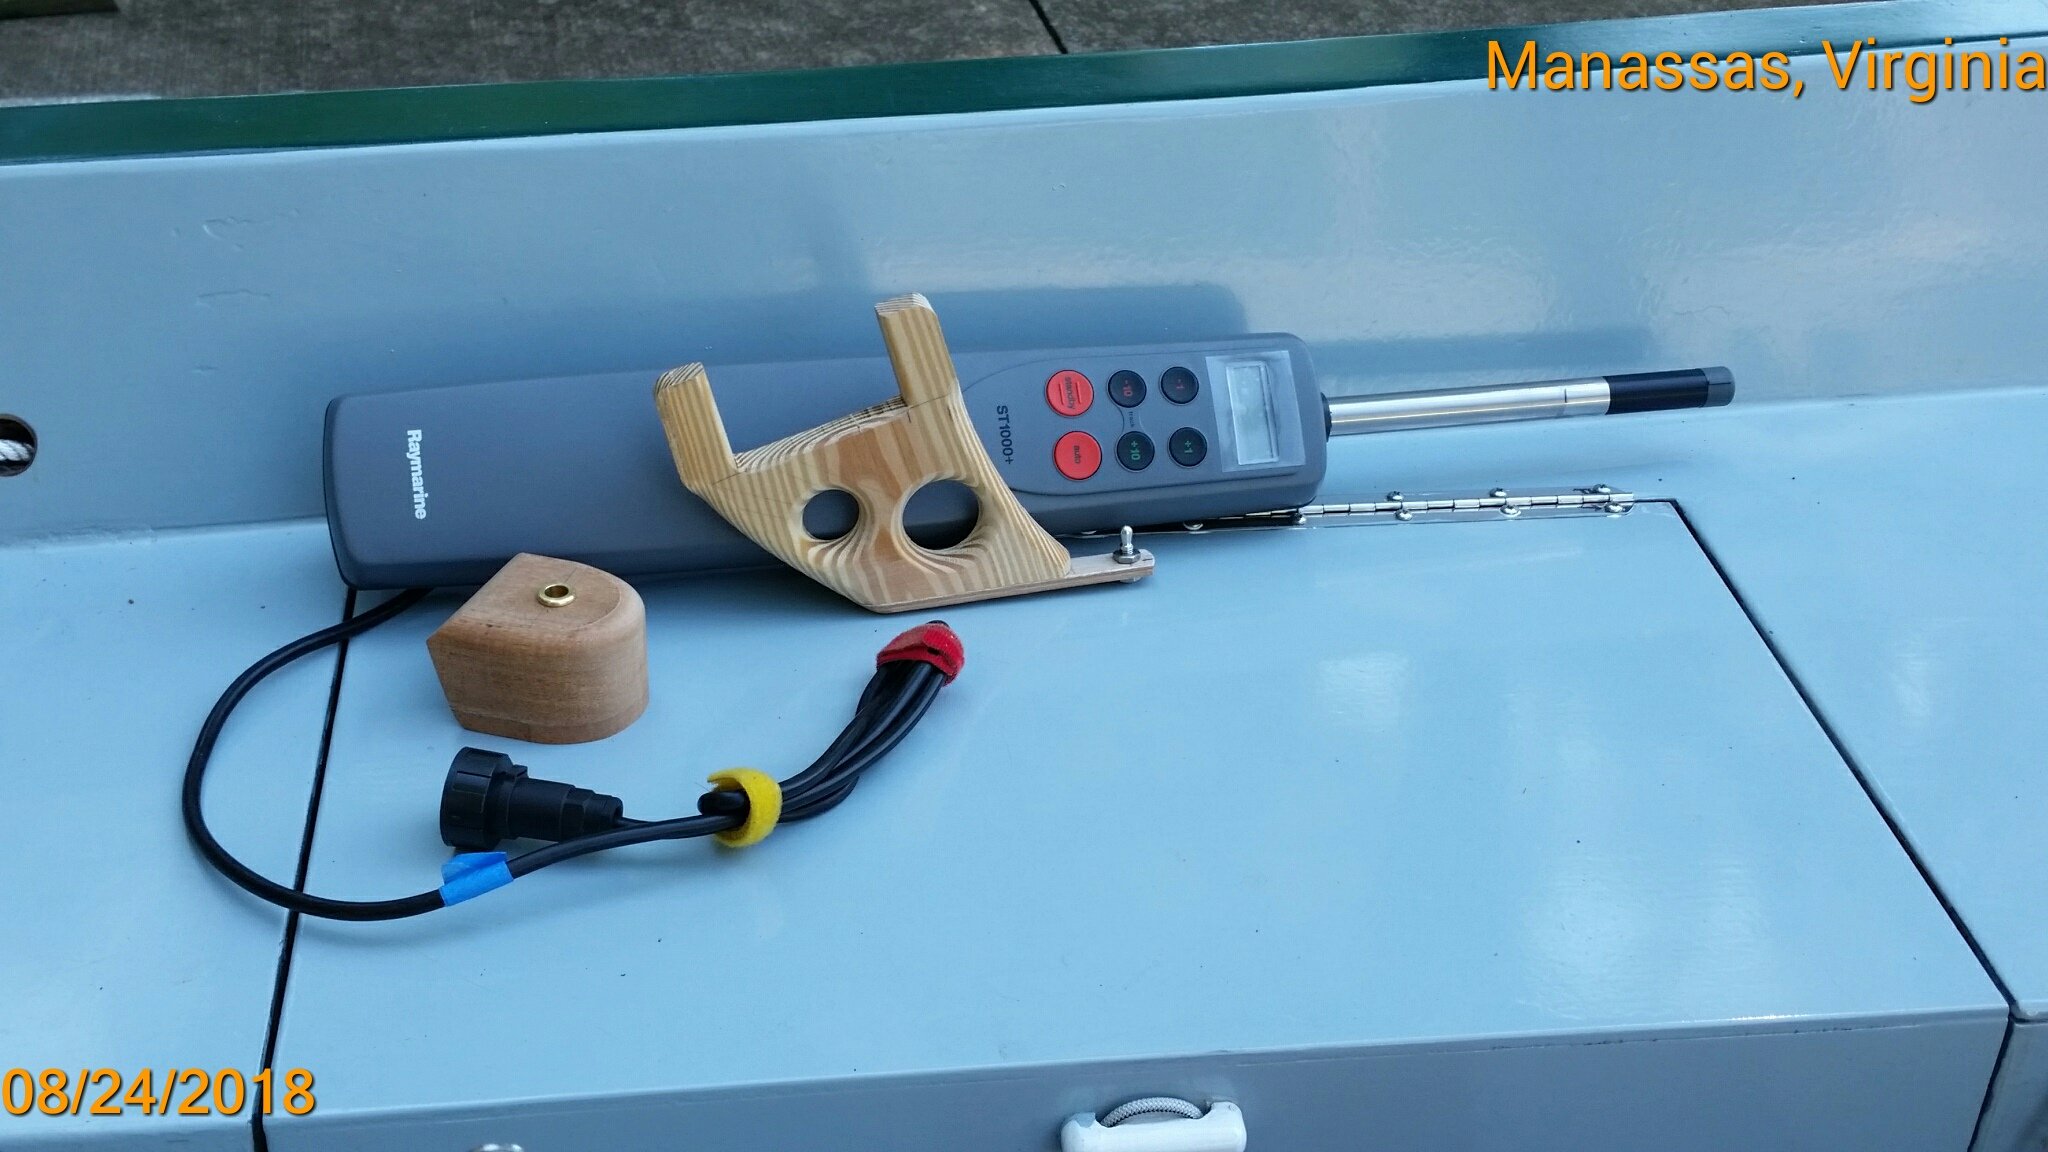
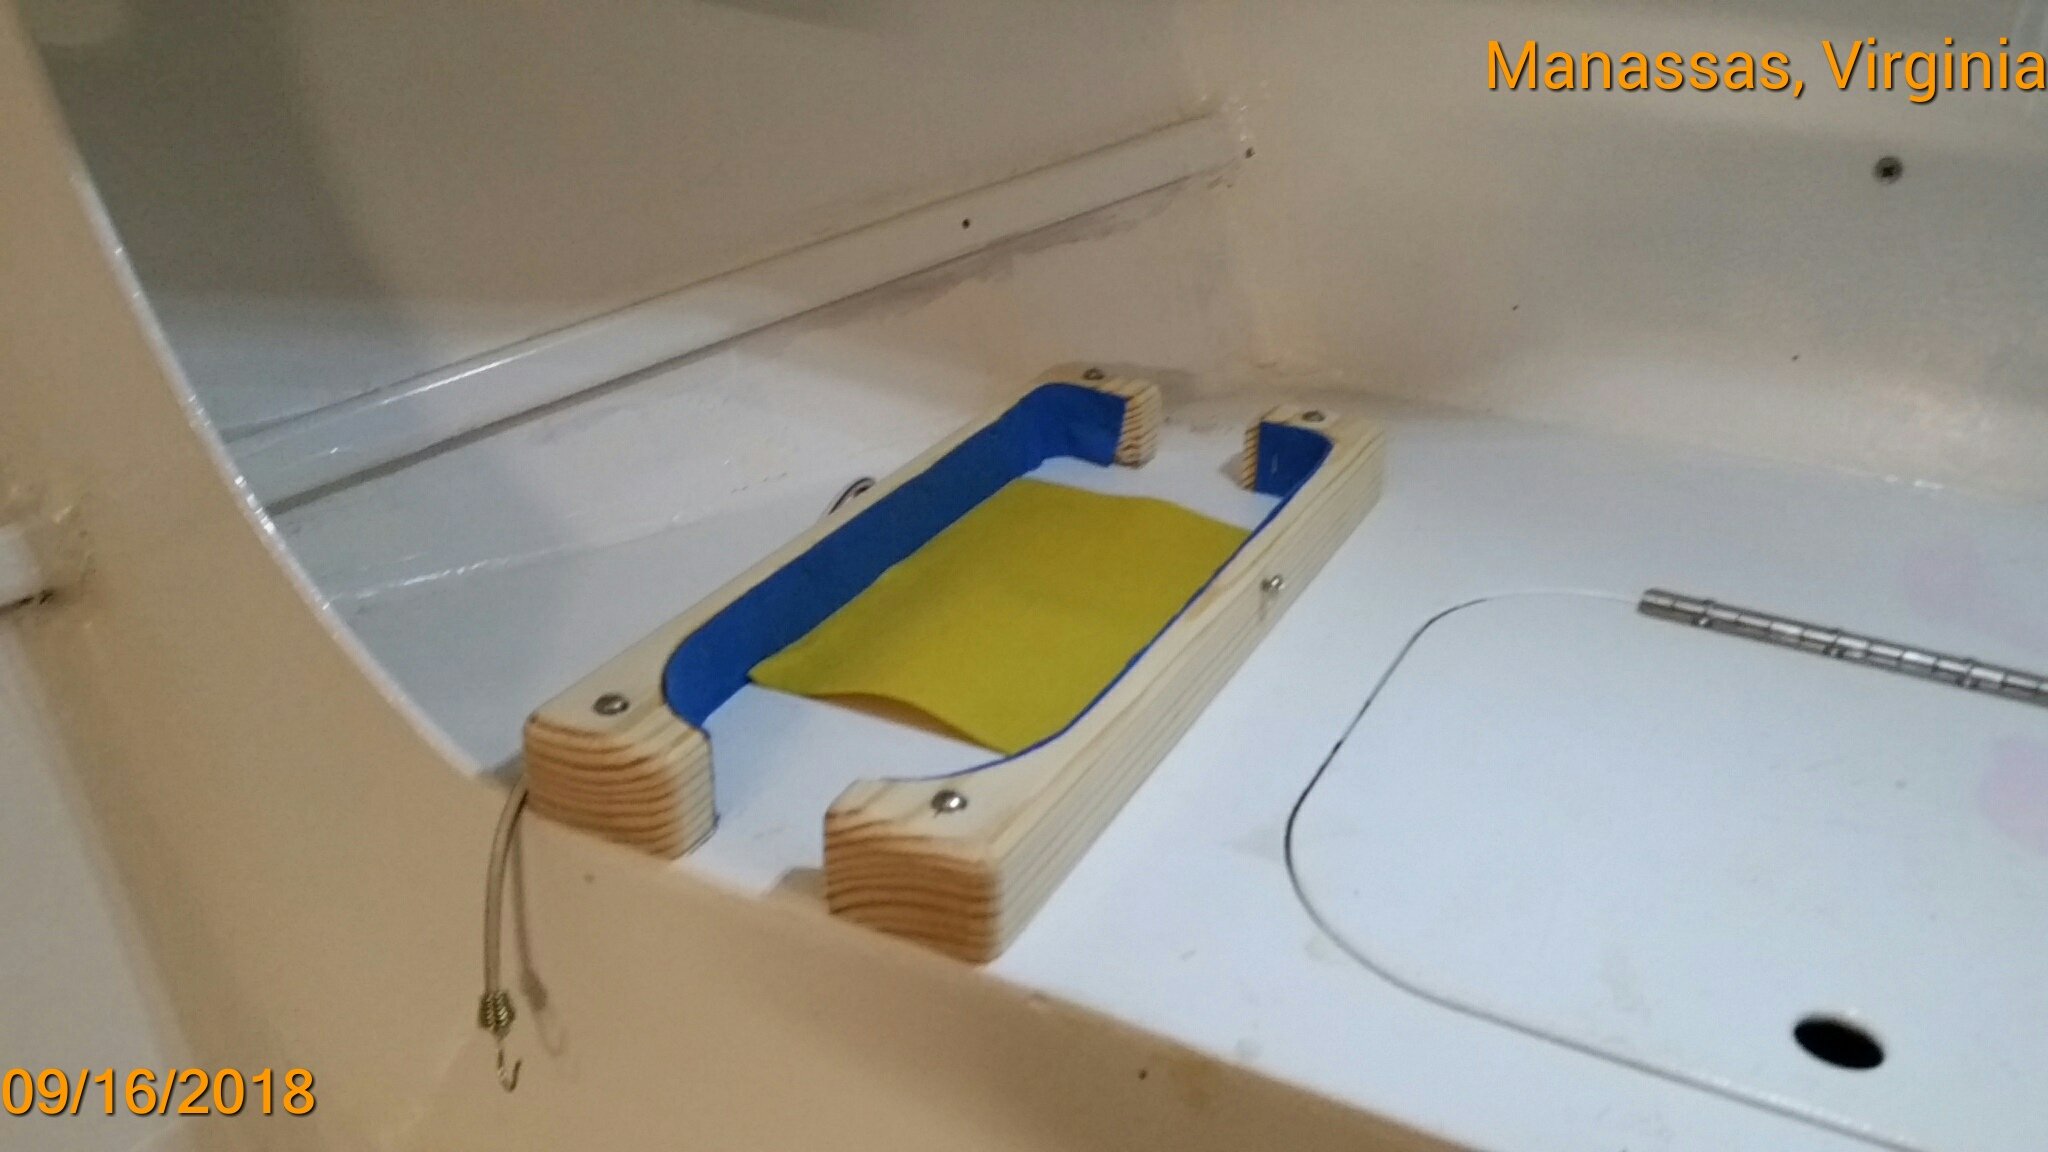
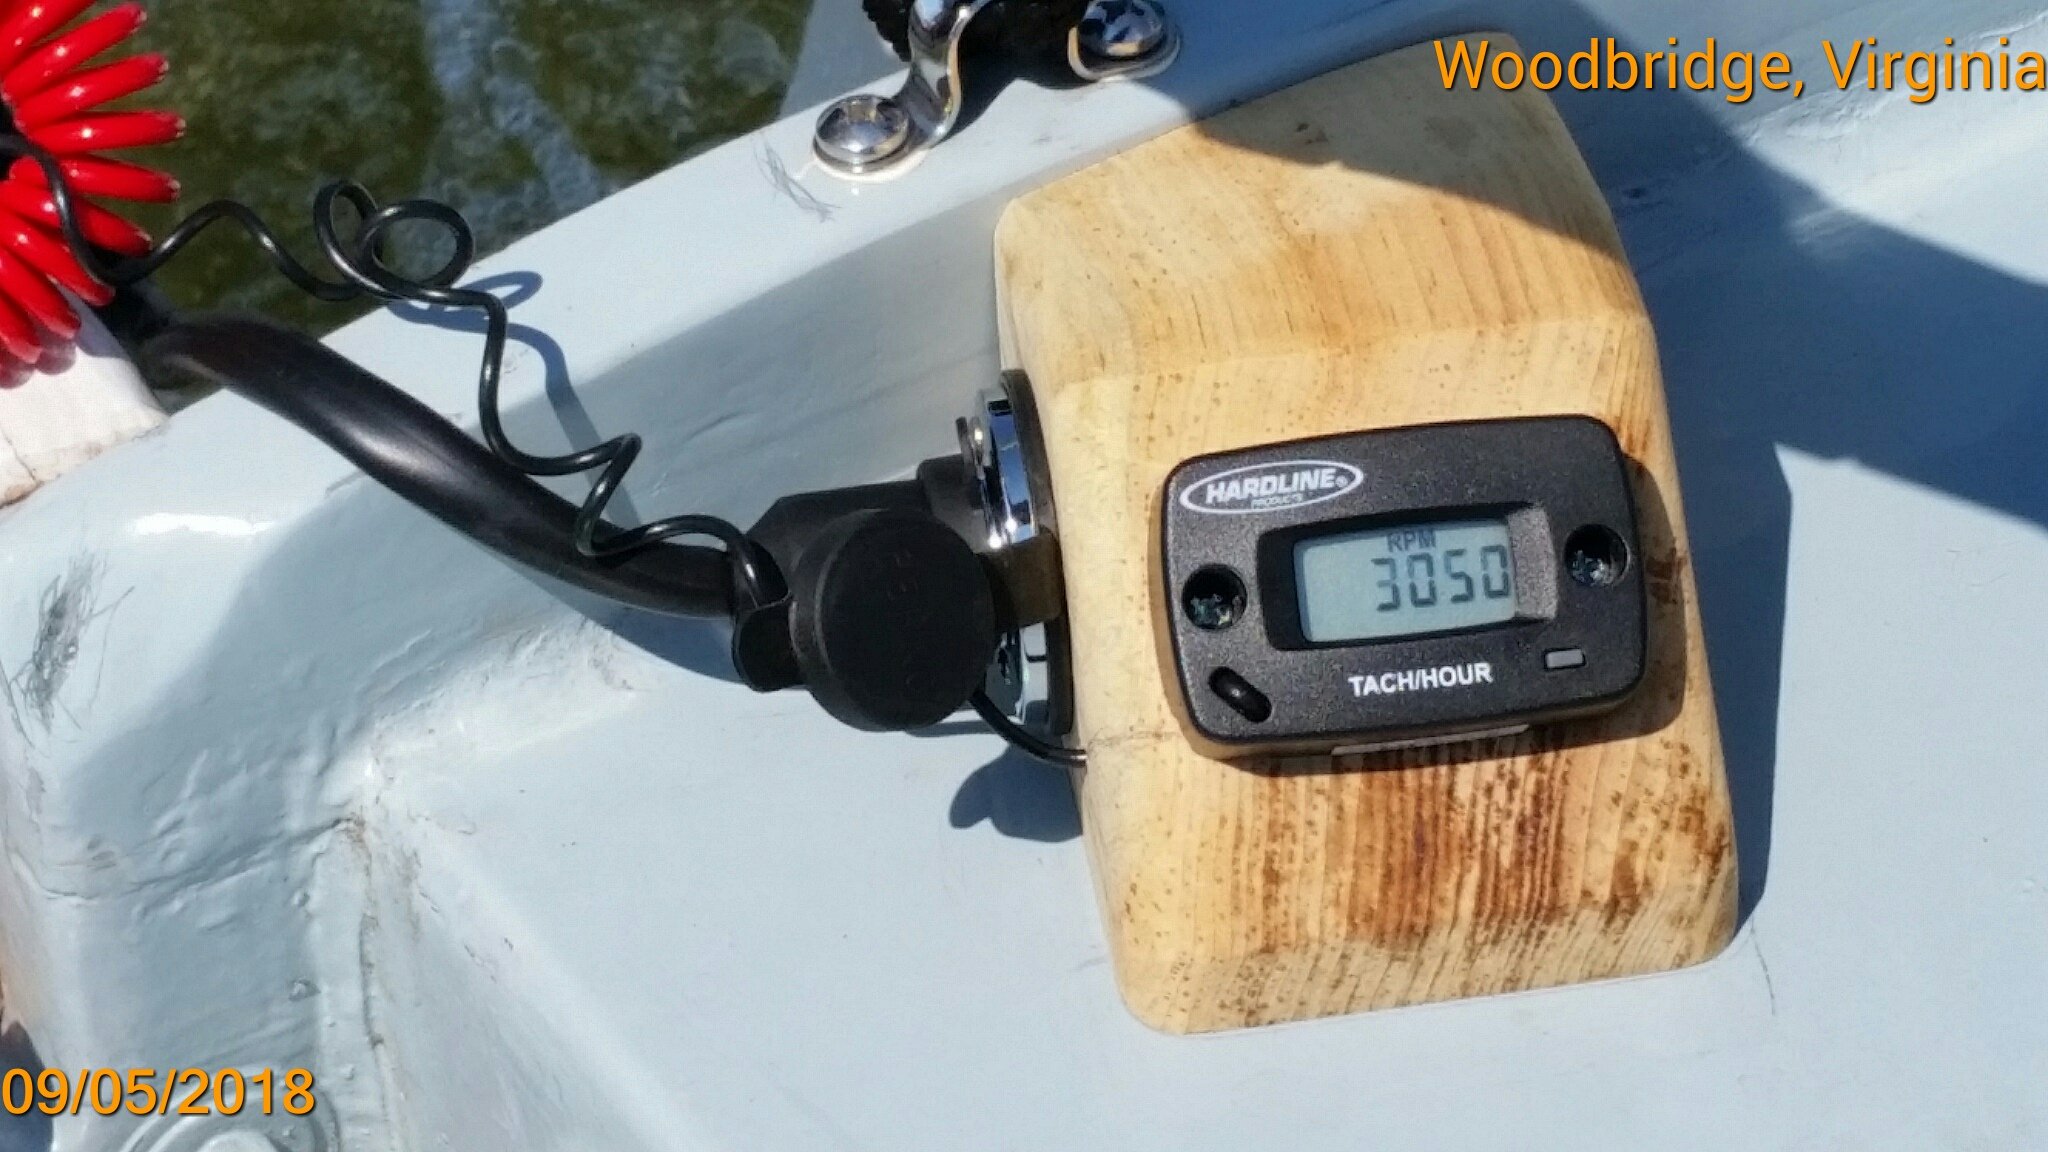
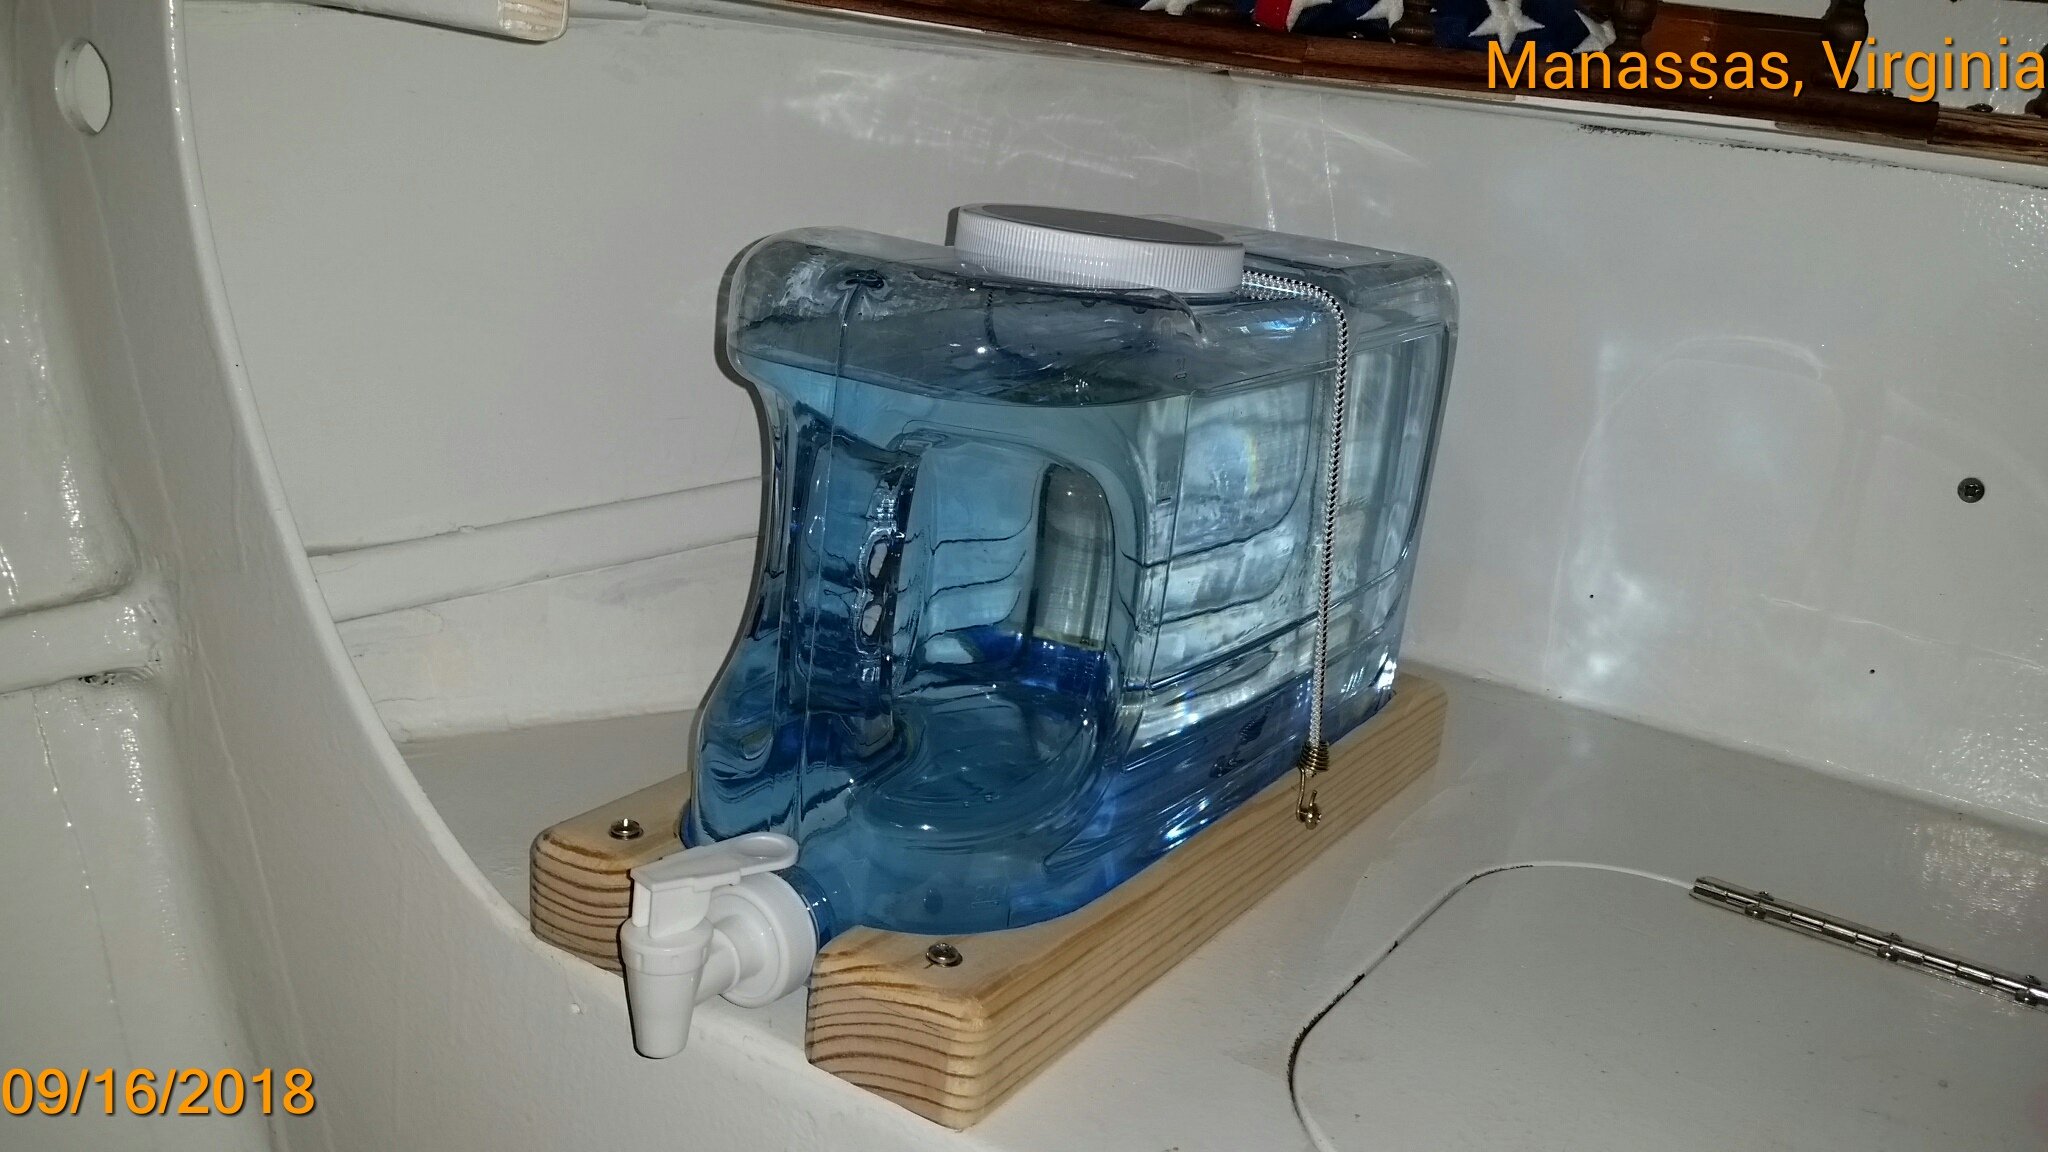
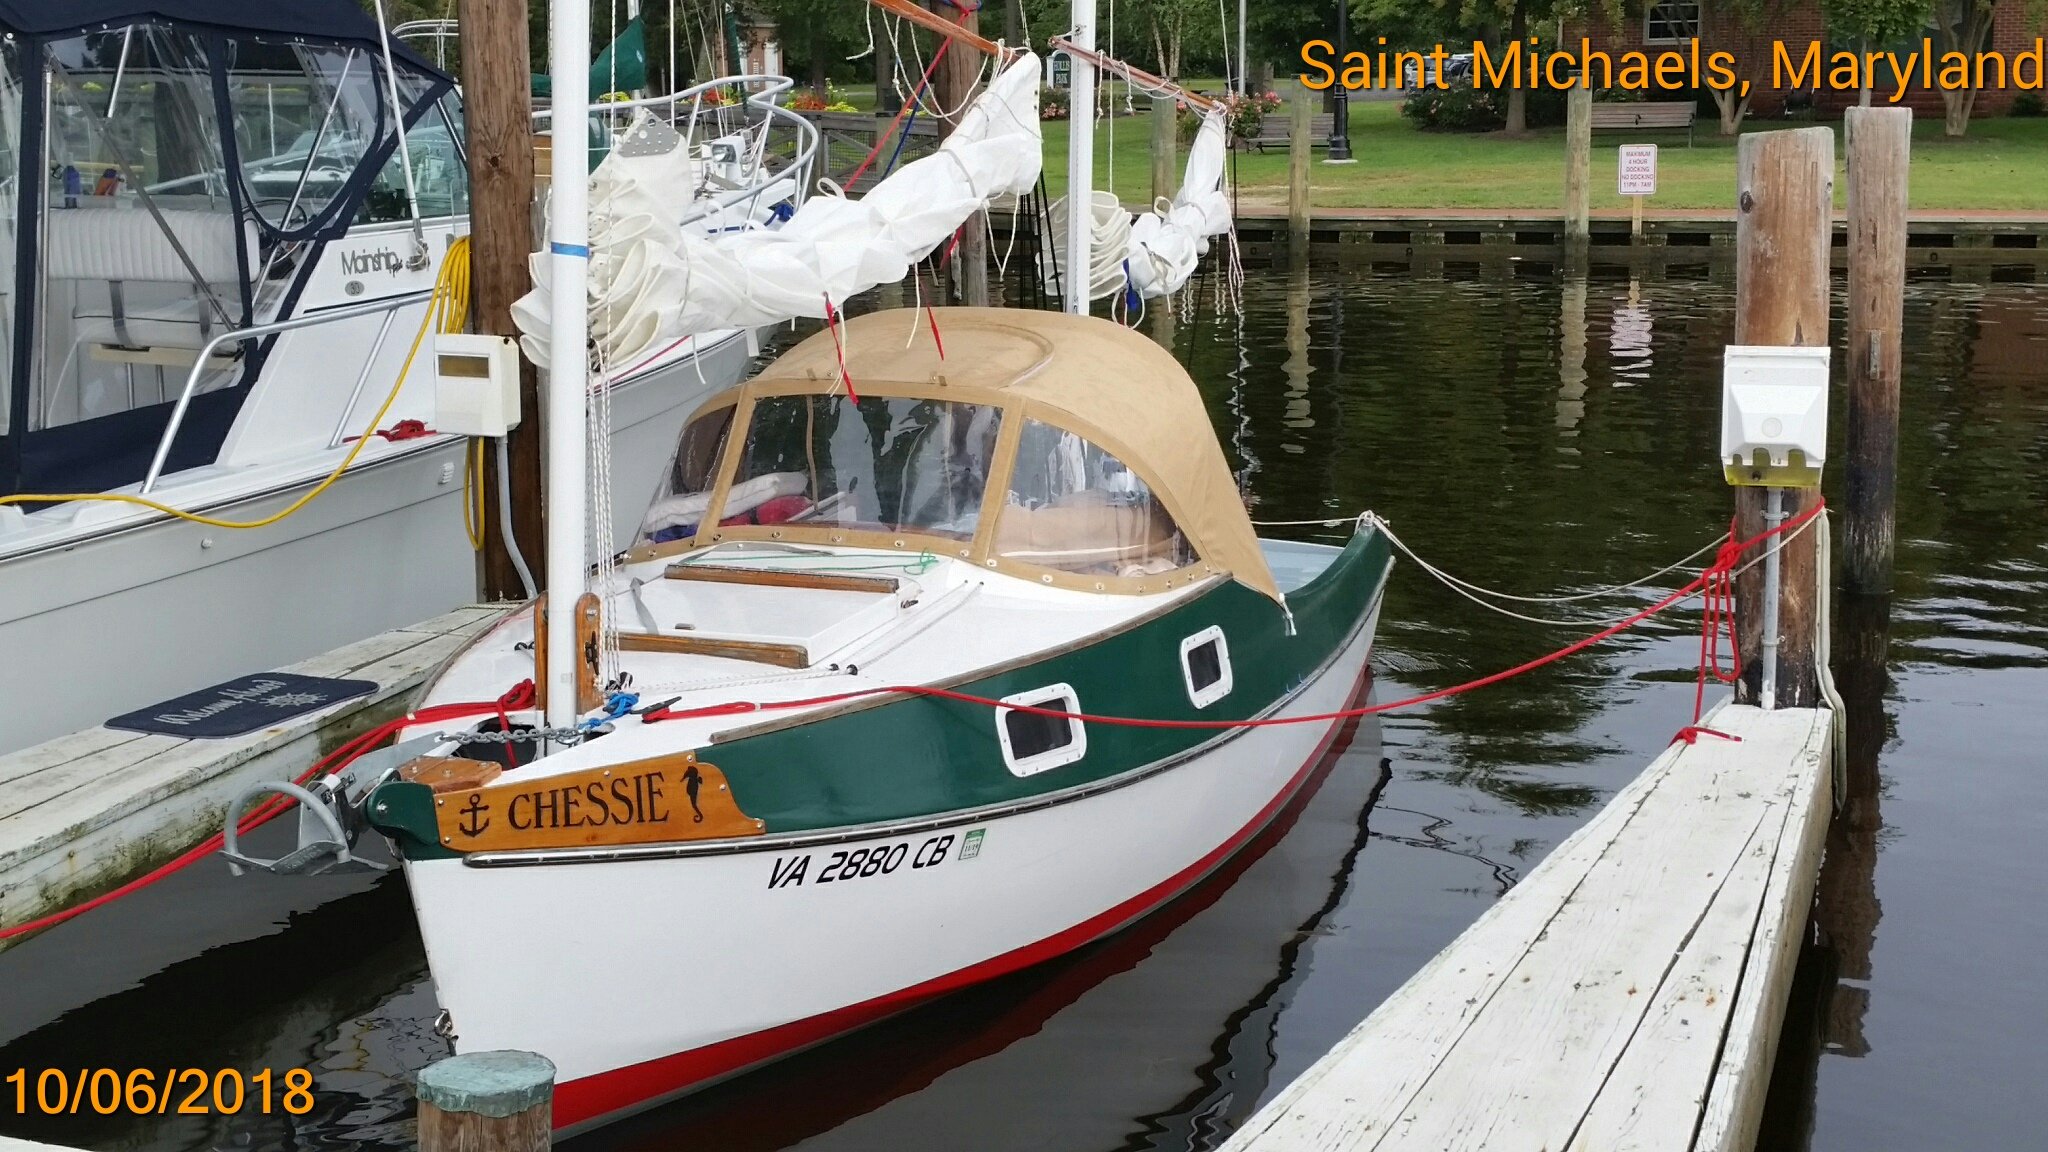
Attention: NEWS ABOUT "Chessie" - - For an overnight or two, extra water is needed for cooking, washing, etc. So, with shelf-space available on the forward locker's top, I fabricated a bed (and hold-down strap) for a standard 2.5 gal water tank with its spigot conveniently over the edge of the locker. As a solo sailor I often wish for a helmsman to steady Chessie's course into the wind while I raise/lower sails, anchor, etc.. So, I purchased a Raymarine "Tiller Pilot." Here's the setup: Not shown is its stowed position which is along the side of the starboard cockpit coaming with its push-rod resting in a notch installed over the transom. The tiller pilot is stowed (whenever not in use) by lifting the push-rod off the tiller extension, retracting the push-rod and simply rotating the assemble aft and dropping the retracted push-rod into its knotch. Also, not shown is the "push-pull" on/off switch installed on the starboard side of the footwell. The Tiller Pilot has its own fuze protected circuit. So whenever the main on/off switch is on, the TP is available for use. Chessie has a new motor: a Honda 4 long-shaft with a 6 amp charger. The charger was considered necessary because of the considerable electrical requirements of the Tiller Pilot. Also, the battery charging from occasional use of the motor pretty much substitutes for a solar panel. The charging circuit is fuze-protected but "unswitched" so that whenever the motor is used -- the battery is being charged even if the main switch if "off." For shore-side use there is a separate charging connector (on the outside of cabin bulkhead [Blk 3] and weather-protected under the port-side cockpit coaming -- also fuze-protected and unswitched. Shown here is the happy owner on the first "sea trial" for the OBM. Also shown is the tach-hour meter installed. Its display is a liquid chrystal requiring very little energy. Its input is simply a wire (the end of which is) wrapped around the spark plug lead held in place with a very small cable tie. Switching between "hours" and "rpm" is by a "toggle" button at lower-right on the module. Cost < $50. The tachometer allowed me to discover that the maximum rpm was only about 3900 -- below the rated 4500. Turns out that the dealer delivered the 4hp with the wrong prop -- a 7-7/8 d x 7-1/2 p. We replaced that with a 7-7/8 x 5-7/8 prop. Now she reves up to over 4500, developing a full 4 hp. Pushes Chessie easily up to 5.5 knots. Next is Chessie at her slip next to the Chesapeake Bay Maritime Museum. She was attending the 35th Mid-Atlantic Small Craft Festival. We had a very nice sail on Friday. The last photo shows the skipper showing off (Look Ma, no hands) that Chessie balances very nicely and stears herself. Notice:: the tiller pilot was NOT ENGAGED. See youall at the Messabout on Friday.


-
Steve,... I plan to arrive Friday am after an overnight at Big Mill Bed & Breakfast in Williamston, NC. I'm overnighting it there also Sunday on the way home. It's just an hour & a quarter from the B & B shop -- but it takes a big rough edge off the.trips to/from home. I'd welcome you aboard Chessie for the sailing activities. We could trade off at the helm -- each of us getting experience with the CS20.3. Maybe we could get Alan to demonstrate some good techniques. But I'll cancel if the weather predicts NASTY. Keep fingers crossed.
-
Core Sound 20 Mark 3 Build - Chesapeake, VA
Pete McCrary replied to AmosSwogger's topic in B & B Yachts Forum
Amos, you and your family have created a mighty fine boat that will be treasured as a family heirloom over the years. Good lessons to learn and great memories. -
Nice work, Steve. Have good sailing in the islands.
-
Core Sound 20 Mk 3 -- #4 "Chessie" . .
Pete McCrary replied to Pete McCrary's topic in B & B Yachts Forum
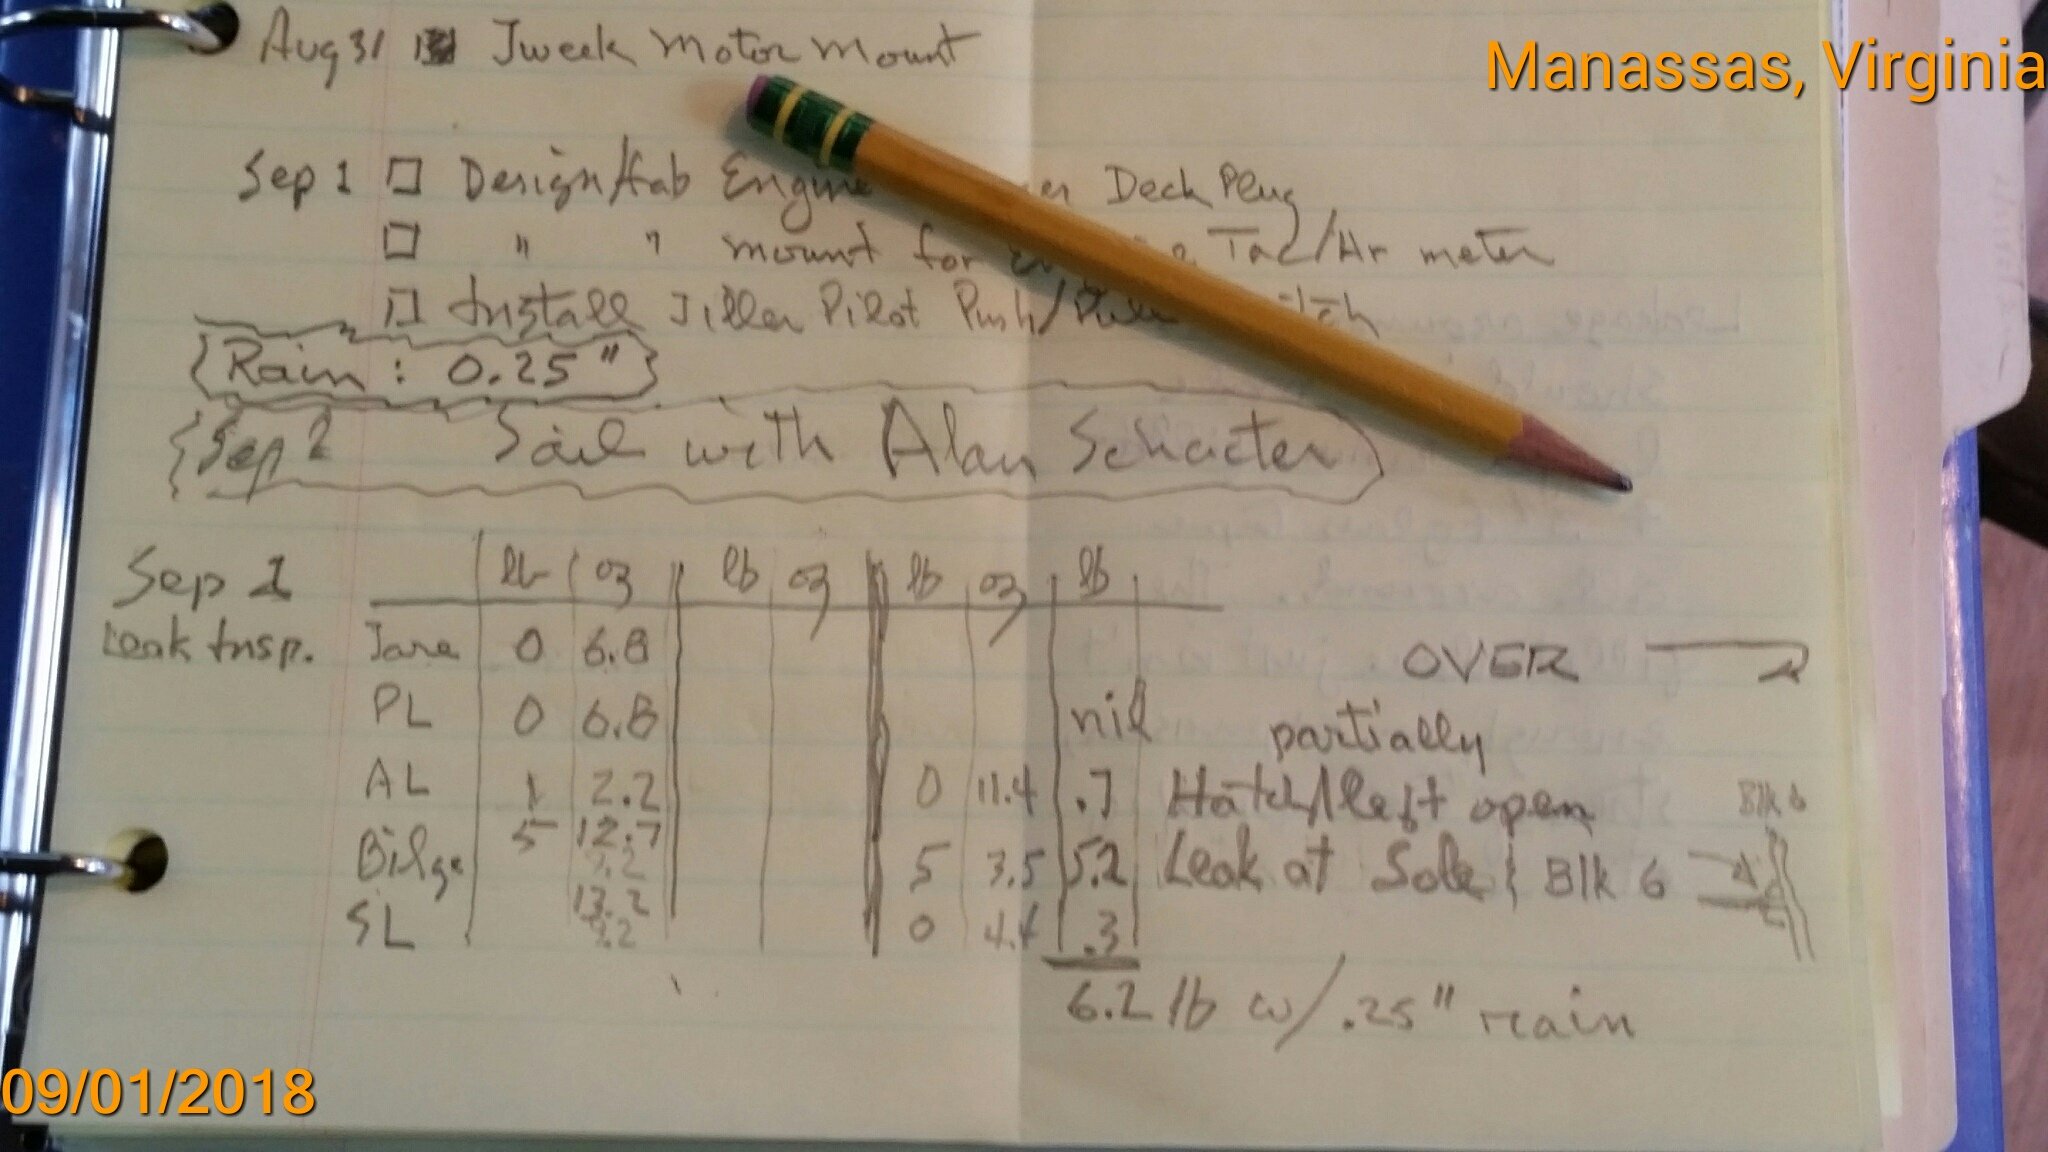
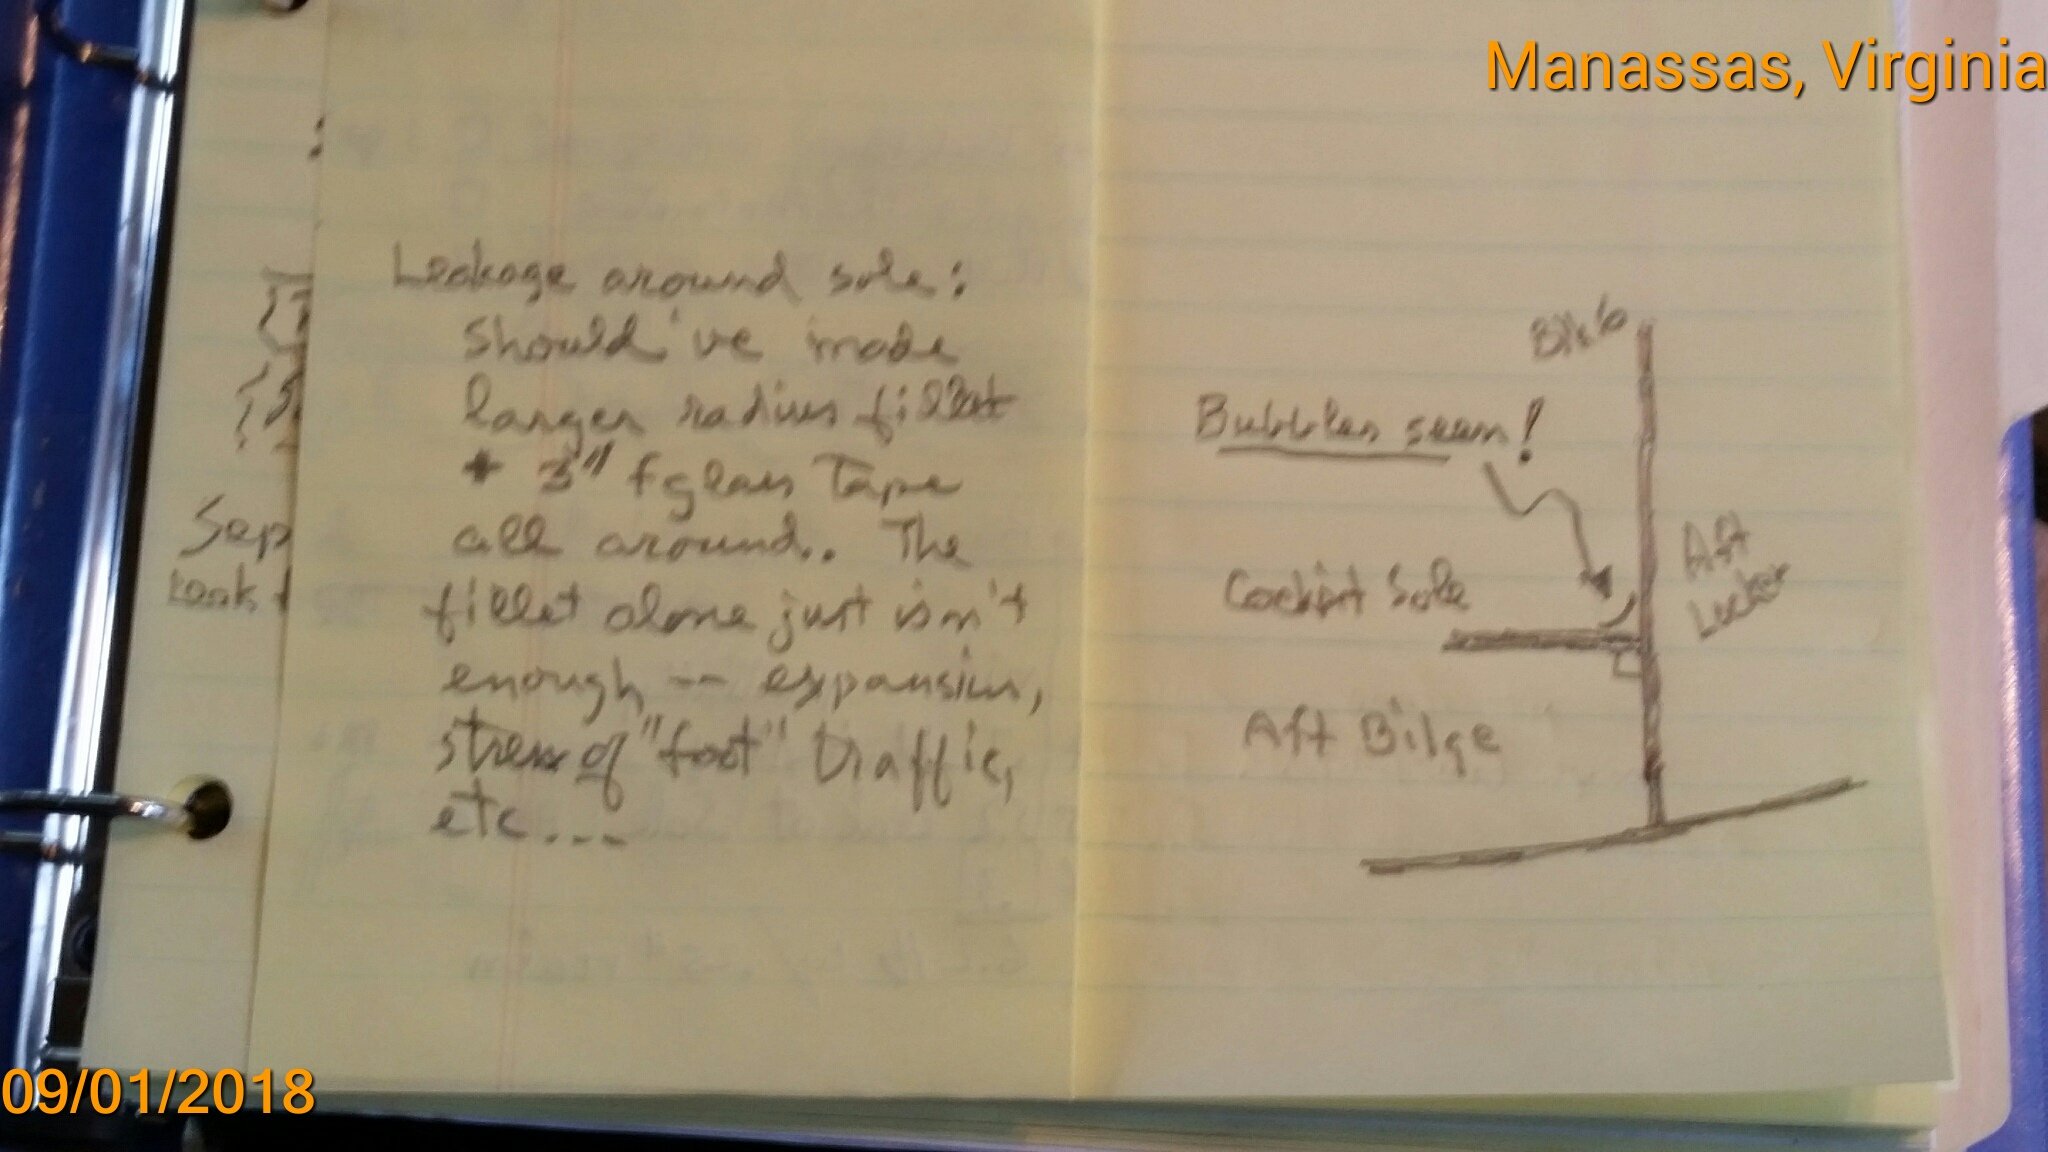
BUILDERS !!:. Learn from my mistakes . . . Chessie has always had some leak problems (rain water into the aft hatches and the bilge aft of the ballast tank), of which most have been discovered and repaired. However, the aft bilge persistently collected rain water. At first I suspected leakage around the access hatch thru the sole just aft of the mizzen step. But it was too much rain water for the amount of rain recorded. This morning (after just 0.5" rain) I did a "leak inspection" which revealed more than 5.2 lbs of water! While cleaning up the water left on the sole surface (collecting at the aft end between the drain holes), I saw air bubbles at the intersection of Blk 6 and the cockpit sole. The collected water was rapidly leaking into the aft bilge. I don't believe the building instructions [that I had] at the time covered this phase of construction, but I recall that I glued down the sole over a thick bead of thickened epoxy and then applied a fillet around the entire edge of the sole. I DID NOT APPLY a 3" fiberglass tape over the fillet. I should have. Where there is stress (foot traffic, slight boat flexing) -- a fillet alone just won't do. Here are my notes on the inspection: Presently, I'll make repairs by clearing out the old fillet and applying a 3" tape around the edges of cockpit sole aft of the mizzen. Over the winter I'll finish the job all around the sole. On second thought maybe I won't do any repair work until after the sailing season so that I can put Chessie in her garage and, with a little heat applied, throughly dry the leaking areas that presently must be fairly soaked with rainwater. Alternative suggestions for temporary and/or permanent repair would be welcom.

-
Core Sound 20 Mark 3 Build - Chesapeake, VA
Pete McCrary replied to AmosSwogger's topic in B & B Yachts Forum
I consider them essential and use them for same purposes mentioned by Chick. I think that Graham doesn't use them -- wanting to keep weight aloft and windage at a minimum. I don't know how he copes with controlling the sprit ends when not sailing. For a while I used 1/4" line for the main, but it was too "stiff" for my liking. Switched to 3/16", which is much better. I also use the main topping lift to hold the mast up while putting the nut on the mast bolt inside bulkhead #1. The shackle end is looped over my anchor roller (and belayed to itself) with the bitter end belayed to a cleat on the garage coaming within my reach while holding the mast upright. The bitter end also has a jam cleat at the cockpit above Blk 3. Note that the cheek block (at the mast head) should be a bit down from the very top. That's because if it's near the top, it can easily flip over to the "wrong" side of the sail. Mine's about 4" lower than the head of the sail (when fully raised). That seems to have solved the problem. -
Core Sound 20 Mk 3 -- #4 "Chessie" . .
Pete McCrary replied to Pete McCrary's topic in B & B Yachts Forum
The new deck plate is made of 3/4" marine ply. I was concerned about the strength of the pine board to support all of my weight plus the mizzen mast. Here is a photo in its stowed position. With a cushion placed just aft of the companionway -- it's a very comfortable seat for crew looking forward. The battery cover is a convenient foot rest. It's also used to support one or two "feet" on the beach chairs that I carry aboard: And I've been considering how I could use one of these chairs while at the helm: It won't be a deck plate. I think I'll fashion just a 1 x 4 that will span the footwell. It'll have an edge to keep the chair's "foot" on the board -- and it'll be able to slide fore and aft over the footwell. The chair with the umbrella weighs just 7.5 lbs -- and the other one 6.6 lbs.. Easy to move about and stow in one of the aft lockers. They are very useful on shore or the dock. I gotta have some sit-down comfort with back support -- and a little shade.


-
Core Sound 20 Mk 3 -- #4 "Chessie" . .
Pete McCrary replied to Pete McCrary's topic in B & B Yachts Forum
Tohatsu 3.5 performance: I've finally got rid of the "bad gas" that was giving me fits. I've always been careful about using a gas stabilizer and draining the carb' after each use. But don't believe the manufacture's label stating that their product will protect gas "up to two years." I was using gas treated the previous season. My OBM mechanic warned me not to trust it for more than about 2 months. This past Tuesday Chessie was taken to the Potomac and launched as a motor boat [mast stowed as for highway trailering]. CB down about a 3rd and an empty ballast tank with just me aboard. Weather hot with calm to light and variable wind. The OBM started up on the 3rd pull without any problems. And the one restart just needed one pull. The test cruise was for 1 hr 23 min (1.38 hrs). Gas consumption was 1.55 liters. That's 1.12 liters/hr. The OBM was run between 3600 and 4200 rpm which pushed the boat from 4.5 to 6 knots (GPS speed over the bottom).. I think that's close to her hull speed. BTW, max rpm was 5400. That's close to its advertised performance of 4500 rpm for 3.5 hp. At wide-open her speed was maybe almost 6.5 knots. But the data is unreliable because the Potomac has a current and tide which makes it hard to know the boat's speed thru the water. According to the GPS, we traveled 12.6 nm and were underway for 2.48 hours. That's about a 5 knot average. That calculates to about 5.6 nm/liter (~ 21 nm/gal). Chessie's standard gas load is 10 liters (including the gas in the engine) -- giving her a range of 56 nm. Plenty for a typical Chesapeake cruise of a few days to a week. I had vinel curtains fabricated to shade the gas cans stowed under the mizzen's partner. They also shade two one-liter bottles of water. Looking aft: Looking forward: Here's a view of the 3/4" deck plate covering most of the forward footwell. A space is left so that a foot may be placed on the sole -- and easier access to the bailers in the ballast tank. This large deck plate provides a sturdier place to stand when stepping the mizzen mast. In the next posting I'll show another use for the deck plate.


-
I wouldn't bother. Except when going almost directly downwind the board will be side loaded and wont flop around. When going directly downwind, you hardly need the CB and might even pull it up.
-
Core Sound 20 Mk 3 -- #4 "Chessie" . .
Pete McCrary replied to Pete McCrary's topic in B & B Yachts Forum
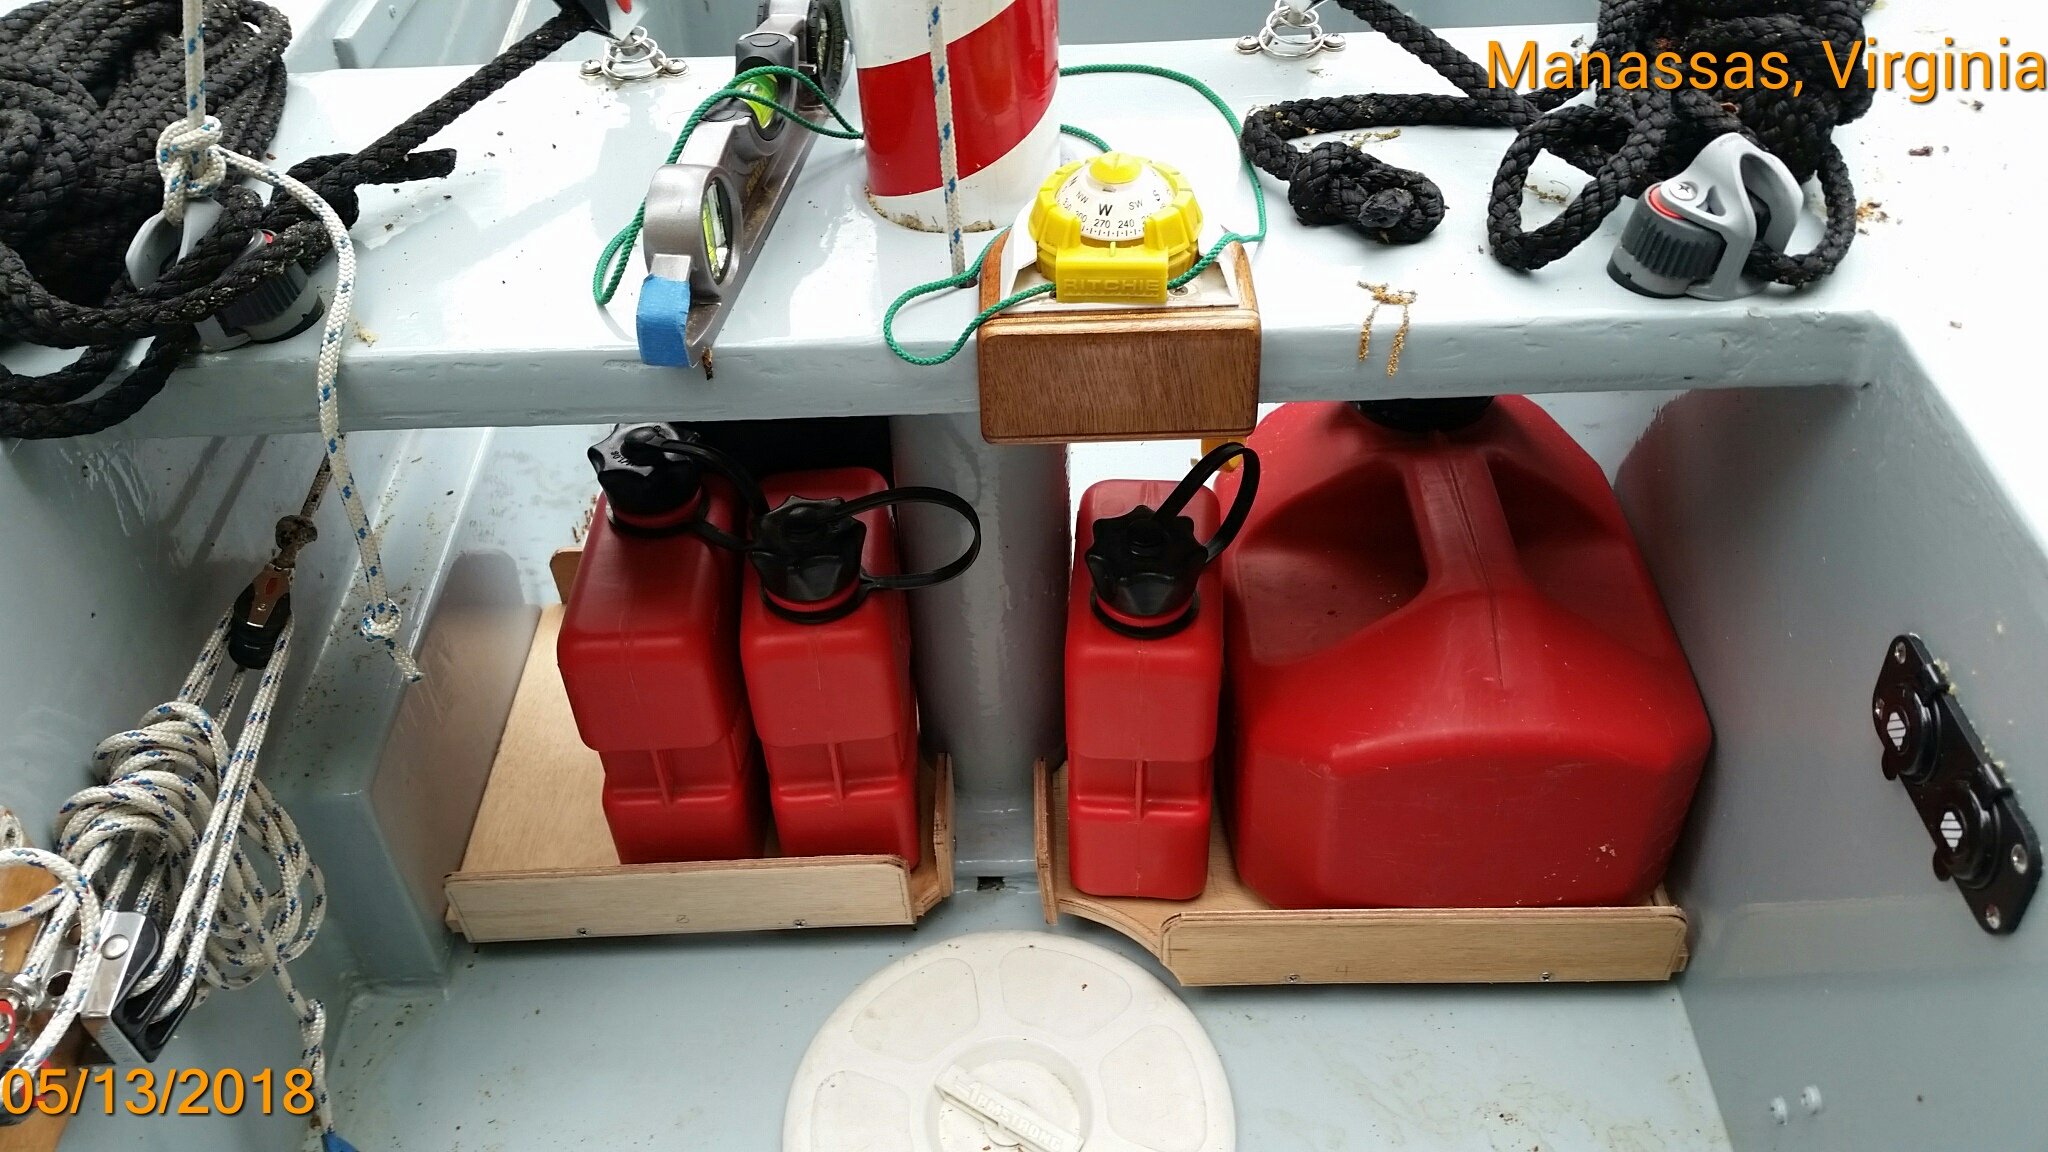
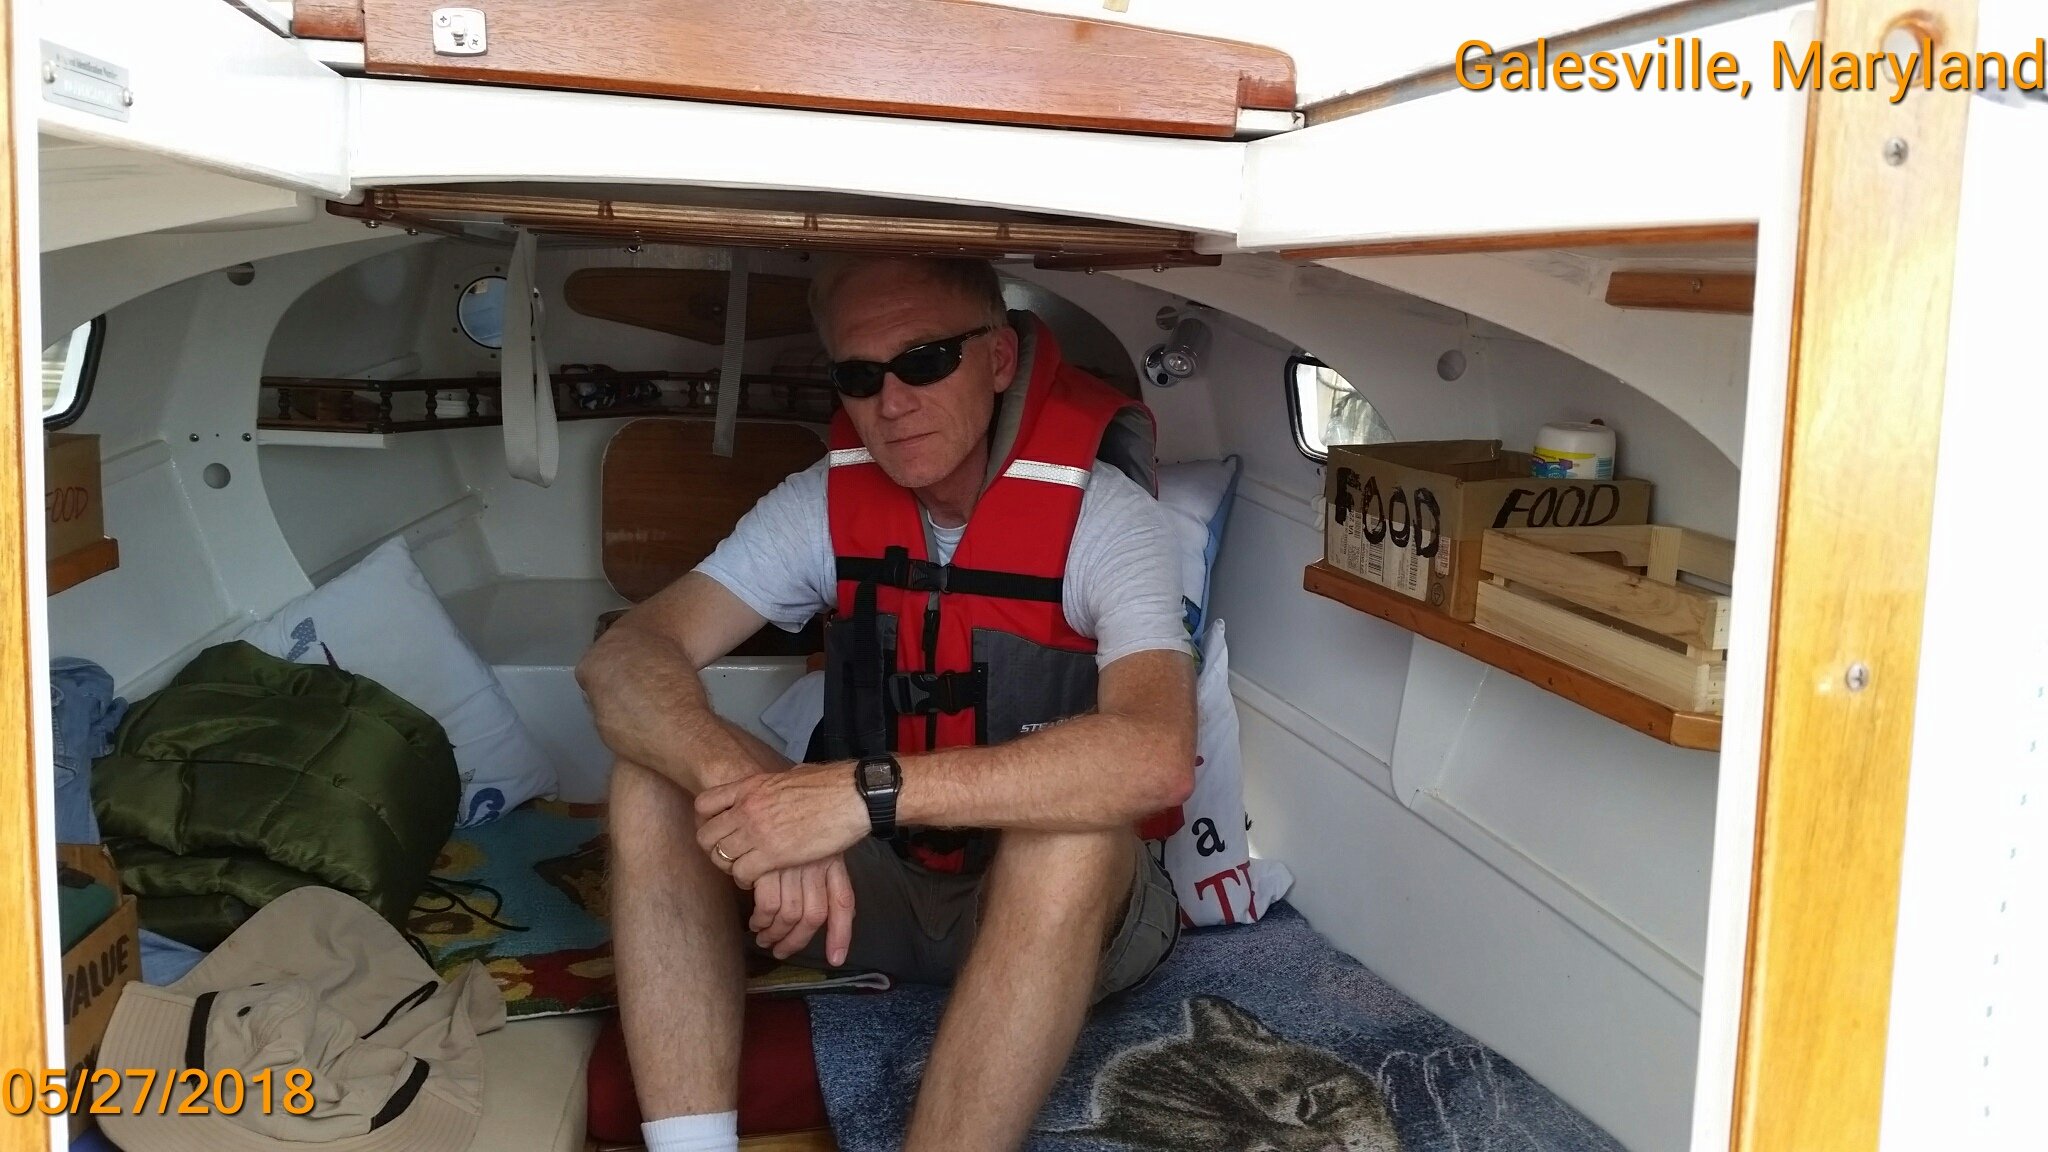
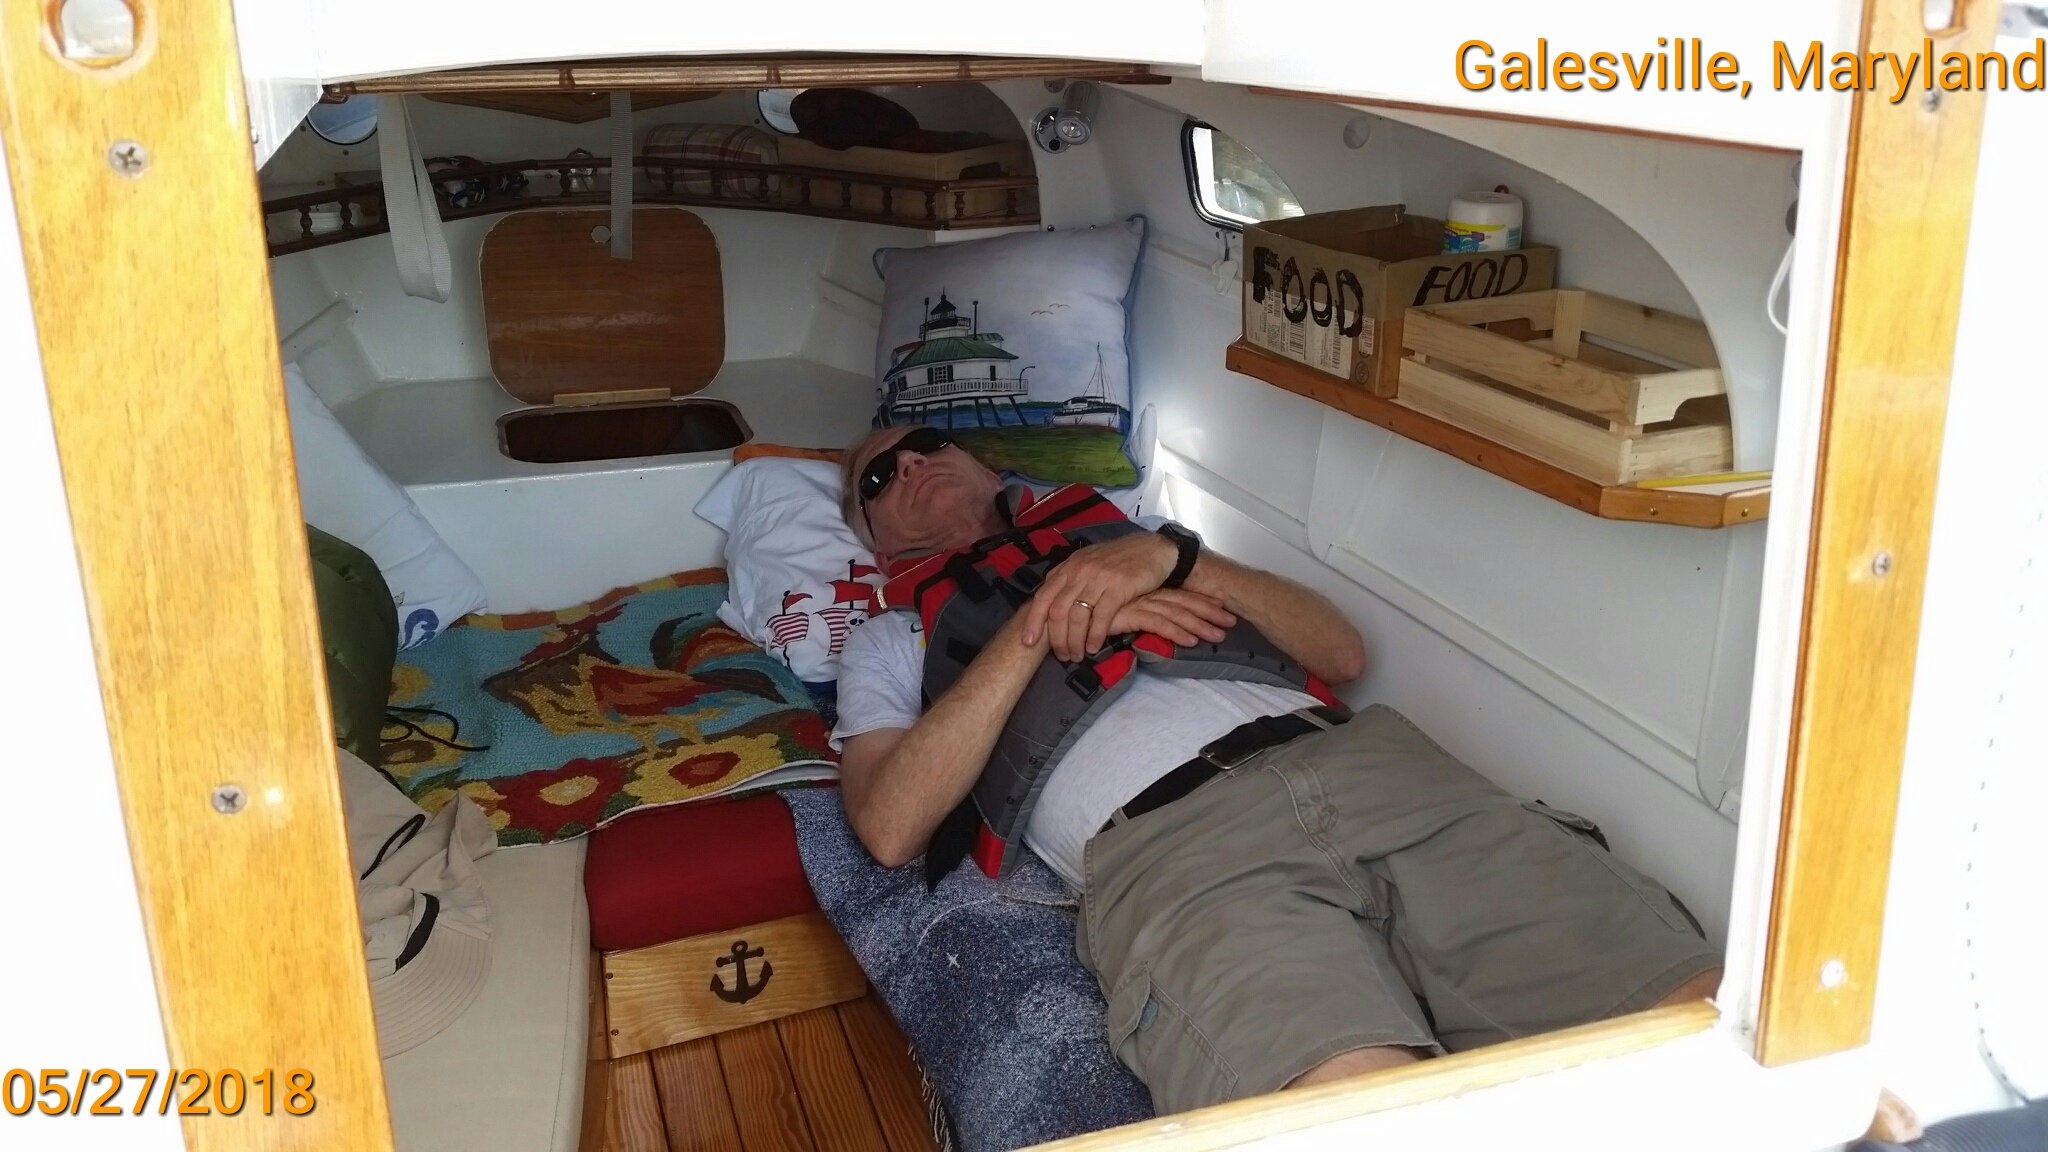
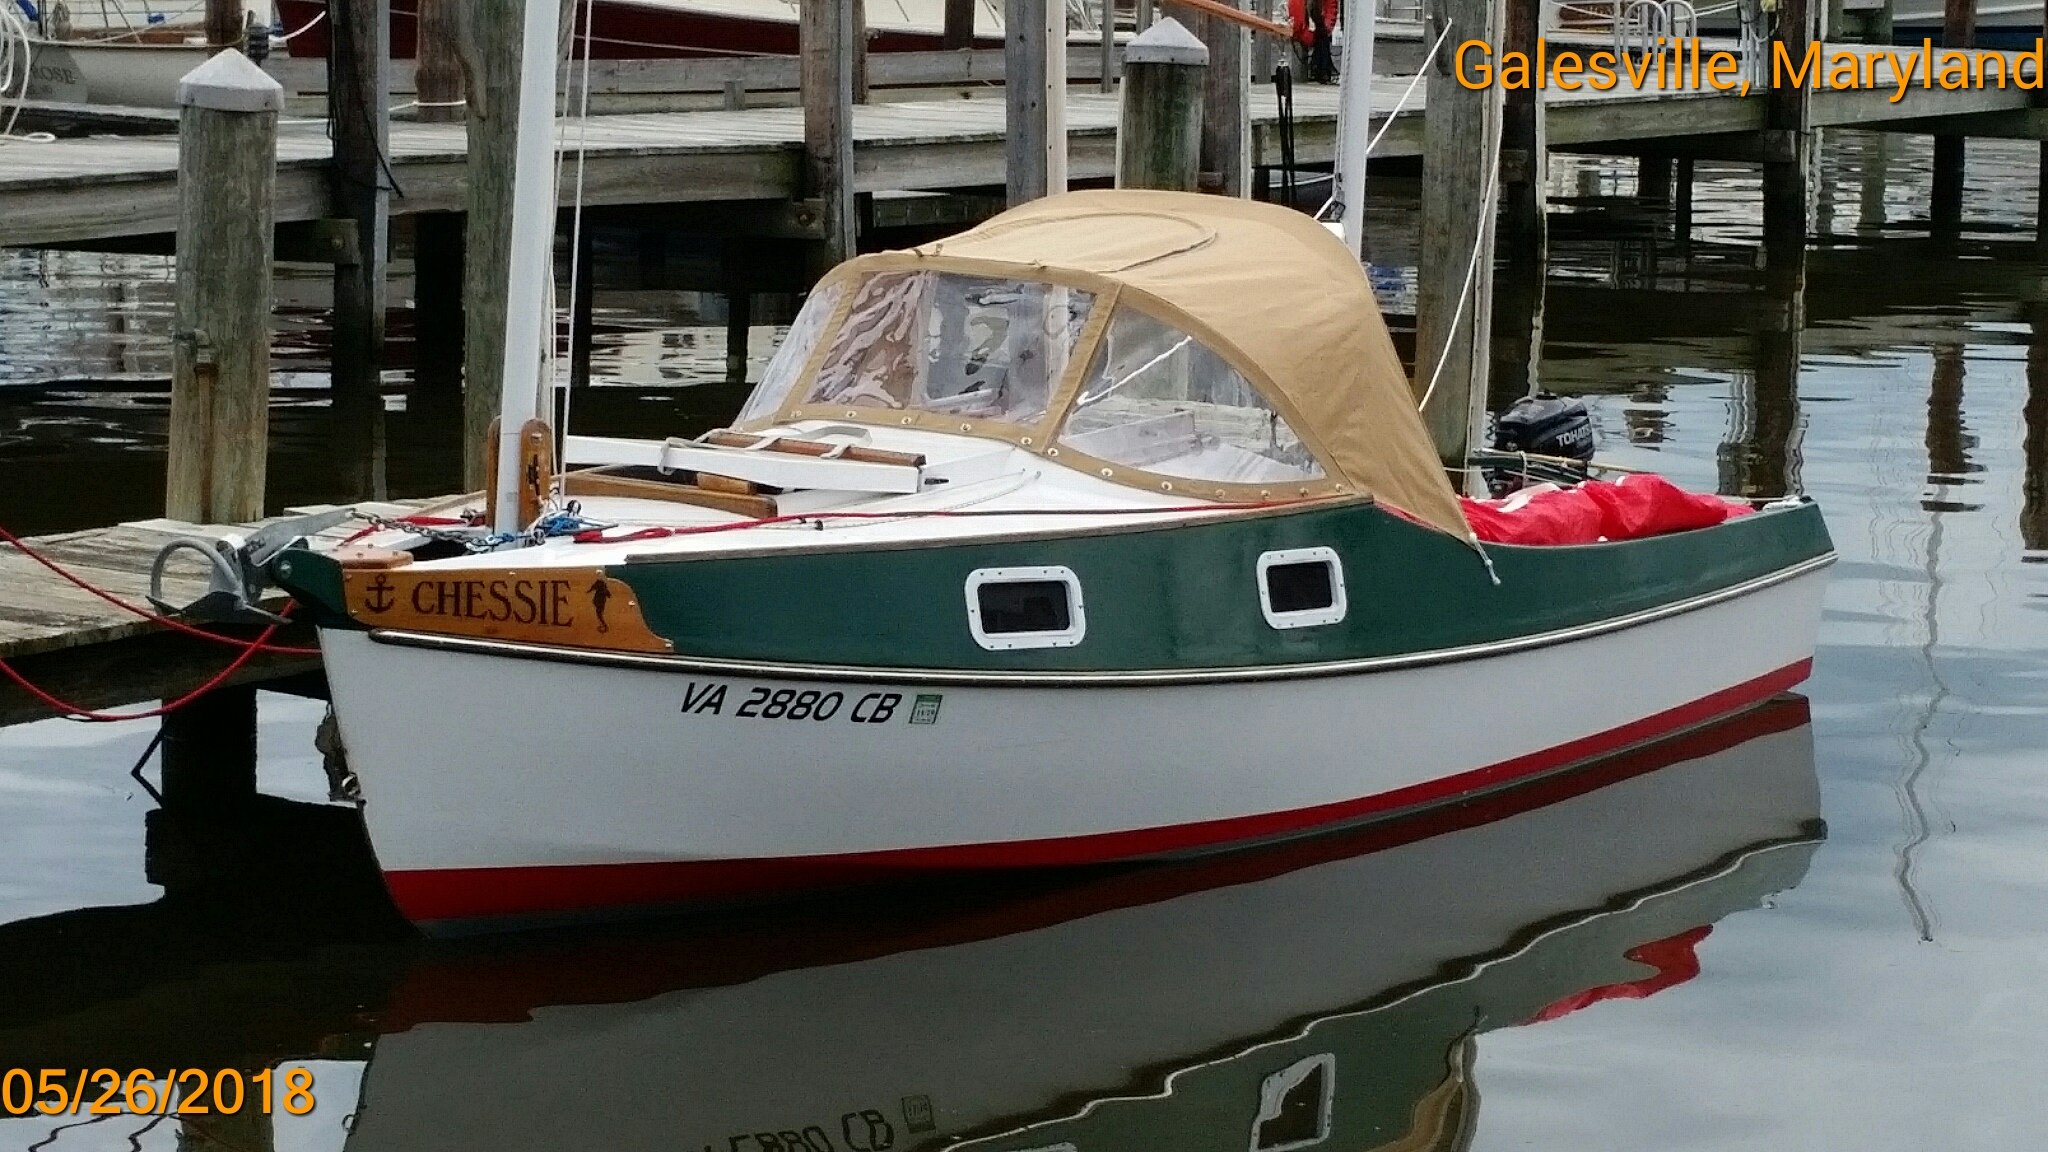
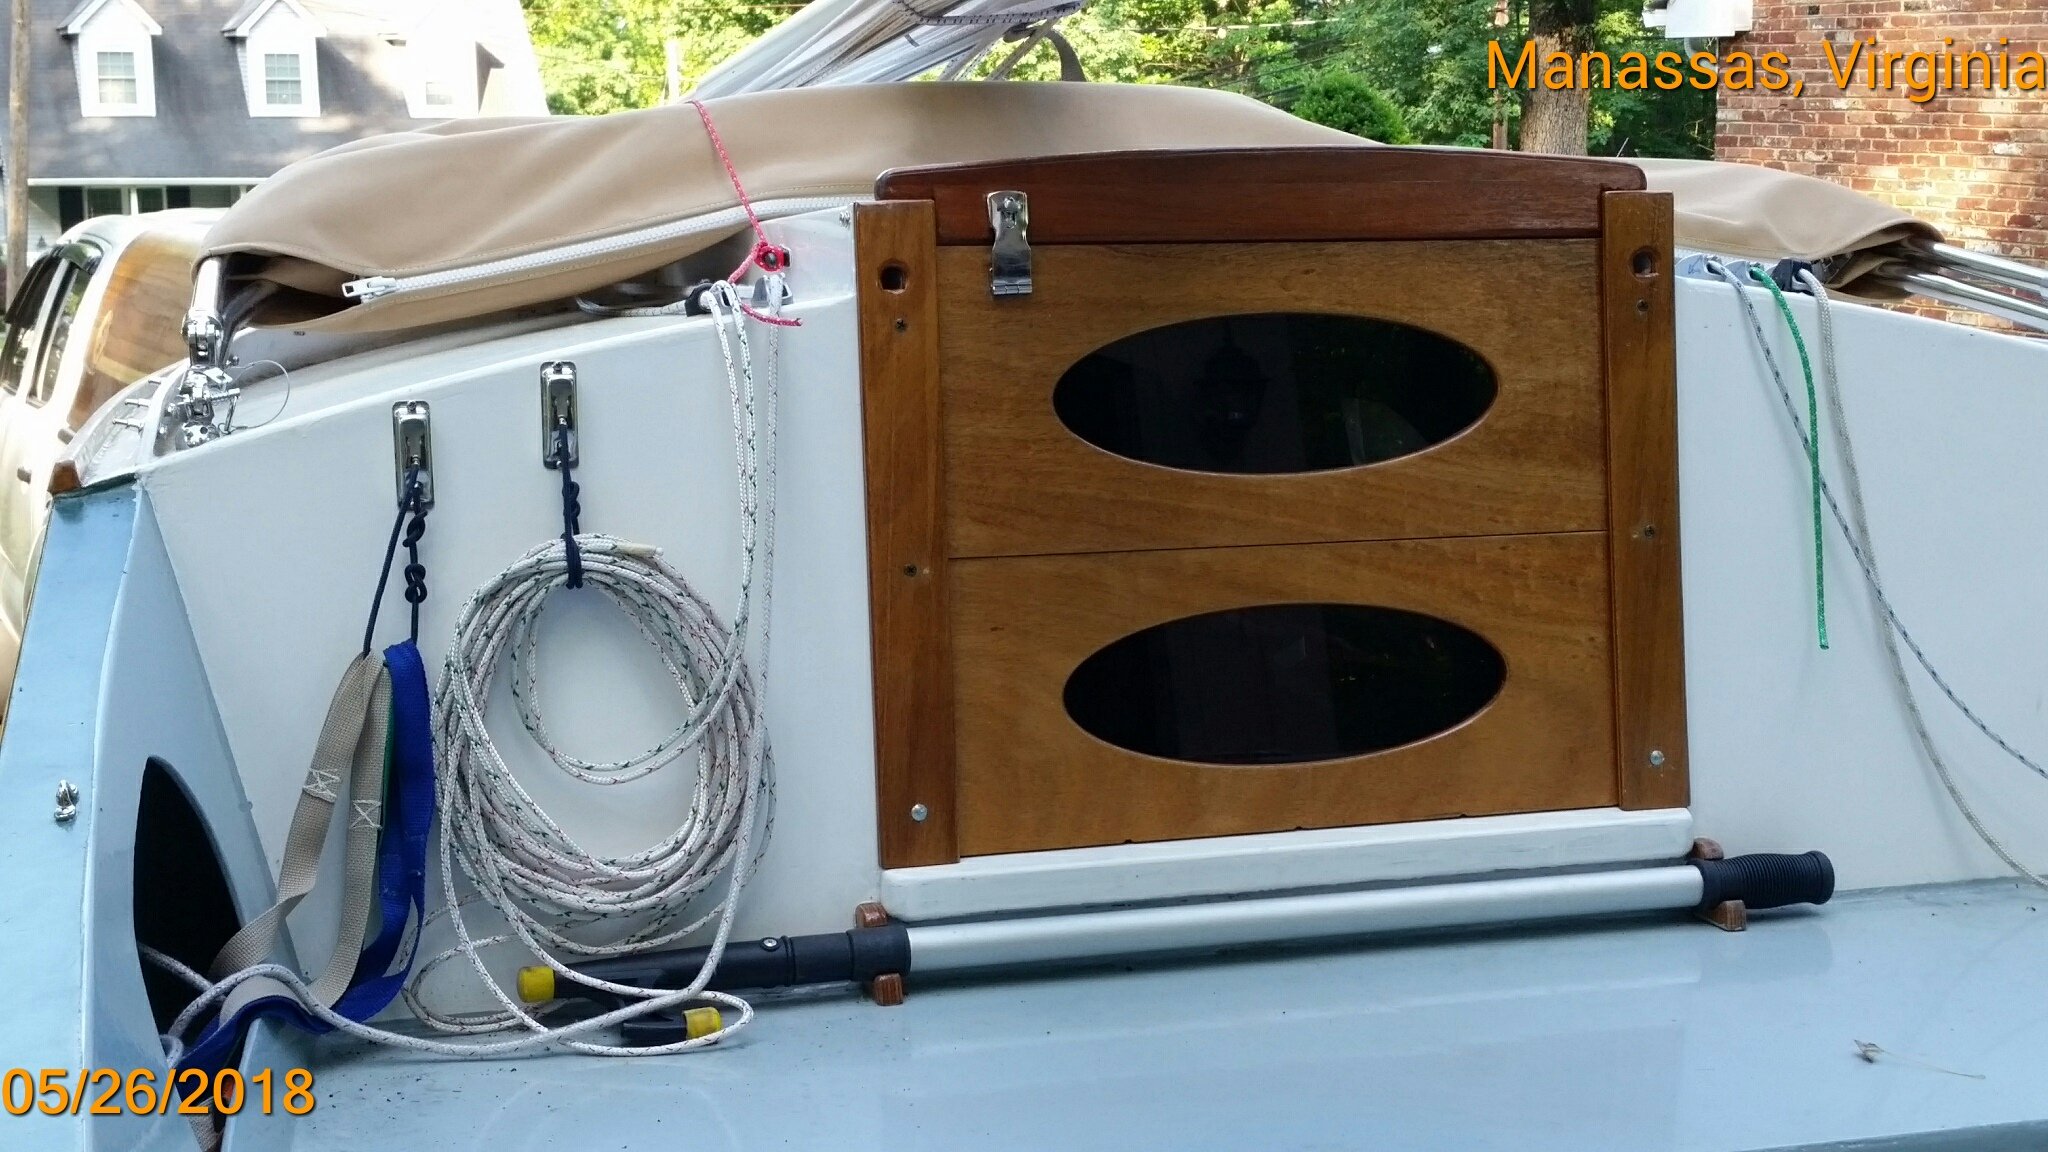
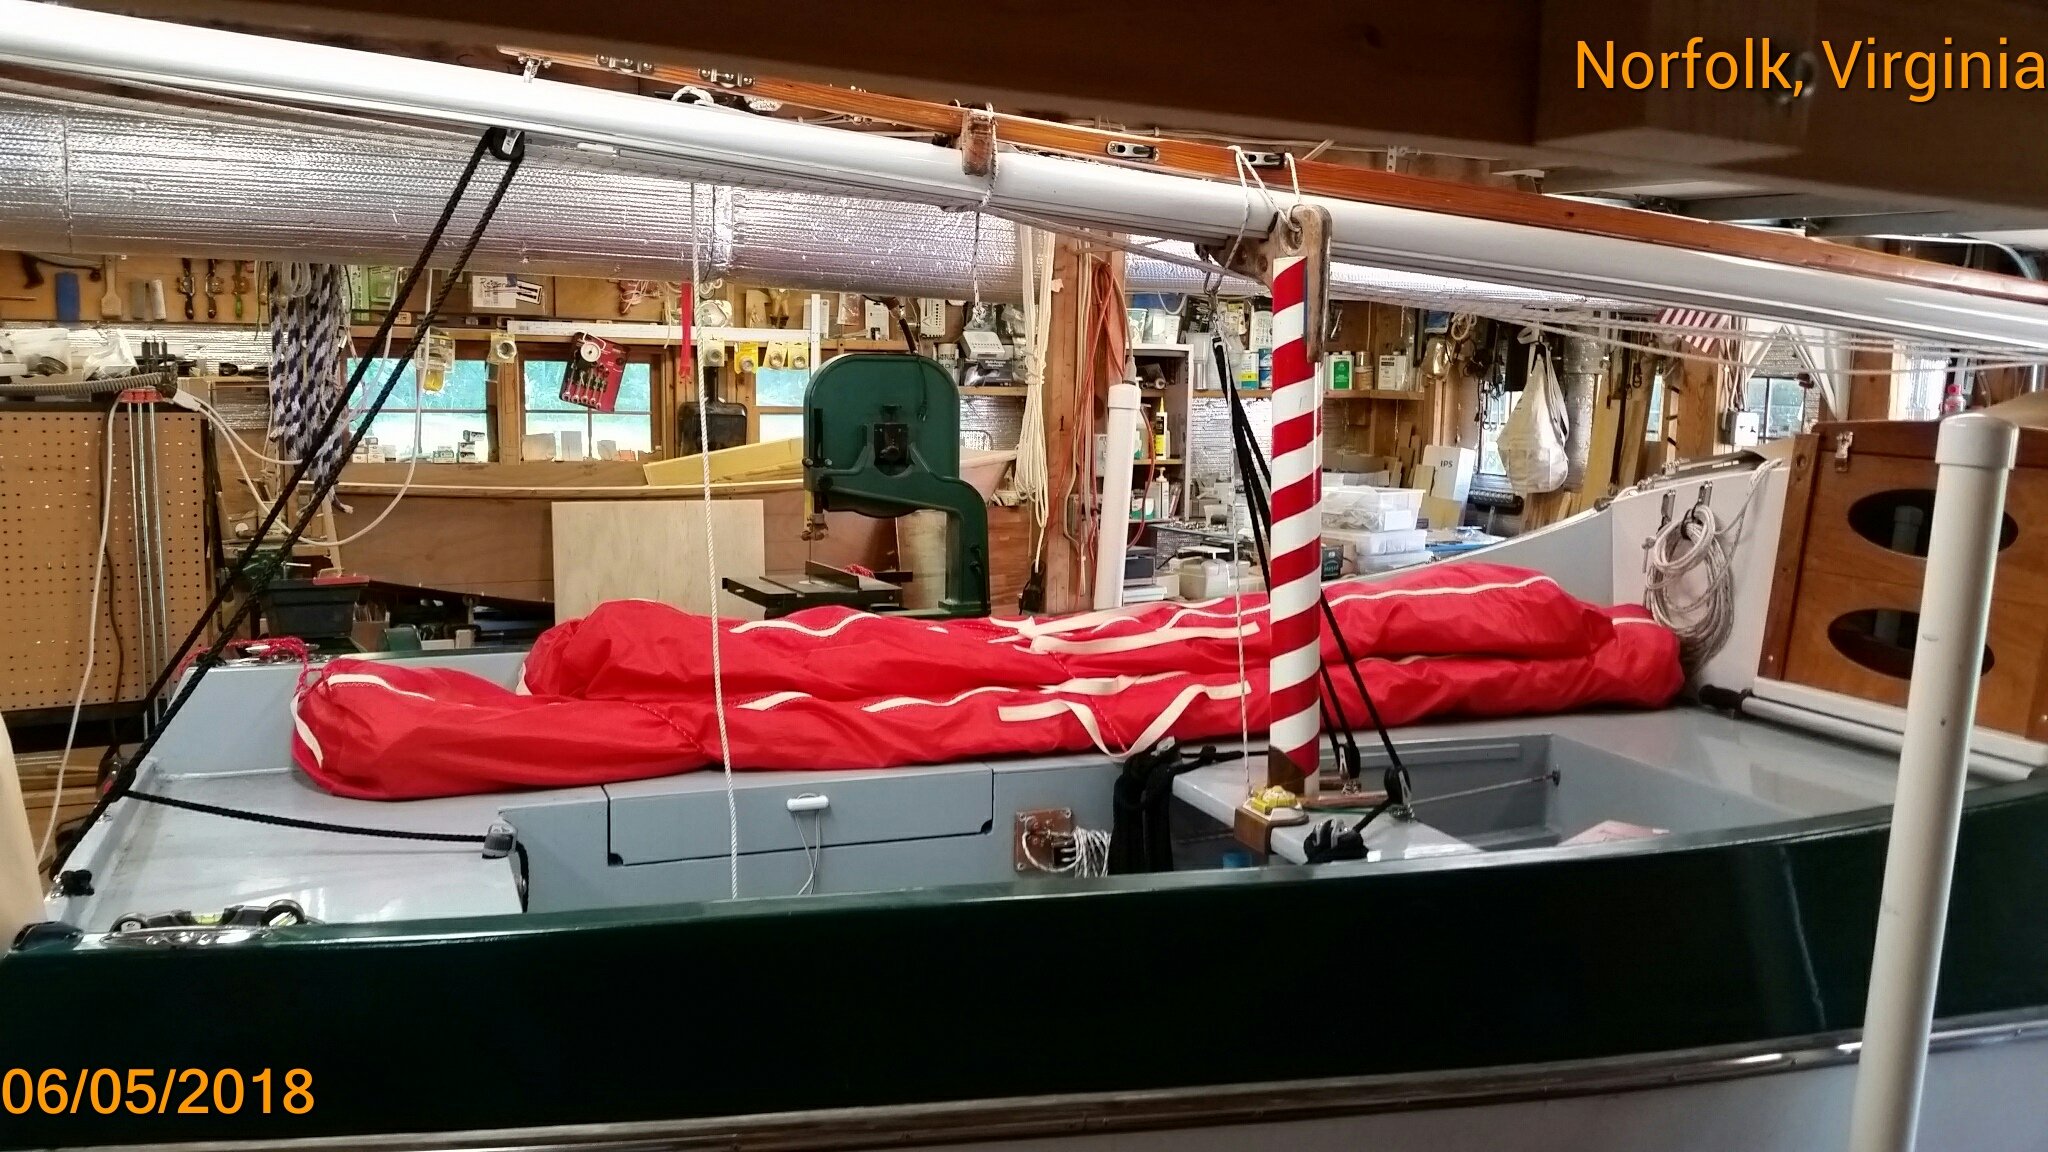
Well, it's been two months. Lots has happened. New stowage for gasoline. I had a gas-stowage rack inside the port hatch. I didn't like that because of the potential hazard and the hatch always had a slight gas smell. So I fabricated two racks to go under the mizzen partner. They each sit on the mizzen step and two 3/4" feet -- allowing footwell drainage under them. A shallow arc (1.5" radius) is cut into the inboard edges to fit against the mizzen [stepping] tube -- which keeps them firmly inplace. I can stow up to 9 one-liter plastic cans. If I take less cans, I can also keep two one-liter water bottles within easy reach from the helm. View from aft. view from forward. On my way to the early May cruise with the Shallow Water Sailors Chessie and trailer was weighed. The two numbers represent just the axle and the axle and the tongue. That's a tongue weight of 220 lbs. A bit too much for my Tacoma. I'll move the boat back a little -- aiming for about 180 lbs. By-the-way, the 2040 weight was with all cruising equipment. In another posting I'll give you the trailer-alone weight. On Memorial Day weekend we had a mini cruise to the Hartge Yach Haven (Galesville, MD on the West River). That's where I learned to sail at age 15 while washing dishes ($5 a week and all the sailing that I wanted between meals) at the YMCA Camp Letts. My son Jim and daughter-in-law Patricia joined Annie and me for the Sunday sail and potluck dinner. Photos show Jim on Chessie's bunk and the cabin's sitting head-room. On Monday am (Memorial Day) I had to motor from the Yacht Haven to the ramp at Back Yard Boats in Shady Side, about 4 nm. The sails were in their bags and stowed the night before on the port side of the cockpit. But we had lots of rain during the night, and because it was quite windy and I didn't have a good way to secure them in the cockpit, while motoring to the ramp, I decided to stow them in the cabin where they would need to be placed when trailering. What a wet mess in the cabin when Chessie was finally parked in the driveway. Next time I will transport (water or highway) the sails on the cockpit port-side seats -- like shown in the next photo: The sail bags will be firmly held to the seat with a line (hard to see because the line is red like the sail bags. The line loops under the mizzen partner and temporarily clamped to the coaming. For hold downs I will drill two holes next to the openings in the coaming. Their locations will be where the clamps are in the photos below. The forward tie down hole. The aft hole location. 3/4" holes just at the end of the clamps. The 3.5 Tohatsu ran just fine for each cruise. But on her next outing she wouldn't start! Turned out to be bad gas. The stabilizer label says it's good for two years. But the Tohatsu dealer told me not to trust it for more than a month or so. I'll follow his advice.


-
No. British Racing green.