Pete McCrary
-
Posts
692 -
Joined
-
Last visited
-
Days Won
40
Content Type
Profiles
Forums
Events
Everything posted by Pete McCrary
-
Anticipating that next year I will be "downsizing" from "Chessie," [CS20.3 #4] to a sailing Spindrift 10 -- I'm remembering some very "wet" experiences sailing my 11' 1" dinghy back in 1963. Its mast was stepped forward (cat rig) and I was at the dock dousing the sail. With my weight forward, the little boat was so unstable that she went right over! An embarrassing moment. Question for Spindrift sailors: With the zippered luff and sailing solo, how do you douse the sail in a hurry?
-
Stareed -- It's been a while. Hope you're ok? I'll soon start my own Spindrift build myself and have reviewed your build for guidance. Have you restarted your build?
-

Core Sound 20 Mk 3 -- #4 "Chessie" . .
Pete McCrary replied to Pete McCrary's topic in B & B Yachts Forum
A 100 lb Spindrift 10 and a pair of oars has got to be a lot less hassle [for old guy] than a cruising twenty foot sailboat and trailer with combined weight exceeding 2,200 lbs. I'm looking forward to it -- remembering the easy fun I had sailing "Outcast," the 11' 1" sailing dinghy that I made (from plans found in Popular Boating) in 1963. I had the sail made by Ted Hood. Had to sell her twice because of work transfers. Twice, because when we moved back to Massachusetts I found a sailing dinghy in the Classifieds -- and it was my Outcast! The second sale was when we moved to Virginia in 1977 to start my law practice. I like to think that 42 years later -- she's still sailing on Quanapowit Lake, Wakefield, Massachusetts. -
Core Sound 20 Mk 3 -- #4 "Chessie" . .
Pete McCrary replied to Pete McCrary's topic in B & B Yachts Forum
Thanks Steve, for the kind words. You're right -- not an easy decision. But for some time I've been concerned about some near misses that should've been avoided. Better to cool it now than risk an accident and injury or worse. My extended family is "more than happy" with the downsizing plan. I'll still be doing some solo sailing -- but in cool weather and not-so-distant venues. I'm still planning to sail alongside Skeena at the MASCF in October and maybe at the Messabout. I'll probably get a lot more sailing with the 10' Spindrift that I'll build this off season. Let your friends know that a fully equipped very good sailboat is available. A good offer from a quality buyer would be accepted even ahead of schedule. -
Core Sound 20 Mk 3 -- #4 "Chessie" . .
Pete McCrary replied to Pete McCrary's topic in B & B Yachts Forum
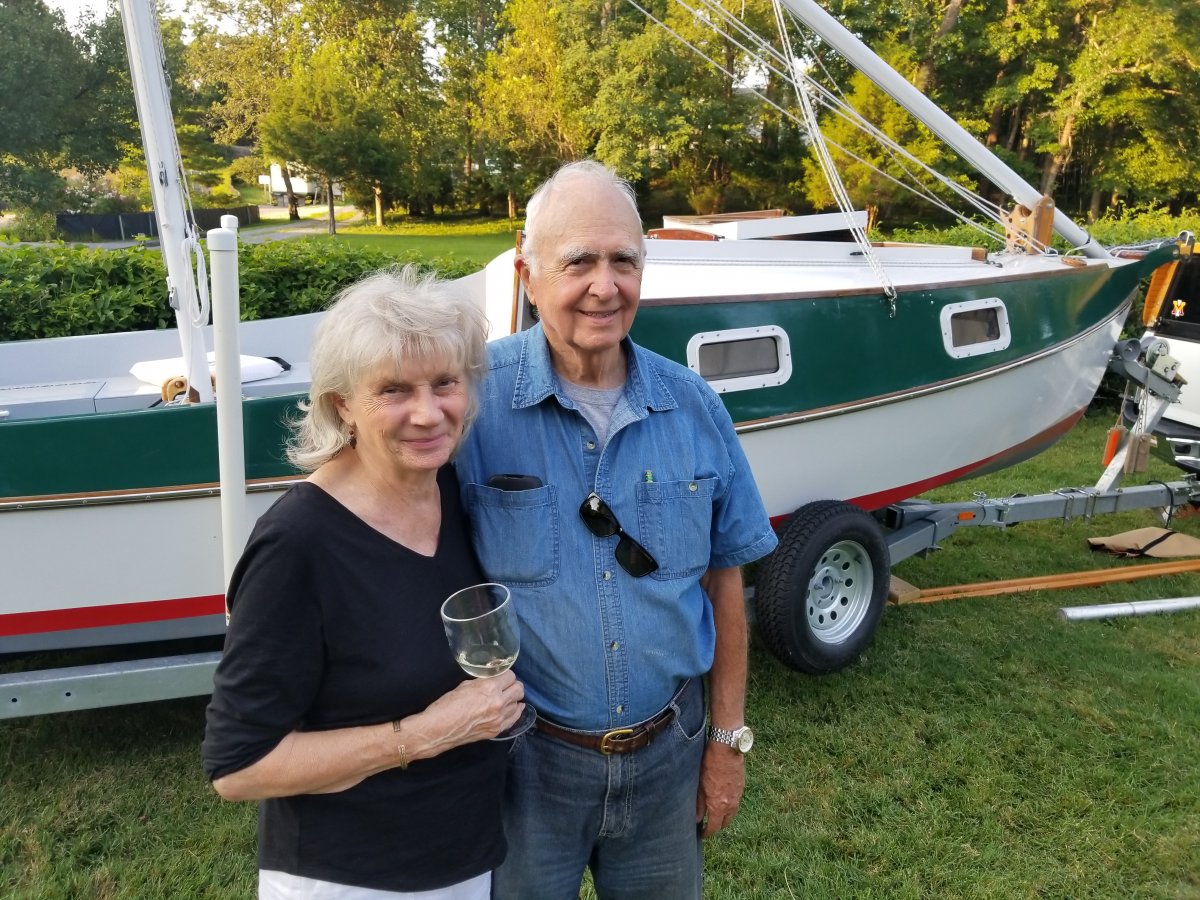
FOLLOWING UP on my posting on Monday, July 29. After trailering Chessie home Saturday night, I continued [my] physical recovery from near exhaustion thru Tuesday -- and on Wednesday I backed Chessie into her space in our garage. In the process I noticed that the mizzen mast was not secured in her forward crutch -- and neither was either mast secured in the aft crutch (the one stepped in replacement of the mizzen mast). The only thing holding the mainmast in place was its hinge and a line from the rudder cover up to the mast. If the pickup and trailer had hit a big bump (e.g., uneven bridge surface, RR crossing, etc) -- it could have bounced the mizzen mast entirely off its transport crutches and onto the highway. With likely disastereous consecqunces! LESSON TO REMEMBER: Dehydration and exhaustion also affect brain function! And although you may realize you're in a diminished mental state, it's too late -- awareness and extra concentration won't bring your brain up to standard. The only real answer is to AVOID getting into that state OR avoid entirely working with potentially dangerous systems until fully recovered. So, considering my age [86] and the demands of solo sailing and transporting a 20' sailboat --- Annie and I have decided that my years of solo sailoring are near an end. We plan a downsizing by selling Tattoo, Catnip, and the Tacoma tow vehicle (separately or all together) with a target date anytime from summer of '20 to the B & B Messabout in October 2020. In the meantime, I'll still be sailing in cool weather, occasionally demonstrating Chessie for interested buyers, and building the 10' Spindrift. Her tentative name: "Betsy Ross." In order to promote her sale, I'm presently in the process of drafting a "Chessie" Owner's Manual. Here is a tentative Table of Contents: Boat Sails Electrical Systems Outboard Motor Dodger Deployment Safety Systems Dinghy and its Transport Trailer and Transport Gear It will include procedures, specifications, and photographs -- and be made available to all in ".pdf" format -- along with links to Chessie's Build on this forum and to B & B's web page. Here are just a few of the photos that could be included: Family outing, Mattawoman Creek across the Potomac from Leesylvania State Park. Mid-Atlantic Small Craft Festival. Chessie's slip at Higgins Marina, Saint Michaels, Maryland. Catnip, nested and ready for stowage. Perhaps in a large closet. Catnip and owner/builder just before her maiden voyage, 7/27/2019. Owner/builder Pete McCrary with wife, Anna, and Chessie a month or so after her completion in 2017. Chessie & trailer with her tow vehicle. With her anchor & roller removed and the tongue folded back -- Chessie can be entirely inside the 22' garage with its door closed. It's a tight fit, but there's still enough room to move all around her. Masts need not be removed. However, in the off season the masts are usually removed and stowed in the garage attic. I do not have a good photo of Chessie under sail. If anyone who attended a recent Messabout has such a photo -- I'd appreciate receiving a copy. I have an [under sail] photo, but it shows Chessie back-lighted by the sun and is out of focus. Looking for a photo taken with the sun behind the photographer.


-
Core Sound 20 Mk 3 -- #4 "Chessie" . .
Pete McCrary replied to Pete McCrary's topic in B & B Yachts Forum
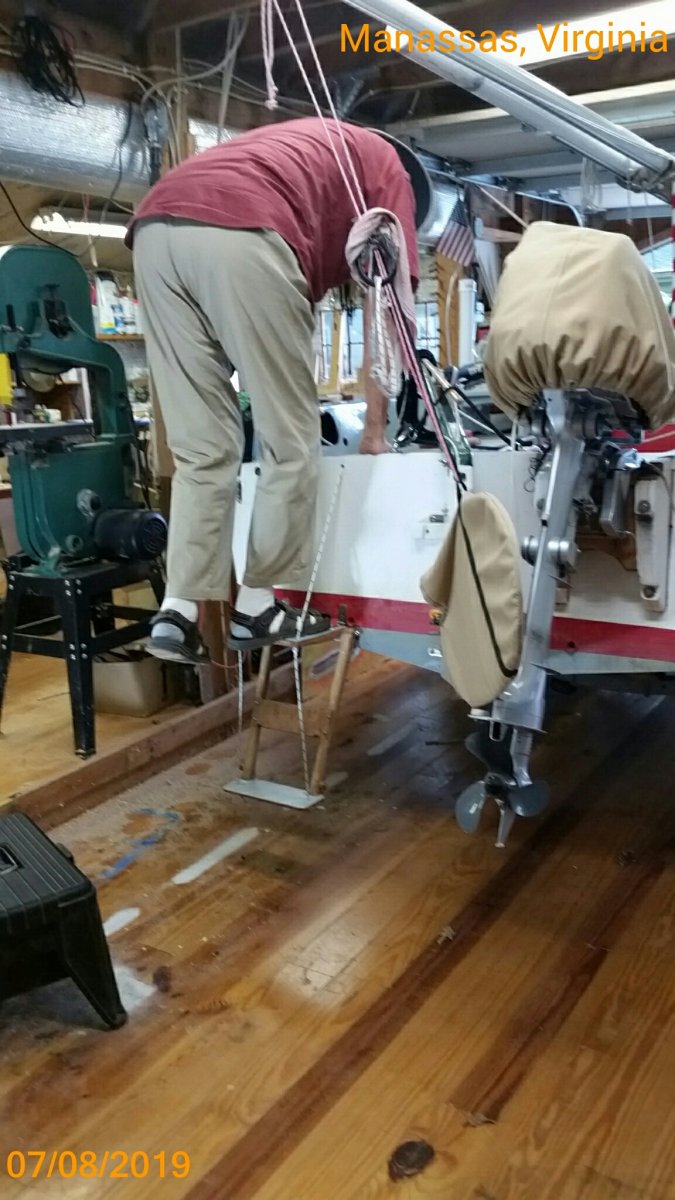
Last weekend Chessie (with Catnip in-tow) attended the 78th Annual Regatta hosted by the Corsica River Yacht Club. All are invited from all over the country and the races are organized by class. Lots of Pinquins, Comets, Lazers, and several classes of Catamarans. Also Catboats -- which is the class Chessie sails with. They let me in because her front half looks like a "catboat,". But they don't know how to assign a "handicap" number. So, I was hoping simply to come in FIRST by getting there first. But it was not to be. It was too hot and humid (~ 94, feel like 100 degrees). Although I was drinking lots of water and avoiding alcohol , by race time I was beginning to feel weak and light-headed. So Chessie and I didn't start any races. I decided to head for the ramp (and then home) after an on-the-water trial on the reboarding ladder. I anchored in midriff-deep water and waded ashore -- looking to recruit someone to take a video of me using the ladder. I did -- but it turned out poorly. So, I'm limited to simply describing the experience. Keeping my feet off the bottom, I easily managed to release the ladder from the transom. The lower tread "floated" (might add weights). However, by holding onto the transom with my right hand, I could lower the tread enough to place my left foot [on it] while keeping my right foot off-of-the-bottom. Then, with both hands on the transom and left foot on the lower tread -- I could pull with my arms and push up with my left leg -- to a standing position [on the lower tread]. Then I could steady myself by holding onto the tiller (right hand) and the coaming (left hand). Next, raise right leg up and place foot on the top tread. The next step was quite difficult (for this 86 yr solo sailor): extend right leg while raising left leg up-and-over the transom -- keeping hold of the tiller (and the coaming after left leg on aft deck). From there (keeping body CG low), the other leg brought over the transom and onto the aft cockpit seat or sole (can't remember which -- probably the sole to keep weight low). A younger person would have a much easier time of it. My opinion is that the ladder is much more effective than many SS folding ladders. Mainly because the SS ladders have treads much narrower and right above each other. The lower tread [on Chessie's ladder] is ~ 4" X 10" wide and extends aft of the upper tread, which has a width of about 6" X 8". And Chessie's ladder has a low profile and is easily deployed from the water. One of these days I'll have a competent partner who can document the boarding procedure in a video well-edited. Patience. CAUTIOUS NOTE:. The cruise ended (very poorly) after only one overnight (planned 2 0r 3). I returned to the ramp by about 3pm (a 10 nm trip, 2.4 hrs by OBM). Clear sky, little wind, lots of hot sun. I was very tired -- near exhaustion. The dock master allowed me to tie Chessie to an out-of-the-way slip while I resisted in the shade and tried to increase my intake of water. After about a 40 minute rest, I started the recovery process. It went well until cranking her onto the greased trough. It was a hard crank [for me] and when finally on the trailer -- I was exhausted and light-headed. I had to rest on the edge of the ramp for a good 5 minutes before moving the tow-rig up the ramp and under some shade. Then the routine process of making the rig road-ready had to be interrupted with frequent rests (in the air conditioned pickup). I dreaded the task of recovering Catnip and loading her halfs into Chessie's cockpit. I was spared that ordeal by a Good Samaritan father and his two teenage sons. Finally, all was road-ready -- but almost 8 pm! I got underway, but within 15 miles (110 mile trip) I was having leg and hand cramps. Stopped and retreated into a 7/11 air conditioned store and bought some cool water. Walked around a bit and noticed that I had failed to stow two throw cushions (which were on top of the sliding hatch!). A wounder they hadn't blowed off. Stopped 20 minutes later for dinner -- felt much better 40 minutes later. Didn't get home until 11:30 -- traffic was not congested, but very fast. We thanked God for safe arrival. Had leg cramps that night (up and stretching at least 5 times). Next day very weak and wobbly. Didn't feel right until Monday. I keep telling myself: Don't sail on the Chesapeake in hot weather! Just stay at home if the forecast is above 90 degrees. If I don't follow my own rule -- one day I could just keel over on the Tarmac or forget something much more important than two throw cushions. -
Couldn't find and bronze screws -- so SS it is! Catnip had her maiden voyage this weekend. Here are a few pixs: Standing by at the ramp dock. -- Rolphs Wharf Marina and B & B . . Chester River, Maryland. Being towed just after sunset traversing from Rock Hall YC to the Corsica River YC's 78th Annual Regatta. She's in the 2nd trough of the stern waves. I think she slowed us down by one knot. Just a little later. She rows very nicely. More importantly, she's fairly easy to board from Chessie's cockpit. I just sit on the coaming with my feet outboard and on Catnip's bottom. Holding Catnip close to Chessie's side, I can place my feet at the centerline of Catnip -- swing myself into Catnip while transferring my hands the the dinghy's gunwales while keeping my CG low. Reboarding is a little tricker.


-
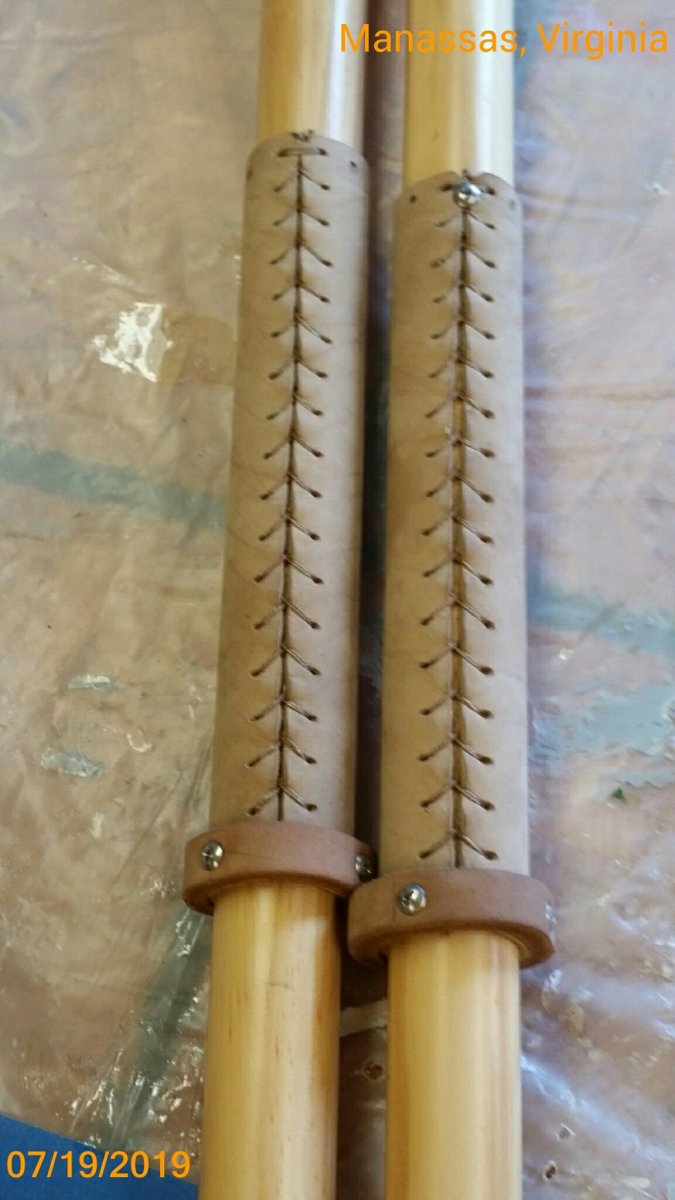
Here's the last job for Catnip -- leathers for her oars. The stitching for the oar on the right was done first. I think it's fair to say: There's no substitute for experience. The buttons ends have a tapered overlap (~ a 6/1 scarf). The buttons are secured with a #6 3/4" SS truss-head WS at each end and two more screws at 120 and 240 degrees. No glue. We'll see if they hold up ok. Here's a view of the entire length. Chessie is entering the Corsica River YC's 78th Annual Regatta on July 27. She will transport Catnip in her cockpit to the launch ramp on the Chester River. Over the weekend Catnip will enjoy her maiden voyage and "river trials." Report to follow.


-
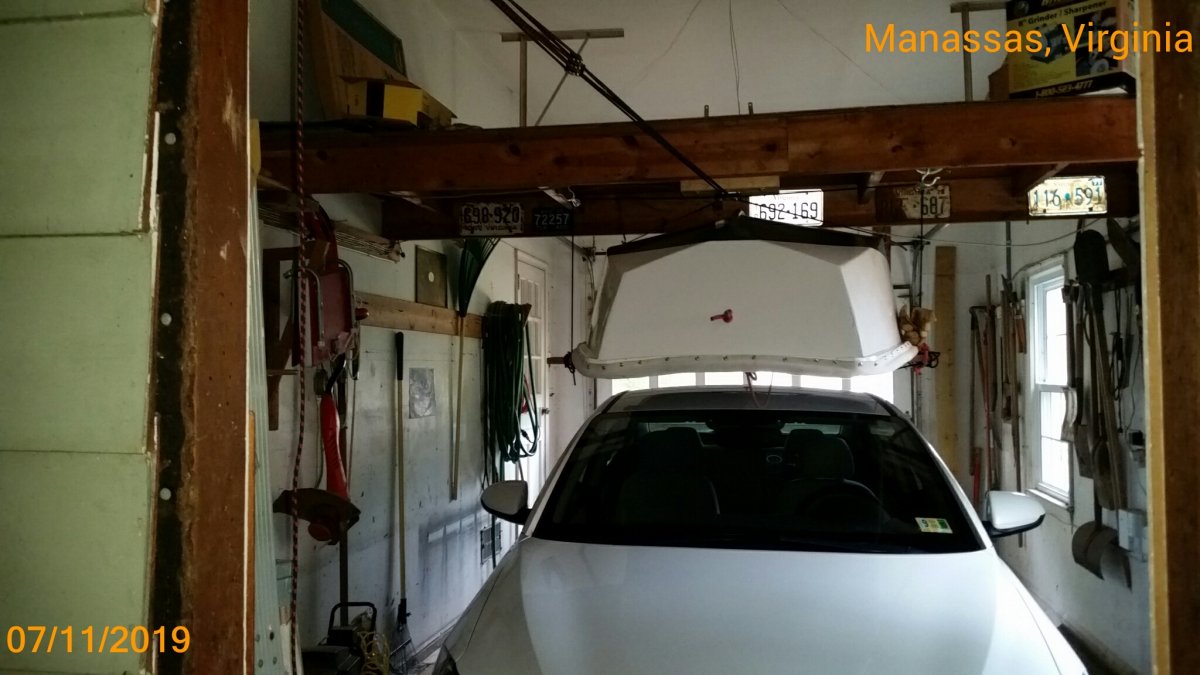
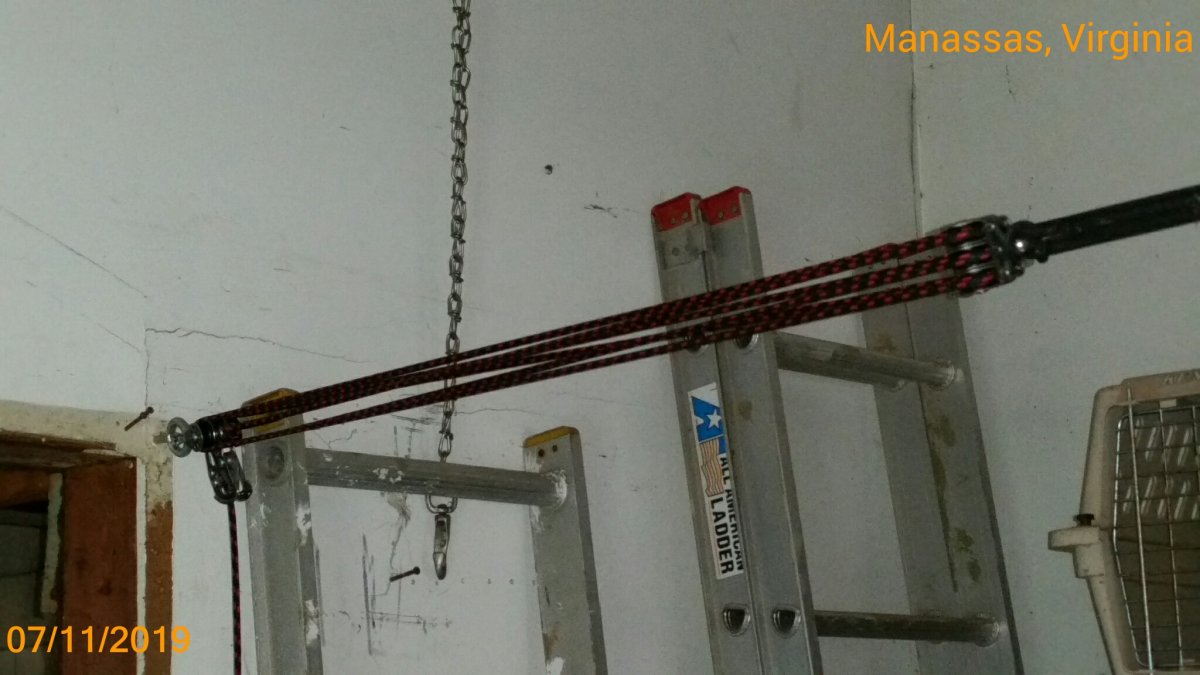
GUESS WHAT? -- All that thought and work for a hook to aid in lifting "Catnip" and her parts was for naught! Not necessary! I drilled a 3/4" hole in the aft end of the skeg (just like the one in the bow-transom for the painter). I just needed those holes and the ones available in each of 5 [empty] oar locks -- along with two lengths of 5/8" old discarded sheet lines. Experimenting with those tools I learned how to lift, carry, and manipulate each half dinghy with no extreme exertion or bodily hazard. Also, with two lines on the foreward half, I could easily align it for coupling with the aft half -- and keep it in position (with one hand) while tightening the nesting bolts with the other hand. All done solo. At this point (in the launching process) there is a 7' dinghy weighing about 58 lbs on a grass spot near the ramp parking lot. To get the assembled boat to the water's edge, I just tilt her up on one of her gunwales, tuck the tongue of a small hand-truck under it, and then pull the other gunwale up to the truck's handle -- off we go wheeling towards the water's edge -- everything under control. The hand-truck is easily carried in the pickup. Here's a photo of it: I think the hand-truck is a better solution for land-side transport than an "undercarriage" which must be placed under the centerline of the boat. And, usually, the undercarriage must be securely attached to its cargo. Whereas the upside gunwale is easily held (or lashed) against the hand-truck. After building my cedar-stripped canoe in 2001, I installed a lift in our garage (which had a very high ceiling) where I could stow the canoe which weighed about 70 lbs. The lift had a x6 purchase. That's where I now stow Catnip. Here are photos showing the close encounter with Annie's little Hyundai. The lifting lines slightly pinch the bumpers. I'll relocate the lines to ease the pinching. The aft & midship seats, painter, bailer, and small anchor are stowed on the aft lifting beam (a 1 x 6). I could keep them somewhere else -- but here, they are lass likely to be left at home. A couple of inches to spare. The pickup wouldn't fit. The lifting pullies with x6 purchase. The tail end has a built-in jam clutch for ease of lifting. Releasing is a two handed job -- one to keep the jam-clutch open and the other (gloved) hand for releasing the line. I've just ordered a sailing Spindrift 10 which will replace Catnip when she's sold with Chessie. Yes, Chessie will be available for sale over the next two sailing seasons. During that time she will be available for demonstration sails or other close looks (inspections). Thinking of a transfer maybe at the October 2020 Messabout.


-
Core Sound 20 Mk 3 -- #4 "Chessie" . .
Pete McCrary replied to Pete McCrary's topic in B & B Yachts Forum
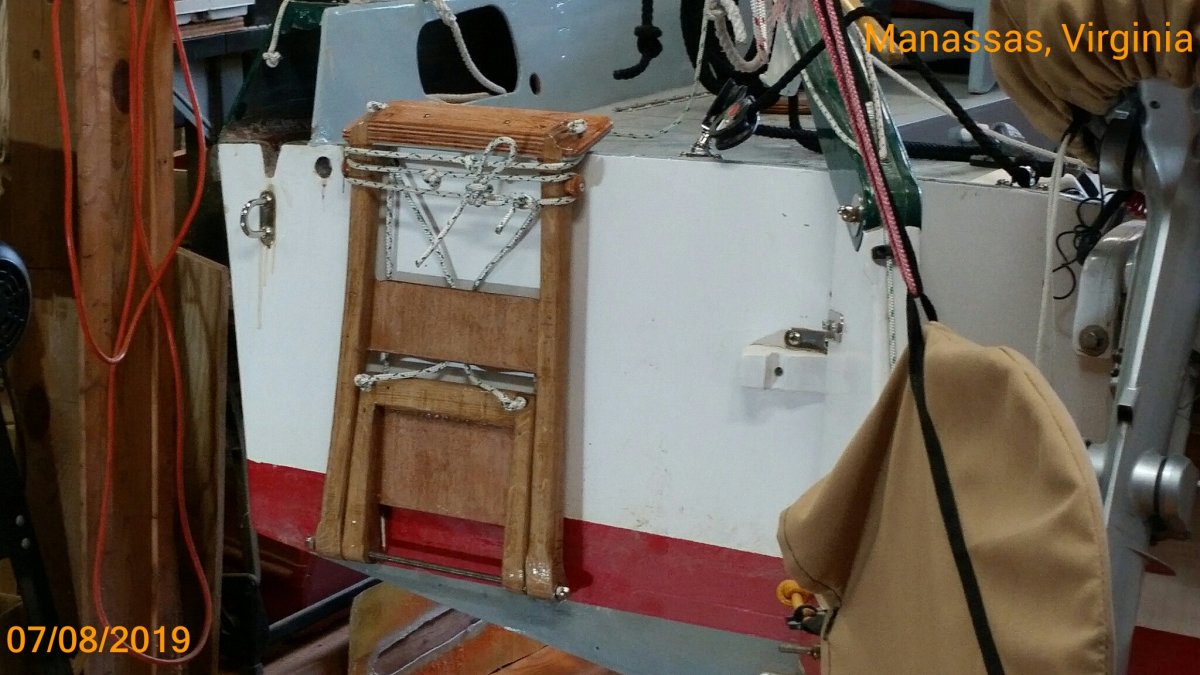
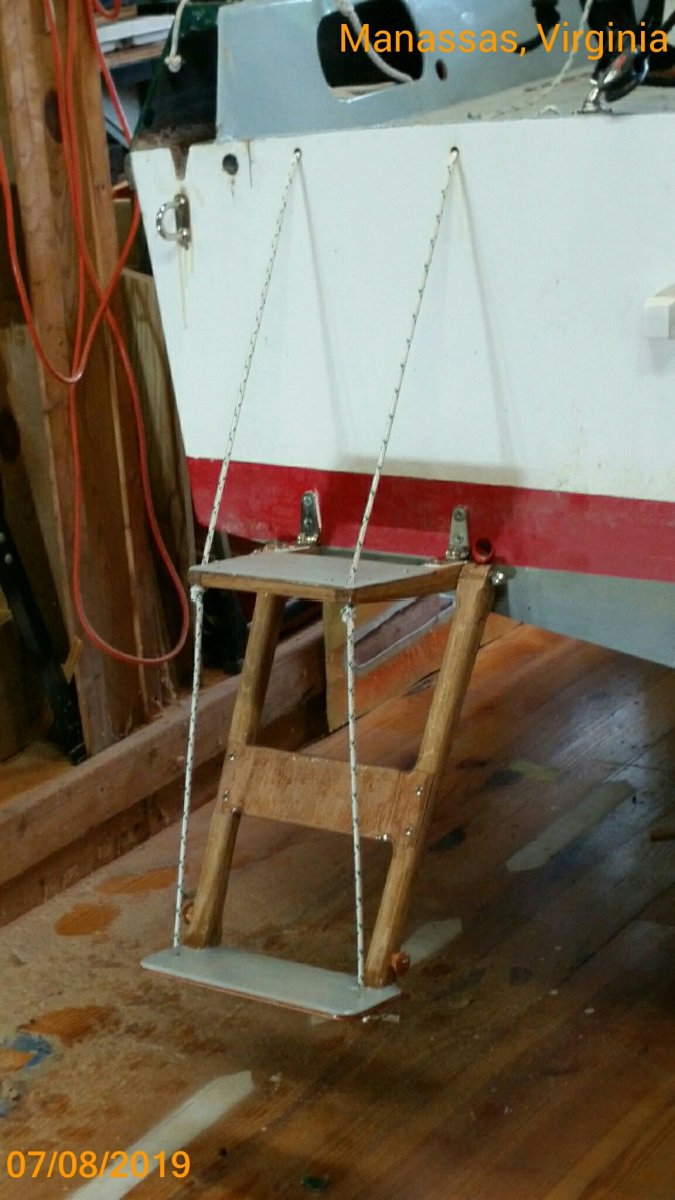
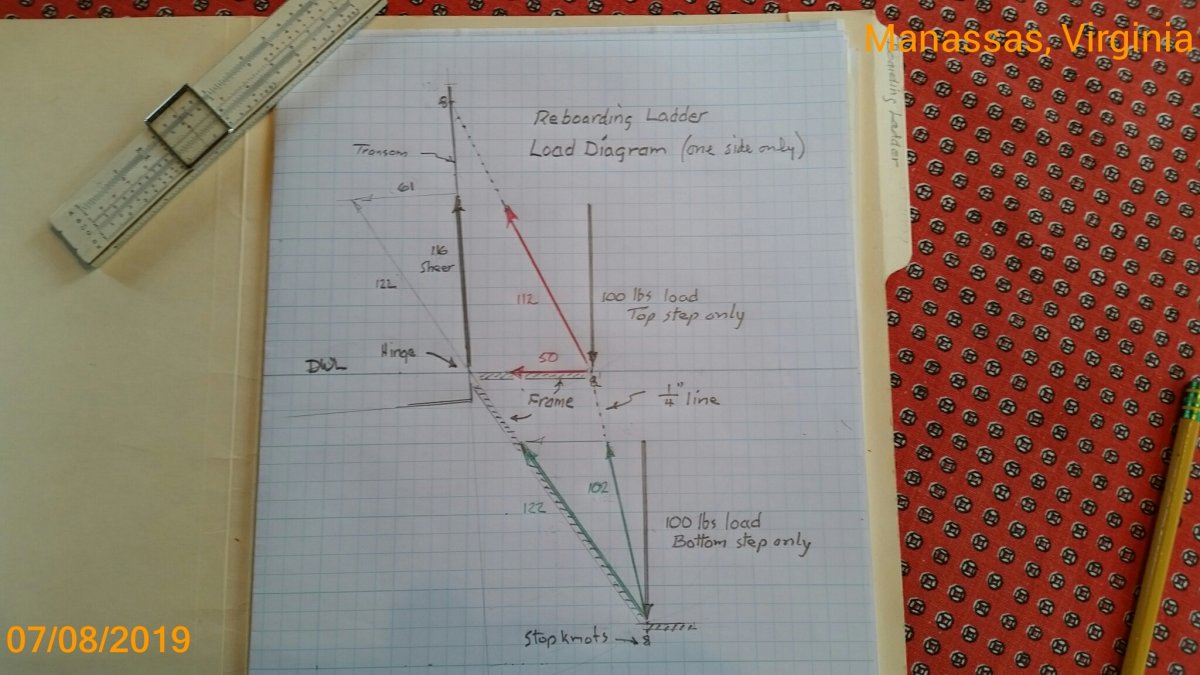
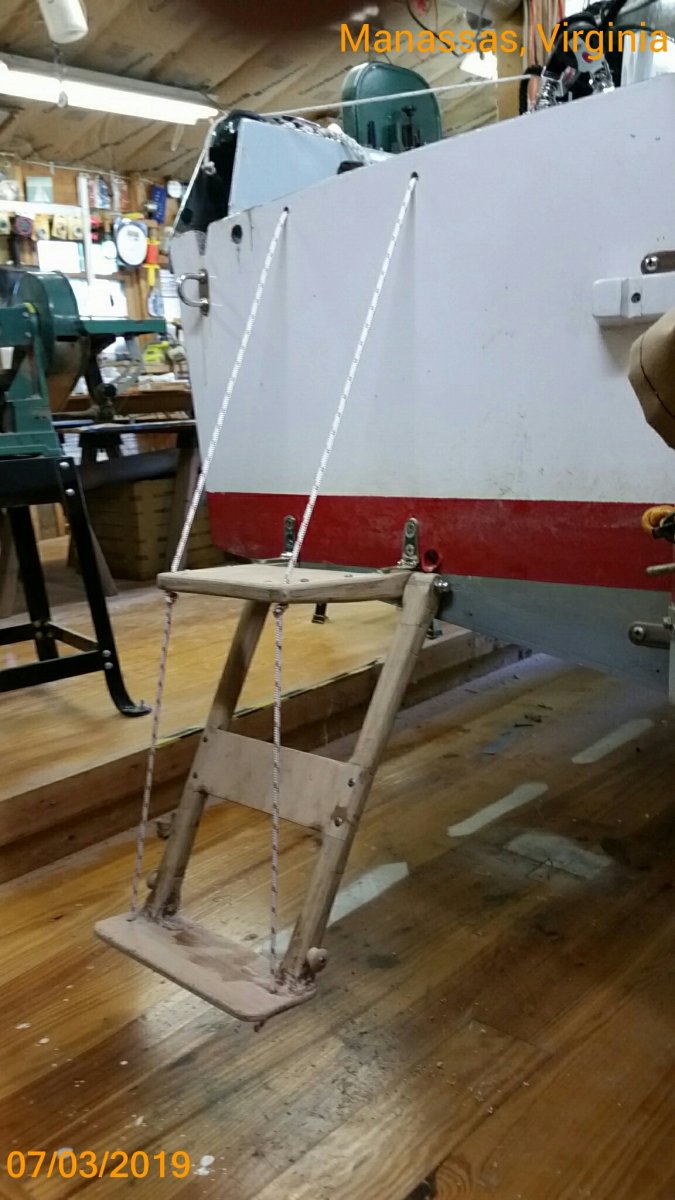
Chessie's Reboarding Ladder is finished, installed, and in-the-shop tested. Here's what it looks like. Stowed. Deployed. Notice that I followed Paul's advice and applied "no-skid" to both steps. Left foot on bottom step -- torso mostly under water. Ready to raise up. Raising torso out of the water. When in-the-water I might have to use both feet on the bottom step. Left leg fully extended and torso completely out of the water. Left foot just off the bottom step ready to raise it all the way up and over the transom. Almost there. Approximate force diagram for just one side of the ladder. I consider 116 lbs sheer stress on the hinge is modest and will not be a problem for the strap hinge (well bedded) with #12 X 1" SS FHWS. For the dry-fit I used 3/16" line. It felt inadequate for the full 200 lb weight. I went with 1/4" -- and it feels much more stable with less stretch. Complete on-the-water testing at the end of the month.


-
Jay and Graham -- Just the boat I've dreamed of building since my "Outcast" (an 11' 1" plywood sailing dinghy) was built in 1963. I will have much vicarious pleasure watching your progress.
-
Core Sound 20 Mk 3 -- #4 "Chessie" . .
Pete McCrary replied to Pete McCrary's topic in B & B Yachts Forum
Jay -- The strap hinges were attached with 1.25" #12 SS FHWS. The manufacture specified #10 screws -- but they were a loose-fit. The top of #12s are just flush with the surface of the hinge. The hinges were 1/8" thick. So the maximum "reach" was 1/8 + 1/4 transom + 3/4 blocking + fiberglass + 4 layers of neat epoxy + bedding compound = ~ 1.25". The two step-frames are only in compression -- and the only one creating any significant sheer stress (on its hinge) is the frame for the lower step. And I think that force is modest (just a fraction of the ~100 load). Later I'll sketch a vector-load diagram just to be sure. -
Core Sound 20 Mk 3 -- #4 "Chessie" . .
Pete McCrary replied to Pete McCrary's topic in B & B Yachts Forum
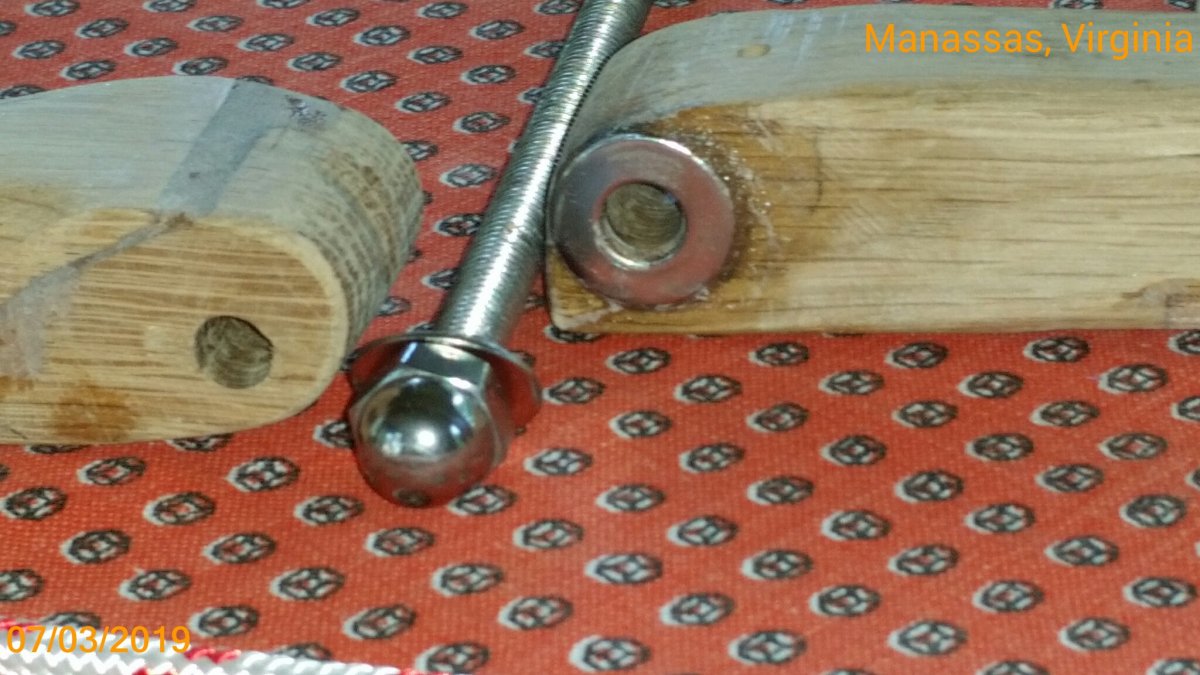
Here are photos of the ladder parts: Notice the center knots haven't been undone -- and that the beginning & end of each knot has been marked with masking tape. Also, starboard & port so they won't be accidentally switched (hole placements not perfectly symmetrical). Here is a closeup of where the two frames are hinged on the 5/16th rod.

-
Core Sound 20 Mk 3 -- #4 "Chessie" . .
Pete McCrary replied to Pete McCrary's topic in B & B Yachts Forum
Chessie's reboarding ladder is basically finished 'cept for two coats of neat epoxy and a bungee to keep it in stowed position. Here's what it looks like: Viewed from aft. Viewed from portside Deployed. I put my ~200 lbs on each step. Nothing broke -- and the 3/16" cords twanged like a banjo string when plucked. It took about an hour of numerous adjustments to get the 8-knots just right. I'll mark the locations before disassemble for the final epoxying. Bottom tread showing wooden "drawer pull" for stowage purchase. Ladder stowed against the transom. The slack has been taken from each line. Their ends will have bowline loops held in tension with a small bungee. Showing the profile from the cockpit. Hopefully it won't often foul the mizzen sheet. ADVICE PLEASE !! I've noticed that wooden ladders are never painted. Should that apply here?


-
Core Sound 20 Mk 3 -- #4 "Chessie" . .
Pete McCrary replied to Pete McCrary's topic in B & B Yachts Forum
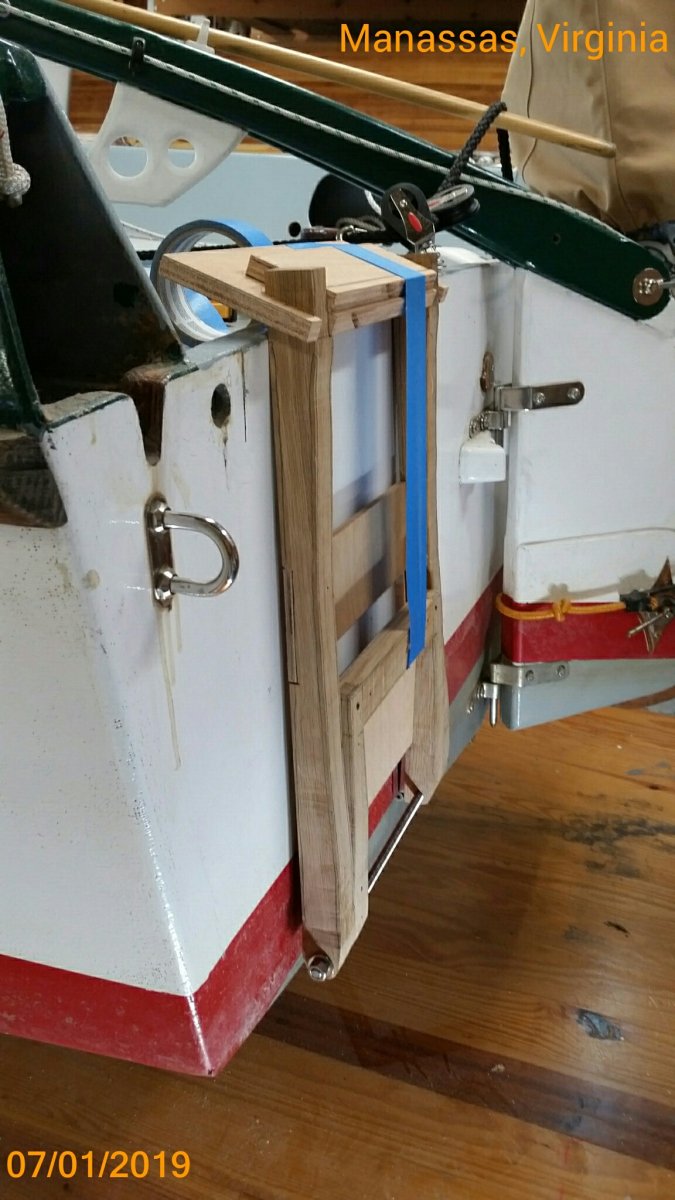
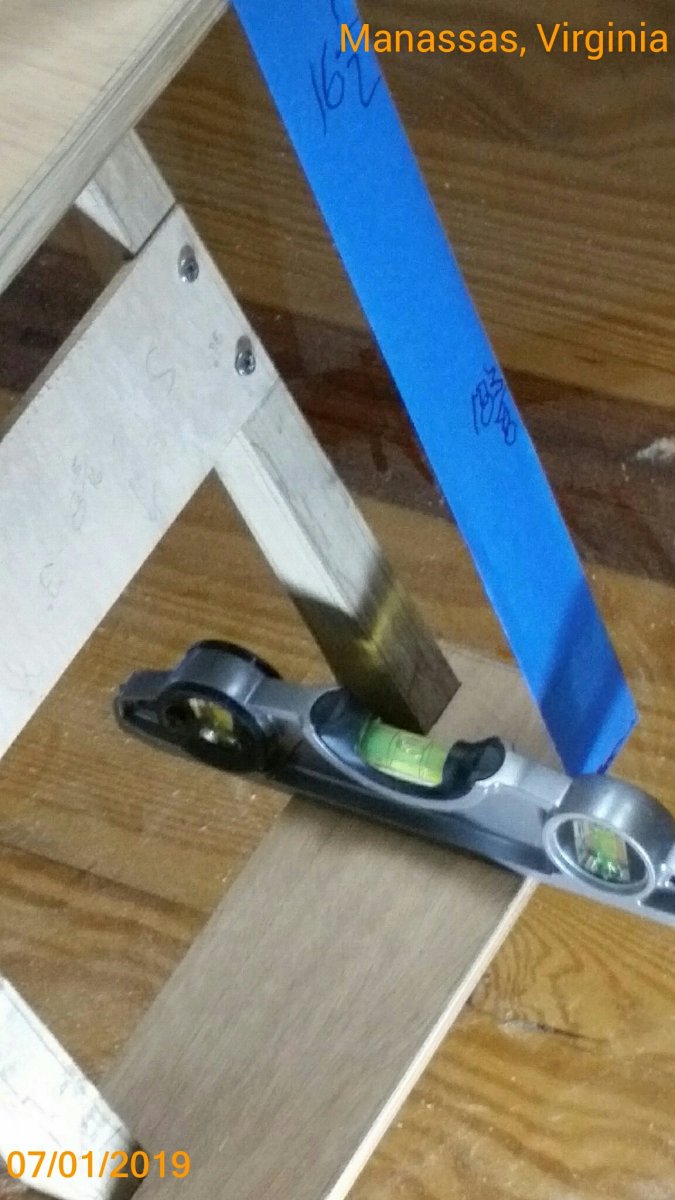
Chessie's recent encounter with a scary microburst has jolted me to build a reboarding ladder based on photos posted by Alex on 12/25/2015. Here are pixs of it "dry fitted" to the transom: First in its stowed position. Next -- it's deployed. The bottom step is about 16" below the water line. That step is about 11" wide and I should be able to place both feet on it. That will allow the strength of both legs to raise myself outn of the water and step onto the aft deck. The frame is white oak and the treads 1/4" and 1/2" marine ply. Hinge leaves are 1" X 2" X 1/8" SS with 3/4" yellow pine blocking behind the transom. The steel rod is 5/16" threaded SS. The ladder will be field tested July 27 at the Corsica River 77th Annual Regatta hosted by the Corscia River Yacht Club. Report and more photos to follow.


-
Core Sound 20 Mk 3 -- #4 "Chessie" . .
Pete McCrary replied to Pete McCrary's topic in B & B Yachts Forum
Joe -- the sail ties were "snug" but not "tight." The problem had to do with the first tie (up near the luff) where the wind could enter the open folds between the sail-track "cars." That allowed the sail to "balloon" from forward to aff -- pushing each sail tie towards the clew letting the balloon get larger and larger. At least that's my analysis. I don't believe it would have happened if I had followed my usual procedure when furling the sail: Unshackling the main halyard from the sail's head and looping [the halyard] under the sail [at the luff] and back up over the sail -- and belaying the halyard [using its shackle] on itself. Then taking up the halyard's slack and even raising the entire sail's luff [and bunched up cars] high enough on the sail track so that the forward hatch may be easily opened. That tightened loop close to the mast keeps the wind from ballooning thru the folds of the luff. The problem with that [procedure] when sailing solo is that in order to raise the sail -- the skipper must go forward thru the cabin (and up thru the forward hatch) in order to undo the halyard loop and belay its shackle to the sail's head. But I wasn't thinking straight because raising the sail is not something I would want or need to do in heavy weather. In fact making that loop should be standard procedure in preparing for the worst. BTY I had made that loop over the mizzen's luff -- no problem with the sail ties blowing aft. -
Core Sound 20 Mk 3 -- #4 "Chessie" . .
Pete McCrary replied to Pete McCrary's topic in B & B Yachts Forum
Remaining at the anchorage was an option -- and probably the right one. The anchorage was fairly close to shore but well protected from the forecasted offshore SWS wind. But I didn't know what direction the storm winds would be. And in my limited storm experience I had never seen anything even close to what I experienced later that day. Also, I didn't like the forecast for the next day when [the forecast said] I'd have to make the trip against 18 knot winds -- so I thought "do it now" and be home tonight. Now I'll know better -- even if it would mean an extra day waiting for better weather. -
Core Sound 20 Mk 3 -- #4 "Chessie" . .
Pete McCrary replied to Pete McCrary's topic in B & B Yachts Forum
Good advice, well taken. Promptly provided by Marc Cruder, retired Coast Guard officer and former Commodore of our Chesapeake Cat Boat Association. Pete: Glad you and Chessie are o.k. Not a good story, and perhaps poor marks for situational awareness. With a smart phone, you should be able to at least get the weather channel radar app, which will show you what is coming for 6 hours from the time you check. I use it to be sure I don't get wet when I want to ride my motorcycle. When you bring it up, it sometimes says "storms in sight"....then when you hit the future radar button, it can tell you exactly when it will be over you. Start practicing with that weather prediction routine. Alternately there is NOAA.gov, which can give you hourly chance of precipitation and wind speeds. Weather has been more extreme in recent times than we all remember. Glad you "lived to sail another day" mcc Just this past May (at a CCBA meeting) Marc gave a lecture and led the discussion concerning reefing -- and a good part of it was about being aware of the weather and the way to make use of what's available by means of smartphones. I should have paid much more attention. I'm usually more cautious -- but I had been looking forward to this cruise and the opportunity to sail with my son. Often, just wanting something so much, purely influences choices. I was lucky that the "tuition" for several lessons learned was not too high. -
Core Sound 20 Mk 3 -- #4 "Chessie" . .
Pete McCrary replied to Pete McCrary's topic in B & B Yachts Forum
A severe test for Chessie -- She gets an A+ . . My compliments to Graham and all at B & B Yacht Designs! With a nice weather forecast I launched Chessie on Thursday (June 13) from Leesylvania State Park for a two-day cruise. Then, when anchored at Pohick Bay getting ready to prepare dinner, a fisherman came by and warned me of bad weather expected. I checked my smartphone and the outlook was very different from what I expected. This was about 5pm and the sky looked nice and we were 10nm from the launch ramp. I decided to abandon the cruise and head for the ramp expecting to arrive by about 7pm. However, at about 1/3 the way rain and wind set in. Fortunately we were close to the middle of the Potomac where it is almost 2nm wide. Quickly the wind picked up and the heavy rain reduced visibility to the point I couldn't see either shore. In fact I couldn't read the compass or see any details on the GPS -- even the bow of the boat was hard to see. Upon launch I had already topped the ballast tank. Thank goodness! The worst of the wind was easily 40 knots, probably gusting to 50! The Honda 4 (long-shaft) was wide open and making better than 5 knots (when wind at 15 - 20 knots). But it wasn't enough to keep Chessie into the wind. The sails had been furled & sheeted midship and all made ready for the worst. But when we were blown sidways to the wind, Chessie was on her port beam and I was at the helm (starboard side) trying to hold on (OBM also on starboard). My guess is that she was (in the worst gusts) almost 80 degrees over. When the gusts eased a bit, she would come up a little and off her beam slightly. The mainsail became mostly unfurled! I thought then that she would go-over! But the mainsail didn't get into the water and the cockpit coaming never shipped any. However, the footwell scuppers couldn't keep up with the rain and water was about an inch or so deep in the footwell. It was all very frightening. I had never experienced anything like it. I felt very helpless -- all I could do was "hold on" and stay at the helm and try to bring her up into the wind. When she was sideways to the wind and healed way over, she was beyond any control. As things began to lighten up and visibility returned, I could see the lee shore in sunshine. It was much closer than when it all started. It all lasted about 20 minutes (probably less) until the wind reduced to 15 to 20 knots and the rain reduced so that I could see all shores. Curiously, there was no lightening. But all over the area the cloud formations were strange and omnimus. Into the 15 to 20 knot wind and chop, Chessie would make a little over 5 knots at full throttle (4,700 rpm). The tide was probably helping a bit. When the mainsail became unfurled, I thought that the sail ties had been blown off. But when finally on shore I found that they were all (4 or 5 of then) bunched up at the clue. That didn't happen to the mizzen. Home by 9pm. Inspection this morning shows NO DAMAGE -- and the cabin and everything that was stowed DRY! I wouldn't want to experience it again, but Chessie (and her designers) deserve an A+ !! PS -- Annie is thankful that "I'm home safe" and grades Chessie with an AA+. Sent from Yahoo Mail for iPad -
Don -- It takes a lot of thinking and trial-erra-try-again & again to "get-it-right." Or something close to it. My concept of the hook & rope rig is going to work out -- but it needs a better understanding and somelot refinements. Lifting the bow-half out of the stern-is much easier than lifting the stern-half off of the bow-half. If you have the space (overhead), it's easier to first tilt them (while nested) up with the nesting bulkheads down and level. Then the bow-half can easily be slid out of the stern-half. This weekend I'll try various improvements and post resulting photos.
-
Attached is a sketch of the design concept showing relative positions of trailer, big-boat, a half-boat and the loader (approximately to scale). I'll need one hook and approximately 10 feet of large diameter line (for easier purchase). The loading board will already be in place. Its high [fwd] end will be a little over 5' 2" high (and lower [aft] end) about 4' 3" high. The trailer fender is about 26" high. Standing close to the FWD half-boat (bow to the left) I'll raise it about 26" and rest its lower gunwale on the fender while gently pushing it against the loading board. At that point its "tipping point" will only need to be raised another 12" or so. By raising the half-boat (while simultaneously pushing against it) to its tipping point -- it can then be rotated over the edge of the loading board and onto the bridge deck. The AFT half-boat is loaded the same way (but transom to the left). Once over the tipping point, instead of sliding it onto the bridge deck, it is placed over the top of the FWD half-boat. Then remove the lifting rig and adjust the two half-boats so that they nest comfortably. They are very closely restricted (fore & aft) by the mizzen mast and cabin bulkhead -- and need only be tied down restricting verticle & side-to-side movement. Unloading should be close to a reverse of the loading procedure. DOES ANYONE think that I can MAKE THIS WORK SOLO? Comments, suggestions, WELCOME.

-
Core Sound 20 Mk 3 -- #4 "Chessie" . .
Pete McCrary replied to Pete McCrary's topic in B & B Yachts Forum
Interlux polyurethane Topside -- White, Sea Green, Kingston Gray, and Red for the boot. I used their Pre-Kote as the primer. Yes, I like the gray -- it's easy on the eyes in bright sunlight and not hot to sit on. I call it "battleship" gray. If it's ok for the Navy . . . -
Considering towing -- first I have to get the little boat onto the big boat. Although each half is only a little over 30 lbs -- each not having "handles," it's not easy to lift either over Chessie's cockpit coaming and into the big boat. So, here's my design concept. The problem -- a tall guide-on in the way. And the coaming about chest-high. Temporarily remove the guide-on and make a wooden extension. Fabricated a cedar board with a channeled "leg" to be strapped to the wooden extension of the guide-on. The underside of the aft end of the cedar board is resting on the coaming. The loading board firmly in position. The forward end has notches that rest over the toe-rail and dodger coaming on the cabin roof. Now I still need a simple lifting rig so that (without any help) I can get each half of the nesting dinghy onto the bridge deck. Here's my idea -- a couple of hooks cut from 1/2" ply made to fit over the gunwale and bumper. Here's a gross sketch: Next, I'll figure out a way loop the pair over a one-half boat with its interior facing away from me and the bottom facing me & it's centerline horizontal, I'll then place the hooks over the lower gunwale and raise (by pulling up on lines rigged to the hooks) the half-boat so that the [upper gunwale] will go up and over the loading board and onto the bridge deck. Do you think i can make it work OK as a practical matter? I'm going to give it a try. SUGGESTIONS WELCOME !!


-
Core Sound 20 Mk 3 -- #4 "Chessie" . .
Pete McCrary replied to Pete McCrary's topic in B & B Yachts Forum
Little things. Getting ready for 3-day event on West River on Memorial Day weekend. The soft plastic holder came with the handheld VHF transceiver. Within ear shot and easy reach of the helmsman. Figure no one will be sitting opposite the mizzen bridge.
-
Core Sound 20 Mk 3 -- #4 "Chessie" . .
Pete McCrary replied to Pete McCrary's topic in B & B Yachts Forum
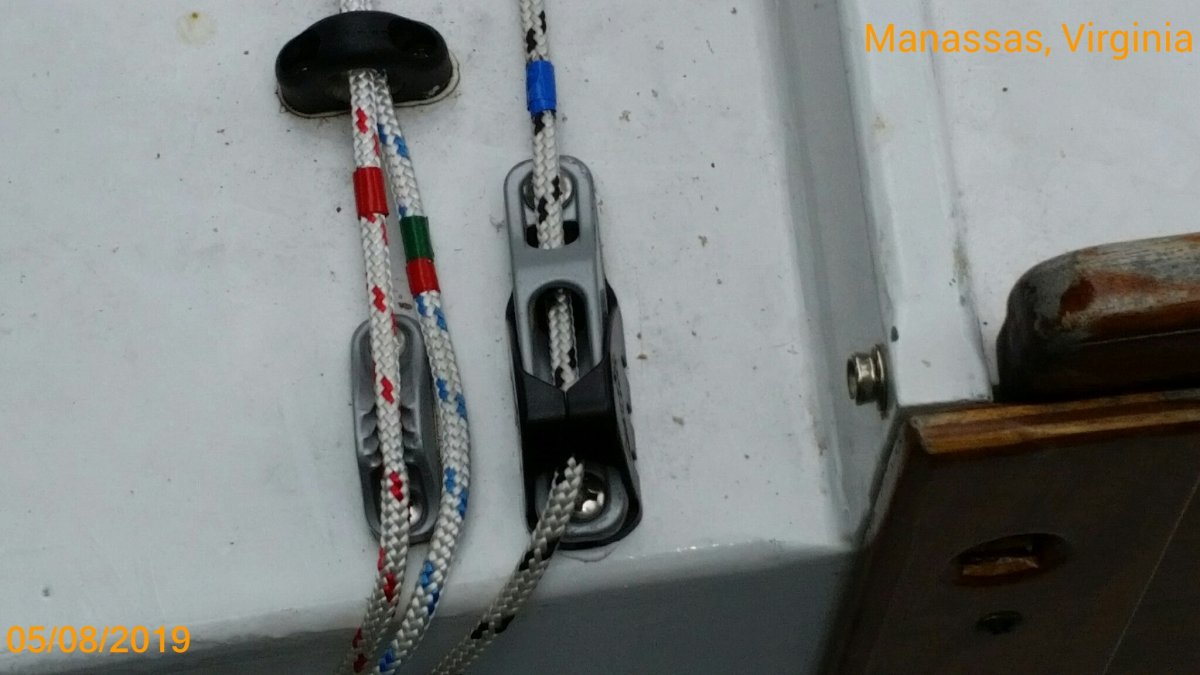
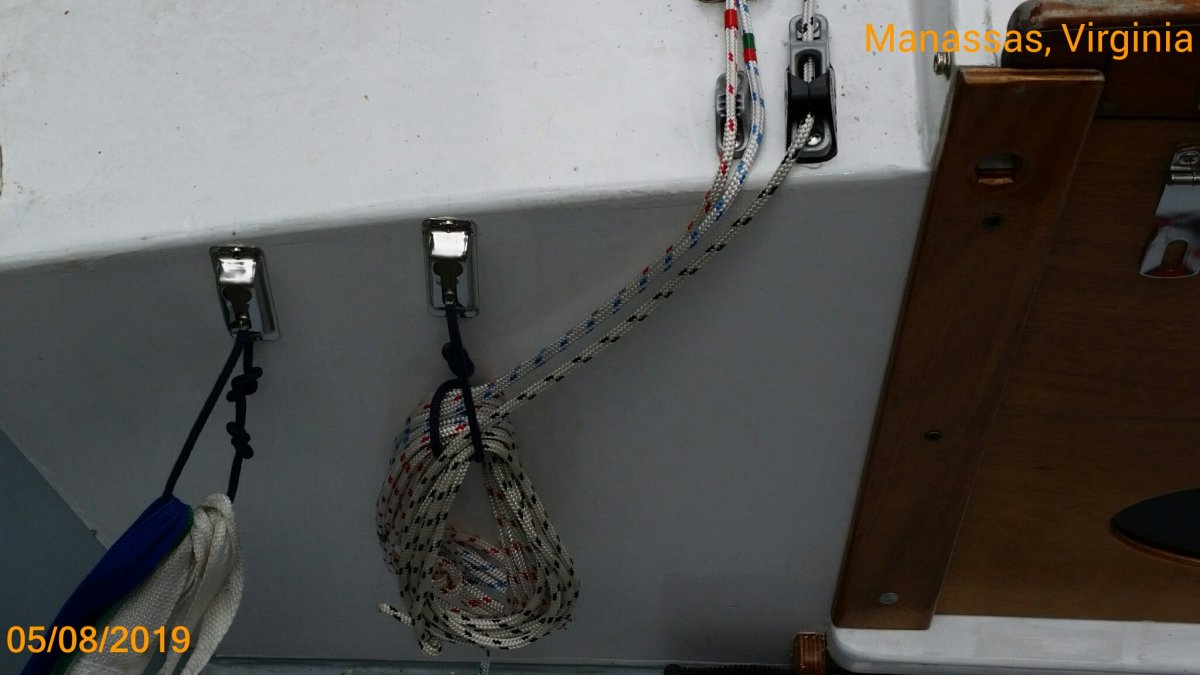
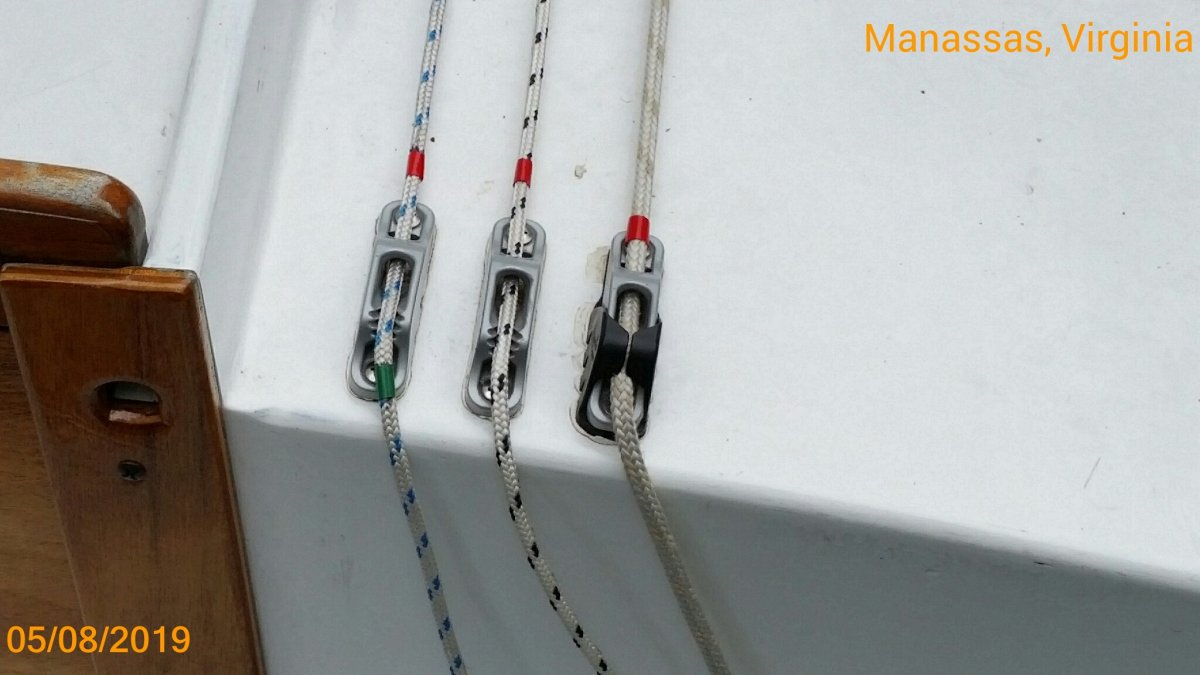
Although Chessie's maiden voyage was almost two years ago -- she hasn't been sailed much because of OBM problems that were just solved last September with the purchase of a 2019 Honda 4 long shaft. Now that the OBM is working just fine, I'm looking forward to much more sailing this season. So, I decided to fine tune the reefing system. From the sail plans I measured the distances between the cringles (tac to 1st reefing and 1st reefing to 2nd reefing). Using those distances, I marked the halyard with colored plastic tape. For each reefing position, the halyard was set first to the measured point -- then the other lines trimmed and positions marked. With sail's head full-up (no reefs tucked) and other lines trimmed -- I marked each line (just ahead of its cleat) with BLUE plastic tape. That included the reefing lines with slack taken up and the topping lifts. I chose BLUE as a reminder that fair sailing is like the "sky's-the-limit." GREEN for the 1st reefing points and RED for the 2nd reefing. On the starboard side (left to right): Downhaul (tac cringle), snotter, and halyard. Trimmed positions for the 2nd reefing. Port side (left to right): 2nd reefing downhaul (cleated), 1st reefing downhaul (not cleated, and topping lift. Trimmed positions for the 2nd reefing. Notice that the 1st reefing line position is the same for both reefing positions. Also, the topping lift shows BLUE because its trim position is the same for all. Keeping the lines off the deck. I changed the cleats on the sprits from the "jam" type, to small "horned" type. The horns provide purchase for attaching the excess lines when sailing reefed. They also help keep the reefing lines where they belong when the sail (with the sprit) is stowed in its sail bag. The red line (white with red marks) is for the 2nd reefing position marked with RED tape. The reefing line for the 1st position (white with green marks) is marked with both RED & GREEN tapes because it's the same for both. Set up with both reefs tucked in. This is the position for my take-down after recovery on the ramp. The sails are kept bent to their sprit booms with the leech reefing lines in place. The sail bags are made to hold both and they are transported in the cockpit. So, when the sails are bent to their masts -- both reefs are already tucked in. If it's fair sailing, it's easy to shake out one or both reefs. And if a reef is called for, it's already tucked in. I think it will work out ok.