PeterP
-
Posts
407 -
Joined
-
Last visited
-
Days Won
16
Content Type
Profiles
Forums
Events
Everything posted by PeterP
-

For Sale - Centerboard, Rudder, & Tiller For PS26
PeterP replied to Scott Dufour's topic in B & B Yachts Forum
Don, I don't think it is a pintle. I would guess it is a random piece of tubing or rod he used to shape the straps/gudgeons. Then again, maybe you just hit on the real reason he wants to sell? Only kidding. PeterP -
Let's hear it for Frank for sprucing up the site! I think Frank needs a good grant writer to apply to HHS for cash reward for running a low cost program that keeps a bunch of insane people out of bigger trouble. Well done- PeterP
-
You guys should look into NAVIGATRIX. I have it on my e-bay $100 HP2740 that I use on the boat. It is absolutely brilliant. Designed by cruisers for sailors. And, technically, it can be had for 0$. ( They ask for donations ). As for charts- ALL CHARTS in the US ( -both raster and vector- electronic data) are produced by the government. ANYONE can download them for free. Including updates, notices to mariners and such. Part of your tax refund. Why would anyone pay gobs of money for free charts? Another way we all pitch in to perpetuate the -boat is a hole in the water to throw money into- my guess. Navigatrix AND every single ( vector) chart of US waters will fit onto 8Gig thumb drive. It is a stand-alone app - just stick it into USB port, boot up and you're away. I should also mention that I had to buy a puck GPS ($40) since the HP has no inbuilt GPS capability. As I am writing this I noticed that Navigatrix has a beta version for Android. That sounds tempting since I also have Galaxy5 but I think I still prefer the larger screen of the HP for chart work. As a back up maybe. Fair winds PeterP
-
Don, it is not a question of sinking the boat because of a leak through there. If the wood is not well sealed mother ocean will find its way in there. You can bet on that. Then next time you take things apart there is a nasty old spot of rot looking at you. Some people use the bow eye for tie off. If you're one of them count the number of jerks that thing is subjected to in even placid water. Amazing, and it all adds up, almost makes you feel like she works to a plan. PeterP
-
I like to do drilled out epoxy bushing with sealant of your choice. Butyl rubber is good but I have used good quality window caulk like OSI QUAD. Cheers PeterP
-
I did SS machine screws on my P28. As you said - nut on the inside should work better than anything. Whole lot quicker too. I used Teffgell (sp?) because that is the recomended stuff to keep aluminum and SS happy together but I have no idea how well it is going to last. If the plan calls for screws on top -do it. Graham ALWAYS has a reason. In this case I suspect he simply wanted to save some work because with nuts and bolts on top you would have to cut dadoes in the plug to get it inside the mast over them. In other words not a strength issue rather KISS issue. Good luck PeterP
-
Hate to do this to you but you will not know if your boat is level until you establish the water line. That is your number one reference line. Everything you put in the boat is related to it one way or another. You can build a boat without knowing where it will be but if you screw up you will kick yourself for not being patiet. Think of it as waiting for tide. My advice is to flip the thing and glass it. Graham will be back long b4 you get that done. You could also try contacting Jay to see if he has the numbers you are looking for. PeterP
-
You will need two long battens struck horizontally across the bow and transom at the height of the water level. They should be long enough so that line pulled across the top of them and parallel to the boat centre line will touch the extreme width of the hull. Mark the three points: where the string touches the hull and the two points on the battens. With two people - pull masking tape across the sticks and watch it pull a perfect line on your boat. With one person - I stick the tape at the mid point on the hull an pull one way and then go back and pull the other half. Take note that the upper edge of the tape will be the bottom of your bootstripe. Graham likes his bootstripe to have an upward tick. On the 17' the stripe goes 2.75" -1.5"- 2" bow mid stern. The 28' goes 6" -3" -4". The smiley effect helps cover up out of trim flotation. Figure out your stripe ratios. For example let's go with 5"- 3" -4". Meaning that the stripe will be 5" wide at the bow, 3" amidship and 4" at the stern. What you need to do now is to rig up two ramps -one in the bow one in the stern. In the bow fasten the inboard end of the ramp 5" up from the horizontal batten at the centerline. The other end will slope down so that at the mark you made earlier it is 3" above horizontal. Do the other ramp going from 4" to 3". Now pull the tape across, - it should touch the hull 3" above your lower tape at midpoint -stick it to the hull and walk the ends up the ramps. Pay attention and go slow because now you will be pulling a curve so the tape needs to be tweaked up in a gentle arc rather than a straight line. Let your eye be the judge - as always. The actual positioning of the boostripe is an individual choice. Should the waterline go through the middle of the stripe, should it be just above,a bit proud of it in anticipation of heavy crew? So many choices, so many opinions. Good luck with it. PeterP
-
Don't sweat it friend. Glassing the boat will keep you busy for a while. Then you need to fill and sand and fill and sand and fill and sand....Then it'll be painting time. You will need to figure out the water line to do the bootstripe but even if Graham and Alan should vanish from this earth there is a good and fool proof way to establish the waterline. Prime the boat and let it float in a placid body of water. Pull it out after a couple of hours and there she be. Never fails. But they will be back long before you need it. Good luck PeterP
-
Chick, I agree with you on the bootstripe. My point was simply to say that having the boat plumb and level makes for much easier fitting out. He is nowhere near ready for boot stripe. Graham's method is the way I do mine and you are right again - no laser is necessary. All you need is a roll of tape and handfull of 1x2 sticks or some such. Cheers PeterP
-
The water line is in your plans unless you build from a kit with no drawings. If you have plans find the line and transfer it to the boat. If not,you will have to wait for Graham to get back. I normally locate the line in the bow and stern then pull a string inside with a bubble level to level the boat. On the outside I use a cheap laser on camera tripod to shoot series of dots/marks connecting the two measurements. To have the water line marked off -inside and out- is - to my mind - fairly critical to a succesful build. Plumb and level the boat and every piece wood you put in will have an easily discernible relationship to the water line. As for the boot stripe I can walk you through it but you have a long way to go on that one. Like Chick says perhaps Alan will post a video on that. Good luck PeterP
-
The "bullet proof" solution in this situation-in my opinion- is to drill an over size hole, fill with thickened epoxy and then re-drill for the bolt. You'll end up with a solid epoxy bushing that is just about guaranteed for water resistance. Works even better under 'glass. Good luck -PeterP
-
That is a major step. It made for a long workay (and a restless night -I'll bet). PeterP
-
Ken, I'm still working on the sail end of things. But she motors well. Howard, she's tied tied up at Graham's. You're always welcome. peterP
-
So there it is: Final chapter of Book I - She's in the water. Huge amount of physical effort, time and emotions all culminating in that one point. Something I find very difficult to put into words. John Eliot Gardiner calls the concept "insufficiency of language" in his book on JS Bach. PeterP


-
Thick and Thixotropic are two different concepts. Thixotropic refers to a fluid whose rheological properties change with application of shear stress. It forms a pseudo gell structure (thickens) which breaks down with application of force and it becomes runny. Ketchup is a great example - it is thick yet you skake the bottle and it becomes runny -every time. In contrast when you thicken epoxy it stays thick no matter how hard you stir it and then it sets up (permanently). Not the same thing! PeterP
-
Had some leftover Ipe after I finished the keel. Plus a couple of 3/8 carriage bolts for added strength.
-
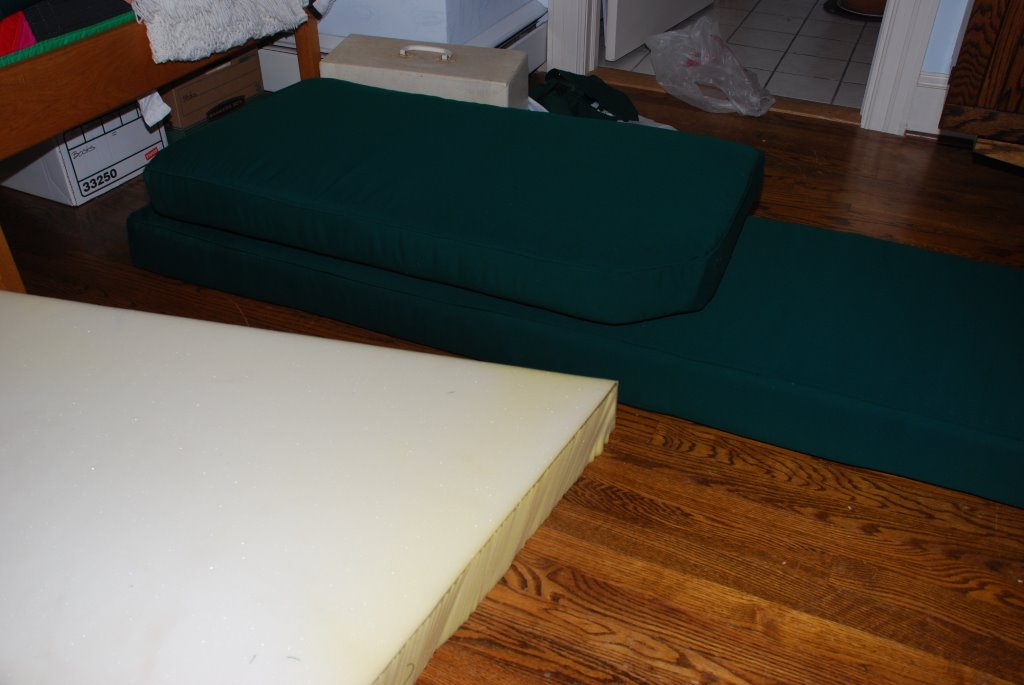
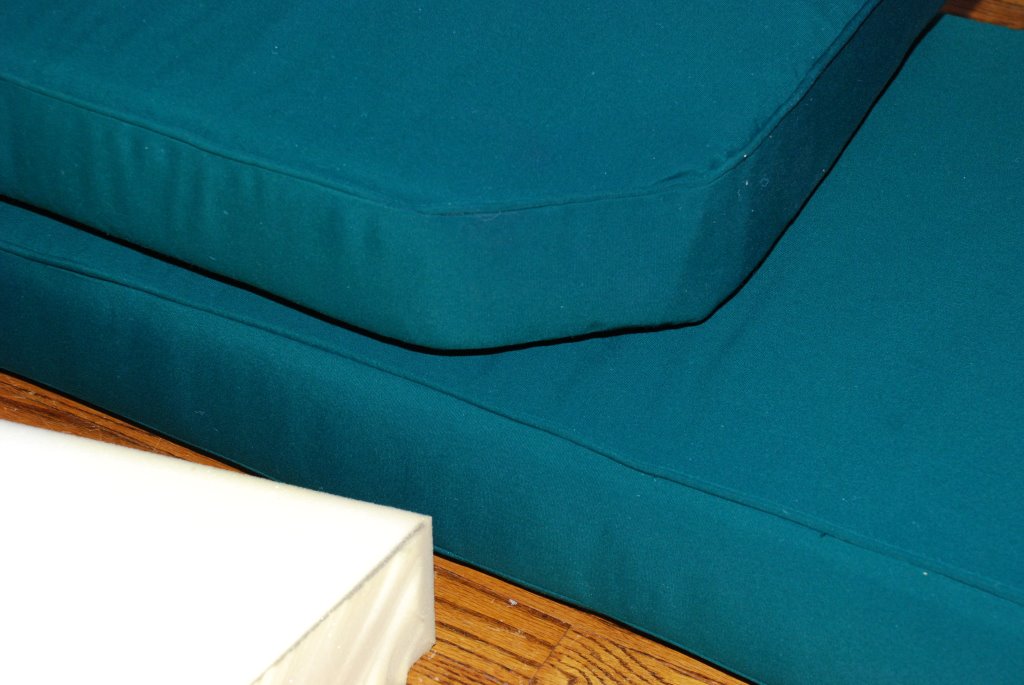
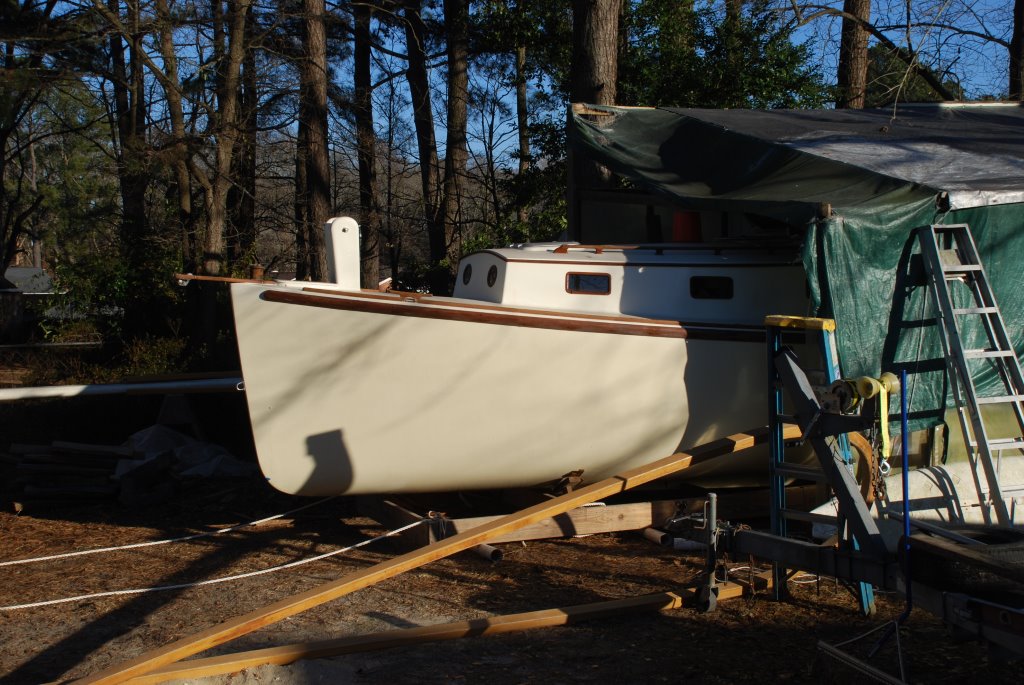
Last week brought some cold weather while I was cleaning up the lead keel. Nasty cold and wet - so I moved indoors and made some cushions. One more thing I learned on this job. The day I die I'll have so much experience I can hardly stand it. The cushions look great with fancy piping and all. In addition they fit like they are supposed to, they are comfortable and the price would be hard to beat. Take a good look at the Singer sewing machine: no frill all metal job given to me for free simply because it was deemed to be too old and lacking in sophistication. I love it - it is slow BUT it wil put a V-92 thread through six layers of Sunbrella and never miss a beat. The key there is: all metal. And now for the best part: it warmed up again so I went around the boat jacking it up bit by bit, slid some schedule 40 PVC pipe under the building frame, hooked up the old Ford pick up and promptly smoked the clutch. In the excitement I forgot to remove one of the blocks, things got jammed up and smoky before I realised what the problem was. Then -finally she slid out. Bit by bit and there she was in the light of day. PeterP


-
After I water logged the mould all the sand had to come out for it to dry out and when it was time to put it back together - upon reflection- I did not see the need for it there any more. The lead is only about 3-4 in high in that section so the pressure wasn't that much of an issue.
-
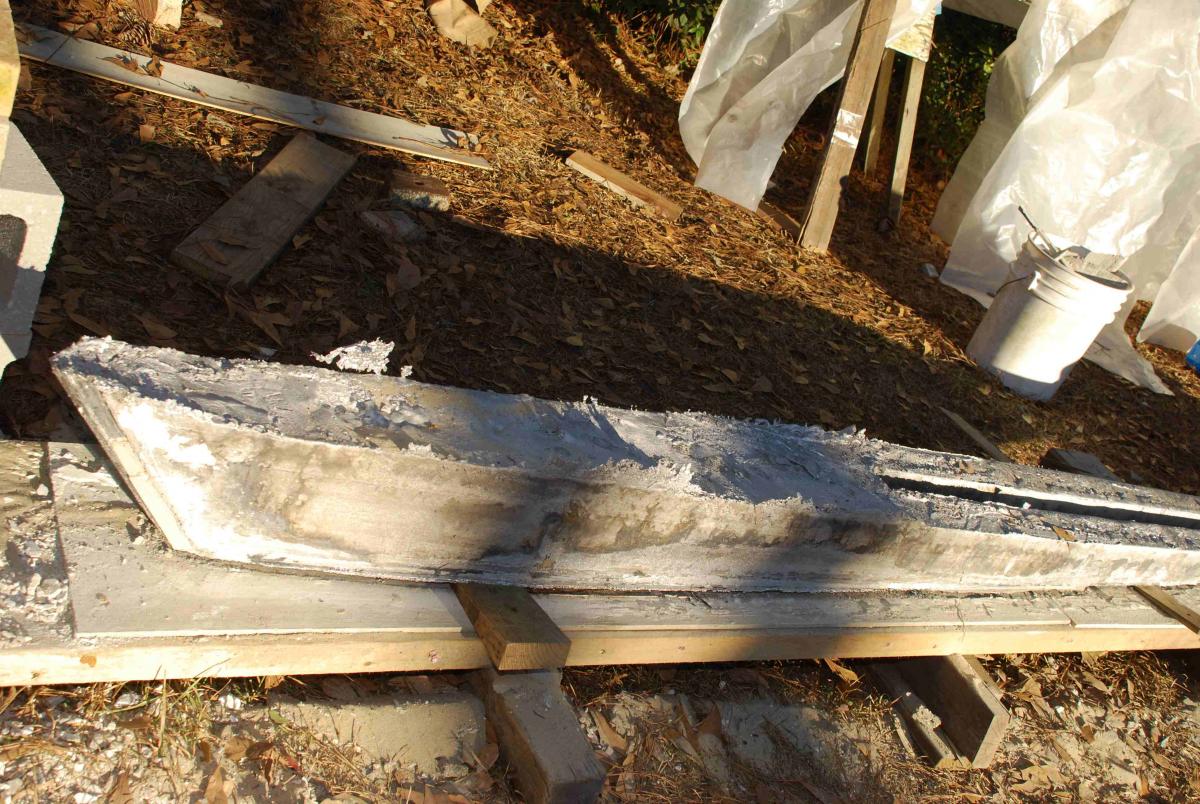
Poured the lead keel. Not something I want to do very often but it is doable. About the mould which underwent a few changes in its evolution - I think it was up to Mark III by Pour Day. The basic concept of using Hardie Plank for the contact surface backed by sand proved to be excellent. The idea of using drywall mud mixed with sand to leak-proof the joints would've worked -I think- except when I filled the mould with water to double check the volumes- the whole thing turned to soggy mess necesstating a major re-do. So back to square 2. The final configuration had regular mortar 3in fillet on the back side and 3M FireStop (1000 degF) caulk 3/4in fillet inside. That worked great. I had zero leakage. It took a bit over 2 hours to melt the 1200 # lead with +/- 300 000 BTU on hand. Hugely inefficient heat transfer. I tried to mitigate the heat loss by walling up with fire brick but still - I guestimate 70% of the heat just blew away. (Some of it kept me warm on that very cold day tho') The big hand-held propane torch was invaluable as it helped to melt the plug which forms inside the pour tube. Big thanks to Tony and Seth who selflesly loaned me some of their equipment. I melted aprox. 1200 # - left about 10# inside the two tanks, skimmed off about 40# of slag and I suspect another 20 - 30 # will come off during clean up and fairing. I thing I shoud be realy close to designed weight. Not a bad days work. PS -There are two tanks available to who ever shows up. Mine will hold 700# and Tony's will hold 500# - his is the better built of the two. Cheers PeterP


-
Not to be wasted. Run it through your kidneys first? PeterP
-
I started using heat gun to make epoxy flow out better when coating- about year - year and half ago. What a difference! My guess it should work equally well for filleting to make sure you get some soak-in. As for Scott's problem - my suggestion would be to build a plastic tent over the keel and run a kero torpedo heater over night. Naturally, you wouldn't want to burn $10 worth of kero to cure $2 worth of epoxy. PeterP
-
Hey Scott, I tried some of it. I bought the 16oz (?) bottle and I just about used it up. At 4:1 that makes about 1/2 gallon. I remember buying it because of unusually cold weather ( for NC) that year and me wanting to keep the momentum going. It worked well enough but things were a little bit confusing what with me mixing stuff at 4:1, 2:1, 1:1 and 5:1! I was glad when it warmed up enough for me to go back to single mix (2:1). I like using food warmer lamps for smaller jobs and I often wondered if getting an old electric blanket would work. Of course Indiana gets much much colder than NC. Glad to hear you are moving again. PeterP

-
I've got you now. You're Wayne the Kiwi - built a P26? - one of the first ones. What's the deal on Newbie with 2 measly posts? Did you lose your password and Frank is making you start all over again? Anyway thanks for the lazyjacks pics. I notice two cheek blocks and a cleat - is that you outhaul? If it is - do you find it a pain to tweak the sail shape from the cabin top? I want to put cascade blocks on the front of the mast with a control line led aft. A copy of someone's design that was recomended to me. PeterP
-
Thanks for posting that. It's a bit late for me but others will undoubtedly find it worth copying. I don't see a topping lift anywhere - how's that working out? I would be interested in seeing stuff on lazy jacks. I have zero experience with those but hey -the very name- LAZY- makes my heart beat faster. PeterP