PeterP
-
Posts
407 -
Joined
-
Last visited
-
Days Won
16
Content Type
Profiles
Forums
Events
Everything posted by PeterP
-
I don't think there is hard chine version of my 28 but I strongly suspect that stretched version of P26 is doable. Be patient with Graham he is slowing down some and between the huge catamaran and his other business it can be a pain to get an answer out of him sometime. He is a lot better once you get serious and start building. Building a (stretched) 26 should be relatively easy as there are 2 or 3 good threads already out there. And Howard is just getting fired up on his 26. His will be well documented I feel. My mast are aluminium -absolutely the best cost/weight/strength/speed of manufacture ratio available. Not as nice as wood but a good paint job should help a lot. Thank you for the compliment and best of luck PeterP
-
Sonke, There are no real plans for Princess 28 R(ound)other than Graham's head and computer. Graham derived the general concept and some of the lines from the 26 but it is a "different boat". He drew the lines as a favor to me -with me working out most of the details as I go along-but I have no exclusive claim on them. I am sure he would sell you a package. Funny you should mention NIS 26 because that is exactly where I started. Thought about B&B P26 for a while but but finally settled on P28R because I do like the smoothly curved boats best of all. The P28 design also has a different centerboard than P26 and the cabin is a bit higher to allow "more" headroom. ( I am 6'2"/ 188cm). You will be hard pressed to find something with headroom to fit your height. As for the bunks - that is relatively easy - you can "cheat"(move) the bulkheads to get the extra length. My boat is strip planked all the way but considerable time could be saved by doing plywood topsides instead of strips. Lastly, there is no need to worry about your English on this forum - certainly not with me - it's all about boats. You ask and hopefully someone has an answer - may not be in Queen's English but so be it. PeterP
-

Well the end of the season is here in Alaska
PeterP replied to sitearch's topic in B & B Yachts Forum
Bob, sure looks tempting in that picture. Too bad your season is so short. Have you thought about asking Graham to draw you up a nice little ice boat? Just kidding PeterP -
Can the stringers be applied to the sides after unfolding?
PeterP replied to Tom the rower's topic in B & B Yachts Forum
If you have a laser go with Par's suggestion. There' a quite few ifs involved in unfolding a boat. Not all of them work out as planned. I've done both methods and I like laser because it will give you flat seat tops all on the same plane. There's a lot to be said for that. I hang the stringers with temporary sheetrock screws through the sides and it does not take any time at all. In fact I would argue that it takes less time -including filling the holes after. PeterP -
Tom, I have always used the same wire: mild steel wire I bought from Lowes eons ago. In fact I built the first twenty with it. And two CS 17 before then. All out of that same roll.They still sell that stuff. Saw it in there the other day. It is very soft and you can twist it off real easy but you are using it on plywood which is even softer. What I mean is there is no point in going high strength/ hi tech. If the wire is not strong enough to snug things up it is better to run wood blocks and screws - less chance of tearing out chunks of plywood. PeterP
-
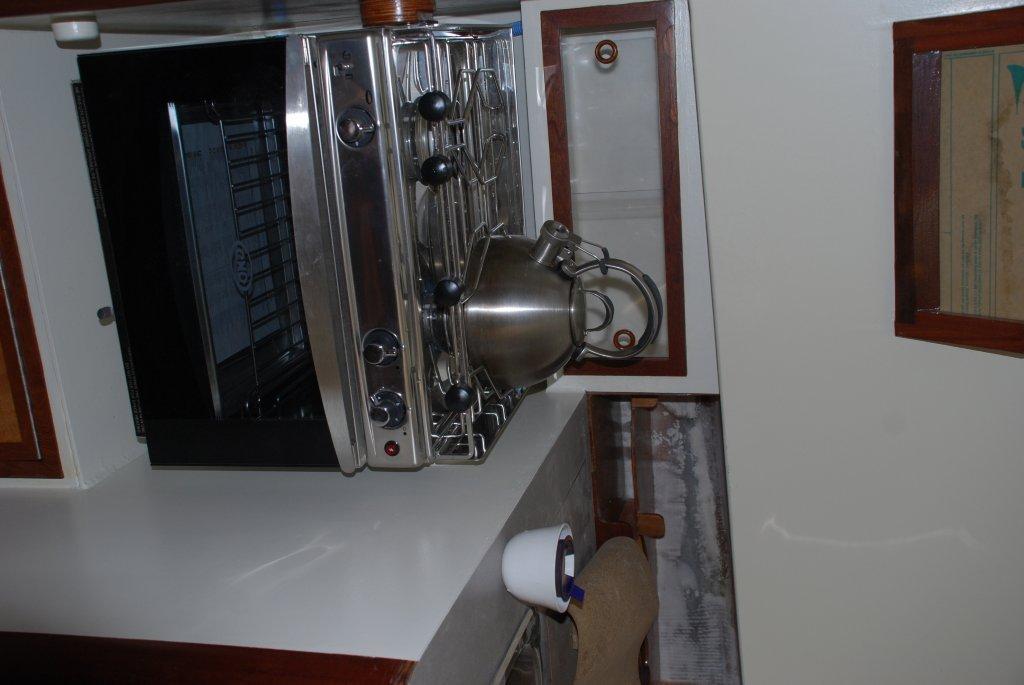
In the sixties it would be called a "Houston we have ignition" moment. I got my propane system all set up, tested and fired up - then it was time to have an official First cuppa on board. Tasted good except for the aroma which is a bit heavy on turpentine right now on account of all the varnish being put on. Wonder how Scott is making out. Stay cool PeterP


-
First Post - CS17 - New Build - Problems already?
PeterP replied to mattp's topic in B & B Yachts Forum
I had a couple 6 mm sheets like that. Made in China. The stresses are not well balanced in a sheet that has most of its grain running in one direction. Joubert has 3 plies of 1 mm and two 1.5 mm and their sheets stay nice and flat. To re-use cut offs from the chinese ply was difficult because everything curled up like lettuce after a few weeks. There were some voids too. Not trying to scare you but re-read Ray's comments - I think they are spot on. Keep it dry, keep it flat, don't sand it too too much, coat it right away and support it structurally if you feel you need to. PeterP -
Howard-makes perfect sense now. All my hardware is 316 SS by the way and if you change your mind about your bushings, Onlinemetals sell SS tube 1/2 in nominal ID that is closer to 5/8- just right for 1/2 pintle bolt. You can order an offcut that's between 9-11in for a better price. I did that and had enough to do all of my goudgeons and the hinge for the flip up tiller. PeterP
-
Howard, looks close to what I made. My stainless U box is slightly less across at 5in over all. I think I told you I put a 1x5 vertical batten inside the transom to beef it up for the rudder hardware bolts. So my boltholes are spaced accordingly 2 and 2 vertically 3in apart to land on the batten. My bolts are also smaller - I originally planned to buy 5/16" but I found some 1/4in on the shelf and used those instead. The holding power of 4 x 1/4" bolts is pretty amazing but if 3/8 will make you sleep better so be it. My strap material is 2.5in which I selected because it fits inside the U box and buying one piece that width would cover all the bits I wanted to make. Are you sure you want to pre-drill all your holes at this point? You said something about doing it while the transom is flat - I have a curved transom and my stuff fits on there nice and tight (without rocking). Elsewhere, you asked me why I made my rudder blade out of white oak: I can get it locally for 3 bucks a BDF (8/4 lumber), I never had problems glueing it up and since it is glassed and will be clear coated if anything happens I'll know pretty quick. PeterP
-
You wish! I have over three weeks in the wood work and metal work in this thing and it's still not done. It's obviously not a high end production job but it'll work for this guy. If you are ever out this way swing by - I can let you have a good chunk of that square tubing - you may get what you need out of it. I also have a brand new solar vent and a through hull I am letting go for half price that you maybe able to use. I still have a fair way to go: wiring, the whole center board assembly, lead keel, masts/sails, paint/varnish -PeterP
-
I had a feeling you'd like it. The rudder blade is white oak -ripped, flipped, re-glued- to approximate a quarter sawn board. I can't afford mahogany so my go to look alike is sapelle which I get locally for a decent price. That's the dark strips in the (ash)tiller. The stainless is 316 grade from on line metals. Not cheap but what was my alternative in terms of sizing components, availability, convenience of being on one site, one shipping charge and so forth? The gudgeon box is 3x1/4in square tube/box channel, cut& drilled. You'll need a drill press and set of SHARP bits if you're contemplating making your own. The box cheeks I added after consulting Graham and Allan. You can't beat thickness for increasing stiffness. Howard, next time you are perusing you boat plans, do something for your own ease of mind: make a cut out of your rudder blade (to scale) and pretend it is a pivoted board -leading edge level with the lowest point of your keel. Draw the water line on it. Now do it with the board going vertical to the same depth. Draw another water line. Compare the areas. On my 28 I can actually put more wood in the water with a pivoting board. Yes, the geometry is changed, laminar flow not ideal but when you're scraping bottom, theoretical contemplations of ideal fluid flow properties are usually the first to go. Seriously- how much super shallow water sailing are you thinking about doing? The way it happens with me is I screw up -get the boards up super quick and get out of there ASAP. Last, don't laugh -pivoting boards scull like demons. The depth sounder - I had originally planned to put it under the cockpit sole but then I started to worry about getting interference from the alternator so the next best place is under the galley sink and there I have to run more plumbing before I can get on with more painting. Never a dull moment... Cheers PeterP
-
Just a quick update - mostly for Howard, since it is about the rudder. As per our discussion - I bumped up the thickness on the blade to 2" finished. I like it really well. It produced a much smoother curve with virtually no flat spot on the board. The black stuff on the rudder box is carbon/kevlar hybrid cloth. One of those things that did not quite worked out. It is pure cosmetics, by the way - the kevlar being green - I had hoped that it would pick up my green trim paint and give the boat that whiff of low key agression. In the end it all turned solid black when wetted out. As for the speed factor I am still hoping when one of those pesky twenty sixers shows up it will provide a nice touch when I show 'em my high tech tail. The hardware is custom/home made. Half in. pintles are commercially available but gudgeons for 4in and 6in box would be custom (meaning MONEY). My metal working skills are not that great but I get by. I can cut, bend, drill and and clean up - pro did the welding - very reasonable. Installing a depth sounder and more painting is next. PeterP


-
He won't get rid of it here. He'll probably get worse if anything
-
Bring him over Oyster. But give me a heads up so I'm home.
-
Howard, that is why when you get a flat sawn board, you should rip it into strips, turn them 90 deg and glue it all back up. Control of stiffness and expansion properties. By the way I got the rudder almost done. I'll shoot you a pic one of these days. PeterP
-
My feeling on the plywood is that cutting it into strips and re-gluing it would involve huge strength loss. Your ply is reduced essentially to being a core material. And not a very good one at that. You could do foam but unless you can do the design work yourself I would not go in there. Graham or Allan could probably do it but as busy as they are I suspect you would be on a back burner for a good fat while. Wood really is your best bet. Cost/strength ratio, ease of manufacture & repairability - all excellent. PeterP
-
My concern was that the center strip - the way the grain is oriented and if it were to swell up - will have a tendency to go fat rather than wide. Board can go 1/2" wider without any problems where 1/8" gain in thickness may cause it to bind.
-
Howard, I hope that middle strip in the glue up does not come back to haunt you later. Wrong grain orientation in precisely the worst place for it. And yellow pine will swell like crazy. I guess you are planning to glass the heck out of it. PeterP
-
Gordy, when all else fails, click on your photo and e-mail it to your self. The program will prompt you for the size you want. When you get the mail just load the attachment to your post and delight us with your clever sand paper cutter. You've got us all on the edge of our chairs.PeterP
-
Just make sure the step ends up INSIDE the boat then no one will notice. Good luck PeterP
-
The platten in that picture is fat 1/8" 'glass. The size is 9x11 which is the standard sheet size. It is not glued to the rubber disc. However, the rubber disc is left in place as a spacer. There is a somewhat better description on my 28' tread as well as Scott's 28. To give credit where credit is due -the original comes from Gougeon Bros. Par is right when he recommends a good grip and a sturdy handle. Low speed is preferable as it is less likely to melt epoxy as well as being easier to handle. Out of balance vibration due to the rectangular shape is not an issue at low speeds. While this is not a piece of gear for re-finishing fine furniture it will do surprisingly smooth job. The rectangular shape combined with constant random movement (it is nearly impossible to hold this thing still) produces almost random orbit sander results. PeterP
-
Scott, just a thought - you could run a tack fillet on your temporaries. That would add an incredible strength to the hull. If you glass the inside like I did - in vertical strips- then it would not be much of a problem to bust out a frame -one at a time-and grind off the fillet. 1700 lbs you say. That 10' beam makes her a whole lot chubbier than my 8' runt I guess. PeterP
-
I am trying to picture 10ft beam boat with a half deep keel inside a 10ft ceiling shed and the feeling I get is:-No way will she flip inside. You will most likely have to drag her out flip her then get her back in. You certainly don't have enough room for a lift of any kind. Are you thinking circular cradle? Sliding my boat on PVC pipe worked really well- even sideways. All things considered she won't be that heavy. I am guessing 1000 lbs with half the frames still inside for strength. I think I left about half of mine in for the roll over. Couple of 2x6 to hold her from spreading out. Don't under estimate the strength you already have in the hull. You don't want to get too rough but I think she is strong enough to stand on her own feet with big pads( to spread the load) for support. Since you are in building trade you could "borrow" a high lift forklift from one of your jobs for the roll over. Worked for me really well. Why do you want to mess with another layer of glass? Why not just squeegee on a good coat of glass beads and fair it slick & be done with it. Certainly, no one will ever worry about the stuff below the water line. I mean, with primer, two top coats, antifouling -the boat sitting in water -who will ever know your bottom is not as slick as glass? I really worked on mine because my boat will sit on a trailer and I don't need some smart alec bad mouthing my work. The topside is where it counts -that's for sure. Cheers PeterP
-
Scot, don't make me blush. I'm too old to start coloring my ugly mug. Two suggestions if I may: with hind sight I would -now -consider pulling a couple of kids off the street to help me with long boarding. Easter break, couple young brutes - they can rough sand that hull in 2-3 days. You follow behind , keep an eye on them and fine tune it. Do you know how you gonna roll this thing? Thinking mattresses like I did? Get your stuff together. It took me several weeks before I scrounged up enough stuff from behind the mattress shop. How about long straps and slings? I hate to sound like a school master but I hate for you to burn out and loose heart. I've been there - believe me. Last- and I'm sorry you did not ask- It would be nice if you could've kept that Belhaven a little longer. There's nothing like a little sail once in a while to get your motivation back. Cheers PeterP
-
Howard, do this experiment and you will understand the beauty and simplicity of the rope trick. Soak a piece of line in epoxy and let it cure for a couple of days. Mix up a cup of your rock/epoxy stuff. If you want- do a third sample of steel wool and epoxy. When it is all well cured lay it on a concrete floor and whack the samples with a hammer. What you'll see is that your rock stuff will shatter in zillion pieces because there is nothing to hold it together. The rope on the other hand - although fractured - will hang together. Ditto for steel wool. The difference is the fibre matrix. Obviously, the steel once cracked-even though stronger to begin with -will rust out in no time at all. The synthetic line wins hands down. I always thought this one of Tom's real clever ideas. Simple, cheap, effective. Hard to improve on that. PeterP