Tom Williams
-
Posts
98 -
Joined
-
Last visited
Never
Content Type
Profiles
Forums
Events
Everything posted by Tom Williams
-
Congrats Graham & Fred. It's really great to see the capability of the CS17 demonstrated. Hull #129 will be getting wet soon. Maybe someday we'll attempt the Challenge. I'm sure everyone on the site would love to get a first hand report on the race. Hope your catching up on the lost sleep! Tom
-
WOW --- That's really looking great Scott! Are you going to paint the topsides or go bright? I debated it and then decided to try bright ... I figured I could always paint later. I like the look ... it says to onlookers "I am a wooden boat". Any guess on a launch date? Tom
-
Hi Noklin ... yea CS17#129 is getting close. I've been stretched pretty thin since Christmas and haven't made the progress I was hoping but, I'll be ready by spring. Attached is a shot of the masts that I just finished. I'm guessing there are probably ~ 30 CS17's finished with another 30 in process but that's just my guess. Maybe Graham has some statistics on plans sold vs. boats built. If you're up this way (Detroit) let me know. I'd be happy to show you the boat. Tom

-
Looks beautiful Peter ... Congratulations! I like the colors you chose. #129 is nearly finished. I'll post some shots this weekend. Tom
-
I did a raised seat approach on my CS17 with the large folding hatch, I've got great access for my ice box (presently under construction), my trolling motor and the battery. I believe the seat will be my favorite perch when sailing next summer! I'll post some finished shots in a couple of weeks. I found mocking things like this up with cardboard and duct tape is a good first step. Seeing it in 3D really helps sort out questions like you're having! Good luck. Tom


-
Closed compartment pressure equalizer hole
Tom Williams replied to Dale Niemann's topic in B & B Yachts Forum
Here's what I did: I glued a small piece of 1/4" plywood (as a doubler) on the inside of my seat bouancy compartments (4 total) in a corner that will drain into the cockpit. I then drilled an oversized holes through the seat sides/ doubler, filled with thickened epoxy, and then drilled and tapped 1/4-20 holes. Before I glued on the seat tops, I faired the inside of the bouancy compartment with thickened epoxy to remove any steps and ensure any trapped water would flow to the holes. I bought some pan head 1/4-20 bronze screws, slipped O-rings over the shanks and screwed them in. The O-rings are squeezed between the screw heads and the outside of the seat side. In the fall, when I winter the boat, I plan to remove the screws and let the compartments dry out. I'll post a picture if you want to see them. Tom -
Looks great Scott. Your skills are second to none! I hung mine on the transom several weeks ago. It's a great feeling to sit in the cockpit, grab the helm and start dreaming! Keep the pics coming. The Belhavan looks like a great boat. Maybe someday ... when my wife is in a good mood ... I'll convince her that a second boat would be a great addition ... (Now that's dreaming) Tom
-
What's 17 feet long, blue, and textured like an alligator?
Tom Williams replied to Ken_Potts's topic in B & B Yachts Forum
I had a heck of a time with my paints. I tried a single part polyurethane and an oil based enamal and found the paints wouldn't harden over the epoxy (Systems Three in my case). They didn't wrinkle as you described, they would just stay sticky for days. I finally broke down and bought Systems Three water based two part polyurethane paint. Finally success! By the way, I highly recommend this paint. It's easy to use and is really hard after it cures. Bottom line --- use the epoxy supplier's recommended primer or paint and as Frank stated, experiment on a small section of your boat. Good Luck! Tom -
Wow Scott, that is one beautiful boat! In hope to see it in 3D someday. I really like the transom color (dark). What wood did you use? Tom
-
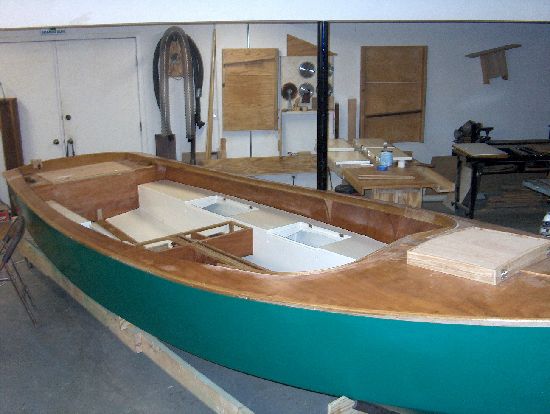
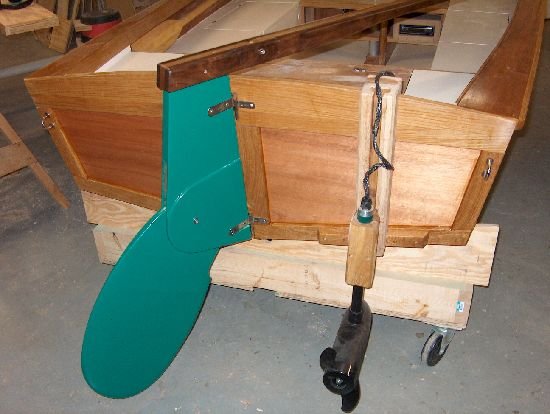
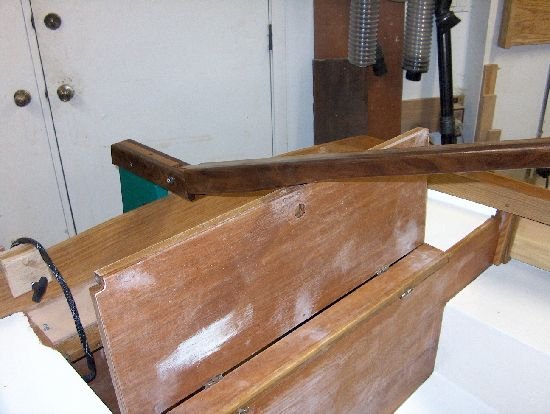
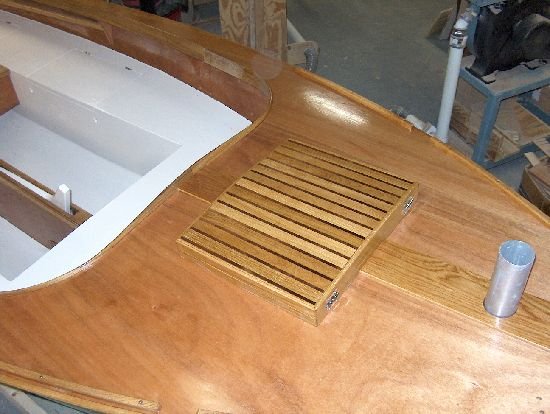
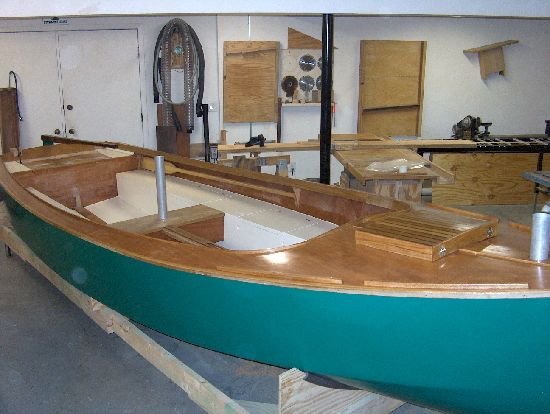
Hi guys. It's been a while since I posted any pics of CS17 hull 129 so here goes. I've had to focus my attention on some other projects recently. The biggest was a "Lean to" on my barn to house the boat when it come out of the shop. It's almost done ! I've pretty much given up getting the boat wet this year and have set my sights on getting it onto the trailer and into the barn before it gets snowed in (early Dec.). My wife has orders for some furniture projects this winter so I'd like (need) to clear the shop. The biggest items left to build are the masts. Other than that is lots of little items like oar locks, deck hardware, hatch tie downs, varnish, ... ( :shock: maybe early Dec is optimistic!!) Tom
-
I'm building a CS17 an a castered cradle. This is a must for a small shop. I'll bet I've put miles on that cradle by now! My pinch point is between my workbench and a support pole (shop is in a walk-out basement). I've just over 7.5 ft width for the 5'10" foot beam. I have about three feet of room to move the boat fore and aft. You really only need walking space around the boat. The biggest hastle i've had is maneuvering long lumber through equipment and clearing the boat. Good luck! Tom
-
Looks great Scott. How are you applying the paint ... with a spray gun? I promise to get my latest CS17 pics posted soon. Tom
-
I found my supplier through this link. I called around and found Johnson's Workbench (Mi) had the best prices. http://www.glen-l.com/resources/lumber-suppliers.html
-
Nice job with the experiment. I will definately plan the same with mine (next year ). You mention in your text a boarding step. I've been thinking about one for my CS17 and would love to see a picture of another. I was envisioning a step attached to the transom between the rudder and one side. The step would be ~10" long X ~5 inches wide located just above the WL. Enough to get a foot or knee on as you pull yourself out of the water. Anyone have thoughts on this? Tom
-
Great story Jeff. I'm sure your boys got memories that will last them a lifetime! Tom
-
Good luck with the test. I'll be interested in hearing the results. I want to add some buoyancy to my masts when I build them. As an idea for reaching the CB when flipped: You could tie a ~ 12" piece of line to the bottom of the CB leading edge. The line would cause extra drag when sailing but would hopefully be hanging down when horizontal. I believe the water forces would tend to push the line to the right side of the board during the capsize. Just a thought. Tom
-
I did run a piece of 6 oz. glass over the bottom fo the keel for extra abarsion resistance (probably an over kill). I used white oak for the keel so I'm hoping its hardness and rot resistance will accomidate a few nicks and scrapes. I don't ever plan to have the boat in the water for more than a week or two at a time. Tom
-
Here's what I did on my CS17 Epoxied the keel batten to the hull with thickened epoxy (wood flour). I pulled this down with screws driven in from the bottom which came out when I faired the bottom. When I epoxied and screwed the keel to the bottom, I coutersunk the keel & used long enough bronze screws to grab the batten. My batten is clear with the exception of one spot where a screw point came through (nothing a little sanding didn't fix). Hope this helps! Tom
-
I've got centerboard/case issues
Tom Williams replied to Joe Nelson CS#35's topic in B & B Yachts Forum
Pretty amazing Joe ... I wreslting a similar problem on my CS17 right now! The 1/4" plywood panels I had for my CB trunk was not very flat. I used it anyway hoping the glass on the inside an the support stringer would straighten it. In addition I made a spacer which I inserted into the trunk when I glassed it in (I highly recommend this step). Bottom line: there's a little bit of bow in the aft end of the trunk. When I inserted my centerboard (all painted of course) it was binding at the aft end. I've added some taper now to the board and it now is working freely. If I could offer any suggestions to future builders it would be to make sure the trunk is straight and true before it goes in. Either find some good flat plywood stock or add some additional support stringers to make it straight. From a structural standpoint, the tapering the centerboard is an ok thing to do. The bending stresses deminish as you go out to the tip. Live and learn! Tom -
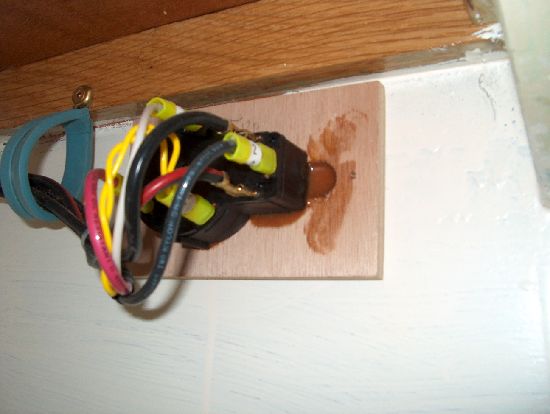
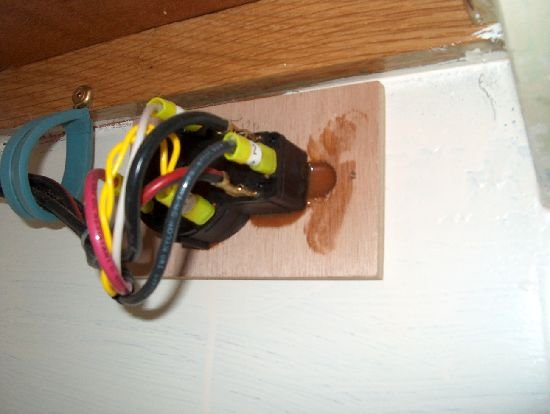
Thanks for the comments. I epoxied the controller (a pot w/ detents) to a piece of 1/4" plywood and have that screwed a seat side. The attached shot is from inside the aft seat locker. It's accessable if I ever need to replace the unit. Right now, there's a 1/8" shaft protruding from the seat side. Before I'm done I'll turn a small oak knob. I tried hard with the battery, controller, motor location to minimze the wire length and, to use heavy gauge wire to minimize resistance. It should work fine and, it was easy to do. I'll report on my results --- hopefully this summer! Tom
-
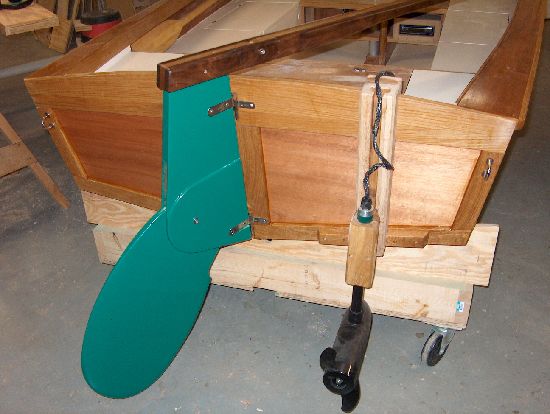
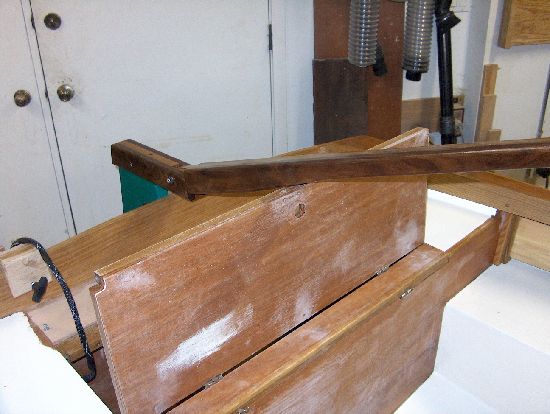
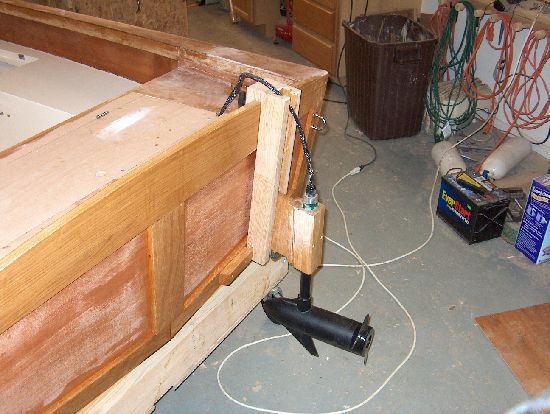
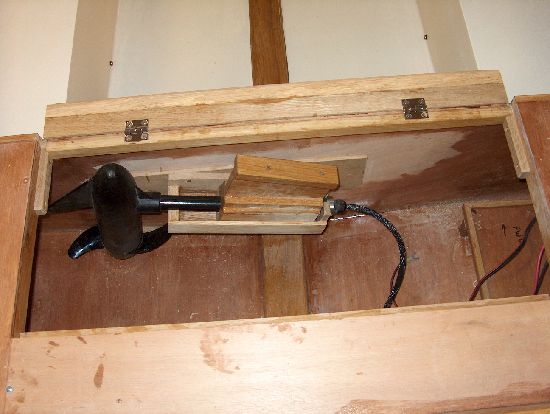
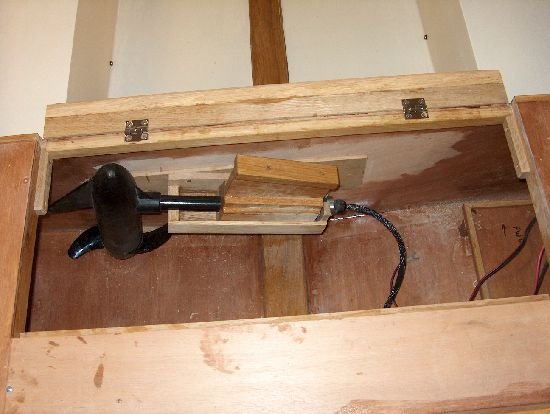
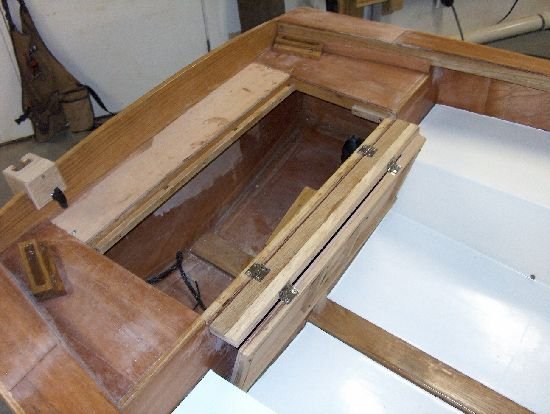
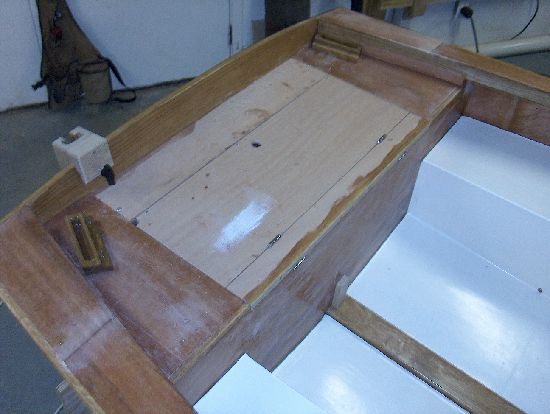
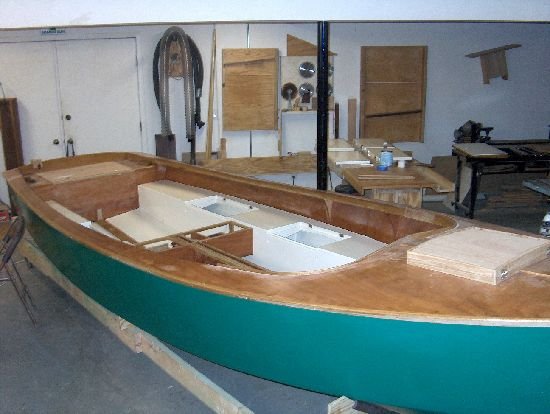
I haven't posted pictures for a while so I decided it was time. Summer has slowed down my building but I'm still hopeful I get to the water before it turns solid (yep .. I'm in Michigan). Here's some shots of my lazarette and the approach I took with my trolling motor. I cut the shaft on a Minnkota trolling motor and made some mods. The controller is mounted under a seat and will have a small turned knob to control the speed. I think it will work pretty good. This weekend I started the rudder and tiller. The tiller will be hinged to allow the lazarette to open. I'll post pics of that in a week or two. Happy sailing! Tom

-
WOW ... Congratulations!!! She is a beautiful boat. Nice job. My CS17 is still in the basement. Your pictures are the fuel I need to keep me going. Keep the pics coming ... I may need another recharge in a week or two. Tom
-
I agree with the Captin. I usually give the layout line about a 1/16" clearance and then plane to the line. The Okume plywood is soft and is a breeze to plane. Get the blade in your plane nice and sharp. It's going to be one of the most used tools in your shop when the boat is done! Good luck! Tom
-
Slow but sure progress - CS17, #129
Tom Williams replied to Tom Williams's topic in B & B Yachts Forum
Yes Peter ... I elected to expand the cockpit forward for more seating in exchange for the third mast step. I'll have reefable sails in case I get into a blow. I intend to build a tent structure covering the cockpit back to the thwart. I put a wet locker between the CB trunk and the forward bulkhead to store my anchors, buckets, etc. So far it seems like a good setup. I thought I'd pass along this story to forewarn my fellow builders. Sat. AM I was using my 4X36" bench sander when all of a sudden smoke started pouring out of it. I quickly shut it off and dragged it outside where I blew/ sucked on it with the shop vac. No harm was done to either the shop or the belt sander (it still works). I deduced the motor had filled up with sanding dust from the years of use and had started to smolder due to the motor heat. Lesson learned -- Vacuum out your shop motors periodically! I'm going to make it a yearly ritual. Tom -
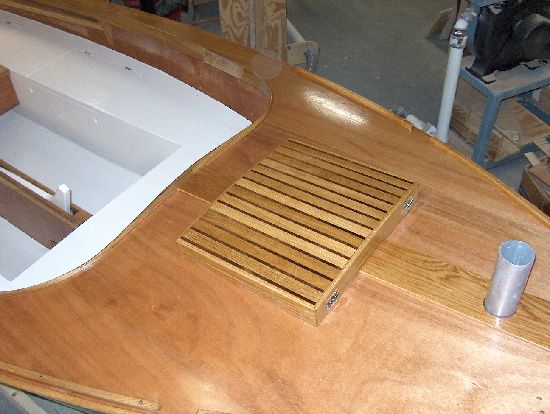
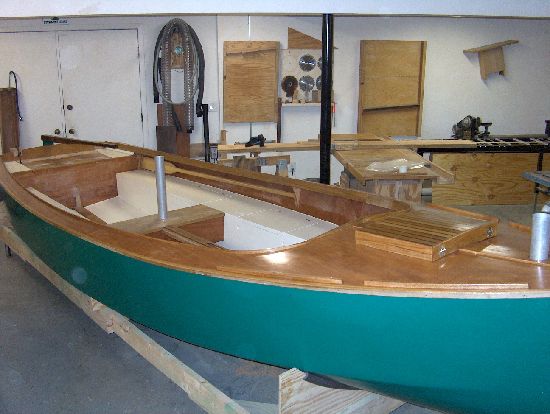
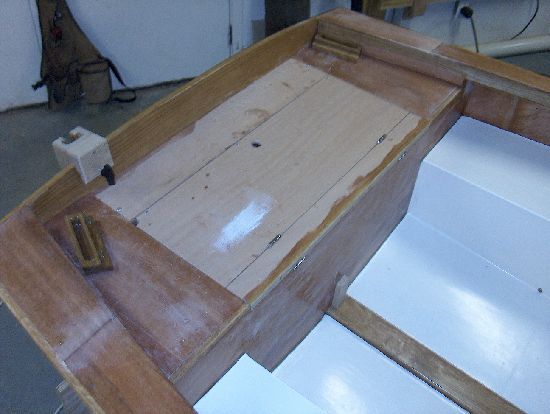
Hi everyone! Sorry for not posting any info for the last couple of weeks but ... (no good excuses come to mind). It's hard to put a lot of time in on the boat with the weather so nice but I've managed to squeeze in a few hours. I absolutly have to make it to the water this summer! The idea of sailing this summer is keeping me going. I can't wait to post some sailing shots! In the last couple of weeks I fitted the cockpit coaming, fabbed the rub rails, and built my deck hatch. This weekend I got the forward deck fit and temporarily screwed down. Heres a couple of shots. Keep on building! Tom