ecgossett
-
Posts
525 -
Joined
-
Last visited
-
Days Won
10
Content Type
Profiles
Forums
Events
Everything posted by ecgossett
-
The biggest time things where waiting for hardware/epoxy from B&B and running to Ace's or Lowe's for stainless screws/bolts. In the future I would preorder and stockpile disposable gloves, foam brushes, rollers, and buy common stainless screws/bolts, & sandpaper (lots of 80 grit) from Ducks Works or somewhere cheaper then ACE & Lowe's. The decks where the funnest/easiest part especially with lessons learned from the sides and bottom. A higher quality rotary sander would have made sanding the epoxy much easier and faster.
-
I've used something similiar for jumping and swimming while sailing on a C&C 25. For limber youth it really wasn't a problem, with my wife trying it on the STMYC Houseboat it didn't work nearly as well, with less surface below the water the rope tends to go underneath the boat taking the man overboard with it. I'm going to use the two plywood aproach that folds down with rope hinges and call it good!
-
Joining you sounds good! We where out in the boat today with a total of 4 adults going to Cumberland Island. The Anderson Large Bailer B&B sent me worked like a charm once we got any kind of speed going, at one point it was like a vacuum in the bottom of the boat. The bad was discovering it worse weather with some decent waves in the sound that having 4 adults onboard a CS17 really sucks. It made the boat wallow a little bit, our speed wasn't as great as 3 people would make it go, and it was harder to tell when I was over powering sails for the wind angle due to all the weight. That said the 3M 5200 I coating inside corner of my centerboard with did not fix the pinhole leak near the bottom from the board damaging the side (was partially down when untrailering). At this point when epoxy arrives from B&B I'm going to carefull cut out a 1/4" groove where the plywood attached to centertrunk post and install thickned epoxy with lots of tape over it, this should strengthen and reinforce.
-
I wanted to restart this topic.. The forcast for this weekend is gusts of wind up to 20kts on Saturaday when I plan to be out sailing to Cumberland Island. That means it time I learned how to use my reefpoints. I saw an article on reefing lines leading to cockpit but not sure that is cheapest option to do. What do you guys do for reefing and how is everything tied down? Is the second grommet above the tack on the sail for reefing? Oh and to clarify my reefpoints are just grommets right now. We are waiting for a drawing from Graham to arrive showing where to install the second row.
-
I would appreciate some plans that use something like plywood for blade. Have looked at the lamination plans for regular paddles using my fir and don't have time for the work. Looked at some plywood plans but they suck... I just need a decent plywood blade template. I figure the oar length for the CS17 needs to be 9-10ft for optimal rowing.
-
In my job laminanted Sitka spruce is used for missile nose cones and very strong and thin. http://www.turbosquid.com/3d-models/3ds-max-trident-c4-missile/459556 The grey area is all laminated Sitka, on top it has very carefully built lug teeth so the top piece can be rotated and locked on. - Edward
-
Thanks John, I started reading the thread this morning and pulled out my plans just a little worried about my 1" in 20" offset.
-
I did mine in stages, used slightly runnier epoxy, it would gravitate towards lowest point. Next day I did more, it took about 4 days to finish, but I felt comfident it completly filled in.
-
If anyone is needs a seat mold let me know and I could sent it your way! The only upgrades it needs is a piece(s) to match your inner framing for seat unless you want to cut it out on the fiberglass post mold. I put in a back piece of wood for hinge screws to go into, and it held glass against mold. Some small strips of plywood might be put along inner walls of mold to increase strength if you are only doing 2-4 layers of tape. I just Duplicolered lined my waterway with the rubber truck bed liner. Make sure you spend the extra $5 and get the better rubber kind with kevlar that attaches with minimal prep to surfaces. Word of warning 2 feet of plastic around area and having it taped off was not enough. The spray is messy and I'm glad the boat is only primed inside due to black spots. My kids left some presents from sailing yesterday in the bottom.

-
Update: Most of my filler for the hull cracks held! One crack it enlarged and the epoxy filler is cracked. Next step is to widen with dremel bit and refill crack again. What I thought was a paint crack on centerboard is an actual crack where water came in. Discovered it might have been caused by centerboard being pushed against trunk case/post by trailer. Just need to come up with better way to keep centerboard up on trailer overtime.
-
The glass inside is still secured... I think when I painted it in August that it was really hot and humid and the humidity under the paint probably expanded and popped the primer a little bit. Between cutting out the trunk and reinstalling it in a different position and high humidty probably played wacko with warping wood etc. We are in the process of building a PVC shelter to fit on top of deck to hold tarp off boat.. Boat is normally kept on north side of house.. This should really help the whole thing stay cool. Anchor roller board is going to be bolted on with 3M 4500 caulk underneith (want to be able to remove to refinish). The board will go around mast hole and give the extra lip to keep out water.
-
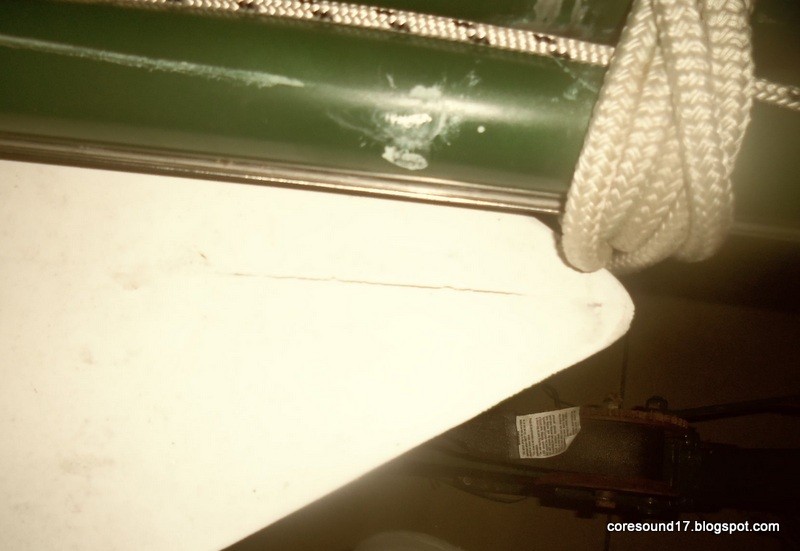
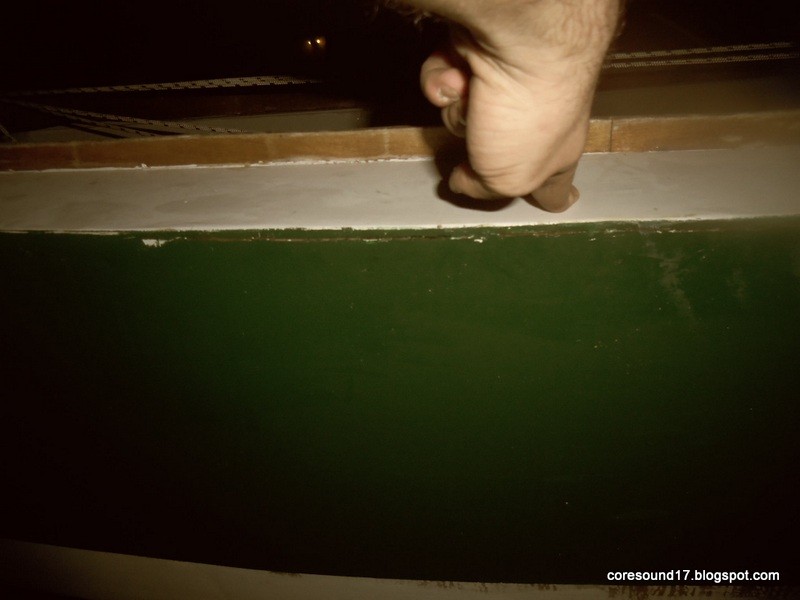
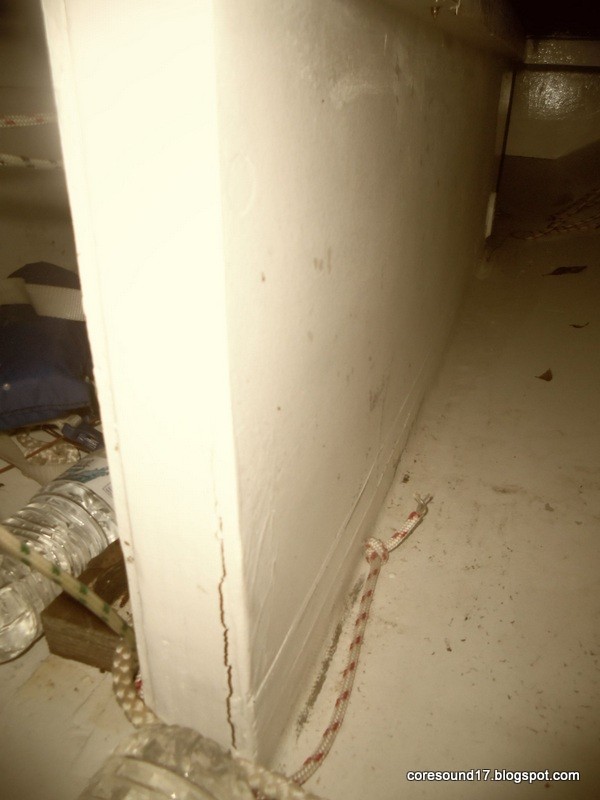
Photos of the cracks.. The infrared view seems to show them better.... The cracks look hairline and the one on the side looks like the side decided to bulge just a milimeter out, it's not the deck to side crack but wood seperating from wood from stress. Looks easy to fix.. The one on my centerboard appeared the day after I painted it. No water has ever come through (inside is glassed), and just need to seal it up. Crack along deck I'm considering routing out and filling with thickened epoxy. Forward deck crack I'm going to dribble in epoxy and forget about it as I'm putting a teak board over it for the anchor roller. - Edward


-
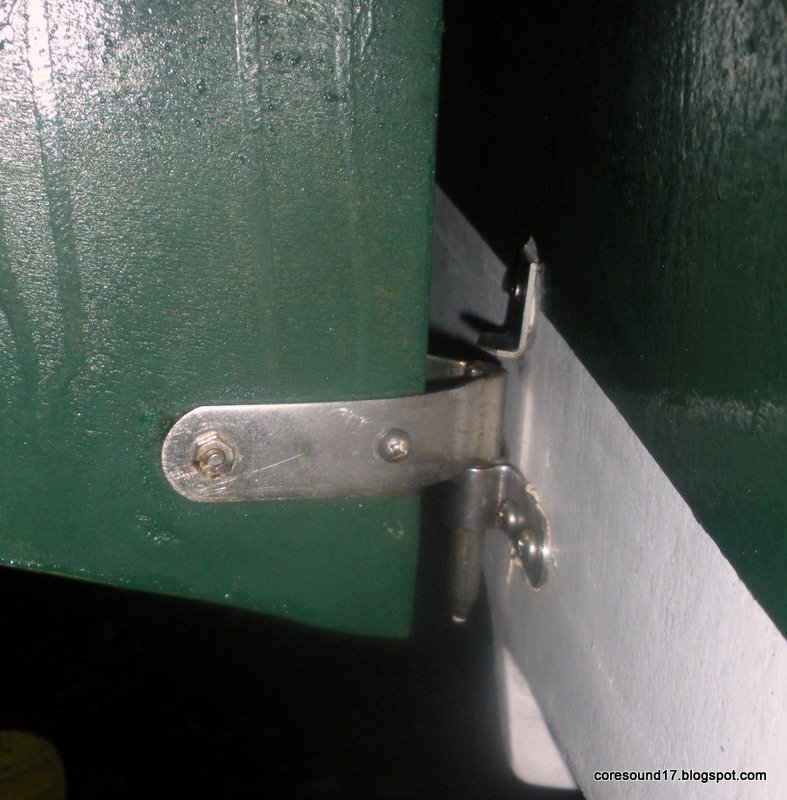
It did take a little doing, that stainless steel is pretty strong. I didn't want to use a sacrifial block and beat them with a hammer, was worried that would damage the finish. But using a hammer and big pliers then lightly beating onto bolt and screwing down seemed to work.
-
I got my sails back from sail maker today and discovered they only have one set of reef points not the two I had thought where being added. Does anyone know if one set meets the requirements for the Everglades Challange? It's only about 35-40% of each sail being reefed. We used the plans Carla sent for sails for the proper locations. Does anyone have good design points that could be lofted so I can laminate a nice curve for my sprit booms? When the boom is windard I really hate how the sail hangs/drapes up on it.
-
I used a pair of pliers, and when bolding on my first hole brought the whole pintle arm down hard rebending it after opening it up.
-
The crack is hairline... Yes it was filleted and had a center plank underneith... All I could come up with was the sun on it for 5 months might have helped with the crack a little bit. The entire deck was coated with 4 coats of epoxy before priming and then painting.
-
After inspecting my CS17 I haven't seen for 5 months I found a small 5inch crack on the forward deck about 3 inches back from the bow. It's right in the middle where the two sheets of deck butt join and was filled with epoxy fairing and painted over later.... Not sure if this is a normal place for a crack or something from the cold temperatures etc. This was somewhere eventually I'm going to have bowsprit covering this area eventually. Another small but think it's normal is on the side where the deck is joined to side panel. Just a small 4 inch hairline crack, can't be to bad because me deck is not only set in epoxy with structural filling, but screwed down with stainless steel.. Better to disover it now then in two months.
-
How easily could this design be modified to have a catalina 28' style bed under the cockpit? Trying to figure out how hard it would be to sleep 3 kids and two adults in this comfortably. I really liked the layout on the Benatou 26.5 with the two aft doors for head and bed. The cabin extended after past the hatch boards so room to stand in head and room to stand to get undressed in aft cabin. If I could get someone to build the hull for me this would be a fun boat to build. I don't have room/time to build hull and filt etc.
-
I"m just doing the UM.. It will also save me a little money on buying a drysuit and couple of other things I thought I would need for the longer version of the race. I have had two offers for prospective partners from other racers. (Sandbagger & Meatloaf if anyone knows anything about them).
-
I used a small round magnet I found at Harbor Tools. Aluminum will not attrack magnet, so with one on outside you can move inside one around.. Lightly super glue washer to magnet so rivet will extend into hole part of magnet. Lightly compress rivet to barely hold washer on, roll mast and knock off magnet. Finish the rivet.... I'm sure something similiar could be done with nuts but that seemed more painful. Round Ceramic Magnet: 32 mm O.D. x 9 mm Center Hole x 5 mm Thick - for example.
-
A lot of people are concerned about different materials corroding.. Why not get a galvanic corrision prevention spray before installing ss rivets, or use something like neoprene to protect. When we do canvas work on boats and install ss snaps on aluminum hatches we have plastic washers that prevent the corrision between seating surfaces. The other possibly very good option is to seal bottom and top of mast and paint entire outside to prevent the corrision in the first place. On my boat I used aluminum rivets with the backing rivet washers to ensure a good hold. It would take a catastrophic failure of all rivets to compromise. Most aluminum rivets I have looked up have a tensile strengh of at least 500lbs. I'm more worried about them possible enlarging hole and pulling through, so I used rivet washers to back up area around hole.
-
Due to time constraints and wanting to spend more time with family before next deployment I switched from the EC2012 to the Ultra Marathon 2012. I took great heed of the articles of people who dropped out of the EC and regretted not making their goal. Is anyone else here entered in either race this year? Any advice for outfitting my CS17 for the race? My three todo things before race are: 1) Oarlocks (looking at http://www.duckworksbbs.com/hardware/oarlocks/index.htm) 2) Add foldup ladder on transom. 3) Mast stowage when down (need advice) for bridges. Do you guys usually row with mast up or down? V/R, Edward
-
On a 42' sailboat at St. Marys shipyard I've seen someone do a kevlar cloth with a kevlar fiber epoxy mix, coat the inside of the hull with a thick layer. They had hit floating debrie at night and had damage to the hull below and at waterline. The idea was to make it harder to get a hole/crack in hull again. It was tested in an area with no coating, and coating using a sledge hammer. The kevlar fiber held up really well.
-
What are good oarlocks for the CS17 that will not break, but you don't have to leave up? Oh and won't break the bank. Thanks
-
Any more photos of other layouts for the 26?