Randy Jones
-
Posts
245 -
Joined
-
Last visited
-
Days Won
16
Content Type
Profiles
Forums
Events
Gallery
Everything posted by Randy Jones
-
Dave, I did not modify the bunks for the Belhaven trailer. Laid flat the way they are, they deflect pretty well to match the bottom of the boat. My thinking was to have the good support beneath the 350lb keel and then hold the plywood portion of the boat up with the bunks. One annoying aspect of bunk set-up is that the bolt holes for height adjustments are in one inch increments. I got it close but should really go back and put a spacer between the bracket and the bunk to get the forward elevation of the bunk correct. Lots of "trailer trial and error", really no other way around it. One last recommendation specific to the Belhaven - Since she needs 10 inches to float and is pretty big to push around you really want to keep the boat as low as possible on the trailer or you won't be able to launch at shallow ramps.
-
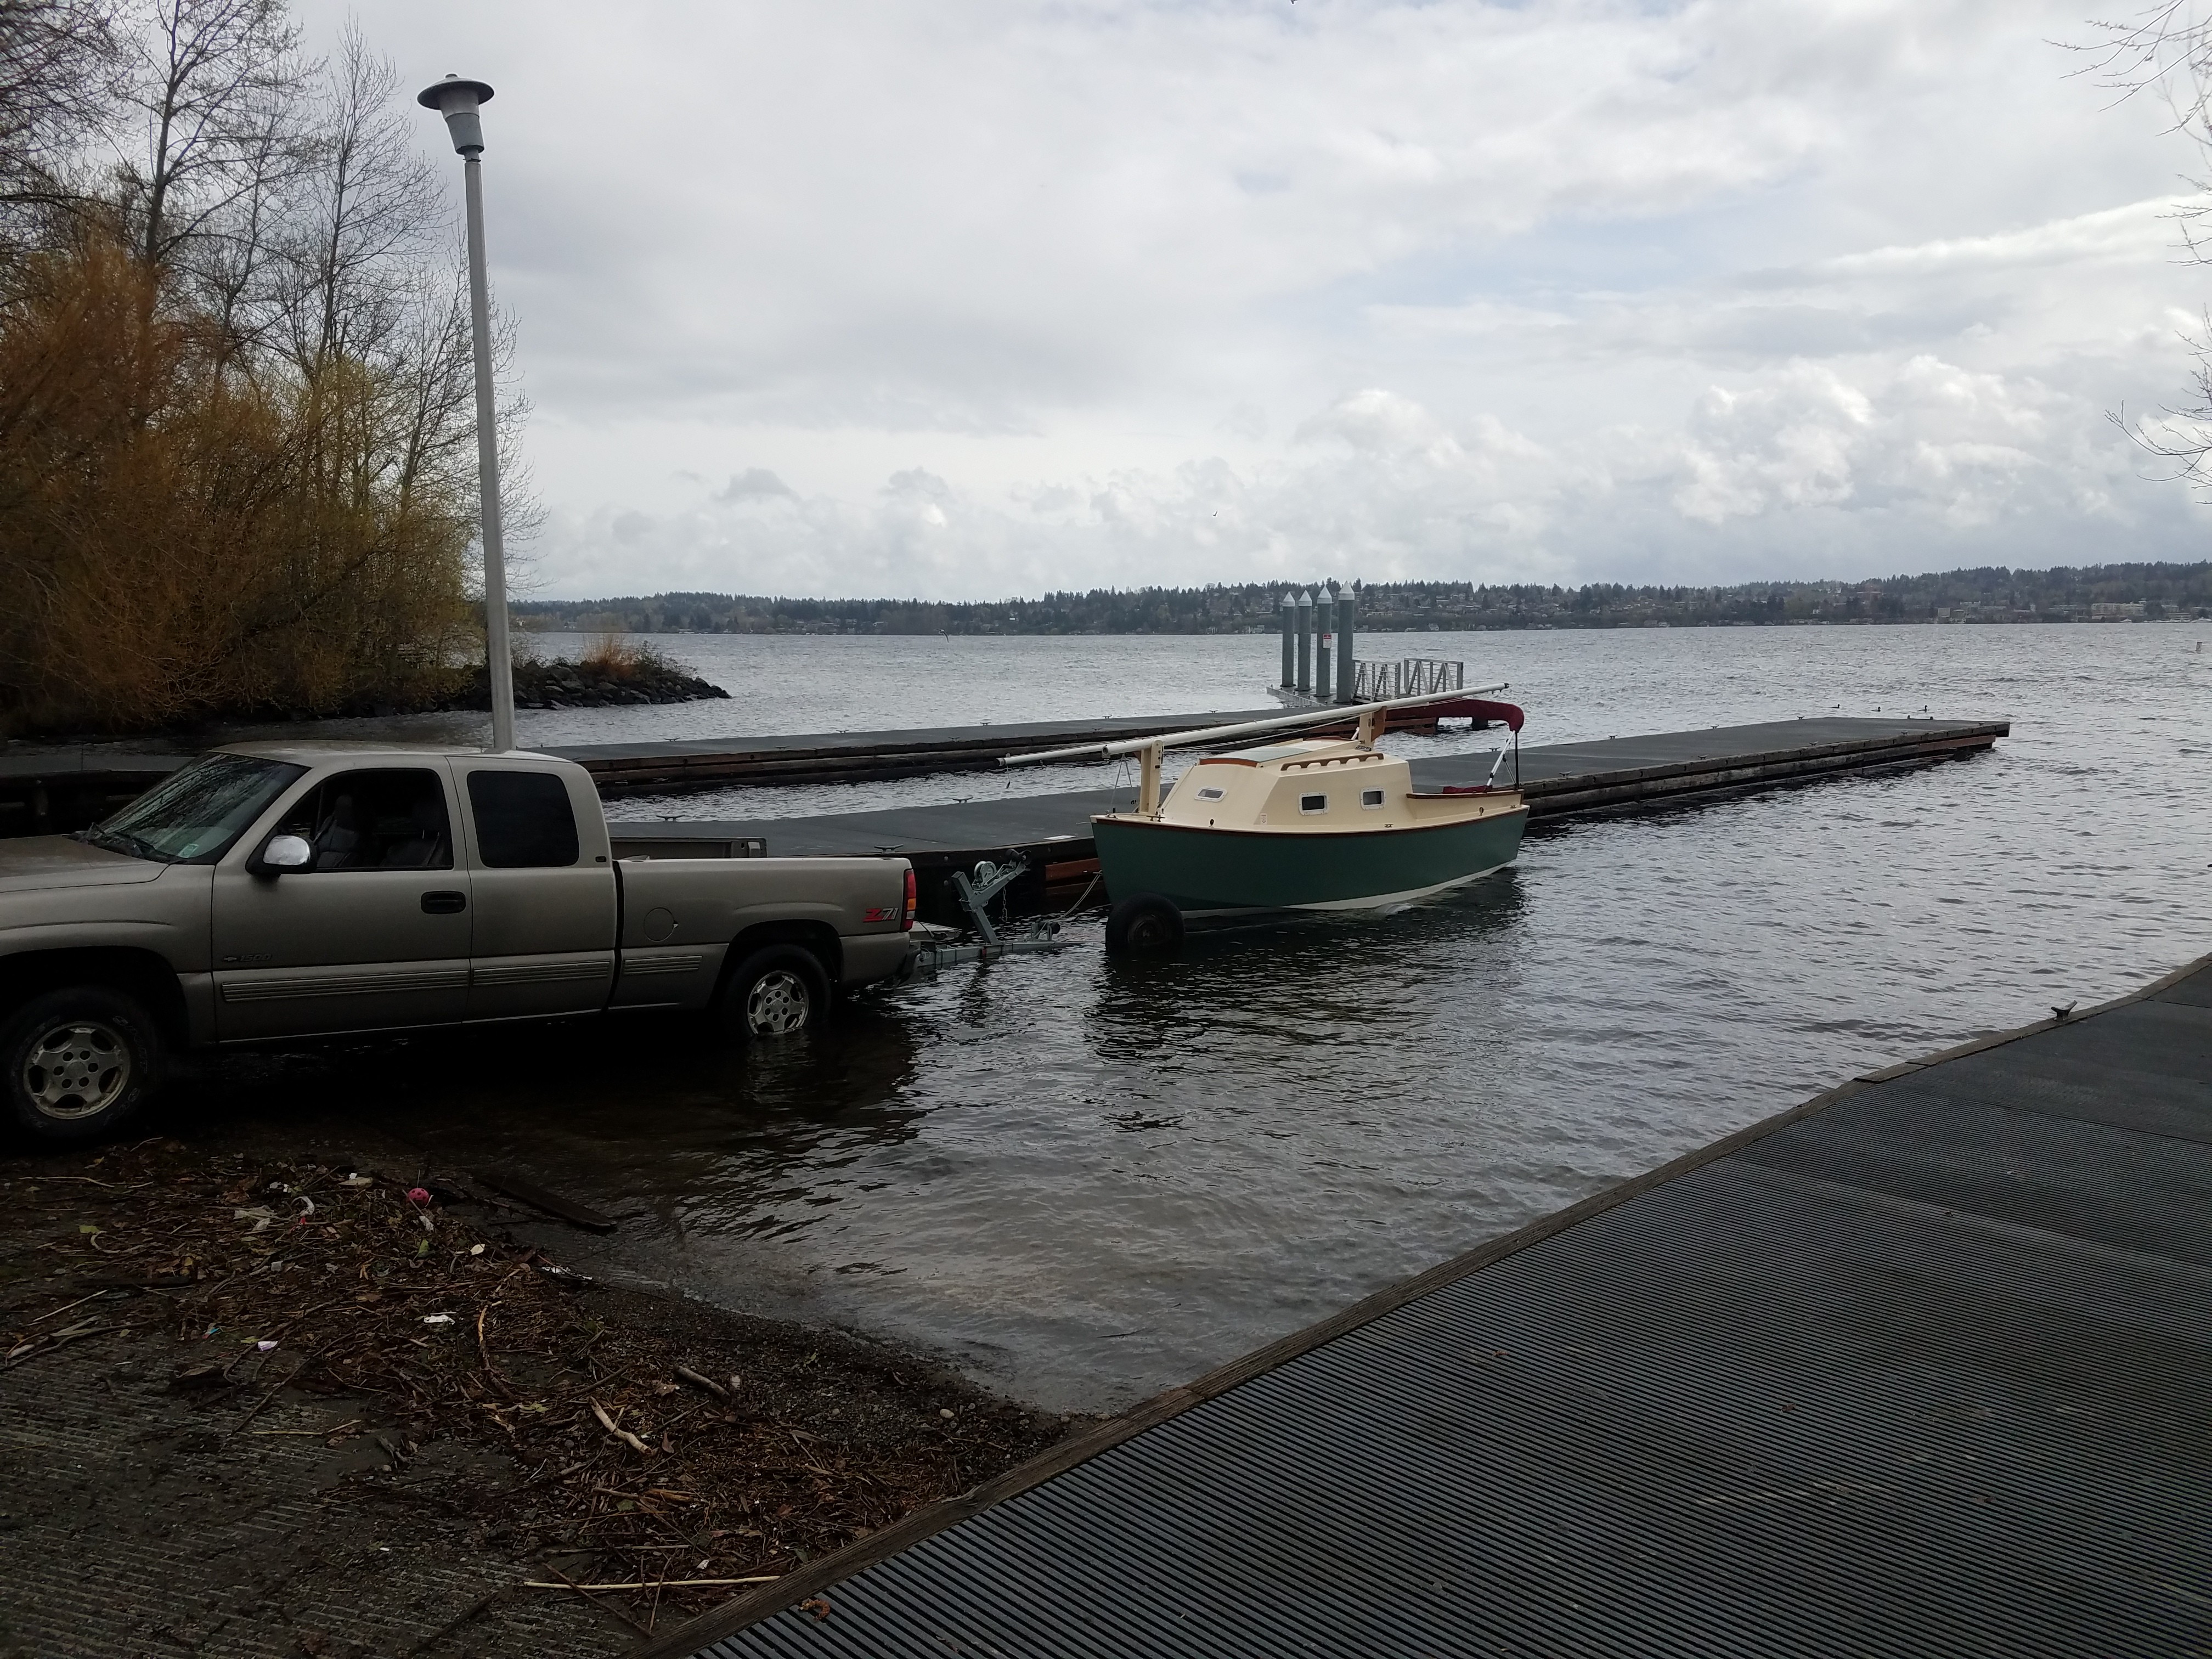
An additional photo that didn't post first time around. I float on to this position then crank in the last few feet. Build more Belhavens.

-
I received a PM requesting info about my Belhaven 19 trailer and thought I would share it here. Trailer is a year 2015 Easyloader EZB 17-20 3100 with two adjustable cross members, two keel rollers, disc type surge brakes and 15 inch wheels with oil bath hubs. The boat sits between the fenders with the bottom of the keel about 14 inches above ground. The plank up front is where the keel rest. You'll notice in the photos that the rollers have flattened out which is fine since I don't want to push 1,200 pounds of boat off the trailer anyway. Everything is working fine even if it looks like MacGyver did the modifications.

-
I have the oil bath bearings on EZ Loader trailers for the Belhaven 19 and CS17. They have been trouble free for years and still showing oil half full. Also a big fan of the LED lights. I'm a lazy "float on", "float off' guy. I've mounted a 2x12 plank down the middle of the trailers and it works well as a walking ramp during retrieval. Even with boots on, keeping your feet out of the 50F water is important for winter sailing because you'll never get them warm again. On the lighter boat (CS17), I built a simple frame to rest across the cockpit where the straps cross it. This allows me to strap the boat down tight enough to prevent it bouncing around on the trailer. The ratchet strap tie-downs stay fixed to the frame which also saves a few minutes each launching. I say go galvanized and don't spend a moment worrying about getting the trailer wet. A million ways to do this and they're all right.
-
I'm considering using a 55lb cast iron anvil to moor my CS17 in a very sheltered bay with rock bottom. The $65 price and lack of shipping costs is attractive. This would be a temporary illicit mooring until I can navigate the permitting situation for a legal mooring properly augured into the seafloor out in deeper water. I would not be leaving the boat unattended - I'd be nearby where I could watch it crash into the rocks. I need to do some review of the bottom if we every get a daylight low tide, but it looks like a bedrock slab with loose rock , boulders, and perhaps a thin layer of mud as you get deeper. Questions 1. I'm thinking that on a rock bottom I've got to go for dead weight and not expect to catch or dig into anything (not that an anvil would anyway). Is that how it works? 2. My particular location is watched very closely by "concerned citizens" which could lead to the State impounding the mooring. Anyone see a cheaper alternative other than 100lb rocks? 3. Would 2 or 3 of these make a respectable mooring? thanks
-
Scott, I replaced the starboard side cockpit hatch with the standard design and it works beautifully to keep things dry. I intended to replace the port side hatches but ran out of time, so I went with a manufactured hatches instead. All along I had assumed the gaskets on the hatches were leaking but upon removal found that the sealant between the hatch and deck had hardened and the sealant to deck bond completely failed. The result was this tiny crack that sucked rainwater into the compartment. Replacement hatches with fresh sealant is working ok but I'll convert the hatches when I run out of projects. Regarding paint, I kinda borrowed the color scheme from the photo below of a Thunderbird which is a Pacific NW one design with hard chine plywood construction in common with a Belhaven19. The brighter green could not get Spousal approval so I went with the darker Martha Green.
-
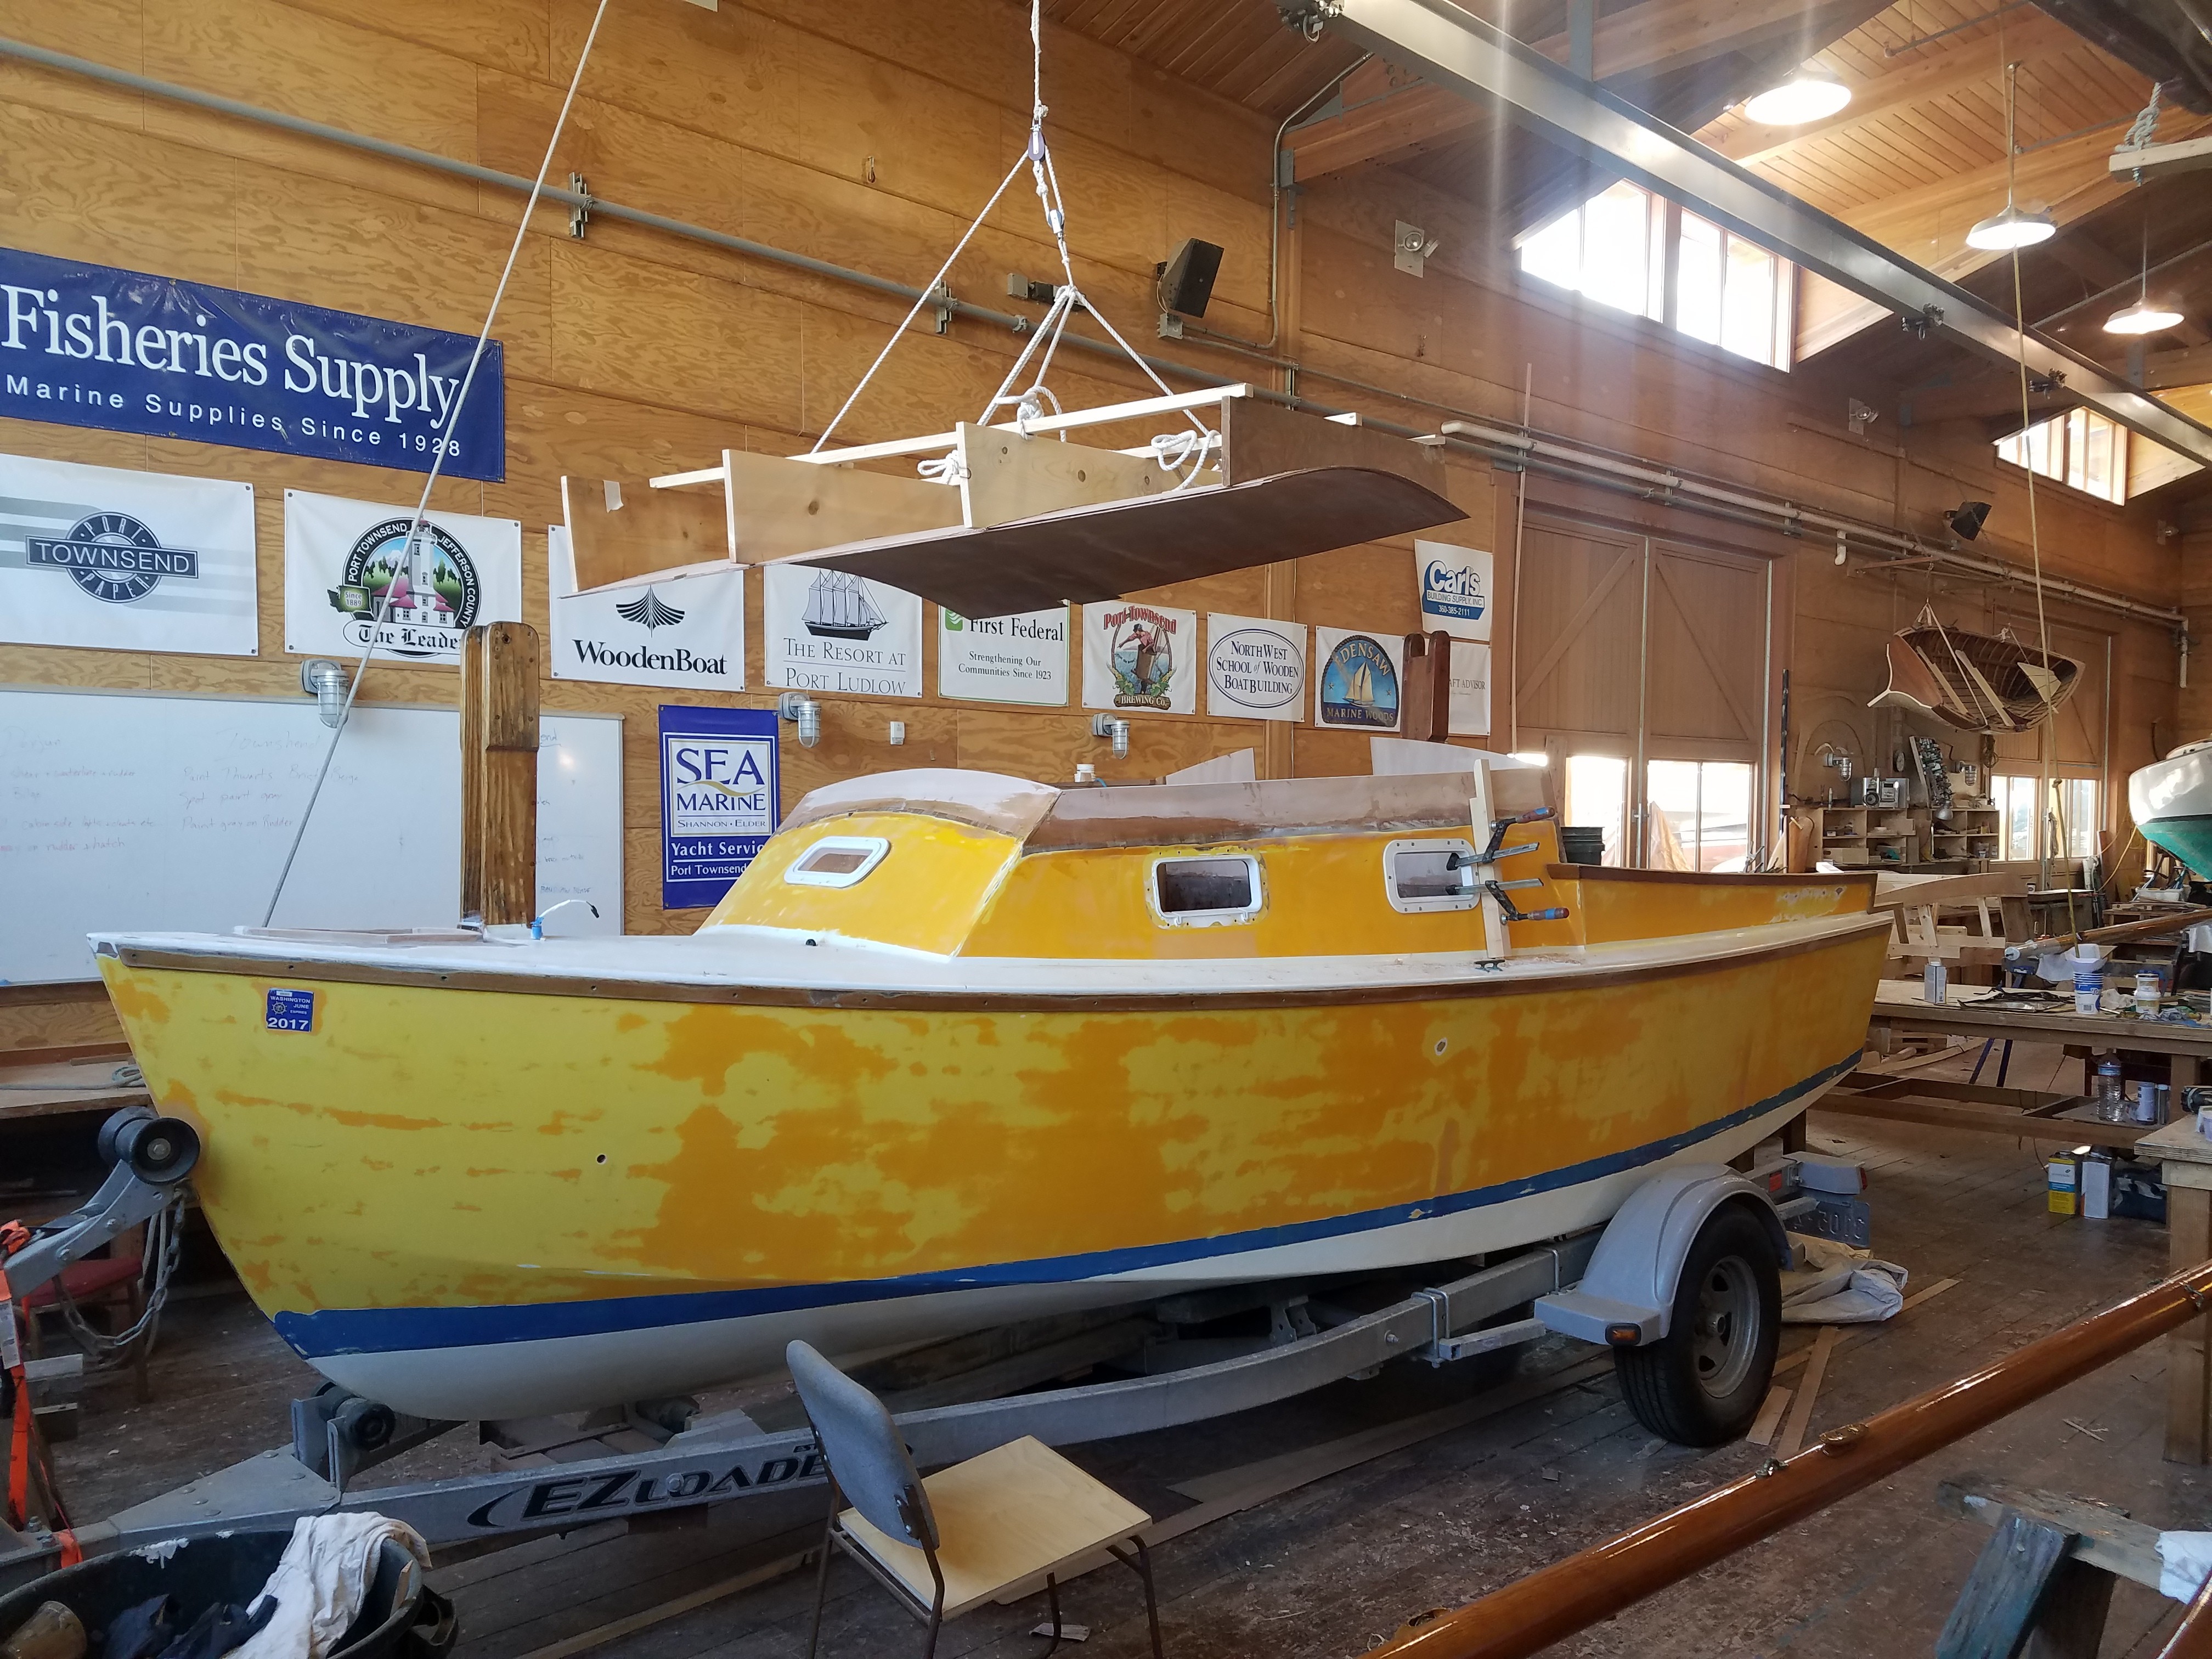
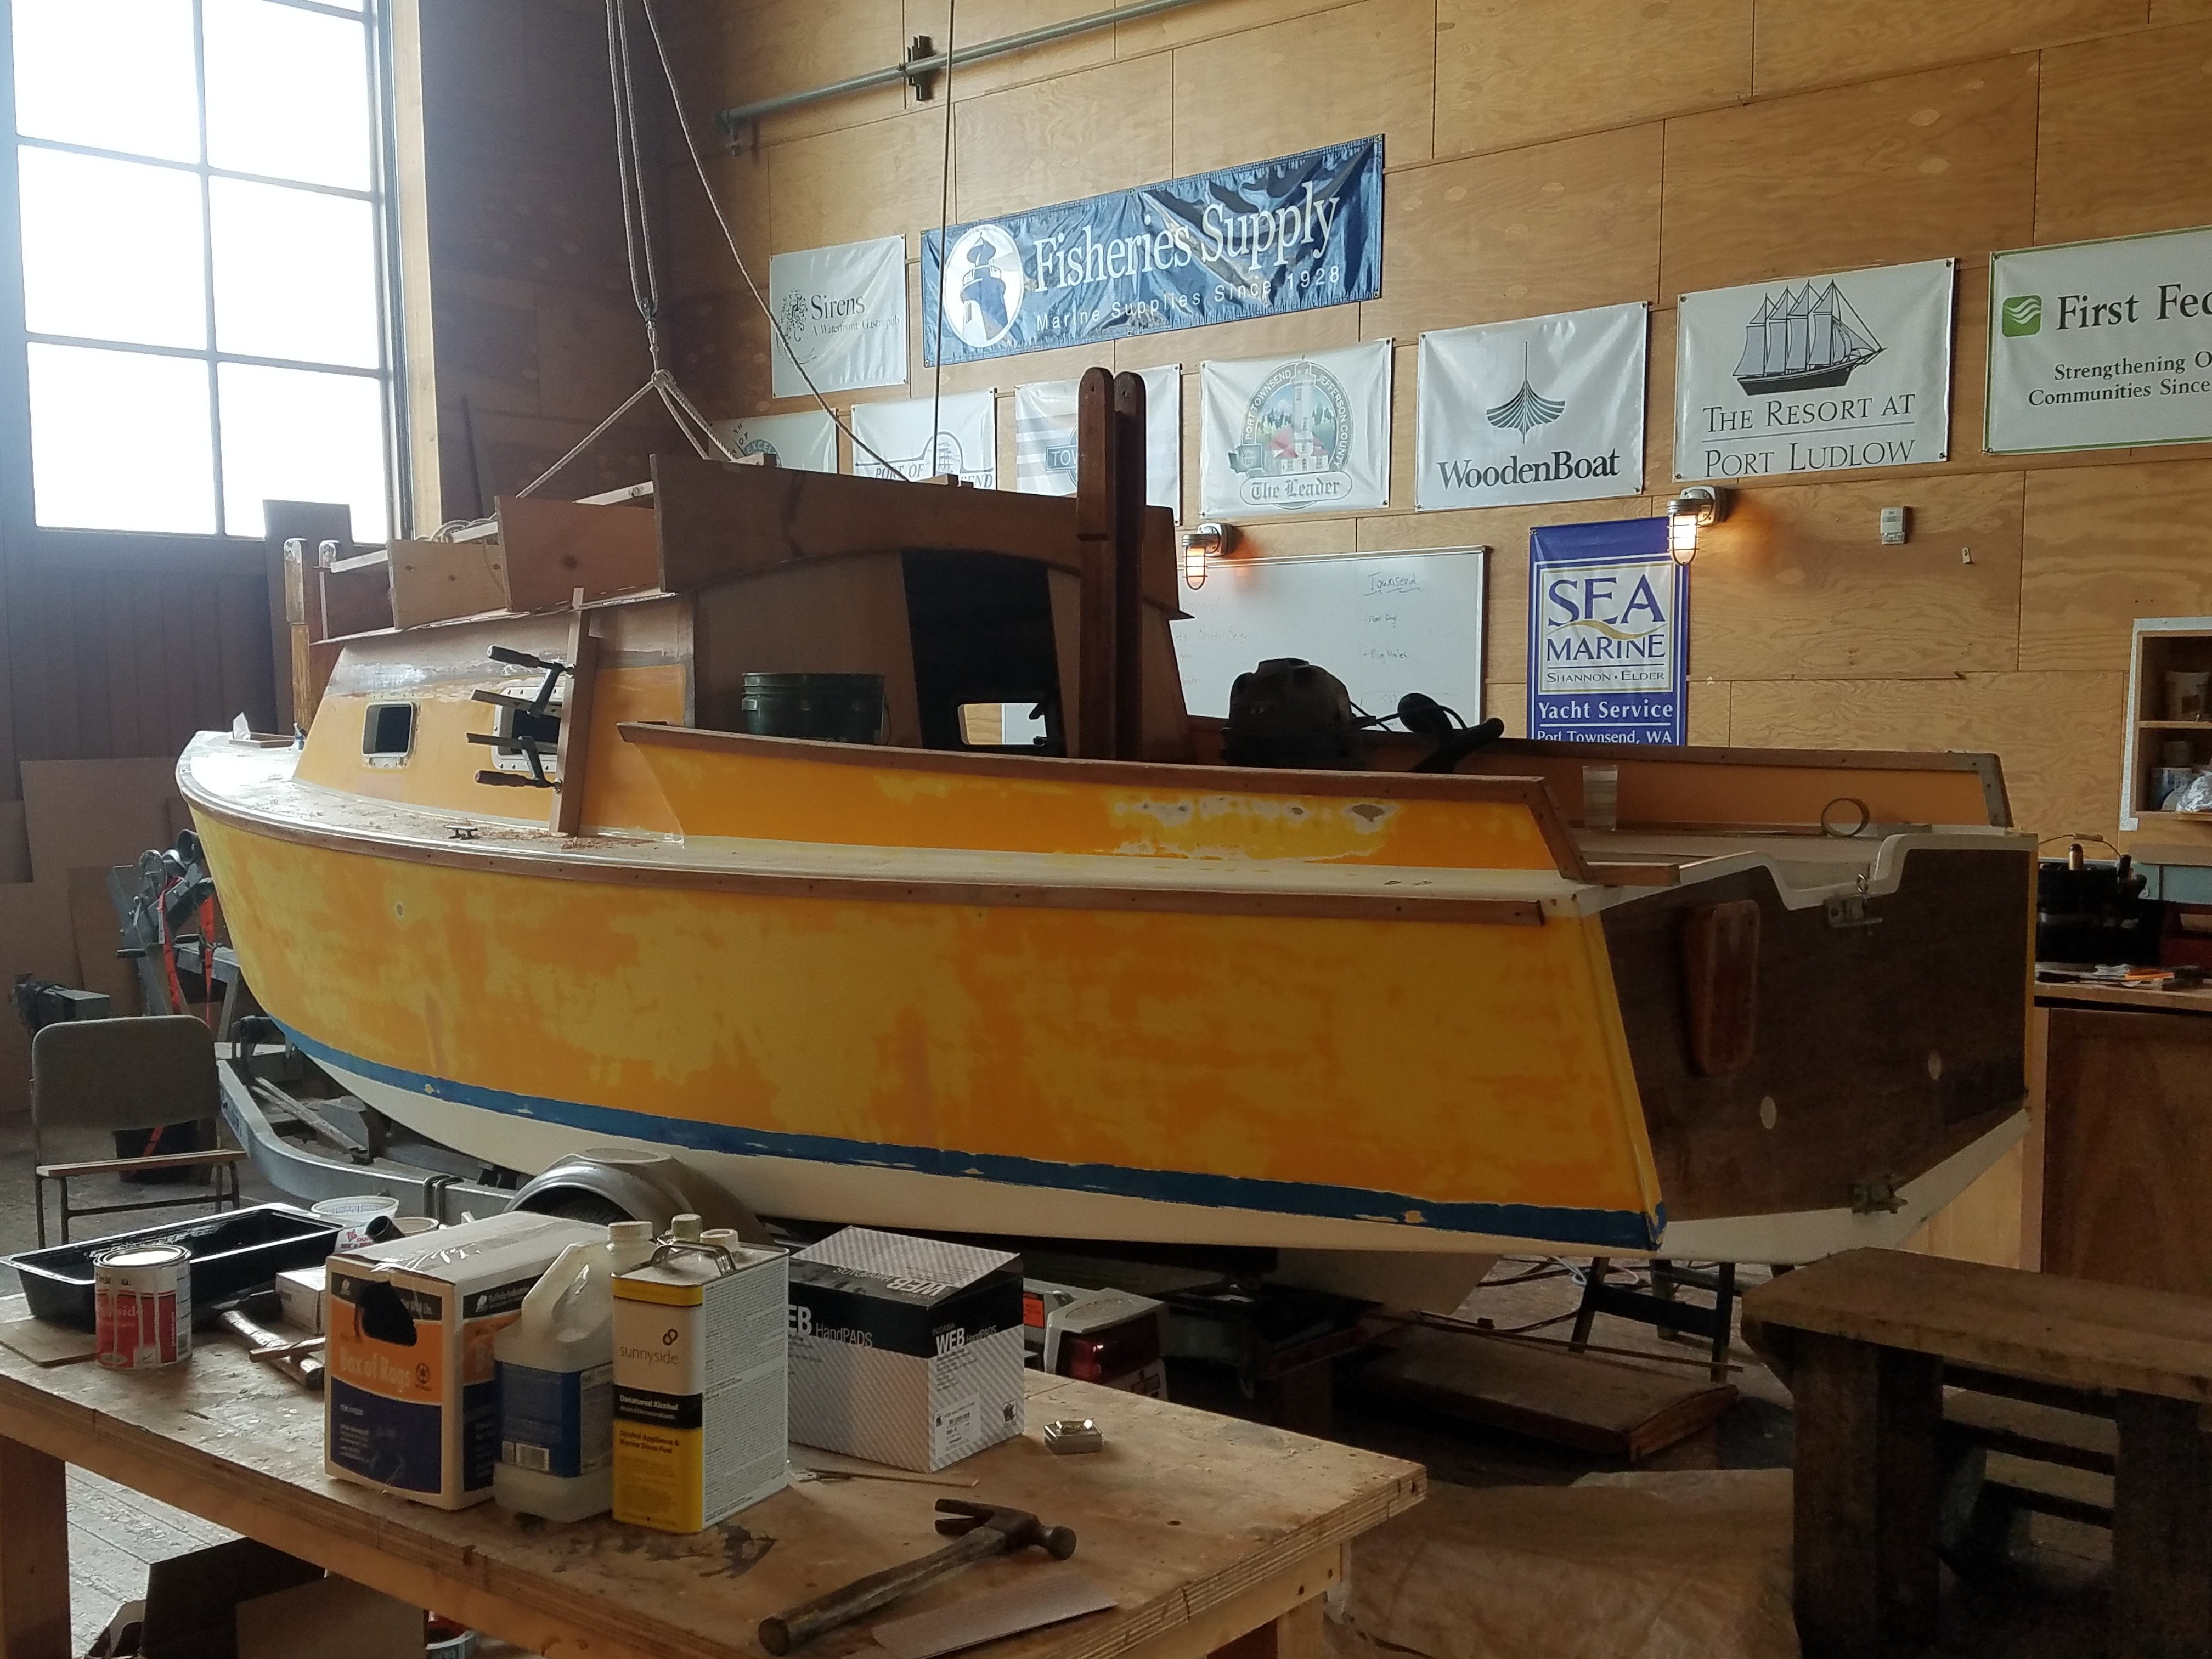
Thanks everyone. This has got to be the friendliest place on the internet. I certainly took some risk messing with a great design and a carefully built boat. Here's a couple photos of the new lid going on, in the shop at the NW Maritime Center in Port Townsend WA. and another from the deck of the ferry.


-
b Hello all, I thought it might be time to share the modifications to Belhaven 19 hull #3 that I purchased a few years ago. Yellow is the "before" photo (credit to Doryman, dory-man.blogspot.com) taken a few years ago at Hood Canal WA. The green photo (credit to Marty Loken, www.pocketyachters.com) was New Year's day 2018 at Rat Island near Port Townsend Washington. The name Clementine is a holdover from the yellow color and I'm sticking with it. Other than the obvious difference in paint color, you'll notice the cabin top is higher. Original cabin top was removed, front and sides scarfed and extended up about 4 inches. Cabin roof was replaced with a three layer 4mm plywood lamination without ceiling beams. The standard forward hatch was omitted to maximize the sliding hatch length. The result is full sitting head room inside the cabin and a comfortable spot to stand with the hatch open. It doesn't appear to have affected the boat's center of gravity or trim, but I admit that the extra height doesn't help the looks. I'm still messing with completing the control lines, interior paint, and wiring. Once I run out of projects I intend to replace the windows with oval framed fixed lights similar to the CS series in an attempt to pretty up the taller cabin. I may also paint a "hat" on the cabin top as a trick to bring the height down a little. I'm still in love with the boat and can't imagine a more comfortable 19 foot trailer sailor for tall people. Questions welcome. Build more Belhavens


-
Oversized wire reduces voltage drop -no harm as long as you can afford it. I didn't see any mention of a battery isolation switch. I'm using one with "A, B, A+B, OFF" options and two 42 pound 55 Amp hour AGM batteries. Two little batteries were easier to lift and conceal. There is also some piece of mind knowing I've got a battery held in reserve and using the off switch to ensure all loads are disconnected during storage. I also used circuit breaker blocks as a substitute for fuse blocks as it eliminates carrying a collection of spare fuses and the need to find them at the most inconvenient of times. My system with parallel batteries and circuit breaker block is "over engineered" but that was the fun part. I've lasted 5 days without recharging, could of course do better if I added a solar charger.
-
Thanks everyone. I was just trying to be lazy and avoid painting altogether. My leftover System3 Silver Tip Yacht Primer (two part epoxy) and System3 LPU sound like ideal choices.
-
I'm switching from wooden to aluminum mast for my CS17. The mast kit from B&B is going together nicely and I've started to think about paint. Other than appearance I can't see any reason the masts need to be painted. How does an unpainted aluminum mast look in a few years? Has anyone tried a brushed finish and left it to oxidize? Am I overlooking something? FYI, I love the original wooden masts but they are tapered too thinly to accept sail track and the lacing is inconvenient.
-
Sailing a Catch Ketch with one mast NOT in the center position
Randy Jones replied to greendane's topic in B & B Yachts Forum
If you look closely at how the lacing goes into and out of the third and fourth eyes from the top of the sail you'll notice the lacing does not spiral around the mast.
-
looks like it was a problem with the particular photo i was trying to post. I got this old one to work. wing on wing with a boat load of kids. Thanks.

-
I'm unable to post photos and unable to find any instructions that I'm sure must be somewhere on the site. I attempted to post one jpg file smaller than the minimum size and received an error message "there was a problem posting the file. -200". Help please.
-
Thanks PAR. I didn't know about flap wheels but they seem like the perfect solution. I'm using the system three water based LPU and will keep the coats thin as you suggest. Ed - Too soon for a good photo as she is still under a tarp and wearing a combination of primer, original yellow paint, and new wood. New cabin top is a 3 layer lamination of 3mm ply with the top elevation about 3 inches higher than the original, and no beams. I can now sit in the cabin without bending my neck. I'll start a fresh post to share photos and ask for forgiveness in about a month.
-
I'm about to repaint the deck of my Belhaven 19. The original paint with non-skid is in good condition and I'm repainting to change colors. What's the best method of preparing the deck for paint? I'd like to just take the gloss of the old surface and repaint instead of sanding the surface smooth, but not sure how to go about that. Also, would the additional 3 coats of paint typically smooth out the non-skid too much? What's worked for you?
-
Sailing a Catch Ketch with one mast NOT in the center position
Randy Jones replied to greendane's topic in B & B Yachts Forum
I don't think you need to double the lines. I tie the line in a loop thru the peak grommet which keeps the peak from pulling too far away from the mast. From there that same line runs down and across the back of the mast into grommets. The line does not circle around the mast and the peak loop is large enough to allow the whole thing to slip down. I will try and post a photo. -
Sailing a Catch Ketch with one mast NOT in the center position
Randy Jones replied to greendane's topic in B & B Yachts Forum
Sounds to me like you did ok. I'm assuming you were mizzen only with the mizzen in it's regular position. Regarding tacking - pulling the centerboard up to shift the center of lateral resistance forward may have helped, you can also "back" the mizzen when tacking and steer backwards with the rudder to complete the tack if you end up in irons. Just remember backing the mizzen is opposite of the way we back our mainsails and sloops back their jibs. You may also have discovered that a chop really kills the forward momentum of these relatively light boats. I'd don't have a motor on my CS17 and typically sail back to and occasionally into the dock. Often there is just one spot at the dock suitable for landing a sailboat but the power boaters have no idea you're aiming at it. Crowded lee shore ramps with a short dock are the worst and an appropriate to use a motor if you've got one. Laced sails can be difficult to raise but I have not had trouble taking them down. Try dropping your sail while the mast is up to see if it works for you. With the sail down, board down, and the motor running you're as maneuverable as anything on the water. In my case I drop all sail and steer the boat in with the oars or canoe paddle attempting to let the wind push me into position where I can catch the dock cleat with the stern line and stop the boat with a round buoy fender between the boat and the dock. It is kind of an all or nothing situation and can be nerve racking. -
The 2017 Pocket Yacht Palooza takes place Saturday July 22 at Port Townsend Washington. This is a one day boat show on the plaza of the NW Maritime Center followed by the three day Palooza Crooza (two nights, 32 nm, with group camp sites and chase boats). I'll be there with my CS17 for the show on Saturday and the cruise which starts Sunday morning and encourage anyone within striking distance to consider attending. It would be nice to see some other B&B boats there. The event is informal, friendly, and free with about 60 boats in the show and perhaps 20 on the cruise. The boats are mostly trailer sailors with a few row boats mixed in and there are no pretentions regarding building materials or motors. check out pocketyachters.com for details.
-
Summer Breeze - Core Sound 17, Mk-3
Randy Jones replied to Chick Ludwig's topic in B & B Yachts Forum
So tempting. Somebody please buy this boat and sail her in the 2018 race to Alaska! (just search R2AK). -
Sailing a Catch Ketch with one mast NOT in the center position
Randy Jones replied to greendane's topic in B & B Yachts Forum
I have used the mizzen in the middle several times. That arrangement works fine except for the boom in the face problem and that other problem about me being lazy. Mizzen only in its regular step works fine. The naked main mast might be doing something thing but I believe the key is to retract the centerboard to balance the helm. Thrillsbe has the right idea - go play with it and see which arrangement you prefer. -
Sailing a Catch Ketch with one mast NOT in the center position
Randy Jones replied to greendane's topic in B & B Yachts Forum
Much better off with your only sail in the mizzen step. I don't use the middle mast step anymore after getting hit in the eye once by the end of the boom. I prefer to sail mizzen only (when necessary) in the mizzen step and the center board slightly pulled up to balance the helm. This worked well several times for making a mostly downwind run in heavy weather back to a boat ramp. Things are completely under control with this arrangement and you can just enjoy the sleigh ride. -
Watch your overall length of truck and trailer. Washington State Ferries tier their prices in painful ten foot intervals "under 30 feet", "under 40 feet", and "under 50 feet". I'm able to stay under 40 feet but I had to position the mast so it hangs over the front of the CS17 and shift the trailer axle forward to achieve a manageable tongue weight. The fixed axle position on your proposed trailer might make you comprise either tongue weight or overall length.
-
There are plenty of dark boats in the Pacific Northwest that don't seem to have heat problems, so I wouldn't worry about the heat issue especially on the exterior of a hull without a cabin. The really light colors show dirt quicker, but that's not a deal breaker either. A color that contrasts with the water is more visible. I can think of one boat that blends in so well with a chop that she is hard to see at a distance. The rest is "season to taste". Yellow sounds good to me.
-
adapting spars to new sail plan for cs 17
Randy Jones replied to tfrei's topic in B & B Yachts Forum
I don't think the extra length on the mizzen boom will be a problem but you'll need to test it to verify that the mizzen sheets still clear the rudder, transom corners, and motor if you've got one.