Abyssdncr
-
Posts
230 -
Joined
-
Last visited
-
Days Won
8
Content Type
Profiles
Forums
Events
Everything posted by Abyssdncr
-
All routed and sanded. Ready for the strongback.
-
Stringers all scarfed and gluing.
-
I have no intention of attaching Jeff to my off the cuff experiments. I can even keep it out of here if it might cause issues of that ilk. Just thought it might be an interesting adventure, and y'all are a fun crowd. I've thought about redoing with hindsight's knowledge since FreeB was my first boat build...well, at least completion, ever. Adding a bow hatch, cup holder, fishing rod holder support structure, practical stuff, but then it might as well be a Castaway. I've since collected a small pile of Tupperware that does all of that stuff nicely as well. So decisions... The canoe is simple and elegant with some nice places to get crafty in the execution. I'll at least get the scarfs going while the flat space is empty...
-
You might be absolutely right... My inspiration for this plan came from this build: http://forum.woodenboat.com/showthread.php?205321-Building-Thread-a-17-foot-two-person-Mirage-drive-boat Based on what I was seeing, IF I can figure out how to accurately do the spiling on the planks, I think they'll make the twists and bends. The okoume on my wood duck is a lot wider and still took some pretty complex curves. It will definitely be an experiment! Here's what I've got for frame stations:
-
Been absent for several weeks getting out and playing with friends and family out in the water instead of building. However, I opted to skip KOSH this week and have a staycation at home instead. Found the time to finish my last build for the shortest stack in the house yesterday and get it launched. For what it's worth, spar varnish sealed the economy 6 oz very nicely (3-4 coats - no leaks at all!) And...now the build bench is empty, so...what to do next? My inclinations are: 1. Wallops Island 12. Frames are all cut. Stringers are cut, but still need scarfed. Fabric is in hand. Should be a fast easy build, but doesn't add a whole lot of extra capability to the existing fleet. 2. Frame battan approach to modified FreeB lofts. Narrowed 20% to about 22.75" wide, stretched to 14', and made multi chine. Skinned with 1/8" Baltic ply. Bulkheads bow and stern, and a decent sized access to the stern hatch for camping gear and whatnot. Thinking of a fiberglass layer to the bottom and carbon powder impregnated epoxy for a bit of protection from the unknown in the river. Not true SOF, but the build style and loft roots would keep it quasi-Kudzu in origins. This won't be a quick build by any means, but would be a way cheaper rendition of a small touring yak, something I don't have yet. Frames are cut and laminated as appropriate, but that's all thus far. So, whatcha think?
-
Ok, y'all win, bought a Perception Swifty 9.5...
-
Got the frames all cut out today. Time to clean them up and start scarfing. We have a group float trip planned for the 11th, and I hope to be able to bring it out then.
-
I just tried the PL Premium on the the young prince's boat - not impressed. Leave it thick enough for abrasion resistance and it looks hideous; sand down the high spots and risk abrasion to surrounding areas. It did fill in the weave of the economy fabric very nicely though and it dries quickly. I think there is a place for that product in the toolbox somewhere, but not so much for this purpose. Also, I misspoke on the 14 oz Kevlar fabric; it's $35/yd...
-
Ok, to be honest, I think my experiment vessel is going to be FreeB lofts, narrowed about 20% to around 22.5" (frames are cut, but until the gunwales are attached, no way to know for sure), converted to multi-chine, and built seam-batten style using 1/8" Baltic birch, so the epoxy coating materializes a little differently... However, with SOF in mind, same doubling with Kevlar (chine stringers down) using Corey's goop?
-
PAR, you may be absolutely right, but even at 35 oz, that's a 2 lb weight hit, which is still a 15 lb savings over Tupperware. I was thinking some graphite epoxy mix over the Kevlar from the chine stringers down. Still not Tupperware durability, but also still not as expensive as plastic and far more classy, even if the surface doesn't flow out glass smooth. Sure, it's a compromise, but the weight penalty is almost negligible and aesthetics aren't a primary driver. Armor is never cheap though, in price or weight. In KS, rapids are a wishful pipe dream, but the bedrock is very real...
-
I was thinking this same thing this week and found 14 oz fabric for $15/yd. Just got back for an 8 mile jaunt down a rocky stretch of the Arkansas river and some extra armor would definitely be a good thing. Rented some Tupperware for $15 instead of sending FreeB down it sight unseen - probably a wise choice... There was a gal there in a Gentry Mobyjack Bay (the actual red one on his website), that Dave made for her personally and she survived mostly unscathed, just a couple scuffs along the keel...but that boat doesn't sit very deep in the water. So, again I'm back to wondering if an extra layer of Kevlar over the poly on the bottom half of the skin would help in this regard...
-
Starting another one and figured the canoe would fit nicely in the inventory. Plans showed up Wednesday. Got stringer stock all ripped about an hour ago. When the paint dries on the other boat on the sawhorses, I'll start cleaning up the saw marks and start cutting scarfs. Fortunately, I got a couple of really nice 2x6x10 WRC to start with, so there isn't much to work around because of the wood quality, just the length issues to address. When the mounting block patterns arrive, I'll start on the plywood. Looks like a fun little boat to build, and at 28" wide, should be plenty stable for the less adventurous of the household. Looking forward to it!
-
Experimenting a little on my latest project, I decided to try the skim coat of Loctite PL Premium construction adhesive prior to paint. If you are careful and thorough, it totally fills in the weave of the loose fabric quite nicely. As best as I can tell, from the get go, with two coats of Rustoleum applied afterward, only (2) individual pinholes were found. Compared to the 100-ish pinholes I was fighting on FreeB, after 3-5 coats of paint, this is a massive win for the economy fabric. It's not the prettiest underlayment to paint over as you can see a bunch of the bondo spreader lines from smearing the adhesive in, but no more unsightly than the pile of extra brush marks from trying to fill in the spot areas where the paint didn't fill in with just paint.
-
I found a little lumber yard right by work that has some excellent offerings of good knot free rough cedar. I used rough cut in some parts or another on all the boats I've built so far. I rip them out on the table saw and use a power belt sander to smooth them up instead of a planer (hey, ya use what ya got). Point being, it almost always easier to sand the "rough" off of a rough cut edge than it is to take out a table saw blade gouge and damned faster than scarfing. In my area, the rough cut is notably cheaper too. I picked up (4) 2"x6"x10' WRC boards just this Tues. out the door for $66. The 2x4s were only $9 & $12 respectively for 8' and 12' lengths. The 12' board let me do the entire Tadpole build with no scarfs whatsoever. After spending $80 per 4'x8' sheet for special order Baltic from Menards, I found out that they keep it in stock there in both 5'x5' & 4'x8' sizes for $36 & $47. Lesson learned. Look for some of the smaller shops and you might be surprised what you find.
-
I've been thinking the same thing lately. Castaway quickly went to the top of my "next" to build list weeks ago, but I got distracted by baby kayaks for the littlest of the household. I'm a form follows function kind of guy though...
-
I dig! Not that anyone doubts you, but it might be nice to show a closeup of the finished product at the end.
-
Yep, pretty much, but standard oval coaming. I'm sitting on two sets of Dave's plans...and for the money, I sure like Jeff's better. I needed some smaller more stable offerings for the wee little people of the household, so I have one of his Kidyaks ready for fabric now, incorporating some of Jeff's ideas (laminated deck beam and recessed aft deck beams). Since I kept all my frame templates for the FreeB, I'd just need to figure out one more template to make two of (well, the coaming support fingers might be different) and stretch the boat out. That seems more sensible than buying another set of plans that are Marks-a-lotted out on brown paper packaging paper.
-
Bored in meetings and thinking ahead for the build bench. So far everyone has loved paddling FreeB, but the wife and eldest are scared of getting caught in the kayak if it capsizes. I know, I know, training (and swimming pool weather is coming), but irrational fears are bound to persist. I could also finish the wood duck, but I like this building style so much better. So... I was thinking about stretching the FreeB design by 3'-3.5' and adding a couple frames to support a open double coaming. Acknowledging that this would be a mighty departure from proven plans, does anyone have any non-binding thoughts or suggestions regarding keeping the same size of gunwales and stringers?
-
I only had 1 deck stringer, but this is how my attempt at grafting in a laminated deck beam into an otherwise plywood frame worked out.

-
Very interesting approach. Is your aluminum hollow tubing or flat bar? Have you welded or riveted sheet metal caps to the joints? I imagine that for maintaining stringer locations you could run screws from the inside out through your frames into the wood and then lash, particularly for the keel and stringers, but it might be tight spaces in a few locations. For the gunwales, you could use socket head cap screws on the outside to be bottom stops and keep them where they belong.
-
Congrats, and welcome! Careful though, building can be contagion all its own. I'm about ready to skin my third boat of the year. Dabbling with another designer's plans on this one, and it REALLY makes me appreciate Jeff's plans.
-
Floating frames, that's a good expression for it. I had a strongback mounting plate on each frame for FreeB, but only the 3 the plans call for on the Tadpole even though there were 6 frames. Built Tadpole with the same approach: bow & stern to keel, frames, deckridge, stringers, gunwales, perhaps even more lackadaisically than I did on the FreeB. It just seems a whole lot easier that way instead of wrestling boards with loose ends floating about via bungee cords. I just figured there was probably a good reason why Jeff & others do it that way that I'm missing.
-
OK, I have a basic question for the "masses" (what is it these days, about 12 of us?). Not sure if it's a tomayto / tomahto sort of thing or if there's some actual rhyme & reason to it. When I did my FreeB, I was just winging it based on model airplane experience of building symmetric RH/LH fuselages that are indexed off the center spine, which was to build a perfectly straight centerline with aligned frames along the length and then add stringers. So, I determined keel length, lashed on the bow & stern, located and lashed frames to the keel, and finally aligned frames & lashed in the deckridge stringers. Then it was just a matter of zip tying gunwales & chine stringers, measuring and marking everything squared up and adding the final lashings However, I also see recommended to locate & lash the end frames, squeeze the middle frames into their locations, add the rest of the stringers and then finalize by adding the bow & stern pieces. So, is there any rhyme & reason to the order of operation or is it just a building preference thing? About ready to start on the next project, & if I should be investigating alternative building means, I'm all ears. Thanks,
-
Delightfully elegant - well done!
-

New SOF builder - just ordered a Tadpole!
Abyssdncr replied to Abyssdncr's topic in Kudzu Craft Forum
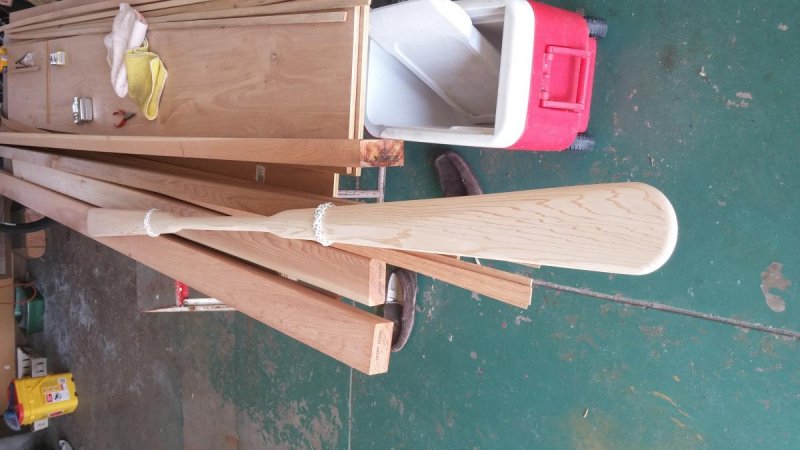
Thanks, after looking at it, I'd definitely tweak the design of I were to redo it, but the youngster is happy. From rough cut cedar to Greenland paddle. Took the really rough blank out last night, and will give the more refined version a whirl in about an hour. Still need to actually finish it, but figured I'd get it wet a few times first.