Drew
-
Posts
273 -
Joined
-
Last visited
-
Days Won
12
Content Type
Profiles
Forums
Events
Everything posted by Drew
-
Pete, I might have missed it if you have mentioned how you applied the undercoat and topcoat. Did you roll and tip or did you spray? If spray, what sort of equipment did you use?
-
Progress at last! Cabin top frame is glued in place and a first coat of epoxy. I have used 1/4 inch hardwood dowels as 'trennels' to secure all parts of the frame that will have any shear load on them. I don't want to use any metal fixings in the boat other than eye bolts etc. The cabin top is cut and trial fitted and first coat of epoxy. Taking Pete's advice I will paint it before fitting, hence the bare stripes that will not be painted, ready for gluing.


-
Your build is coming along so nicely and so fast, I confess to being a TOUCH JEALOUS!
-

Core Sound 20 Mark 3 Build - Chesapeake, VA
Drew replied to AmosSwogger's topic in B & B Yachts Forum
I chose to fibreglass the dry area aft of the ballast tank simply to strengthen that area of the hull. If the glassing is done well it will also add to the waterproofing. -
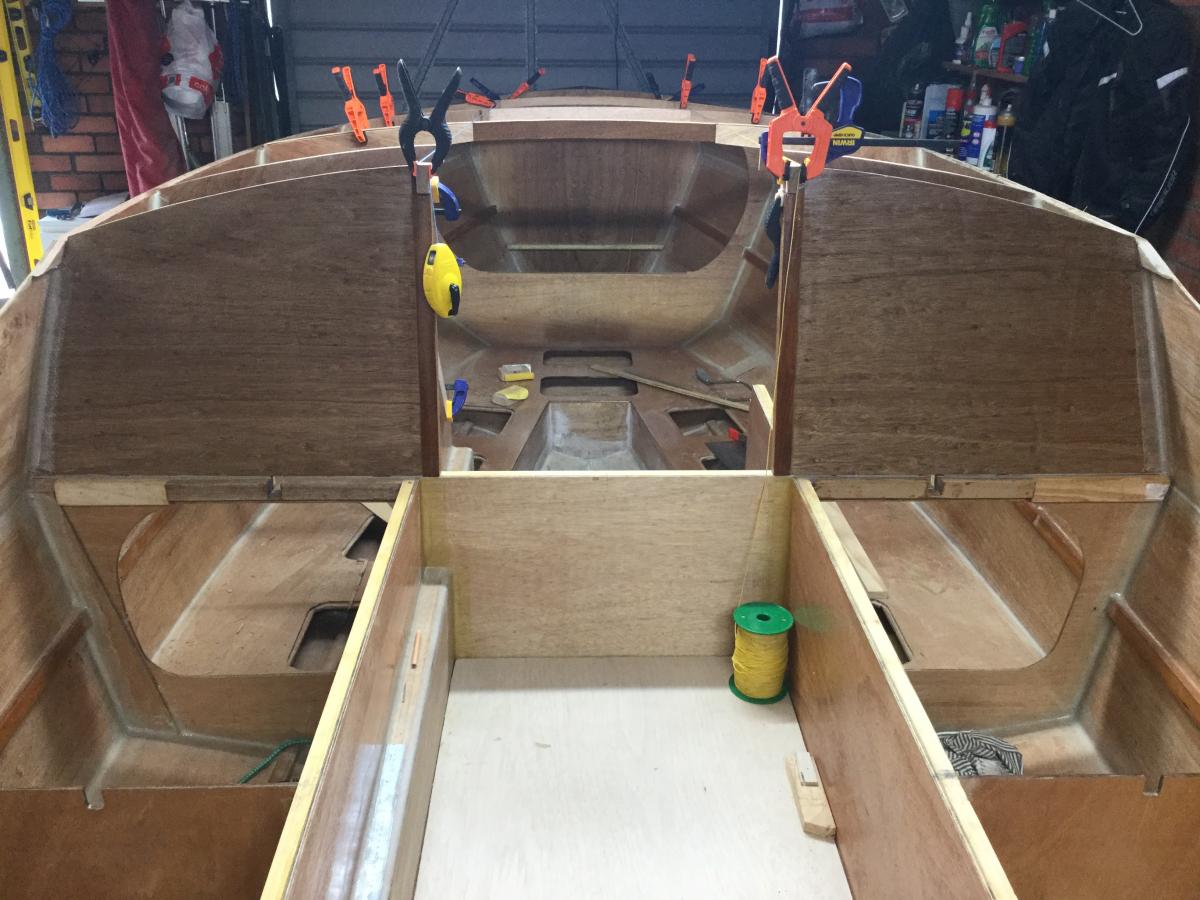
Here is the cockpit view of the extended cabin bulkheads. I wanted to wait until I had cleaned up the dust and rubbish, but that could be a long wait. Cabin roof (deckhead) bearers are being shaped and dry fitted, and re- shaped until I am happy with the curve and flow of the cabin top.

-
I really enjoy being part of this group - thanks for all of your contributions. Rather than take over your thread Pete, I will post an update on my thread.
-
Oops! To paraphrase and misquote - fiberglass and resin can cover a multitude of sins! Thanks for posting. Are you fitting one bailer facing forard and the other facing aft?
-
Pete, your notes are so helpful. Did you overlap each sheet of peel ply or just butt them. Using peel ply in the past I found the main issue was the little ridge that forms at the edge of each sheet, but I found I could sand that back easily enough.
-
Pete, what weight of cloth are you using? I assume from the way it lays out you are using bi directional cloth and it looks to me to be about 6oz. Give me a cople of weeks and I should be at the same place.
-
Great idea. I have some of those hanging around.
-
No chance at all of catching up to Pete and Chessie (thanks Pete for the roll-over pics) but moving forward nonetheless. Filleting and taping inside and out for the sheer strake is complete, so this week's goals are to fit the rubbing strake and glue in the cabin aft bulkheads. After that, start on the cabin deckhead. See if I can get a nice fair curve like Chessie's.
-
Good tips guys. Thanks, that is how I will do it too.
-
Thanks for the pics Pete. I'm wondering why you chose to lay the roof on in one large sheet instead of cutting out the hatchways and using clamps along the hatch rails? I wold think that cutting out the hatchways after fixing would be more difficult than doing it before gluing. I look forward to hearing how the cutting out goes. You certainly have achieved a nice curve in the cabin top.
-
Yes Steve, no plans whatsoever to row. I will post some more photos as I clean up the mess and get ready to trial fit the cabin deckhead.
-
Wow! Great progress and great ideas. Today I glassed my sheer strake into place against the bulkhead knees. The gunwhale taping is next now that I have check measured everything three times at least. Measure twice, cut once continues to be the mantra. Thanks for your inspiring pics.
-
I routed out the slot when I built the CB box, but left it glassed over during construction to avoid rubbish settling through the slot and into the box. I will just cut the glass out with a sharp chisel when I build the pendant box and pulley setup.
-
The CB tackle will be unchanged from the plan, I just haven't got to it yet. The slot for the pennant coming out of the box still has glass over it which I will cut out when I install the pulley and build the box. It won't interfere with access to the cabin.
-
Time I stopped feeding off everyone else's great posts and stirred the pot a little. I have fitted bunk tops, taped and epoxy coated anything that stayed still long enough, although bunk tops are waiting for a final coat and sheer strakes are still to be epoxy coated. As you look at the photos, yes something weird is happening here. Graham's design is just what we need in a boat at the moment, but I prefer a smaller cockpit. With that in mind I have sacrificed the bridge deck and brought the cabin ends aft to the cockpit forard bulkhead. That bulkhead is now a coaming and the top of the forard ballast tank is a step into the cabin. I topped it with 9mm ply and will glass it. The small amount of extra cabin that was previously the bridge deck will be a small galley area on the port side and a radio and chart area on the stbd side. Everything else is standard, but it also means we don't need a step taking up room in the cabin sole area. So everything is being trial fitted at the moment then, when it all fits with the same measurements, glue, fillet and glass! Progress at last!


-
I suggest that the two whites are the equivalent of a 'masthead light', which is kind of weird since the whole thing is mast head. Standard lighting is port, stbd, stern (overtaking) each at 120 degrees and masthead. Two masthead lights if over 150 feet LOA if I remember correctly.
-
CS 17 Update since we seem a little MK3 centric right now...
Drew replied to JPower210's topic in B & B Yachts Forum
Thanks Alan. I know Performance Metals from aircraft building days. They weren't very helpful with the OD and wall thicknesses in T6 when I emailed them but I will try a phone call and see if I can find this person John, that might be more helpful. -
CS 17 Update since we seem a little MK3 centric right now...
Drew replied to JPower210's topic in B & B Yachts Forum
KR2. I haven't caught up with Allen in ages. Your boat is looking beautiful Peter. Where did you get the aluminium for your masts? I haven't been able to find any that is close to the specs called up for the CS-20. -
If a replacement part is not available, I would take a section of aluminum tube (or steel as long as it is well protected against corrosion and electrolysis). Cut the tube in half longitudinally and rivet inside the hollow using three or more stainless rivets on each side of the break.
-
B and B Yacht Designs in "North Carolina Now" TV Spot
Drew replied to Alan Stewart's topic in B & B Yachts Forum
As one of the "down-under" members, it was great to see you on the film clip. Well done! Just proves that you don't need to be a major pan-national company for success, just have a good design and do it well. -
Ah yes, the mizzen base. I'm not sure I have measurements since I am cutting sheet from scratch. Thanks for the reminder. My forard ballast tank is fully coated and the aft tank about to be, so now might be a good time to think about the mizzen. Seriously considering whether to put in a tabernacle for the mizzen mast.
-
Despite being behind schedule, I am happy with the progress forard of bulkhead 3. Bilges have 3 coats of epoxy and all taping and fillets are done. Bunk tops being prepared and trial fitted prior to fitting hatch rings and coating with epoxy. Building from scratch means little inconveniences like butt joins have to be used but I am happy with the result. I ended up doing cabinet cuts in the butt joints in the bottom panels to ensure the sheet bent to take the shape of the hull. When the bunk tops are in place I will start on the sheer and cabin top.