Drew
-
Posts
273 -
Joined
-
Last visited
-
Days Won
12
Content Type
Profiles
Forums
Events
Everything posted by Drew
-
Much appreciated Pete and Chick. Thanks! Undercoating the boat hull today, hoping to get it done before temps get too high. Expecting over 100 F in the next couple of days.
-
I'm sorry to ask a mundane question that has been asked before, but can anyone remember how to change the name of an existing thread? I want to add the boat's name to the title. Thanks!
-
The early cool of the morning saw the other half of the boat glassed. We were extra careful to wet out and squeegee the peel ply material but what started as a dead smooth finish still developed some slight wrinkles by the time we were finished the length of the boat. The reason, I realized, is because the taffeta material I am using as a substitute for commercial peel ply is quite soft and nowhere as rigid and wrinkle resistant as the real thing. Once wet, it slowly changes shape and wrinkles. No big problem, just some sanding to remove the ridges that formed (as its only the epoxy , not the glass cloth that forms ridges) and still worth doing for a nice smooth finish and less filling of the weave. So be warned, peel ply substitutes are not as good as the real thing for large areas.
-
What a great dream to have - a real challenge! Mine is to take a CS 20 up the East Coast of Australia. Maybe one day in the right weather.
-

Core Sound 20 Mark 3 Build - Chesapeake, VA
Drew replied to AmosSwogger's topic in B & B Yachts Forum
Amos, so sorry to hear about your friend Terry and the other victims. We are on the other side of the world and somewhat protected from that level of violence, but we still hear the news and there are many in Australia who feel for our friends there. It is significant for my family because my sons live in LA and travel a lot within continental US for their work. Thinking of you! -
Today's top temp in Canberra was 34C (93F) so an early start this morning to glass one side of "Dragonfly". With my lovely wife Tiia mixing the batches we used about 2 litres of epoxy base (2:1 formula). Despite our best efforts, the peel ply material ended up with some small wrinkles, so I guess some sanding and filling will be needed after the job is finished. Two pics, one before glassing, the other after glassing with peel ply on. One of the lovely aspects of Graham's design is its sweet lines looking from the bow. I chose to tape the forward third of the chines and keel/stem for two reasons. First for strength, second, in the case of the curve to the stem, so I didn't have to fold the 10oz cloth over the stem, which would result in bunching and cuts to make it fit. This way, I have one uninterrupted sheet of fibreglass from stem to stern on the bottom and sides up to the rub rail.


-
Enjoyed your cruising yarn Pete. Shallow water cruising will be new to me, but looking forward to seeing the vistas that the new boat will open up. I think I will name her Dragonfly after my last aircraft. A bit like Chichester with his Gypsy Moth. Best wishes with the New Year goals.
-
Core Sound 20 Mark 3 Build - Chesapeake, VA
Drew replied to AmosSwogger's topic in B & B Yachts Forum
Me too Don. I want one of those little apprentices. It is Christmas Day here in Oz, cos we get the sunshine first, so Happy Christmas to all my B&B friends and best wishes as you build into 2017. -
Yes Amos, well into the 30's Celsius in Sydney. A little less in Canberra. A record for this time of year since the early 1970's. Weather, one of those things you live with and adapt to. Thanks for the heads up Pete, I will use padded blocks under the cabin to support the hull. Steve, the rub rail is 1 and quarter inch by 3/4 pacific maple. It bent well with a little moist heat. I don't plan to put a metal edge on at this point, but will coat with epoxy and hard additives.
-
Steve, I also used one piece of cloth. After prepping the surface I cut the cloth to suit, cut the corners, then wet it out in situ. Unfortunately I forgot the peel ply, so I recommend that you use peel ply, which means use plenty of resin in the wet-out. Later, I sanded back any rough edges and it has worked out quite nicely (once I filled the weave etc).
-
The big day finally arrived. Work colleagues came over and we used Pete's block and tackle method to flip the boat so I can work on the bottom during our summer break. The pics that I will try to load show the process from removing the cradle (it has wheels) through to inverted. Note the legs and wheels that I clamped to the forard hatch coaming and the transom to support the boat inverted.


-
Core Sound 20 Mark 3 Build - Chesapeake, VA
Drew replied to AmosSwogger's topic in B & B Yachts Forum
Amos, even if the paint can go directly over epoxy I really think that a primer undercoat is a good idea, it makes the finish harder and more resistant to scuffing and by interacting with the finish coat it also makes the finish harder. For this reason I think it a good idea to decide on an epoxy/paint system that is fully compatible and stick with that. Money well spent in the long run. -
Amos, there is nothing I would love more than to be in NC for a Messabout, with or without boat. Maybe one of these years. Thanks guys for the encouragements, just trying to maintain the high standard set by you all. As my dad used to say, "If it's worth doing, it's worth doing well" (or as well as you can, anyway
-
Today I cut out the companionway. Next challenge - flip the boat to work on the bottom. The area beside the ballast tank on each side will have table tops where the bridge deck is normally. This will enable a small nav area on one side and a stove on the other. Still deciding whether to put weather screens on the sides of companionway, will probably try without and modify later if needed.

-
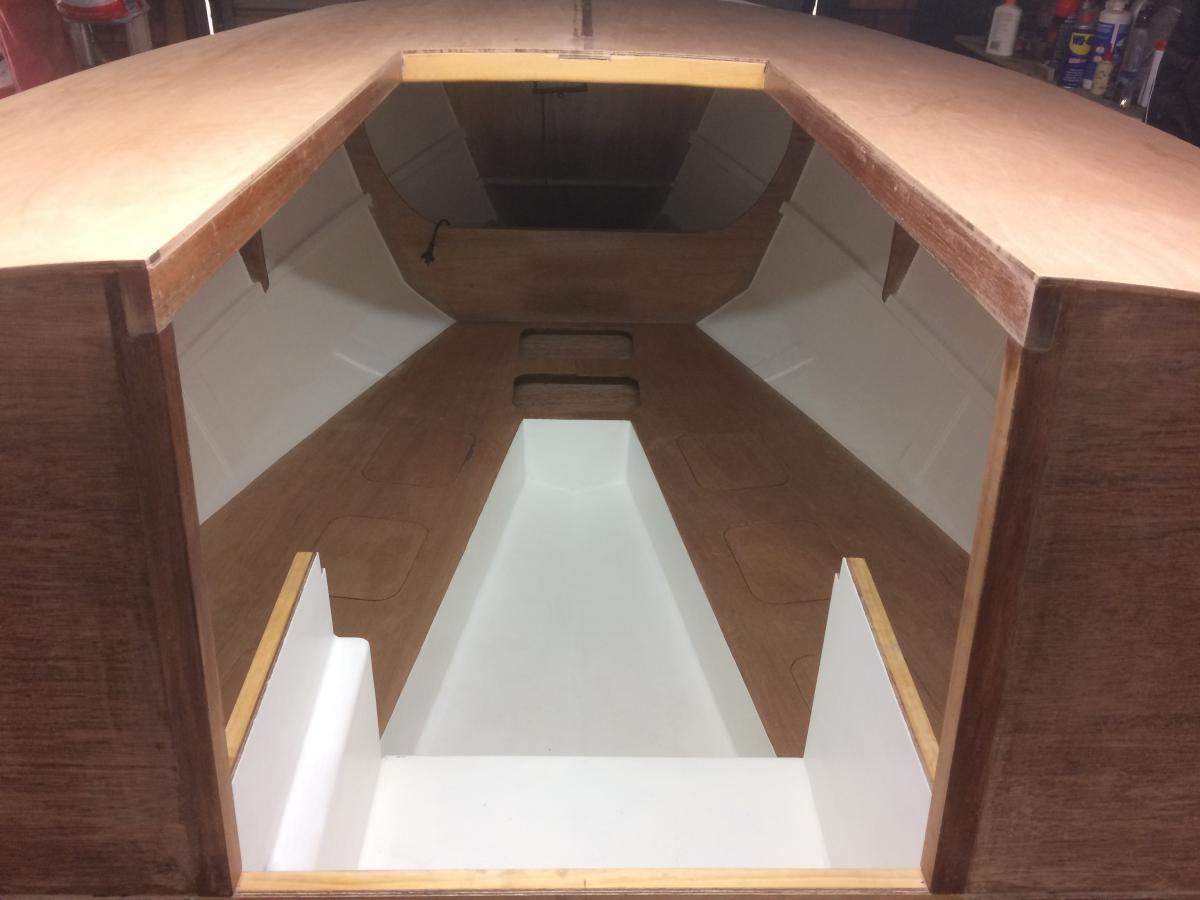
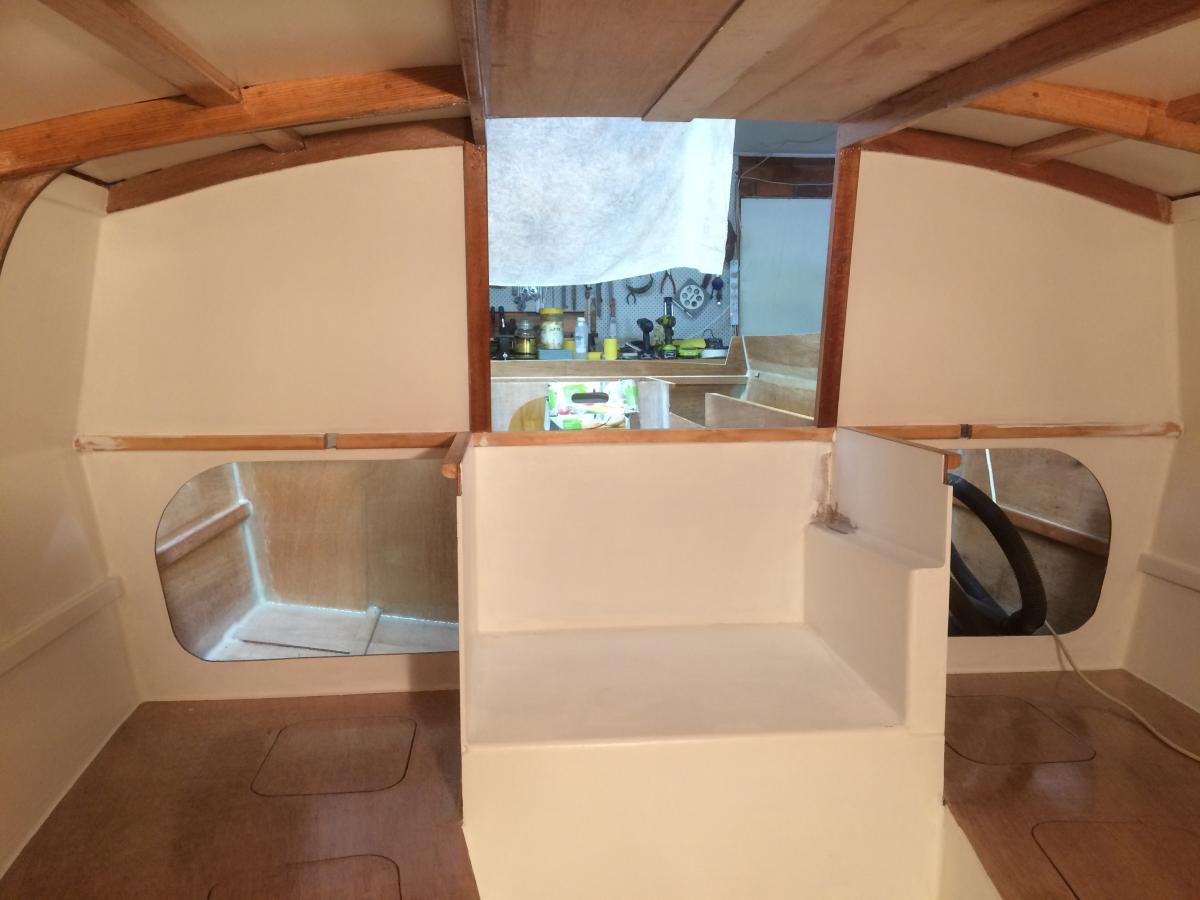
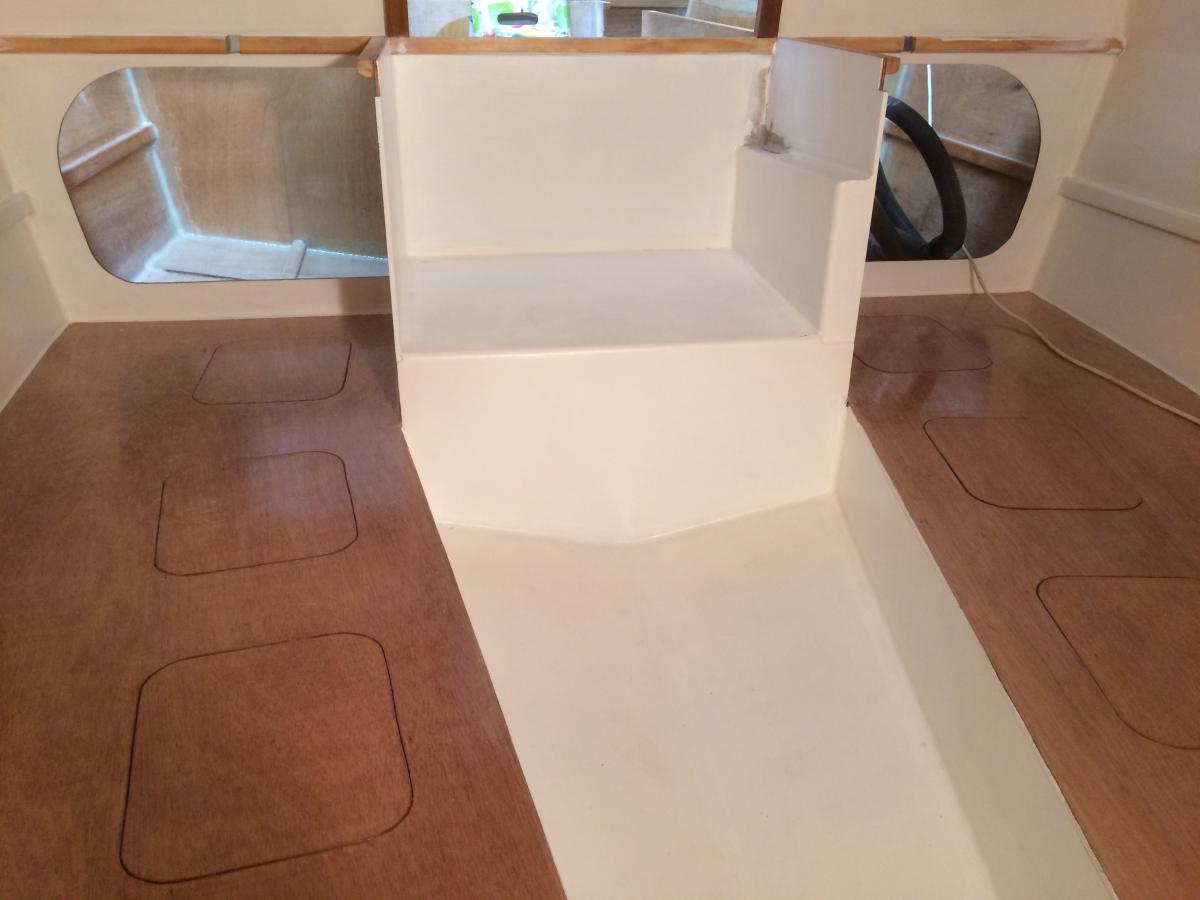
Hallelujah! The lid is now on. Here are some pics looking forard and aft inside the cabin. Notice the extended length and the step down which is actually the top of the forard ballast chamber.


-
Len, I'm building the CS20#3 using Meranti. It is, as Par said, heavier but I have found it just as workable as the Okuome (Gaboon) and once it is resin coated and/or glassed I think there will be little difference in life-span. The difference will be a heavier boat, which I don't mind. As an aside, I found it difficult to get really good quality gaboon at a decent price.
-
Core Sound 20 Mark 3 Build - Chesapeake, VA
Drew replied to AmosSwogger's topic in B & B Yachts Forum
Amos, I have put a 6 inch screw-in port in that area, mostly just for ventilation and to be able to inspect the area. -
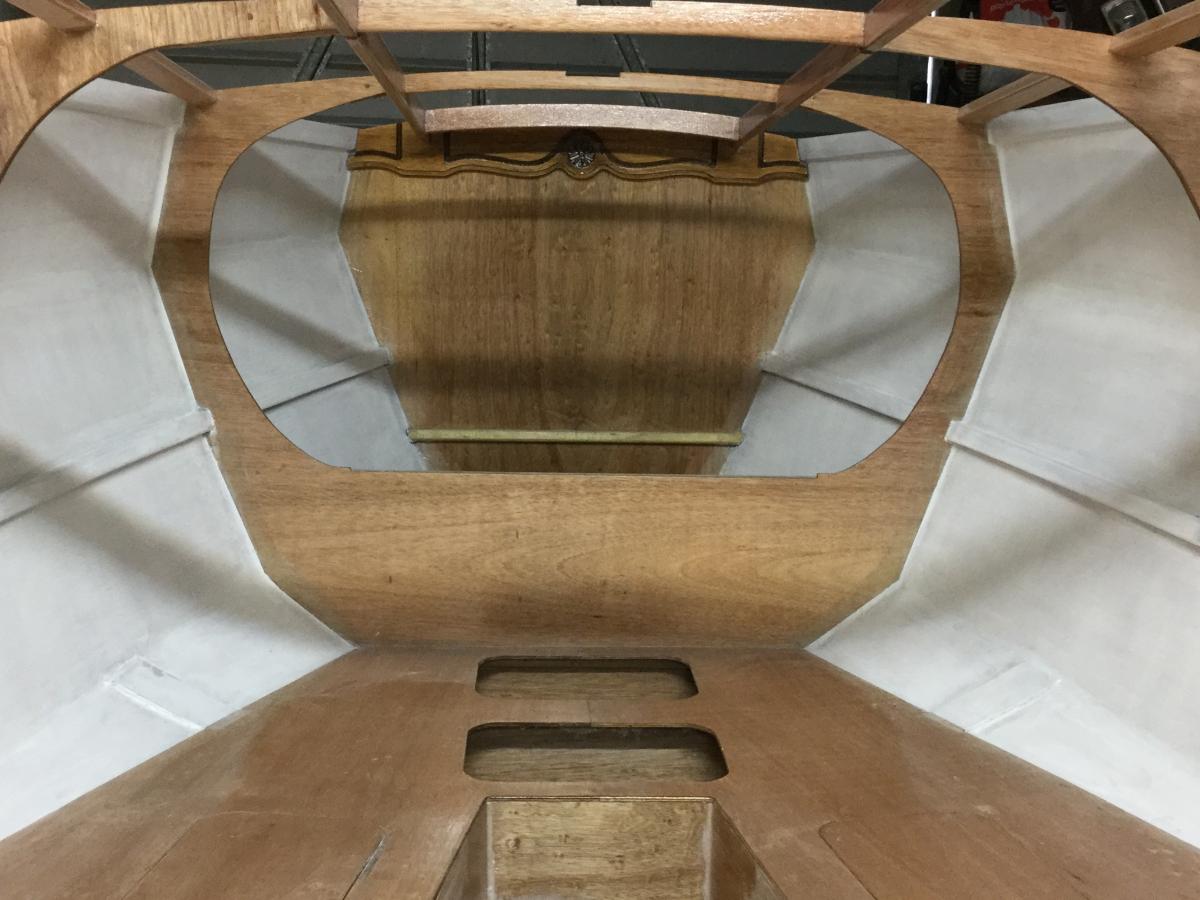
Amos, not much progress at this end due to work commitments, so lots of small things like attaching the centreboard uphaul pennant to the board (used a plunge router clamped in position for the hole) and finishing the cabin sole. When I glassed the sole I forgot to use peel ply, so have had to fill the weave the old fashioned way. The step into the cabin is about to be glassed then, after final sanding and undercoating the cabin foot well I am ready to mask up and paint the interior surfaces. Wife and I like varnished timber finish, so cabin knees and frame are epoxied and will be clear finished, as will the forard bulkhead with the bit of fancy woodwork.


-
Core Sound 20 Mark 3 Build - Chesapeake, VA
Drew replied to AmosSwogger's topic in B & B Yachts Forum
Very very nice work Amos. I can testify that it is very satisfying once you have epoxied the area and then fit the prepared bunk tops. (I did three coats - first one sanded then the third onto the second while it was still green). I also coated the bunk tops prior to gluing them in and used masking tape on the lines that would be glued so that the epoxy and glue would soak in a bit and maximise the bond. As for me, I'm finishing the cabin sole and will then paint out the entire cabin area prior to fitting the cabin top (deckhead). Will post pics once the painting is done. -
Another great idea Pete, better than mine, which was a tang attached to the inside end of the bow eye. I'm intrigued by this mat stuff that you have on the bottom of the anchor well. What exactly was it before you adapted it?
-
I'm leaving the anchor well unpainted but have put about three sanded coats and a final coat of epoxy for protection. Everything else that is left as bright timber I am coating with the controversial non-yellowing epoxy/hardener mix and several coats of clear finish over the top of that. Yes, I use Bote-Cote products and, having used some deadly epoxies in aircraft building, am enjoying the ease of this one (but still wear mask and gloves at all times). It is worth noting that we are actually building epoxy-encased plywood boats in the hope that moisture will NEVER get at the ply, but if it does, I want to know really early. I have seen too many rotten plywood trailer yachts that were built a little haphazardly.
-
Yes, that's the plan, so I am using non-yellowing hardener and clear coat finish on those surfaces. Off white uppers with bright trim as a relief feature.
-
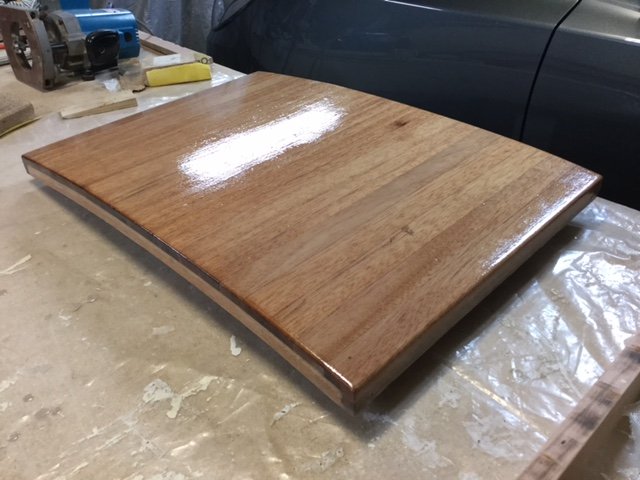
Chessie is looking so good Pete. Thanks for your pics, I get so many good ideas from them - I wish I could contribute in return. Our (officially unnamed) Mk3 is progressing slowly but surely. Inside the cabin and cabin top is undercoated prior to assembly. While waiting for an opportunity to apply the finish coat (off white) I decided to build a curved hatch and hatch coaming for the forard hatch. Next job, finish the cabin sole ready for painting.
-
Core Sound 20 Mark 3 Build - Chesapeake, VA
Drew replied to AmosSwogger's topic in B & B Yachts Forum
Coming along very nicely Amos, the workmanship is a credit to you. At this rate you'll be able to make America great again all by yourself (Sorry, couldn't help myself). Your apprentices look like they are enjoying the project too! -
Pete, So glad you are not seriously hurt and then am glad that the boat seems undamaged - a testament to your building skills and Graham's design. That gives me real confidence. I would look closely at the fillets along the inside of the chines to make sure that nothing has been damaged by a small area impact that might crack the joint. I would think that your keel design will have well and truly protected the keelson joint. At your stage of completion the trailer seems to be a reasonable option and less challenging perhaps than re-building the cradle.