Miyot
-
Posts
339 -
Joined
-
Last visited
-
Days Won
16
Content Type
Profiles
Forums
Events
Everything posted by Miyot
-
Fishman 38, the 1700 is 17oz bi axial without mat. The peel ply won't conform to bends and such without wrinkling. Every wrinkle would cause a ridge to form in the epoxy that would have to be sanded out. So it will be tricky in some areas. Like everything else, it will take some time to learn how to use it. You shouldn't stretch the peel ply. I don't like the idea of glassing athwart ships, as this will make many overlapped seams. Which would have to be sanded and fared. Although I understand why you would do it this way. Doing smaller sections would be easier for one man to handle. I'm leaning toward fore and aft glassing, keeping a wet edge and rolling out and working the peel ply as I go. It would be all about preparation. I'm still undecided, and looking for some solid info on how to proceed. If I could get an extra hand during the glassing procedure, I would definitely go fore and aft. I will make up some test panels, try different layups, etc. and go from there.
-
Fishman 38, I was waiting for answers to your questions as well. Don't feel you can't post or ask any question you have a mind to of anyone who posts on this thread. You are always welcome, as well as anyone else. The more the better. Dave
-
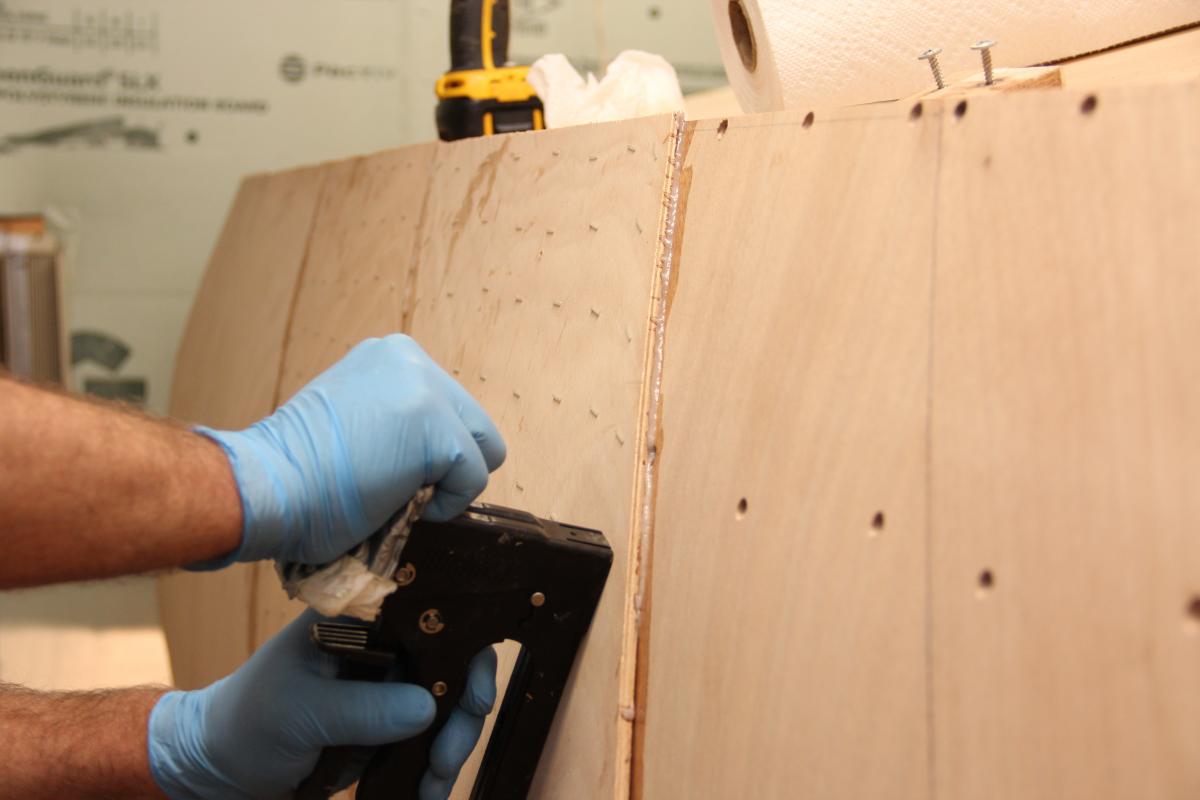
Stapling the outer planks. I put my back against the wall and brace to get the force I need. Up forward, with the more narrow planks, my clamps can reach in and it will actually be easier.


-
Thanks for the tips fellows. I will make a rack for the glass roll. Like a giant toilet paper roll. Lots to consider as I plank and progress to the outer finish work.
-
Hightech, I have the rollers your talking about. I got the aluminum ones at Jamestown. The glassing work is worrying me a little as I haven't done much of it. I'm a little unsure about how to proceed. I got a book on glassing boats, but didn't think much of it. I'll do some test panels and go from there. I am pressing on, trying to get her planked. Dave
-
Fishman 38, I'm not coating the insides with epoxy as I go. I did hot coat all the areas below the water line that will be hard to reach after turn over. Such areas as the bottoms (which are the tops when upside down) of the deck stringers and so on. I may pull fillets on the side stringers bottoms (which are the tops when upside down). If you understand what I'm saying your doing well. Anyways, everythings easier when gravity is in your favor.
-
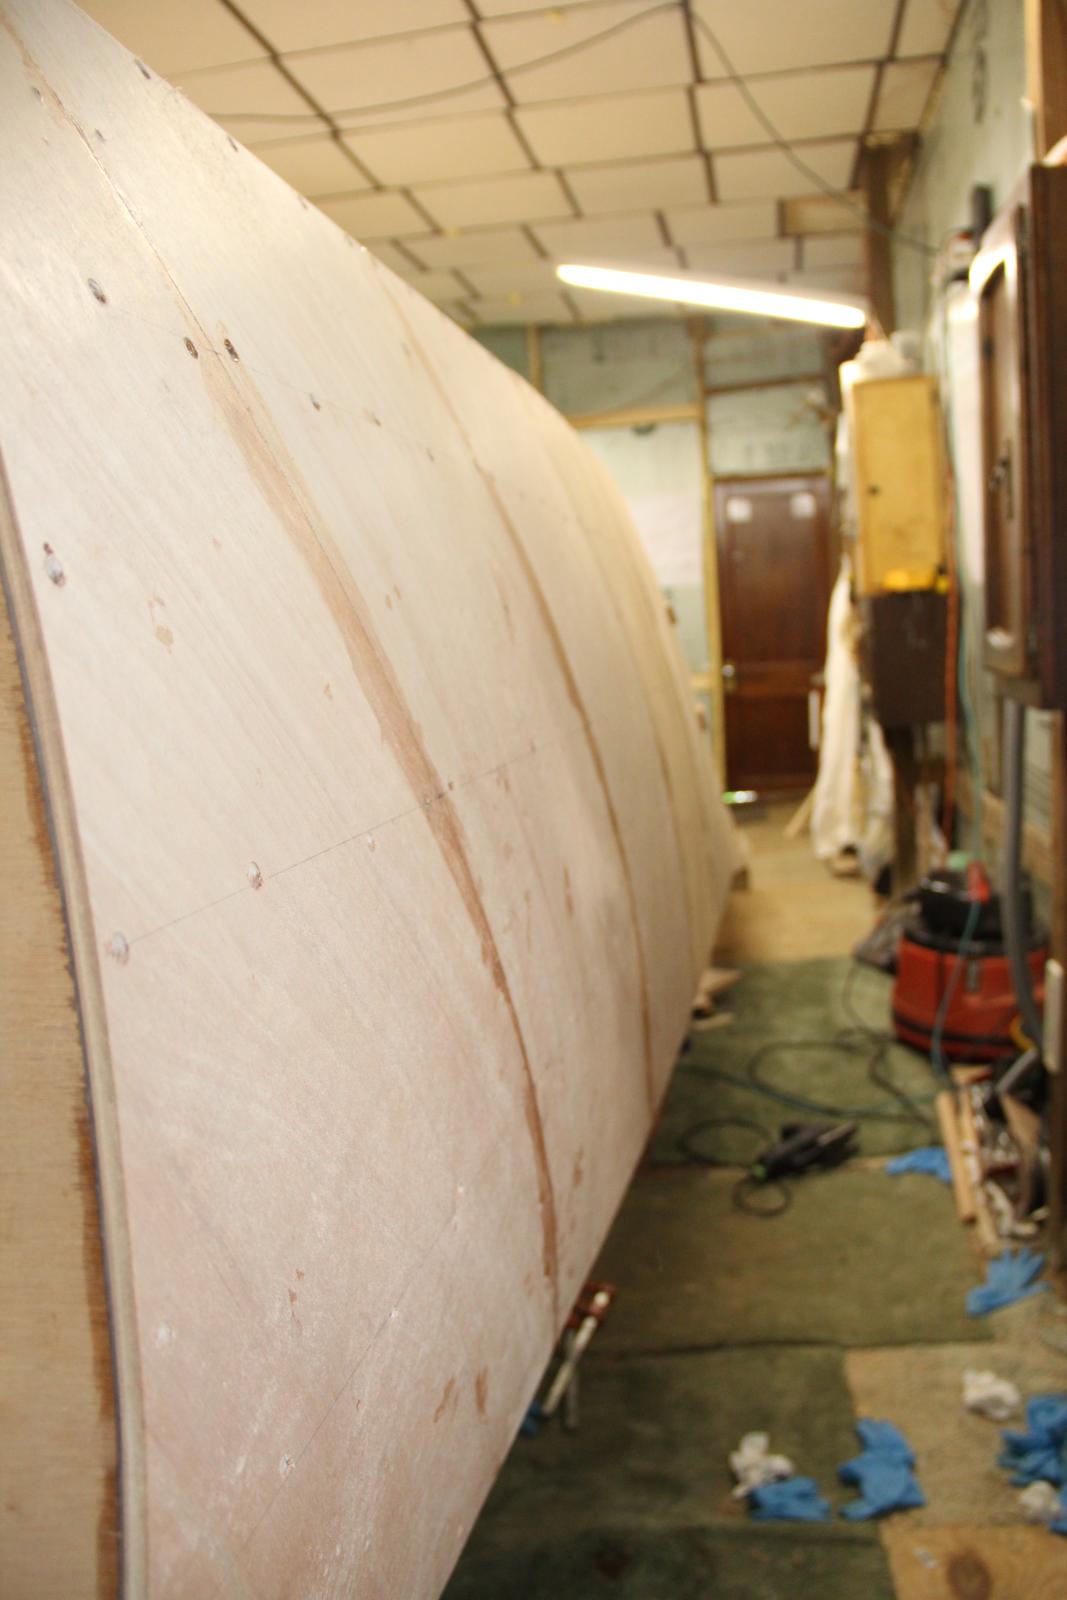
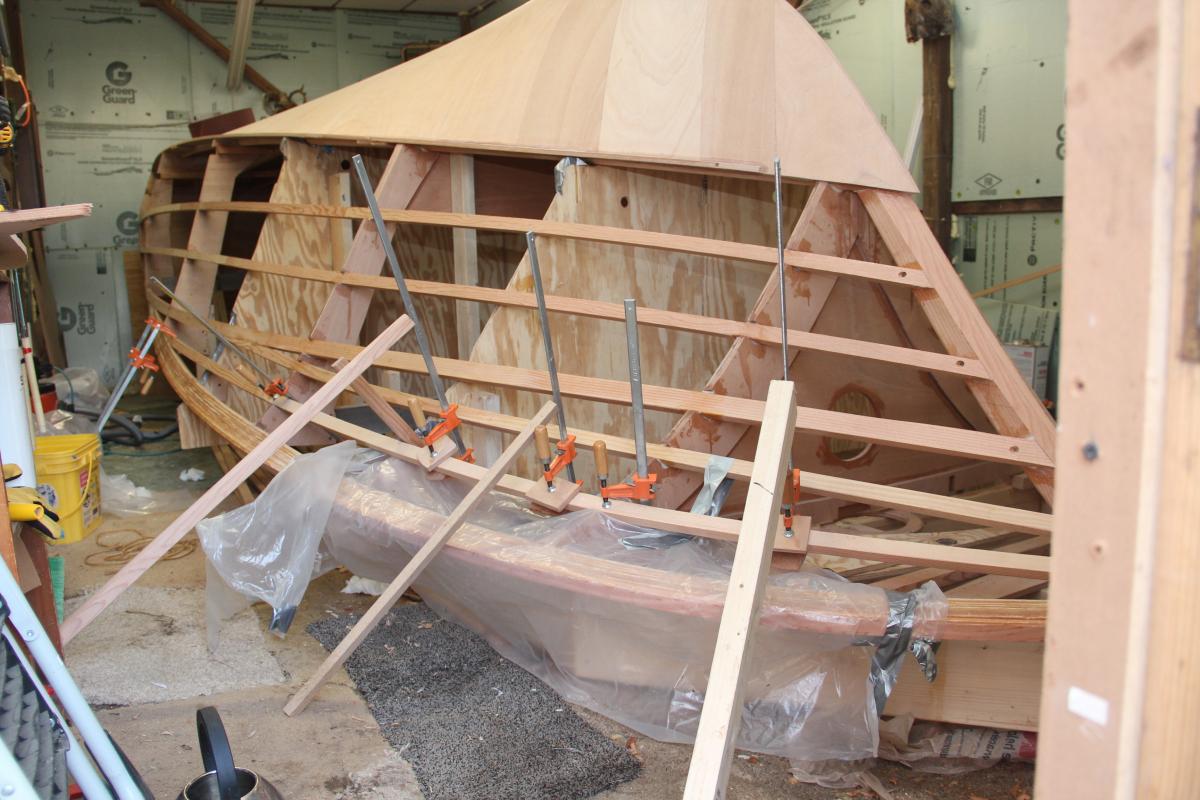
Rogue (the boats name) is now planked from the stern to almost station 5 on both sides. I have begun the second layer of planking as well. I got a 115 lb. roll of 17 oz bi axial and 54 yrds of peel ply. I'll make up a few test panels and get a feel for glassing and using the peel ply. Russell, if you see this, I have been stapling the outer layer of planks. It is going really well. My hand is sore from using so much pressure. I have to brace against the wall and really push. It is real work and you break a sweat. But the results are excellent. Here are some pics from a few days ago. Russell you can't see it in the photos, (also the outer layer hasn't been started in these photos) but the staples are a hair long for this thickness of planking. Most just barely break through the inner layer and are visible on the interior of the boat. The next smaller size staple is to short for adequate holding power. A light sanding on the inside will take care of it. They do cause a slight splintering in spots. I'll have to sand here anyhow. But the staples will add no extra work. They protrude less than a 32 of an inch. My side planking is 2 layers of 1/4" ply .


-
No limbers in the keel. One pump will be a back up, and I rig it to a manual switch. The other will be automatic. I'll have an access hatch for service, and I can sop up any small amounts the pumps can't reach.
-
Fishman 38, I cut the limbers after I installed the vertical stiffeners and added the extra transom lamination's, I think. Anyhow they are there now. All the compartments will drain aft to the lowest point. I will install 2 bilge pumps there.
-
Oyster, thats just what I use on the seams. Thanks for the heads up.
-
Hightech, pictures hide a lot, but I think its ready. I have fastened on 5 planks so far and I'm starting to get the hang of it. I spent some time figuring out how to use my ply to its best and then took my time fitting. I went with the recommended angle but with a smaller width. I get 6 planks from a 4X8 sheet which will cover about 9 ft of hull. The planks cut out at about 1 foot 4 inches wide, and and cover 1 foot 6 inches when fastened at their 30 degree angle. My 4X8 sheets are actually slightly over size at 98 1/2 long, making my planks 49 1/4 tall. Anyhow I end up with very little waste. I'm now ready to start really moving. I think it will go quick now. Dave
-
Russell, I have begun side planking. Although I have not yet used the stapler as I have not started on the outer layer. I think it is all about getting the stapler square and being able to apply pressure with your body weight. I have clamped on an outer plank to see how its going to go. I believe the stapler will work on the majority of the side planks. The aft planks are much larger than at the bow and clamping will be nearly impossible on the outer layer except along the gunnels. However I think starting at the chine and working down is going to be relatively easy. The planks will lay pretty flat in this area and the bend midway down is not that great. At the bow I will probably start at the first stringer above the sheer clamp. The planks in this area are narrow enough my clamps will reach in and do the job. I will fasten perhaps this stringer, the sheer clamp and the second stringer above the sheer clamps with screws. The rest with the staples. Perhaps 85 - 90% of the side planking can be done with the staples. Now I haven't started stapling yet and could change my mind, but I'm confident the stapler is going to work well. That air stapler looks unwieldy, but may work better than the hand stapler. I just wouldn't know until I tried one. You just have to be careful the planks aren't lifting off the inner layer as you go. Post pics of your build.
-
Russell, for me the hand stapler is just fine. Getting your weight onto the stapler is the hard part. The planks must be held together somehow, and my body weight is what I used most. I do have a small compressor to run a stapler, but didn't what to listen to it run. I plan on using the stapler for side planking as well. It will be a different story here, and I won't be able to use the stapler everywhere. But I'll still use it where I can. Thanks fellows, can't wait to turn it over.
-
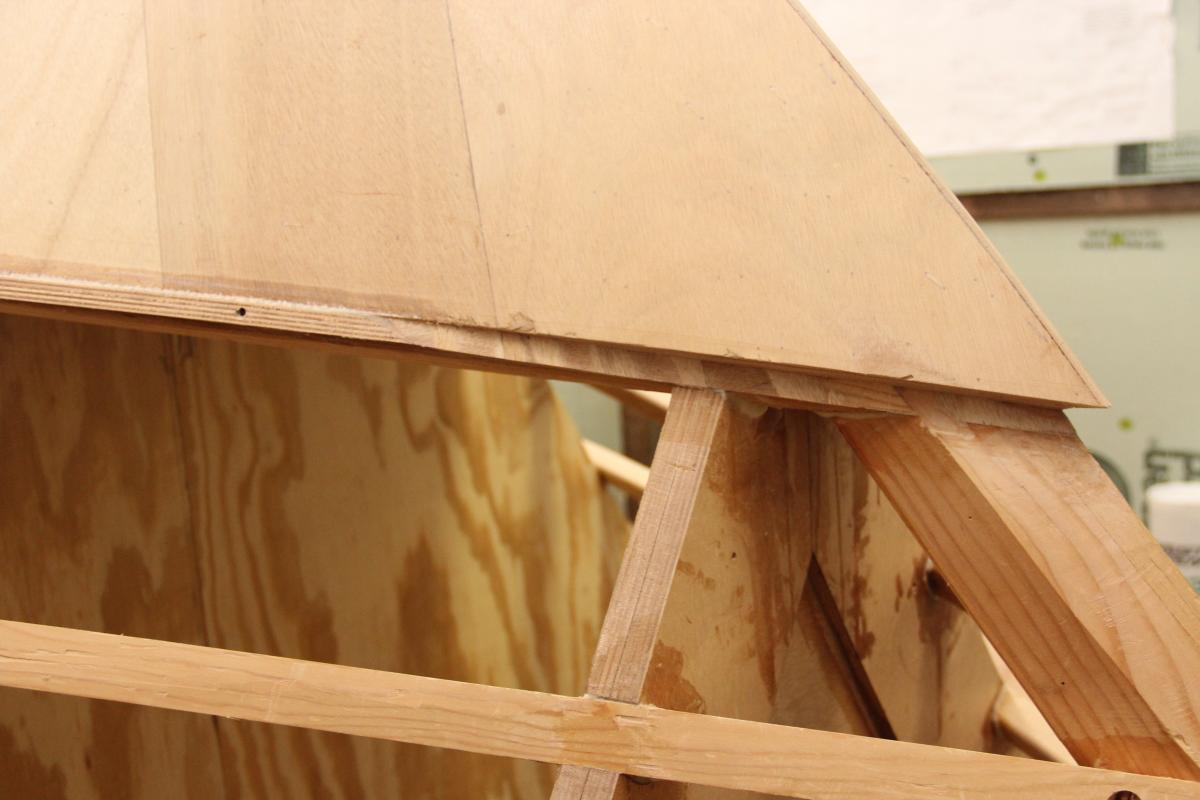
Fared and ready for side planking. The sheer clamp fares from 3" to 4" around station 5. I began the the transition 20 1/2 aft of station 5 and flared to the full 4" around 10" forward of station 5. If anything, I left a little extra so I can make any minor adjustments after turnover. I think I'm close on the profile it should have. I glued thin shims to the upper most stringers (first ones below the sheer clamp) just at the stem where I couldn't get the twist I needed. I shaved them to size with the spoke shave and block plane. I think just right. I cut the final gain today and I will begin side planking tomorrow. 7 months on the build so far.


-
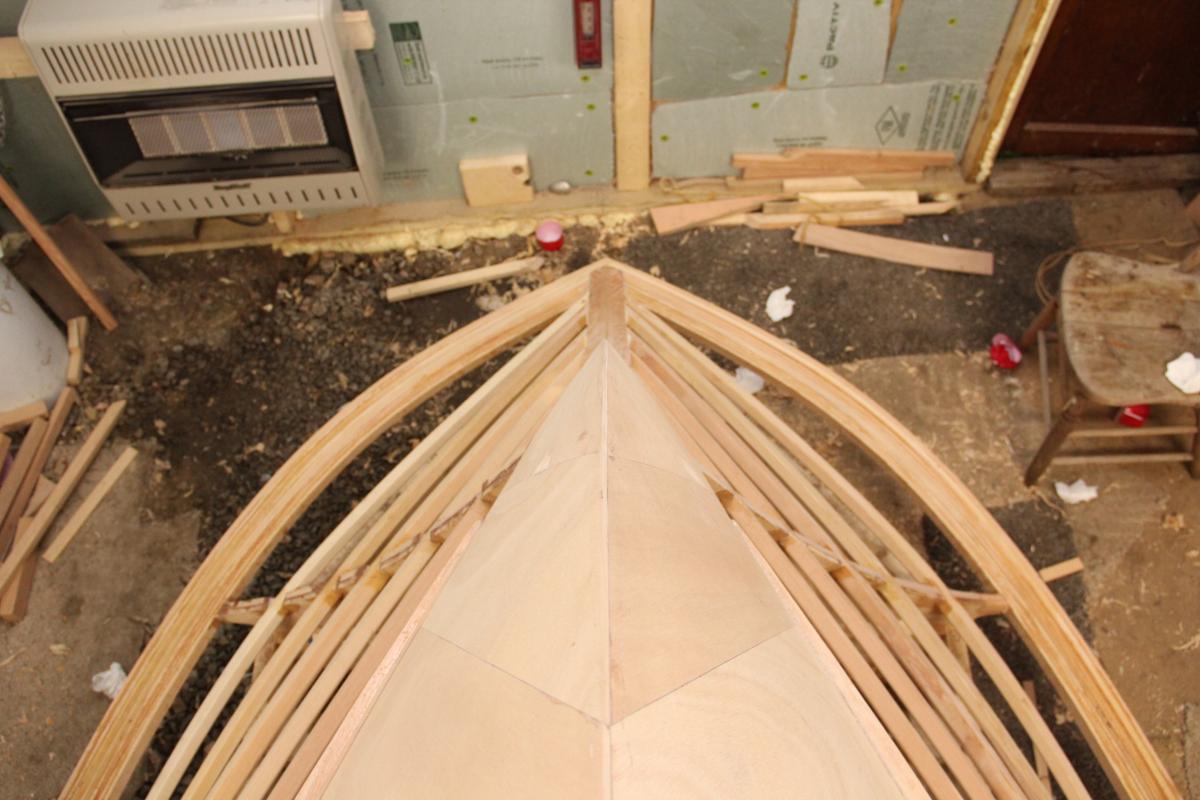
Thanks fellows. It aint perfect, but its mine and I'm learning. Its not without its problems. I had my intermediate sheer stringer crack after it had been on the boat for a month. Perhaps I banged it with something. Anyhow I found it and opened it up as much as I dared and worked some epoxy into it. Then added some cabosil to the epoxy and worked it in good. Clamped it up, and its good to go. I broke the last stringer trying to install it, even after I had steamed it. Made another and it went right in. The first stringer just below the sheer clamp on both sides doesn't quite have enough twist to it at the stem and back about 10 inches or so. I struggled to fasten them just right and they won. I'll epoxy a strip of thin wood on these two spots and then plane them to size. I had problems with the station 2 frame and couldn't make it work. I moved it back, shaved some off and generally messed with it. I finally removed it and pitched it. My Doug Fir was like steel leaf springs and this was a problem spot for my inexperience. Hope it looks ok when I turn her over. This section of the sheer and bow is so important for the looks of the boat. My plans call for a 3" by 1" laminated sheer clamp with a fourth layer (1" x 1") running from the bow to about station 5. Making the clamp 1 x 4. I ended my outer 1x1 lamination about 3 inches before station 5. Sprung a batten to make the fair transition and carefully cut off the excess. It didn't look right. I glued it back on, glued on some additional length and moved my transition point to 20 1/2 inches aft of station 5 after playing with a batten trying to find the fair line. I'll cut off the excess today and report how that looks. It is difficult to see how things will look right side up when they are upside down. I'm fairing now and taking my time, trying to fix little problem areas to make it right. Hightech, you are catching up. Yea, next yr at this time. I hope your right.
-
One more for an aft look Progress pics


-
Hey, thats a familiar shape. I have something in my barn that looks remarkably similar. I have finished my sheer clamps and my stringers are done as well. I began fairing my topsides yesterday. I'll get some pics up soon. I put an air conditioner in the barn yesterday. Temps in the barn were pushing 90 in the late afternoon. Fast hardener is out of the question now except for the smallest of jobs. I think the air conditioner will keep things in the mid seventies. Where are you getting your fiberglass at if you don't mind saying? I am ready to order and I'm looking for 17oz bi axial. I'd like to get some wider rolls of tape as well and can't find any 17oz any wider than six inches. Your boat is looking good and your making good progress for as much as your working. I'm really interested in your build and looking forward to seeing it progress. Keep the pics coming. Dave
-
I'm game. Because the boards actually sit on top of the floors?
-
How about ceiling, which actually refers to fore and aft planking on the inside of frames. Not what's above your head.
-
Fishman38, there are no fasteners in my sheer clamps,just epoxy. I did screw each side stringer with a single 1 3/4" silicon bronze screw at the stem. I did consider running a silicon bolt through the sheer clamps and stem, but I don't think I will. The first layer of planking will be screwed and glued. This should hold things well enough.
-
Hightech, I'm adding you to my friends list. You are the first. That comment about the wife was excellent. We both had a good laugh, just perfect. I worked on the boat today, adding another lamination. Cut the stem so the final two laminations on each side will overlap the stem. I also added the final side stringer on the port side. This one really takes a twist, poured boiling water on it for a half an hour and it went right in. Dave


-
A couple more Two more laminations on the port side and three to starboard. The outer two laminations will be 1/2" thick as they will now take the bend. I ended up with 10 laminations per side. A couple days and my sheer clamps will be finished.


-
Should be ready to begin fairing for side planking by next weekend. Should start making some serious progress in a few weeks as I will have some time off work. I have decided on a center console and have found my T Top and leaning post. I've been slack for a couple of weeks and I'm getting ready for a push. Makin way. Brought the trailer home, 8 hr round trip.


-
Fishman 38, If you can I would get Greg Rossel"s book BUILDING SMALL BOATS. An excellent read with lots of valuable info. A must have book.
-
Round over end to end. When you glass the inside, the glass won't lay on a 90 degree corner correctly. With the round over and the fillet the glass will lay right without any air gaps. If you do it right. Also where the stringers are visible the round over is more pleasant to look at and sharp corners are prone to breaking when struck by something. In my Penobscott 14 build, all the stringers are visible. Also they are walked on and bumped and banged. They are round over except where they contact the frames. Here they are left square to bite nicely in a square notch, which also helps keep the twist in the stringer and looks cool to.