Miyot
-
Posts
339 -
Joined
-
Last visited
-
Days Won
16
Content Type
Profiles
Forums
Events
Gallery
Everything posted by Miyot
-
it is cut 90º across the board? aka square to the board? That is correct, that is what I was trying to say.
-
I used a 10 or 12 to one scarf on my side stringers and chines. The scarfs are on a 90 to the length of the stringer, across the fat side or widest part. Fishman 38, I didn't spend a lot of time messing with the scarfs. I cut them with a band saw, trued them a little with a plane and glued them up. The stringers were cut out a little over sized. Then planed to proper dimension after the epoxy cured. Makes a good looking scarf.
-
On your side stringers and chines the scarf is a 90 degree angle to its length, it will take the bend and twist. If you were scarfing planks that were curved or shaped like a crescent moon when layed flat out, those would have a dog leg scarf.
-
If I'm applying epoxy to smaller parts, I usually use a foam brush. It doesn't last long, but usually long enough to complete the job. They work well for varnish as well. When I'm done, I open the shop door and pitch it out side. The next day, I pick it up and throw it in the trash I avoid cleanup at all cost..
-
Post some pics when you can. Wish I was farther along, but glad to be this far. Laminating the sheer clamp is taking awhile. I wanted to get two lams a side per day but I have been busy and I'm averaging one per side every day. I have 3 on each side so far, will try to bump it up some this weekend. The first and second lamination look a little funny because they are the inside of the clamp. Number 3 on and they start to look much better (my lamination's are 3/8 thick). I made up 14 at 3/8". After these are glued on I'll make some thicker ones to come out to size and finish. Moving on. Dave
-
Starting on the sheer clamps. I had damaged the sheer clamp notch with a jigsaw so glued in a new piece (frame 2). I have fussed over and over with this sheer clamp, knowing the sheer is the big deal. I finally settled on the numbers, the only adjustment I made was to shim the notch in frame 4 about 1/2 inch. The sheer was just a little flat through this section. I tried fixing the problem by moving the sheer clamp on the other frames, trying to ease the problem without shimming so much. I couldn't get it. This notch is curved, I shimmed the bottom, not the side of it. This brought the clamp up and out. What a difference, just seemed to finally be right. Tried the other side and it needed the same. I tried a 1/2 inch lamination and it would not go. I dropped down to 3/8 and it worked. There is just a little flat spot right close to the stem, the Doug Fir is a little to stiff to bend nicely here. Once all the lamination's are on, if it still doesn't look just right I'll glue a short lamination on there and plane it sweet. Here are some progress pics.


-
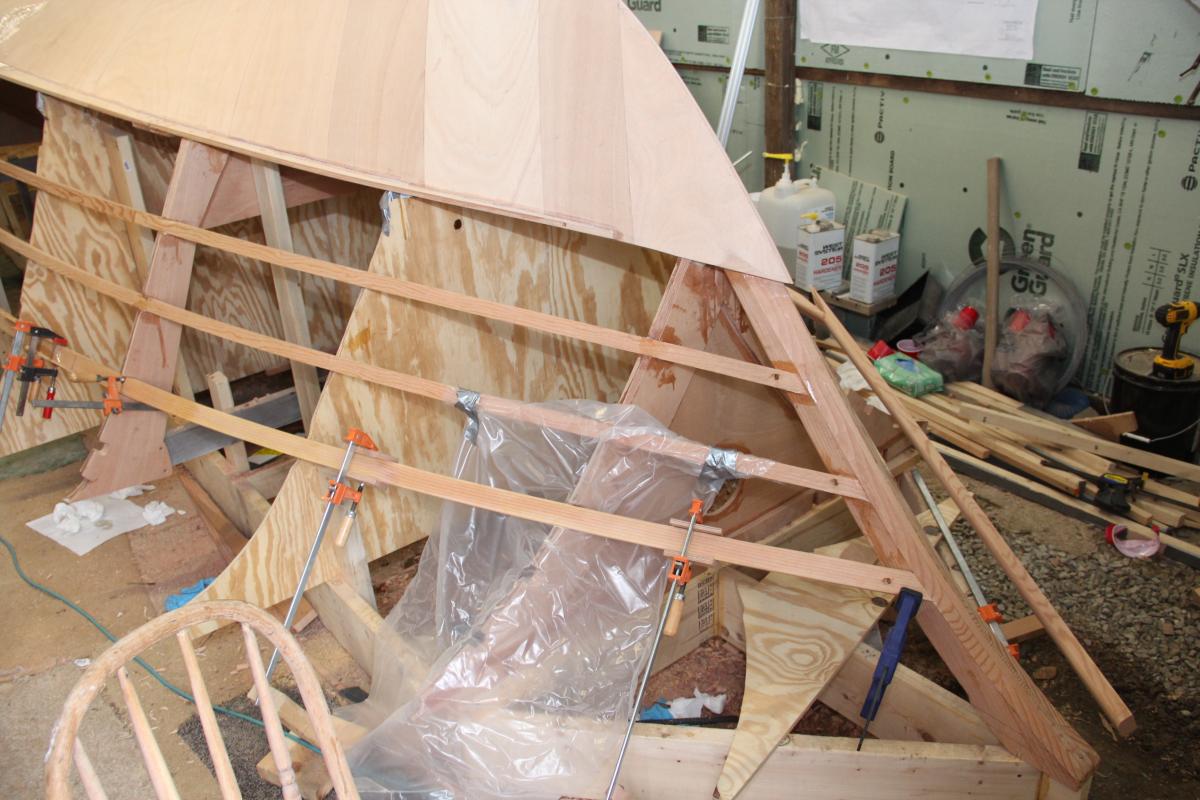
Fishman, I'm not steaming per-say. I have been wrapping a couple bath towels around my stringers and a piece of 5 mil plastic. I open the plastic and pour boiling water on the towels, then close the plastic. I do this about every five min. for about 40 min. I have had no problems bending them in with this procedure. It would probably be easier to make a tube of 5 mil plastic several wraps thick and then staple it along its seam to keep it closed. Slip it over the stringer, tie off the far end and run a steam hose into the other end. I made a steamer out of a steel gas can and radiator hose for my last build and steamed a 16 ft white oak keel for my Haven sail boat (16' X 8" X 1 3/8" keel). This works excellent. I can't get my steam setup close enough to the ground for it to work, and I'm to lazy to mess with it. So I'm just doing the boiling water thing. I cover the frames with plastic, bend the stringer into position. Put the twist in with some clamps, cut the miter at the stem and clamp it up. I have broken or cracked every one that I tried dry, above and including the intermediate sheer. Ruining every stringer and sheer I had made up months ago. Even with good wood and no grain run out, they would not go. And being lazy, I continued to try. I let them dry in position for several days, and then glue them up. No problems. I had chosen my best boards out of 400 board feet of Fir for the bend and twist at the bow. I still have some good boards left, plenty to finish. The Fir is good wood and holds fastenings well, but I don't like it. Very splintery, planning is a chore. You have to be careful and go with the grain, like all woods, but Fir particularly so. You can't take big shavings for fear of tear out. Don't put any scarfs near the bow and don't steam any of them. I don't know if the heat would ruin the joint, but I suspect it would. You may not need to go to this trouble on your build. I do.
-
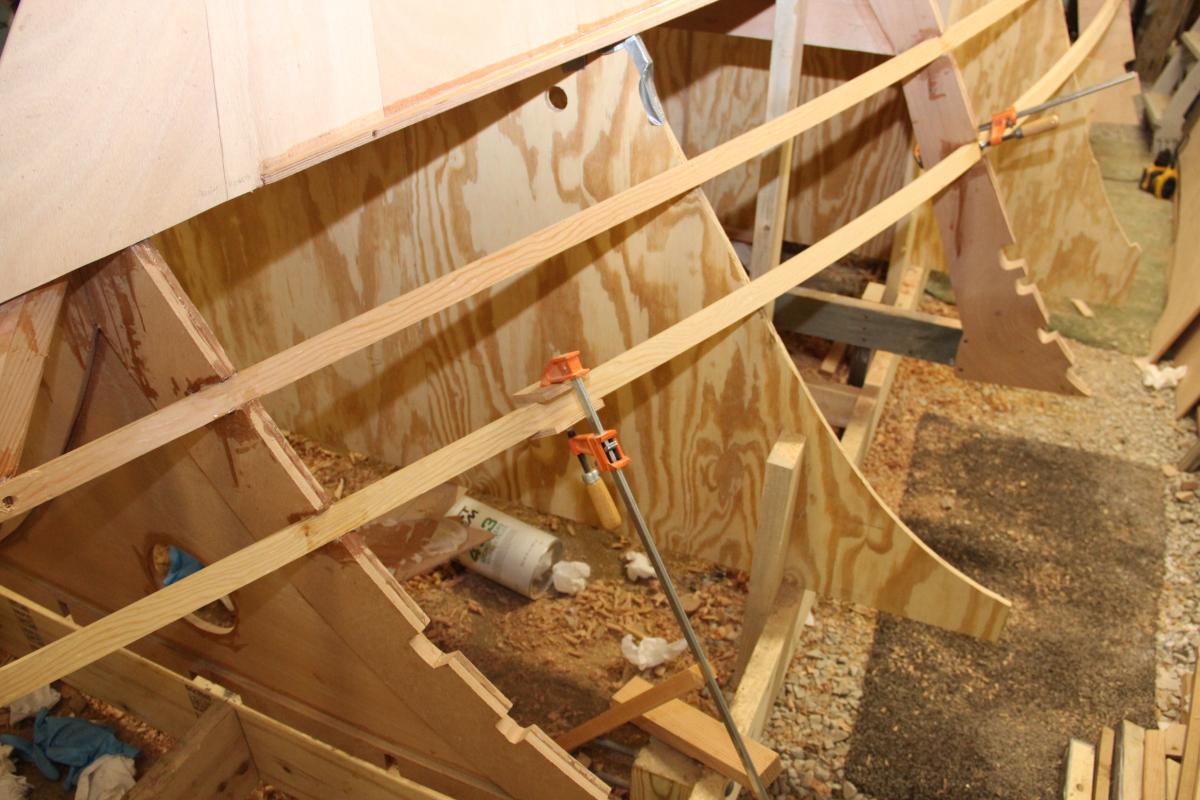
Scarfs cause no fairing problems, you must make them long enough so they don't cause a hard spot, causing them to bend unfair. 12 to 1 is good. My Doug Fir is clear but has a lot of grain run out in a lot of pieces. From the sheer clamps up I must steam every piece. Even the good ones are cracking and splitting from the bend. Always nice to have the longer stock, but it won't all be good. Your boat may not have as much stress in your stringers. My stringers and chine pieces are larger in dimension and the twist at is bow is difficult. But doable. One more stringer on each side and i'll be ready for fairing and planking.
-
Well not done exactly, but you have sharpened enough. Ok lets say you have got the correct bevel on your plane iron. I then rock it up about 1 degree and bring it to its final edge. I sharpen some and then feel the edge on the back side of the iron, or the side opposite the bevel. A slight burr or wire edge will develop when it is done. If you did your job correctly it will be the full width of the iron. I then lay the iron flat on my finish stone, bevel side up and make one pull holding the iron dead flat. The direction is away from the edge of the iron, not toward it. This removes the most of the wire edge, there is still some left. I then give it a quick stropping on a piece of leather. Or you can skip all of the stropping and just go to work. The wood will strip your wire edge off, but I don't think your edge lasts quite as long.
-
Hand planes are invaluable. Seldom do they come ready to use out of the box. A jack plane has good weight and momentum, easy to keep things relatively flat because of its length. Will jump small gaps or dips and only remove material where it is high. Thus helping you to fair to a flat. A block plane (I like a low angle block plane) Is much shorter, very good for fairing some areas but liable to dig low spots if care is not taken. Excellent for end grain. The spoke shave can reach into a concavity that neither the Jack or Block plane can reach. For example, while planing my bevel on my stem, particularly the curved part at the forefoot. I had developed some crown on my bevels. I had been using a jack plane. The jack plane wanted to roll going over the curve, losing contact at both ends of the plane. Now with some skill you could probably avoid this. After a crown is developed it is difficult to get rid of. My little spoke shave could reach in and get the high spots, using a straight edge to check my work. While fairing the outside of my chine plank (convex surface) the jack plane was ideal. But both it and the block plane were useless on the inside of the chine plank (concave). Fishman had said he had everything but a spokeshave. He needs one for his build. I would also recommend a small rebate plane. I am pretty new to all of this, but my planes are my tools and they are tuned and sharp. When one won't do what I ask, I try another. I can skew the blade for a better cut. I can slightly round an iron to remove some material just where I want. Invaluable tools. And I am just starting to learn, most have forgotten more than I'll ever know.
-
A block plane can't reach into a concavity. Duh!
-
Could be Miyot was just saying the spokeshave is a useful tool to have in one's arsenal, not necessarily for the beveling process. Also although the name spokeshave implies a curved cutting edge, I gather they're also available with a straight cutting edge. You need a spoke shave for beveling, can't go without it. When I beveled my keel and stem I use an electric hand plane, a jack plane, a block plane, and a spokeshave. I have a flat sole spokeshave, a rounded sole spokeshave, etc.
-
A block plane can't reach into a concavity. Are you all goobers or what. Fishman said he had about everything but a spokeshave. As a matter of fact, I use a jack plane for all of my fairing. At least whenever I can. Or more appropriately, wherever it fits. Sharpening a plane or any edge tool is no secrete. Get your bevel right. I use a sharpening guide. Touch up often, especially when planing plywood. Don't over.sharpen. When you draw a wire edge on the back side, you are done. Are you goobers or what.
-
Fishman 38, you need a spokeshave. My little Lie Nielson was around a hundred bucks. Its only for finish work A Stanley would be nice. I think Kamal is a little cheap, but serviceable with a little tuning. I don't think you can get Raptor staples longer than 9/16. I could be mistaken. You don't have to worry much about screw holes on your first layer. I just made sure the epoxy filled them while gluing on the second layer of planks.Make sure you don't take to much off of your stem and keel bevel, leave a little till after setup.
-
Yes, you are right, I had used this one first and cracked the other end, turned it around for one more go. I hope the piece I scarfed in yesterday goes in, i'll steam it first. These sheer clamps are under quite a lot of stress, and they must twist considerably as well. The first break was just a split, but it bothered me as I had chosen the best end. The big break didn't bother me near as much, I actually had a little smile. I know i'll get it done. But it would be nice if the next try works.
-
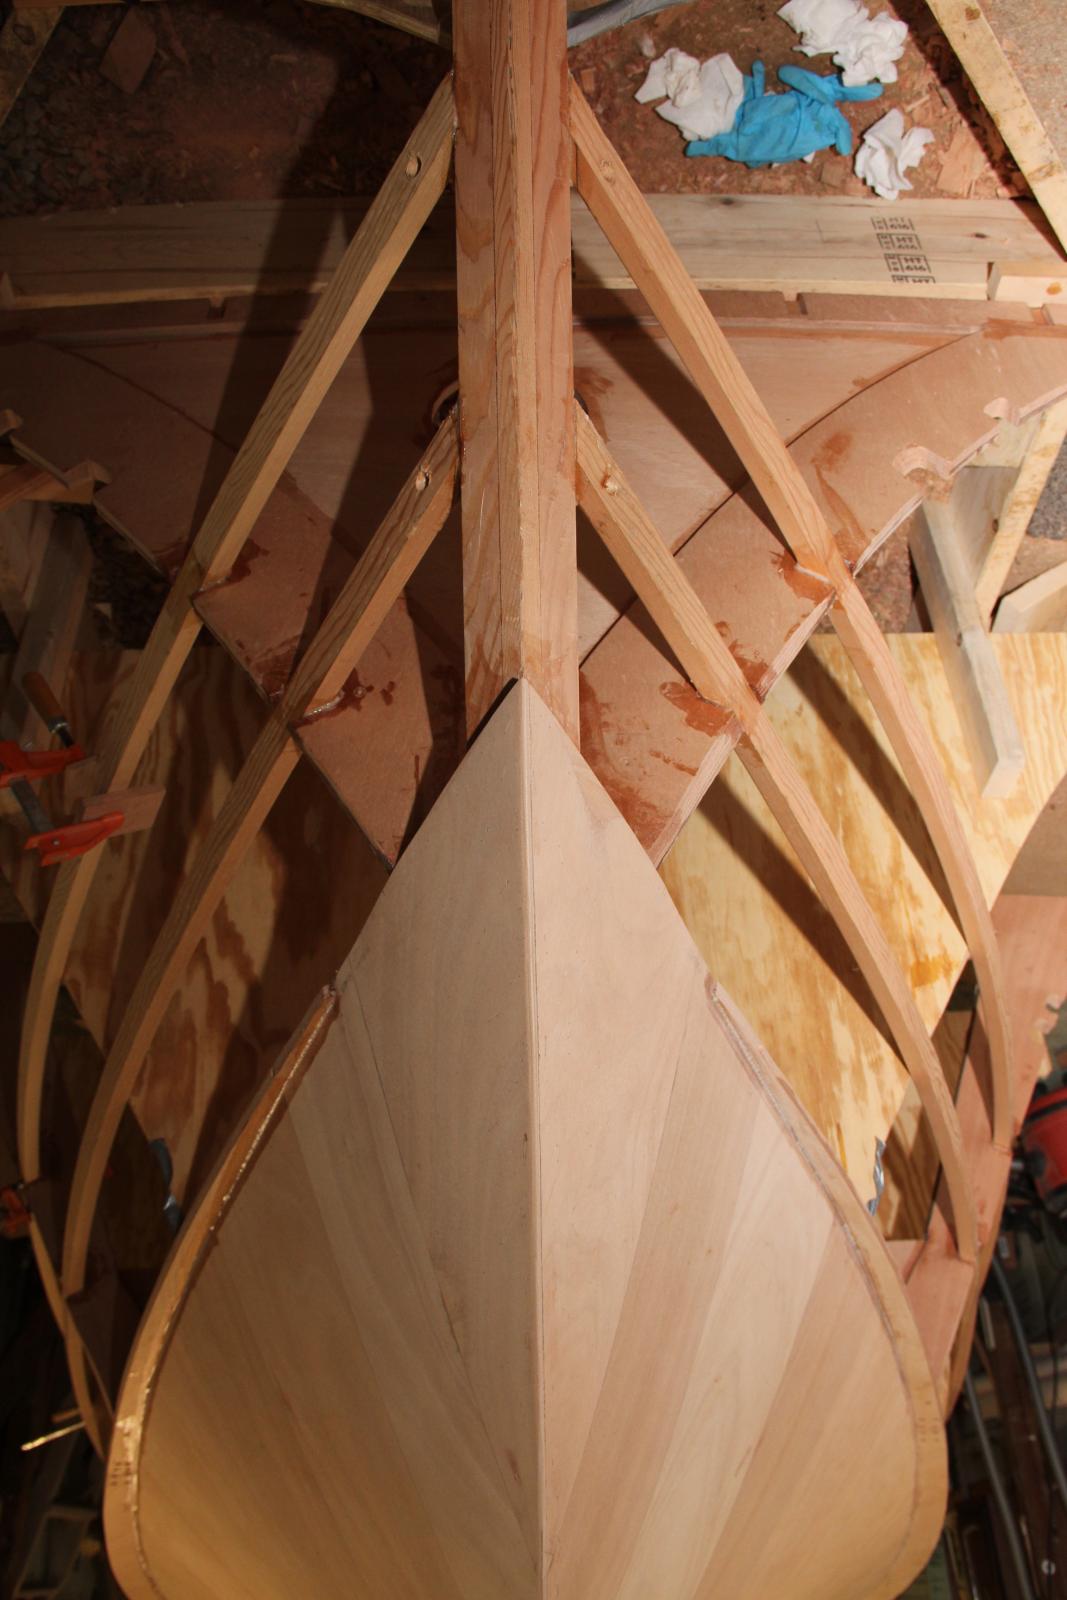
Installing the intermediate shear clamp. These have been tough. I got the first one to the stem, measured and cut the compound miter. Began to bring it flush and it cracked. Now this is fun. I took it off, epoxied the crack and scarfed a short piece to the end. Then let it cure. Meanwhile I put on another, brought it to the stem and cut my miter. Then eased it back out and wrapped a couple bath towels around it and poured boiling water on it every 5 min for about 40 min. In it went. Then I turned the broke one end for end, put it on the boat and brought it to the stem. It made it. A minute later it exploded. So I cut out the section and scarfed in another. When its cured good I won't mess around. I'll steam it and clamp it to the boat. Let it sit a few days, back it off and cut the miter. If all goes well I'll have them both glued to the boat By Friday night. I'm getting close to the flair. I can start to see how it will look. Very exciting.


-
I use metal lath screws. You can get them at Lowes. I use these for all my glue lay ups. I have not broken one yet. I did not fill the holes after removing the screws, but they will be eventually, one way or another.
-
Glad to hear you did use a filler. I worried a little on that one. A notched spreader is the way to go. I mix my filler a little at a time until it is a little thicker than ketchup. Or even a like a thin peanut butter for some applications like on vertical surfaces. How much to add will come with experience. As soon as I have the right consistency I spread it thin on a trash piece of ply wood so it will not cure to quickly. Then I use a small plastic mix stick to apply it. When gluing up panels like the transom or planks, I use it about like ketchup. As soon as I have the right consistency I immediately pour it on the wet out panel and spread it with the notched spreader. You have to move and have everything ready, especially on large panels like a full sized planks on the bottom. The only time I use a roller is for wetting out large panels and planks, etc. As the weather warms I will be switching to a slow hardener I have already put off glue ups because of the temps. Sounds like you are right on track. One more thing, I use a few screws during my glue ups to keep things from sliding all around. You have probably found trying to glue boards together is like holding onto an eel. They want to slip all around. A few screws pre drilled before lay up stops that. I figured you already knew that but just in case.
-
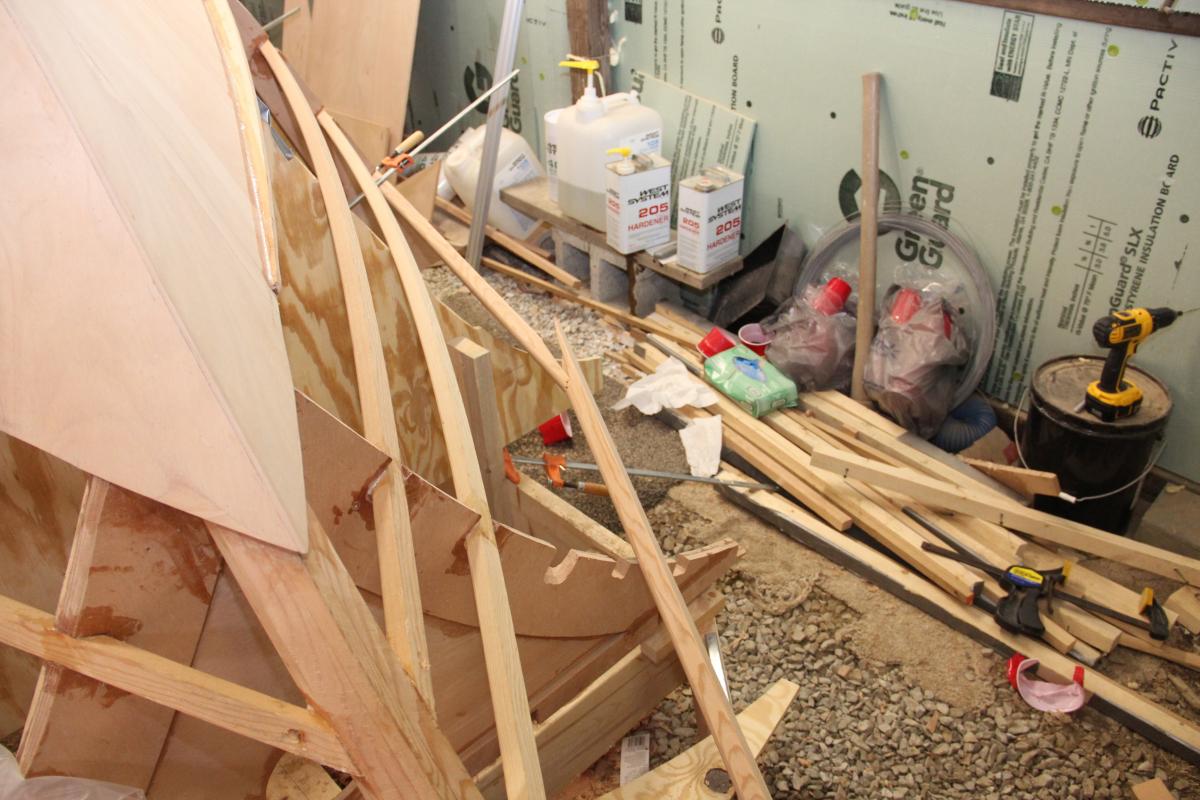
Both chines on and four side stringers. I used a clamp to keep the twist in the side stringers until the epoxy sets up.


-
I checked out your keel and stringers in your pics. I didn't see any squeeze out of your resin on your keel lay up. I hope you are using some kind of filler in your epoxy during glue up,such as microfibers or cabo sil, etc. You can't use straight epoxy to glue things like this up. The epoxy needs a filler to help fill small gaps. Straight epoxy will continue to soak in after you join the parts resulting in a dry joint. No strength. The procedure is to wet out the parts like you did on you stringers, then mix up a batch of resin with microfibers, put that on and then join the parts. Perhaps you had already cleaned up the squeeze out. Dave
-
Temp definitely affects pot life as well as thin film working time. The amount in your container affects pot life as well. The more in your container the faster it kicks or heats up. When using straight epoxy(without additives like microfibers) pour your resin into a larger shallow container right after mixing. This will help dissipate the heat caused by the resin beginning to harden. This will give you a little more time. When mixing fillers such as microfibers, spread them thin onto a trash piece of ply wood. This will give you some more working time as well. Better read up on epoxy use. You don't want to get caught gluing an important large part and have it set up on you. Hope this helps. Google Gougeon Brothers epoxy use. This should help. Get their user manual. I would read it before going forward. Dave
-
toomanyboats, I don't know what your plans call for so I can't really say. The designer knows what structural elements are needed and they are in the plans. My transom is only glued on, no mechanical fasteners were used. My transom is 3/4" thick with an additional 9/8" of plys glued in the central mid section where the motor will hang, this was in the plans. I have a bulkhead approx. 2 1/2 ft forward of the transom. The motor well sides attach to the transom and this bulkhead and so does the upper decking. Lower decking at the same level as the cockpit sole also fastens to the transom and this bulkhead. This is quite beefy and all provides strength to the transom. I did add vertical stiffeners to the bottom stringers where they fasten to the transom, these were not in the plans, I just liked the idea. You can see these on some of my previous posts. I believe your plans have the additional plys which are glued to the transom and notch around the keel, which on my plans appear directly above the transom drawing on the construction plans. Also the planking overlaps the transom sides and bottom, very strong. If you have questions on structural members give Graham an email. He has never failed to answer any of my emails. This is only my third boat and I'm really not qualified to answer any questions on boat building. As you build, your confidence will grow along with your boat. It is all a learning experience and fun. Dave
-
Looking good, keep the pics coming. Give the dog a pet for me.
-
Toomanyboats, I'm not exactly sure what you need,but i'll try. Our plans will differ but should be similar. I measured back from the last station as per the plans and marked the transom position on the keel. Drew lines on both sides of the keel to the designed rake, clamped a small board on each side on the lines as a jig and cut off the end of the keel with a hand saw. Then I marked a center line on the end of the keel, clamped my two transom supports to the jig, set the transom on them and leaned it onto the keel. Then fiddled with it until it set right and square against the end of the keel. Not to high or low, remembering the bevel where the bottom planking meets the transom. I ended a little high and had to plane off the extra material. When it looked right I drilled a single hole for a bronze screw through the bottom of the transom into the keel and epoxied it to the keel. Your stringers, side stringers, and additional plys notched around the keel all fasten the transom to the boat. I made a light frame out of 1/2 " ply and put it around the inside perimeter of the transom, notched for the chine battens, stringers. This has to match the transoms side bevel for the planking as well. Everything holds the transom on. I used only one screw just to glue the transom to the keel. Hope this helps
-
That looks good. I am lost about now. I to am agonizing on just what to do. T Top, Express, Big console with head and windshields, Hardtop. I need to look at a lot of designs and figure out what I really want to do. It takes as much time as building.