Justin C
-
Posts
126 -
Joined
-
Last visited
-
Days Won
5
Content Type
Profiles
Forums
Events
Gallery
Everything posted by Justin C
-
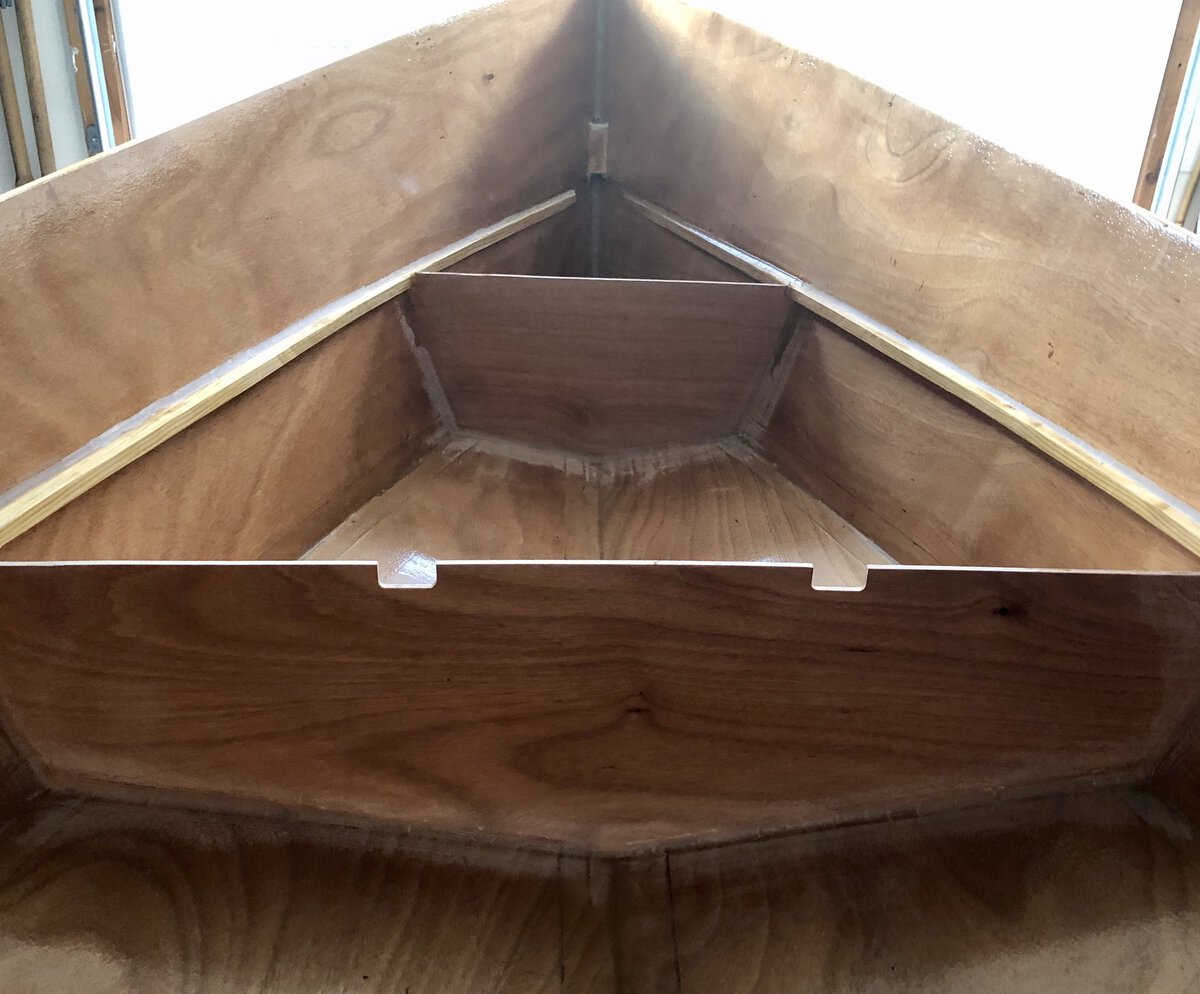
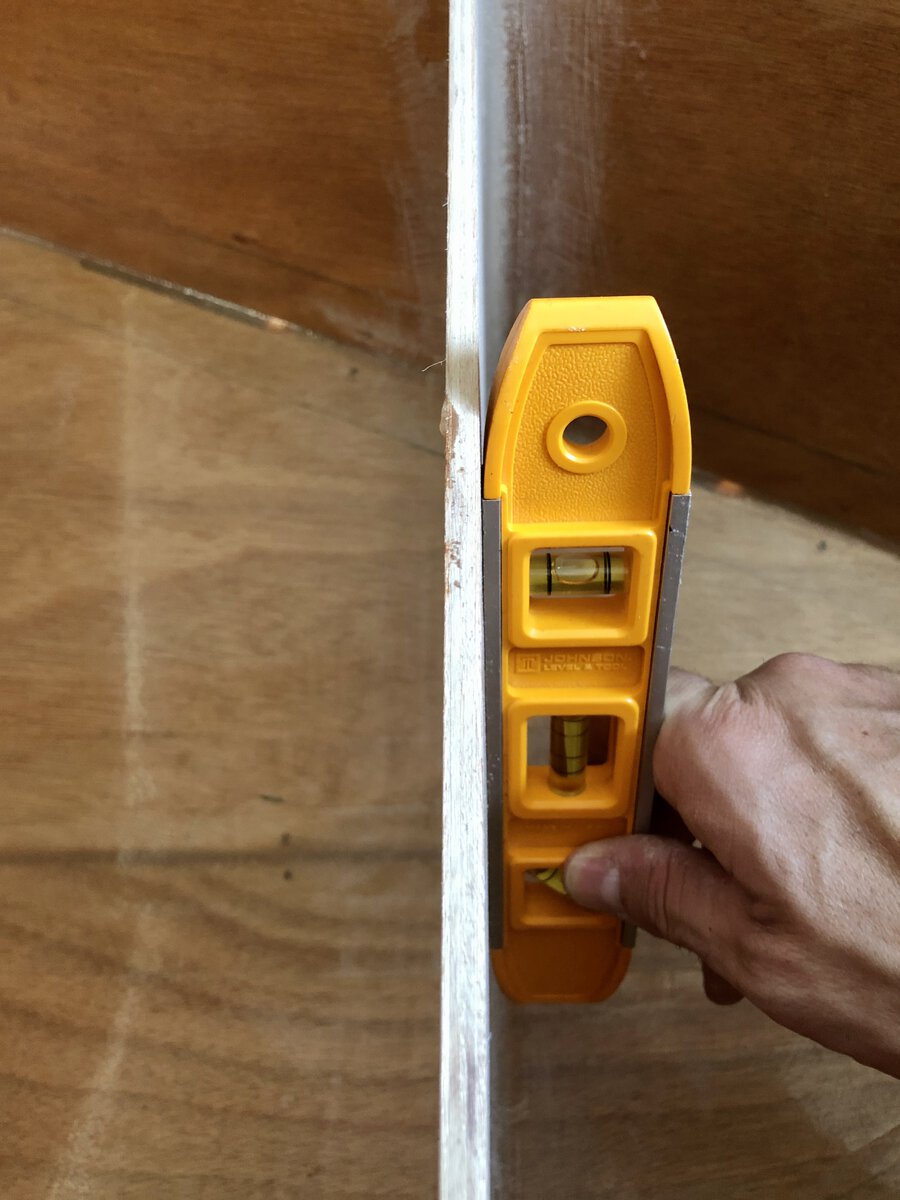
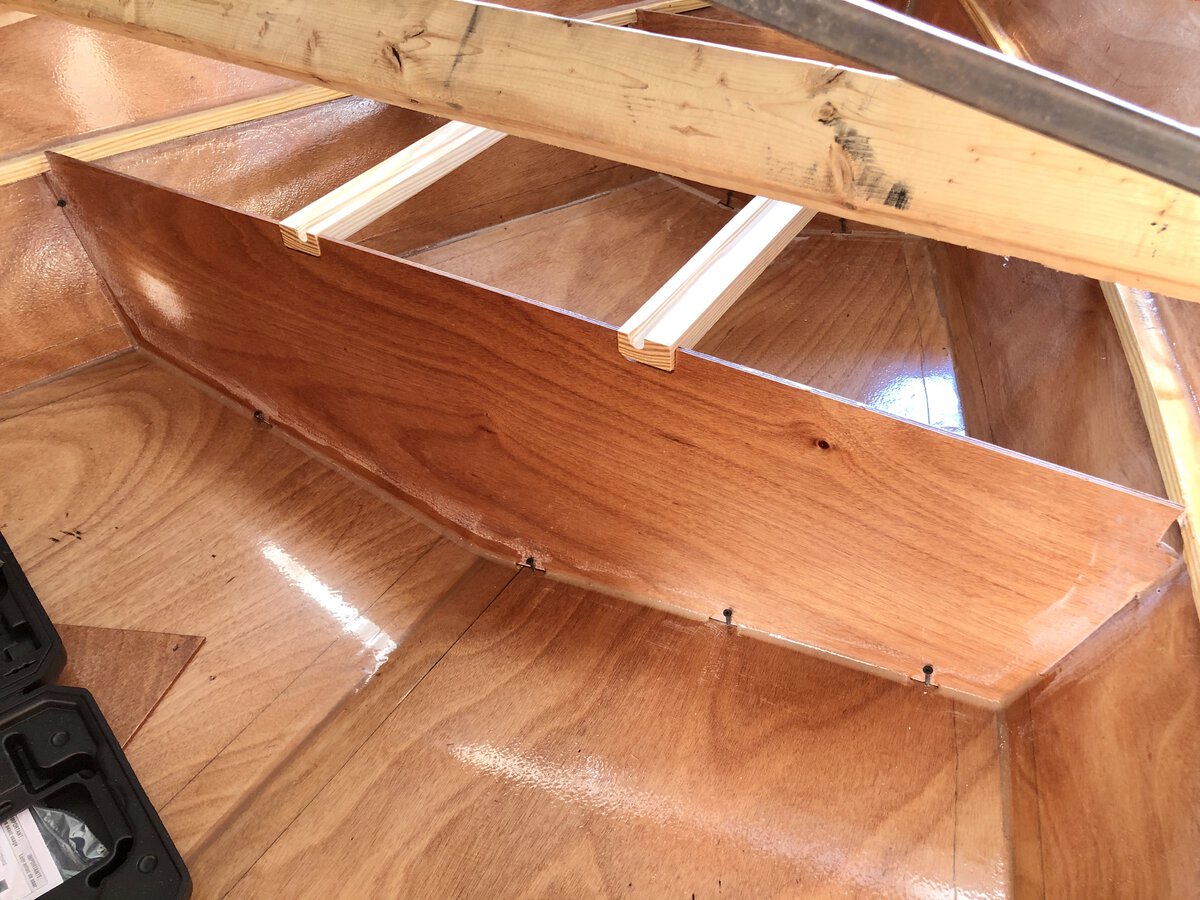
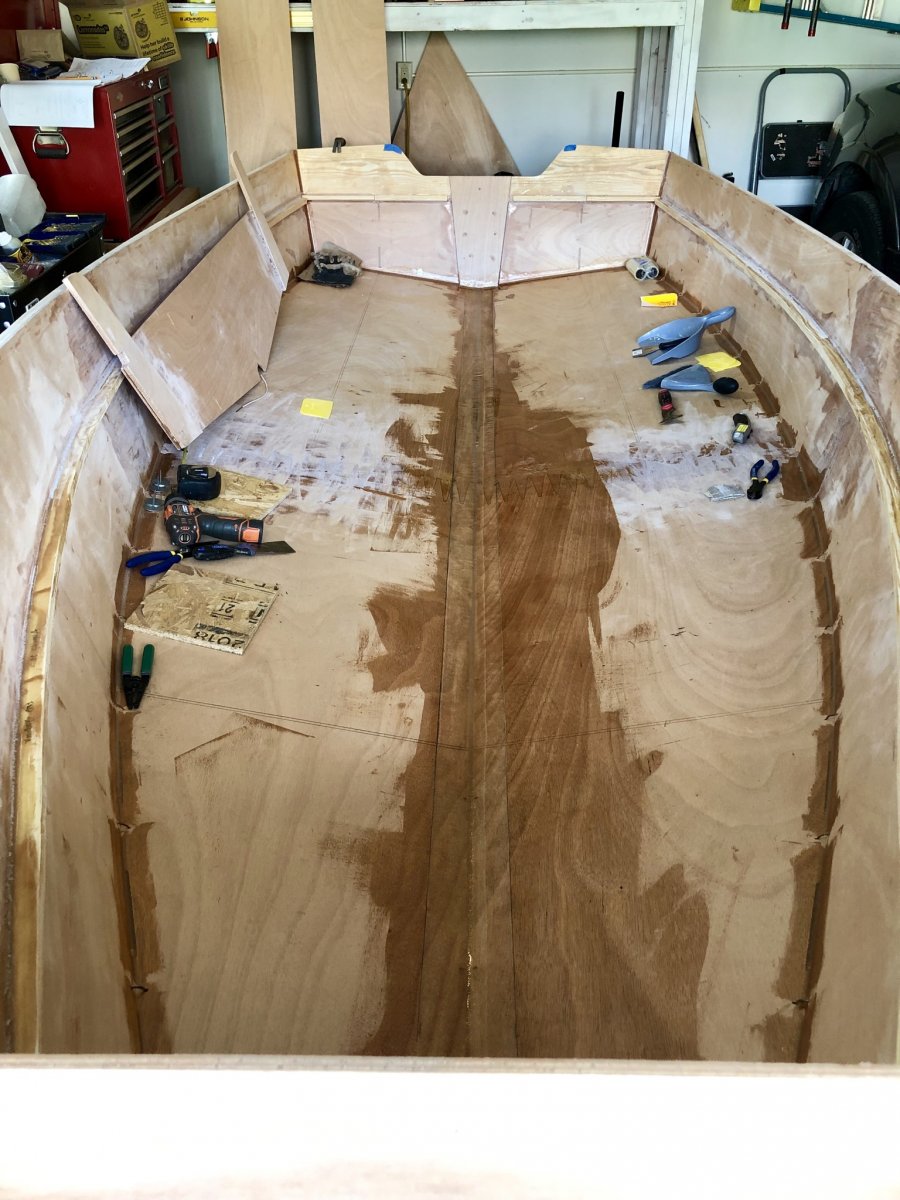
It was a rainy weekend up here and with the kid's sports being cancelled it left me with some free time. I removed the temporary 2x4 spreader that I had installed to widen the hull sides forward to allow the 2 forward bulkheads to be installed properly. I also removed the rest of the temporary screws I had holding the bulkheads in place and filleted the rest of the gaps. Once the epoxy fillets cured, I sanded them smooth. I have a small overhang (1/2") over the forward bulkhead where the hatch goes. From looking at the plans, this seems about right. Once I had this overhang measured, I clamped a level from once side to the other to get a consistent set back for the hatch hardwood drainage pieces. This will allow me to place the transverse drainage piece properly. I also spent time dry fitting the casting platform. I did round off the forward point of the casting platform where it meets the stem to allow it to fit nicely with the bead of thickened epoxy already up there. Next up is to rough up the epoxy on the interior pieces in preparation for taping all the seams.


-
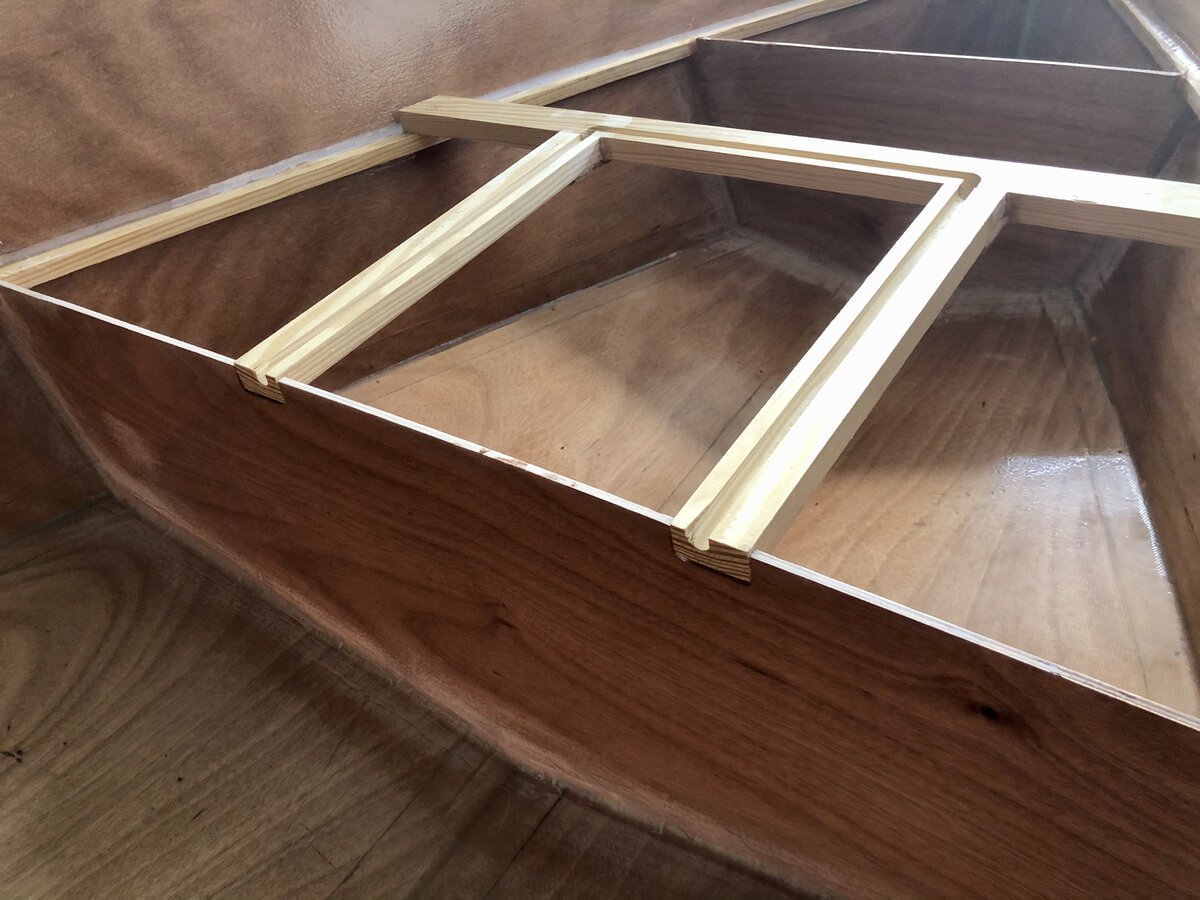
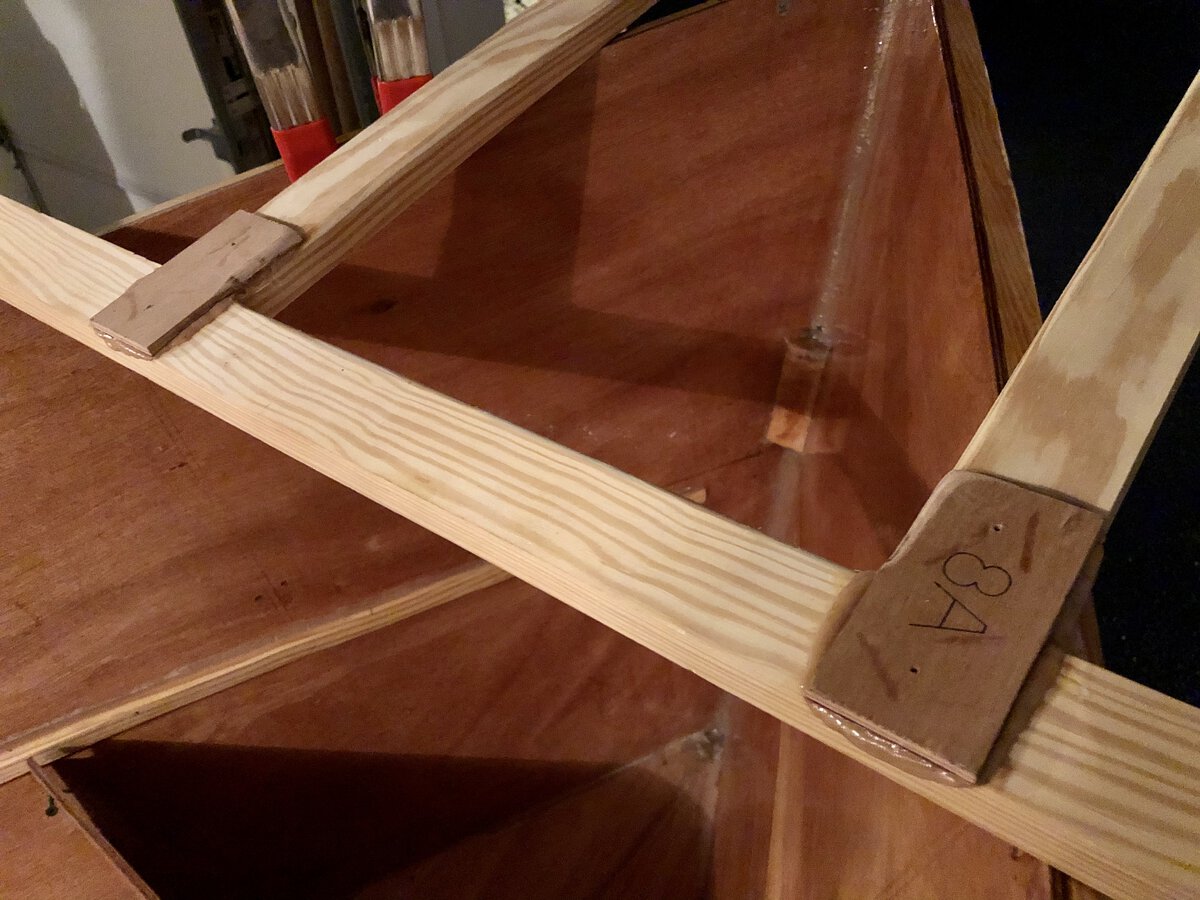
Alan, All good pieces of advice I incorporated into the recent work. Here's a quick update: The forward bulkheads 1 and 2 have been installed. I scribed them as Alan has suggested and this took a few back and forth installs/sandings to get it just right. I only filleted them to the hull bottom and left the sides open. The reason I did this was to set their vertical positions and it will allow the hull sides to come back into positions when I remove the 2x4 spreader currently installed. I epoxied the forward box hardwood support drainage channels and clampled the pieces together. I also rounded over the inside bottom edge of these pieces with a trim router. Presumably, this is done to remove a sharp edge where you would later 'reach into' the box. Good forethought! After the epoxy set up, I cleaned up the squeeze out, sanded the underside of the butted joint, then glued the small butt piece with thickened epoxy to further strengthen the joint.


-
I was able to get the forward bulkhead into its proper place. It’s still sitting a bit elevated, which I attribute to the rounding of the inside keel when thickened epoxy and two strips of fiberglass were installed. I think I will dremel out a small amount of material to allow the bulkhead to sit better. I also have a few questions about the drain channel hardwood supports for the box in the forward casting platform. Will a butt joint with thickened epoxy work to properly join these pieces? With regard to the athwartship hardwood piece mentioned above, this looks like it will run flush with the inboard hull stringers? Does the set back of the athwartship piece meet the hull stringers the distance back from the vertical bulkhead #2? If so, I have a 1/2” on either side where I have to widen the hull. See here:


-
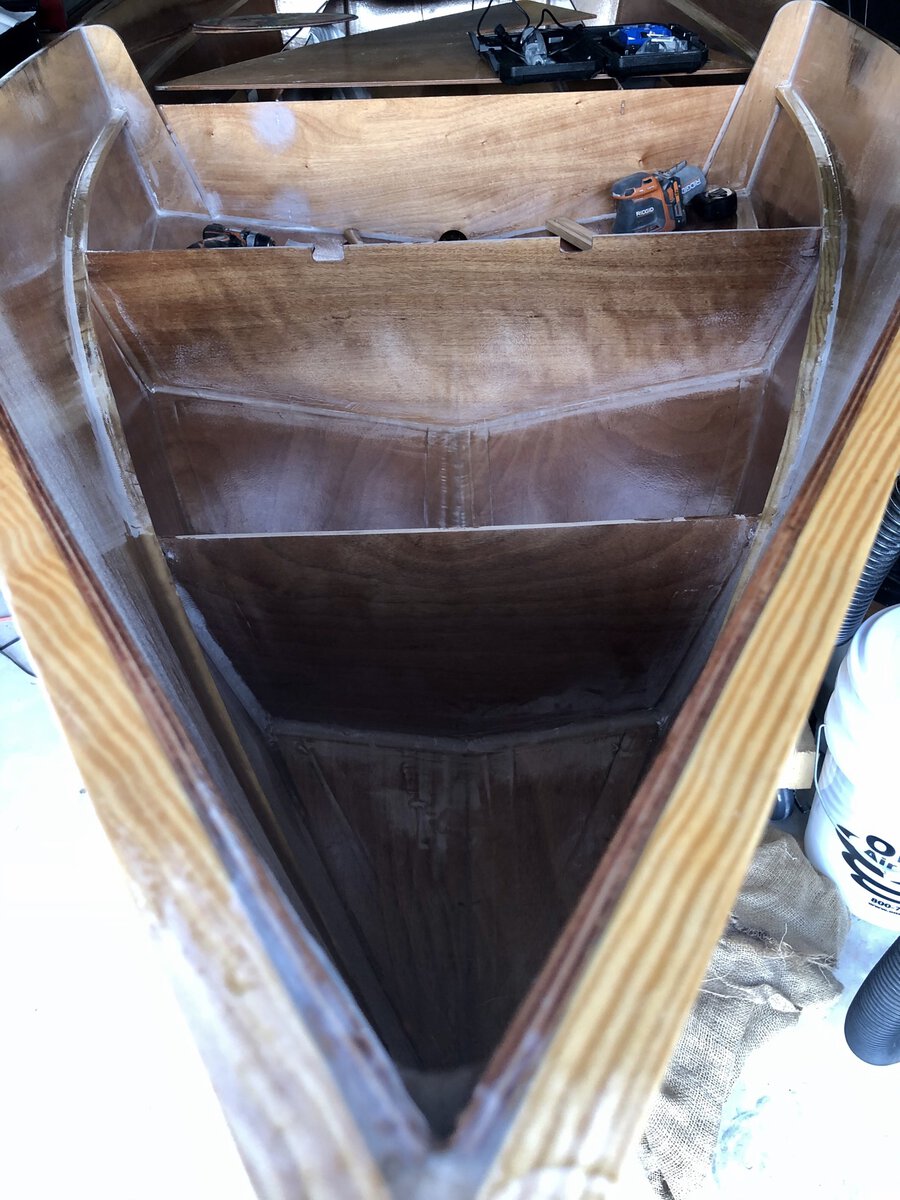
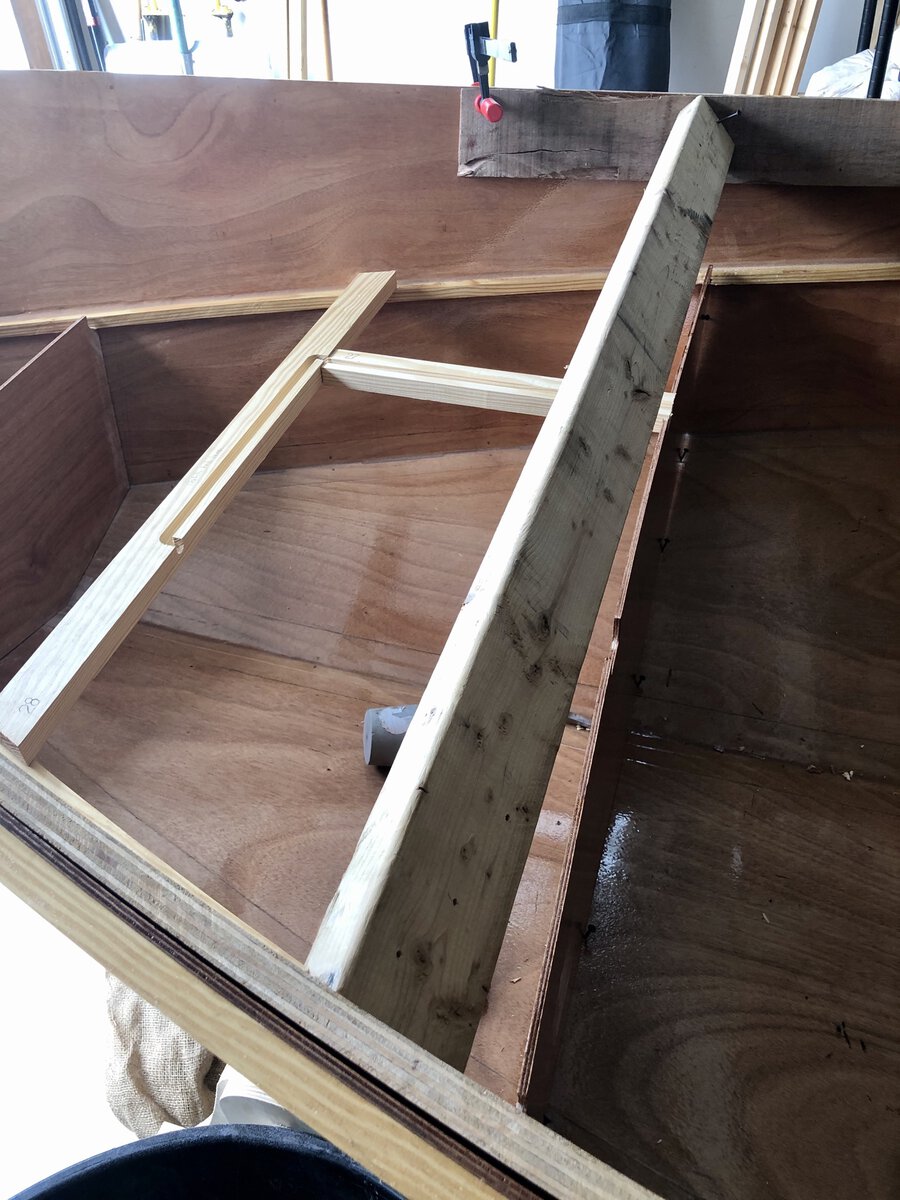
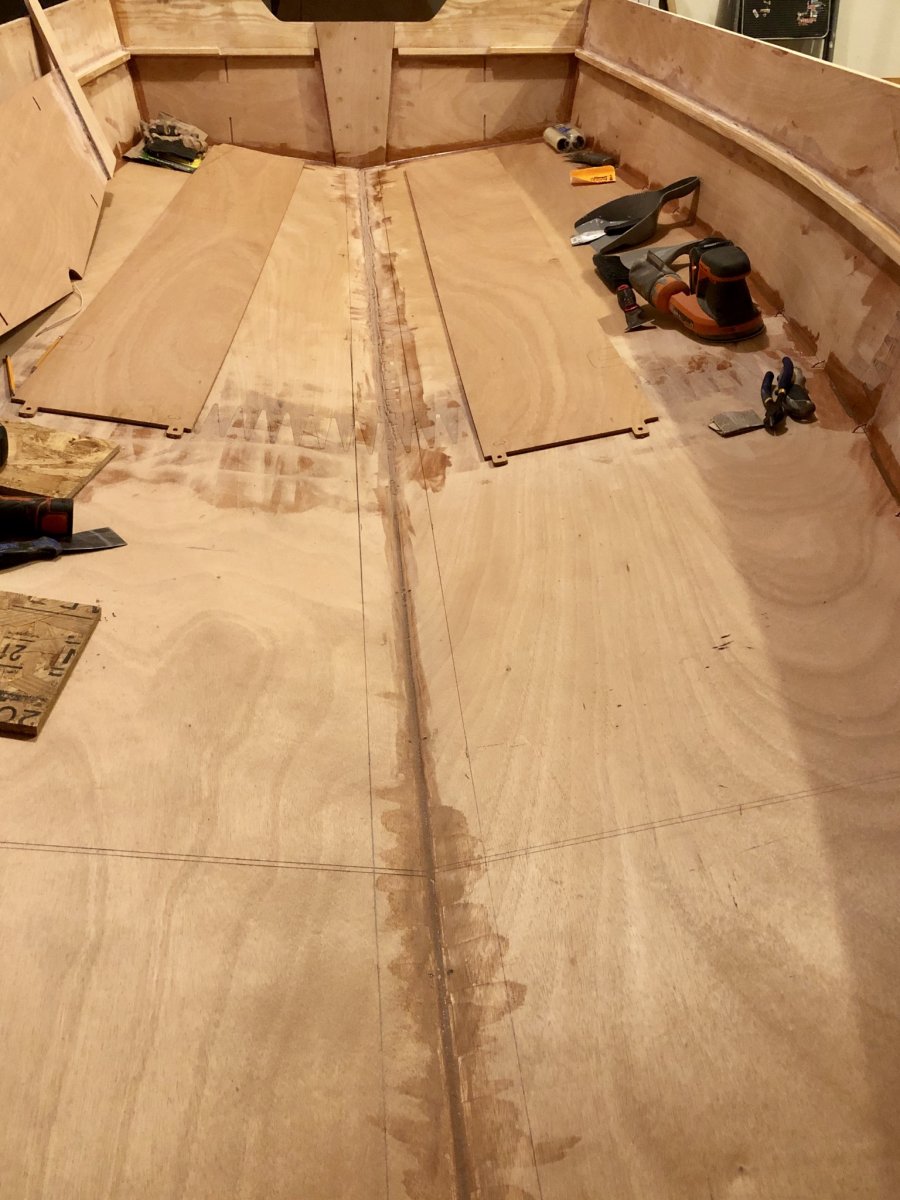
Ok, I have still been working, albeit slowly. The temps have been getting to the 50s the last few weeks and it certainly extends the set up time for the epoxy. I have 3 full coats on the whole interior of the boat and all the large pieces (and some of the small pieces too). I sanded areas that would be joined to the interior before installing. I used drywall screws to position the longitudinals as well as the centerframe. I sunk the screws an 1/8” into the inside hull to properly position the pieces then filleted thickened epoxy into the joints. It worked nicely. I’m having a bit of difficulty installing bulkhead 2 (the forward bulkhead). I clamped some sacrificial strips of wood to the interior hull above where this bulkhead is to be installed. I then pounded in a 2x4 to widen the hull to allow the piece to fit. I can’t exactly get a good fit and the piece is installed in there under a lot of pressure. I have a few options: 1. “Modify” the bulkhead to make it fit. 2. Continue to further widen the hull laterally to allow it to sit properly. 3. A combination of 1. & 2. The casting platform will be installed on top of this and I’m not sure what will take the flex out of the bulkhead unless I do something like above. Any and all advice is welcomed.


-
Alan, thanks for all this information. I’ll check out the store for supplies. I have the whole interior and most large pieces coated with three layers of epoxy. I sanded in between one of the coats and hot coated the other two. It actually went very fast and I’m close to the stage of actually assembling the insides. Would priming everything I epoxied (boat interior and most large pieces) now make sense? I would still need to grind down areas that would be assembled - bottoms, corners, etc for filleting and taping. Before: After:


-
That's good to hear and in-line with other advice I received. I really don't have a place to spray and would rather not atomize the paint, so brushing it will be. To be specific, this is what I plan on using: AWL-D8001 545 epoxy primer AWL-D3001 545 epoxy primer converter AWL-T0031 topcoat brushing reducer The 545 epoxy primer and converter will be mixed 1:1, then reduced 10% for brushing. AWL-F8215 AWLCRAFT 2000 in cloud white AWL-H3002 AWLCAT #3 topcoat brushing converter The topcoat will be mixed 2:1 (base/H3002) then reduced with T0031. Since this stuff is expensive, and I'd like to be clean, do we use syringes to measure? Or just pour into calibrated mixing containers?
-
The bulkheads, longitudinals, seat tops and fore deck have received 3 coats of epoxy. I applied the first coat, then sanded. As Alan mentioned, sanding with 150 first would have been smarter, but, I'm learning. I mixed up about 2 cups worth of epoxy and poured it into a disposable paint tray. I was fortunate when I purchased them I left 3 nested in place that I would later realized would be smart. I used a 1/8" nap foam roller and got an even coat applied in no time. I remembered a heat gun I had would come in hand to knock down the air bubbled the foam roller incorporated into the epoxy coat. 4-5 hours later, when the epoxy was still tacky, I applied another coat. All the pieces got flipped, then the same process took place for the other side. I realized why leaving 3 disposable paint trays nested in place would prove to be smart - I left the used roller in the tray to dry up a bit before I removed it. I waited a bit too long and since the trays are made with very thin plastic, I cracked and removed some of the tray when trying to remove the roller with partially cured epoxy. The two trays underneath it are the backups - lesson learned. I preparation for installing the fore deck, I also removed a section of fillet from the top inside of the stem to allow the fore deck to fit. I have also decided on topside paint: AWL GRIP 2 part epoxy primer and AWLCRAFT 2000 topcoat. I plan on testing this out in the forward compartments and also under the seat tops, where the insulation will go. These areas will not be seen and it will allow me to become comfortable using the paint/primer/reducer. Next step is to install the center frame bulkhead and the longitudinals bulkheads, sand down the areas that will be filleted then get the fiberglass tape into place.


-
All great info but above, in particular. I should have known it would be easier to sand ply than epoxy by now. All the sections I mentioned will be 3 coats of epoxy before paint. I’ll rough up the perimeters where I will apply the glass tape before install.
-
Yep, I quoted myself. I threw caution to the wind and rolled a coat of epoxy onto one side of the seat tops, forward casting platform, longitudinal bulkheads and forward lower bulkhead. It went on easy. I came back 6hrs later and the smooth surface turned into a bumpy surface which will need to be sanded down. I used the Wooster 1/8" foam roller. I guess I should have tipped the epoxy coat with a brush after to knock the air bubbles down. I'll try to do that on the non-coated side of the above named pieces and see how that works. I think I may also be able to coat the center bulkhead and flex it without the epoxy breaking. I'll use the longitudinals with 2 coats of epoxy as a test and if it works, I'll coat the center frame before installing it.


-
Thanks for the update and good to hear all is well in B & B land.
-
I am close to being done as much as I can do in the interior of the boat before I start the installation of the bulkheads and compartments, etc. I have all these pieces laying around and to me, it makes complete sense to set up a large plastic sheet and coat all the pieces with a layer or two of epoxy now before they are installed and or/taped in. The centerboard in particular needed quite a bit of flexing to get it into position and the fully cured epoxy may crack. Thoughts? Any potential problems with doing this?
-
+1. Holding the tube with channel locks and using a cutoff wheel was exactly what I was thinking. I am also going to coat the inside of the cutout with un-thickened and maybe a little thickened epoxy. No water will be getting in there.
-
I've never come across a flanging (flaring) tool. I certainly didn't know how to use one, but a quick google has me thinking it's not difficult. I came across this crude video on how to install a tube. I'l going to read up on the Gougeon Brothers book, chapter 14., on hardware bonding.
-
Good luck! I sure hope it does stay offshore and picks up speed.
-
Chick, do you have/can you take pictures to show the plug inside and out? If you mounted it as low and close to the center-line, didn't you go through the transom stiffeners which are much thicker than the ply transom? Not sure why a 3/4" block would be used in this area if it's already thick. Did you wait until the end of the build to install the plug? On a side note, I added two staggered layers of glass tape along the bottom to transom seam. I marked lines two inches off center to keep the tape straight. I also glassed 1/2 way to the bow along the inside chine. I like having the room to work and decided to glass as much as I can before I compartment off the boat with longitudinals and bulkheads.

-
Nice set up and that'll be a solid glue joint.
-
Great to hear - I have to head to one tonight for some other items and will pick up some sheets.
-
Despite saying earlier that I may stay away from pour in foam, I am considering using this 2lb urethane foam http://www.uscomposites.com/foam.html. I can't seem to find marine grade board flotation at a reasonable price and googling marine flotation yields mostly pour in foam. Once I have the side compartments built out (with or without modifying them for storage/cooler - see above), I'm going to create cardboard forms and pour the foam outside of the boat and then install the custom molded pieces into their respective spaces. Can I completely encapsulate the foam blocks with epoxy? I would never have to worry about the foam breaking down due to condensate.
-
Chick, thanks for that link - I'll check it out.
-
The plans say 25hp max, so I think I'll go that route. Probably Yamaha, however, I have not spent any time looking into it. I assume you need an engine choice to figure out weight? 126lbs for the 15" shaft and 143lbs for the 23" shaft. About the rest of the above, thanks, this was very helpful to read. I would still fill the side compartments with foam as I was just thinking the center portion of the seating area could be used as storage or a cooler. I know you design plans that way you do for a reason. However, this is a custom boat, so I am trying to reconcile those two facts. 1. Safety 2. Function. I figured I would attach this file as it may be useful to someone reading this some day. Backyard built boats - things you may not know.pdf

-
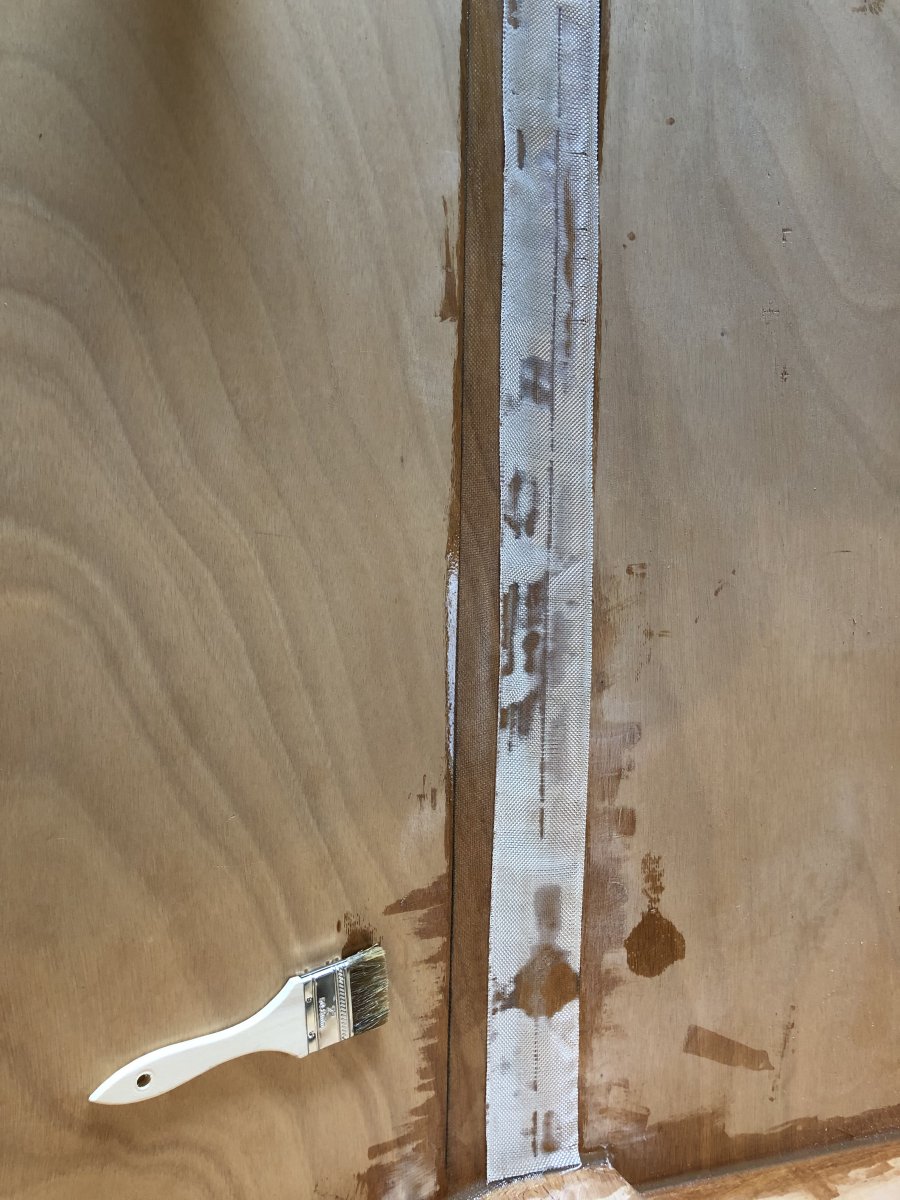
Keel with two layers of overlapping glass. I started with a brush, then moved to a bondo spreader to wet the glass in place.


-
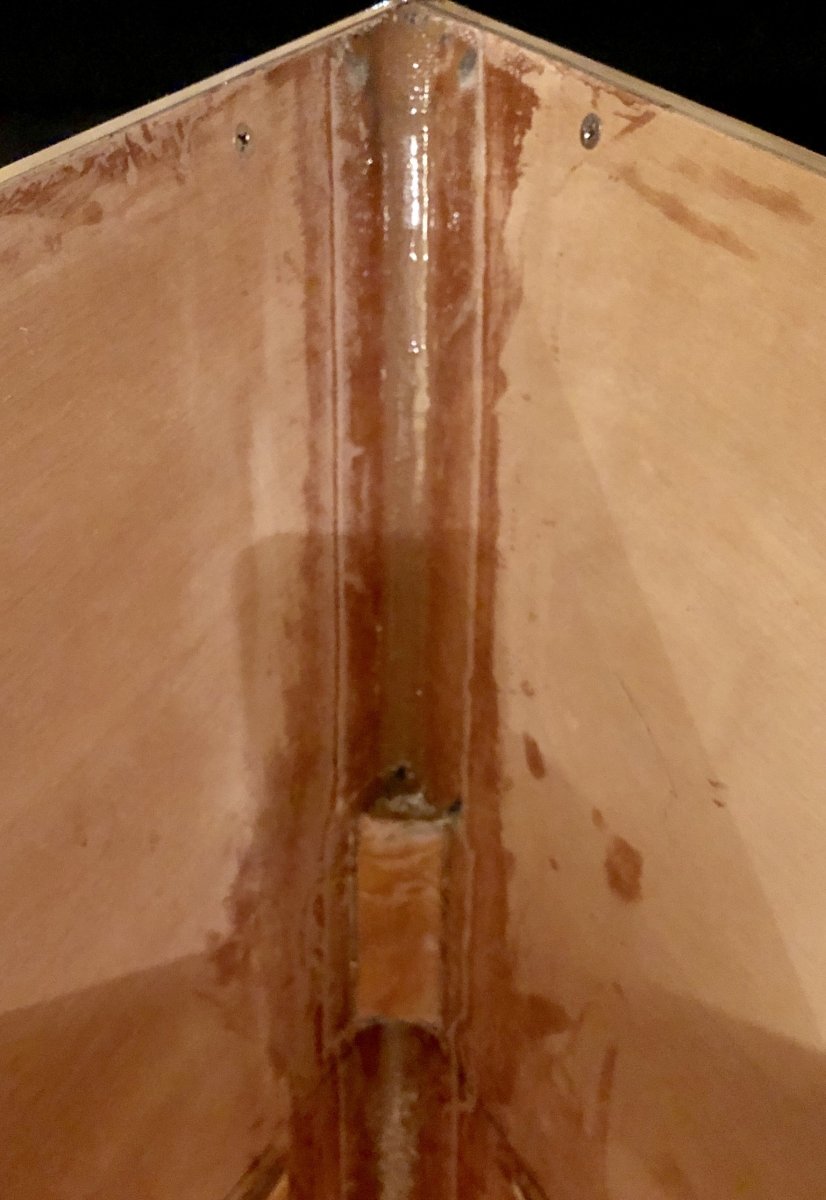
Quick update: the stem inside and out received a layer of glass tape. I cut pieces of glass to fit first then laid them out on a piece of plastic I had on the floor. Un-thickened epoxy was brushed on the inside and outside of the stem. I then wetted our the glass on the floor until it went translucent. I used double latex gloves so that after handling the glass tape, I peeled them off and had gloves for the brush work, etc. I also slightly cut the ends of the chip brushes to stiffen the bristles. This also allowed me to move the glass tape by gently pressing into it at an angle and forcing it to slide. I had a little trouble with the bow eye stiffener - I probably should have waited and glasses this piece separately or just glasses up the inside of the stem, then adding this stiffener block after. Oh well. I removed the centerboard and wire ties along the bottom, finished the gaps with thickened epoxy, then sanded smooth in preparation for the two layers of 3” glass tape along the keel. I drew two parallel lines 2” off the center line. This will allow each piece of tape to overlay by an inch and thought this would make the tape job neat in places that will be seen.


-
Chick, thanks for the advice. For the boat to be self-bailing, the sole has to be higher than the water line. So, since I don't know the waterline (presumable, it's at or very close to the aft chines), maybe I should wait and install this later on. Regarding the foam, the Jessy has two large bench seats that run fore and aft. I'm considering asking Alan if it makes sense to install one of his hatches in each side for additional storage. I will have to divide each seat in 1/3s and will foam and enclose the outer 1/3s where the inner 1/3 is the hatched compartment. Further, the forward upper compartment can be made watertight by using a properly sealed circular deck hatch.

-
Great video quality. Sounds like a nice little cruise!
-
Drilling the holes for the bow-eye got me thinking about putting in a drain plug at the transom. Any advice of tips? I'm thinking an inch off the aft sole on centerline in the transom. I'm thinking about installing it towards the end of the build, after the hull is glassed. I'll reference the link Alan posted above. Also, talk to me about flotation for the port and starboard compartments. I know I don't want pour-in foam and think board foam may be best. A breather, like this https://www.amazon.com/Benjamin-Obdyke-CBNI-Underlayment-Breather/dp/B007DJ3JQS could surround the compartment. I need advice.