Steve Day
-
Posts
914 -
Joined
-
Last visited
-
Days Won
2
Content Type
Profiles
Forums
Events
Gallery
Everything posted by Steve Day
-
Not plywood. I cut 3/8" to 1/2" (approx) strips of 1-1/2" fir and poplar and scarfed them into lengths to run the whole boat. We then glued them in place on the boat with thickened epoxy (with wood flour and silica) and held them in place with temporary screws. Unfortunately, there was no way to clamp them in place with the upper deck in place on the boat. I had to work today at West Marine, but Wally was able to sand the gunwhales into shape while I was gone. I was able to stop by for a minute this afternoon and drop off some supplies to the barn and got a chance to look at the nearly finished gunwhales. They look pretty good! :-) Our intention is to make the decks gray and the gunwhales bright. We also will make the coaming around the inside of the decks bright. That should make the boat look pretty decent. We have to really start the search for a trailer in earnest as next steps involve getting the boat "up in the air" a bit to complete the rudder assembly and get the thing to the water to see if it will float. Steve
-
I got to work on the boat a bit this week among all of the other things going on. The third and final lamination is on both gunwhales and we are now ready to shape them into their final form. The after bulkhead is painted and the "master" battery switch is installed. We put the mounting board in the after compartment for the fuel/water separator and the final fitting of the fuel filler has been done. As soon as the gunwhale is shaped, we can start preparing the after deck for paint. We are getting closer to launching and are anticipating the event. More to come, Steve
-
Really nice looking canoe! You are doing well up there. Are you coming down this way to Kayak any time soon? Keep up the good work. Steve
-
The first thing we did was carefully plot the centerline of the shaft in the boat from the drawings. We drilled the hole through frame 10 using the laser level to give us the vertical centerline and the mark on the frame to give us the proper elevation for that hole thru 3/4" of wood. Then we used the laser level to project the vertical and horizontal centerlines onto the stern log. Using the laser to establish the horizontal angle and eyeball to mark the vertical angle and a very long bit shaft (necessary to get through the stern log) to align them, we drilled the hole. Believe me, that was fun! And we had to sit around and scratch our heads a bit to figure out how we were going to do it. However, it worked and the hole is really close to the desired angle. 8) :-D Thanks for asking, Steve
-
Larry, I was wondering if you had dropped off the face of the earth. You need to get over before we get it completely done. We worked on the boat quite a bit today. We installed the second lamination onto the gunwhales on both sides, we cut the hole for the fuel fill and dry fit the fill hose, we installed the raw water strainer, the raw water hose from the sea cock to the strainer and from the strainer to the raw water pump. We also installed the bilge ventilator fan and the bow eye. We painted the after bulkhead with primer. We got a lot done, but there was really nothing to show with a picture. More to come as the week progresses. We talked about a possible launch date today and decided it would be nice to get the boat in the water in July. What part of July, we don't know, but we're shooting for July. One thing that might affect the launch date is whether we can find a suitable trailer for the boat. Steve
-
Sorry, my "fat fingers" got in the way of what I was typing. At 1/3 gallon per hour, that is 36 hours of "steaming." My bad! :oops: :oops: :splat: Steve
-
Paul, 12 gallons. At 2/3 gal per hour, that is nearly 36 hours of "steaming." We think the engine will burn somewhere between 2/3 and 1/2 gallon per hour. Steve
-
Ray, What a cool adventure for them. I'd be willing to bet that you were bustin' out with pride at their opportunity, and rightly so. I also detect a bit of envy in your note. Congratulations! :grin: They'll have some stories to tell after this. Steve
-
We were able to get the following done yesterday: Engine box placed in its final position. First strip of gunwhale epoxied in position on starboard side. After deck epoxy applied in preparation for paint. Holes drilled for bow towing and trailering eye. Here are a couple of shots of the boat taken yesterday:


-
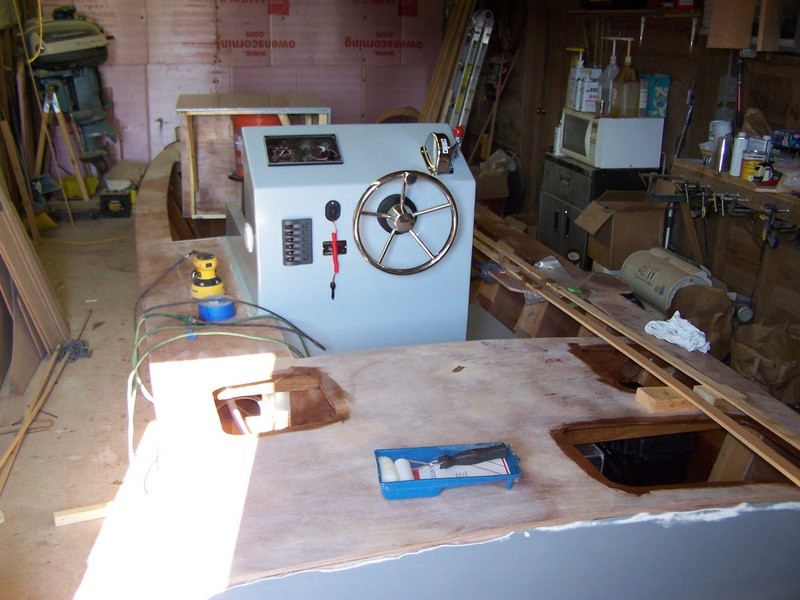
Neither can I, PAR. Neither can I. We got a few things done this week, but we were both busy with the outside world. Status today is as follows: Throttle control is installed. Shift cable is run. We need to fabricate a bracket to get shift working. Steering box and cable are installed. Engine box has finish coat of paint. After deck is installed and holes cut for access hatches. First lamination of gunwhales is scarfed together for installation. Main fuse for electrical installed. Here are a couple of pics taken today:


-
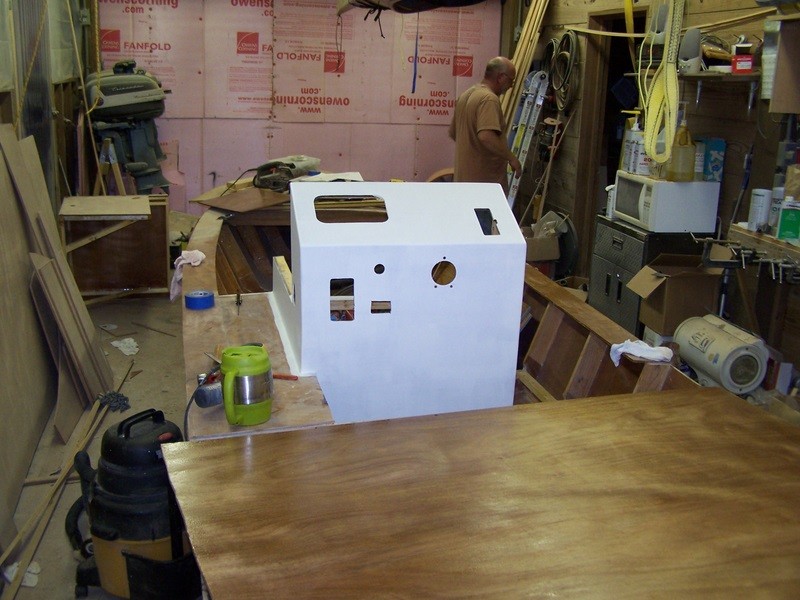
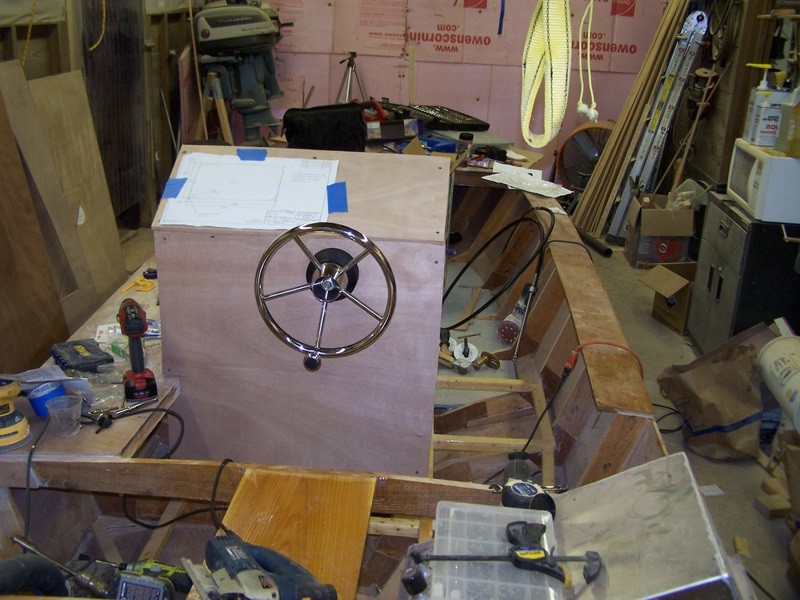
I was able to get out and do a few things today after the dentist put a temporary cap on one of my teeth. Why not sand and paint while my jaw regains it's feeling? We're getting primer on the engine box and console back panel and I put the first coat of color on the console. Here is a picture of the console:

-
Wally had her running yesterday. It really sounds good!! Nothing like a straight pipe for sound (muffled with water). :grin: :grin: Notice the water issuing from the exhaust.

-
We got some more stuff done today! :grin: After deck is epoxied in place, second coat of primer is on the console, epoxy coating is on the engine box, after bulkhead is epoxy coated, and we cleaned off the forward deck and sanded it in preparation for paint. It is beginning to look like a boat!! :cool: Here are a couple of shots of the boat as she sits now. BTW, these photos were taken with my new Motorola Droid. The quality is comparable with my Kodak.


-
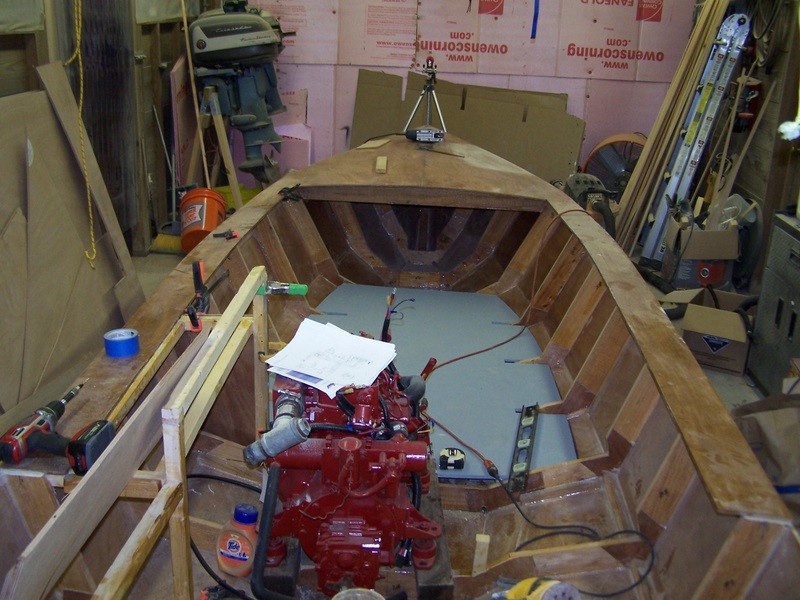
We were able to work on the boat all day today and got the following completed. We installed the shaft coupling (finally came in from England), aligned engine, made the connection, and bolted the engine down in position. The propeller was put on earlier this week, so the drive line is in place and ready to go. We also got the console primed, the engine box epoxy coated, and the deck panels cut to accommodate the console and after bulkhead panels. As the day came to a close, we trimmed the after deck and dry-fit it in place. We also spent a lot of time discussing access hatches and what we would like to do on the after deck. All in all, it was a good day and we got a lot done. An observation we both made was that it is a whole lot more complex to make an inboard than an outboard. However, we both think it is well worth the effort (and a heck of a lot of fun!! :grin: :grin:). Steve


-
I hate to keep touting West Marine, but their advisor has some pretty good advice on anchors and anchor rodes. You can find it on their web site www.westmarine.com. You should have enough rode to get a 7:1 scope where you intend to anchor. The first portion of that rode is recommended to be the appropriate sized chain. This is to get the proper angle on the anchor, and it has the added benefit of abrasion resistance in rocky bottoms. They also have a chart to estimate the appropriate size anchor and rode on the web site. I tend to go one size larger for overnights, as you necessarily are not able to watch and sleep at the same time. A size smaller may be OK for a "lunch hook." Just my 2 cents, Steve
-
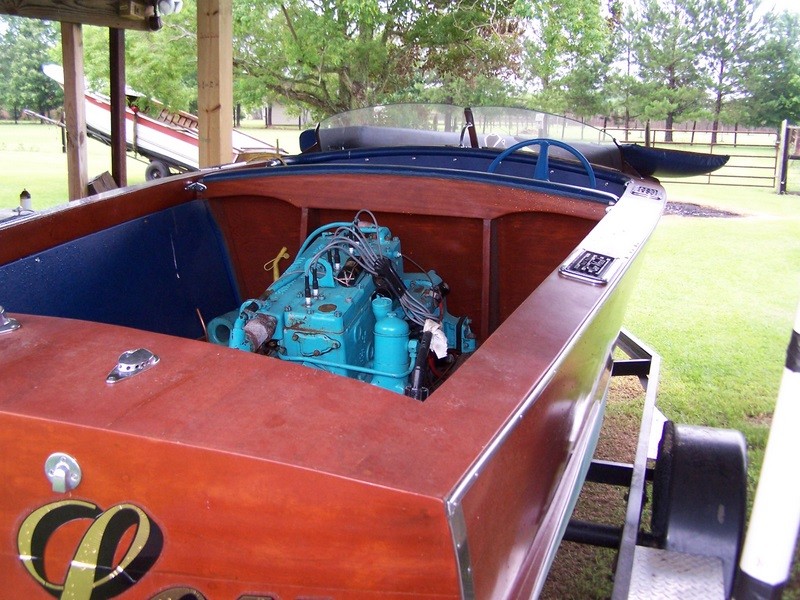
The next project for Wally and me after the Rescue Minor will be this boat. It is a 1947 Gar Wood with a Chrysler in-line 6 cylinder engine. Wally has gotten the engine running and we have taken a little time to contemplate the job ahead. Lots of work to get the finish up to where we think it should be. Here is a little boat porn for you antiquers out there:


-
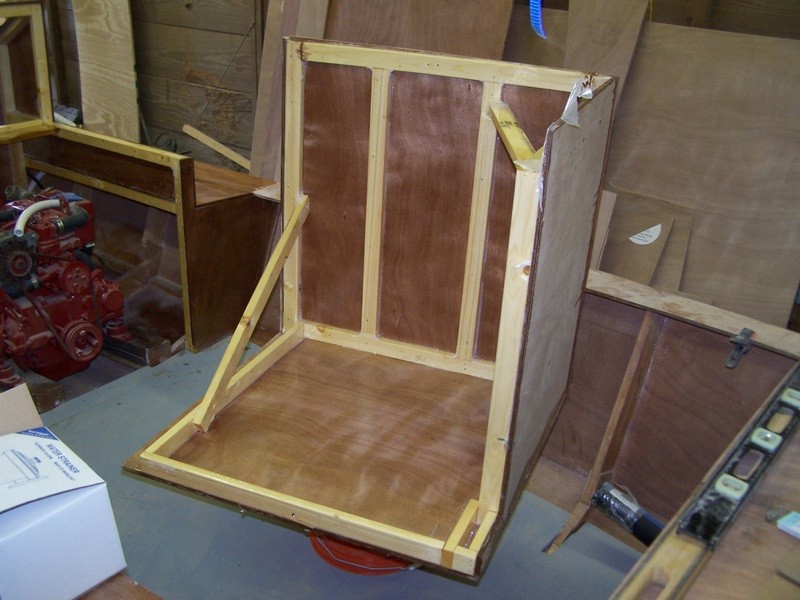
Hey Guys, We were able to get a lot of work done on the boat this weekend. We got holes cut into the console for instruments, controls, and the helm. The edges of the console were rounded and a final coat of epoxy was applied to the fixed portions of the console and engine box. The next steps for that area will be primer and paint, then installation of the things filling those holes. We epoxied the engine box together and it is curing as this is written. We also epoxied the bulkhead on frame 10, which helps define the area where the helmsman will sit/stand. Here are several photos of the boat as she sits today:


-
We got a lot done this weekend. :grin: :grin: We were able to get the console into its final configuration and epoxied together and we got the engine box framed out and the first piece of plywood on that. Here are some pictures of the boat taken today. Steve


-
Hey Y'all, I finally got out to the Rescue Minor to work on the console and some other things and took a couple of pictures. These show the start of the console with the uprights on the starboard side and the deck around the console roughly in place. I also added the exhaust hose from the muffler to the transom. Wally and I both think we will stay off the water for the most part this weekend due to all of the folks that are going to be out there. I think we may be able to get something done on the boat(s) this weekend in lieu of "battling" the crazies.


-
Raw water heat exchanger. We haven't had much time to work on her since I was out of town all week last week and I have been working a lot over at West Marine this week (vacation time, y'know). I should get enough time tomorrow to get over and take a few pictures. Wally was able to get the deck done around the engine box and steering console. The steering and engine controls should be in this Friday. I have started the console and will have it "framed out" this week (hopefully). Sorry I haven't been able to give you your "fix," but there is always tomorrow. Steve
-
Mike, I like the looks of that one! She looks really sweet. I hope y'all are going to use her to camp a little this summer. Steve
-
Cool! Good to see another one is starting. It seems the idea of low horsepower diesel boats is catching on these days. Steve
-

Another Spindrift 12 goes 3D...Yippee
Steve Day replied to Greg Luckett's topic in B & B Yachts Forum
Greg, I was going to ask if you got any of the cold weather and snow. Crazy weather we're having. Makes it hard to work on and sail the boats. Steve -
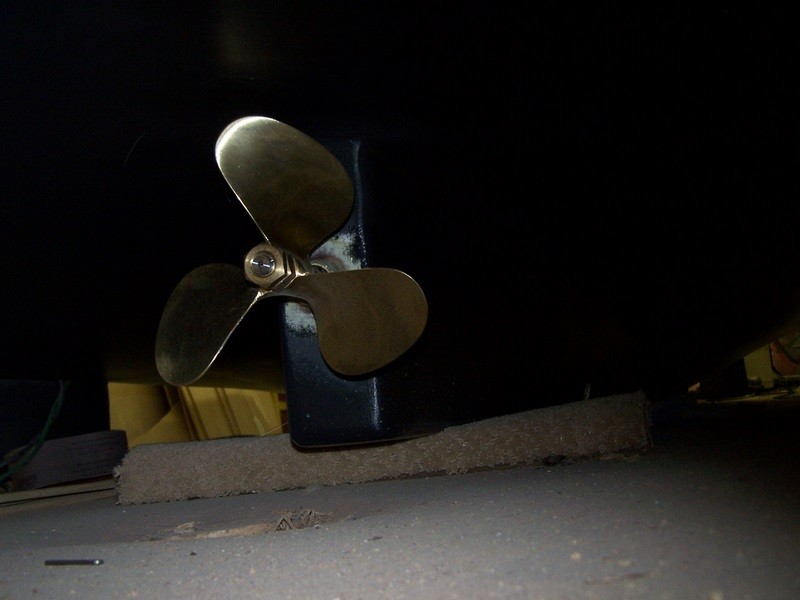
Wow! I had not been seeing much reaction to my pictures and commentary and now there have been several comments. PAR is right. That is a water cooling/lubrication line that leads from the pressure side of the raw water pump to the seal. This is one of the "Lasdrop" seals and is quite nice looking. Certainly better than the old stuffing box design. The engine turns in excess of 3000 RPM, but the transmission turns the prop at about 1500 - thus the estimate for a 14" pitch. This estimate comes to us from two different propeller shops and has been given a "sanity check" with the other Rescue Minor builders at the last show. I think we are on the right track and we're making headway. Eric, I met a Rotary Exchange team from Brisbane several years ago in York, Nebraska, where I was the local Rotary Club President. Great folks! More to come in the near future. Steve
-
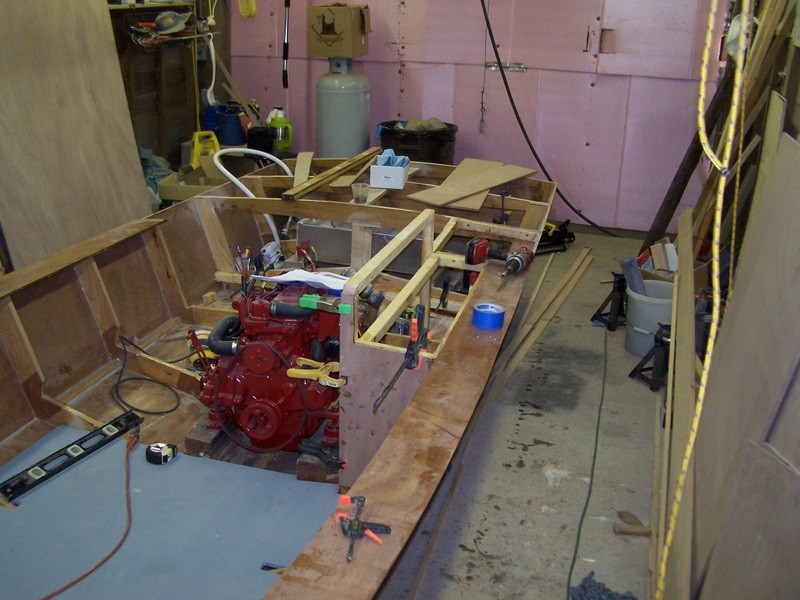
Hey Guys, I got out to the boat yesterday and today and got quite a bit done. Building the engine box/console is really a lot of fun, but it takes time to hang the structure out there and epoxy it in place. As I get more of the structure in place, the frame becomes stronger and looks better. I have the frame on the port side of the box in place and am starting to add the skin to that frame. This part will be fixed and the movable part of the box will "mate" to it. I have also started the deck supports for the decking on the starboard side and behind the engine box. We are planning to make the console/steering stand at the after end of the engine box and will probably use the after deck as the seat for the captain/coxswain. Access to the open deck and forward will be around the engine box on the starboard side. That walkway/deck will be about 3" above the grey deck in the pictures. Here are some shots of the boat as it sits today: