Bryan Rolfe
-
Posts
98 -
Joined
-
Last visited
-
Days Won
14
Content Type
Profiles
Forums
Events
Everything posted by Bryan Rolfe
-
https://bandbyachtdesigns.substack.com/ substack is sort of like a blog/place to publish content
-
Glad to see you back to provide an update -- I think if nothing else it's not for people get closure! Looks really great, and glad you've been having fun in the meantime.
-
The longer you can wait for a buyer, the better. I'd probably say 3-4K US if I were buying one instead of building, after having just done that. If I were selling mine, there's probably no price that would be reasonable for how much time I spent on it, but if I got a good 4-5 years out of it cruising, and then was ready to sell it, I'd be happy with 1-2K.
-
Excellent build, thanks for sharing! You really went above in beyond, doing some vacuum bagging and foam construction. I also noticed you glassed the inside of the boat and I'm wondering if I'm going to eventually regret not doing that on ours, as I suspect over time we'll drop things in the boat and glass would offer some impact resistance. However, it's already pretty heavy as it is, and I don't know which trade off I would have ultimately preferred. What is the material you used for your rub rail?
-
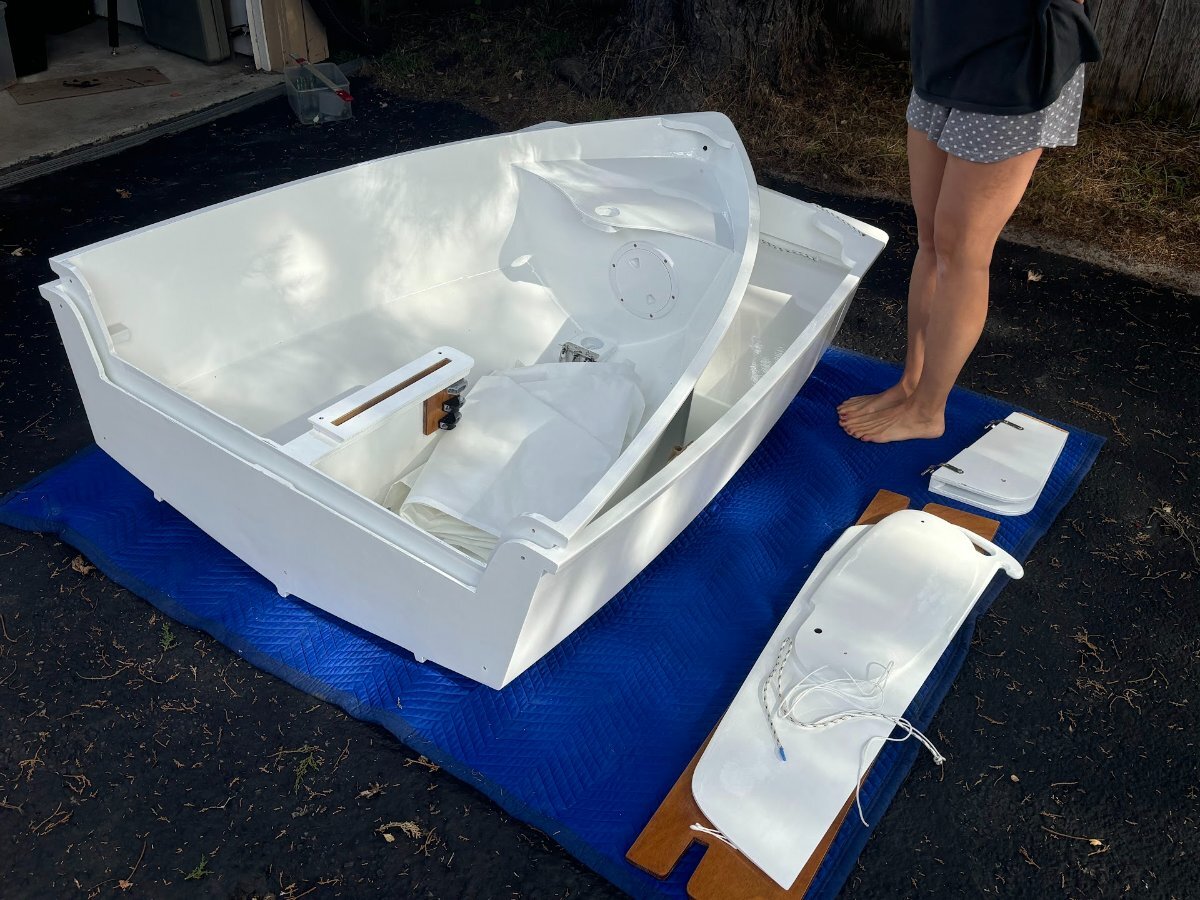
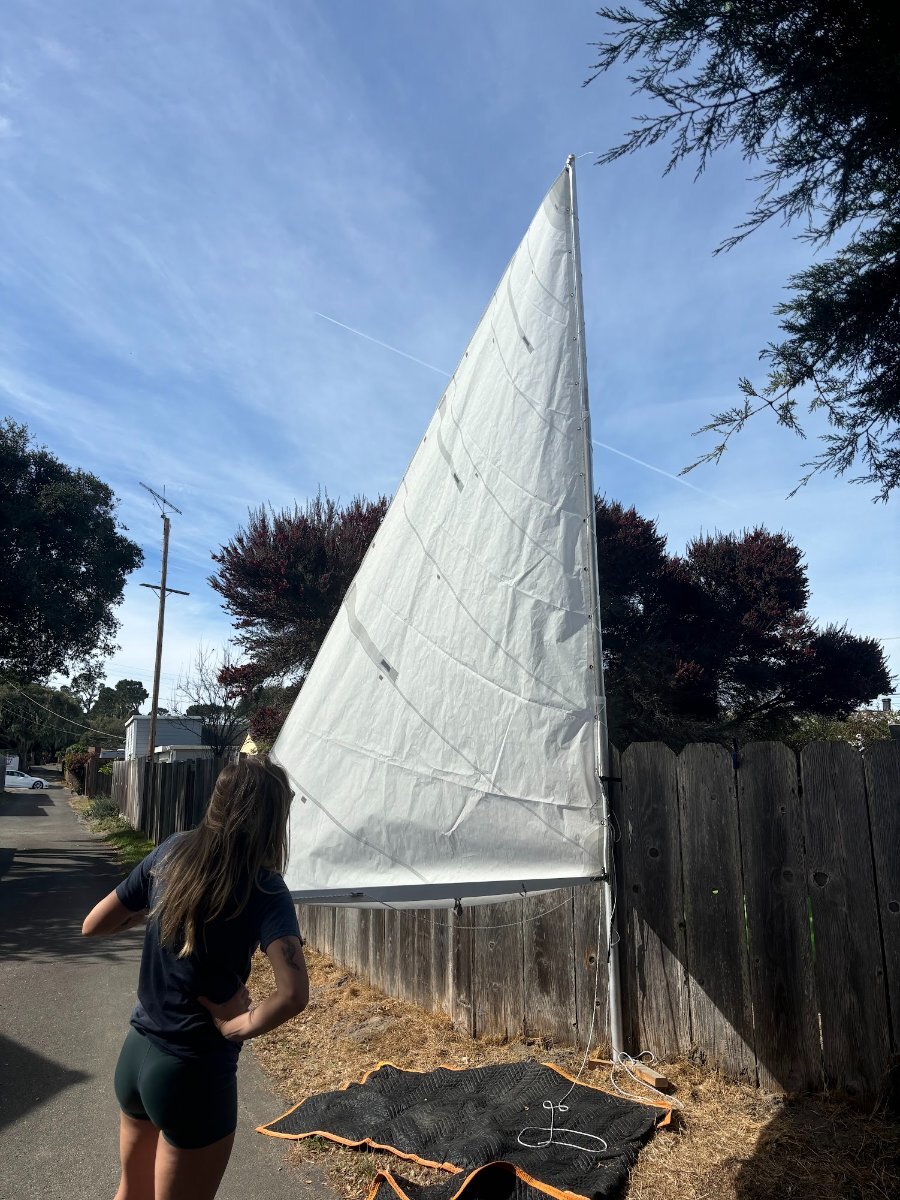
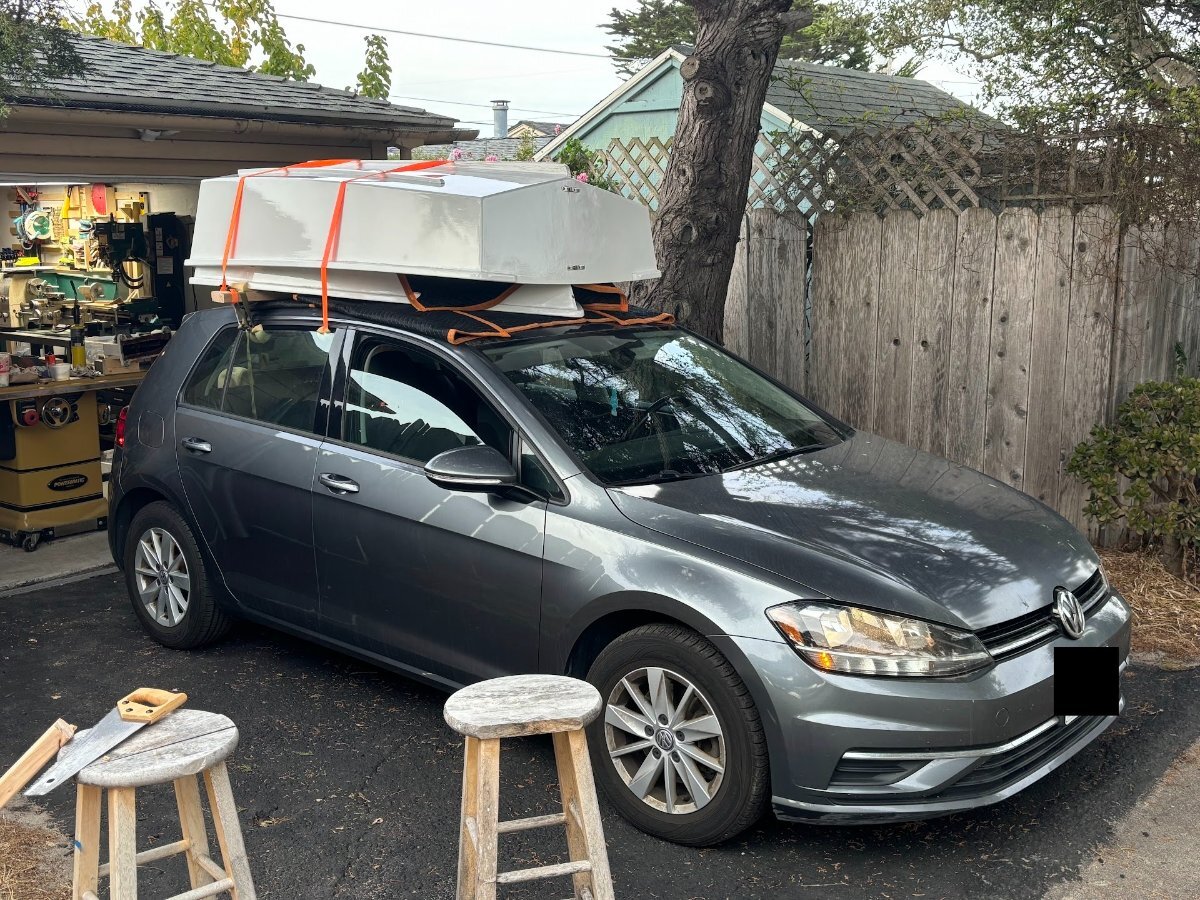
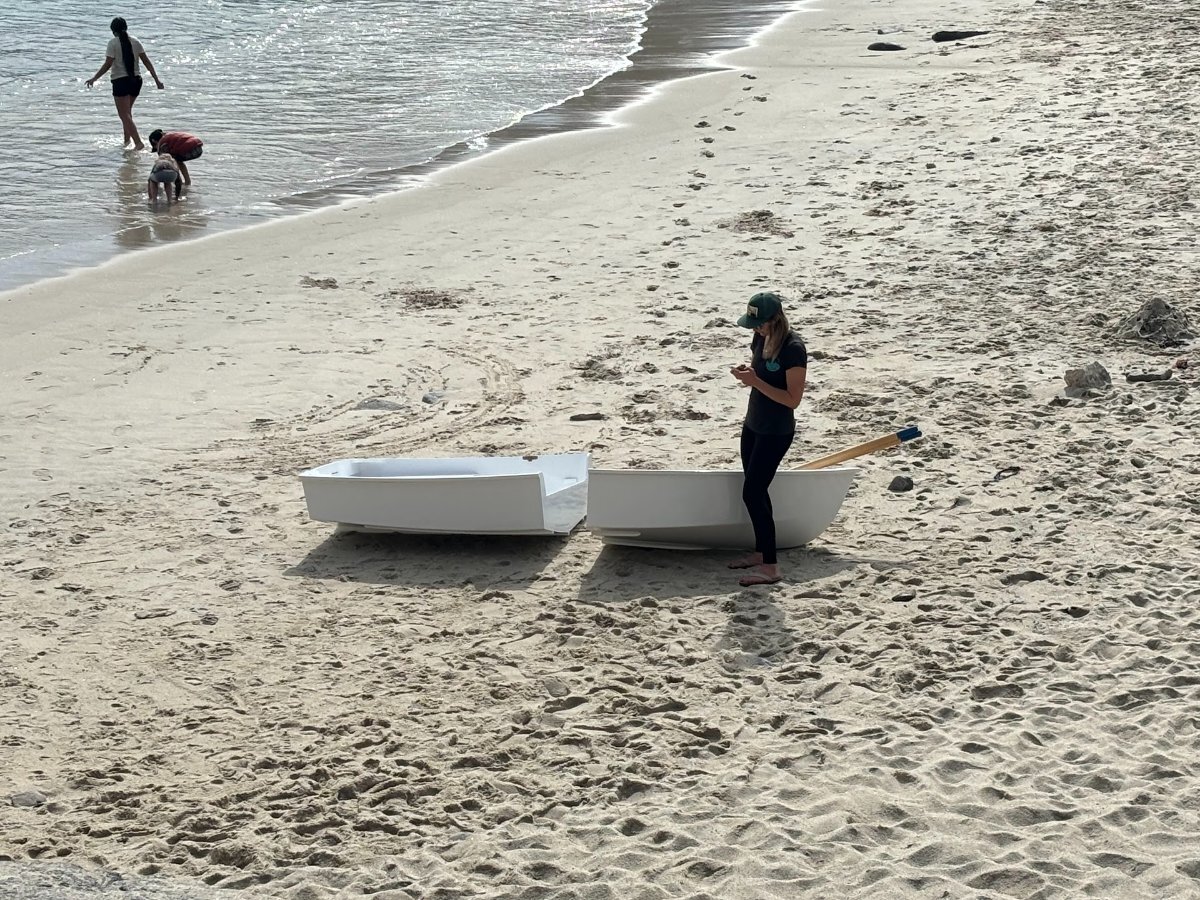
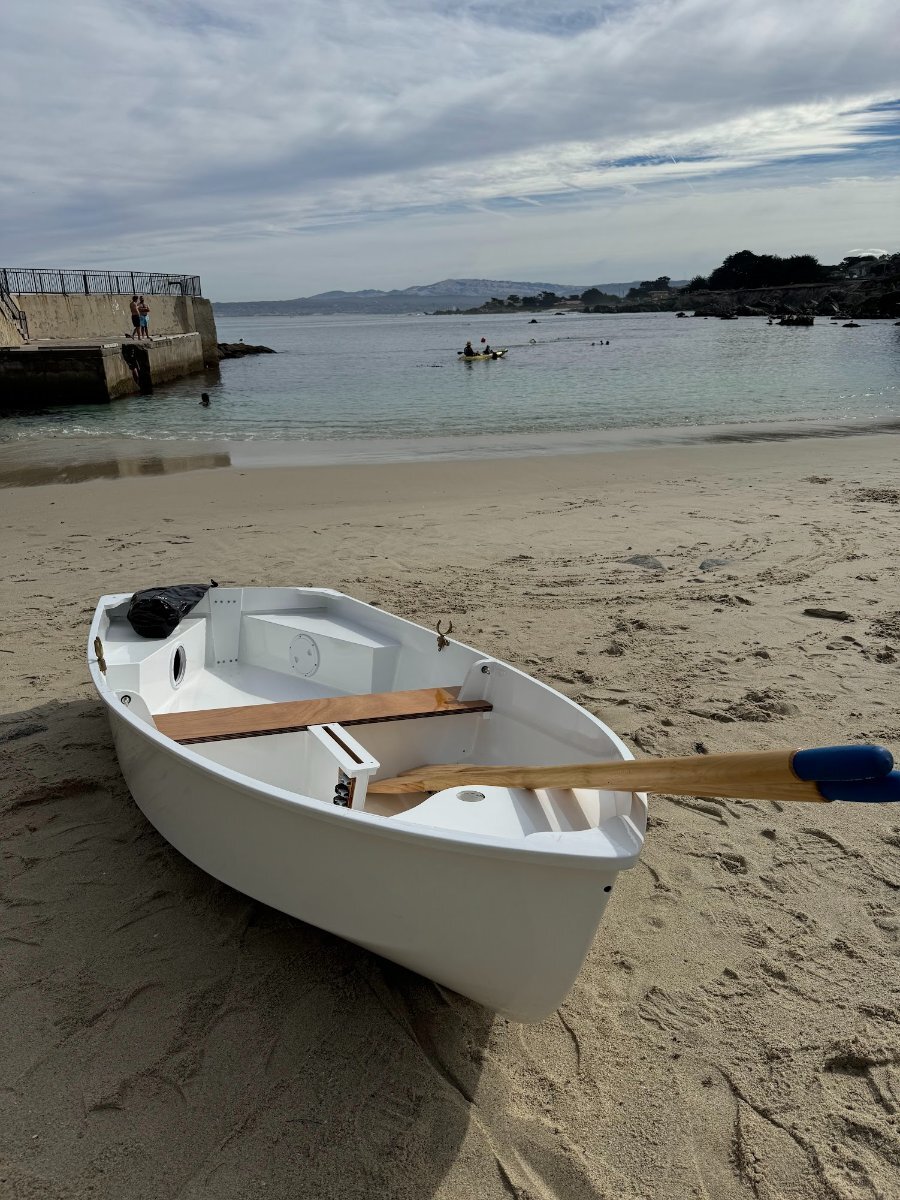
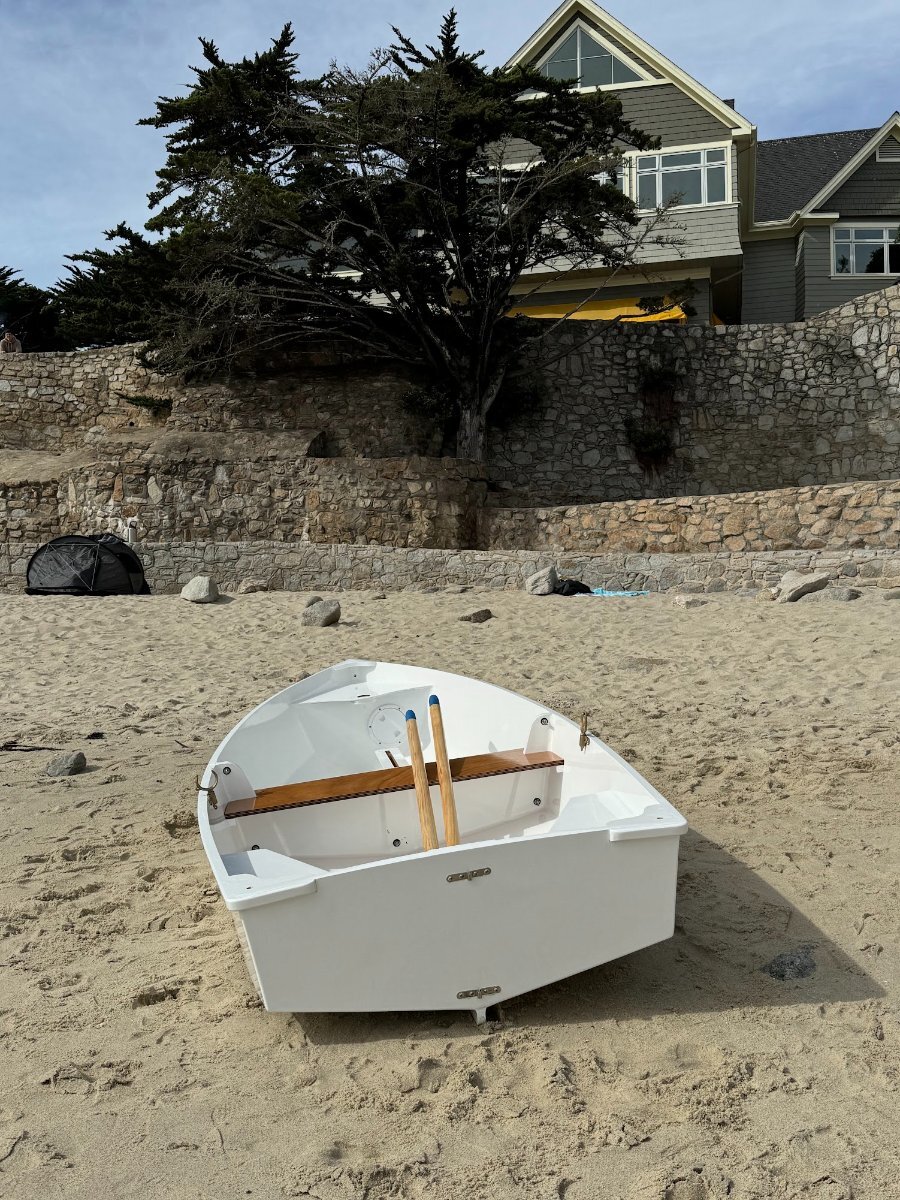
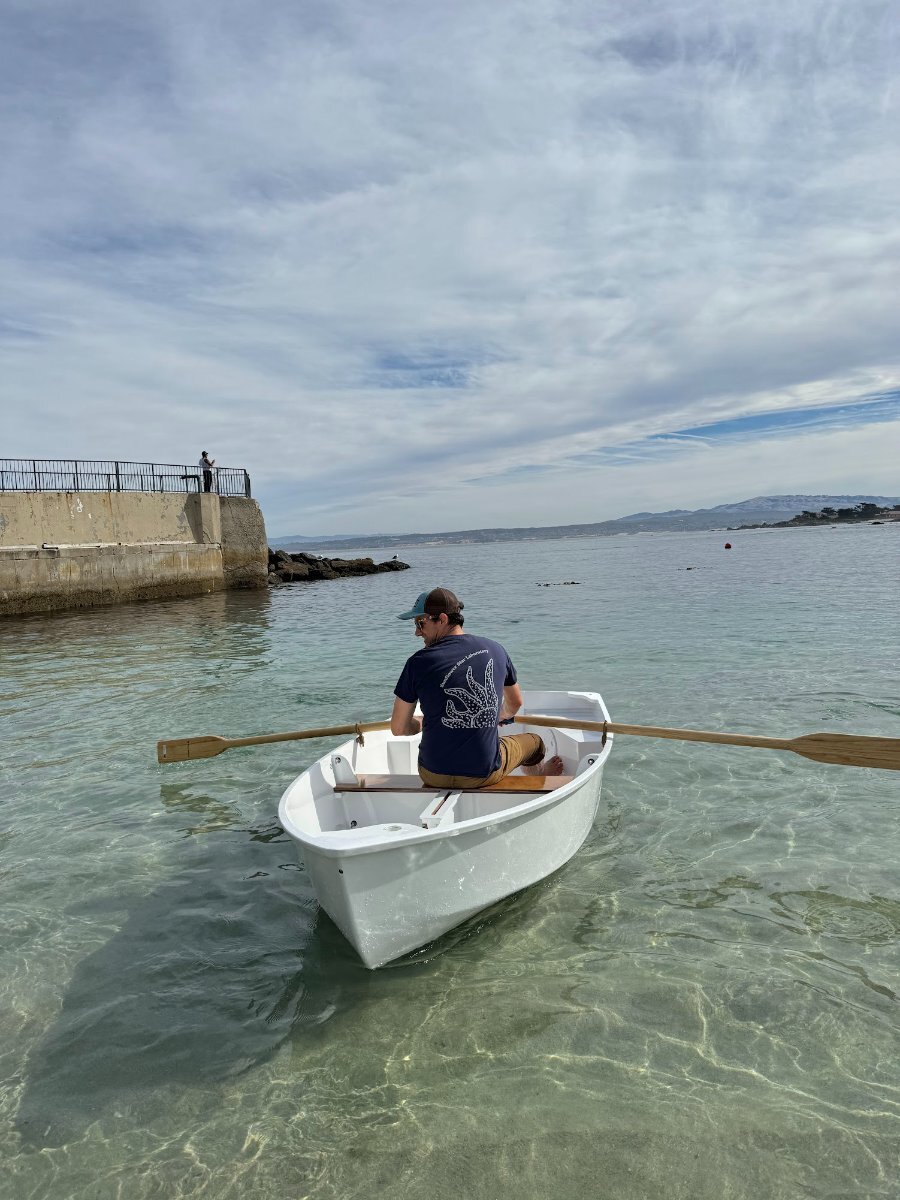
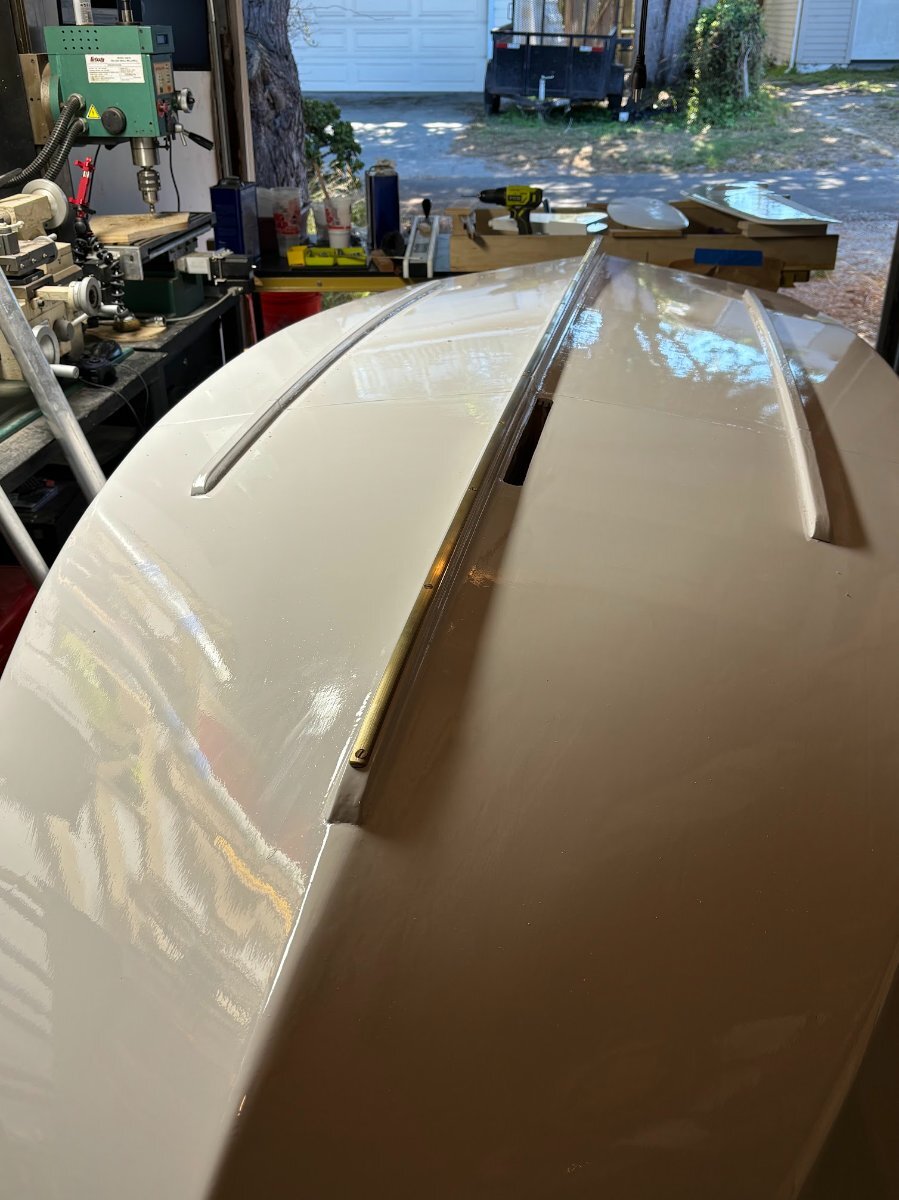
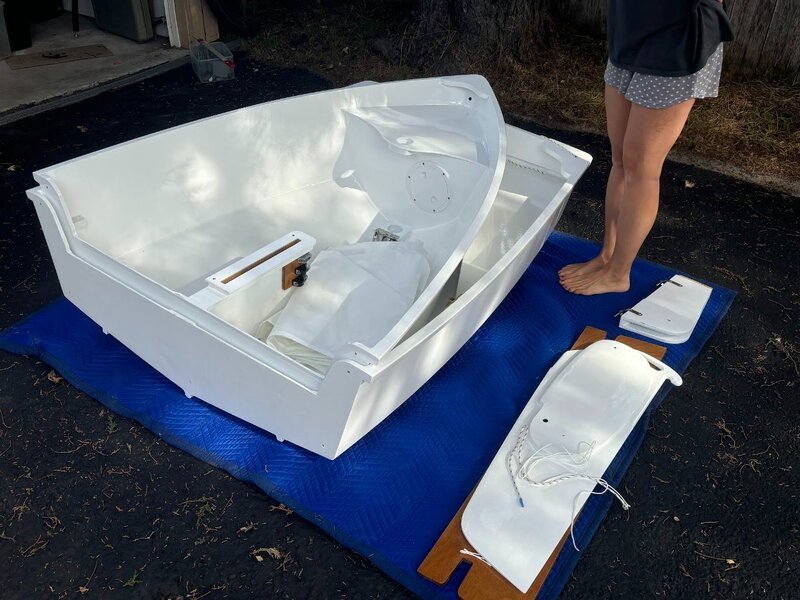
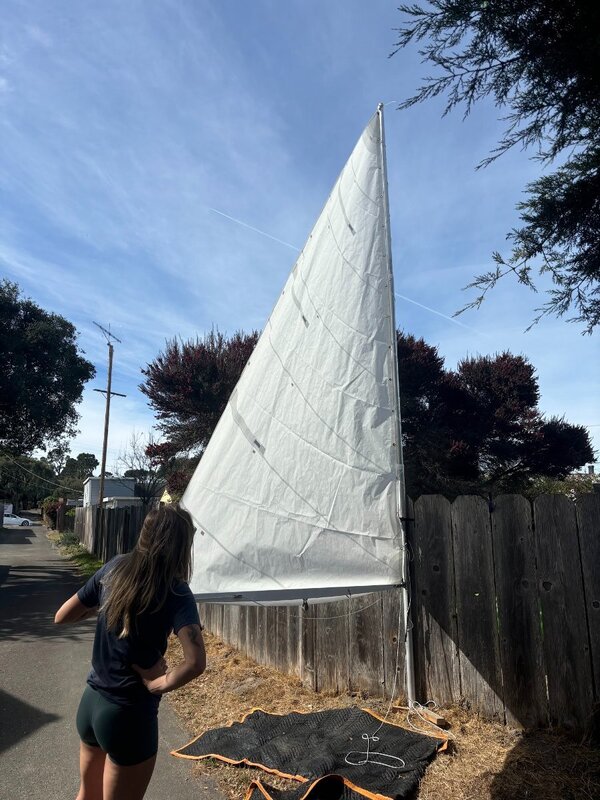
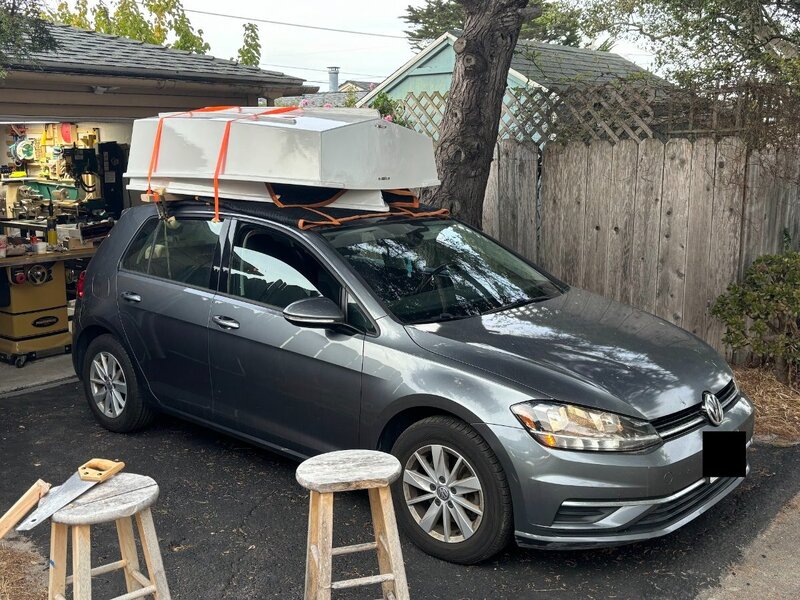
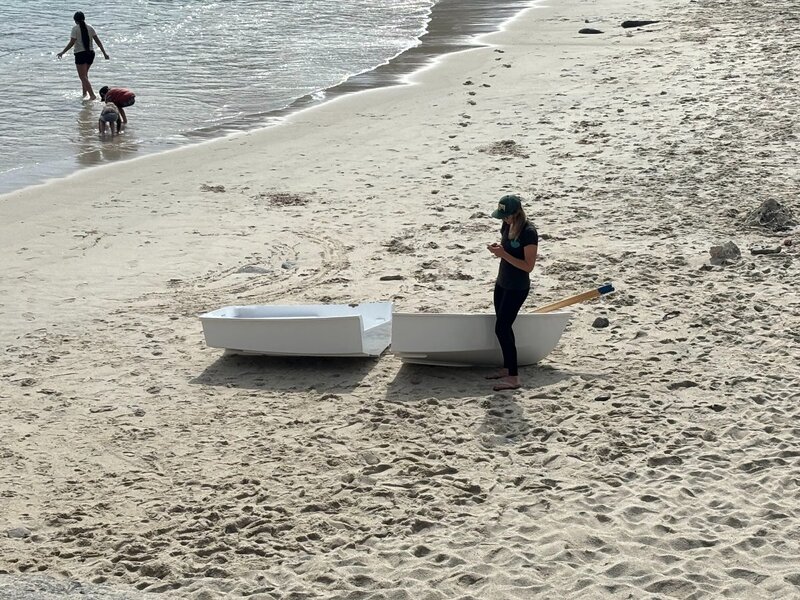
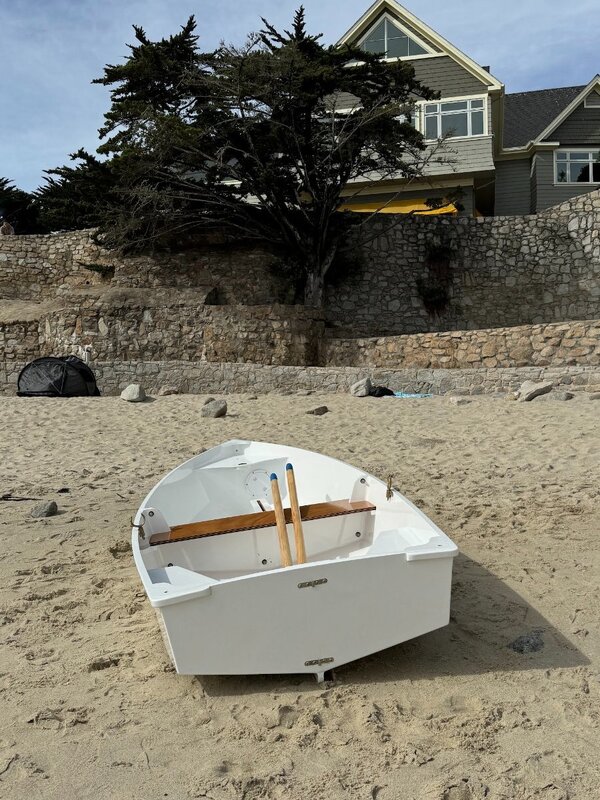
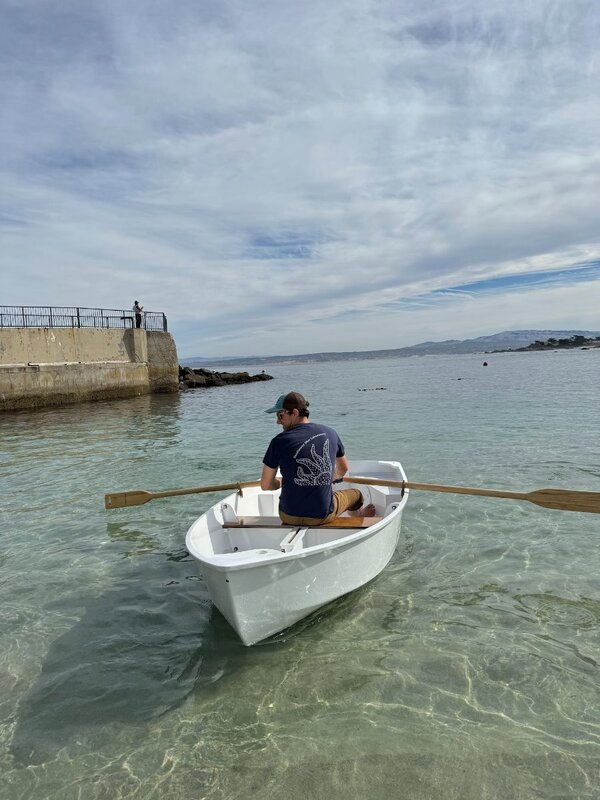
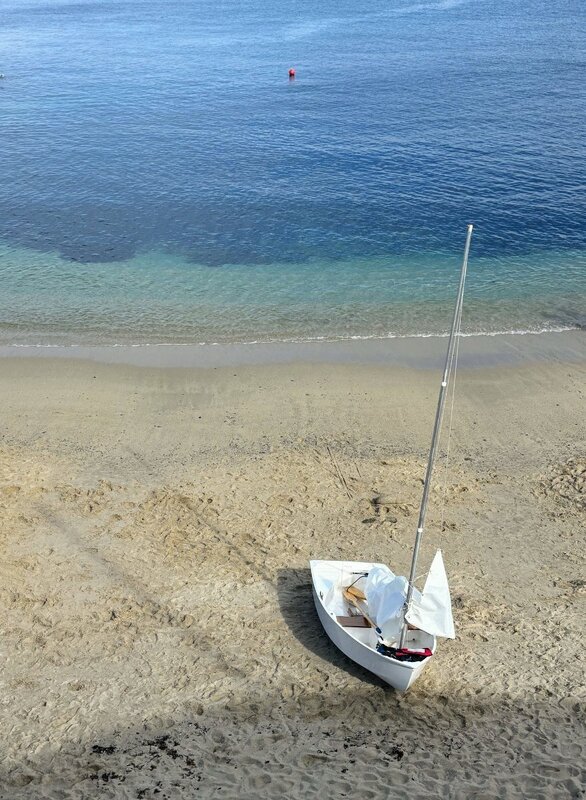
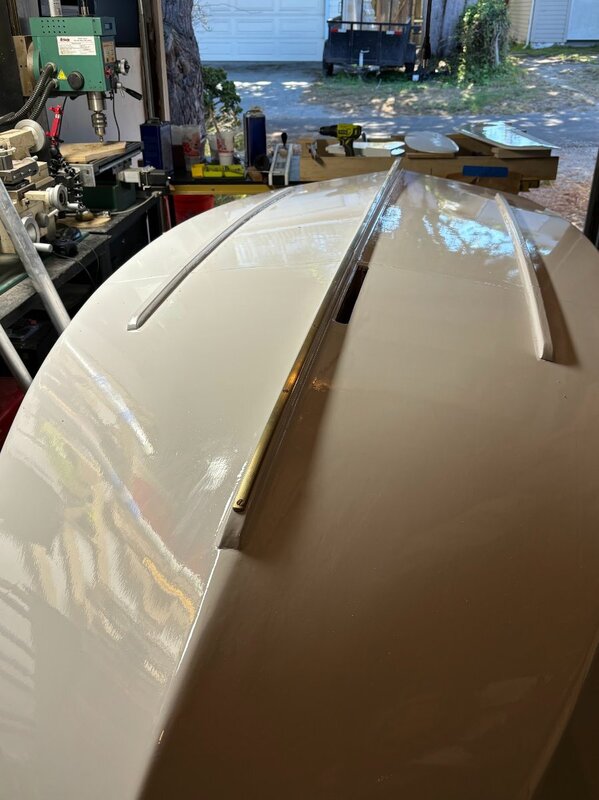
It's finally done! Looking back at this thread and all my photos, momentum really declined in the spring of this year through the summer. Work was really busy and big boat projects occupied a lot of my time. There were 2 months we had the big boat hauled out in the summer where 0 work was done on the dinghy. I also think all the little items (boom, rudder, mast, sailing hardware, sealing all the holes, etc) took longer than the big items, like assembling/glassing/painting the hull. In any case we launched it for the first time yesterday here in Monterey, just at a nearby beach. Overall it went really well. The oars we used are only temporary, and much too cumbersome and heavy. I also don't love the bronze oar locks and might swap them out for something else. Sailing wise, even with both of us in the boat in light winds, I was really impressed. Really couldn't have asked for better conditions. One thing I noted is that it's very difficult to row the boat with the sail down, because the boom is in the way. It's much easier if the boom is lifted even a foot or so -- maybe it makes sense to carry a tiny little a-frame to prop the boom at the aft end of the boat up when needing to row? Hopefully we don't need to row very often while sailing... I also think I want to cushion the end of the boom somehow, as it contains lots of hard sharp objects that can easily do damage to the boat our our heads, but mostly the boat, like when it drops. Oh, I forgot to mention, I also added a brass strip to the keel line. Final check of everything Checking the lacing method we planned on using. The sail I built from a kit from sailrite, and used grommets in place of a sleeve so we can lace the sail on. This is nice as it lets us lower the sail and remove it whenever we need to. Loaded onto the car, luckily we're only a mile from the beach and the speed limit is 30mph. Got a lot of questions about why our boat was in two pieces. Just prior to first launching She floats! More stable than I expected, and only minor leaks at the bolts joining the two halves. Might need to think of some better rubber washers, or just tighten them down a bit more. She sails!!!


-
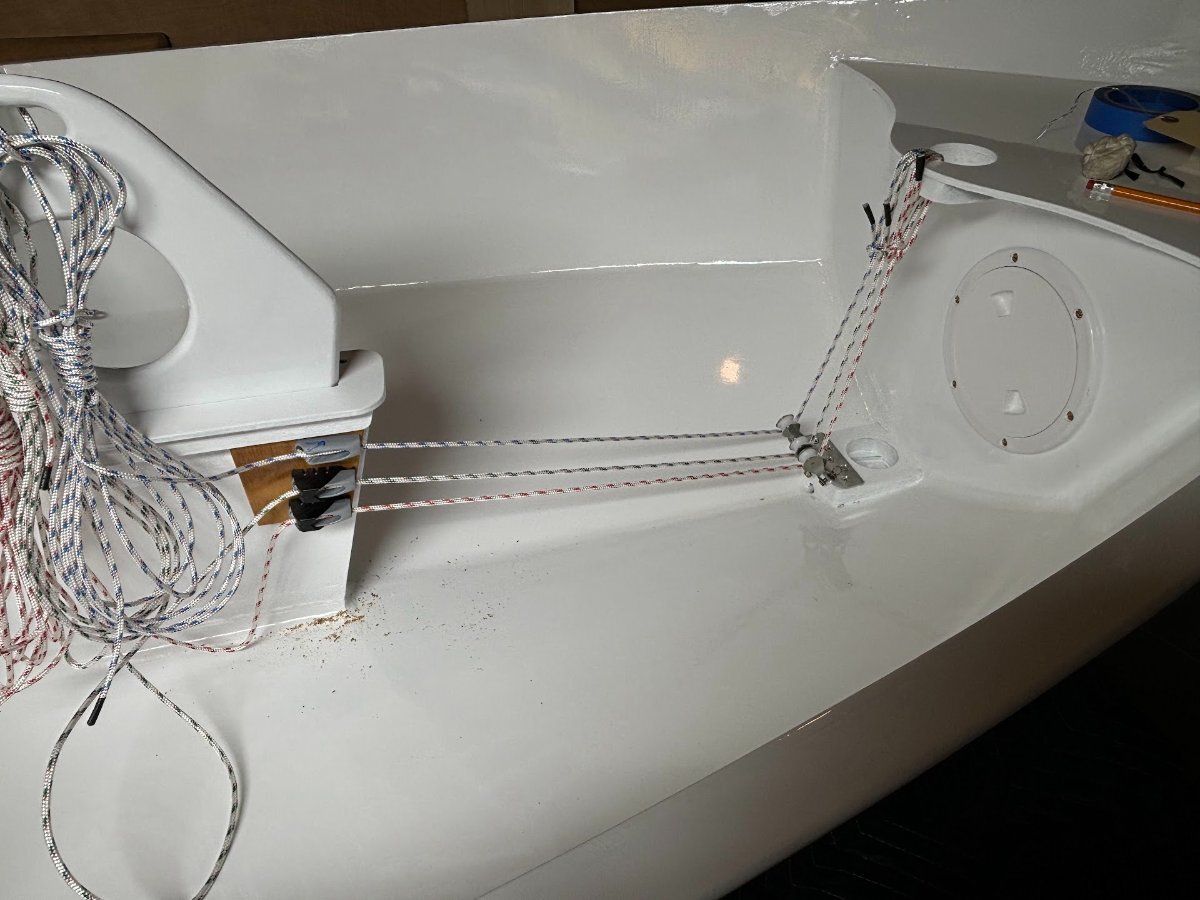
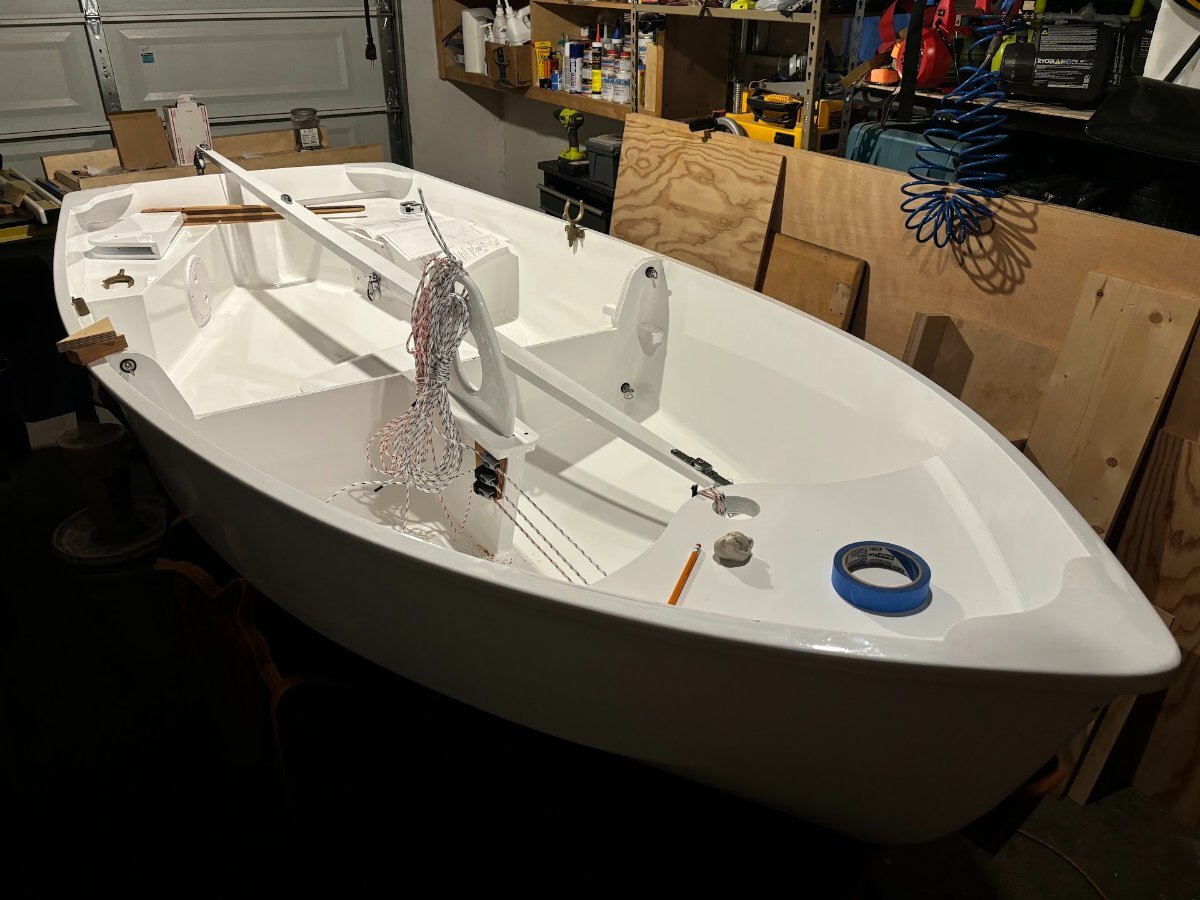
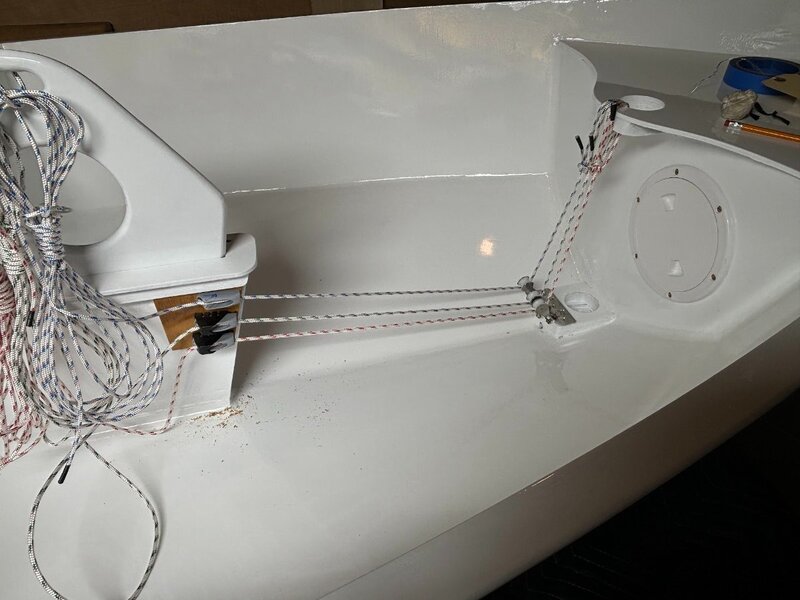
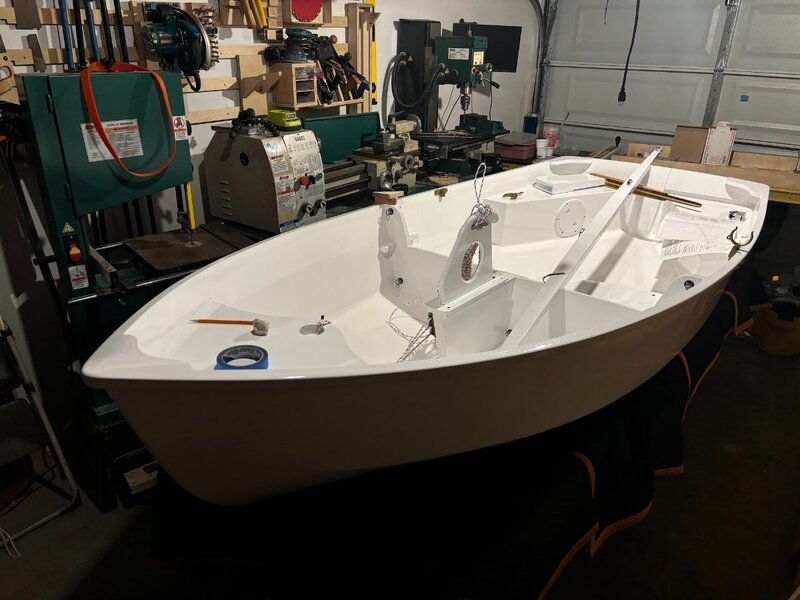
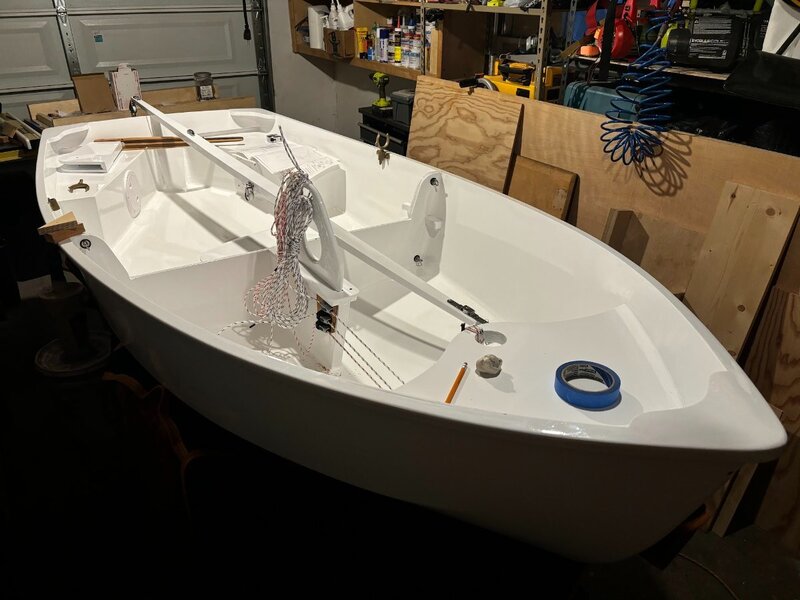
Coming in on the home stretch! Got most of the hardware installed. I still need to epoxy coat some of the holes for the fasteners and add the reefing block (but otherwise the boom is complete. For the cleats for the control lines, I ended up adding a piece of ply to provide more backing material for the screws. Haven't decided if I'll paint or just varnish this. The thwart is in the process of being varnished (not shown below), this is the only other piece of visible wood, besides the tiller, on the boat. I haven't mounted the rudder yet or glued the tiller in place, as I'm waiting on a longer pintle to arrive for the bottom of the two -- I didn't realize that the bottom one should be longer to make installing the rudder easier, and hence have 2 short-pin pintles. I also need to find a set of oars that I like. But otherwise I think we'll be splashing in a few weeks!
-
Trying to decide what piece of metal to put on our Spindrift 10 keel(s) to protect them from abrasion when we drag up on the beach and just in general if we hit something. I was thinking something like this: https://www.jamestowndistributors.com/product/product-detail/222 but bought much cheaper here: https://www.onlinemetals.com/en/buy/brass/0-5-x-0-125-brass-half-oval-360-h02-extruded/pid/23728 Idea would be to grind out the front and read end to be rounded off and smooth, and then glue it down with 4200 or similar, and add fasteners along the length. I'd pre-drill and countersink all the holes first of course. My only hesitation is that it's brass, but I'm not sure how much that really matters for this application.
-
I bought some bronze oar locks for the Spindrift 10 I'm building, but can't help but notice their weight. Given the dinghy will be our tender, that we'll frequently be lifting on and off the deck, and that it's fairly heavy already, I'm really trying to avoid adding extra weight if possible. Is there a better/lighter alternative than bronze oar locks? Maybe aluminum? Composite?
-
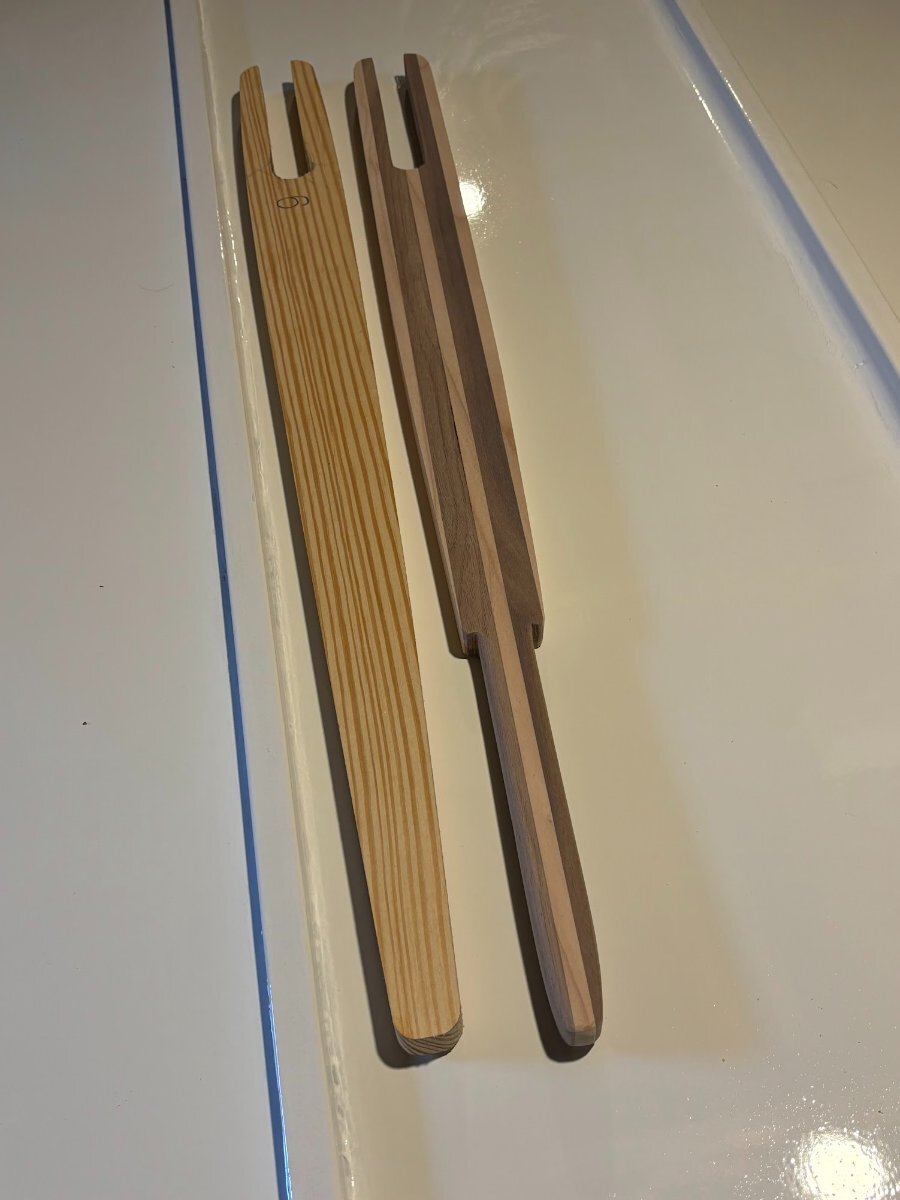
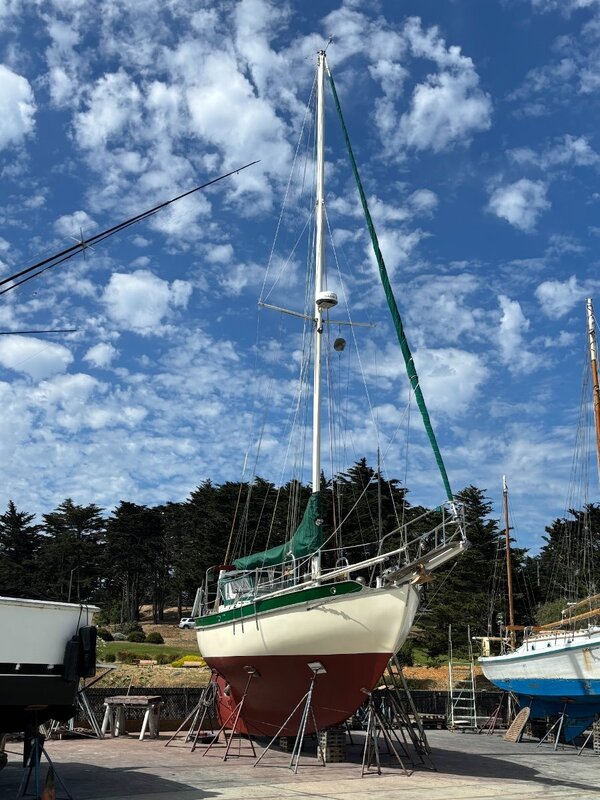
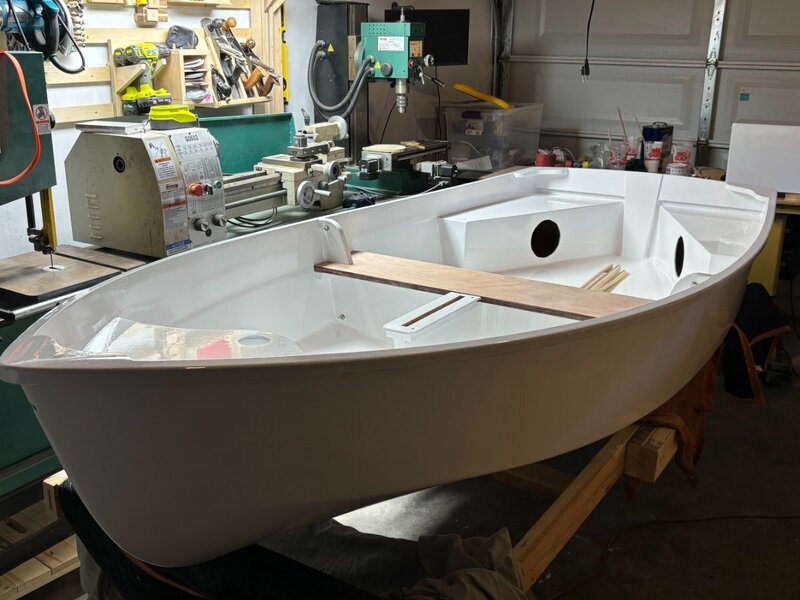
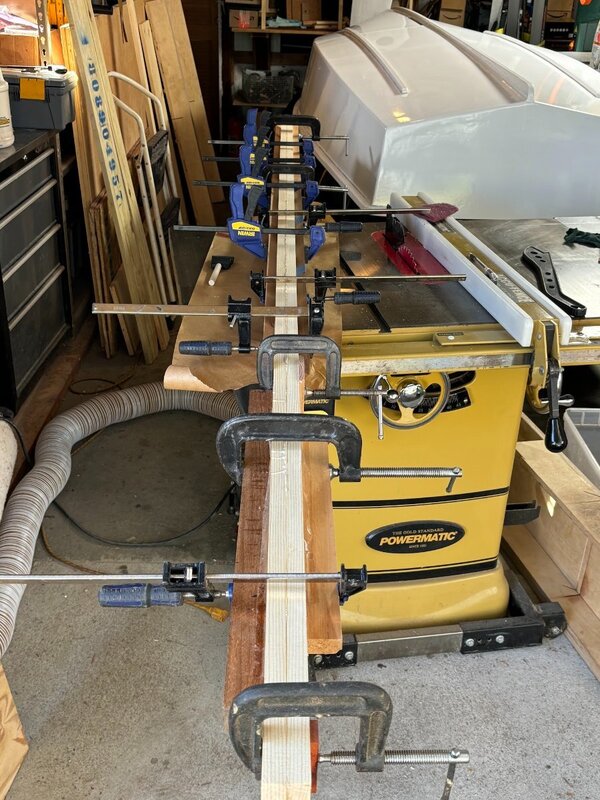
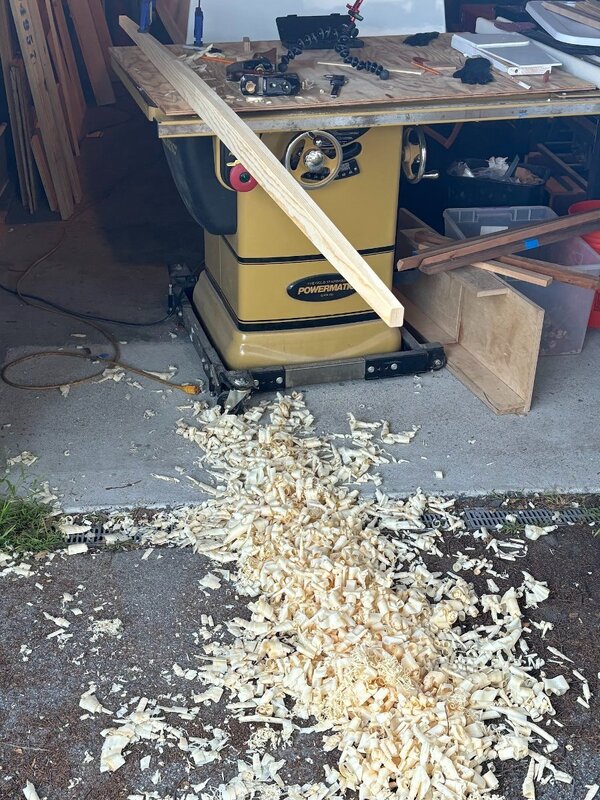
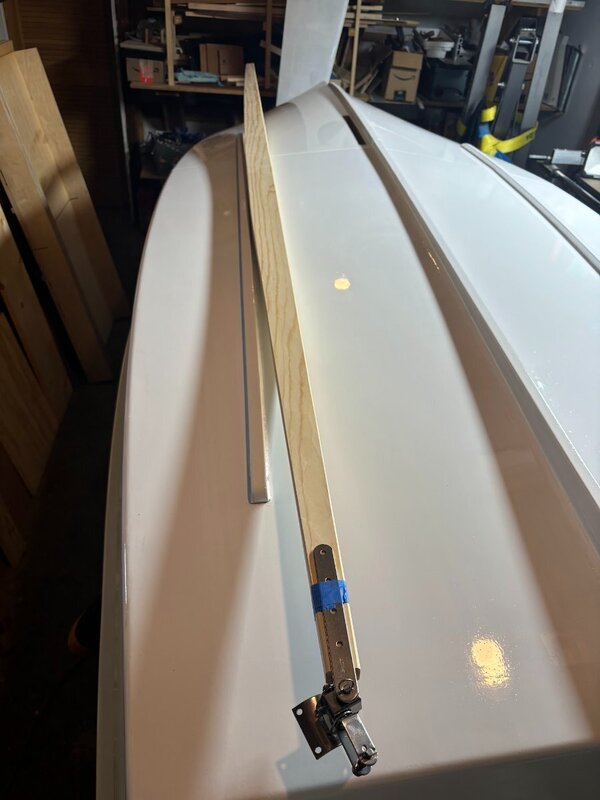
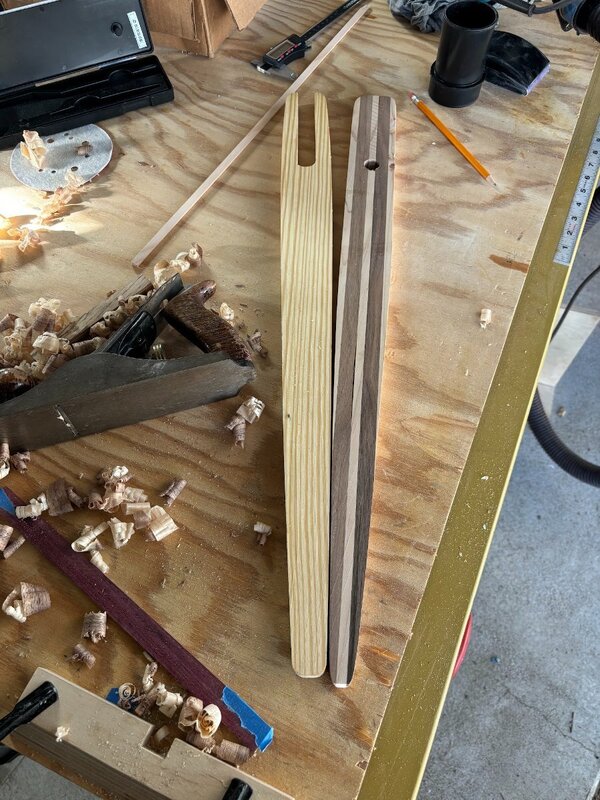
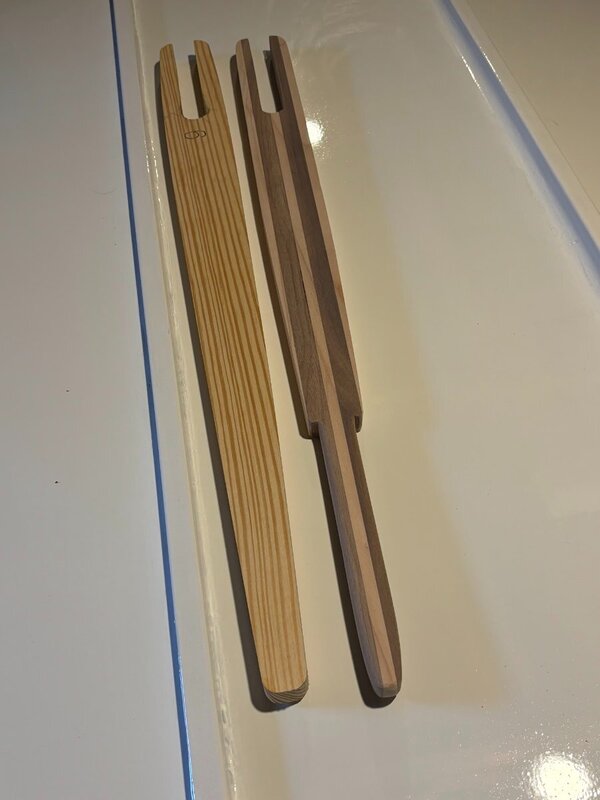
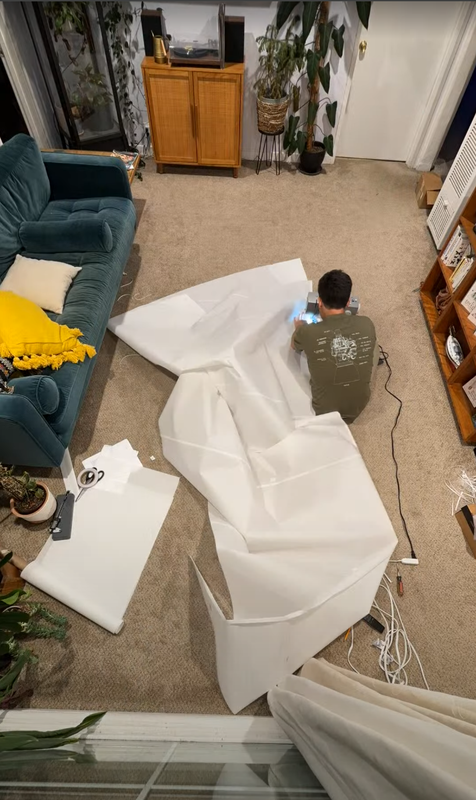
This build has not been abandonned! However, we hauled out or big boat, our Westsail 32, for the first time, and in the process discovered some things that needed some serious attention. Our 1-week haul out plan turned into nearly 6 weeks. We replaced all our seacocks and thruhulls as well as added one for a water maker, removed over two decades of built up bottom paint down to the gelcoat, repair 80+ 1/2" deep blisters on the starboard side of the keel, re-fitted some rigging tangs, repainted our green stripe, re-did the name, and some other misc. items. I moved my home office onto the boat, and spent almost every waking our working on the boat, so no dinghy progress was made in that time. Right before she went back in the water: However, now that that epic chore is over, I've been working on the dinghy again. This week I've added final coats of paint onto the boat, which includes getting the gunwales painted. I've also been working on fairing and painting the rudder and dagger board (not shown). For the tiller, I decided to make an accent piece out of walnut and ash, rather than using the pine. It's not done, but I think I'm more or less satisfied. I also was able to get the boom built. I didn't have any suitable 2x4s of clear fir, so I used two 1x4s glued together with their grains opposed. I figured this will probably result in a more dimensionally stable piece of timber anyway. Because the plans call for tapering in two axes, I did one with a jigsaw (the side) and cleaned it up with a hand plane, and the other axis I did just with a lot of planing. But because it's a pretty soft wood, this only took 30-45 min. Oh! I almost forgot, I also sewed up the sail! Next up: Get some epoxy coats coats on the boom Glue the rudder assembly up Paint the boom, rudder, and daggerboard Add grommets to the sail Varnish the seat and tiller Add the gudgeons Add the rigging hardware

-
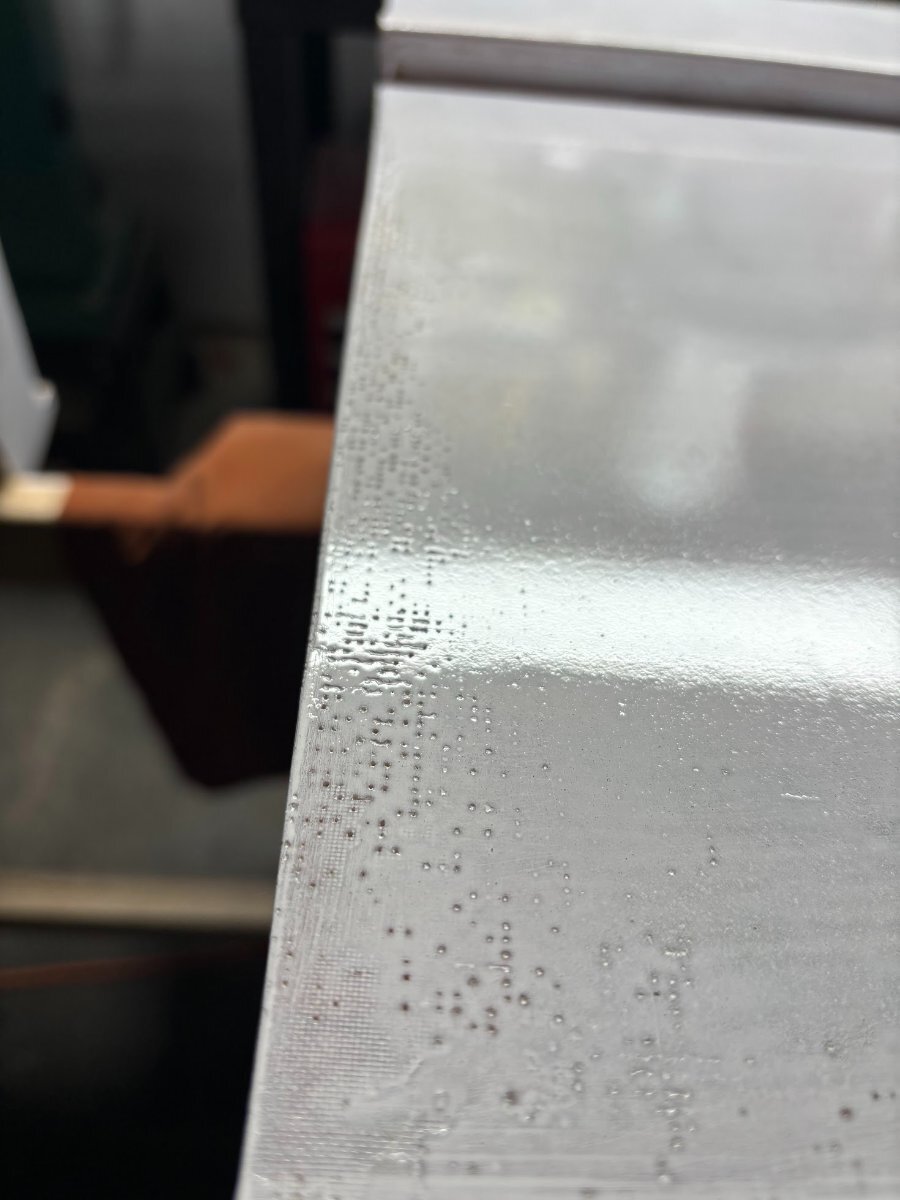
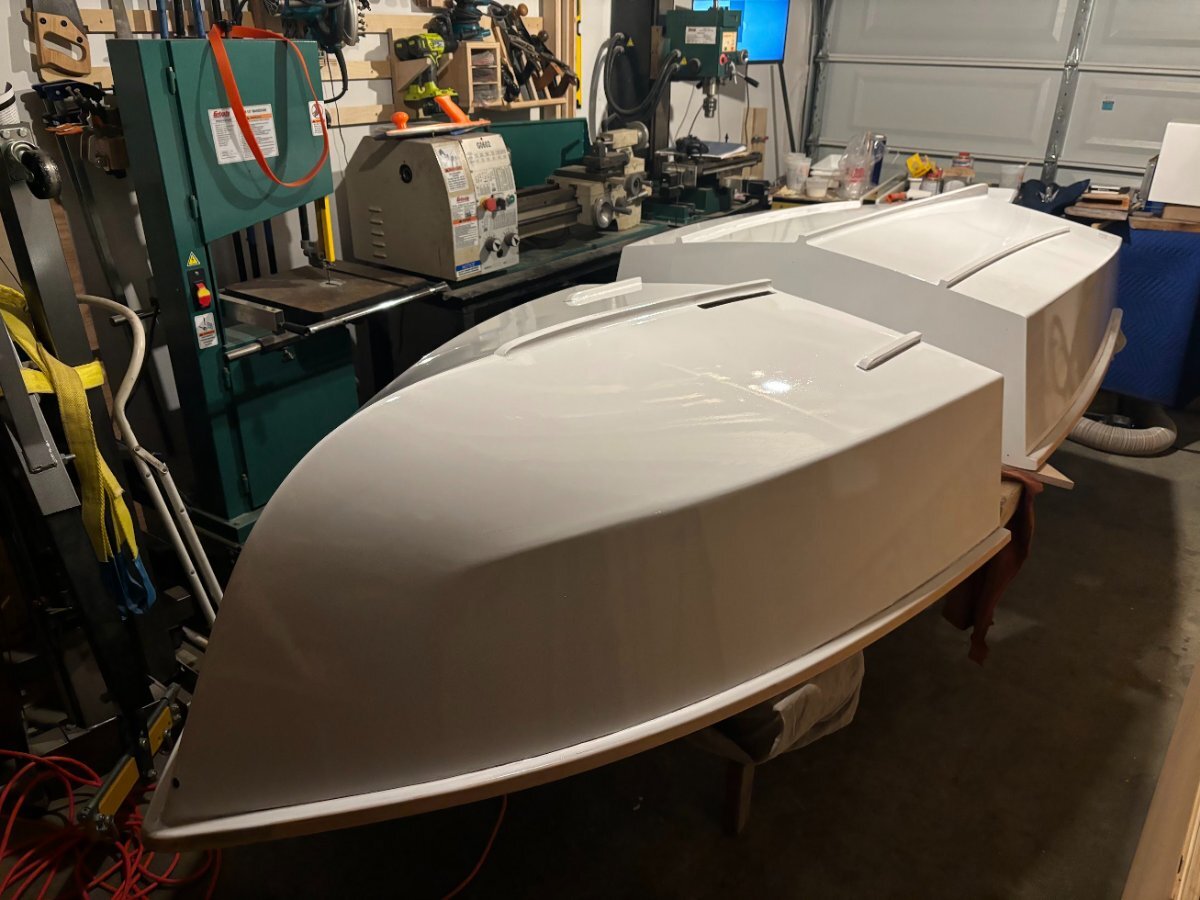
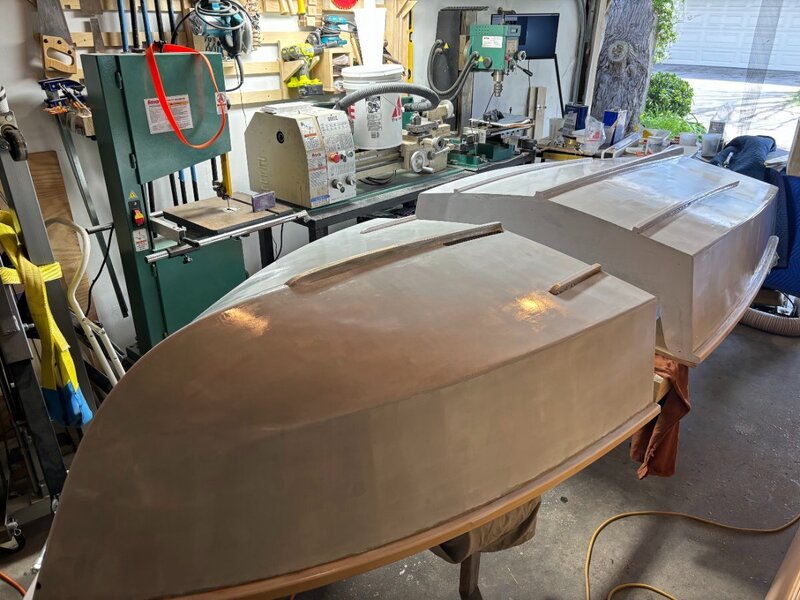
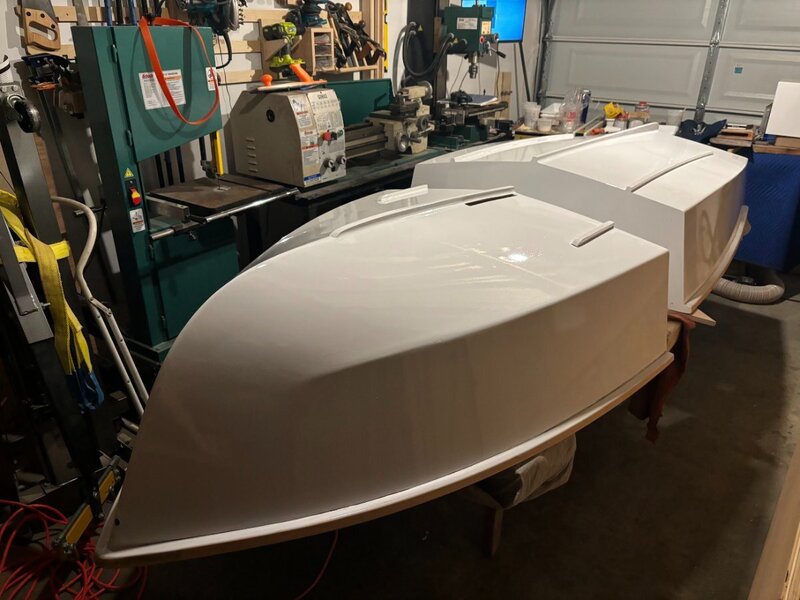
Finally got the paint on the hull. It has taken 4 coats (albeit I'm thinning the paint 5%) so far, and I might do one more coat. Each coat was a little less than 200g + 100g A:B, so 300g of paint. That's about 2.5 coats per can, if you can pour out the perfect amount of paint. I used left overs from each session on other boat projects (making some LiFePO4 boxes for the big boat). I think if I had used a primer it would have only taken 2-3 coats. The primer would have also revealed the defects without having to "waste" a coat of the paint. Instead, I painted directly on the glassed hull, and the first coat revealed quite a few pinholes that I went back around the boat and filled with the green fairing compound. Again, if I had a white fairing compound, I think fewer coats would have been need to full cover. We tried rolling and tipping, but the tipping honestly looked worse than just rolling the paint, maybe we need a different brush, or maybe the consistency of the paint wasn't right. Here are some of the pin holes I later filled. Notably these are caused by poor application of peel ply. First coat of paint barely covers, but starts to make the boat look alive. After filling the holes, and adding 3 more coats, things are looking really good: I'm not sure if I should just paint the gunwales, or epoxy seal them first like the rest of the wood on the boat. I'm pretty sure the paint will provide a good seal, but I would also hate to have rotting gunwales in a few years because I didn't take the time to epoxy coat them first. I guess we'll see. I'll use the left over paint, and another can I have coming, on the thwart, daggerboard and rudder.


-
After finishing the primer coats, I found some defects/pin holes that I wanted to address so I went back with fairing compound in a few places. I should have followed up with a primer coat in these areas, not so much for paint adhesion, but to reduce the number of paint coats I'd need to obscure the green fairing compound. But, I was out of primer, and my order for more primer and paint just got delayed a week. In any case, I moved on to painting with the 2-part Epifanes Polyurethane. I also only have one 750ml can of this as I'm waiting on the same delayed shipment. It seems like 1 can gets me about 2 - 2.5 coats. It's really unfortunate that the paint is delayed, as I was assuming I'd be able to apply the 3rd and maybe 4th final coats without having to sand -- since the recoat window is 48 hours. I'll try to see if I can obtain the paint locally, but it's not looking good. But hey, the boat is starting to really look professional now!


-
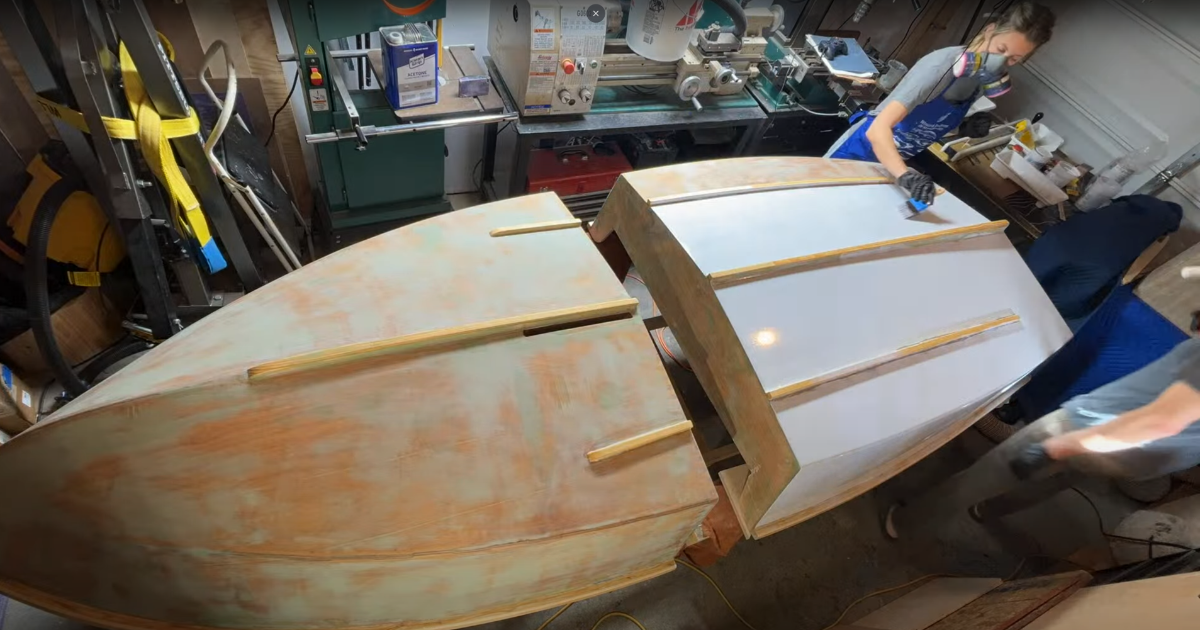
Ah, the day is finally here. Painting has begun! I'm using Epifanes 2-part polyurethane paint and primer. So far I've only put 1 to 2 coats of primer down -- a few places still need their second coat. The first coat I did on the aft side I did not have brush thinner for, and as such, it went down very thick and was not at all easy to apply, especially in corners. I also was using a nap brush rather than a foam brush. After this coat cured, I sanded it pretty good with 220 grit to flatten out any drips etc. But for the fwd end and subsequent coats, I am not sanding, as long as I re-coat within 24-48 hours. The fwd end and subsequent coats I used a foam roller and 10% Epifanes brushing thinner. Those were a piece of cake, and for the detail areas I used a synthetic brush. For the hull corners though, I actually just pressed the roller into the corners after I had laid out most of the paint from the roller. That worked very well. For those wondering about quantities, I used 1 x 750ml can of primer (2 parts) and that got me almost 2 coats. I think it might have gotten me 2 coats if I had used brush thinner the first time around. It's honestly not totally clear if I needed the primer. Epifanes says a primer should be used on epoxy, but I also know people directly paint their epoxy boats with paint. I'm waiting on a fresh order of paint and primer, but I think I will get into actual painting this weekend. Then I will need to flip the boat.



-
I am now in the phase of the build that really seems to be the slowest. I haven't had a lot of time to work on the dinghy, in the last few weeks, but when I have, a lot of my time has been spent sanding and fairing. I think I'm letting perfect be the enemy of progress now though, and honestly, this will be a working utility dinghy for us, it's not going to be a show boat. In any case, here's where things are as of today. I've added the bow-eye reinforcement, and drilled the hole for the painter. It is very slightly off-center, but that's ok. I used a block of cherry cut to fit the bow, epoxied it in place, and added 6 layers of glass tape tapering outward. I'll need to come back here later and add some thickened epoxy to clean up the tape lines/etc. For the rest of the interior, I spent a few days sanding everything thoroughly, and went around inspecting for defects. After a lot of consideration, I decided to use fairing compound to correct some of these. Again -- they wouldn't have been noticeable at any reasonable distance, but I couldn't help myself. Afterward I added one last coat of epoxy over everything. I think this is 3-4 coats in total, depending on the location, but I sanded pretty aggressively in the fairing process. I'm hoping this finish coat will only require an amount of sanding purely necessary to provide the mechanical adhesion for the paint. I also got most of the rigging hardware. This week I plan to paint if time/conditions allow. I should at least be able to get the primer on. Once the interior is painted, I'll separate the two halves and flip the boat over. I need to do a quick repair on one of the nesting bulkheads, and apply some epoxy to the strakes and keel, but otherwise the hull is ready for paint too.


-
Sometimes I wish I was on a tight schedule so I'd have an excuse to stop fairing! Got the boat outside to more easily clean off the amine blush, as well as fit the mast step (can't get the first mast section to fit inside the garage). It was actually pretty satisfying to hear water sloshing around inside the dinghy for the first time. Made me excited for when we get it out there for the first time. Mast step epoxied in place: Back in the garage I spent a solid day sanding. I've really about had it with the Total Boat epoxy for coating work. It does say that it's not designed for finish work, but it's hard to decipher for what reason exactly. In my experience though, it has a tendency to bead up more easily, and doesn't self-level as well. Here's an example of the sorts of imperfections I'm still left at in places after sanding. I didn't want to sand them completely out yet since I think I'll burn through the adjacent areas in the process. I decided to do another coat of epoxy. Partially because I sanded so much of the other ones off, but mostly because I wanted to reduce the imperfections as much as possible before switching to fairing compound, if that's what I decide to do. Luckily, I have some Resin Research epoxy from a few surfboards I built. This stuff is designed for finish coats and you can add a bit of xylene (they call it Additive F) to it to improve it's self-leveling qualities (at least I think that's what it does). I figured I might as well give it a shot. I think the result came out a lot better already, though it hasn't yet cured. I think maybe one problem I was having with the total boat epoxy is my own fault though. I was using a tack-cloth as my final prep step, and I think this is a mistake. I think some of the wax in the tack cloth contaminates the surface. I should have followed the tack cloth with an acetone wipe down.


-
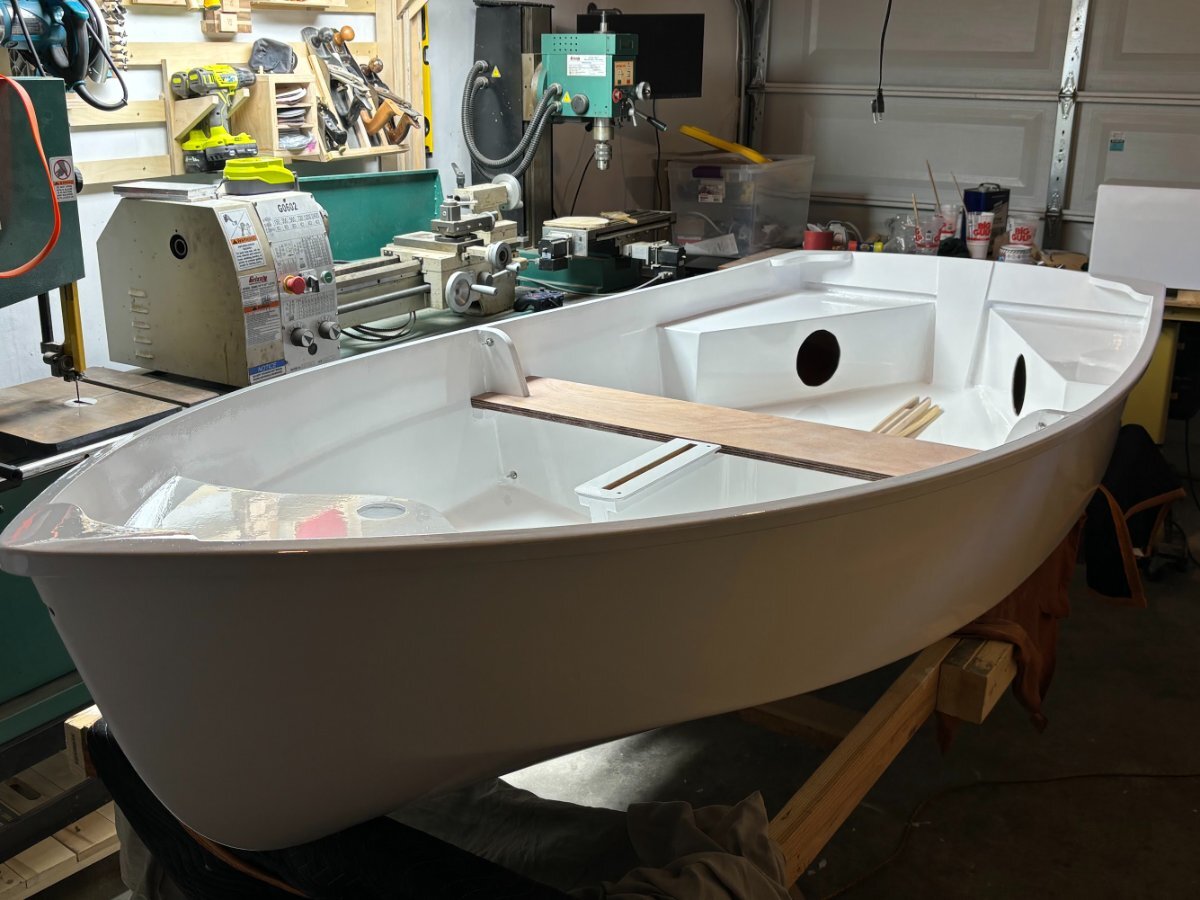
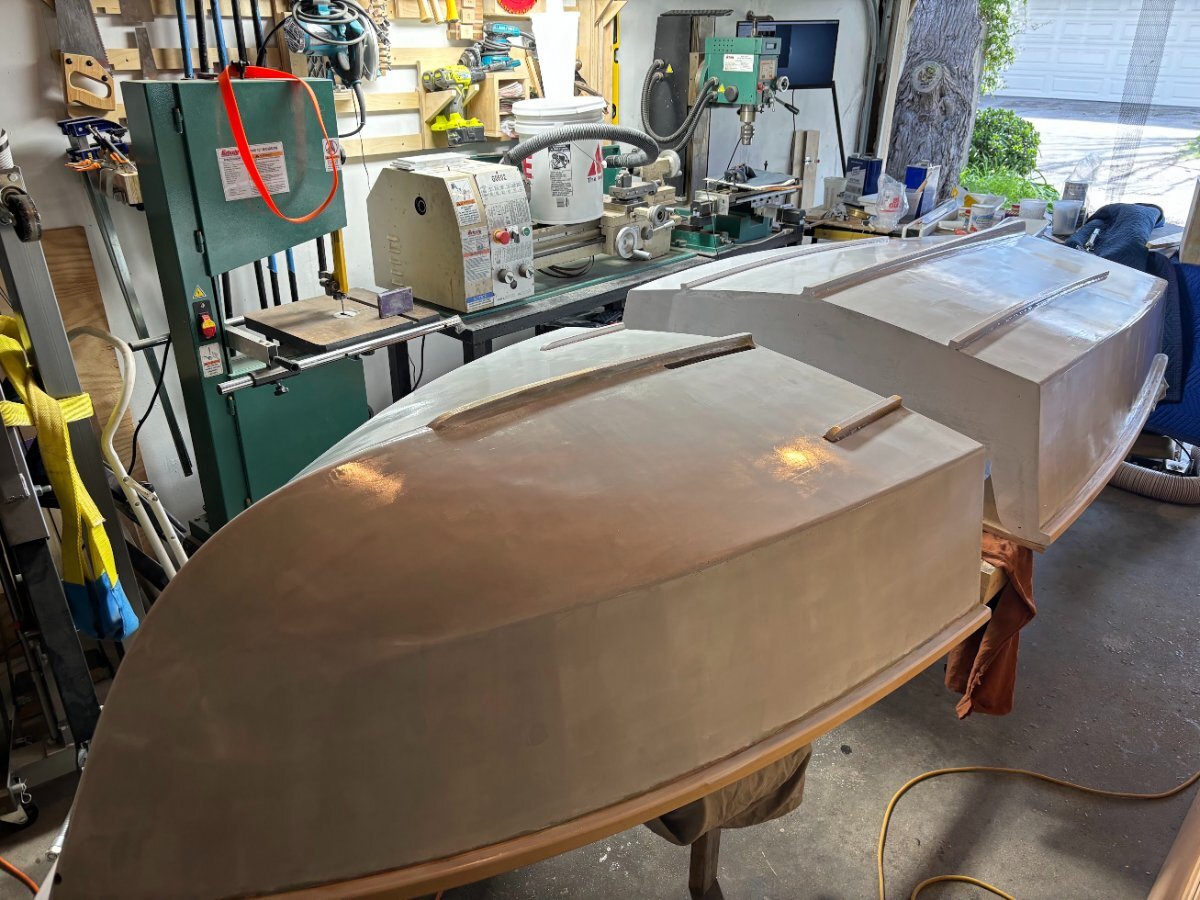
Work has progressed slowly the last two weeks owing largely to strong storms here in California that also knocked our power out for 3 days and projects on the big boat. That said, the hull has been faired (two passes with fairing epoxy fairing compound and lots of sanding). After the first pass and the 2nd application of compound, but before the second sanding: You can also see in this photo that I wrapped the rubrail around the stern. Once the boat was flipped again, I spent a lot of time sanding down the edges of all the tape as well as other places that were not very smooth. This was honestly a lot of work. Most of my fillets are pretty good, but the last ones I did on the trunk were superb in comparison. I recommend anyone doing glass fillets for the first time to practice a few and nail down a good technique. It will save a lot of sanding and back-filling later. I also fitted the wooden pieces that support the middle thwart. Here I am just using weights to hold things in position as the epoxy cures for the supports: Tonight I got 2 coats of epoxy on, and will put a 3rd on tomorrow. I'm using a slow-cure epoxy for this, and temps are low, so I should be well within the tacky window tomorrow still. I'm using a roller, which works ok. My epoxy (and probably all epoxies) seems to be really sensitive to any sort of surface contamination. Despite what I thought was a rigorous cleaning, I still have places where the epoxy wanted to bead up. It's possible I sanded blush into the surface, but I thought I cleaned all my epoxy surfaces before I began sanding. I still need to fit the mast step, and re-enforcement at the bow for the tow line. I also need to finish shaping the rub rai and add coats of epoxy to these as well as a few other bits. Then I'll probably go back around the boat and add a bit of thickened epoxy where it's needed to correct any imperfections. Next week and weekend I'm travelling for work, but hopefully I can have paint on the boat before the end of the month.


-
I bet it was very satisfying to see if it fit on deck the way you hoped! I'm looking forward to that moment as well. Maybe you've seen it, but Florence has an A-frame and deck brackets that they use to stow their dinghy:
-
Those are some shiny oar locks! With nails and other hardware going into the boat, is there a concern about water ingress into the wood? Does it make sense to use a sealant when installing hardware?
-
I'm drooling over here. I've decided to go with Epifanes (which I just learned is pronounced epi-fawn-ase) based on the advice above, availability, and ease of ordering. Are you guys planning on building the rudder and dagger board later?
-
Interesting. Are there other 2-part paints that you guys recommend available in the US? I'm leaning towards Awlgrip since I know it won't be going away any time soon given its popularity, but I also know it's finnicky (not sure if it's any more finnicky than the other two part paints). Boat looks great!
-
Looking great! Seeing the paint go one makes me excited to get to that step. I'm still trying to decide between a two-part paint like Perfection, or an easier 1-part paint like Brightsides. I understand that the 1-part paints are easier to touch-up and repair, and I painted my last full-sized boat with a 1 -part paint, but I also understand they'll potentially need more frequent maintenance. Do you know how much paint you're going to need to get the coverage and coats you're looking for?
-
Wow, she looks great with the primer on. What primer are you using? I think in a way you should count your time constraints as as blessing. Without time constraints, you can spend so much time sanding and fairing every little imperfection out of the boat -- and ultimately no one is going to notice these but you.
-
You're officially ahead of me now, good job! I haven't decided whether I want to drill a hole in the bow, or use an eye-bolt, but I think you made a good choice to prevent damage from it bumping into things.
-
Looking great! Word of caution while doing epoxy work with the hulls re-mated: I added a fill coat and in the process accidentally glued the two hulls together in one small spot. In trying to cut the epoxy away, I managed to cut into some of the glass on the nesting bulkhead faces, which wasn't a big deal, but was a headache.
-
That's a great idea and definitely one I'm going to adopt. The smaller we can pack away the mast, the better.
-
Got the bushings completed on the mast sections. will probably sand down the front of the bushings a bit more to provide a smoother transition between segments, since I plan the sail to be laced to the mast, and I don't want it to get caught on these transitions when lowering. After sanding: