Scott Pettigrew
-
Posts
54 -
Joined
-
Last visited
-
Days Won
4
Content Type
Profiles
Forums
Events
Everything posted by Scott Pettigrew
-
I would probably fill each hole with thickened epoxy, but I already have some on hand from another project. If my choice was between buying epoxy and wood flour or buying new cedar I'd go with new cedar.
-
A lot of effort for something that's flimsy and won't last. On the other hand, after paddling this maybe it will motivate them to build something more substantial.
-
That's some good advice. I didn't have a fantail to contend with, but was concerned about numerous wrinkles and bunching. Shrinking the fabric solved much of it (I was using Nylon). Your last point is very true. Every project has flaws. Usually only the builder can see them. Once you get on the water all will be forgotten.
-
 Regarding knots and lashing, Jeff covers them in his instruction manual and his YouTube video here: Even though I didn't end up finishing my Cape Falcon kayak, I had already paid for their Skin on Frame Kayak Building Course (https://cape-falcon-kayak.thinkific.com/courses/kayak-building). It's not cheap, but probably much cheaper than an in person course. Why should you buy it? I still watched the videos, particularly some of the details on building a coming, lashing the gunwales, keel, stringers, and skinning the boat. He provides great detail on stitching the skin, stretching it, getting out the wrinkles, applying a two-part urethane, etc. You can watch the free prep course (https://cape-falcon-kayak.thinkific.com/courses/skin-on-frame-kayak-building) to get a feel for what the videos are like. An additional note regarding what build method you should use, I have also built a stitch and glue canoe (Sassafras 16 from CLC), and a strip built sailing canoe (https://duckworks.com/ulua-plans/). While I don't have the experience level of Dave, my opinion is that skin on frame is absolutely the best way to go for a kayak if what you want to do is get on the water quickly, cheap, and not throw your back out hoisting the thing on the roof. The other methods produce a strong and beautiful boat, but take more time and money. The other build techniques have their place. I'm planning on building a small sailboat using stitch and glue in the near future.
 -
In regards to question #1, I started building one of Cape Falcon's kayaks and was probably 2/3rds finished with the frame when I shelved the project and went with KudzuCraft instead. The amount of print and video material on "traditional" skin on frame is probably what swayed my decision initially. It seemed to be what most people were doing, so the masses must not be wrong....right? ? What changed my mind was when I started discussing with the designer my steam bent ribs, and he was talking about how if they are off by just a half inch it could dramatically change the stability and/or performance of the boat. It was becoming more art than science. I think had a I finished the kayak all would have been ok, but didn't want to waste any more time on a potentially poorly functioning boat. Another thing about the traditional method that makes me chuckle is how some of the builders act like they are paying homage to the Inuit. While the completed frame may roughly resemble what the Inuit built, nothing about the process is the same. I'm pretty sure the Inuit didn't have table saws and plunge routers. Once I realized that the way the Inuit built boats was based on the materials and tools available to them and not on what is the best method TODAY based on modern materials and tools, the decision on picking a design was easy. Bottom line, I think the Kudzu Craft designed boats are far superior. Not only do they provide a more accurate and consistent hull shape, but they are stronger (my opinion), easier and quicker to build, require fewer woodworking skills/tools, and possibly cheaper. If you decide to go the traditional route, I'll give you my partially finished CapeFalcon frame. You just need to drop by KC to pick it up. ? Regarding the skills/tools needed, one idea is to tap into the local woodworker/boatbuilder community. Here in KC we have a woodworkers guild. Members have access to a fully equipped shop plus the expertise of the members. Something similar probably exists in the SF area. Additionally, if you read through the threads posted here you'll find the answer to almost every question imaginable. Good luck! Scott
-
@Hal Hammond Thanks for the report. I'm about the same size as you, but would probably opt for the bigger boat. However, I'm leaning towards building a short shot next; would like to experience the multichine design. Decisions...decisions. ?
-
@Hal Hammond Very nice. I'm reading the description of the Ravenswood LV on kudzucraft and the low stability discussion. How do you perceive the stability related to other kayaks? I'm thinking this might be my next kayak build. I like the lighter weight and shorter length relative to my Vardo.
-
27 lbs is light. I'm no engineer, but I think the 3/8 will be fine. What color is that?
-
I didn't use polyester, but can probably answer #3. The pigment is mixed in with the urethane, therefore if the urethane works on polyester, then the pigment will work.
-
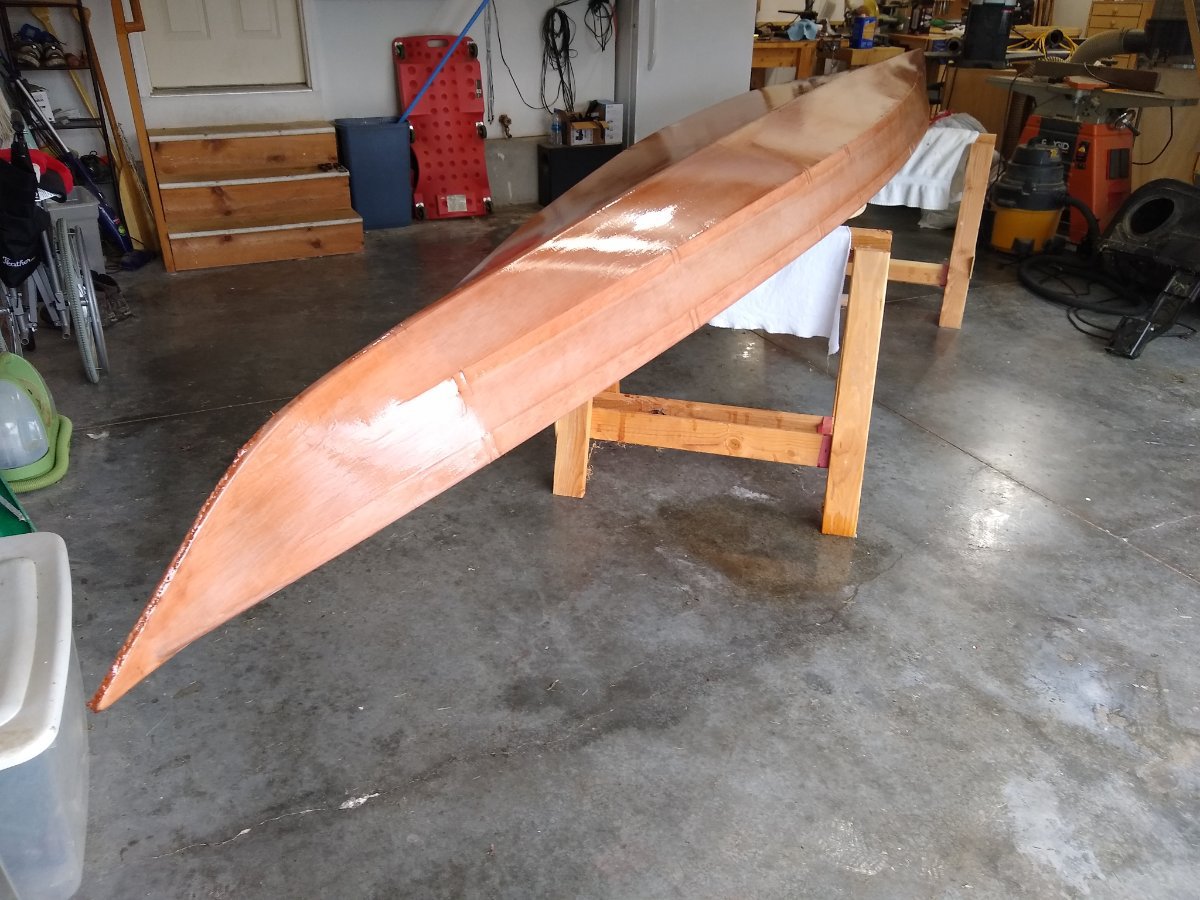
Thanks. Turned out better than I expected. Skin Boats (https://www.skinboats.org/) provided the pigment and they recommend only using a small amount...adding just a teaspoon at a time until the desired color is achieved. Thing is, I never was happy with the color and ended up using all of the pigment to get the color dark enough. Although there are many drips and runs that you can't see in the pictures, I'm satisfied with the final result.
-
I should preface my comment by saying that I have very little experience in a kayak. I rented a plastic sit on top kayak once on Waikiki beach...that's it!! Compared to that the Vardo felt less stable but much faster. I'm also not sure I have the turning technique down yet. I started out with a 1.5 in foam pad and then chucked the pad to see if the boat felt more stable just sitting on the floor boards. It did, but could just be me getting used to the boat. I don't think stability will be a problem, it's just a newbie adjusting to the environment. Although sitting on the floorboard was ok for a short paddle, I plan on cutting down the pad to .75 in and going with that. Probably need a little cushion for longer seat time. I was using a store bought paddle but intend to build a Greenland when time permits. The back pad slid down a little, so an extra screw or two will be inserted to remedy that issue.
-
Finished weight came in at 33 lbs. using 8oz nylon and 3 coats of 2-part urethane. The color is burnt sienna rare earth pigment mixed in with the urethane.


-
I'm adding my experience with the two-part urethane as it might help someone in the future. As Jeff mentions in his book, getting the mix right is critical. I've applied gallons of two-part epoxy and never had any trouble, but the urethane is much more sensitive to having too little of part A, the hardener. After applying 3 coats to the hull and waiting 72 hrs, the urethane was still slightly tacky. To remedy the situation, I mixed up one more batch but went slightly heavy on part A, roughly 4oz of Part B to 2.5 oz of Part A. This did the trick, and the urethane fully cured in about 24 hrs. I think what happened initially is that a disproportionate amount of Part A was remaining inside the measuring cup because it's more viscous that Part B. When I flipped the boat to do the deck, I measured a smidge higher on the Part A and also used a stir stick to scrape the inside of the cup and make sure I removed as much as reasonably possible. Lesson learned: Measure carefully. Get all of the stuff out of the measuring cup. And if you are going to err, err on the side of too much Part A.
-
Looks good in the photo. Not so much in person. Not sure I'll go with this finishing method again. Need to see how it ages. I used burnt sienna pigment, which has the unintentional result of looking like varnished okoume.

-
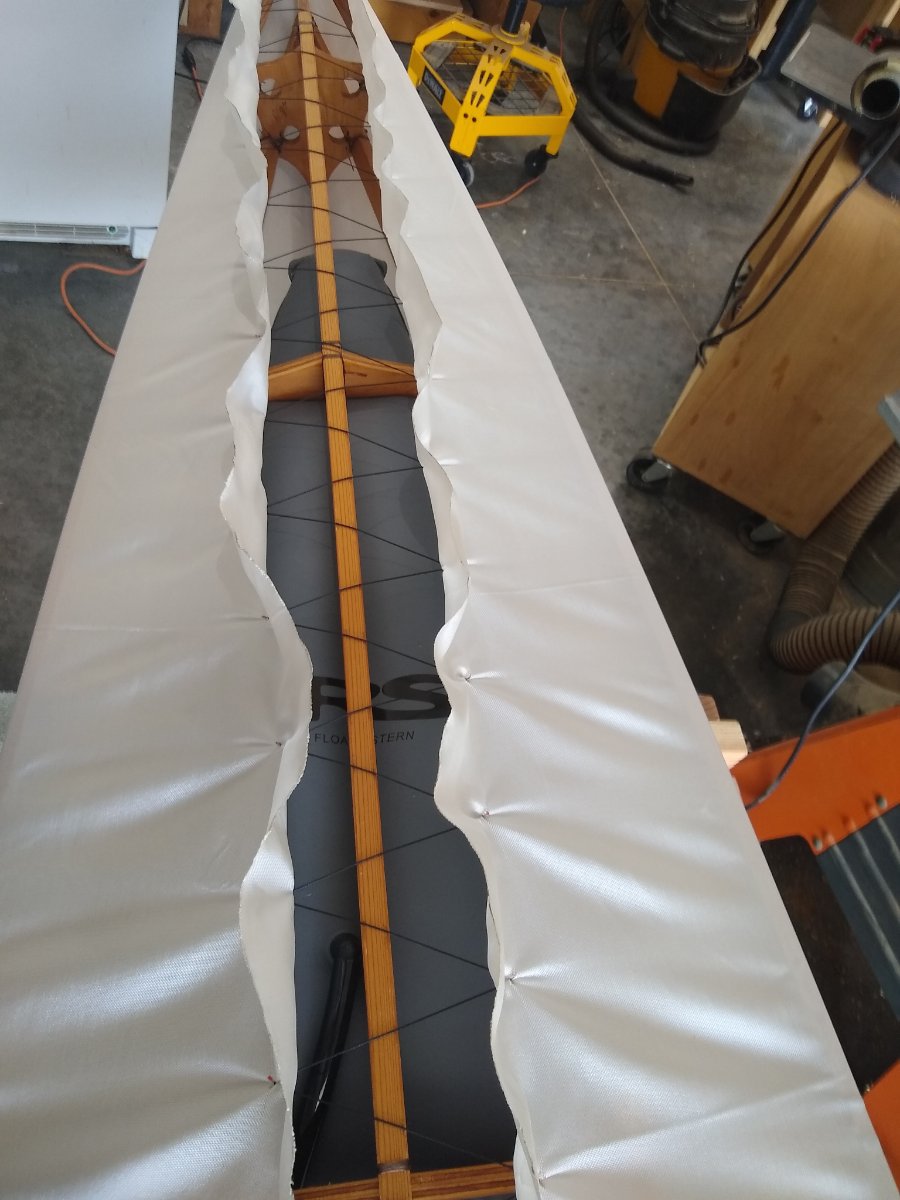
I'm applying the two-part urethane today. It's a long story, but I previously paid for the Cape Falcon Kayak course and decided to use the skinning and coating method recommended by the proprietor of that company. My skin is thus 840 X-TRA Tuff Ballistic Nylon, covered by the two-part urethane that I colored with rare earth pigment. I also did the lacing system where you tighten up the skin before actually stitching, and then after stitching everything, hose down the entire boat. When it dries the skin is super tight. Looks wrinkled in these photos, which are before I soaked it. Not sure if I like the pigment infused urethane approach. Doesn't look the greatest, but I'm sure once it's in the water I won't care.


-
This is an old thread, but I have a urethane question I didn't see addressed. Can you apply a coat of urethane over a fully cured coat? I know with epoxy this is a no no without sanding. I'm think that even after 3 coats I may want to come back and do some touchup. Will a new coat adhere if the underlying coat is fully cured? I'm using the 2-part urethane from the Skin Boat Store.

-
Kudzu is right about the scarfing. I used scarfing to make deck beams out of cutoffs I had laying around. Here's a tip that might help. My side deck beams were too pointy where they met the laminated beam (red circle) and pushed on the skin. I didn't realize it until sewing up the skin, but was able to reach in and sand them down before fully tightening up the fabric.


-
I'm with Dave. I would try and replace the wood with a solid piece. I do use penetrating epoxy, but as a pre treatment for new wood. Not to fix rotted wood.
-
No, I have not, but if you want to try brass I found a supplier with good prices. https://www.onlinemetals.com/en/buy/brass-half-oval
-
Great job!
-
I've done some woodworking when I had no place to do it but a parking lot...it is a challenge. A good jigsaw and blades designed to cut plywood do make a difference. I would not try and cut them to the finished size, but cut them slightly on the small size and then use a flat file to fine tune once you get your keel and other pieces cut; that way you'll have a nice snug fit. Regarding the edges, using the trim router should be easy to learn, and once the bit is adjusted properly is fairly hard to screw up. Good luck!
-
It's difficult for me to estimate build time because I break it up over many months, sometimes going weeks doing nothing. This is partly due to my work schedule that has me on the road for much of the year. However, one thing I know for sure is that skin on frame using the Kudzu method is faster than strip built, stitch and glue, and "traditional skin on frame kayak building, all of which I've done. I think the other factor that will affect build time is the tools you have. Necessary woodworking skills are rather minimal, but could also slow you down. Why is cutting out the frames taking so long? Are you using a coping saw? For me, I'd say cutting out the frames was a couple of hours, but I have a bandsaw ?. Cutting the keel, gunwales, and stringers about another hour, but I have a table saw and planer ?. Scarfing and gluing up those pieces was maybe another hour. Let them dry for one day. Putting the frame together with bungy cords was quick - < 1 hour Tapering the gunwales and stringers ends with a hand plane was maybe a couple of hours. Lashing took me the longest time. I did it over roughly two weeks, with the the goal of doing one frame per day. This took at most one hour each lashing session. For my coaming, I laminated multiple thin strips of white oak, waiting for the glue to dry between strips; this took about a week. Getting ready to skin now, which I'm guessing will test my sewing skills.
-
Ones motivation for reducing boat weight should be considered. For me, I want a boat light enough that I can single-handedly mount it to the roof of a car. The last boat I built, a stitch and glue canoe made with 1/4" okoume, came in at 80 lbs. Too heavy to easily lift over my head, but it's great once it's in the water. For me, wether my Vardo is 30 or 35 lbs is inconsequential considering my current fitness level. Maybe when I'm older I'll think otherwise. ?
-
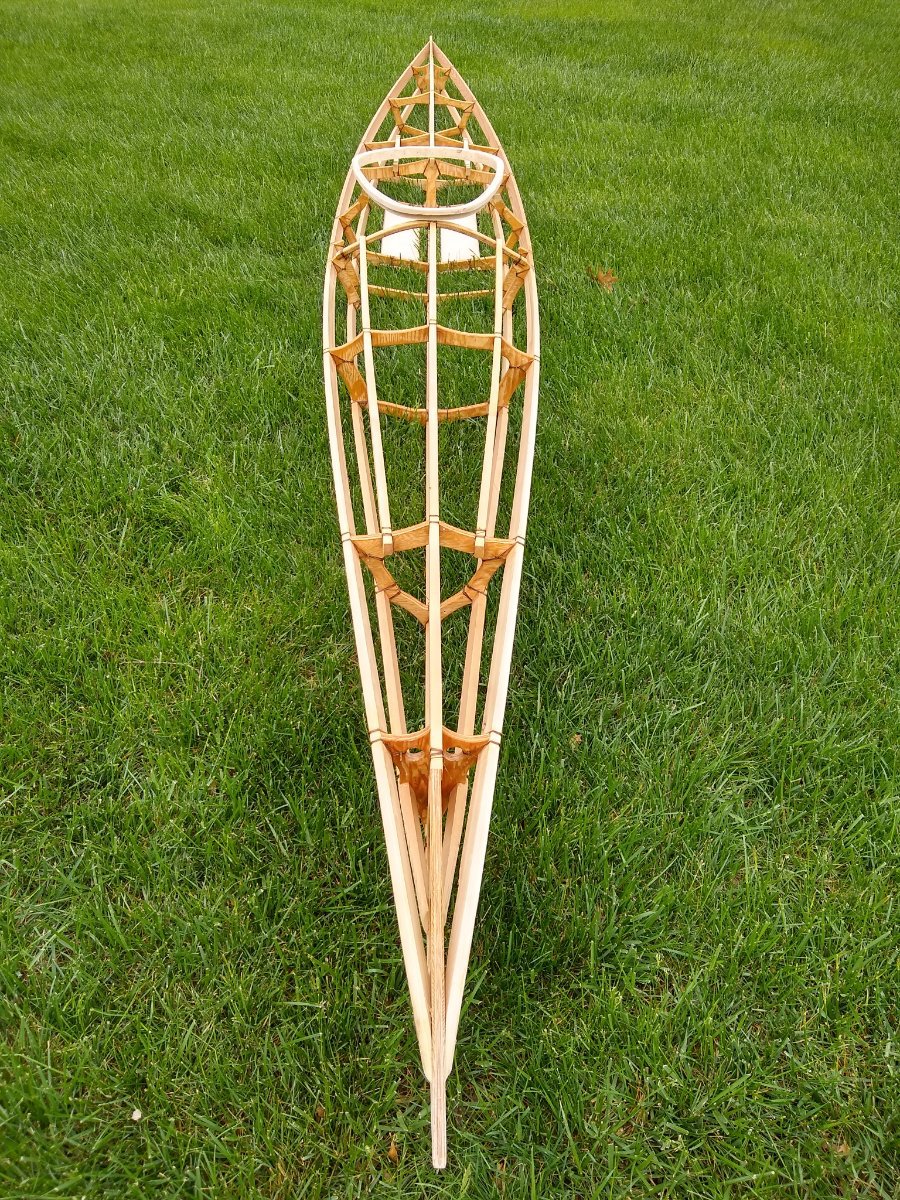
Thanks. I don't know if anyone has told you this before, but I started to build one of the "traditional" style skin on frame kayak's with the steam bent ribs. Not only is steam bending by hand more art than science, but as I talked to the designer he started saying things like "if the distance from rib "X" to the deck beam is off by a 1/4 inch your boat will either be too tippy or not perform well." I wasn't loving either the process or the fact that after all that work the shape of my boat might be off spec. For the first time in my woodworking life I stopped a project midway...then I ordered your plans for the Vardo. The other frame is still sitting in my basement. Maybe one day I'll finish it, or perhaps it will become firewood. ? Here's the unfinished project.

-
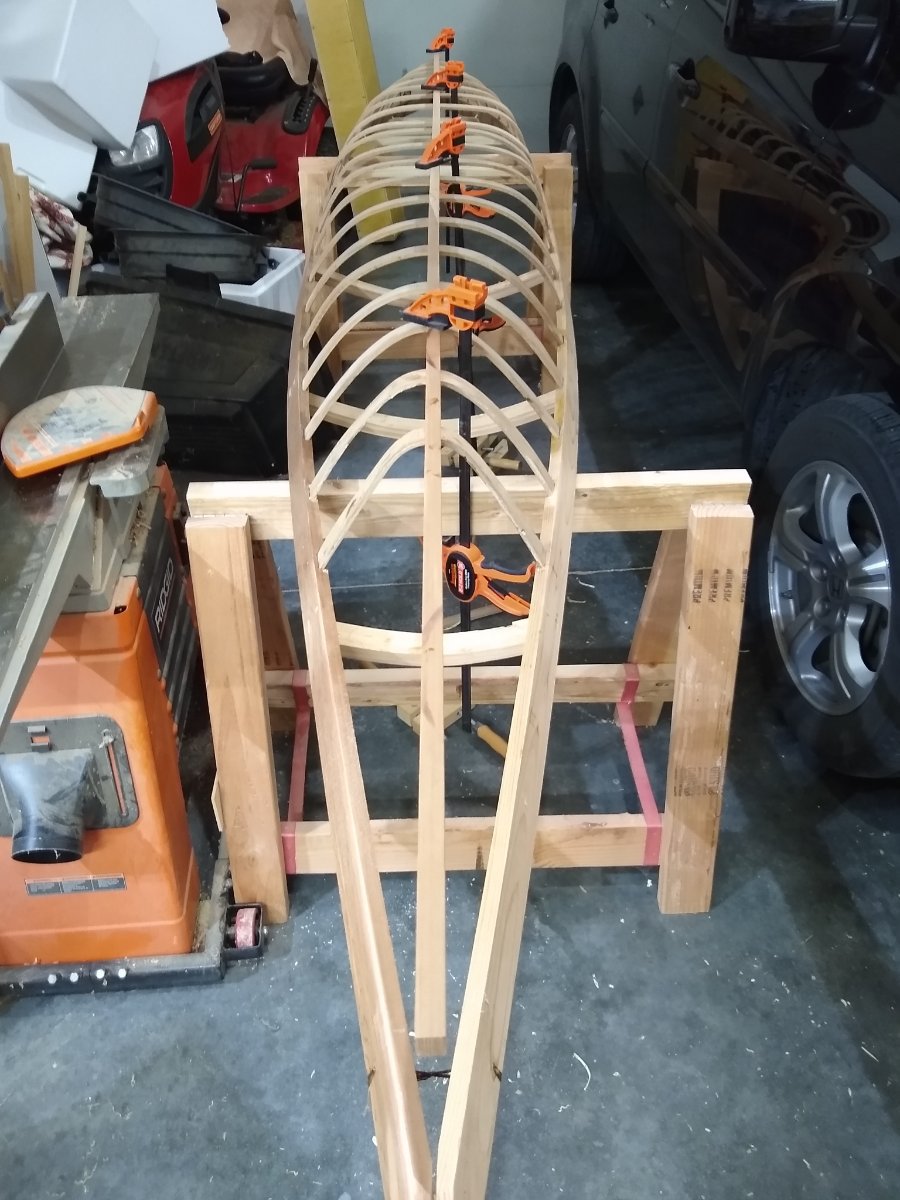
I appreciate everyone that posted pictures of their projects and finished frames. They helped me immensely. Here are some of mine. The spring clamps came in handy when positioning the stringers on the frames because of the one-handed operation. I also found adjustable bungy cords very effective.