Maria CS20 104
-
Posts
192 -
Joined
-
Last visited
-
Days Won
1
Content Type
Profiles
Forums
Events
Everything posted by Maria CS20 104
-
Ray, Tom, Graham and other experts, HELP
Maria CS20 104 replied to Maria CS20 104's topic in B & B Yachts Forum
Thanks, I am enlightend from my ignorance. I note your seats go all the way aft and I think I see two watertight bulkheads in the seat. Any reason for taking the seats all that distance or will you connect bith a bench across the back? Thanks again Charlie. By the way, how did you, family and boats fair in the storms. Thanks Jim -
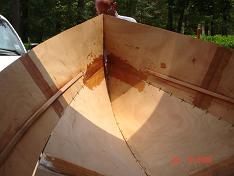
??? We have the hull together, all interior seams filleted and taped, looks really great. I think I am supposed to put in forward bulkhead and then Keel Batten. Next I think I put in the rear bulkhead and tape and glass all. What's next? Turn boat over, do seats, frame deck, or what? I think I am on track, need input from the experts, kinda stuck here, I don't want the hull to deform when I turn it over so I think I am supposed to do the items listed but I may need to do more???????????????? :-\ Help, PLEASE Thanks, Jim Atkinson
-
Hey all, wife and I spent Saturday and Sunday glassing inside seams of the hull. Yes all stitches and wires are out afet we filleted the Beast last week. Set up a wet down table and as we made the epoxy, one of us would take the tape, lay out on thick plastic and wet down lengths of 18 to 48 inches of tape on the table as the other laid epoxy on the sides and center board. One would paint hull, other would wet out tape and hand off and help set with laitex gloves on. Sprinkled baby power on hands to allow for easy put on of gloves and keep the sticky down to a minimum. I think we have discovered that we needed to "paint in" good cover as the other wet the glass tape and then we worked together to set the tape onto and into the wetted sections. Got all the sides to bottom (internal chines) and then the center seam over Saturday and Sunday. All set up went really well and found NO bubbles or separation. I think having a wetdown table really helped a bunch in the wetting and then laying of tape. Took less time too than the butt joins for the sides and bottoms as we set up to build the boat. Went out this morning and found fine clear joins and glass. Karen spent three or four hours sanding down ridges outside and inside on the glass. I think I messed up some and should have put the high seams on the outside on every overlap but did not really know what I was doing, and it worked out fine as Karen really sanded down fine and true today and cut very little glass. Still have the corners of the transom to glass up to the rails but all else is done. She is going to sand down edges of center glass tommorrow and fair to the bottom, she is really getting really good with a soft touch. Once done she will lay one more coat of epoxy on all interall seams and I will do glass work on the transom corners up to rails to finish the internals before we set forward bulkhead and rear bulkhead. We actually measured four and a half inches down the center seam and lined out for laydown for epoxy and tape. Realy looks good. K layed down another thin layer of epoxy on the center and is ready for sanding of high outside center edges. WE HAVE A FEW QUESTION FOR ALL, HELP HELP HELP. What's next? We think it's to set forward bulkhead, fillett and tape and then set and place keel board, screw down and let set with very thick and gooey fillets and clean along sides with thickened epoxy and then finnaly set and fillet rear bulkhead, glas/tape, clamp and let all dry. Once into place, then what? Sand down lightly and turn boat for bottom work? I think that's right, just need input as we progress. Are we missing something? I am not sure but I do think we are on track and we really need your input. Is there something more we need to do inside the hull before turnover and fairing hull. Any instructions and advice on bottom are really begged, appreciated and hope for as well. The great Beast of a BOAT looks and measures so true with plumb bob, levels and squares it kinda scares me to see it work out so well but I am excited for the next step and it seems they are comming quickly with our progress. I for one could not believe we had such a simple time with glassing the inside and look forward to trimming, planning and sanding the outside and putty fill work on the bottom. Need input we can get from experts and all folks who have been here before us. I want this to be pure and clean and I love the touch and feel of the work. Please, SEND ALL NOTES< DIRECTIONS AND COMMENTS. Soooooon! K wants to SAIL Jim Atkinson Marriah CS 104
-
Ruston Louisiana CS 17 builder
Maria CS20 104 replied to Maria CS20 104's topic in B & B Yachts Forum
Good to talk to you, think I could preach on God's gift and using them and being blessed by them and holding them and CHrist in your heart. Nothing is more important in this life. Christ and his promise is first, formost an -
cs 17 in the port townsend wooden boat festival
Maria CS20 104 replied to jan nicolaisen's topic in B & B Yachts Forum
Jan, Jim Atkinson here, I'm the guy that is orginally from Washington and love your lake, and picked on you in regard to your concerns regarding perfection. I am so very glad you went to Seattle and got the exposure you clearly have earned and deserve. Hope you sell a lot of boats, buyers will be lucky to have your masterpieces. I saw your boat in another mag and read the final installment on the building. WOW , we are at the point of fiberglassing the inside seams and installing the forward bulkhead and stern half bulkhead. I have a dumb question, should I install these and fiberglass inplace before I turnover and begin the bottom? I think the answer is yes, just want your input. I also want to add some 3/4 x 1 stiffeners on the bow side of the forward bulkhead, Ideas? Met a fellow enthusiast about 20 miles away and we are stealing your ideas and both have blow-ups of your work. By the way, which one are you in the boat, I thinks yer the gray hair with a lot of wisdom in yer smile. Keep the faith, lover your family and gifts, and enjoy yourself. Best and Blessings to you and all of yours. Jim Atkinson -
Ruston Louisiana CS 17 builder
Maria CS20 104 replied to Maria CS20 104's topic in B & B Yachts Forum
Keep the money for a boat, man alive, give them kids 5 grand and tell them to have a wonderful party, congrats. I got my ply in New Orleans, think you might be able to do better I spent a lot, $1500 for 15 sheet (includes tax and I went and picked it up in the family haul-all). I do have a souce for some varied hardwoods and I met a really cool dude who owns Blackwater Canoe, you need to meet him. Talk to ya later Jim -
Hey, glad to see another B&B builder in the area. I have a few boards you may be interested in. 16 foot 2x12 by 16 foot old fir. Yes I got Bradfords stuff, he may have a few more pieces but I've got some you might like for your boat. Call me at 318-355-3994 (cell) 397-2201, (HOME) come see the boat and give me some advice, I need it all, got seats to build and bulkheads to install. We are almost done with internall fillet work and ready to do internal fiberglass tape. Look forward to a fellow B&B worker in the area Jim A
-
Lumber needs??? Fir vs ???? CS 20 104
Maria CS20 104 replied to Maria CS20 104's topic in B & B Yachts Forum
Johno downunder. It took a month to clean both saws. I played heck trying to clean the bandsaw blade wheels well enough to keep the blade in place, talk abbout a slick cutter. She has used a few tools in a rather unorthodox manner, I have caught her using a skill saw to cut fire wood when the chain saw wouldn't start. I thank goodness she really isn't into cooking as mch as I am or the sander might be found outside at the BBQ where it would be necessary to clean the grill all too frequently. She has cleaned it with a wire wheel on the drill, saved time. Jim A -
Lumber needs??? Fir vs ???? CS 20 104
Maria CS20 104 replied to Maria CS20 104's topic in B & B Yachts Forum
Hey Ruston, yes I got all the fir I found, he may have a few sticks and 1 by 8 boards. I am in West Monroe, just down the interstate from you. Home 397-2201 and cell 355-3994. Call and come on by, you might just keep me moving when I get slowed and or stuck. I do I think, Have a 2x12 by 16 footer I may have as an extra and don't mind getting into the hands of another B&B builder. Jim -
CS-17 or CS-20 Builders in Puget Sound Area
Maria CS20 104 replied to JEHayes's topic in B & B Yachts Forum
Hey there. I was raised in Tacoma, and still have 9 brothers and sisters from Tacoma to Seattle, and even one in Bellingham. I spent the summer of 1971 on Whitbey Is. I now live in North Central Louisiana. Long story. I am building a CS 20, hull 104. It has been a real joy, (wife and son are partners in the crime) although my time is tight lately, we are slowly making progress. Hope to turn hull over in a few weeks to do bottom work. I looked at somewhere around 200 boat plans over three years and finnaly was lucky to trip over B&B. Most of all I wanted in a sail boat seemed to come together in the CS 20. Reasonably easy to build, light, roomy enough for four to six folks on a day sail, very capable for a week or better outing with my son, versital, FAST and quite in line with my building skill sets. I think this boat would be ideal for the Sound, you'll have to gear up with weather clothign (open boat) but so whaat. With the wind on Puget Sound, especially between the islands, from down around Olympia and up around McNiel (sp), up through the Narrows, passing Vashon Is, through to Port Townsend North up toward (not in) Deception Pass more westward toward Victoria, I think the 20 will rock you. Having sailed the area throughout High School, I know the wind can pick up quick, it gets wet and cold. Me thinks you'll stay drier in a 20 and you've got more float for the boat. With a nylon cuddy or wind break you could sail year round if you like the stronger winds and COLD experiances don't bother you. Some of the best sails we had were in November, December. Some where I have pics of our work. Wife, Son and I, just look for Marriah 104 in previous messages. Best of the Best to you, miss my home waters and Oh man do those mountians still call me. Jim Atkinson -
Thoughts and Prayers for friends and family, be safe. Jim A
-
Hey Greg and all, we are back from vacation by a week and worked on inwalls and tying in the transom. All went well until I started fitting the forward bulkhead. Poop to say the least. had to recut the inwall notch, and the seat notch along with the temporary bulkhead inwall notch, chiseled out about 3/16th and trimed the vertical edges. Fitting much better. Still trying how to deal with the forward bulkhead, I have a smile in the bottom of the boat and it has kicked my butt royally. Grahams answer is to modify the bulkhead to fit if the hull is square and fair. Hull is square and fair but it does not fit. Smile is 1 and 3/8ths at center and tapers back about a foot or so, looks like a pumpkin grin learing at me saying "told you so". I actually climbed into the hull and bounced around in the forward compartment and it did help to curve out some but not enough to make a difference. Sooooooo, Graham says to make it fit and I plan to cut a 1/4" plate on bottom curve and set/epoxy to forward bulkhead. Plan on going into the hull and making paper or cardboard template to cut the add on plate rather than cutting a whole new bulkhead. My bulkhead beam warped and looks like a snake, soaked in the pool for a few days and now is drying under home make press rig. I've done this before and it works well if you fit and epoxy in place befor the heat getsto it again. Live and learn. Any ideas on the forward bulkhead will be greatly appreciated. Jim
-
Go for it, my bride of 26 years are building a CS 20 and it has brought us closer and caused us to talk more and work more on a single focus, she pushes me and I love it, she is really engaged seeing me focused and talking and sharing a dream. go for it! Jim
-
104 CS 20 going 3D we are at the treshhold
Maria CS20 104 replied to Maria CS20 104's topic in B & B Yachts Forum
64 I am still in awe of how you cannot screw it up to much. Aligned today and put stretchers (spreaders) half way from forward bulkhead to bow, and another at four feet from stern, this was to produce a more consistant curve from stem to stern making a nice clean curve. We are really ready to put epoxy fillets in and move forward. THink I spent four hours measuring spreaders and blocks to firm up the hull and placement of inwalls. Trust me we have fought inwalls to conform to hull shape, spreaders have helped a bunched. Nothing like a poly hammer to push, drive and correct misaliginment. 6 foot level gives me confindence that we are true and square. I keep redoing the obvious and punching in and out and trying to make perfect, pretty stupid but my nature. Here is the question. Got inwalls in place and stretchers spreading hull fairly, I want to begin fillets and I am worried,do I need to let spreaders do there work for a few days, and can I fillet the cines while waiting for the inwalls to form. Think I can fillet in bow and stern and part of the chines, but do not want to pull spreaders off until wood sets to curve. What is the best way to set and glue in inwalls? Should I do them first and then do chines, the inwalls are working to curve better than I did expected and I have seen them to square up some to the sides of the boat. Comments and Guidance from the Masters is needed...... Jim -
104 CS 20 going 3D we are at the treshhold
Maria CS20 104 replied to Maria CS20 104's topic in B & B Yachts Forum
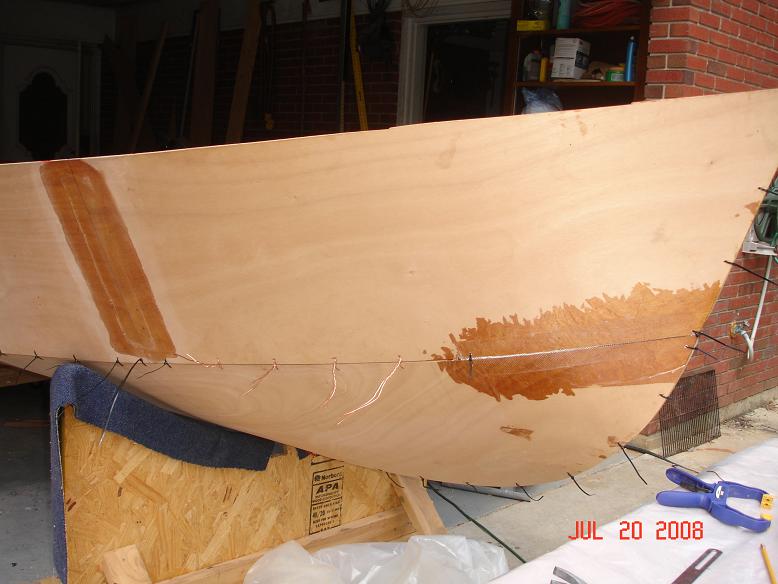
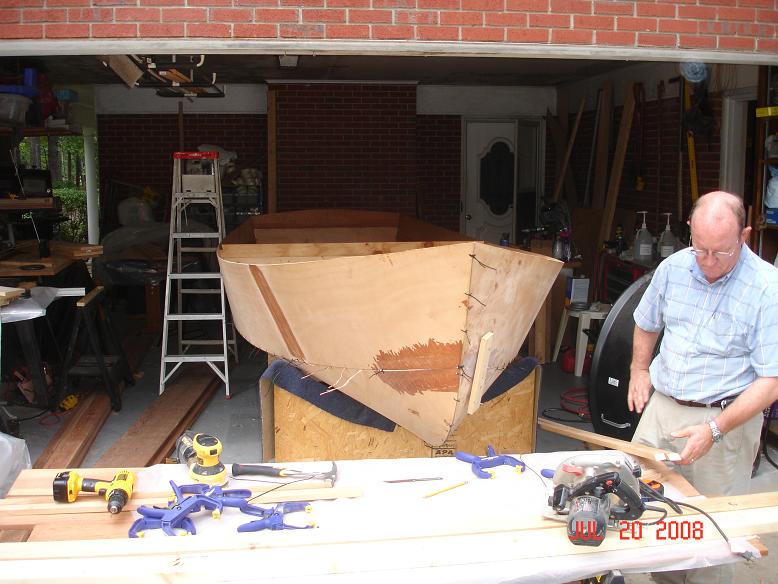
Hey ya'll got the sides, bottom, temp center bulkhead, and transom all wired, looks and feels fairly true and measure out to be true as well. BUT HOUSTON, WE HAVE A PROBLEM! The forward bulkhead does not fit, I have a smile at thte bottom of the bulkhead where it does not set into the bottom of the boat. At the very center bottom it is about 1.25 inches and like I said it is a smile as the gap closes to both sides evenly. Tried everything I could think of to pull in, but if the bottom comes up, the chine spreads and the sides don't meet. If I set it further in the seat stringers are not in the cutouts and the top of the bulkhead is below the edge of the boat. Yes, I have checked and rechecked the measurements of the bulkhead, exact as I could make it and she ain't right. Any ideas? Jim -
...nothing outlasts a woman with a camera (or phone)...


-
...still going...


-
...a few more...


-
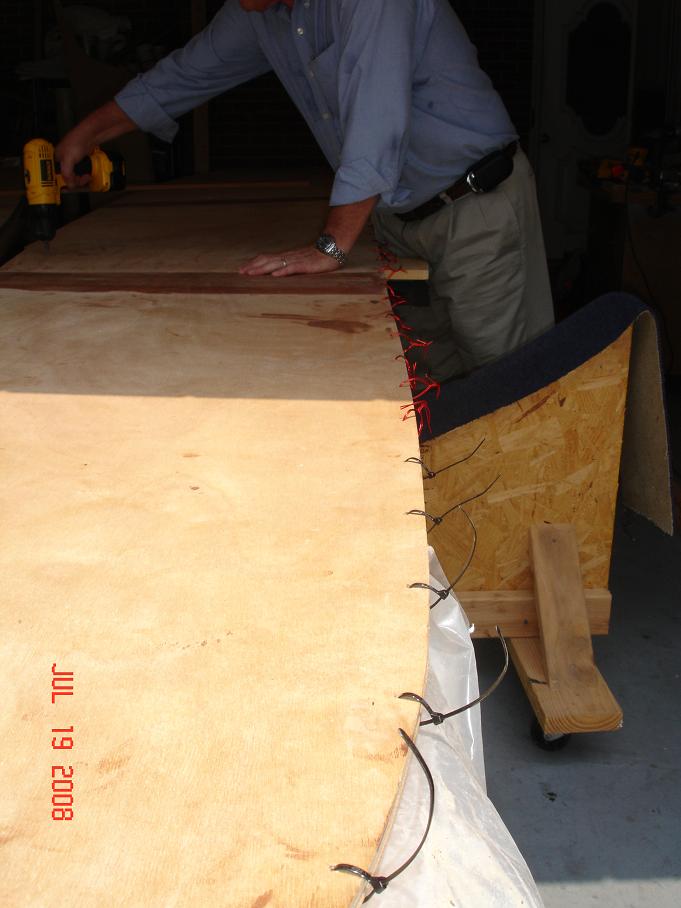
Here are pics from this weekend 95 plus degree heat, I am whooped and beaten and bruised but really happy. Still have some of the centerline to pull in and we just kind of figured it out! We are going to provide a little lift from underneath and pull in tight. My beautiful bride figured this out when I told her not to loft the boat, IT's REALLY A BOAT NOW! WOW!!!! When Karen (wife) lifted the stern about 2 inches,the centerline really came in close, then the gap totally closed, caught me a little by suprise but it really worked and we now are fairly sure how to pull it in; we are within an 1/8th of an inch in some places and snug in about half the length. A little loose on the forward end at the sides on the bow. The bow itself tied in really close (cool and tight, Pat the son says it looks watertight, he's never been on a submarine). Had problems with the inwalls and the scarfs began to separate. Took them off and fiberglassed strips on both sides to strengthen, they are seting up as I write. Noted that the seat stringers did not attach well even with thinnly tickened epoxy, guessed I squeezed a lot more out than I thought, I know we got good coverage, probably soaked into wood too much. Had concerns about transom when it looked too small for the space. When we pulled in, and allowed for a little more overlap of about 3/16ths where the sides are overlapped on top of the sides to the bottom of the hull it kind of snapped into place. Wierd! When we place the temp center bulkhead I think I fought it for two or four or six months (hours) but when the bottom pulled up everything fit and there are no gaps on the sides, and only a small gap at the centerline where we have not completely pulled in, fully expect that it will sit in place completely when bottom pulled up. LEARNING A LOT (liked most of you have before us). BUT WE ARE 3D! AND IT IS A BOOOOAAAATTT! It is sooooo cooool! I do have a question or two if I remember them: Question One: What is the angle of the transom from top of the sides to the hull bottom, or do you base it on the "shape" of the rudder cheeks keeping the back of the cheeks square to ground at 90 degrees, or does it matter much? Question two: (by the way it is still 93 degrees outside and I think 150% HUMIDITY, yuck), oh yeah the question, when is the right time to set the forward bulkhead, we still have an inch to pull in at the bottom of the hull, will it come in when the bottom comes in, or do I need to lift some and wire to the bottom of the hull? Question three: Does your back hurt as much as mine? Question four: Does the backache ever go away during building?????? ( I think not, no big deal, we are having a great deal of FUN, and we are spending great time together, is spite of my pondering and pondering and pondering. ( I think I like pondering, it focuses my head on the next three or four steps and gets me in the groove of the boat, she has become a woman, OH LORD HELP ME (kinda, at least with the fitting in and fitting out and then the fitting round about). My Thought for the day: If you participate, the dream does comes true! (On the philisophical side: One little teenyt tiny bit of action is better than any hope or unfulfilled intention!). Lord keep us all safe on the lonely seas, Here are pics, (I hope), Best and Blessing to ALL "ON THE MOVE FORWARD" in life's adventures! Jim A


-
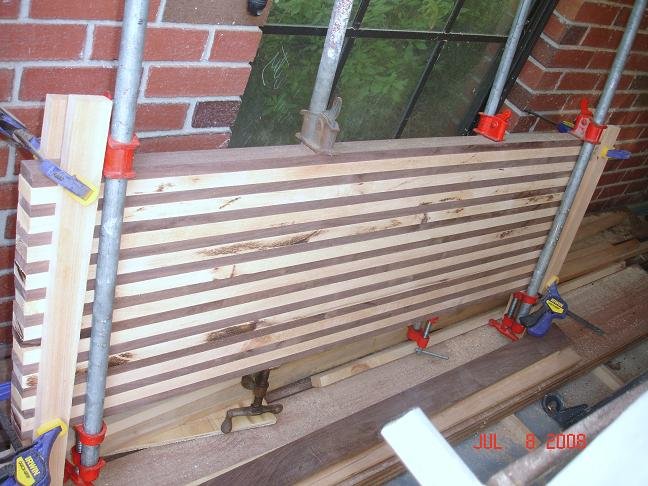
Just a coment regarding biscuits and epoxy. Charlie and Graham are absolutey correct when they note that the can only swell in a water based glue. When we used them on the centerboard blank we used very thickened epoxy and squeezed the living heck out of it when we pulled and hammered it together to drive the excess out and I suspect there were a few air pockets, not many I am sure based on what we did. I think it helps and I think that when the pockets cured they provided an epoxy wedge that along with the biscuit helps stability and increased conectiveness to the edges. Only my perception, but I got a biscuit cutter out of it anyway. Jim A
-
Greg, finnaly pics of CS20 104 parts and pieces
Maria CS20 104 replied to Maria CS20 104's topic in B & B Yachts Forum
Charlie, you would through more work into the mix, but I am excited to be here, all wired temp board in place and will do the transom today and finish pulling it in and squaring up. Keeping our fingers crossed. Jim -
Greg, finnaly pics of CS20 104 parts and pieces
Maria CS20 104 replied to Maria CS20 104's topic in B & B Yachts Forum
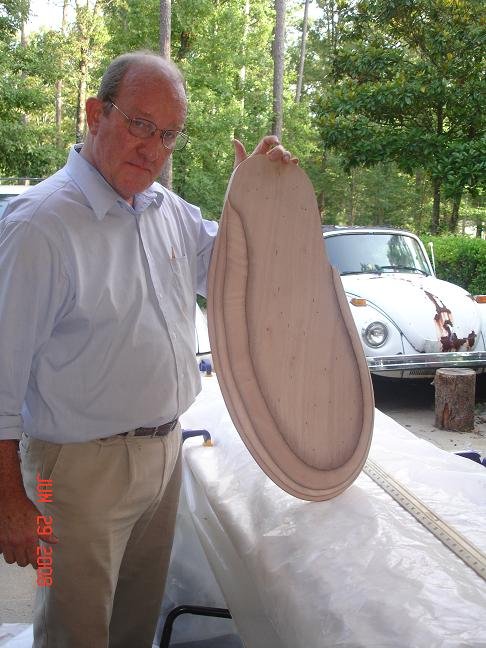
:DGreg you should see the PVC clamps on his ears... he is great young man. Doesn't know when to help, neither does my wife cause I get in this groove and ponder a whole lot. WHen building anything, I always reach a point, usually in the middle of some needed event where I zone and don't say anything, kind of pisses them off until my mind is right and they fortunatly stand by, take a break and wait for me to speak. Too much thinking on my part. The nice ting is TODAY they see the boat and it looks like one. Lots of pulling in to do and setting the bulkheads, take most of tommorrow I'm sure. DOing it mostly myself cauwse of the my pondering. Wood you see on the rudder is Okume ply from Joubert. Wood on the centerboard blank is hickory and walnut. THe centerboard will look a lot different when planned, sanded, and shaped, I plan a hickory toe and a walnut, hickory, fir tiller when I include the extension. Really getting into the strip joining and shaping. Making the rudder was a chore but very satisfying when sanding down to shape. Spent a LOT of time pondering and sanding to make all the bands of Ply measure out the same on both side to be as assured as possibe than the shap is symetrical and fair. Glad you liked the pics, thanks Greg for the advice on how to post. Drove my son with the clamp earings nuts making him show me how to do over and over and over, he finnally wrote them down and I still messed them up for about an hour or better. Give me wood, to heck with electronics. THis site is the first and only I reallly enjoy sharing our work and talking to fellow adventurers. Thanks so very much for the support and encouragment. I will need a lot more as we progress, just nice to really be 3D. GEt some more pics tommorrow when the hull is more complete. Thanks Again Folks Jim Atkinson -
Greg, biscuits are a better choice because the diagonal stress is at 90 degree angle and although you may increase the surface area by 50% or so with V slot, you reduce the stress capability because it probably mates at close to 45%. As others have noted, maximize the strength by increasing the angle against the grain is maximized around 90%. It is also dependent upon the relationship of the grain orientation. Alternating the grain increases the strength and minimizes the potential to warp, does make the wood susceptable to rough surface when planning as I think I noted before. Biscuits are fun and easy and provide additional strength points over a large join at 90 degrees and it does not take many spaced evenly apart. I used a 3 by 2 alternating join with the biscuits. Between first board 3 biscuits and next two, next three and on and on. With the epoxy you should get a really strong join. Concern I would have with a "V" cut is the slippage between the pieces when you try to press and clamp. Even with biscuits, the boards will slip and it is really important to have FLAT surface to press pieces against. I push and HOLD DOWN, even weight down sometimes against clamp bars, and then I am more able to apply higher consistant and constant pressure with the jaws of the clamps. Again physics, minimize ability to misalign as pressure is applied and the work you will have to do to push hold down or pull in the strips to keep them flat against clamp bars. (Trust me, it ain't never going to even or level, just do the best you can and it will work out). It is not uncommon in my experiance when joining strips that they will "buck" as the uneven edges come together and are pressed together, usually because I join edges in the rough (ruff), not necessarily true to square and they move, but taking time to square is very time consumming (eats up good wood too) and I do not think necessary when you are joining with thicken epoxy, and adding an additional 1/2" or more thickness to the board you are making. Making the boards thicker (as far as I am concerned) makes it more more easily be planned to square and true, as I am sure you know. Of course making strips as square as possible is best to prevent slippage when clamping, but you will still have to press the wood down with hammer, blocks and back, into the pipe clamps for flating and squaring as best as possible that you can, when max pressure is applied. I use my son's weights to help keep pressed across the joins. Does it always work, NO, but it will come close enough to make it good to plane in if you make sure you add enough thickness to allow thorough planning of any piece as you know. I would always go with the biscuit joiner, read many acticles and data that indicate it works best for butt joins. Choice you have to make is how close should the biscuits be, can't tell you a thing about that, I did mine at around 10 to 12 inches apart over a 5 foot work piece, like I said on a 3 -2 alternating setup. And again, it is critical to get really good and I think thickened epoxy coverage with really good epoxy. 8) Hope this helps, just more info from a dumb engineer. By the way I am learning from stupid stuff I already did and had to re-do, NOT and EXPERT an EXPERT is a "has been drip under pressure" Usually with no real life experiance! Jim Atkinson CS 20 #104
-
Greg, finnaly pics of CS20 104 parts and pieces
Maria CS20 104 replied to Maria CS20 104's topic in B & B Yachts Forum
...last of 'em...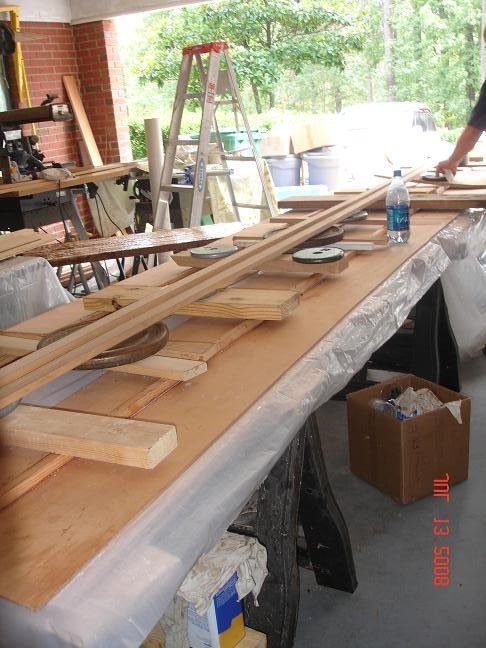
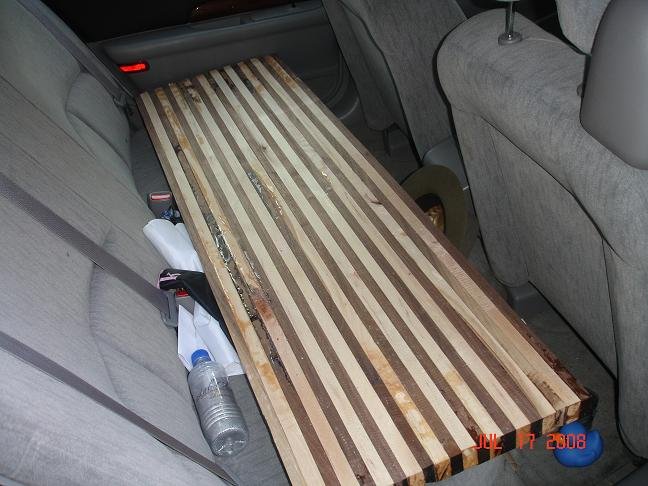


-
Greg, finnaly pics of CS20 104 parts and pieces
Maria CS20 104 replied to Maria CS20 104's topic in B & B Yachts Forum
...and some more...