PeterP
-
Posts
407 -
Joined
-
Last visited
-
Days Won
16
Content Type
Profiles
Forums
Events
Everything posted by PeterP
-
I am assuming the following: your boat is a CS and your fore deck is all in place. To cut out the old tube and put in a brand newie would be a serious case of back -breaker. I would try the bearing approach -I don't see any harm in that. The looks of it may hurt your ego more than anything else. PeterP
-
Peter's vote for a good cordless is seconded over here. I have a Bosch 18V and love it. The power pack is relatively large but the driver does a lot of good stuff for me and I don't need to swap out to recharge too often. I wrapped mine completely in duct tape and it remains to be seen how effective a protection that provides. PeterP
-
I think your hunch is correct - the wood absorbs moisture, swells and hence the tight fit. You may consider skimming some of the wood and building up it back up with fiberglass to keep things stable. Also, check the bottom of your mast - make sure you have a good solid seal down there - the moisture has a tendency to wick up the grain if it is left exposed. PeterP
-
Joe, His "Shackleton's Boat Journey" is my personal favorite. The ultimate small boat trip I feel. Combines the sea and mountains which happen to strongly resonate in my life as well. Another good one is Bill Tilman along the same lines. I have to warn you though - after you read those books you will find it extremely difficult to say: I think it is too cold to go sailing today hon. PeterP
-
Regarding your first picture: those clamps are not very effective. Not enough power. The wood blocks pictured need to be duplicated on the other side ( outside of the boat ).Get a couple of good size C-clamps or pipe clamps and force the wood blocks together - on the outside. Clamping the outside will do two things - it will squeeze the ply together while torqueing it upwards. That is the way you need to go. Listen to the ply while you are at it -don't tear it up. Make sure you have the wood blocks securely fastened - plenty of screws to spread the load. As for your second shot: you could attach wood cleats/blocks to your bulkhead and then run long screws into them through the ply bottom (use fender washers to spread the load ). But you have to decide what to do because I cannot tell what the problem is exactly from looking at the picture. Always eyeball your work - sometimes you make things nice and tight in one place and end up with ugly old dish somewhere else as a result. PeterP
-
Shackleton was a good one but give credit where credit is due. Kiwi by the name of Frank Worsley did the sailing/navigating and his book has to be one of the best small boat yarns ever. PeterP
-
Excellent report and one that mirrors my experience described elsewhere on this forum. Nothing like pictures to get the point across though. Biggest thing in my mind is to remember to release the sheets before one starts hauling her up. The weight of the water in the sails can be formidable. Well done and long overdue. PeterP
-
I am pretty sure Graham does surveys Paul, or used to. Go for a sail and have her surveyed same place. That may be the deal.
-
I totally missed David's suggestion about the air powered boards until I posted the previous reply. I did look at those and the price scared me. Also, vast majority of the boat is machine sandable with what I already have- it is only the hard turn of the bilge that needs to be done by a board. Besides, the way I huff and puff while longboarding you could argue I am air powered.
-
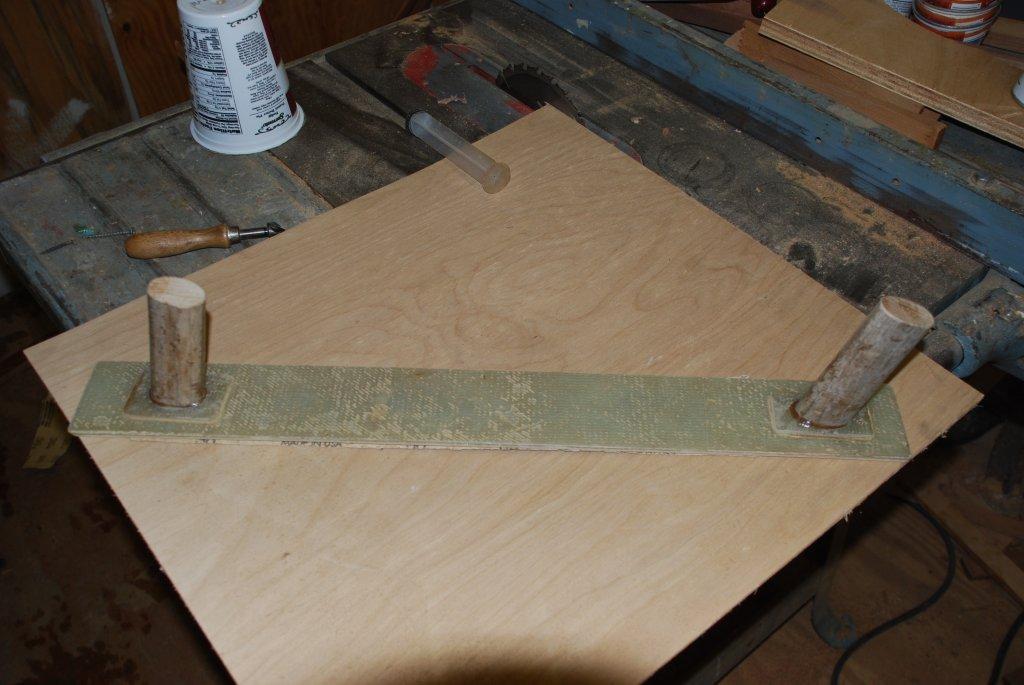
The handles on the longboard are pieces of a broken old maul handle. Slant and twist for maximum comfort in my preferred sanding position. However, if you decide to switch hands it is not that natural anymore. As for the paper: I started with a roll of 3M Gold 80 grit because that is all they had in gold. I've since ordered some 60 grit on E paper because the 80 wasn't fast enough. Also, for shaping, I've stuck on some 36grit floor refinishing paper. That stuff is only 18in long though- bit shorter than my board. The 2 3/4 rolls are stick on. For my sheets and other stuff I've been using 3M spray on fabric adhesive. Not because of preference but because I already had it. It works well - too well if you don't watch out and put too much on. In fact a good part of my sanding time involves removing old 9x11 sheets -which I have to spray individually-from my big sander. But it is all worth the effort. That sander really goes to work for me.PeterP
-
Well, things have slowed down considerably but we are moving. I've had a two week break and there was the get together. Now I am putting 10ft bay window in the house to keep the love of my life in good cheer. But despite all that I try to do something on the boat every day ( or so). The port side being almost all planked up, I decided to try my hand at sanding. Sanding being right up there with all the other uninspiring jobs I thought I would jazz things up a little and made myself a 9x11 platten for Mr Hog - my 9" sander/polisher. See pics bellow. I also made a 24" flexible longboard out of some 12oz cloth I had laying around. I hate to use the word fun in association with sanding but taking Mr Hog for a spin with a full sheet of 80 grit paper at 3000rpm made for a lively two hours to say the least. That is how long it took to get the whole side smooth. Not fair but smooth. Also, the longboard is finally up to the task. It started out too flexible so I had to go back a couple of times with additional laminations of 12oz cloth. Now I have to do some tweaking on my arms, they are woefully underpowered as I have found out. Looking for a 1.5HP power pack for each arm. PeterP


-
Winding sticks allow you to see if a boat (or board) has a twist in it. Get three or four pieces of 1x2 straight stock long enough to lay across the width of the boat. Spaced out every three/four feet. Then sight along down the length of the boat and you will see immediately if the sticks (hence the boat) are true or twisted.PeterP
-
Yet some more.PeterP


-
And some more.


-
Some more pictures from the get together.


-
What kind of cedar? Good tight- grain yellow pine is excellent. Pick through the pile of 2x6 at the lumber yard and you would be surprised what you can find there. Boat lumber at not so boaty prices. PeterP
-
Edward, roll out your plans, draw a line parallel to the waterline through the tip of your stem. Using a architect rule read off the distance above transom ( mind the scale!). Clamp a vertical stick to your transom and at the established height pull a string to the stem. Hang a bubble level on the string and level the boat. You should be level fore and aft. Using that string you can establish your seat tops height. Pulling another string across the widest point gunnel to gunnel and using that same bubble level will level the boat athwartship. Use several winding sticks to make sure your boat is not twisted. You are plumb&square and ready to git'er done. PeterP
-
I REALLY like the colour scheme! Congratulations-PeterP
-
Takes a lot of courage to tell the whole world you screwed up. Whole foot? My guess would be mis-measured scarf. Maybe you get lucky and all you have to do is to scarf a couple of short pieces to the ends of you sides.PeterP
-
Plywood is a lamination I would not try to steam bend it. I don't think it will retain the shape because the grain orientation is optimised for flatness. Rip up your plies and glue them up to the shape you require. The thinner your plies the less spring back you will have. PeterP
-
Sounds like you need to switch brands. I use Graham's Slow and it gives more than ample time at 85-90 deg here in NC. Raka also works well here. They are both 2:1 by the way. When you mix a batch use a big pot and spread the stuff up the sides. Even a large batch spread thin will not cook off. I personally like large yogurt containers - they are reusable and already paid for.PeterP
-
You and me are watching the same channel. I played it safe and went an extra 8' on the boat. PeterP
-
Sorry I am so late with a response - I just got back from a trip. The shelter is a real cheapie. It is made out of salvaged 5/4 treated lumber ( sides) 2x4 spruce rafters on 2' centers, and 14' wide roll of greenhouse plastic. Including the screws holding it together I don't think I have $200 in it. The size is approx 14x32' and if I could find the room in it to swing a leg I would kick myself for not making it larger. It is slapped on the side of my shop. In realtor speak you could describe it this way: Architecturally, it blends in quite naturally with the rest of the "semi-developed" backyard and lends it an air of industry and serious effort. ( read: not a total eye sore/ junkyard). The plastic is the key. My first shelter disintegrated in a year because of cheap plastic. It was a major mess with flakes of the stuff littering the yard. After I re-covered it with a better material - it held out for almost 10 years. But even the best of plastic is no match for ice and heavy snow. I'll be at the meet if you have any other questions. PeterP
-
I am sorry to be a little late with my reply. I had to go out of town last week. I do not have a complete set of drawings in hand to post. What I have is a set of full size half breadths and scantlings for the hull. The plan is to glue up the hull, glass it and turn it over. In general terms the 28 is a stretched out 26 is a stretched 24 and so forth. But that is like saying that Beef Bourguignon is only a stew. The simple fact that the 28 is round bilge means the boat was practically redesigned in practical terms. Also, even though I do not have stuff drawn up I have a clear picture in my mind as to the final product. Small diesel is in the works. There will be no pilot house( as practical as they may be). Decreased windage for towing and simpler to accommodate horizontal masts without them. Pretty standard cabin lay out. Rotating masts with sleeve luffs and wishbones. Lot of details to be worked out yet but like they say: every journey begins begins with a single step. My destination may not be precisely defined but I am already huffing and puffing towards it. PeterP
-
Bob, there were several factors involved. I bought a set of plans for NIS 26 from Tom Lathrop a good while back before Graham started thinking about larger designs of his own. One day we were talking about my plans and Graham just happen to mention that he did not think the stability curves for the NIS were that great. In all fairness this is an older design. By this time I had also heard that Kirby was not very accessible with regards to problems, questions etc. And I really wanted a round bilger. I go way back with Graham - I've built four of his designs over the past 19+ years so I know that if I go with his design it will be as good as it gets and he'll back me up during the build. So when when the word got out that he was doodling with bigger Princesses I was ready to leap in. The 28 looks just the right size for what I am capable of doing -comfortably. Which is to cruise the four corners with my wife plus an extra bunk for one of my daughters if they want to join us for a few days. Ride on a trailer to get there. Perhaps Cuba, Bahamas and few of the Islands. Big enough to hold two weeks worth of grub so we won't have to anchor behind Piggly Wiggly all the time. Much better performer than NIS for the capable and definitely better stability curves if you not. If I ever get the itch to go to Greece or Tierra del Fuego I would look into getting there as deck cargo. PeterP