Bcone1381
-
Posts
137 -
Joined
-
Last visited
-
Days Won
1
Content Type
Profiles
Forums
Events
Everything posted by Bcone1381
-
MKS, The process I am using wraps thin (1/8" thin) strips of oak around a mold. The strips are up to 7 feet long. I built up the about four layers to 1/2 " thick with the wide stuff (1 1/2" wide) then went to the narrower (1/2) wide for the lip. Here is a photo of a narrow strip I am using to build up the lip. I wish I had a few more clamps! The lip is almost built up. I will have three layers for about 3/8".


-
I have watched a lot of his videos. He is a great teacher! I just have time to learn but less so to refine skills. Anyway, if anyone is interested, I use a blade made by Highland, called the Wood Slicer Resawing blade. I cannot compare it to others as it is the first resaw blade I have owned. I resawed 4" oak with it. ! I have the main coaming glued up and will add its lip over the next few days. Quit honestly, initially it looked unacceptable to me, but I thought I would try to save it. I sanded it down and this helped the cosmetics a great deal. On this side you see gaps between the strips of oak. Some might say its clamping pressure issues or uneven Resawing issues, but lets just call it a skill and experience issue. . This is what it looks like on the other side where I filled in the gaps with mixture of saw dust and wood glue. I think it made a big difference and is nice enough to use it.
-
Edited due to double entry.


-
Why use the band saw? 1) I am a rookie with more book knowledge that practical application and believe the band saw is a good tool for re-sawing. 2) I invested in a re sawing band saw blade so "I gotta put it to use." 2) the band saw kirf is at most .015" thick. 3) The table saw kirf is .125" thick and would have doubled my lumber cost. 4) I was able to resaw a 4" inch board. But with my results, the table saw would have given tighter tolerances. A weakness of mine is being a human being therefore "Am unwilling to admit my error." A strong point is that I recognize my own ignorance. In the hands of a skilled woodworker, I still think that the band saw properly adjusted with the right blade is a better tool for re-sawing, and that my skill level is the issue. However, am have an open mind, am willing to be influenced, and appreciate the question.
-
P. Douglas, I am glad you spoke about the pre-bending/disassemble, the assemble-glueing procedure! I was wondering about the wet wood, glue, heat gun issues that I might have. Up to now, I was just going to wipe the hot steamy wood off with a cloth and slither on the glue and go for it. I will seriously reconsider. What happened with the failed method?
-
Labrat, the strips of wood are 1/8" thick....well, it's thickness is not uniform, but after yesterday's post I trimmed them so the max thickness went from 1/4 down to an 1/8". I will have four wraps of 1.5 inch oak strips, then four more with 1/2 wide oak strips for the top lip of the coaming. I think my coaming will have some rustic elegant character to it....if you know what I mean. My parents got this roaster as a wedding gift in 1949. Today it fulfills the need as my steam generator. My wife invoked the "no open flames inside the house rule" when considering the use of the gas Coleman camping stove. The long pipe is a clothes dryer duct...ask your wife's permission before taking yours down for a project like this. Again, I call on the wisdom of The Lord in hopes that this works!! I've never bent wood before, and here I go, blabbing to all of His Creation like I am an expert! Post edited due to dyslectic author fixing grammar.


-
This will be the first coaming I have ever made. I have spent a couple hours experimenting, and expect some failure....I mean some educational by experience along the way. The jig for the coaming was made from MDF. . I am a novice woodworker. Re-sawing an oak board into strips using a band saw resulted in wavy cuts. I soaked them last night in preparation to bending them around the jig. But I woke up this morning realizing a need for more exciting tolerances on the oak strips thickness. Will work on that today. Time spent: Re sawing oak: 1.0 hours Coaming Jig : 2.0 hours Total time so far : 4.0 hours Cost: One clear Oak 1x4x8': $13.74 Total cost to date: $93.74


-
I started building a Kudzu Craft Ravenswood Kayak today. I will try recording the build process with photos along the way. Total time so far : 1.0 hours Total Cost so far: $80 for plans, one spool of waxed Sinew, plus shipping Material on hand : 1/2 marine plywood Next step: glue the plans to the plywood, finish the jig for the coaming.

-
Here is a product I thought might help with the abrasion issue on rivers. I have a sample but have not tried it. http://www.keeleazy.com/page1/page1.html
-
I used the skin boat method to attach my deck rigging also and really liked the results. Replacing the rigging in The future if it does wear out wont be too bad.
-
Is there a kayak design for light weight adults with little kayak experience? My wife is 5'7", and 110 pounds. I would like to build a second kayak with good stability characteristics at her weight without adding ballast. I understand that Because of the various degrees of rocker of kayak designs, poor handling characteristics with light weight paddlers can result. How would Ravenswood work out at the 110 to 120 pound catagory paddler?
-
Woodman, can you show us any photos of the SOF with the stain/urethane combination?
-
Your on the right track about considering the collective tension the stringers place on the frames and thier influence on the outcome of the hulls shape. When I built the cast-a-way this summer, I wrote in my notes to 1-Lash all frames to the keel and then 2- lash the gunwales to the frames, then 3- lash the remaining stringers to the frames. To keep the tensions on the emerging Kayak Frame even and symmetrical my lashing sequence started in the center of the Kayak and progressed out to the bow and stern. I would try to envision the collective tension and keep it over the keel. If your think the collective tension is off center, or you think you could have done it better, redoing those lashings is better than risking a crooked Kayak.
-
Well, lets dream, and push the envelope on origonality and crativity then! Artistic Creativity will draw people to our construction methods and that has yet to be developed very far because I think the SOF method of Kayak building is in its infancy. Jeff's methods of construction using frames and stringers hits a bulls eye that will serve us for centuries ahead, but was unavailable 100 years ago. But, We have not really built many of these boats yet. The number of contributors on this sight is small. The strip boat builders creativity took some time to develop, and although I am no artisan, I see possibilities for growth in our craftsmanship. For example, we don't have to use plastic hatches, and We can incorporate magnetics to hold them down, and i have not yet heard of a builder here who has sprayed on a coating. Imagine using the Hobbie Mirage Drive in one of our Kayaks! Zoom! Incorporating the retractable skew design that Woodman used...well, I am a dreamer and that's how the wood strippers began incorporating their creative details... they dream and imagine, and try new things.
-
I have experienced this relaxation to a lesser extent using the 8 oz original fabric coated with Spirit Line, a two part poly urethane. Heating it up again after its coatings were completed did take out most of the relaxation, but it's only been on the water four times and therefore untested. I am watching re-relaxation. (I think you told me to try reheating with an iron and wet cloth.). O I since have looked closer to the photos on Jeff's website of his boats. In see this relaxation taking place in his Curlew http://www.kudzucraft.com/designs/curlew/index.php And his Vardo http://kudzucraft.com/designs/vardo/index.php We builders on this web sight have a great kayak frame building system....I love it! But I sense that we are still in the experimental phase with the covering process? If I get my next boat started soon, and am skinning it under cold temperature conditions, I will seriously consider nylon. Nylon relaxes when it's cold, and tightens with warmth. I would have concerns sewing up nylon in the hot summer months. In will be keeping my eye on this topic, it's an important one.
-

what kind of patching kit for polyester
Bcone1381 replied to square_nails's topic in Kudzu Craft Forum
Yes, that is the stuff. As I ponder these items for a repair in the field, and if I envision a worse case cold and rainy day, curing of the glue will be an issue to overcome. Shoe goo infohttp://en.wikipedia.org/wiki/Shoe_GooGoop infohttp://www.eclecticproducts.com/ag_adhesives_epoxies.htm -
what kind of patching kit for polyester
Bcone1381 replied to square_nails's topic in Kudzu Craft Forum
A fabric patch with Shoe Goo or Goop for dual purpose adhesive and sealant. -
For those considering Spirit Line, It is a very durable finish. It's not like paint. Shoo Goo, or a two part polyurethane floor finish is a closer comparison. Durability and toughness is its positive points. I might sound like a salesman, but I am rather merely a consumer who is pleased with the product. If a run or two (which are avoidable with care) will destroy the kayaks appearance your in your mind and will cause anger and pain, then by all means paint it. If you can't spend the time to baby sit the goop as it sets up after application, then paint it. But if scratches are your concern then Cory's Goop is the product you are looking for. Again, it's durability claims come from an actual user of the product...me.
-
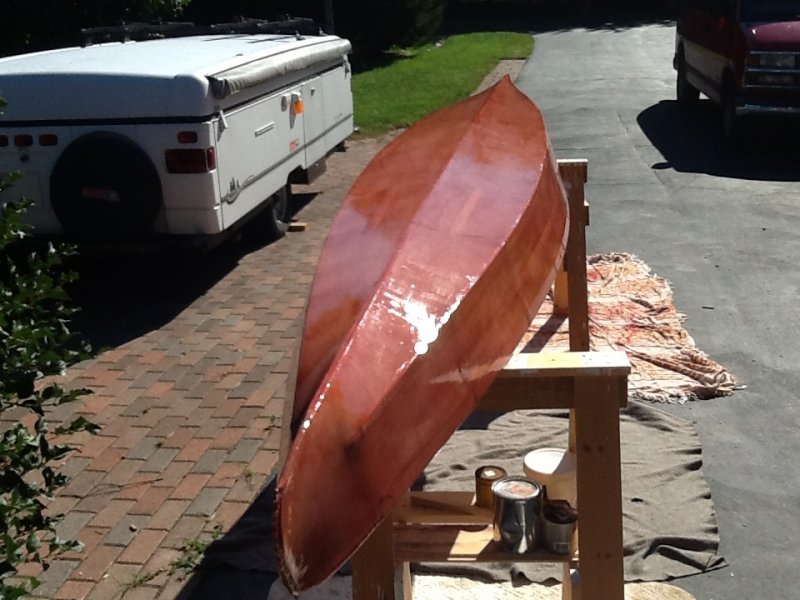
Cory's Skin Boat School has completed about 1400 boats, and Spirit Line is what they use. I finished my Kayak this month and its what I used. I did not get an automobile show quality finish on my Kayak, but I think it's finish will draw positive attention. It's a working boat, it's a very durable finish, and I like the pigmented transparent look. Spirit Line has issues with the coating that went ontop of a builders art work that is addressed in the application instructions. I would also not store any on our boats in direct sunlight unless an aluminum paint was used as a UV barrier. Spirit Line goes on clear. I am very pleased with its apparent durability, and it does need to babysat after application while it sets up in order to take care of the runs that develop. For color, pigment can be added, or he has a product and method of dyeing the fabric before applying coating. I watched his application videos, and have completed one boat and now could nearly match the videos speed, and get a similar finish if no foreign objects (bugs) contaminated my surfaces. The skin boat school has video tutorials to apply the coating. Call the skin boat school, and Cory will take the time to answer all your questions.

-
You are adventurous!! Two immediate thoughts are, 1) Don't forget about the cost of the strong back upon which the frame is assembled, and 2) it might be easier to raise funds, than to lower the cost. You are considering a very rewarding doable project for these boys where they will apply their lashing and pioneering, camping, planning, and survival skills. You must keep us all updated.
-
I have been working on the coaming this weekend. The plans called for 3/8 inch wood attached with SS screws. I changed that to saved a little weight, but cost a lot of time and the jury is out if it was worth the extra effort. Throughout this build I figured if I watched my ounces, the pounds would take care of themselves. The scale will tell. I attached strips of 1/8" ply with lashings, put a dado cut into the lumber I used for my stringers for the top rails, then glued in place with tite bond III. The floor boards are removable. I figure that I can clean the sand out out the boat a bit easier with the floor boards out. I used the 1/8" ply and reinforced it with pine strips. Gaps in the strips allow the floor boards to fit over the kayak frames. They seem real light weight and sturdy. In think they worked out well. I still need to install my deck rigging, a seat, and a back strap. We are getting mighty close!


-
This thread from a few months ago that helped me gain knowledge on plywood. http://messing-about.com/forums/topic/8412-plywood/
-
Ravenswood - A Suitable Design and Other Questions (newbee)
Bcone1381 replied to J.E.D.'s topic in Kudzu Craft Forum
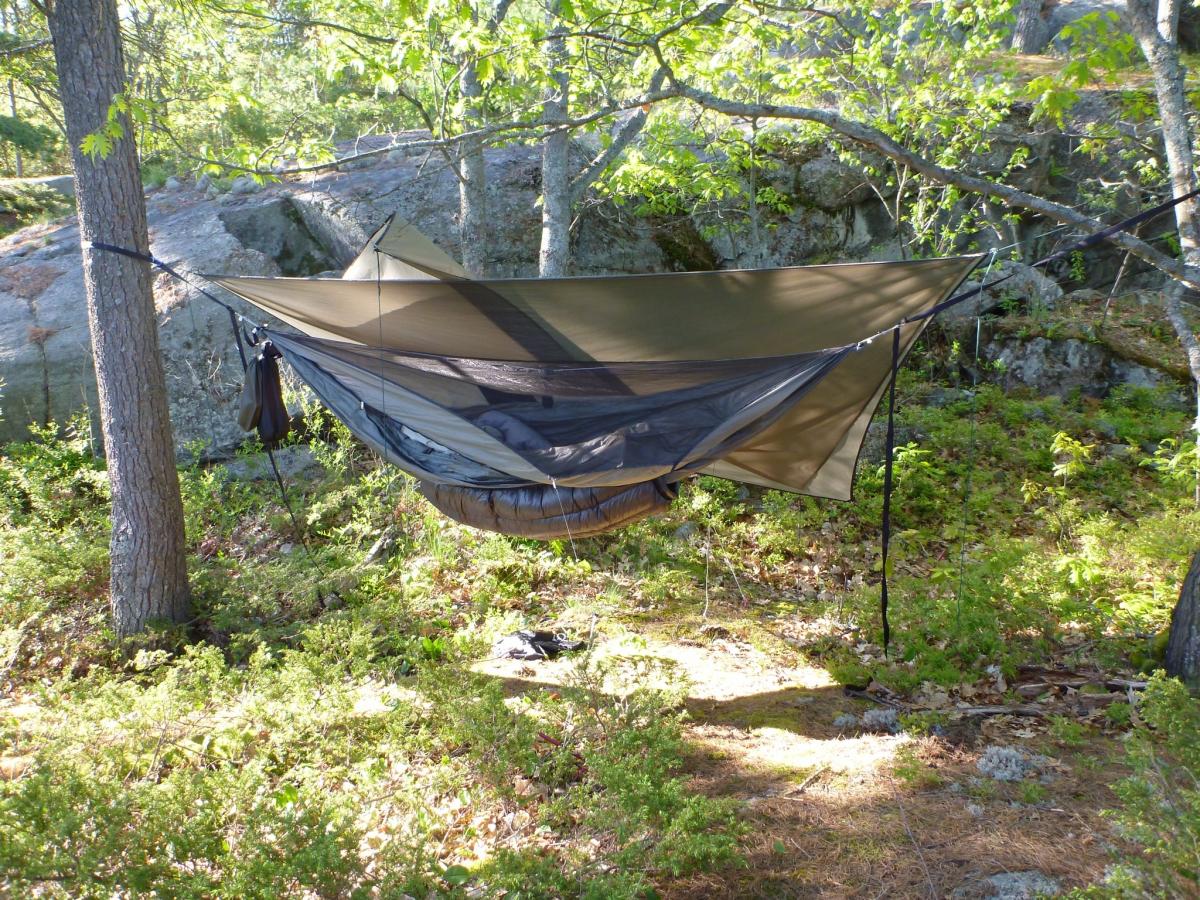
I can't help your with choosing between a Vardo or Ravenswood. (I new to this and am building Jeff's cast-a-way fishing kayak and will also use it for camping). However, I have some experience camping/backpacking. A person will save themselves a considerable weight and space by ditching the tent and going with a serious well engineered hammock (like a Warbonnet Blackbird) set up under a quality rain fly. Light weight, small package, Quick and easy to set up, better sleep, bone dry in the hardest rain. This site will more than introduce a person to hammock camping. BTW, if you can make your own kayak, you can make your own gear too. https://www.hammockforums.net/forum/?
-
No steam? No soaking? No heat? You just wrapped it around your form and held her tight with the screws, eh?
-
Jeff, i wondered if the fabric relaxed in response to receiving a coating. Do all polyesters relax like this, or just the original 8oz? How does the recycled polyester do with relaxation? Well...it does not matter because from now on I too will sew it on tight. It's not that hard. But it will always be a mystery because heat shrinking sure works awesome with aircraft grade fabric.