Aphers
-
Posts
239 -
Joined
-
Last visited
-
Days Won
17
Content Type
Profiles
Forums
Events
Everything posted by Aphers
-
Thanks, you're right, the loads will be significant. I could probably get away without a winch, maybe a 2:1 purchase would be enough. I would probably want to set up the lifting lines in a way that there was a stopper to prevent over tightening. I thought about bolting an eye right through the keel, that would be about as strong as you could get. But unless this is next to a bulkhead, it's going to be putting a lot of compression strain on the hull. I'm thinking that the mast step might make a suitable attachment point? As designed it isn't through-bolted of course, so it would need to be modified. Further aft there isn't such an obvious place. Maybe just an eye bolt on the floor about half way along the length of the seating. Or right at the bottom of the transom and accept that it will be pulling at a bit of an angle. Would be interested to see what other people have done?
-
My S11N is steadily progressing. Before I get on to the finishing stage, I should give some thought to how I am going to carry it on davits. I expect to use the davits primarily to keep it out of the water at night, and perhaps on shorter passages in good weather. I think it's going to be a bit big to safely hang off the yacht in rougher conditions. I would like to have it secure in the davits, so it is not rocking around at all. That means attachment points low down in the boat allowing me to haul it up tight against the davit arms (with appropriate fendering, of course). The loads could be fairly high doing it this way. I'm wondering about fitting strong points on the front face of each aft seat compartment, and another perhaps on the forward end of the centreboard case. Does that sound reasonable? I don't want to reinvent the wheel, presumably somebody has thought of this already... If it helps, the davits are not yet fitted to the boat, so the exact distance between them could be chosen to suit the dinghy.
-
Ouch! Best wishes for a speedy recovery.
-
I was a bit worried that the keel wouldn't sit perfectly upright. So I used two clamps at the aft end, and could adjust these to tilt the keel one way or the other until it was in line with the pencil line up the back of the transom.

-
I sawed the boat in half prior to building the aft seats, just to make sure everything would fit. The seat panels did need trimmed down a little so maybe just as well. Of course the test fit was done without the keel in place which would have given a little extra clearance. Today's job was fitting the keel. I didn't see any specific length given, so I just carried it as far forward as I was able to bend the wood. When I come to cut it in half tomorrow I was wondering about putting a slight angle on the cut, to reduce the chance of catching a fishing line etc. Has anybody thought about adding little bilge strakes, by the way? Might save some wear and tear on the chines? Oh one other question- when I fit the seat tops, I am correct to think that these just get glued in place, not glassed as well?
-
Thanks for those thoughts. I don't think I want to risk compromising the buoyancy, too much at stake. Those Armstrong hatches look fantastic, but I don't think they're available over here. For speed I think I will just install the hatches from my donor boat- it has three 4" ones on it. I presume it wouldn't be a big job to swap these out for larger ones at a later date?
-
I'm just at the stage of fine tuning the fit of the aft seats of my Spindrift 11N. I understand that the compartments under the seats are primarily there for buoyancy, but as a daily use tender they would also make excellent stowage spaces. I'm thinking of all those things that clutter up the bottom of a dinghy, like the grapnel and its rode, or the spare outboard fuel can. Etc etc. I do like the idea of being able to lock the access hatch, just to deter the casual light fingered passers by from making off with low value items. The smallest such hatch I have so far found is this design: https://www.force4.co.uk/item/Force-4/Inspection-Hatch-with-Lock/11BQ Which will*just* fit on the seat top of the Spindrift. But it's very tight. The design has a pretty wide flange on it, and the actual cut out is much smaller than it would appear. I would prefer a slightly smaller hatch, if I could find one. Anyway the main question is- would this type of hatch compromise the buoyancy too much? I don't think it would have as positive a seal as the circular screw-in type.
-
Thanks for the tips on taping. I have watched the Core Sound 15 videos but it was right at the start of the project. I think more of the information would stick now that I'm so far into it, so it must be time to watch them again. Anyway, a major milestone today- sawed the boat in half. I felt a lot more nervous about it than I expected! I can now take one half at a time outside to do sanding and other messy work, which lets me get on with a much needed tidy up of the workshop.


-
Just to update this, today I shortened the cables on my trolling motor, as I suspected that there was an appreciable voltage drop occurring. It has made a big difference, there is a real kick to it now and the voltmeter on the motor only drops one bar instead of three. It feels faster than it is, but it's happy at around 4kt now on the RIB. I think it will be an excellent match for my S11N. A suitable compact lithium battery is a project for another day.
-
Selvedge- I've learned a new word, thank you. I've turned the boat upside down now and should be all set for taping tomorrow. However I've noticed that the line of the keel has a slight dip in it. Perhaps I was a bit too enthusiastic getting the nesting bulkhead into place; this is where the keel is slightly higher than looks right. I was going to make up some micro balloons to fill the gap, but then I thought perhaps it's best just to get on with taping, and then fill on top of that to fair it to the right shape? There's only about 4mm needing brought up to level, but it does catch the eye. One other question on the exterior taping- should I be trying to minimise overlaps, so as to reduce the amount of fairing and sanding required? Or does it not really matter? In particular I'm thinking of the corners of the transom, and the two patches neat the bow on the chine where there are already short lengths of tape from the unfolding stage.
-
I do have some West filler, brown and easy to sand- I think it might be micro balloons but I'll need to dig it out. Brainless sanding is OK with me, but the easier it is, the better. I'm not brave (or daft?) enough to go for a bright finish anywhere except a few highlights like the knees so filler might be the way to go. The tape I'm using seems to have one edge with a rougher/thicker finish. I guess it's where the fabric is hemmed or something like that (might not be using the correct term). Anyway it leads to an uglier edge.I am tempted to try cutting it off, laborious though that will be for long sections, it will probably be easier than sanding it off later.
-
Had to take a week off the build, away from home for a work thing. Been back a couple of days now and got all the inside seams filleted and taped. I'm not happy with one of my butt joins, it seems strong enough but I don't think it was properly wetted out- no real surprise I suppose since it was the very first task on the project. So I'll probably sand/grind that back and do it again, but I'll wait until all the outside seams are done so that the boat is as strong as possible. Next up is flipping the boat and taping the outside. Any tips on how to do this really neatly, to reduce the amount of fairing and sanding that will be required?

-
I found a pair of galvanised drop/captive style rowlocks going cheap on eBay, they look terrible but they might scrub up OK, and they were very cheap. Worth a shot. I persuaded my other half to help me with the gunwhales last night... told her it would take an hour, it took more than three By the time we'd finished tidying, we got to bed at 2am. But that's how you make progress... Oh and of course I did run out of clamps. Made some wooden ones using slats from the old bed, the gift that keeps on giving. And when you're really stuck it's amazing what you can use for a clamp...

-
That's an interesting gunwhale detail, @Chick Ludwig - would give some options for attaching fendering. I've also spotted some chromed brass captive rowlocks (https://seamarknunn.com/acatalog/captive-folding-rowlock-50mm-chromed-brass-2257.html) which are a good price, but I'm not sure how they would look after a few months of use. There is a reason we use bronze instead of brass for structural boat fittings. Anyway, better get back to work...
-
That's the ash ripped for the gunwhales. Bit nerve wracking but it was good clear timber. A 6.5x30mm x3.6m strip seems extremely fragile. Thank goodness I still have the table saw- I nearly sold it just before deciding to do this project. I was working from 28mm stock, cutting it into thirds, so the way it worked out I have four strips of identical thickness, and two that are a tiny bit thicker. I might put the thicker strips on the very outside after the thinner strips have established the curve, if that makes sense. Thinking about the gunwhales leads me on to the rowlocks. I guess the correct type to fit are the ones that sit on the side of the gunwhale? If I had the money to spare I would go for these: https://shop.classic-boat-supplies.com.au/boat-hardware/rowlocks/bronze-rowlocks-drop-style-shallow-mount-pair/ But failing that, I will probably go galvanised instead: https://shop.classicmarine.co.uk/galvanised-turnover-rowlock.html
-
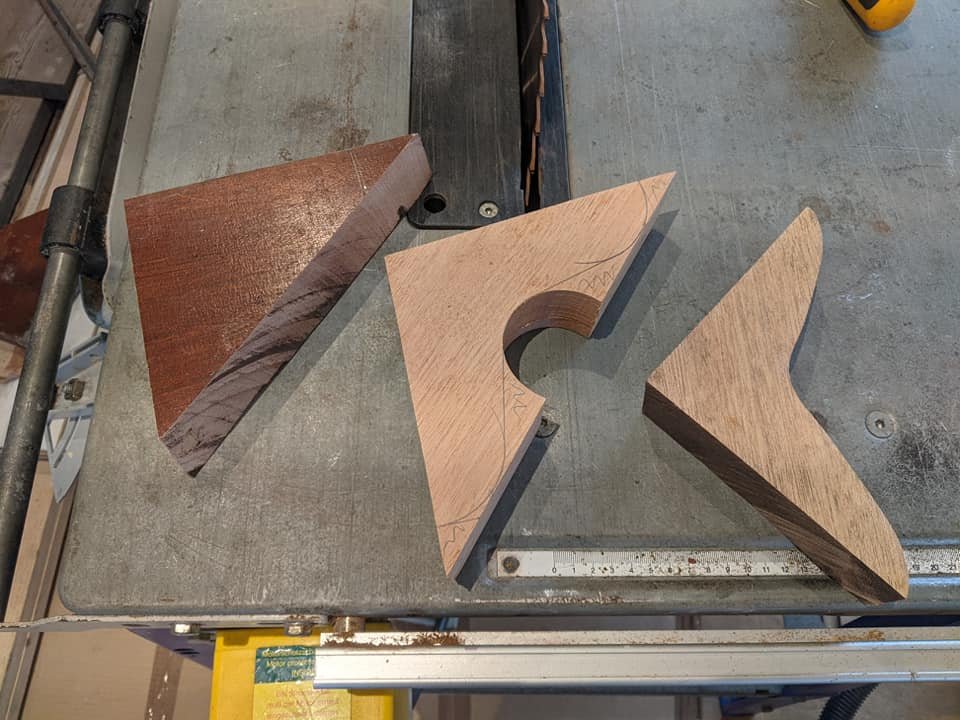
I did not expect the knees and breast hook to take that long. Where do the hours go? I found another piece of hardwood after all so didn't have to laminate. I didn't see any benefit in ripping the stock down, I quite liked the chunky look. It will be adding about 300g to the total weight, I can live with that. One benefit of my little mistake last night was that I got better at making them- five in all, when you count the breast hook! With a bit of patience, the pillar drill and table saw did the bulk of the work. I was a bit unsure about what order everything happens after the initial unfolding and dry fitting of bulkheads and transom. I glued the breast hook in place, then moved on to the transom and knees. I'll start on the gunwhales tomorrow. Should I glue up the nesting bulkhead before or after the gunwhales? At the moment it's just screwed in place, and the forward bulkhead is wired in. Everything seems nice and square with no twist. Measuring from the bow to each corner of the transom I was within 2mm, which is probably within the margin of error with a bit of sag in the tape.


-
First mistake, fortunately I spotted it before it was too late. I have no idea how I managed to do this, but I've made a pair of beautiful knees, perfect mirror images of one another, with the prescribed angles to the transom and sides all in place. Took me a good chunk of this evening (if I had a bandsaw I'm sure it would have taken a fraction of the time). When I offered them up to the hull, the angle between the side and transom was all wrong. It would pull in with a bit of persuasion but just to be sure, I checked against the drawing and it was way out. Aargh! Maybe at some point I started reading from the breast hook drawing- I've been putting a fair number of hours in so getting a bit tired. Annoyingly, that was my last good chunk of hardwood. I've got my ash for the gunwhales etc, there would be enough spare to do the knees, but it's only 2x1 so would have be laminated up from two or three pieces. Is that a problem?
-
Quick question: the stock I have for making the breast hook and knees is 45mm, so about double the thickness called for in the plans. Other than the slight increase in weight is there any reason not to use this? I've already made the breast hook and quite fancy having a little more material there since it is a fairly high stress area.
-
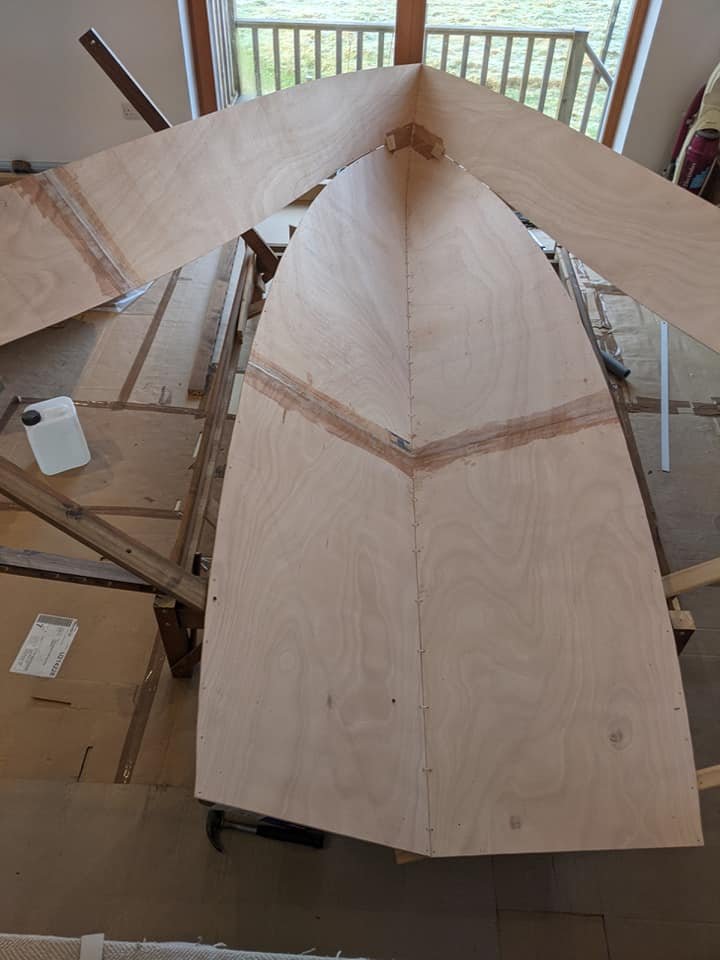
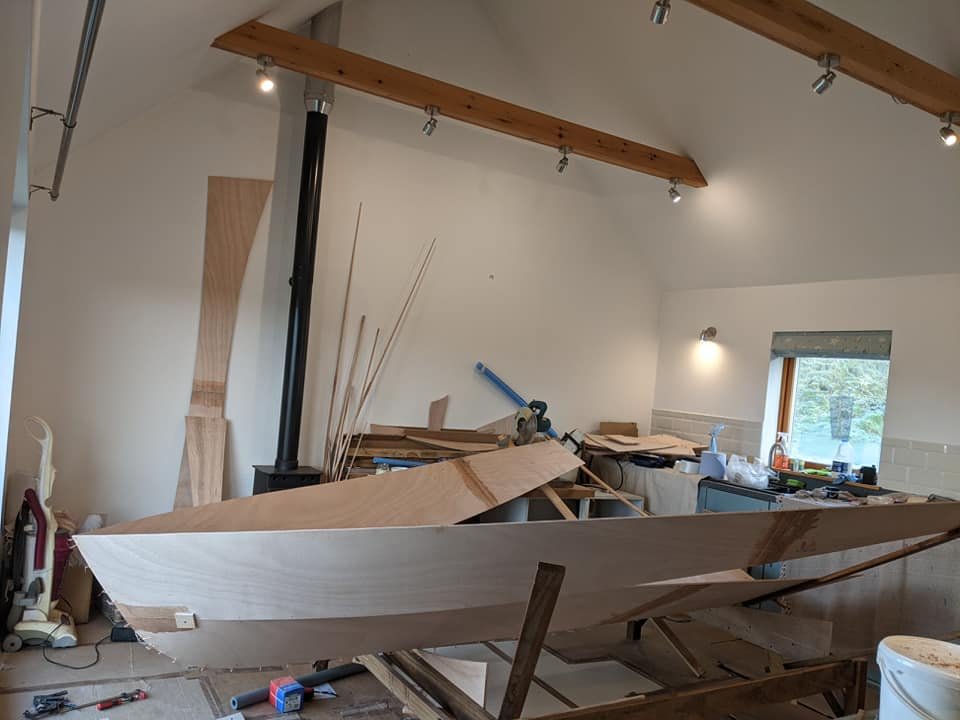
As promised, progress so far. I was pretty nervous when it came to the opening up. But I needn't have worried, the joints all held. My first taped butt joints weren't brilliant. I've put the better side to the outside, where possible, as I think that will see more stress. I can also hide an ugly joint more easily on the inside. My epoxy work has got steadily better with each little job. I've been doing this mostly on my own, although my 4yo son likes to help out where he can. I gave him the job of poking the wires through the pairs of holes which he took to with great enthusiasm. I had to go round and pull out all the ones that were in random old screw holes of course The old bed frame has been great. Unlike trestles, I can move the entire thing around without having to get it aligned afterwards. And with the extra width, I was able to tack on various battens to help me with the unfolding. You'll see in one photo that I have a sort of goalpost arrangement at the forward end; this lets me put a little downward pressure on the sheer line to gently persuade the boat to open up. It's just held by one screw each side so can swing fore and aft, and by pulling it forward I can press down to lower the sheer. It made fitting the forward bulkhead pretty easy. Well that's tea break over so back to work...


-
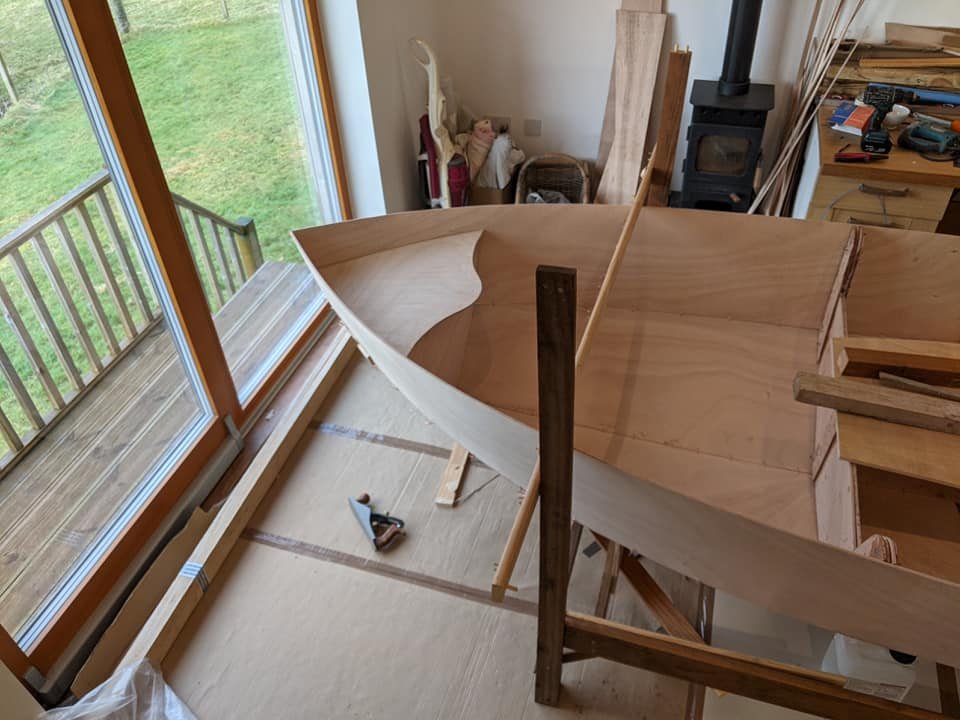
Progress so far: all major panels cut out, transom and bulkhead assembled, the two sets of floor/side panels are joined at the bow and ready for stitching. Cradle set up (I had an old bed to get rid of so modified that as a frame). I'm surprised how much time it took to epoxy together the transom and nesting bulkhead. Maybe I should have enlisted SWMBO to mix the batches of epoxy and stir in the silica. I've ordered some better (larger!) epoxy tools which should speed things up a little. I'll upload a few photos when I get a chance. Hoping to do the grand opening tomorrow.
-
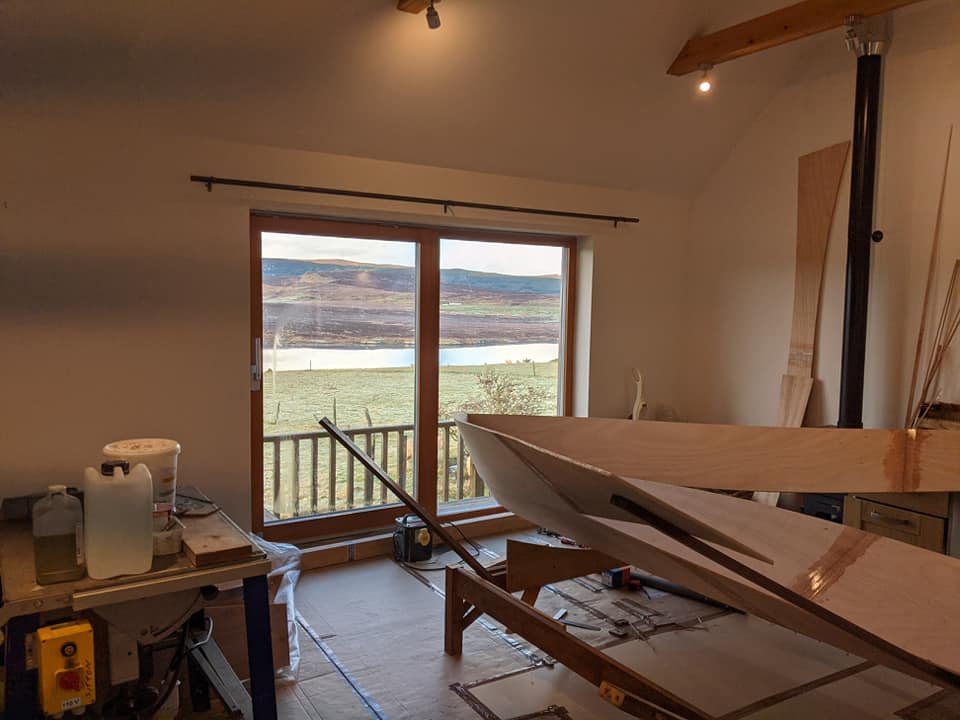
Thanks for the encouragement! Plans arrived today, I'm hoping to make a start at the weekend. And yes it's nice to have a room with a view
-
Ah thanks for that, I had assumed that the frame was built to a specific size/shape but I guess not. Which is good in a way since I can make it up from scrap timber. Since I took the photo I've laid plastic and cardboard down to protect the floor, and a bunch of tools are in there now including my big table saw. I've also built a temporary workbench from old kitchen units.
-
After considering all the options for a tender, I persuaded myself that a Spindrift was the best choice. Our yacht has limited deck space and the idea of a floppy roll-up rubber dinghy somehow lacked appeal against a nesting dinghy that promised to row beautifully and give us some fun under sail too. We are a family of three and plan to become full time liveaboards; this pushed up towards the largest version, the 11N. After a year of procrastinating, and waiting for a suitable build space to become available, I finally have most of the pieces in place. Four sheets of finest Okume plywood, 4 12ft lengths of 2x1 ash, several gallons of epoxy, and a good working space. The plans and templates are in the post and should be here later in the week. I've never built a boat before, and my timescale is potentially quite tight. The workshop is a holiday cottage which is out of use just now whilst all travel is locked down. In fact the workshop is a cottage that I designed and built myself. A bigger project than a dinghy but quite a different set of skills. I've used epoxy and glass before, but only for relatively small repairs. To help speed things along, I've opted tor the full size templates. I also have an old 'OK' class sailing dinghy to use as a parts bin. Having a heated indoor workspace means I don't have to worry about the weather at all, but working around my (part time) day job means I will only have four days per week, plus my evenings, to get this completed. I'm guessing a couple of hundred hours might go in to this, and I need to have the cottage freed up by the spring, so time could get tight. I shall be bombarding you all with questions as I go, so here's the first one: what size is the building frame for the Spindrift 11? I could get the timber for that on order right now and hit the ground running once I have the plans.

-
Will follow this with interest. I gave some thought to a composite project but in the end decided to go the conventional route. It will certainly be interesting to see how you get on and if you can beat the design weight.
-
AGM are good batteries because they can be discharged deeper, and recharged faster, than traditional lead-acid types. But you pay for that extra performance. 'Lithium' covers a wide range of different chemistries. LiPo is very high energy density and is used in RC models and other high performance applications. But it's not considered safe enough for use on boats as they can go up in flames. The preferred Lithium battery type for boats is LiFePO4, which can be considered no more hazardous than lead-acid. Compared to lead-acid they are much, much lighter per Ah, and they can be discharged to almost totally empty without damage, so in effect you only need half as many Ah. They also charge up quickly and efficiently, at a flat rate. Discharge rates are generally around 1C which means for a 50A current, you need a 50Ah battery- but there are now some cells that can discharge at 3C, offering very high output from a tiny battery. The big downside of LiFePO4 cells is that they must be treated very carefully. Even a momentary deviation from the safe voltage range will quickly destroy a cell. Not necessarily in a dangerous way, but it's expensive and inconvenient. If you just monitor the whole battery voltage (4 cells makes a 12v equivalent battery) you don't know whether an individual cell is too high or low, and sooner or later you will kill a cell as they go out of balance with each other. So you need a BMS, a little gizmo that watches each cell's voltage and activates some sort of cutoff when it gets too high or too low.The same gizmo will also redistribute power between the cells to keep them balanced. It's a pretty big subject. Putting together a LiFePO4 battery on a DIY basis takes a bit of work- I'm still learning about it and haven't built one yet- but by sourcing the components directly you can make a very cost effective system. It would be ideal for powering a dinghy motor, but due to the complexity it doesn't really scale down well and makes more sense for big yacht or RV batteries.