


Phil
-
Posts
81 -
Joined
-
Last visited
Never
Content Type
Profiles
Forums
Events
Everything posted by Phil
-
Greg Thanks for your patience. You are very fortunate to be learning all this first hand!!! 8) BTW let's see the photos of the boat you were born in
-
Barry Here's an idea I've been working on for sacrifical rub strips. So you wouldn't have to mess with bedding compound and screwing directly into the hull. You could also make a wooden "T" as well. The drift boat guys up there in the PNW screw their UHMW directly to the 3/4" hull bottoms, but I don't think that is such a good idea. Not much screw bite! :roll:

-
Got yea! I see the transition between the bevel and the gain now. The gain allows the strake to flush-out to the stem or the transom. Is this a Bolger detail or traditional? I always thought they planed the thickness of the strakes. See WB # 189 page 19 " The Landing School" Is this what you gain from a "gain"? The detail your using allows for the full thickness of material, yet it's flush 8)
-
I was confused by the photos showing only 1-2 ft. of gain at each end. So the gain or "bevel" goes the entire length of the strake? Makes for truer glueing surface as well.
-
Greg Nice boat! I take it an outboard? Excuse my ignorance, BUT is what you're calling the "gains" the (scarf joint ?) between the lapstrakes at the bow and transom? Nice detail! I always thought the plank thickness was planed down to get the curve fair. :oops: Updated detail for plywood?
-
Looks great! You'll likely be the fastest on this part of the river 8) If you need help flipp'n give me a shout!
-
Stump Glad to see you make use of a fine day! 8) Oyster Check your transom drain, I find mine there sometimes.
-
Here's a good trailer backing tip that was on "Ship Shape TV". You put your left hand at the 6 o'clock position on the steering wheel & look over your right shoulder while backing. Which ever way you swing your left hand & wheel is the direction the trailer goes. :roll:
-
Stump bump v. to collide with, knock or strick a stump, n. A swelling or lump on a stump. Come on Stump I know you been workin'on it. Is the one in WB launchings this month the design your working on?
-
What a treat, thanks Nifty clamp design. You know it's a good design when you don't have to sketch it to remember it! Does work get done between classes or is this a dedicated class project? Phil
-
Barry, I agree, for a permanent solution alum. conduit and a pipe bender. The trick to heating plastic (or metal) is to get it to the min. heat required for it to loose it's memory (ie. when you let go it doesn't go back to being straight) and not so hot as for it to loose it's initial strength, for PVC it's ideal temp. is 250df with it's welding temp. at 500df. If you exceed the ideal temps. for any prolonged time the part will lose it's strength. I noticed you said you used CPVC. I repaired a few plumbing lines in the house this past weekend. I cut into old CPVC with the shears only one rachet and it blew apart really ragged. The old white PVC cut like butter. I think it has plastic added to it ("plasticized"). The new CPVC however cut like butter as well?? So I guess exposure to hot water (which it's designed for) makes it brittle?? I ??? the CPVC for a structure but........there are also UV issues??
-
Jeff I think this is similar to what your asking about? Over at B&B http://www.messing-about.com/forum/viewtopic.php?p=28286 I looked up some PVC characteristics (250 deg. f. for bending so SWMBO's hairdryer is not going to cut it! You need a heat gun to do it right. No fire or it will scorch and melt!) as Graham says do the heating slow and evenly. Good luck, Phil
-
Thanks Capt J I guess you have to write, unless I'm missing something? Let me see, how do you lick a stamp? Up & down or sideways? No web site???
-
Are there BJ24 plans available yet?
-
What bothers me about it is the beam width, as in tenderness. Making adding a "true" cockpit diffucult. For a little simple skiff w/ a 25 hp running 15 mph @ +/-20 mpg, it's attractive. I like Toms' BJ24 as well, but don't have the plans. Do you have a link to his site?
-
That's the one Oyster. What do you think of that little boat? Is that one yours?
-
Thai long-tails
-
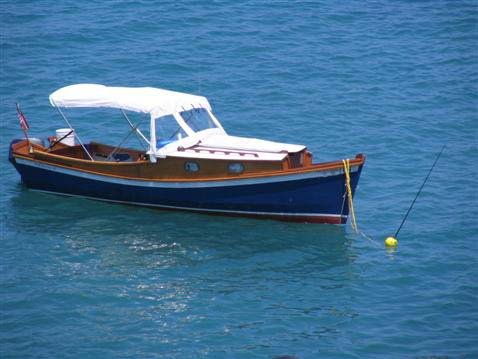
Alright Oyster these aren't quite up to par with your sculpture..umm..unadulterated sin :shock: How would you like to get the sandpaper bill? Link to his Site: http://www.skiffamerica.com There is a forward mast/sail designed for in the plans. Just none built with one as of yet???
-
Stump way to hang in there til you get it right! That would be an A+ in photo-posting class .
-
Show us the orientation of the different 1/4" layers. I've always wondered about that because the different plys/layers in the plywood are normally at 90 deg. to one another. I can see the 45 deg. orientation in thin 1/8" solid veneers helping structurally, but with 1/4" p-wd laid at 45 deg. every 3rd ply/layer would be at 90deg.??? Are you vaccum forming or pressure rolling the layers? Thanks Phil
-
Stump I'll give it one more try on the photos. Cause you know, they sure do make the conversing alot more pleasent! and informative! Go here: http://www.imagestation.com and set up a free account, make an album with your photos (each photo 300kb max). Open said album and said photo to insert in reply, then right click photo, then click properties, highlight the entire URL, click (ctrl- C) for copy. Then in another window open the forumn/topic/reply and type the message you want above your image, click the (Img) button (top right), then edit paste, then (Img) button again. Here's one of mine linked from there. This is what it looks like in the message body with out any spaces: Here's one of mine linked from there. Repeat process for another image. Do not add any attachments as photos you just made a link to them above. Good luck Edited to add:see these http://www.messing-about.com/forum/viewtopic.php?t=3622 http://www.messing-about.com/forum/viewtopic.php?t=2027
-
Capt'n Jake & Joel Don't hold out on us now!!! or is this just how long it takes to fair it. Keep'um com'in (the photos & the boats)! Greg That Winter Boat Building Class needs a some flotation as well!!!
-
Glad to see you get started 8) I take it at 1/8 scale? Are you keeping all materials to the same 1/8 scale? On the photos, open them in whatever software you dwnload them from the camera with. Look in the top tool bar for (image size) it could be in edit, options, image, tools,ect... Then resize to Franks' recomds. 400x300@ 72 dpi, the ones you have posted are +/- 200x150@72dpi. If they're still fuzzy you may have a setting on the camera wrong. Do you have any menu options on the camera to set the (file) size or a slide or button on the side or top for up close and far-away shots? BTW there's always the throw it up against the wall adjustment.
-
Stump see if you can change the file size on the menu options on the camera. I set mine at 1600, normal quality, then resize with photoshop.What imaging software are you using?
-
Hey Stump 4X8 :shock: So thats why you wanted that 1 cylinder diesel . One helpful hint if your using bass or balsa wood. Go to Rite-aid or Walgreens and buy a few of their foam padded fingernail files. Different grits on both sides 8) . Makes sanding a breeze! For glueing try white, "Tacki -Glue" glue, real short set time.

