Jim Stumpf
-
Posts
440 -
Joined
-
Last visited
-
Days Won
8
Content Type
Profiles
Forums
Events
Everything posted by Jim Stumpf
-
There is the telescoping pole just in front of the lazaret, which is the only structure in the shade pushing up. Just aft of the adjustable pole the canopy actually drops towards the rudder head giving protection from the sun as it drops closer to to the horizon. Yes the forward end attaches to the mast. Hope that helps. If the sun ever comes out I will roll the trailer out and get some better pictures. Jim
-
Hey Don, I used 5/16 fiberglass. I had some 3/8 left from a repair but that was to stiff, I broke a ferrule trying to get the bend I wanted. The 5/16" seems to be just about right. Jim
-
Sun shade progress This is what I would consider a picnic canopy or hanging out at the anchorage sun shade. Certainly not to be used underway. Still working out lines and misc. shown below is a pic with it at rest for overhead sun and then another pic with it under tension for side shade, you can almost pull it to the deck if needed. The loose flap forward was left to go around the mast and eventually attached to the camper to fill in the void between the camper and the mast where I am sure 90% of the sun will fall in a strip across my napping face.


-
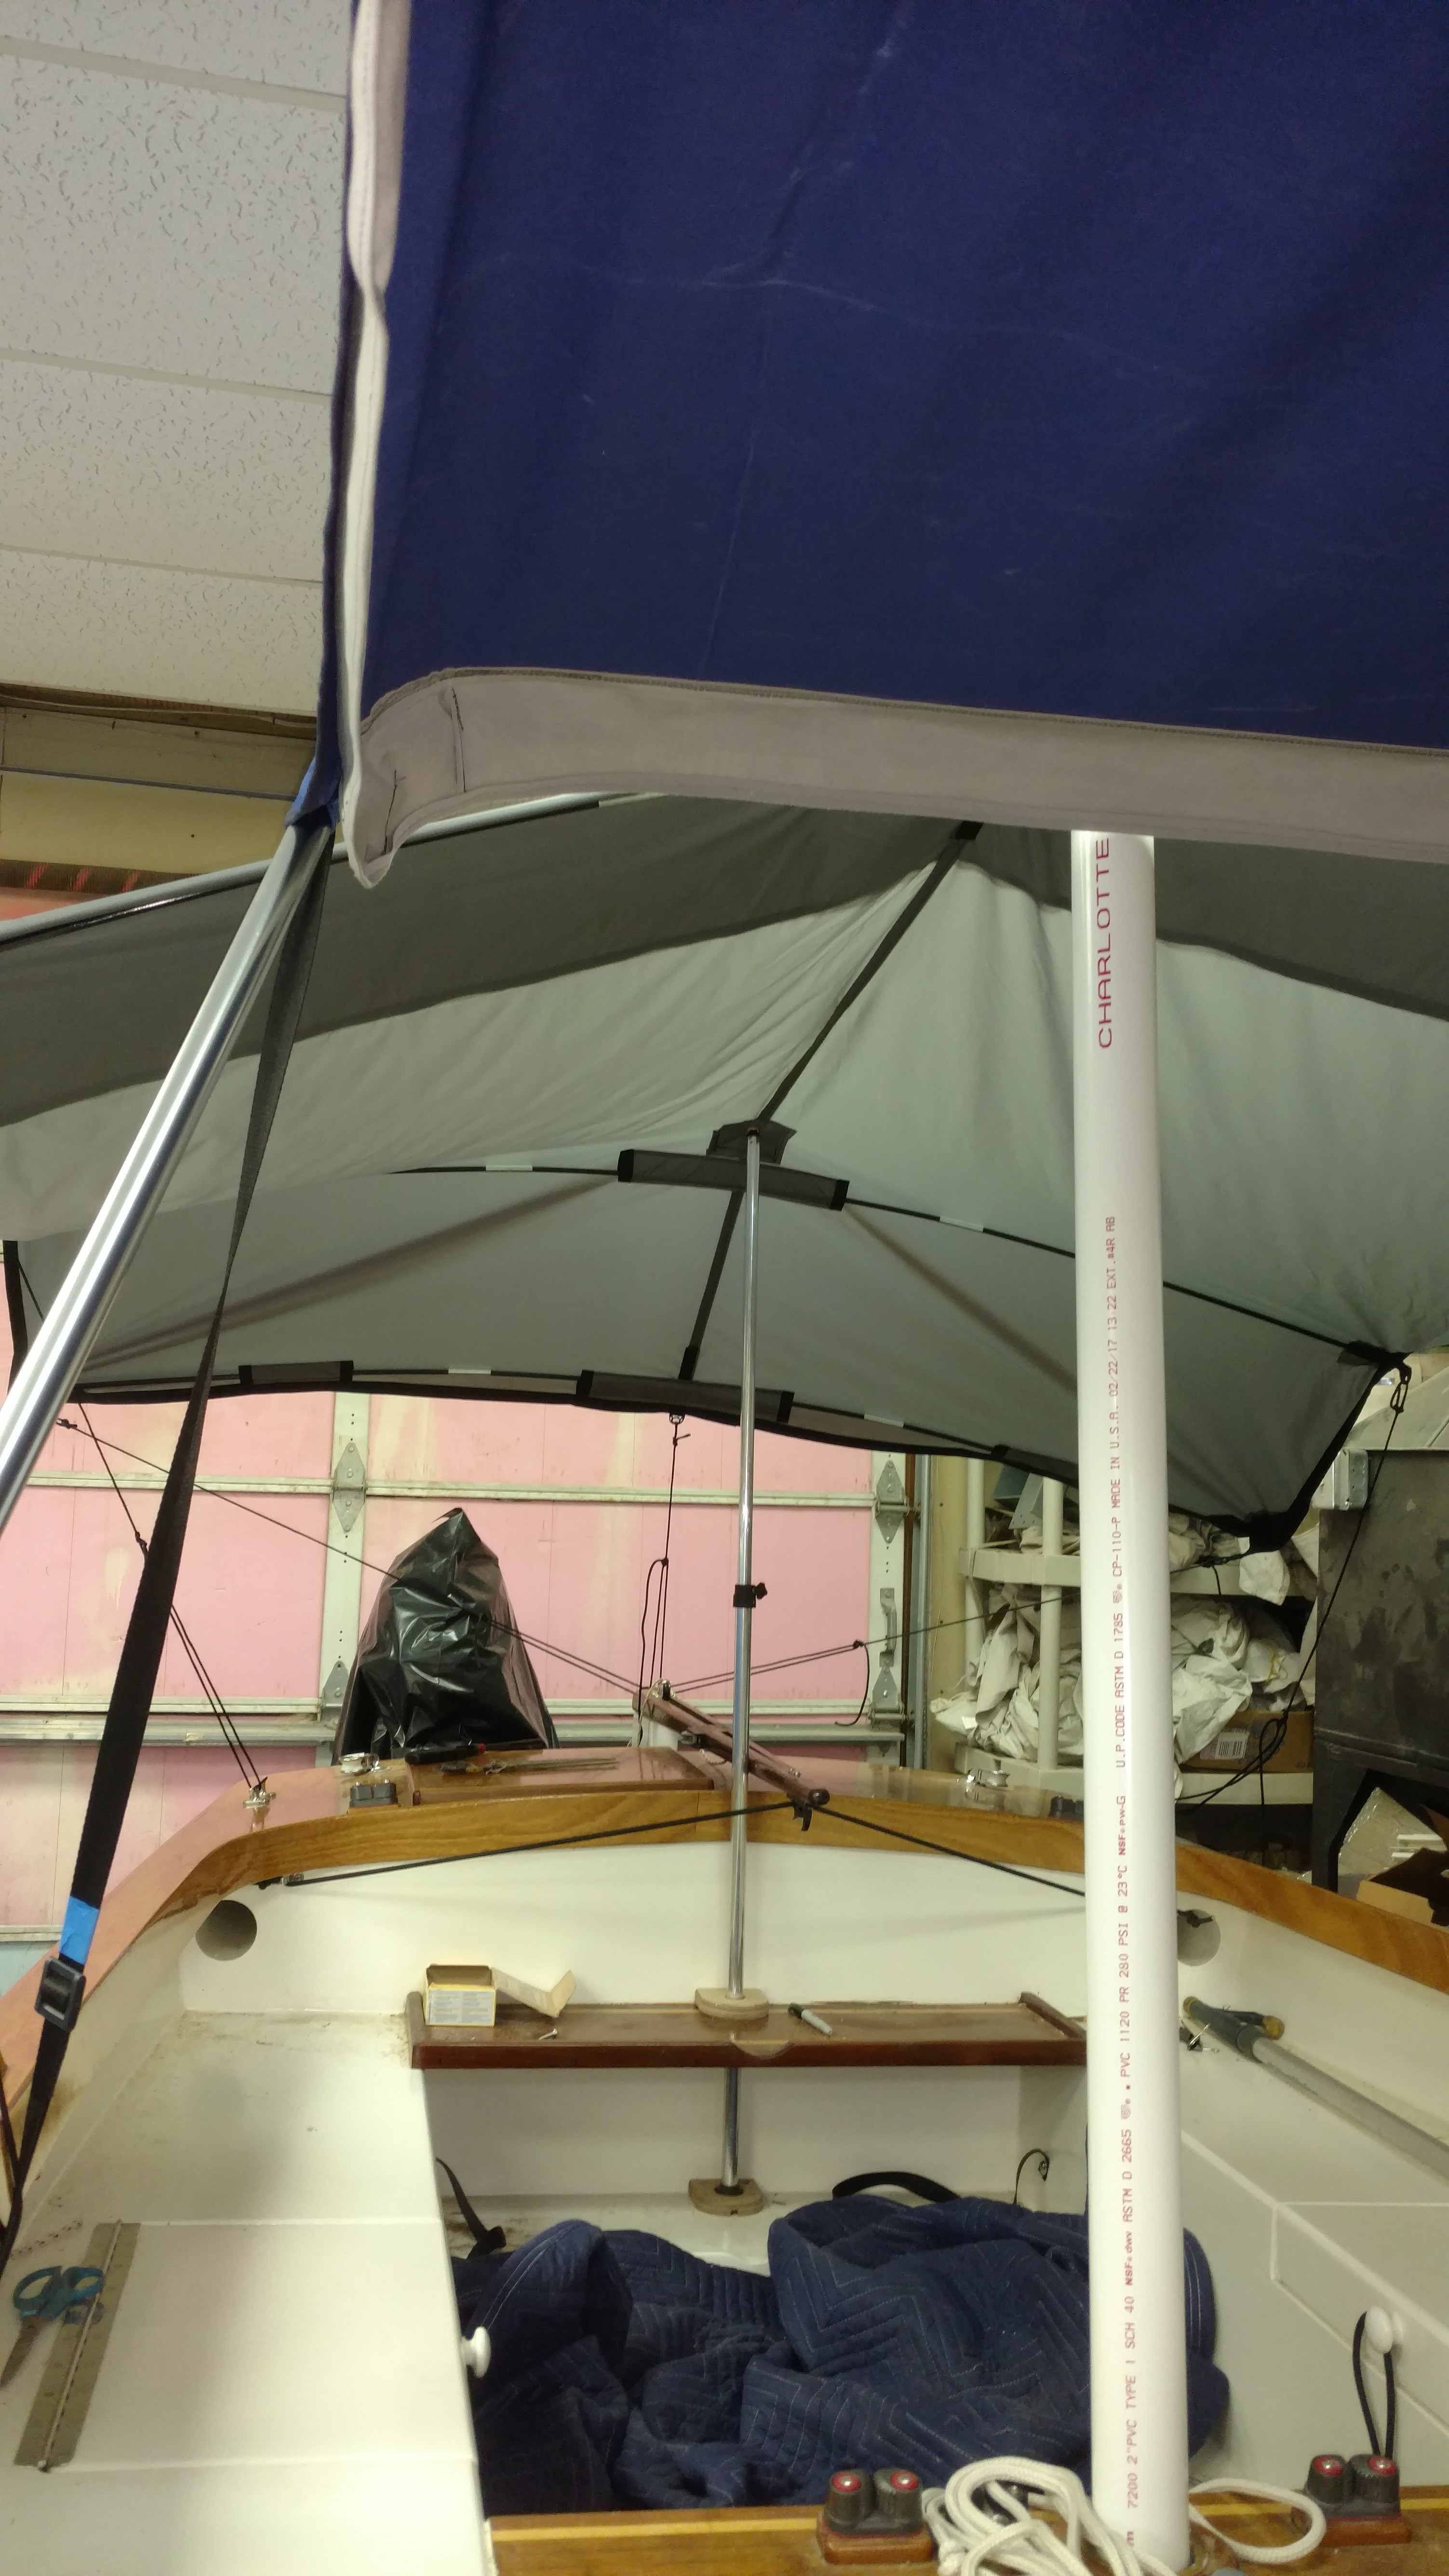
I thought that I would start a new thread on my camper top build. I started with an inexpensive bimini from Amazon. https://www.amazon.com/Oceansouth-Bimini-Available-Three-Different/dp/B013ASEG9E/ref=sr_1_1?srs=8055815011&ie=UTF8&qid=1491246347&sr=8-1&keywords=2+bow+bimini I have the Bimini installed backwards (on purpose) so that it folds forward. The secondary leg was shortened by about 10 inches as the frame is not centered fore and aft in the forward cockpit. I did not center the frame as I wanted to repurpose the forward oarlocks for the deck hinge. The removable deck hinge is screwed to a riser block. The block has a carriage bolt dropped through the center of it and is wing nutted under the deck. This is kind of cool as the bolt acts as a pivot point for the hinge and gives you the ability to accommodate some twist for alignment. The grey fabric hanging from the blue top (this bimini only comes in blue) is an apron piece that I am sewing to the top for attachment of the side wall curtains. The corners are not completed in the picture and were a major undertaking as you have to be able to sew in 3d, if you follow my lead on this project you will need the help of a very good friend as this can get a little frustrating and intense. They are currently finished and I will have to get some pics posted. So far so good I will keep you posted. I also just completed a sun shade for the aft cockpit and will post some pics, that is a more floating assembly and more of a fly. The above bimini would probably work in the aft cockpit if you don't mind all of the addition hardware but it would fit. More progress pics as they come available. Thanks, Jim


-

Wanted to contact Dale Niemann, cockpit tent
Jim Stumpf replied to Jim Stumpf's topic in B & B Yachts Forum
Hello Dale, Thanks for the response, no need for a PM, just had seen that you hadn't posted in awhile and wanted to get your attention. I will be visiting Fl this year for the FL 120, I will be making up a cockpit tent and have been struggling with a design. I think about moving the mast to the third mast step (for nights) and going full cockpit with it or possibly stopping at the thwart with a half deal similar to yours.I am leaning toward your design (and not fight the mast) and then possibly adding just a sun shade aft to create cover but not an enclosed space. The only feedback that I have seen from you regarding yours was that you thought it too tall. Any thoughts and advice would be greatly appreciated and as always pics rule. I am curious as to your method of connection to the hull and how you dealt with the fact that the cover does not waterproof/bug proof the entire cockpit. Did you install screening below the thwart and dams on the seat to keep water from rolling under your cover. Sorry to have stalked you and I look forward to your advise, Lively has been an inspiration over the years. Good luck in this new phase of your life, I've been married for over thirty years and can imagine your change (for good or bad) has been a challenge. Thanks, Jim -
Finding centerline of mast/attaching hardware to masts
Jim Stumpf replied to acreew's topic in B & B Yachts Forum
I set this jig up on either end so that my line did not wander, put a small kerf in the tube at the plumb mark either end then strung a piece of mason line. I used PPG self etching primer and sprayed with rustoleum, 4 sailing seasons and it seems to be sticking (I need to put some leathers on my sprits to stop wearing paint at that junction) Hope that helps Sorry pictures are in reverse order. There are more pictures in my build pics in the signature link below. Jim

-
I was hoping to ask Dale a couple of questions about the tent he had on Lively. I see that his profile does not allow PM and it doesn't appear that he has checked in here in awhile. If anyone speaks with Dale please pass along the request as I would really like to discuss his design. Thanks, Jim
-
1/2"emt conduit hoop and center post. All tube to deck fittings are plastic bimini anchor/hinges. Front post to the hoop connection is a plastic bimini fitting. All joints have clevis pins for removal and the front post to the deck has a quick release pin so that it can be pulled and the entire dodger can fold forward out of the way.

-
Good luck on your project. One note on the dodger; these boats can be pretty wet to windward and the dodger was installed more to keep some of the spray out of the seating area especially for anyone sitting forward of the mast thwart. Mine has one pin in it to release it and let it drop out of the way. Jim
-
I have been doing a great deal of thinking and searching on this topic lately and here is where I am at this time. I built a spray dodger last spring and want to incorporate a camper into it. In fair weather the dodger could be folded forward and out of the way for maximum ventilation. I am thinking 2 fiberglass tent poles utilizing the two sets of oar lock sockets. The following picture is from the Swallow Boats website. I like the overall concept. What I don't like is attachment system as used in the picture. I think a skirt that laps the coaming and lays on the deck would be better with the tie downs to the interior. Instead of the line at the exterior of the coaming perimeter I think something interior under the coaming edge would be better, it could be a line or snaps. Entry would be from the aft deck. Just my current thoughts subject to change without notice.


-
Stop out and help paint the house and I will take you with me next time It was a great weekend, good sailing, spectacular sunsets, both of my adult daughters and my best friend Joe. Doesn't get any better. Jim

-
First time out this season. This is far better than painting the house. Jim

-
Nice Dave, Simply elegant as well as functional. (Both the oars and paddles)
-
Looks like you have a pretty good start. Will you be able to rework the existing canvas or will you be making new? Jim
-
Here are some pictures of my recently finished dodger. I can not provide much empirical data as I have not been on the water yet this season. The idea was to keep the outboard ends as low as possible so that the helmsman could see over the top of the dodger. I made several mock ups to see what I could see over. The unit is of a more round shape to facilitate less visual obstruction. I will have to measure the apex of the arch but I recall it being about 10 or 13 inches above the deck. It will not be a place to sit up right if you are sitting on the seat, its primary function was to divert some of the spray coming over the deck. These boats are light enough that I would avoid as much surface area to catch the wind as possible. Hope this helps and if it ever quits raining here on the weekends I will provide an on the water report. https://goo.gl/photos/8jfVRtSFxo1wEWqb6 Hope that helps a little, Jim
-
I thought as much on the drink holder. You should insulate it to keep your coffee hot..wink wink..yes coffee. I built a wine rack out of pvc for my bride who finds the best way to live with me is to have a glass of wine daily.

-
Looks great Dave. What is the assembly behind the lazaret seat, the tray with the 2 pieces of pvc pipe. Although I am not a racer I have not found it necessary to hike way out. With 2 in the boat the forward crew member sitting on the side deck seams to be enough, solo just my weight on the side deck is enough although I have slipped and scared the crap out of myself in a good blow and have added nonskid to the floor this spring. The boat tends to spill excess wind when heeled too far and if I am struggling to control the boat I reef. 25 knot winds, solo, with the third mast location in use is a walk in the park . Jim
-
My boards are about 10". I do have the forward oarlocks in place as per Graham's recommended placement, I could try the oars out and let you know, this additional use was not on my radar. Thanks Jim
-
I hadn't thought about selling mine yet but the opportunity to sell and start a new build is never far from my thoughts. Pics of the build https://goo.gl/photos/JZ8Gfo4d7fik7kXT7 Pics of this years upgrade https://goo.gl/photos/8jfVRtSFxo1wEWqb6 More upgrade pics https://goo.gl/photos/x2ZH8DaCxC66ok1Q7 Please send me a private message if you would like to discuss further. The outboard in the pics can not go with the boat it was a bday gift for my 50th from a dear friend. I have an ohio title for boat and ohio registration for the trailer. This is the 4th season for both the boat and the rebuilt trailer. Thanks, Jim
-
Nice build Don.
-
Thanks Paul. A note about the seat filler boards... I found that the forward seating area at the curve of the coaming is a great place to hang out but the seat is too narrow for the average american backside. The boards in place in the picture just above will stay installed all of the time to make that forward perch more comfortable. I will try to get some pics of the way I have this all fixed in place pretty simple and secure, easily removed also. Thanks, Jim
-
Dodger is complete. Wew. Now I will need to rework a few lines to clear the dodger. Thanks, Jim


-
Oh come on Dave "don't rain on my parade" pun intended. I think you are probably right but a guy can hope. Thanks, Jim
-
We worked on a modified set up this morning which I will get rigged up today and I will share pics. The uphaul will remain unchanged and the downhaul will keep true to its orginal theme but will be rigged slightly different to keep it out of the footwell, bunk-board area. Thanks, Jim
-
Its celan today because of the fresh paint. In a couple of weeks it will be full of that smelly ohio lake bottom sludge that stains everything. Spray dodger is substantially finished pictures at 11. After all of the struggles I am very pleased, if it keeps the water out of the cockpit when beating to windward I will be one happy camper. Thanks, Jim