markja
-
Posts
45 -
Joined
-
Last visited
Content Type
Profiles
Forums
Events
Everything posted by markja
-
I simply bent the lower pintle to fit the lower part of the rudder, no problem. I fussed with the top and bottom pins so they would stay parallel to the edge of the rudder, too. As far as clearance between the rudder blade and the "cheeks", i found some large nylon washers at the local hardware store that I let into the blade until the fit was good enough, I think it keeps things from sticking. -Mark


-
Bob, The pictures were taken at Lake Sonoma,near Santa Rosa. Is it the dry brown hills in the background that gives it away?
-
Yep. I haven't yet felt the need to reef it. the winds are pretty light on the lake I usually sail on.
-
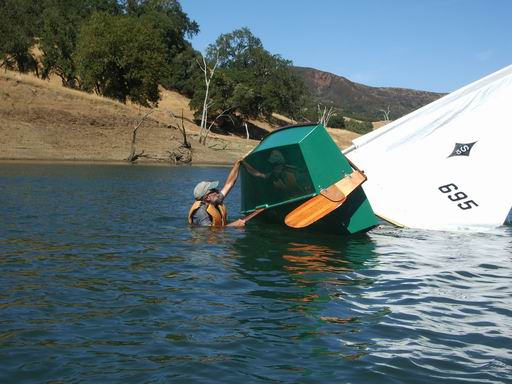
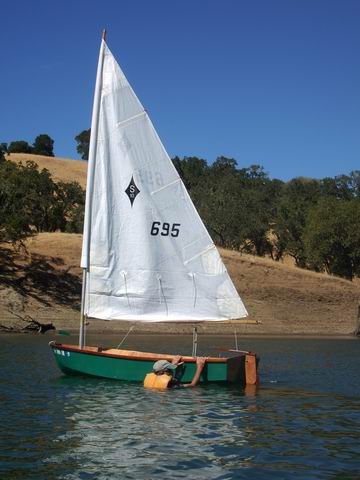
I had my Spindrift out last weekend and got the nerve to try a capsize. That was fun. The water was warm and it was fairly easy to climb on the daggerboard and pop it back up. I found it easier to swim around to the stern and climb in. The hollow mast had a cup or two of water inside when I got back to the dock. Are there any reasons not to drill a small hole (~1/4" D.) just above the mast plug so it can run out? I also discovered a little water sloshing around in the forward half of the side seat tank. I am guessing it got in the after half where I cut a hatch and then got between the bulkhead and seat top somehow when capsized. When the plywood seat top was glued down, I might have not got the epoxy to bond to the top of the bulkhead...It doesn't sound like a lot of water, but I think I should add hatches to the forward seat half now so I can dry it out. Great boat to sail so far. I will try to post some more pictures here. Mark

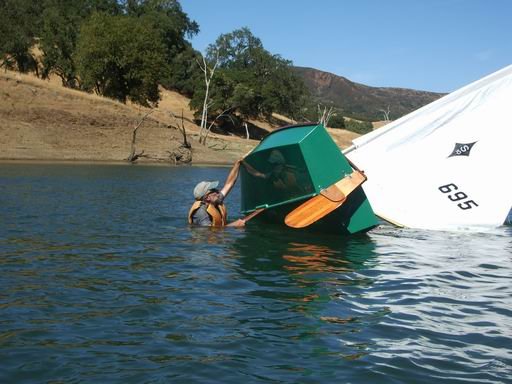
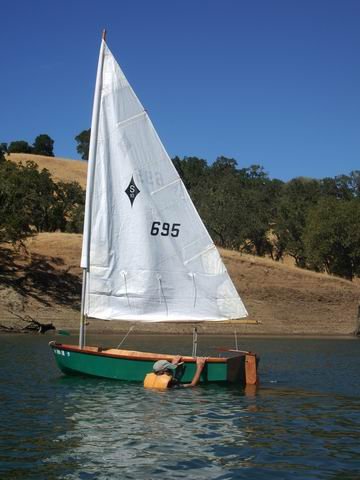

-
I had a problem this year with 1 of 4 sheets of Okume Joubert BS1088. I had some delaminating, too and didn't notice it until the boat was taped. I took a depp breath, and just dug out the loose area and filled with epoxy. Found one more small bubble after the first splash and forced epoxy in there too. Several launches later I haven't noticed any problems. I guess we just don't expect defects when we buy quality plywood. I sure wasn't trying to scrimp on mine. Oh well. I went around and tapped with finger all over the hull. The loose plies sound quite a bit different. Good luck. MARK
-
Garry, I like your gizmo, too. With a small truck I don't have to flip the boat, though. How do you get your boat flipped without scratching it up. The lakes I sail have concrete or asphalt ramps. Hard on the paint job. I am wondering if I could carry it on top of our Honda Civic... I fastened a 1/8" x 1/2" piece of hardware store aluminum along the keel for bumping along the concrete. Works great so far. I suppose salt water would eat up the aluminum. but for $10, I'll just replace it. I took the boat out today to a larger lake. I think the winds were blowing about 20 knots. The Spindrift popped up on a plane pretty easy in that wind. Lots of fun. I have the reefing sail but have found no need to reef yet. I almost let it capsize, but chickened out at the last minute. The automatic bailer finally got tested out, too. I made a wind indicator to mount in a hole on the bow knee. Really helps me figure out the wind shifts. I will try to post a few more pictures if I can get someone to go along with the camera. By the way, thanks to all with advice and help with my boat-building. I am thinking about another boat, but we now have a Spindrift, a canoe and 3 kayaks in the garage...I suppose I will have to part with some before adding another. The Lapwing sure looks interesting. MARK
-
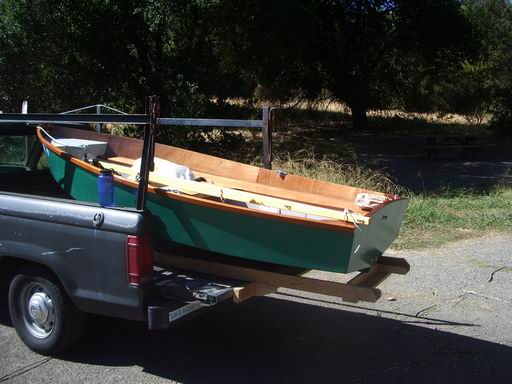
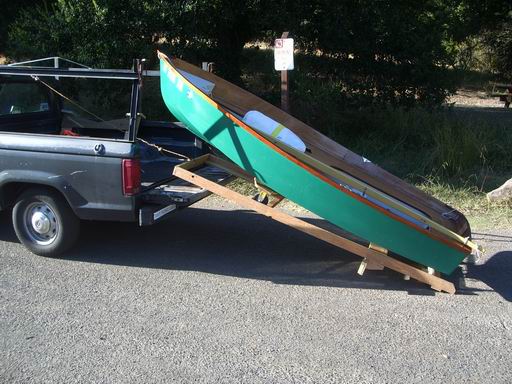
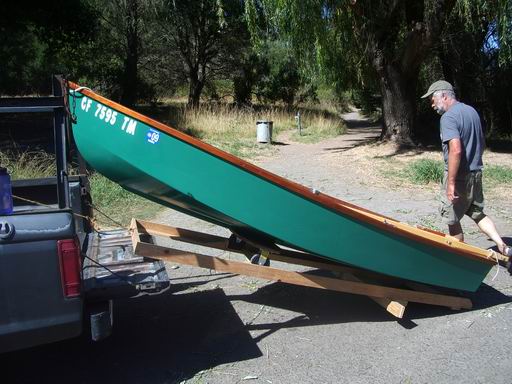
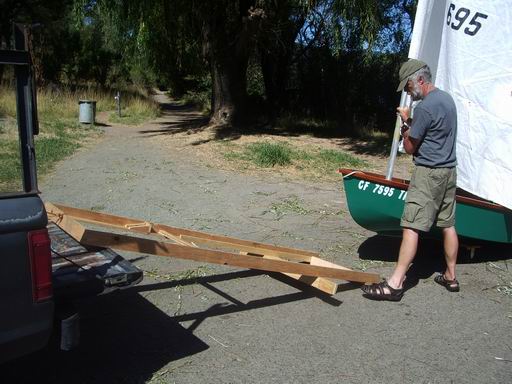
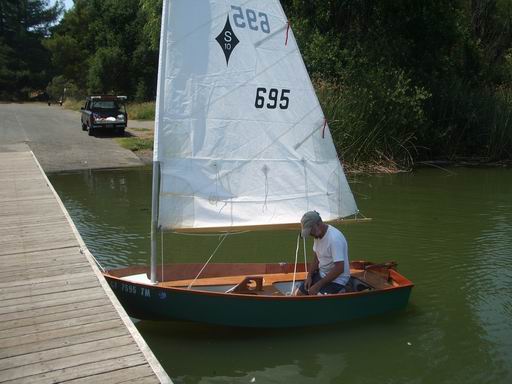
I have finished my Spindrift 10. It is great fun to sail and I have managed to take it out after work on a small lake near our house several times already. My cartop helper person only helped once though, she decided it is too heavy. So after some trial and error (only a few small scratches) I now have this gadget for getting it in and out of the back of the truck fairly easily by myself. The other nice thing is that the boat can stay right-side up on the dolly with all the gear inside. It makes it harder to forget to bring important pieces of gear (like the mast, which I left behind one time). There is a dolly that fits into the daggerboard slot and a ramp to wheel the dolly and boat up and it stays in place with a block of wood on the ramp. Then I lift the whole thing up and slide into the bed of the truck. It sticks out about 4 feet which is manageable and legal. A trailer would be easier, I guess but I haven't figured where to store it. Mark


-
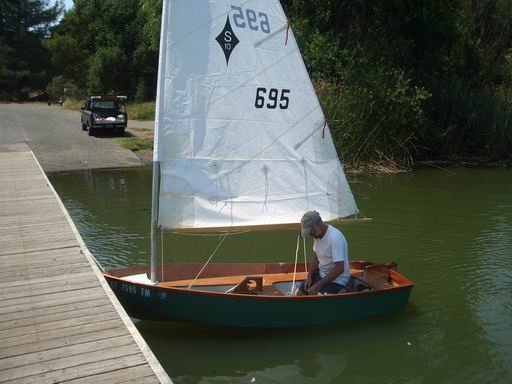
Greg, I just finished my S10 with System 3 paint in the last few weeks. Really like using the stuff. Bought a gallon of the yacht primer and a quart each of green and white (really light gray). after four coats of primer and about four topcoats, I still have about half the paint left over. The primer is great whether you roll it or roll and tip it, it leveled out for me. The WR-LPU topcoats were different. They ended up looking fine. When you first roll it on, It is full of bubbles, but a pass or two (no more than that)with a foam brush and it smooths out. I thinned the WR-LPU about 20%, too. I varnished the seats so it is mostly the cockpit that is painted inside. The hardest part for me was waiting a week for the paint to cure so that I could put it in the water. Your boat is looking good. MARK

-
Russ, i sealed it a day ago. the Life Caulk seems to get rubbery quickly but the "cure time" is anywhere from 1-7 days. It sure looks waterproof to me. The boat colors are System three Mercer green outside and Bainbridge White inside. The inside color is actually a very light gray, easy on the eyes and it hides a lot of stuff, that I decided wasn't worth sanding and scraping out in the corners and under the seats, etc. I really liked the System Three paints. The primer was easy to apply and sanded well, too. The topcoats were a little trickier as mentioned here in the forum but, it makes a semi-gloss finish that is probably gonna get scratched eventually anyway. the water clean-up is great. I wouldn't pour it down the sink, though. that stuff, when activated will partially skin over and set up even under water. It is definitely not like a latex house paint. I'm a going sailing... MARK
-
How long should I wait before exposing the Life Caulk to the water? I have installed the bailer with this caulk and the only thing keeping me from launching is wondering whether it is cured. It seems to have hardened up a bit already. I am not concerned about painting it right now. The instructions say exposure to water will actually speed up the cure time...launching the boat would certainly expose it. MARK
-
That makes sense to me, protect the plywood as much as possible. I will use the Like Caulk on the bailer and see if i can find the Sikaflex for the plastic. Here is a recent photo

-
I would save it. Probably will be a better investment than anything in the stock market for sure. We now pay around $8 / bd ft for clear all-heart vertical grain. We still use some redwood in the custom wood window business where I work. It is great stuff. very stable but a little soft for many applications. MARK
-
My Spindrift 10 is getting ready for the water. I still have a hole in the bottom to fill with an Andersen self bailer, though. I plan to set it using Life Caulk. Is it best to caulk right on top of the finish paint (System 3 LPU) or scrape down to the epoxy coat under the paint? Also I have some round ABS plastic deck plates. I think those are best set in a silicone caulk, because the Life Caulk says it may not be so good for plastics. Does have any other recommendations? I am hoping to do a trial launch this weekend. Will post a picture or two. MARK
-
Thanks for a couple of good ideas.
-
I have a piece of 2 inch webbing to use for a hiking strap on my S10. It is supposed to fit mainsheet mounting block on the bottom. It seems I will have to punch a couple holes thru the strap for the 2 bolts that go throught the keel to hold the block. This is a non-nesting boat. Would it be better to add a couple grommets around these holes? or maybe just a washer to spread out the stress? MARK
-
This is the one the post describing the hiking strap setup. http://www.messing-about.com/forums/index.php?topic=5720.0 If I was to rivet the gooseneck to the mast, would 3/16" aluminum pop rivets be OK? I can't seem to find SS pop rivets anywhere...
-
Thanks for the advice. moving along, does anyone have a picture of a hiking strap setup for these boats? I have read the post on how to fit one but a picture would help. MARK
-
The end of the 8'-6" boom extends 12 inches beyond the grommet at the clew when I pull the sail foot real tight. Seems like more than enough for the outhaul...or maybe too much? I haven't mounted any hardware on the boom yet. MARK
-
Ah, that makes more sense now. Thanks. MARK
-
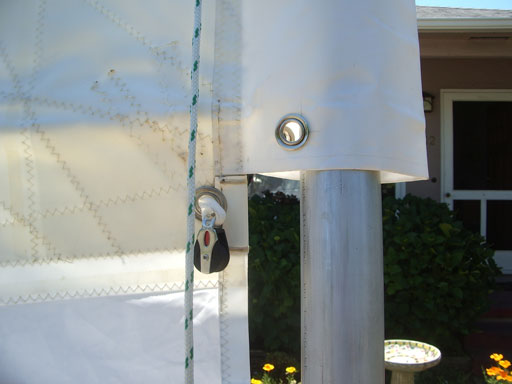
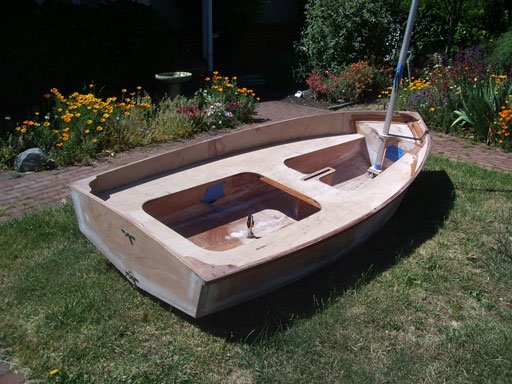
I think my last post got lost, somehow... I have just about finished the hull and am trying to figure out how to rig the sail I have the reefing sail from Graham. Near the downhaul point there is a block and a couple grommets next to it. I can see how the downhaul would run through the block, but what are the grommets for? Also, at the outhaul there are a couple small lines attached to the sail seams and end with what looks like a jam cleat? Can anyone give me an idea what they too are for? I will try to post photos here to show what I am looking at... Also a picture of progress so far... Thanks again. Mark


-
Your mast looks great. I am building an S-10, too What did you use to paint the aluminum? Are you using a reefing sail from Graham? I am wondering how to keep the 3 sections from turning when using the sectional mast. I don't think the halyard wants to be twisted up... Maybe it won't be a problem if things fit tight enough? MARK
-
I have the hull pretty well along. I need to get the seat tops glued down. I have used the Okume plywood and all Honduran mahogany for the solid wood parts. I am lucky to get the scraps where I work. I have a piece of Alaskan Yellow Cedar for the boom. I think it is available mostly on the West Coast and is a good substitute for fir or Sitka spruce. very light color, more pricey than fir, though.

-
There are a few places on a Spindrift where fasteners need to go through the hull: where the mainsheet block attaches on the bottom (a couple bolts throught the keel and plywood) bolting the pintles to the transom attaching a self-bailer (with a gasket, too) What is the recommended sealant in these situations? Thanks MARK
-
I think it is easier to clean paint where it runs or seeps over a varnished surface rather than a sanded wood or epoxy surface. You don't want to find any paint under varnish. But if there is varnish under paint, you will never see it. So if you varnish first, paint next and if any paint laps on top of the varnish it can be wiped or carefully scraped off. MARK
-
David, I would varnish before painting because it is easier to extend the varnish a little bit into the painted area, then go back and mask off a neat edge on top of the varnish a bit and lap the paint a little over the varnish, rather than the other way around. ...if that makes any sense. MARK