Docpal
-
Posts
288 -
Joined
-
Last visited
-
Days Won
10
Content Type
Profiles
Forums
Events
Everything posted by Docpal
-
Oyster, You're right, there WERE more than 4 people at the Messabout. Here are a group of them(30 +) having an Italian dinner on Friday evening... I just got home last night after some "issues" involving a plane with a flat tire, etc., and I've posted some pix that haven't been covered yet on Flickr; I too would like to add my thanks to Graham and Carla ( and everyone else who helped organize the weekend). It was a GREAT time, and I learned a lot as well...

-
I'll be coming in Thursday afternoon, and staying through Sunday. I hope to help Graham show off the Shopbot CNC machine a bit in between sailing..."Petunia"is no where near ready for the trip as I have been on the road most of the last few months, but I hope to see a few CS 17's so I can get some ideas to jump start my Winter building phase...
-
I'm hoping to get down to B&B sometime around the October messabout, and I'll be glad to help in making this process shorter. I know the program which Graham is using pretty well, and I think I can make almost any font, as well as thousands of designs achievable without too much trouble.....
-
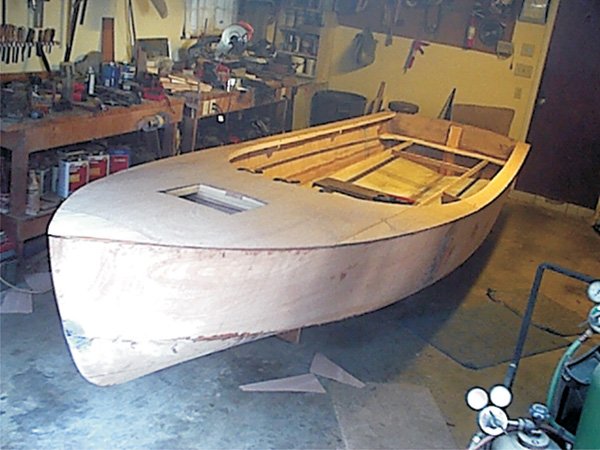
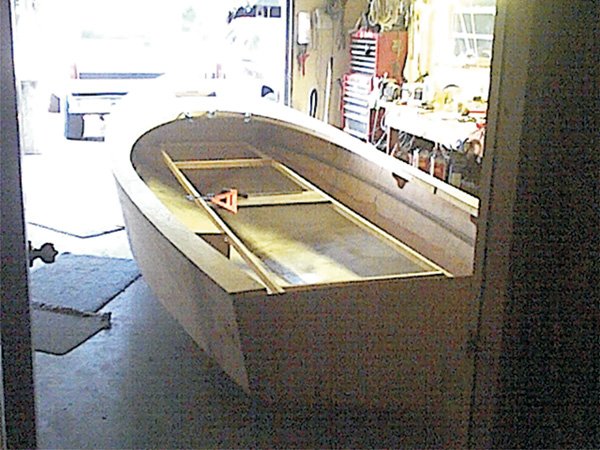
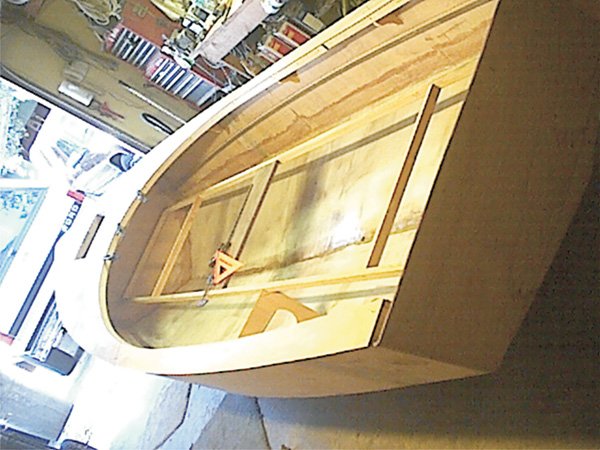
I asked PAR to send me some larger copies of his pix as I couldn't really see the thumbnails very well. He did so and asked me to reduce them in size so they could be posted individually on the Forum, so here they are.

-
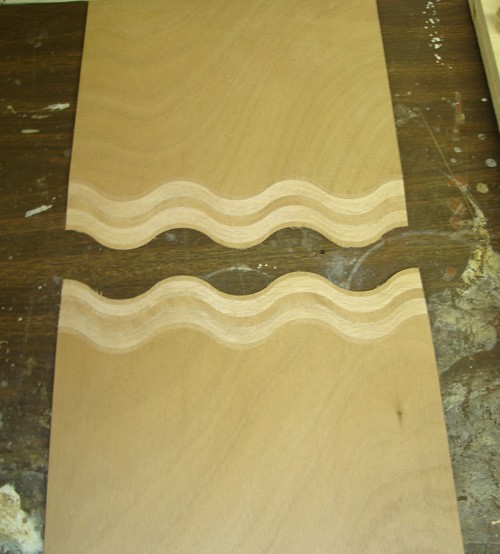
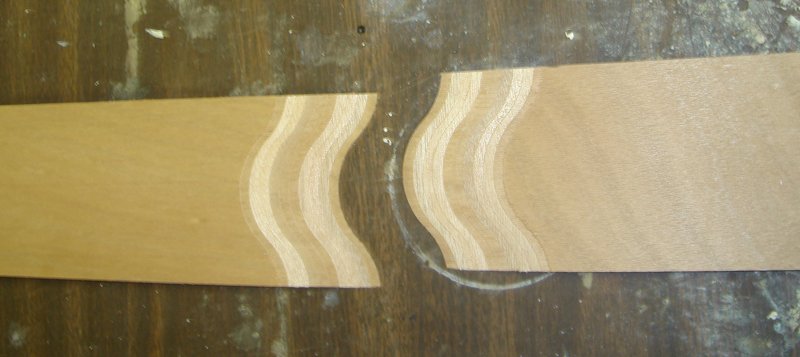
Yup. It also expands the width of the joint when you factor in the fluctuating wiggles. We use this in everything from boats to signs because of it's added registration ability...
-
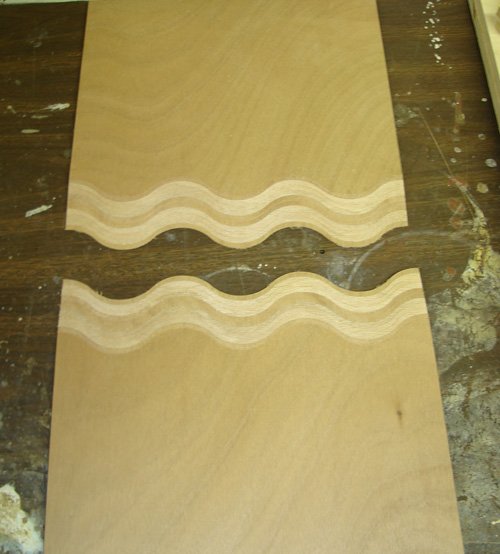
Ray, If you liked the step scarf check out Bill Young's later creation; the "wiggle step scarf". The idea is that sometimes a "standard step scarf" still can be detected because it may "show"a "break" along the side of a hull. With the "wiggle" version it breaks up that visual distraction and minimizes the chance of detection. Of course if the scarf is glued properly ,and primed and painted it's usually invisible anyway....
-
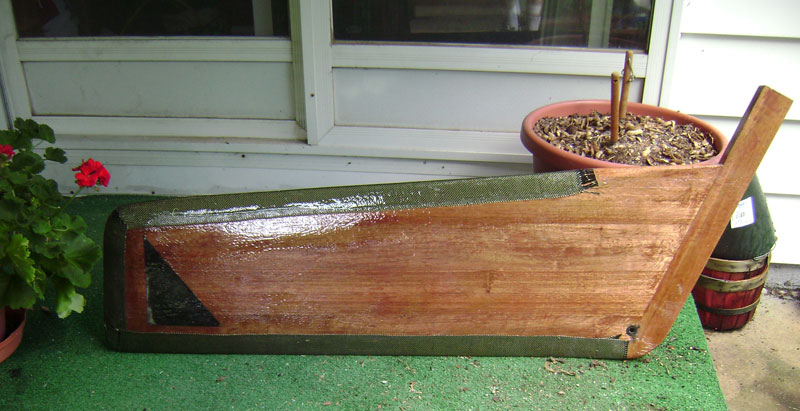
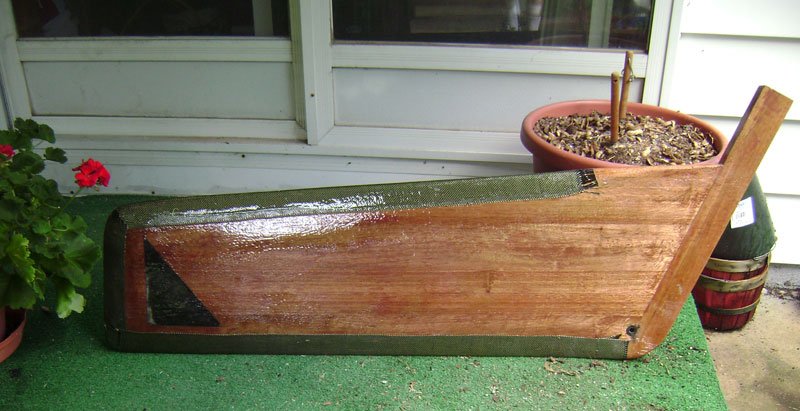
Here's what I came up with for the first phase of the experiment;I added 5 lb. of lead shot into a cavity I cut through the centerboard in a way I thought would keep the weight as low as possible most of the time. There is .125"of epoxy resin on both sides of the lead shot, and both sides are "capped" with 8.5 oz. cloth then faired with more resin. Just in case this changes things too much I bumped up the size of the centerboard pin to a .375" diameter. The perimeter of the board is covered with a Kevlar/Carbon tape.
-
I will contact Frank and try to find out WHY all of my posts have double pix in them, sorry !
-
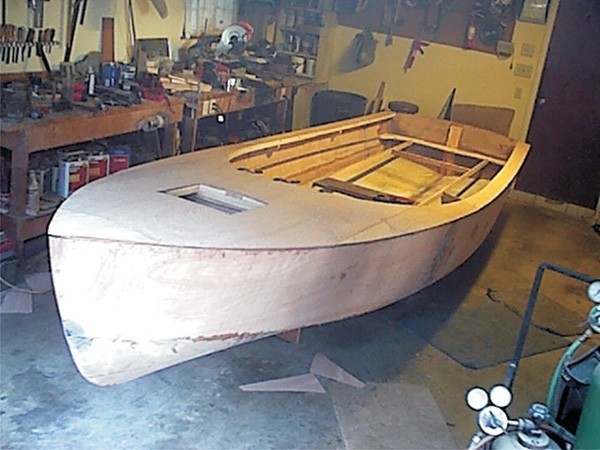
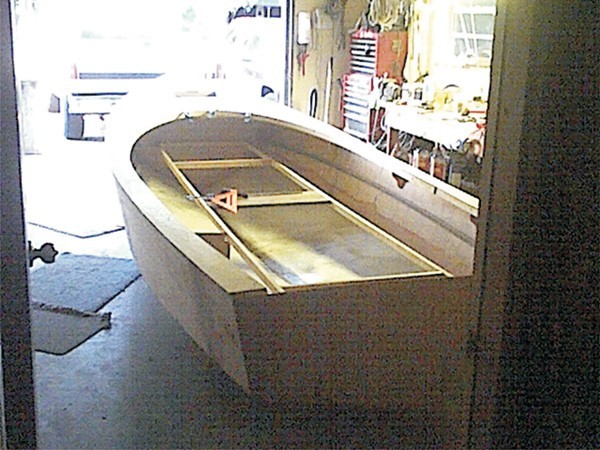
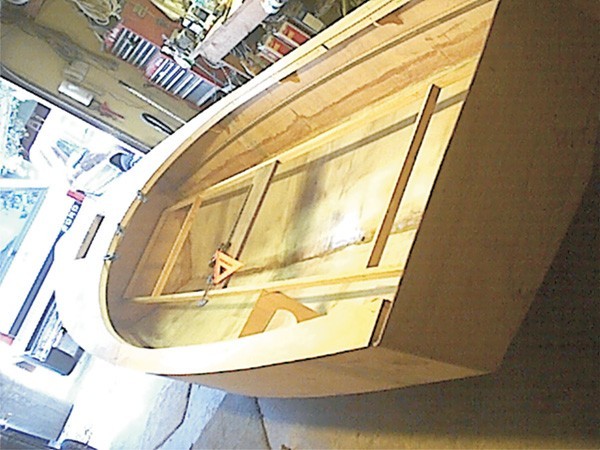
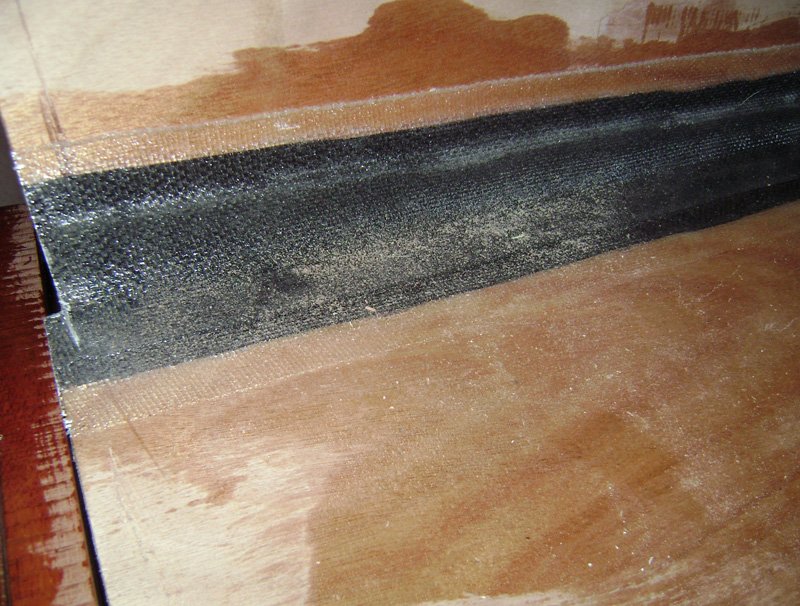
I've finally had a chance to get started on Petunia, and as promised earlier I will try to post some of the "mods" I am attempting as I go along. Here are two quick shots of my first "tangent"from the standard design. I had some carbon fiber tape on hand from an earlier project and thought "now that would really beef up her strength, and not add any appreciable weight", so I sandwiched a layer of 3"wide 11 oz. unidirectional CF tape between the two layers of 10 oz. tape that Graham had provided. It's neither cheap, or overly expensive ( $4.40 a linear yd. from US Composites...) but it sure adds rigidity to the chines! Total weight to do the full chines on both sides added 12 oz. in all so I don't worry about the added weight. I will also be running a strip of 4" wide CF tape down the keel as well to beef up her "backbone"under the keel batten as well. I almost considered just using a few layers of the 4"tape in place of the keel batten, with only a section of wood near the center board case,but thought that I shouldn't stray too far from what's worked in the past.... I think another benefit will also be the extra strength at the bow when I have the 4"tape crossing the 3"chine pieces. There will be a backing chunk of purple heart glopped into this "crossroad" to further spread the load of the bow eye. More to follow as I move along in the process.

-
SO, I'm getting the feeling that this is one of those issues which is decided by "feel" more than science? Thanks to all who have suggested some of the options for adding weight. Instead of firing up a "forge" in this heat wave I have chosen to take the simple route and I just ordered a 5 lb container of .08"lead shot from McMaster Carr. (Their part # 9030K21). Costs about $32 plus shipping ( can't wait for the UPS guy to ask me "what's IN this little package?" and I tell him- lead...). With such small shot I should be able to pack it in pretty tightly, and get maximum weight for the cavity I decide on... By the way I glassed the insides of the centerboard trunk yesterday. Used MAS epoxy with the "medium" hardener. One of the few advantages of glassing in 99 degree weather is that I went from pouring the epoxy, to trimming off the "green" edges in about 90 minutes.... ;D
-
One of the projects I am working on today is shaping my center board. The board, like all of the wood members in "Petunia" is Philippine mahogany. I chose that because from prior experience I know the wood's properties ( light, easy to glue, can look beautiful when finished, etc.), and also I've learned that by using a better grade of clear wood I don't have to take the extra time to cut around knots, checks, or other assorted "boogers". After searching on this Forum with no definitive answer I'm wondering; is there a "desired"weight to the centerboard? As I cut away the profile the board keeps feeling lighter, and lighter and I've only seen a couple of pictures on Graham's CD of other people's boards which all look like they are made of heavier woods. Obviously I'll gain a little of that weight back when I glass the board, but has anyone ever weighed their board? If I'm on the light side I can always add some lead weight down low to compensate, but I really don't know what the optimum weight IS...TIA for any ideas...
-
This is just a quick introduction, and a test to see if I can finally post on the Forum, (I've been having a lot of problems having my password recognized in the last few days...) My name is Bill "Doc" Palumbo and I am currently building CS 17 hull # 204 ( AKA " S/V Petunia "). I saw Ray's post and wanted to comment on the idea of using a CNC kit compared to the more "traditional"methods. First a quick disclaimer; I work for the company that makes the CNC machine Graham is now using ( Shopbot Tools) , and I travel around the country teaching people about CNC. Some of my careers prior to being a robot guy were educator (including a stint as the director of a boat building school in the SF Bay area in the '80's) and running a towing and salvage business in the Florida Keys . So my "take" on the CNC process is a little different. "Petunia"will be my 4th CNC cut boat, ( and 14th overall) but before that I had my fair share of pounding cotton, and steaming frames, and installing shutter planks with forklifts, etc. I'm glad I learned that part of the process, but I'm also very glad that I'm not doing that on a daily basis any longer...Of course I'm also not as interested in larger boats as I used to be, and the advent of good marine design hardware, and affordable CNC machinery got me into this side of the process about 12 years back when I bought my first machine with the idea of building canoe kits. Ray nails the process very well. It is nearly impossible to get the consistent precision of a machine using traditional methods when building small boats. At least when dealing with sheet materials. When working at the Wooden Boat shows a few "old timers" would always come up and watch us building kits for awhile, and then they'd always ask "can you do sliding bevels for plank edges with that gadget?". My response would have to be "no this machine only works in 3 axes, not 5" and they'd walk away triumphantly...Sure I could cut 4" thick futtocks, and stems just as easily, but these days I just don't want to... Tight seams, good gluing surfaces, and symmetrical panels are there with some thought, some basic design work, and some electricity. And now instead of having a wall full of building jigs, I can carry an entire "fleet"of designs in my pocket on a flash drive. I can also be coating some pieces while the machine is cutting out the next set of parts, and I don't need to worry whether or not my "employees"are working, or goofing off. I've just returned from a few teaching trips out of town, and I'm now looking forward to jumping into the assembly of "Petunia". I'll also try to go back through the Forum here and try to learn from other's experience(s). I have a very limited space to work in so I'm being forced to do all of this is a much more logical sequence than I was used to when I had my own boatyard, but that's probably a good thing. My days of being a "wrecker"in Key West taught me that there is NO such thing as a boat that is built "too strong", and I am a "belt and suspenders" kind of guy when it comes down to boat construction. I suspect that I'll wander from the instructions every once in awhile when I see a way to gain strength, with little loss of performance. But having said that the main reason I was drawn to the CS 17 was that it is such a well designed hull, I think I can do so with little fear of compromising her integrity. I'm a big fan of "cross pollinating" tradition and technology, and I will try to document my build accurately so maybe I can add to this great pool of knowledge I see being assembled on the Forum. I'm now going to hit the "preview"button and hope that I haven't done all this typing just for practice... After all that I posted to the wrong thread... I MEANT to post to Ray's thread "Core Sound hull # 233". Not an auspicious debut, but at least I know how to post now...!
-
This is just a quick introduction, and a test to see if I can finally post on the Forum, (I've been having a lot of problems having my password recognized in the last few days...) My name is Bill "Doc" Palumbo and I am currently building CS 17 hull # 204 ( AKA " S/V Petunia "). I saw Ray's post and wanted to comment on the idea of using a CNC kit compared to the more "traditional"methods. First a quick disclaimer; I work for the company that makes the CNC machine Graham is now using ( Shopbot Tools) , and I travel around the country teaching people about CNC. Some of my careers prior to being a robot guy were educator (including a stint as the director of a boat building school in the SF Bay area in the '80's) and running a towing and salvage business in the Florida Keys . So my "take" on the CNC process is a little different. "Petunia"will be my 4th CNC cut boat, ( and 14th overall) but before that I had my fair share of pounding cotton, and steaming frames, and installing shutter planks with forklifts, etc. I'm glad I learned that part of the process, but I'm also very glad that I'm not doing that on a daily basis any longer...Of course I'm also not as interested in larger boats as I used to be, and the advent of good marine design hardware, and affordable CNC machinery got me into this side of the process about 12 years back when I bought my first machine with the idea of building canoe kits. Ray nails the process very well. It is nearly impossible to get the consistent precision of a machine using traditional methods when building small boats. At least when dealing with sheet materials. When working at the Wooden Boat shows a few "old timers" would always come up and watch us building kits for awhile, and then they'd always ask "can you do sliding bevels for plank edges with that gadget?". My response would have to be "no this machine only works in 3 axes, not 5" and they'd walk away triumphantly...Sure I could cut 4" thick futtocks, and stems just as easily, but these days I just don't want to... Tight seams, good gluing surfaces, and symmetrical panels are there with some thought, some basic design work, and some electricity. And now instead of having a wall full of building jigs, I can carry an entire "fleet"of designs in my pocket on a flash drive. I can also be coating some pieces while the machine is cutting out the next set of parts, and I don't need to worry whether or not my "employees"are working, or goofing off. I've just returned from a few teaching trips out of town, and I'm now looking forward to jumping into the assembly of "Petunia". I'll also try to go back through the Forum here and try to learn from other's experience(s). I have a very limited space to work in so I'm being forced to do all of this is a much more logical sequence than I was used to when I had my own boatyard, but that's probably a good thing. My days of being a "wrecker"in Key West taught me that there is NO such thing as a boat that is built "too strong", and I am a "belt and suspenders" kind of guy when it comes down to boat construction. I suspect that I'll wander from the instructions every once in awhile when I see a way to gain strength, with little loss of performance. But having said that the main reason I was drawn to the CS 17 was that it is such a well designed hull, I think I can do so with little fear of compromising her integrity. I'm a big fan of "cross pollinating" tradition and technology, and I will try to document my build accurately so maybe I can add to this great pool of knowledge I see being assembled on the Forum. I'm now going to hit the "preview"button and hope that I haven't done all this typing just for practice...