ScottWidmier
-
Posts
266 -
Joined
-
Last visited
-
Days Won
1
Content Type
Profiles
Forums
Events
Everything posted by ScottWidmier
-
Last night, about 5 hours after glueing the mast up, I went down to the basement to check on the mast. I was plesantly surprised to find a lot of epoxy drips on the form under the mast and even some epoxy that had squeezed out of the upper joints. Not only that, but the epoxy was hard, not tacky, which is one advantage of resorting to the fast hardener. So, dying of curiosity, I unwrapped the shock cord, plastic coated wire, and cut the string (impatiently) to see if I could pry the halves apart (crucial). After a little bit of fussing, mainly caused by the adhesive on the painters tape, I was able to get the halves apart and a glorious sight met my eyes, epoxy had also been squeezed out of the joints on the inside all of which alleviated my fear of starved joints. So, I am now a lot more confident that I have a mast I can use! ;D ;D ;D I did differ a bit in method in that my mast doesn't exactly split in half. I have three staves on the part that lifts up and the other five on the part that stays in the form. This gives me a more complete cross-section to fit my plugs into though I do have everything strapped back together (dry) out of concern for possible warping of the three stave cap. The need to work is getting in the way of my mast-building! A couple of observations for those thinking of a birdsmouth mast (probably have more later). 1) Building a birdsmouth mast isn't beyond anyones skills (if I can do it you can do it). Just be aware of first time anxiety. 2) Making a form out of a long 2x and plywood with half-moon or, even better, half-octagon shape cutouts is highly recommended. Makes putting the mast together a snap and helps hold the mast nice and snug leaving space under to pass whatever you are using for clamping pressure. 3) Lining up the staves next to eachother birds-mouth cutout up makes spreading the epoxy easy and fast. I needed 12 pumps of resin on my mast. 4) Don't worry about the staves having a bit of warping as putting the mast together will take care of this. 5) Innertube, rubber medical tubing, or in my case shock cord provides an easy way to get clamping pressure on the mast without having to bother with fancy knots or keeping steady tension when wrapping. Several short lengths work better than trying to wrap one piece down the length of the mast. I did notice that I will be plaining off almost a quarter of the flat corners on the birsdmouth mast which really does point to more staves resulting in a stronger mast. I think the main advantage would be the ability to use thinner staves resulting in weight savings. Basically removing unneeded or uneven thickness in the walls of the mast. The builder must judge if the weight savings is worth the added effort though. The mast that is currently on my boat made from 2 layers of 2x and rounded has a pronouced warp of a little over an inch so I can't wait to get this new mast on. I also will be weighing both masts to see the weight savings and will post the results here.
-
I write this note from my moaning chair..errr..couch :'( . Today I braced myself to epoxy the parts of the birdsmouth mast together hoping things would go well. I took apart the mast and set up the staves birdsmouth pointing up. I even went to the trouble of clamping them together so that epoxy wouldn't drip down between. I pumped out some RAKA resin and mixed in some wood flour. Then I went to my bottles of hardener only to find out I was down to the dregs on both the slow and medium hardener. Of course, I had plenty of fast hardener > ! So, I looked on the side of my epoxy cup and marked a line for where the resin was. I then tipped the dregs of both the slow and medium into the cup just getting the amount I needed...lucky right ;D . Well, not so lucky as the batch I mixed only went halfway up the mast which ment I had to quickly mix up a thickened batch with the fast hardener. At least the pumps worked! So, I slathered the remainder of the staves and started assembling the mast which task was made much easier by the octogon forms I had made. Then I realized something....I had forgotten that I wasn't going to glue two of the faces so I could take the mast apart and put in plugs...STUPID! Choices, do I go ahead and glue it all up hoping that plugs aren't really needed or do I do the right thing... I quickly grabbed my box o rags and frantically wiped epoxy off with a tick tick tick sound resounding in my skull. I then put tape down the length of the joints I didn't want to glue in the hope that this would prevent the epoxy that had already soaked into the wood from bonding :-\ . I then assembled the rest of the mast but not without some struggle to get the last stave in place worrying all the while that I was rubbing off too much of the epoxy. I got the mast together and quickly compressed the tapered ends and held them in place with some tape. I then wrapped the mast inexpertly with twin...hmmm doesn't seem tight enough so lets try plastic coated wire....hmm, still some gaps so lets try some of that 500' of 1/4" shock cord. That worked best of all and I only had to use 200' before I felt comfortable . Actually, I found a little bit of cord went a long way which really points to the wisdom of PAR's method with the innertubes. So, now I have a mast glued together with epoxy that I am kinda concerned about going off correctly, with spots that might not have enough epoxy on, with glueless joints that might not prove too glueless, and hands stinging from the acetone used to clean off the epoxy that leaked through rips in my latex gloves. Next step, after the epoxy cures, is to pry apart the two halves and make the plugs. I plan on painting the inside of the mast with unthickened and then slightly thickened epoxy with the hope that it will run in and fill any gaps or unglued surfaces. then I will glue the two halves together and hopefully have a usefull mast after all of this. Still, folks might not want to sail too close to my boat when the wind picks up ;D .
-
12 sided, Howard, you have to be nuts! However, your mast certainly looks great and may be a bit more sturdy than fewer staves. I thank you for the idea of using the roller to spread the epoxy on the staves. That sounds like a great way to speed up the process. I need to figure out which option to go with for clamping the mast and then I will spread the epoxy. Wish me luck!
-
Ok, anyone who thinks making a birdsmouth spar is fun must be around the bend! ??? First, I trimmed all of the staves to get the final dimension I wanted using the calculator I found on the web. I was wanting to dry-fit first before trimming but I figured the extra wide staves were part of my problem. I then cut in the taper on both ends using my table saw. Nothing but nothing produces as much sawdust as making a birdsmouth mast out of 2X8 stock and I now have enough coarse sawdust for every cub scout in our pack to make several firestarters . I then made six half-octogonal forms instead of the half round. I figured the half-octogonal forms would give some advantage but also could be easily converted to half-round if I was wrong. I put the forms along a 2X6 to insure they were well alinged. All of the above went well though a bit tedious given the number of staves and forms. Then, it came time to try and dry fit the mast. I found it still was very difficult to get the staves in position especially the last three that were on top and not supported by the form. Even then I had to use tape to clamp them together so I could see the shape of the mast. Now I am very daunted by the next step of glueing the mast up. There are a lot of surfaces to butter up and putting the staves in place when all slippery seems like it could be difficult. I assume I use unthickened epoxy? Is it normal to have some gaps to fill? I also plan on masking off two surfaces so I can split the mast to put in plugs. On the plus side, it means less surfaces to have to initially butter up.
-
I tried from either end or the middle. I can't get all eight staves in position to even start wrapping it with anything even if I try to ignore the rest of the mast to concentrate on a part of it. I think the half-moon stands sounds really good right now. Thanks for all of the information.
-
It was Charlies method I was talking about though I didn't see the thread PAR responded in so thanks. I assume masking tape is sufficient enough to keep the halves from sticking to eachother? Charlie scares me a bit by the PVC method because it kinda sounds like vodoo given how true I found Daves statement of it is like herding cats. However, swmbo is fine with my boatbuilding as long as she isn't involved so an extra set of hands is hard to get so I will have to try the PVC method. I assume the PVC has to be very similar diameter to that of the mast? Dale, I am using simple spruce for this mast since I am doing it just for the experience of making a birdsmouth mast. I bought the straightest knot-free 2X8 and cut it into the staves. Besides, I have had great luck with white spruce on other masts. It is light weight, easy to shape, and I can pick through and find the best pieces. My other mast for this boat is laminated out of two spruce 2X and works great. Be interesting to see how much weight savings I get from the birdsmouth mast. I predict it won't really be all that much.
-
Thanks Frank, that makes me feel a lot better . I will cut out the forms and see how that works. How did you do the plugs? I could build the mast in halves and then make plugs to insert before glueing up the two halves. I am only concerned that this might lead to problems with the straightness of the mast.
-
I have eight 16' staves cut complete with 45 degree birdsmouths. However, I am having a devil of a time dryfitting the mast without the staves going every which way. This is exceedingly frustrating after reading all of the articles on birdsmouth mast where they simply rolled the mast up when dryfitting. I have tried tape on either side and have tried rolling it around different diameter items. I have tried starting at either end and then in the middle all to no success. I shudder to think about glueing this up if I can't get it together when dry. My last hope is to build a form out of bits of plywood with half octagon shape cut in. This seems like a lot of extra work given how many articles I read where the birdsmouth mast were simply rolled up! My basic dimensions are staves 1 1/2 inch wide and 5/8 inch thick. I haven't yet cut the taper in just wanting to see how the mast went together at this point. I also need to cut plugs to go into the mast and would appreciate any advice people can give me. The plugs on this particular mast will be at the tapered parts at either end of the mast. I plan on tapering the foot so that it is easier to lift out of the deck and maststep. I already have made and used a solid mast out of laminating two 2x4 together and rounding with a plane. Works fine but I would like something a little lighter for ease of raising the mast plus I just want to try making a birdsmouth mast.
-
I think the boat in waterworld was a Tri and much more modern that I was thinking of. However, that windmill drive was kinda cool! Jeff, I guess that is why most cats have deeper hulls. However, shallower hulls allow pulling up onto the beach and you can sail in shallow water with a centerboard...it just bumps along the bottom. Besides, the downside to a catamaran is the difficulty in tacking where you have to have a lot of momentum or get caught in irons. I was kinda thinking leeboards or centerboard would be better for turning than lateral resistance in a full-length hull.
-
From time to time when dreaming of my "next boat" my mind flutters to a catamaran. The speed, double hulls for storage/berths, and a big net trampoline for lounging really piques my interest. Basically, a cruiser which expands upon touching the water to give you lots more lounging area. Now, I like the idea of shallow draft hulls so have been toying with a catamaran design using hulls similar in shape to a sharpie or dory giving the advantages of building ease, shallow draft and traditional looking shearline. I also was thinking of lower-tech rigging than you see with most catamaran designs. Then I found wharram designs (www.wharram.com) which have a lot but not all of the features I am thinking of. On the plus they have the nice shearlines, simple rig (sprit..yea!) and simple dory hulls. However, the hulls are deeper draft with a much narrower bottom than I was thinking of. Here is a picture of the cat they have in the size range I am thinking of (23'). So, I am thinking of a catamaran design that flies in the face of tradition with shallow draft hulls and either daggerboards or leeboards giving the needed lateral resistance. The only designer I have seen advocating shallow draft wider hulls on a catamaran was Bolger when he designed a little cat for club racing. I am thinking of two dory shaped hulls 24' long, 4' at the widest point, and with a bottom 2' at its widest. Then I run into a lot of questions including: 1) How tall should the hulls be...I would prefer shorter both for reducing windage and looks. 2) Shape of the transom? I am leaning towards pointed. 3) Rocker amount and shape? Should I give it rocker in the aft for good speed under displacement or reduce the rocker in hopes of getting on a plane. If the latter, should I make the stern wider? 4) Form of lateral resistance? For simplicity and ease in shallow-water sailing, I am leaning towards leeboards which mount on the inside of each of the hulls. No through-hull to worry about and simple kick-up for beaching or shallow water. The windward board could be raised for speed. 5) Engineering of crossmembers? Needs to be easy to expand to sailing width on the water. Big bonus if I could reduce the width for using a boatslip. Add to this that the crossmembers need to support the mast... Just had a thought for #4 and #5! I could build a centeral member or "hull" that is never ment to touch the water but supports both the mast and a centerboard. The crossbeams would attach to this centeral member. Anyway, I would love to hear the input from folks on my musings.
-
Dale, I just read a short article in Small Craft Advisor (great magazine!) on Welsford's Houdini (http://www.duckworksbbs.com/plans/jw/houdini/index.htm) and am rather impressed! It is 13'6" long falling into what I would consider the sweet spot for small open catboats though its beam is a little narrower than traditional at 5'1". It has a lot of freeboard being developed for the rougher waters around New Zealand and the interior could definitely be rigged similar to my boat including the coaming. If my Little Gem wasn't fairly close in size to the Houdini I would consider building it as my next boat. Of course, my kids have already called the next two boats to come out of my shop so I better get busy!
-
Saw a TinyCat on the Beer Cruise and it is a big 12' boat that could accomodate some interior changes. Found another one that is a bit more slender but the Michalak Skat (http://www.duckworksbbs.com/plans/jim/skat/index.htm) is another option to look at. Again, all of these 12' boats could possibly be scaled up to give you a bit more room and stability.
-
I use a portable propane camp stove on my boat with a locker made out of PVC with drain holes for storing the propane cylinders outside the cabin. Still, I do admit to getting kinda lazy about putting the propane in the storage locker... That will change after reading this story!
-
I support the recommendation for Duckworks. Their hardware is excellent four our boats and Chuck and Sandra are nice people as well who provide a great boatbuilding magazine.
-
It does seem like the number of catboat plans out there is rather sparse especially given the benefits of maximum boat in minimum length. I do like the C12 finding it just as quick as a 14' sunfish but able to be overnighted on. However, since it lives on a trailer I do wish for a foot or two more length. In a boat of this beam, a foot or two longer would make a huge difference in carrying capacity and stability! However, it also would make it that much harder to row and the oars just that much longer...tradeoffs! Maybe we need to campaign for someone to design a 13-14 foot open catboat...or just take a design like the C12 and scale up a bit!
-
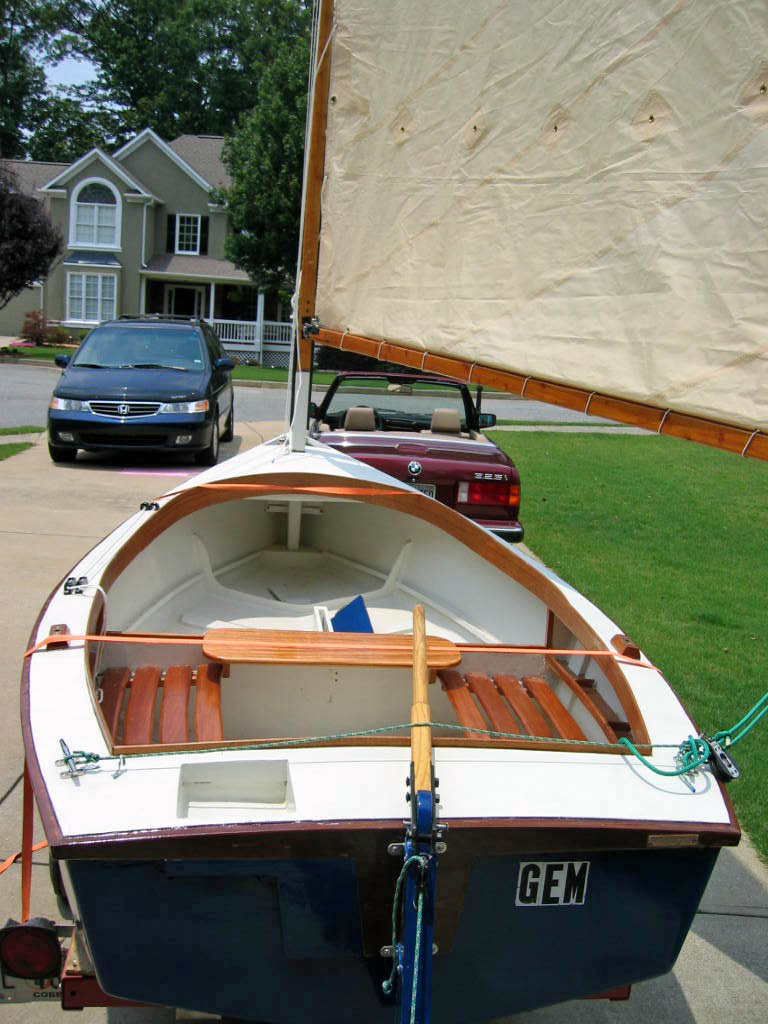
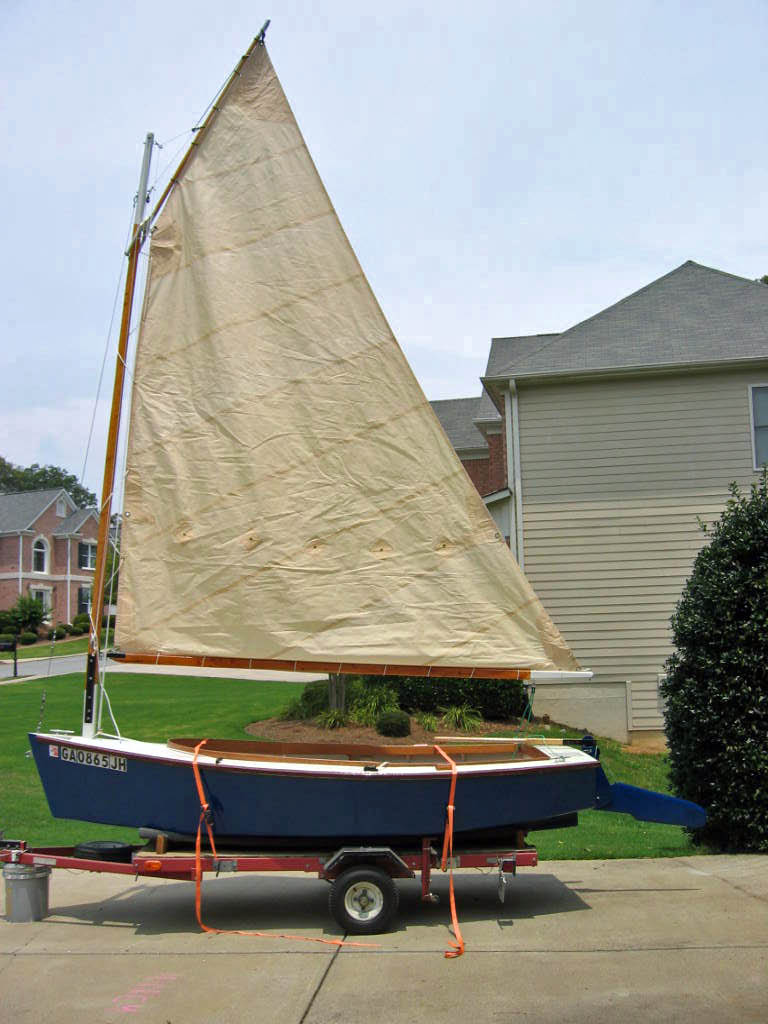
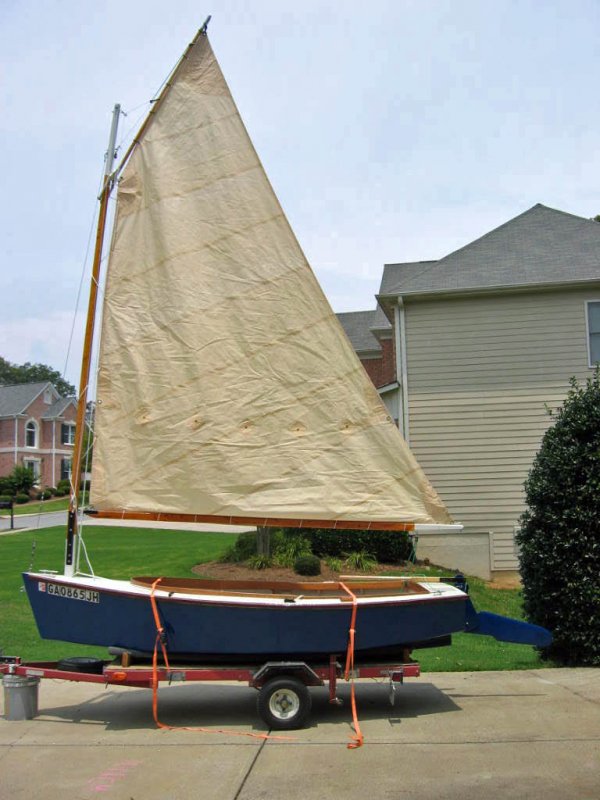
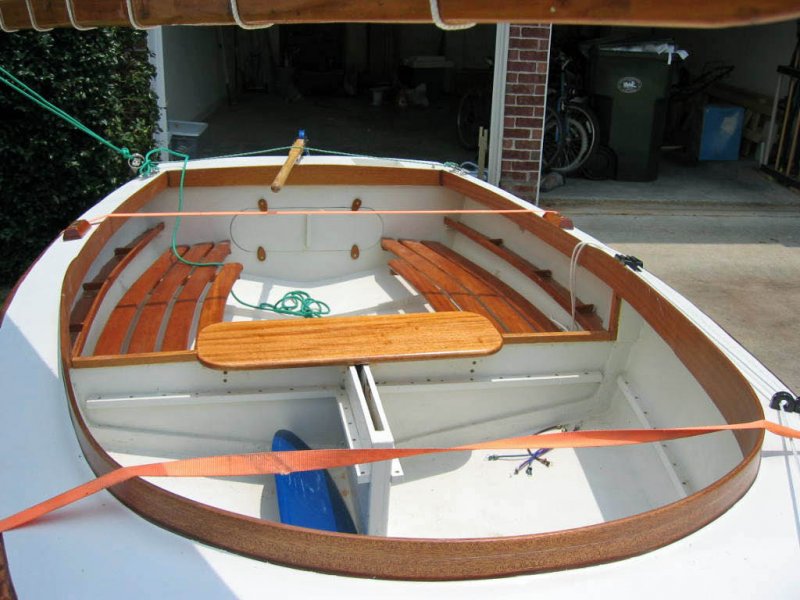
Hi Dale! Nice to see you made it over to this forum as well. Didn't anyone warn you that boatbuilding is addictive! We still need to link up sometime to show off eachother's boats. I believe you have my email address and I do have some open weekends...heck, you could even help crew on my Mac 26D during one of our races if you wanted to. As for the next boat to be built question be ready for a cascade of wonderful plans and conflicting ideas. The fact that there is no one perfect boat leads to variety in homebuilt which makes it all so much more fun. Let me put my two cents in now by focusing on a couple of your requirements, under 15' and comfortable for your wife. To me, these requirements add up to a catboat which gives you the most volume in th shortest length resulting in excellent stability and very comfortable sailing for you and your wife. I read somewhere that an extra foot of beam on a boat is like adding 5' in length and my experience bears this out. So, a 14' catboat that has a beam between 6-7' will feel as big and stable as a 17' boat with 5 foot beam giving you a lot more boat in your limited build area. My first boat was a 14' flat bottomed Stevenson Projects designed Pocket Cruiser with 14' length, almost 7' beam, an 8' long cabin, and a 7' long cockpit (courtesy of a bridge deck). That boat was so stable that I could walk my 200+ pounds down the rail and didn't have to worry about body placement when sailing...excellent for when I had small kids who couldn't stay still. Many times I would take a full crew with 4+ adults and multiple kids. The cabin was a great feature to both store stuff and give a place to shelter from the rain or for crew to take a long nap in. I also overnighted comfortably with my wife on that boat. Given the stability of that 14' boat and the fact that the crew didn't have to move around when tacking (and the ease of the cat rig), it always seemed to be the most popular with wives and girlfriends at sailing get-togethers. I am sorry I sold it when I moved to Georgia . The stability of the 14' Pocket Cruiser is much-much greater than the 16' weekender and equal to the much heavier 21' Vacationer BTW. All of this is meant to illustrate how a catboat might fit your needs best. As far as catboat designs that are out there, I have mentioned the Stevenson PC but would suggest something with a multichine hull which helps to absorb some of the pounding from motorboat chop. I love my 4 bottomed C12 from Bateau.com but if your boat will live on a trailer there is no reason to give up the extra 2-3 foot of length and volume though I will put some picts below just to show off : . Here are some to look at: http://www.duckworksbbs.com/plans/jw/houdini/index.htm Welsford 13' Houdini http://www.duckworksbbs.com/plans/jim/fatcat2/index.htm 15' Fatcat is a bit non-traditional but comfortable https://www.boatdesigns.com/products.asp?dept=441 Glen-L 13' cat http://www.woodenboatstore.com/prodinfo.asp?number=400%2D047 really nice 14' catboat by Charles Whitholz

-
What are we hoping to build in the next 5 years?
ScottWidmier replied to Greg Luckett's topic in Main Forum
Two mouseboats for the kids and a Kayak for the wife (my marching orders!). Then I may build a shallow draft camp cruiser row/sail that is a little bigger than my Little Gem. Currently looking at the Light Trow amongst others. -
That is the 12' boat that sailed circles around Craig's Vacationer in light wind! Annoyed the h** out of him! ;D A better comparisons comes from sunfish I have sailed with both pre and post modifications. In both cases she proved to be at parity with a sunfish despite being 2' shorter and a lot more slender 8) . I also was able to sail closer to the wind. The only way the sunfish could beat me was with its quicker acceleration in puffs. Oh, this may surprise those of you who know me : but, other than the hull shape, this boat was completely modified from the start. As planned, the C12 might be even faster with a cat marconi rig.
-
I have been enjoying tweeking my Bateau.com C12 called Little Gem. Of course, I have a plastic 26' boat and another 12' boat of my own design to go sailing in when the urge hits. Incredible how much that does for patience when working on a third boat. Took Little Gem out for a test sail with a little bit of trepidation due to moving the mast forward by 16" and switching to a gaff cat rig and I didn't know what this meant for balance. It turned out that I got everything right and the boat balances so perfectly that I can let the tiller go when sailing into the wind and the boat tracks straight ahead. After the test sail I am making a beefier mast though. The pictures below are from a four page gallering of images detailing the life of this boat: http://forums.bateau2.com/gallery/thumbnails.php?album=419
-
Jim, tell Joe his C12 looks great! Has he gotten her out to sail much? Thanks for the compliments on my remake of my C12. I could have probably built new boat that is a little more roomy for overnighting using the effort I have put into the remake. Unfortunately, SWMBO is anti boat collection :roll: and I couldn't bear to part with Little Gem or Plum Crazy to make room for a new boat. Besides, I already have permission to build two flying mice for the kids to use so that makes four boats to store in addition to my Mac26D at the slip.... guess my wife is really tolerant of me :oops: . Besides, with the modifications I am making to her, Little Gem will be a nice little overnight boat for one that fits on my folding trailer behind my little car. Sorry I didn't get it together in time for an April messabout. She is still three or four weeks away from overnight capable in the comfort I am looking for...life got in the way. Probably be June for the BEER cruise before I get to see your Kingston.
-
Interior shots in case you missed them on the other thread.
-
Just finished making the tabernacle for my new gaff cat righ on my 12' Bateau.com catboat. The mast will still be removable but I will be able to fold the mast down with sail in place for easier trailering and launching.
-
The results:
-
I can only tow one boat behind my car and that will be my Mac 26D. I have two people flying in from other parts of the country to crew and the 12' boat might be a bit small. Maybe the classic boat rally on the east coast (Georgia)? I gotta find out details about that trip.
-
Don't worry about it, several had mentioned the need for a rack but I was trying to cut corners. I was warned against using metal though because it might leave black marks on the wood. I did end up building the rack by drilling some holes down the side and tapping in dowel sticks. I then tried it all again crossing my fingers. I was really worried my setup wasn't generating enough steam due to only 700 watts on the cheap hotplate I bought. I pulled the second piece out of the box and it was more evenly steamed throughout though there still was one little dry spot. Amazing given I soaked the wood both times for 24 hours! I decided to try again on my form this time working from one end to the other clamping in station in progression. Took a lot of effort but it did take the curve without a dreaded crack! The wood dried very quickly and a day or so later I decided to mount it on the boat. I was concerned about first taking it out of the form because some judicious testing showed it was ready to at least partially spring back to straight. So, I ended up droppint the coaming and form into the boat where my wife held it up with her knees in position while I released the clamps. The coaming sprang from the form into position on the boat and some simple adjusting and clamping to hold it in place while the glue dried. I have since used thickened epoxy to give it a nice rounded transition from the deck and yesterday I sanded and sanded. I now have two coats of spar varnish on the coaming and it looks incredible! I picked out this particular piece of Mahogony because it had some beautiful cross hatches that add a lot of depth to the wood and the varnish has really brought this out. I will post pictures as soon as I get the varnishing done and paint the deck white. I am afraid the beauty of the wood won't come accross in pictures but she should look great none-the-less. Overall, steaming wasn't that bad and I am very please with the nice sweep of the coaming. While I don't want to take up steaming for a hobby it does lead to wonderful results. Thanks to everyone for your suggestions!