vttramper
-
Posts
41 -
Joined
-
Last visited
-
Days Won
1
Content Type
Profiles
Forums
Events
Everything posted by vttramper
-
Never heard of them, but they look perfect for what I need!
-
Hi Jeff Thanks for the quick response - somehow I missed it until tonight! The videos are helpful, and bring back the time I spent stitching up my Ravenswood a few years ago. I actually found that whole process very relaxing. Go figure. My current project is a canoe, however, so I'll just plan on working the fabric as taut as I can while I do the stapling at gunwales. The bow and stern may be a little tricky, but from the ironing work you show at the end of the Shad part 7 video, it looks like small wrinkles can be dealt with, with so I think I'll be OK. Thanks again for your help! Steve
-
I have built several boats with the old 8oz fabric and had good results heat shrinking the skin. The new 9oz fabric is described as having less shrinkage and "should be sewn tight". Should I plan on sewing pockets at the ends and stretching the skin onto the frame (as with nylon)? Thanks Steve
-
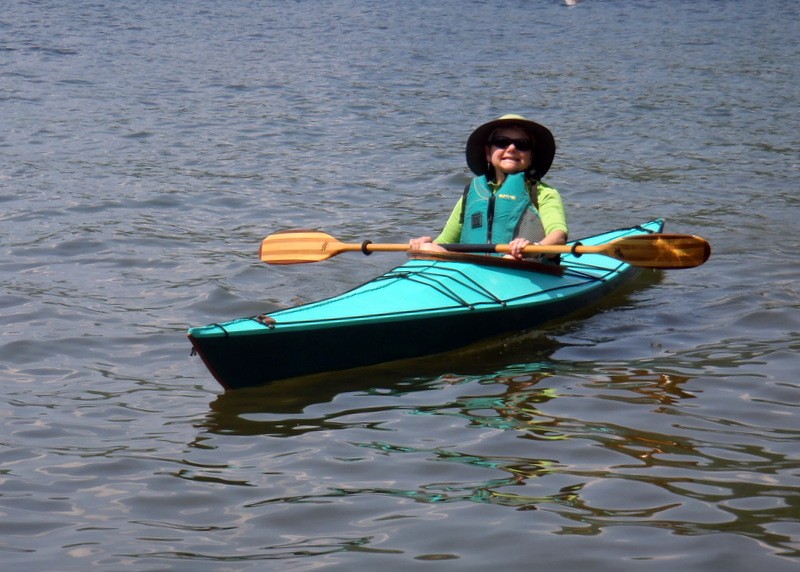
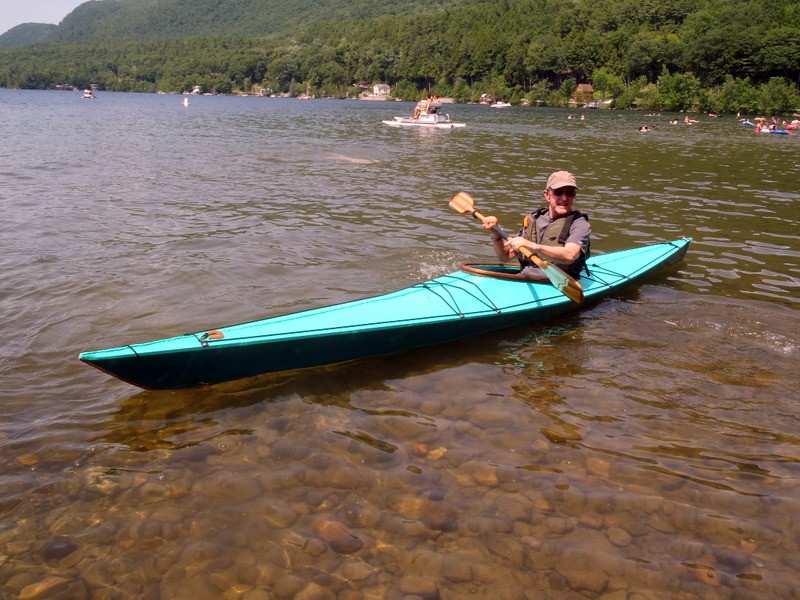
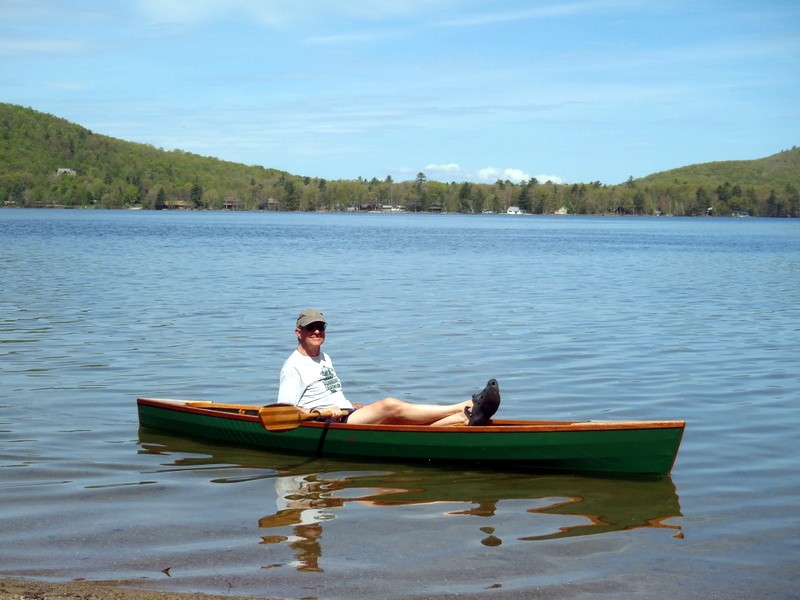
Just launched my Ravenswood this weekend. Both my wife and I are very impressed. It is surprisingly stable, faster than expected, very nimble and handles wind and 1-2 foot waves nicely. No appreciable weathercocking in 10 mph winds and following seas were no problem. Overall a very nice boat to paddle. This has immediately become my go-to single boat. (Not in the least because at 20-ish pounds it is really easy to lift onto the car top!) Now my wife thinks she wants one too...


-
One complicating issue is that the location of the pilot holes is in part dependent on the location of the keel-bow (or stern) connection - that is, you don't want to find that you pre-drilled a screw hole directly over the lashing or over the meeting point of the two frame pieces. I speak from experience, having pre-drilled a laminated wood stem at nice even 5 in. intervals only to find a hole located directly on top of the joint. (Oops - measure twice, drill once!) Anyway, this will vary from boat-to-boat and supports the approach described by Jeff: "...put in one screw at the beginning. Then bend the strip into shape. It will not be perfect but it is close. Then I take it off, mark for screw holes and drill and counter sink it." That gives you an opportunity to also mark exactly where you DON'T want to drill. Works for me.
-
I checked my boats (Ravenswood + 2 other SOF and 4 strippers) and the laminated wood stems I have made are all about 2 ft except in one unusual case - a 16 ft canoe with a recurved bow - that need about 30in. So, for me at least, the shorter lengths would be good.
-
Cross country skiing in the Green Mountains this morning - you guys don't know what you're missing!
-
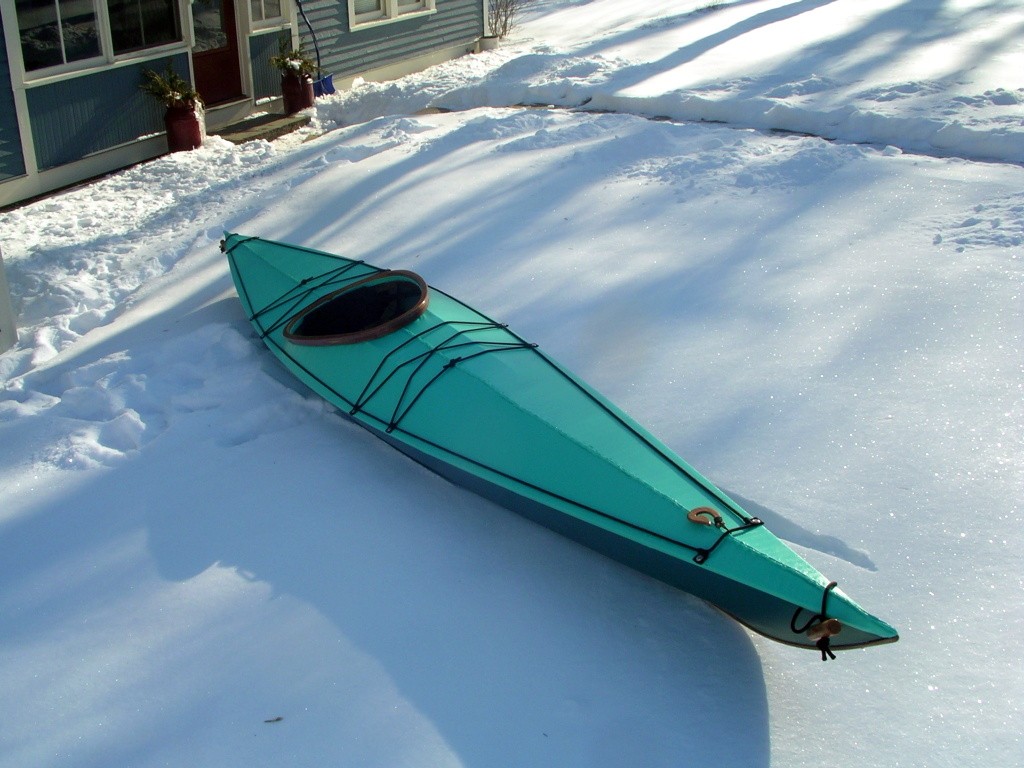
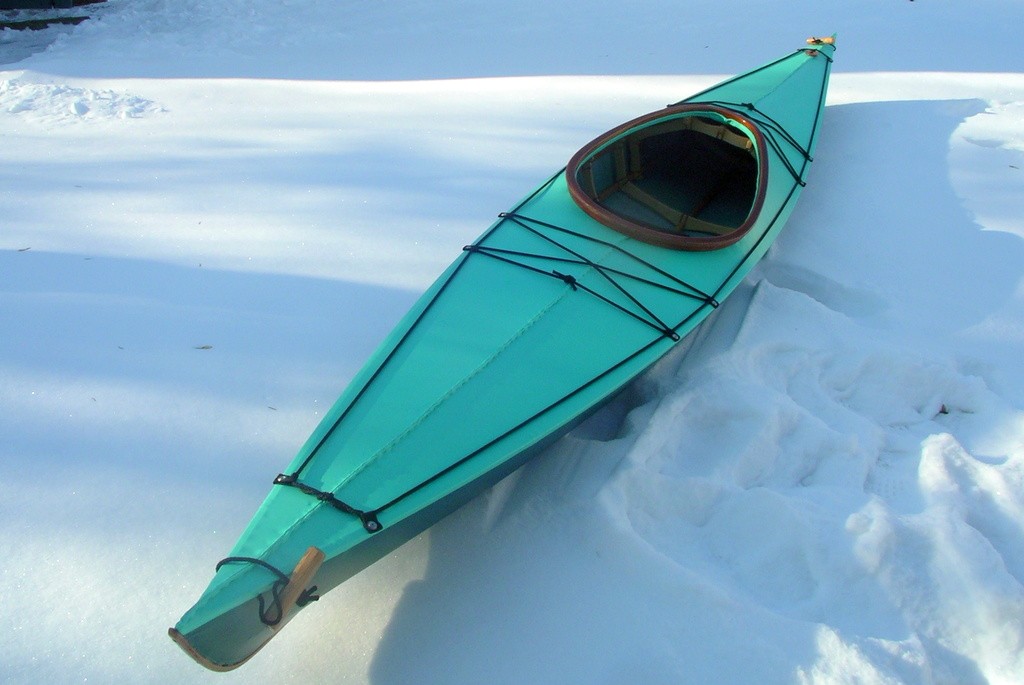
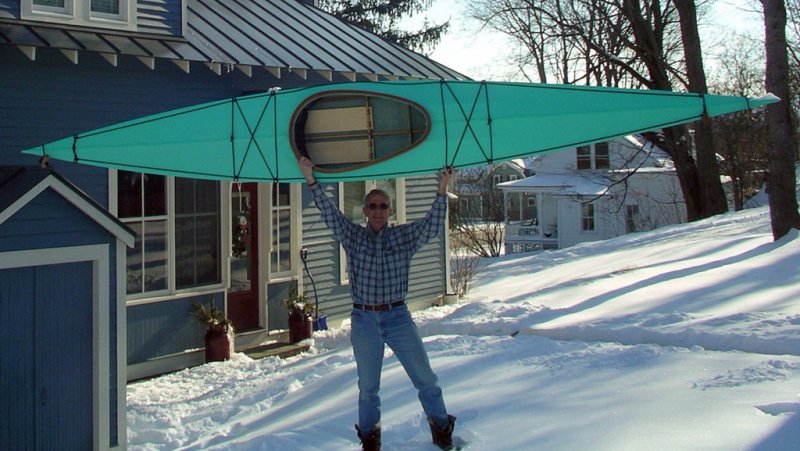
The "snow trial" pics were taken before we got another 10 inches of snow yesterday. And there's another 3 expected tomorrow. Actually though, in contrast to you folks in the south, we have have gotten less snow in VT than we often get by this time in the winter. In any case, it will be a while before I'll be doing any paddling!

-
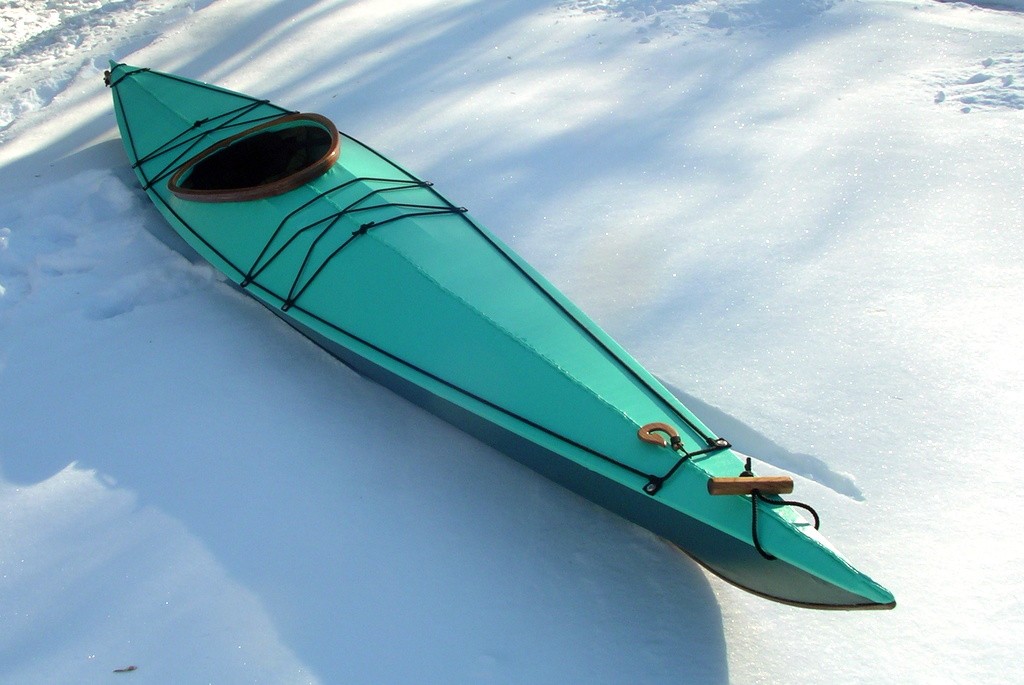
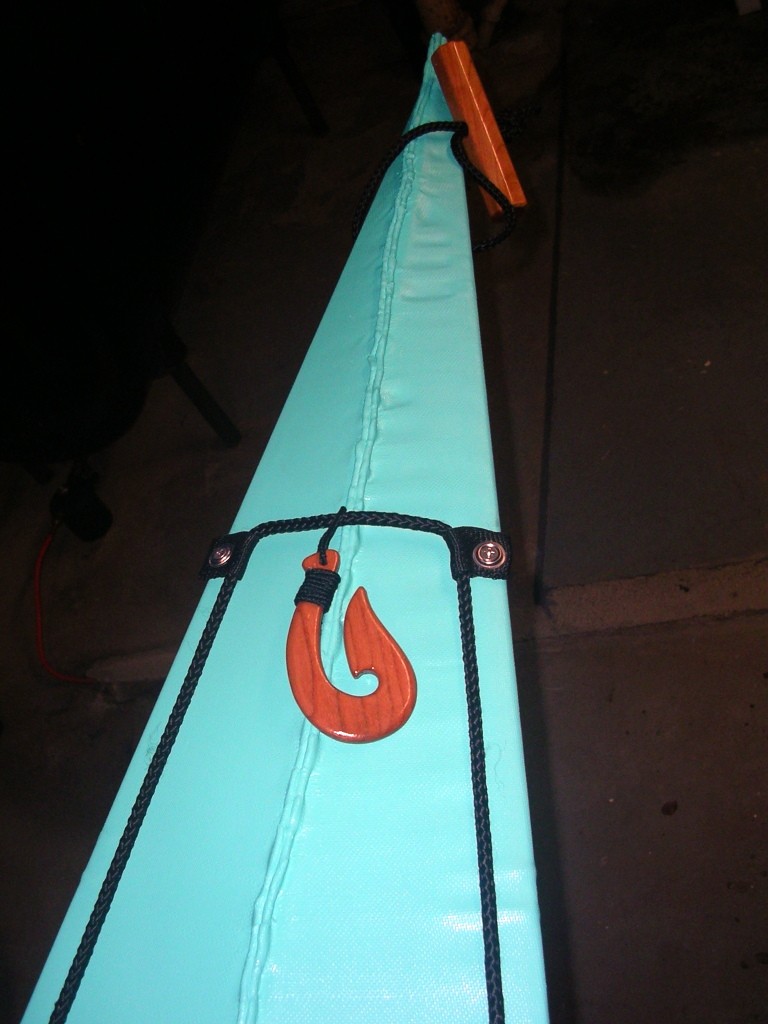
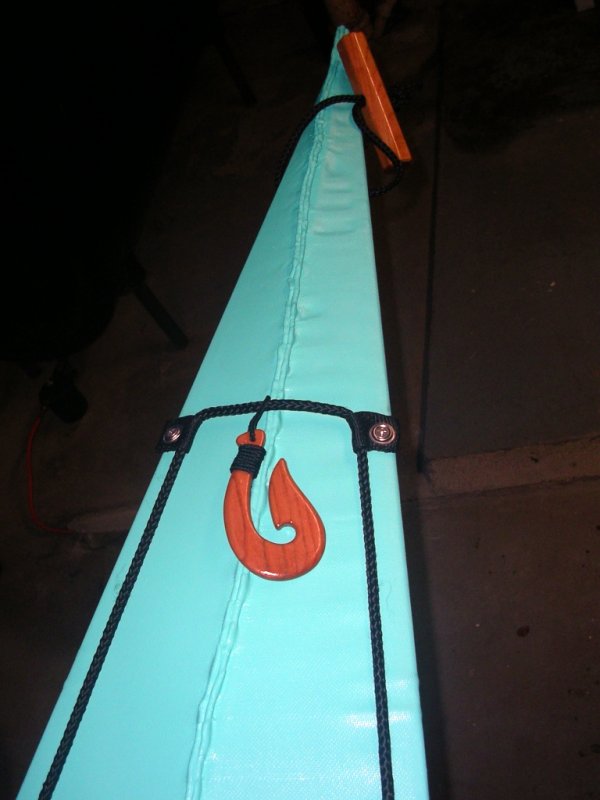
Thanks all. That Maori fishhook is called a hei matau and is intended to signify strength, good fortune, and safe journeys, especially over water. Seems appropriate. I have done the same thing as an inlay with wood strip boats, but lashing it on just seems right for the Ravenswood.
-
What a beauty! I wish I had the skill (and patience) to do that paint work.
-
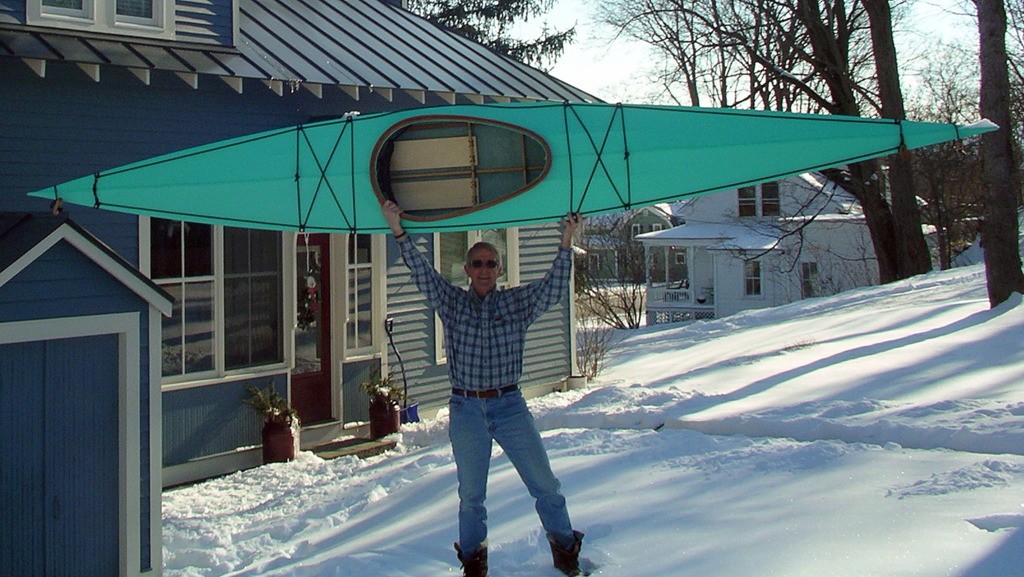
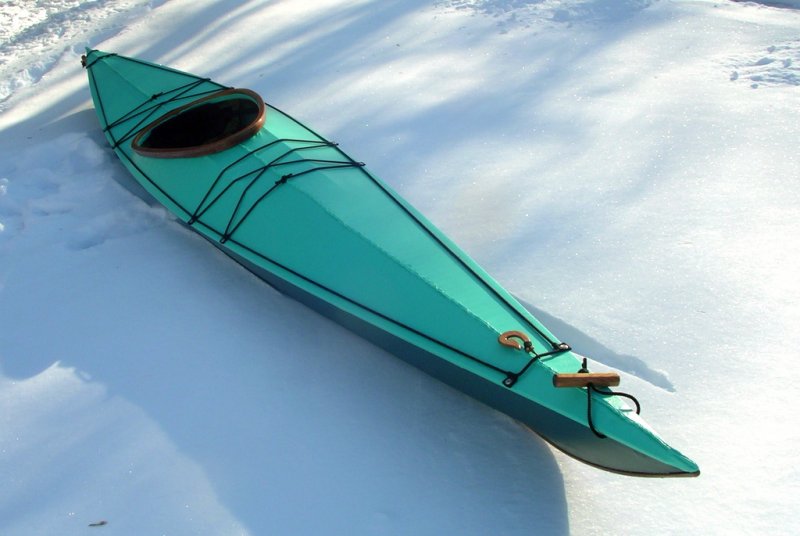
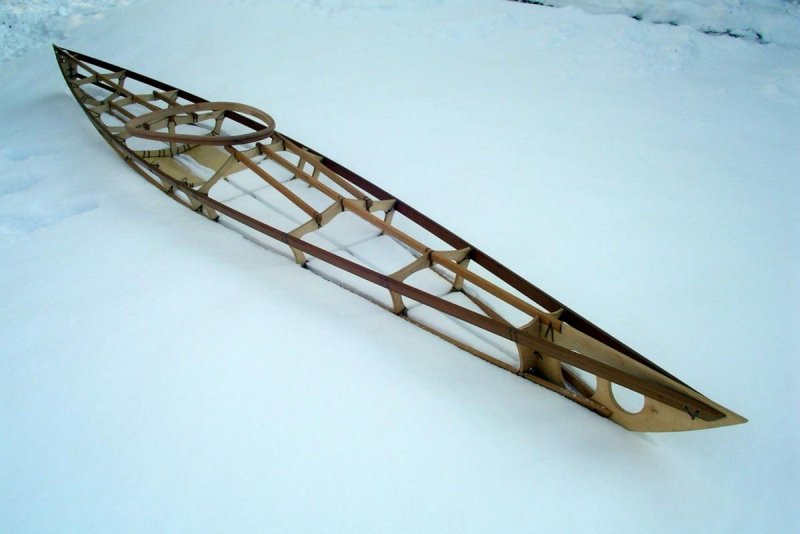
Hi all, These winter project Ravenswoods seem to be popping up all over! It's going to be a while before sea trials up here in VT, so snow trials will have to do: Final weight (fully fitted out): 26.5 lbs From the construction log: Setup, initial wood work - 23 hrs Lashing, finishing frame - 29 hrs Skinning, painting, fitting out - 28 hrs Total exactly 80 hrs. I can't match Pickman's paint job, but every boat needs a personal touch, in my case a Maori influence: I am very pleased with the Ravenswood design and the whole construction process. This is my third SOF but first of Jeff's designs and I can't say enough about the difference a good design makes. Now I just need the ice to melt up here. Oh yeah, and for those new float bags to appear in the Kudzu store. Meanwhile, back to the cross country skis for a few months. Cheers, Steve

-
Nope, not behind the seat. And max flotation/filling-of-space is my objective in float bags so largish sounds perfect.
-
Here you go: 1. AROUND the boat behind the cockpit coaming: 54.5 in. 2. AROUND the boat at the frame at the end of the foot rests: 47.5 in. I'll be watching the Kudzu store for the float bags!
-
That's a beauty - love the logo. The paddles on the Adanac website look very nice - did you go with a shouldered model? I have never used a Greenland paddle, but now that my Ravenswood is finished it seems like I should. I have a good source of WRC near me and I am tempted to pick out a nice tight grained board and try a hand at making my own. I have no expectations of being able to match the Adanac quality, however!
-
I test fit my Wilderness Systems spray skirt on my Ravenswood (under construction) and it works great. Don't know if it is still available tho, it is an oldie but a goodie.

-
I claim no talent for sewing! I think what worked well was carrying the cord around the combing. It was tricky to make the transition from the deck to the combing, but then the stitching went really well and having the cord seemed to make it easier to keep the edge consistent and it makes for a nice clean look, I think.
-
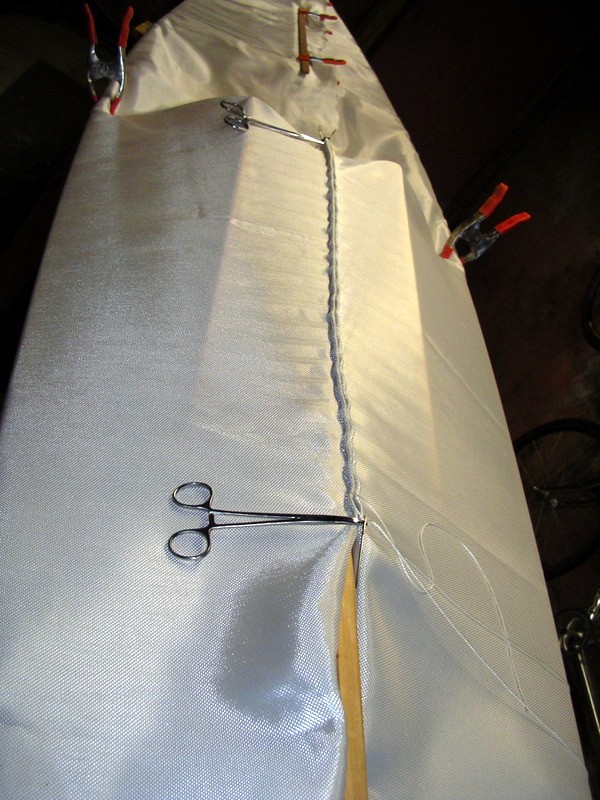
Hi Gary I just finished skinning my Ravenswood using the double-corded method with the 8 oz fabric. The lighter fabric has a fairly loose weave and you have to be careful when stiching so as not to create "pull holes" as you tighten up the seam. If you are careful about working the material (rolling it betwen thumb and finger) to get it tight (but without the gap shown in the video), and then stitch, it works well. If you create gaps and then try to pull the seam tight with the thread you will have problems. This is true in general, but I think the corded technique makes it a bit trickier, mostly because those cords give you real leverage! After finishing sewing, my cloth wasn't as tight as Jeff shows with the heavier cloth, but the 8 oz stuff really responds to heat shrinking with an iron and the final result was nice and tight. With the heavier material, the weave is much tighter (at least that is how it looks in the video) and you can really pull the seam together snugly as Jeff shows in the video. I think that would make the sewing process go better and also make it possible to pull the material really tight overall without requiring much heat shrinking. I am happy with my final results (see my earlier post Skinning Ravenswood for some pics) but I think I will use the heavier cloth for future builds. I realy like the corded method and I think it works to best advantage with a tight weave that lets you pull the fabric. My 2 cents. Steve
-
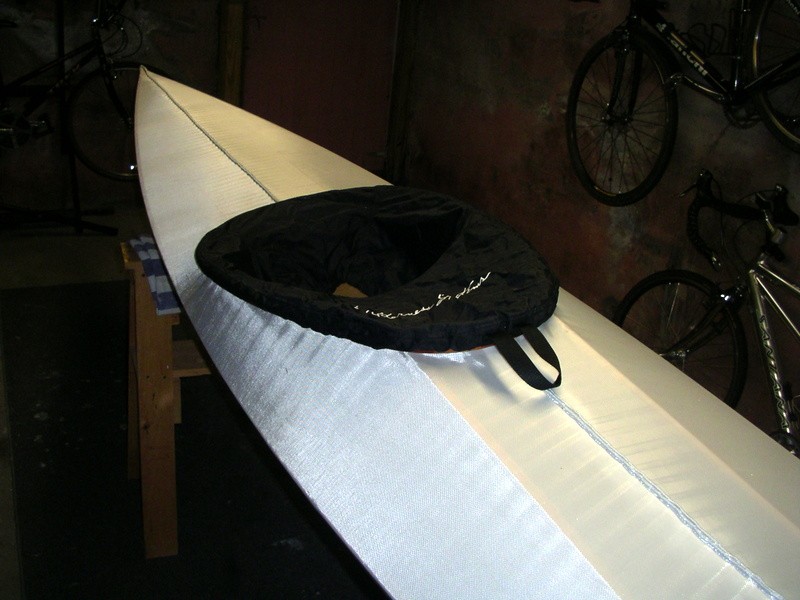
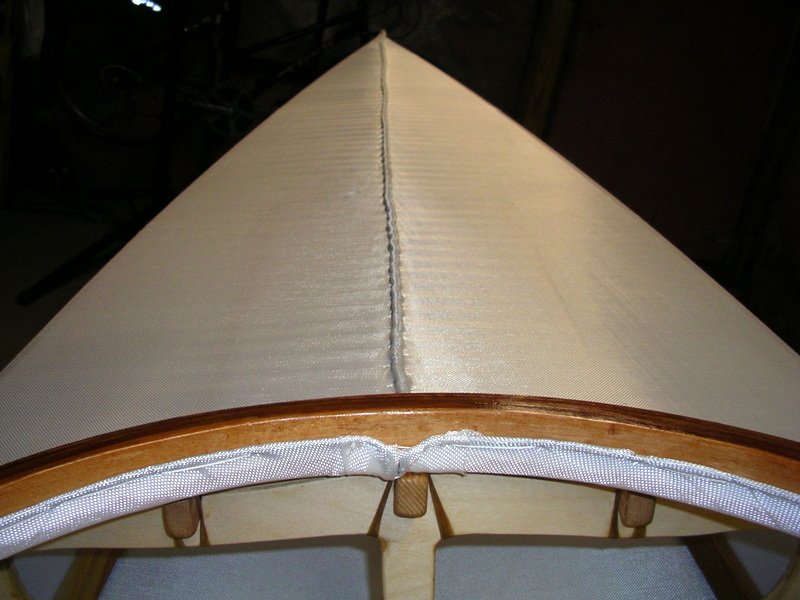
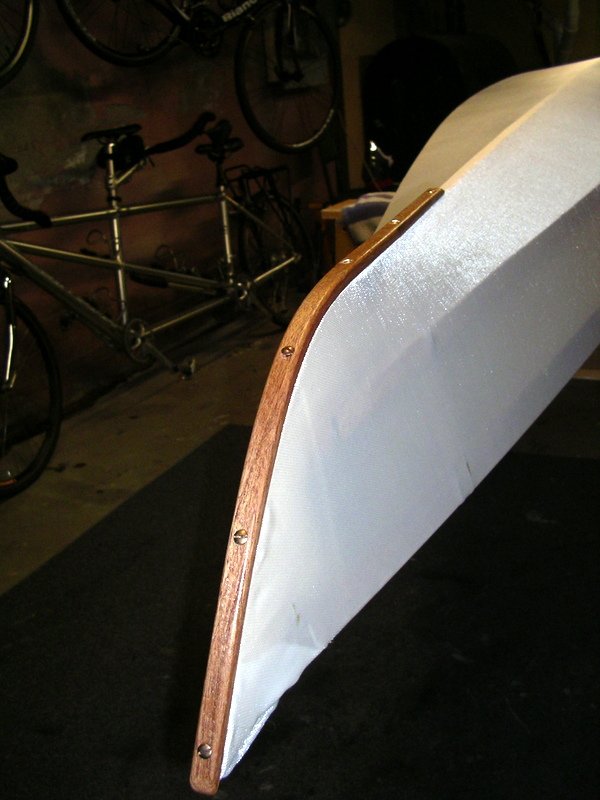
Progress continues on my Ravenswood, in fact the end is clearly in sight! So.... how many more months until the lakes ice out in Vermont? I used the double-corded stitching technique to sew up the hull and, while I really like the way it looks, I think that approach might be better suited to the heavier 11.5 oz cloth with its tighter weave (as shown in Jeff's video). I found that I was constantly struggling to avoid pull holes when tightening up. This is certainly due in part to my complete newbie-ness regarding sewing, but it is a technique that seems to call for a cloth that you can pull tight. I am much happier with the aft deck. I got better at working with the material to get it tight before snugging up the thread, and also seemed to be better able to deal with the inevitable challenges at the stem. Got a little straighter with my seam too! I continued the cording around the cockpit and I really like how that worked out - I like the look and it was surprisingly easy to stitch. There is a tricky bit as you make the transition from the hull seam into the cockpit, as the cloth needs to be cut to allow the cord to be moved to the other side, but it is reasonably straightforward. In retrospect I was not consistent enough in pulling the stitching taut as I worked along the combing - next time I might use sinew to sew up the combing just so I can really haul on it as I go along. I stapled the cloth at the ends, but for both the bow and stern there was only about 6 inches of closure required - the rest tightened up well during sewing. I am using stem bands made from laminated strips ripped from a piece of mahogany I had in the barn. I think it looks nice and it hides those ugly staples. As has been my experience with prior boats (canoes) the fabric tightened up and wrinkles vanished like magic with a little ironing. This is actually why I went with the 8 oz cloth - I had worked with it before and liked the "shrink wrap" feature. I think I will use the heavier cloth in the future, however. The deck is painted and I really like the color. The hull will be a deep blue/green of a much darker hue and I think the contrast looks good - at least it does on my piece of test cloth. I experimented with painting the deck color, taping, painting the deck color on the seam, and then over-painting with the hull color. I was able to get a pretty nice line with no bleed-thru on the test cloth. I'll find out if it works as well on a large scale in a few days!


-
Agree - I did an experiment simply lashing two pieces of wood together and then trying to break the joint. - the wood gave first, no contest. Not very scientific, but still impressive. Appreciate your thoughts on the longevity of the synthetic sinew. And I did obcess over those stopper knots. I think my original notion that the lashings will outlast me is probably right on.
-
Jeff - I know you have re-skinned boats and in the process found a failed frame - due to lesser quality ply if I remember right. But have you seen any problems caused by lashing failure? I am very impressed with the apparent strength of lashed joints and wondered if there is any reason to expect deterioration over time. I saw skin boats in Alaskan museums with what looked like intact lashings that would have been very old. Different material, of course. My guess is that the lashings will outlast me, but I was just curious.
-
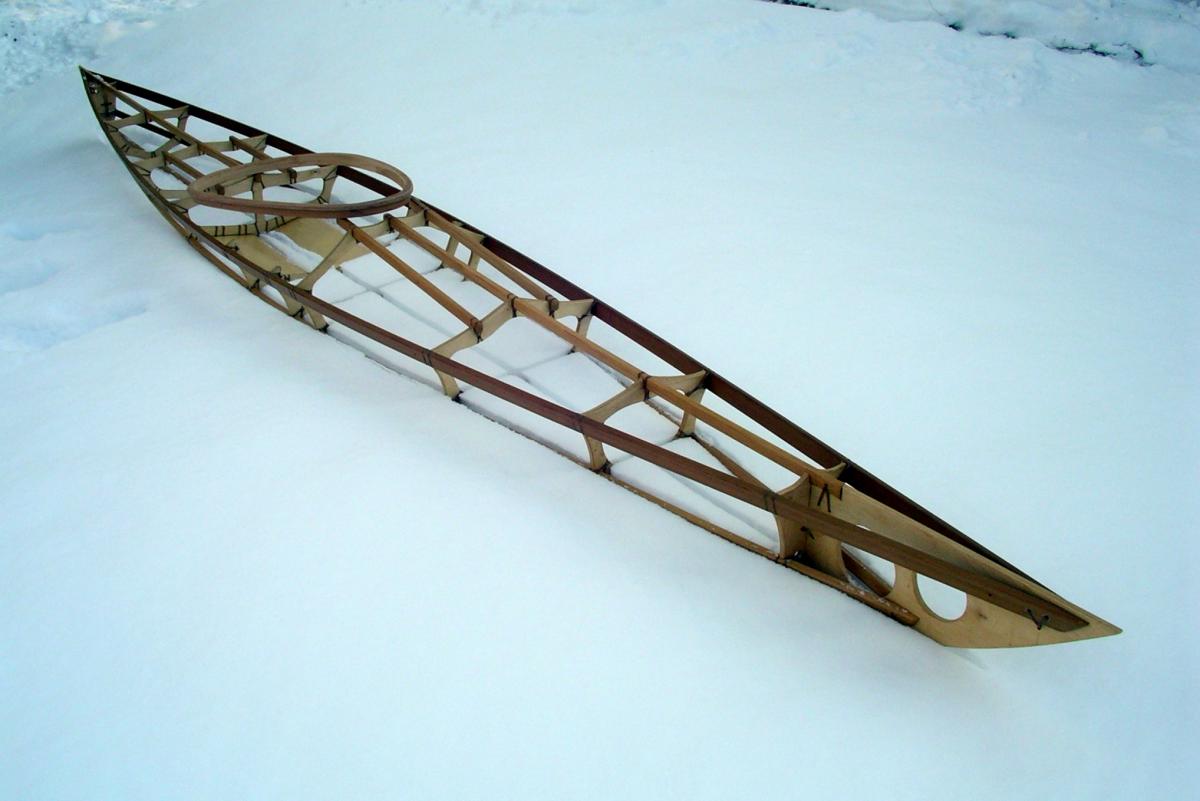
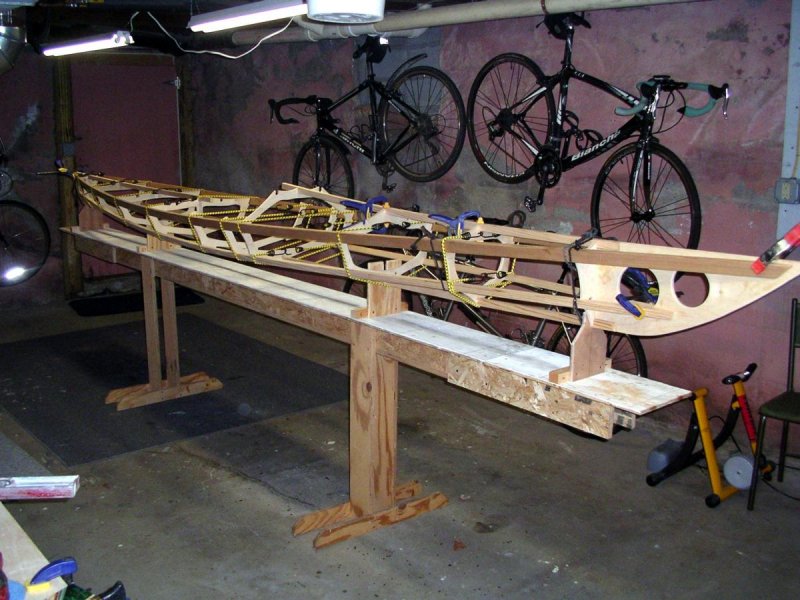
There isn't much grass visible up here in Vermont, so FRame On Snowy Turf will have to do. Once again, Jeff, the Ravenswood sure is a pretty thing to look at and going from plans to all-bungee assembly to fully lashed went absolutely smoothly. Everything popped off the brackets with the keel straight and the rocker still fair. All credit to the designer. Here is the initial assembly (NBC: Nothing but Bungees and Clamps): Ald here is the obligatory FROG (aka FROST) pic: Some stats from my build log so far: Weight of finished frame: 20.25 lbs (Baltic birch and WRC with some cherry in the combing) Hours to date: 47 (23 setup, cut out parts, make combing; 24 lashing frame and finishing) Cost: $416.31 I'm hoping for under 30 lbs with finished skin, footbraces, and rigging, and that looks doable at this point. I believe somewhere around 80 hrs total will be required, depending on how much time it takes me to do the sewing – that will be a first. I think I'm done spending money, and in the neighborhood of $400 is right on my budget. I ask you, how else can you have this much fun and then end up with a great boat for $400? Amazing. My plan is to sew on the skin using the corded method in the new video and then paint the deck a sea green/teal color and the hull a dark grey/green. It looks pretty sweet on the swatches. I plan to experiment with sewing and painting on a mockup and I will post some pics when I have some more progress. Steve
-
I like those bronze stems - I have done the exact same procedure with the ends on my SOF canoes but made laminated wooden stems with something (usually cherry) that is pretty tough. But those bronze jobs would be very nice.
-
Thanks for the info - I really like the idea of wrapping the fabric over the edges to help absorb/distribute localized strain. I still think my current boat will get sewn, however, but you never know what may be down the pike.
-
After all that - I am leaning towards sewing, partly for the "conversation starter" look and partly because I really want to try my hand at sewing. Question: How well does the 2-cord method work with 8oz fabric? The video emphasizes its value with the new heavier fabric, especially in pulling the fabric tight, but is it also effective with the looser weave 8 oz? I had been planning to do the whip stitch but also like the finished look of the corded method. 2nd question: Jeff, what tape are you using? I saw an earlier exchange on this forum on various tapes but I don't recall any clear answer. On other projects (bare wood rather than fabric) I have not had great results with the usual blue or green painter's tape, and that was without the irregular surface of the fabric. The problem is partly bleeding and partly lack of adhesion (early release) - probably two manifestations of the same problem. To a degree the bleeding can be helped by painting the taped edge with the initial, underlying color so any bleeding just matches. But getting part way done and having the tape start to let go is disasterous.
-
I know that several builders on this forum have stapled the hull and deck fabric to the gunwales, with the seam covered by a rub rail. This avoids the stitched seam on the center of the deck, making for a clean appearance. It would also simplify a two-tone paint job, with the (in my case) wobbly paint line covered by the rub rail. My worry is that a free-floating combing would put a lot of stress on the stapled seam at the point alongside the cockpit, at least on entry/exit. I think all the examples of the stapled approach that I have seen used the plywood combing with added supports, but I much prefer the free-floating, stitched-on, laminated combing. I have built two canoes with stapled-on skin and it worked OK, but in that case there are no points with particularly concentrated stress the way there would seem to be at the side of the kayak cockpit. I am at a decision point on the skinning approach and would appreciate any feedback. (Just to complicate things, I also like the traditional stitched look and am intrigued with the sewing, plus I have invested big bucks in thread and needles. Decisions, decisions.)