


Ken_StJohn
-
Posts
96 -
Joined
-
Last visited
Never
Content Type
Profiles
Forums
Events
Everything posted by Ken_StJohn
-
Effectiveness of the gills is <obviously> proportional to how much of them are in the flow. Any situation that puts more rudder box in the water will benefit from them.
-
Doc et al: In light of the discussion regarding flow over the rudder-foil, it's easy to see what the gills do. They actually become AN ESSENTIAL part of the rudder's lift equation. On aircraft we have leading edge "slots" which help to start the airflow over the top of the wings - particularly at low forward speeds like takeoffs or landings (watch-you'll see them down on these operations). Same with the gills. They keep the water on the opposite side of the rudder as the turn from taking a short cut over to the high pressure turn side. If this short cut happens it's a double whammy! It robs the low pressure side of water flow which is trying to create the lift and neutralizes (or greatly reduces) the pressure differencial between the two sides of the rudder. Hence the rudder stalls easily as a small amount of movement quickly reaches what maximum amount of lift is available - which, without the gills, isn't much to begin with. This will be particularly noticeable at slow forward speeds as there isn't much water flow going over the rudder surfaces. Conclusion: Add the gills!!
-
As my career was primarily in aviation, I cannot resist noting the similarities in sailing and aircraft. This may or may not be the issue here but I couldn't resist examining the rudder issues! The rudder behaves like an airfoil with the water obviuosly playing the part of the airmass. When amidships, the water flow devides equally and passes past each side at the same rate. Move the rudder to one side slightly and the water on each side will be flowing over the rudder at two different rates and two different pressures. By comparison to each other, pressure will be less on the side opposite to the turn due to its increased speed. The rudder (and therefore the part of the boat it's attached to) will be pulled (or lifted) towards the lower pressure resulting in a turn. What causes this faster speed on the low pressure side of the rudder has to due with the property of a liquid or gas to follow the contour of a surface and appear to "stick" to it. This happens as long as the surface is properly designed to be smooth and is a science in itself. Any irregularity on the surface that interferes with this smooth flow will cause the flow to separate from the surface and "stall". The stall means that because there is now no particular difference in pressures, the rudder will no longer provide lift to turn the boat. The stall can also be caused by moving the rudder beyond that point where maximum lift is achieved. Beyond the max lift point, the water will separate from the side opposite to the turn on its own regardless of any irregularities in its shape. Contrary to popular belief, the only reason an airplane (or a rudder) stalls is due to the angle of attack it makes to the oncoming air (or water) flow as it moves along. It has nothing to do with its speed. Airplanes can be stalled at 700 knots by abrupt movement of the controls and rudders can be stalled at 20 knots the same way and I've done both. There are <at least> three conslusions to be drawn: 1. Design the rudder like an airfoil with smooth sides, thicker at the leading edge, and tapering towards the rear - you know, like an airplane wing. Spend time making sure there are no bumps, valleys, blunt leading edge, rough surfaces, etc., etc. We don't want anything that will prematurely interrupt the smooth flow and the natural "stickyness" of the water as it passes over the surface. 2. In operation try to move the rudder slowly and smoothly through its various positions approaching the point of maximum lift. In times of slow forward speed it's hard to feel when the rudder passes through the point of maximum lift and stalls. Easier to feel with a tiller (as Adla experienced) but also easier to move through the point of stall due to the long lever arm moment. 3. In airplanes you recover from the stall by lowering the angle of attack between the relevant wind and the wing until the airplane starts to fly again. In boats you do the same by bringing the rudder back until the water smoothly flows over it again and then ease it back to the point of maximum lift.
-
Thanks Dave! It does keep me a'goin! Adla also posted a great video shot from the cockpit so really had a good sail myself! Got he stringers on the deck panels today. Stringers on the bottom panels tomorrow and maybe 3-D at last! Thanks for thinkin' o' me!
-
Barry: Yep, thanks to the inputs on the mast box jig from Dave Richards, I'm ready for that one! Roger on the screw heads popping. Would have probably found out the hard way. That's the truly great part about this Forum! When I first began the process I was concerned about the lack of contacts in Colorado according to the Stevens' website. Don't worry about that any more - the world is my oyster (with due apologies to Oyster!).
-
Barry: Thanks for the excellent information, particularly re the larger container. That was pretty scary yesterday. Also, the fender washers are a great idea. The plans call for screws every 5-inches alternating sides out from the center line. Any opinion on this spacing/method?
-
Greg: Yes, this helps a lot! I got some basics from Adla the other day and am using West 105/206. I have the syringes and the sticks so I'm all set. The pumps were out of stock so I bought small graduated mixing cups. Don't have any cracks to fill since the epoxy filled the ones that were there! Learned about the amount of heat contained epoxy generates yesterday. Had to use pliers to get the cup out of the garage after I noticed the smoke billowing out of the cup! My local <50 mile round trip> West store was kind enough to eat the overnight shipping to send the pumps directly to my house. So I intend to use them as much as possible to repay their customer service. In the mean time I'll have to mix by the cups which is kind of scary from a flame up stand point! I'll need quite a bit to do the whole keel to bottom joint and am concerned about this much in a cup. I'm guessing I don't have to put epoxy on both surfaces, right??
-
Greg: Yeah, that is the prime objective regardless. I will delay the event to do it right. I just wanted to see if anyone knows for sure before I launch into something I didn't have to do. While we're on the subject, if I have to go with filled epoxy, how do I determine how much to add??
-
Dave: When you get a chance - upoad a picture so we can see your handy work! (BTW-mailed the documents on Friday morning)
-
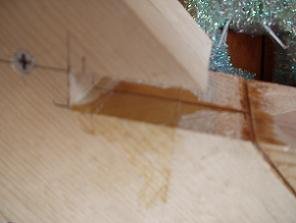
I had to fill a seam which opened on the dead wood to keel joint on my Weekender. Although taped off, some epoxy found its way inside the stem notch cut for the bottom panel. I was going to use the standard plastic resin glue for gluing the bottom panel to the keel but, I am concerned about the square inch or so that has epoxy on it. Today's the day to go 3-D. I didn't want to epoxy the keel as I have no filler available. Will the plastic resin glue adhere to the epoxy or am I stuck with having to epoxy the whole thing? Does sanding the epoxy'd area and using the glue seem a reasonable alternative?
-
Adla - the video is GREAT! Thanks for taking the time to put it together and sharing with us!
-
Making Progress - Cut the Dreaded Stem Notch!
Ken_StJohn replied to Ken_StJohn's topic in Main Forum
Terry: That's the question of the moment - when! If I had to guess I would think September. But, as we usually have snow in September, it could get if-fy. As far as where, it will probably be up at Standley Lake or Chatfield. I just finished glueing up the deck today and hope to add the stringers to the deck and bottom this weekend. All the other pieces parts are cut and ready for assembly. This kind of tells you where I'm at in process. It's great to actually hear from someone else in Colorado! -
Adla: Great pix as usual! I am so envious of all of you that have many boats to mess around with. I will get to sail with only three here in Colorado that I know of ... Me, Myself, and well ... you know.
-
If YOU Had It To Do Over Again-What Would YOU Do Different??
Ken_StJohn replied to Ken_StJohn's topic in Main Forum
Barry: Where can I find it? -
If YOU Had It To Do Over Again-What Would YOU Do Different??
Ken_StJohn replied to Ken_StJohn's topic in Main Forum
I am certainly not offended or dismayed by Ray's comments! All you guys have way more experience than I building boats. I truly value any comment from any of you guys. I started this project alone but, after only a couple of weeks on the Forum, I have absolutely abandoned that feeling!! I think it's important to consider Ray's comments into the mix with everyone else's. He obviously has some reasons for his comments that are valid from his perspective and should be considered. Personally, I chose this boat as a stepping stone to the learning process. Usually doing this requires the subject model to be some watered down, lifeless object that stands on its own merits for what it is - nothing more than a learning tool and little else. This is not the case with the Weekender - at least in my opinion. I get to learn the basics of boat building, experience the advice of subject matter experts along the way, and end up with a really cool looking vessel that I don't have to be embarrased of on the water. As someone said in this topic, "This won't be my last boat". I agree. However, I can't think of a better way to begin the evolutionary process than building the Weekender! Thanks, Ray, and everyone else for your comments which I hope other "newbies" will read which is why I posted in the first place! -
If YOU Had It To Do Over Again-What Would YOU Do Different??
Ken_StJohn replied to Ken_StJohn's topic in Main Forum
Has anyone out there actually scarfed the side panel joint?? Any "issues"?? What ratio did you use for the cuts?? -
Nice job, John, I see what you mean about the expoxy!
-
Another idea, Dave. Maybe use a small coat/hat hook. I've seen them with just one "prong".
-
Don't see no mast box - what's gonna make it go?
-
Dave: How about using a small u-bolt, putting it in a vise and bending over the "u" part 90 degrees. Then you could use the two threaded ends to mount it.
-
Thanks, Dave! Ken
-
If YOU Had It To Do Over Again-What Would YOU Do Different??
Ken_StJohn posted a topic in Main Forum
All: As I am getting to the no turning back point, I'd be interested in your view regarding things you would do differently if you had it to do over again! I figure there's got to be at least a couple things that really stick in your mind now that you're done. Might save some other poor souls (and me) from making the same mistake or not seeing a better way to do something. These modifications I am seeing on other boats have to be the result of some needed improvement found while actually sailing. After you see them it seems so logical. I've been sitting on the flat, unmounted, bottom hull panels trying to imagine some - but it's just not the same! -
Making Progress - Cut the Dreaded Stem Notch!
Ken_StJohn replied to Ken_StJohn's topic in Main Forum
Sorry All, forgot to upload the web page index ... website functioning now :oops: -
I finally got back to working on the weekender. Cut the dreaded stem notch. It turned out to be 2-1/8" deep instead of the 1-3/4" as shown on the plans. The overall length of the two bottom panels was right on the nose at 155-3/4" so not sure why this occurred. I rechecked all of the keel stations/measurements and didn't see anything wrong there either. Oh well. New pix at: http://home.comcast.net/~weekenderproject
-
Thanks! Great job and details. I am constantly surprised at the number of mods out there. I keep "looking" for ones to do to my boat as it goes through various stages of construction. Thanks again!
