Ken_StJohn
-
Posts
96 -
Joined
-
Last visited
Never
Content Type
Profiles
Forums
Events
Everything posted by Ken_StJohn
-
Sealing Stringers/Panels - 5200 or Glass Tape?
Ken_StJohn replied to Ken_StJohn's topic in Main Forum
These are great tips guys, as usual. Interesting thought on the 5200 sealing against inside penetration - never thought about it in that aspect. This all started because I saw some guys had glassed interior sections before the sides went on and it looked like tape across the stringers. Thanks, again! -
Just anothr question in the string of many! Getting to the point where I want to seal the stringer joints in places like the lazarette/transom compartment, forepeak, etc. So, the guide says to use 5200. I have had a couple advisements to glass with fiberglass tape. I'd be very appreciative of any comments in this regard. I am particularly interested in knowing if anyone has had any leaks regardless of the method they used. Thanks All!!
-
Sorry, Dave, I was at a hot spot when I answered you and then closed left. I couldn't have called you anyway from the "road". I think I'm on top of it now and besides, I can always cut the hatch if I had some burning reason to do it. I think I'll skip it for now.
-
You said what I was trying to! I was going to be more concerned about the aft surface of the bulkhead lining up with the corner for a continuous line than the 65" measurement. Thanks! (got your PM this morning-thanks for that too.) What's your feeling about cutting the Lazarette hatch on the front even though I'm planning an access hatch on the deck top like yours? I have two thoughts - one, it would allow access to the transom and, two, leaving it out would strengthen the lazarette. I am not sure about making it a sealed compartment by extending it from side to side so cutting the hatch is still an issue....
-
The dimensions given for locating the bottom stringer for the cabin bulkhead are clear enough. The upper dimension is less than that - at least to me. So, as usual, I appeal to you guys for an answer! The Guide says: "Distance from back of CABIN BULKHEAD to station-line #16 at rear corner of DECK= 65" ". I take this to mean a measurement along the top of the deck starting from the point where a side of the bulkhead contacts the top of the deck back to station line #16 - should make sure it is the same on either side to keep the bulkhead aligned. This looks like the Front surface of the bulkhead should be flush with the point of the deck curve such that it forms an extension of the cockpit curve right across the face of the bulkhead. Does this make sense???
-
Glad this stuff helps! Hope to get back to work today on something connected with the boat - been out of town. Good idea on the locking wheels if you don't have a wall or something to push against.... Andrew, I may have to break through the ice by the time I finish so I may not beat you to the water after all! Yes, this is an exciting change from cutting out pieces and parts!
-
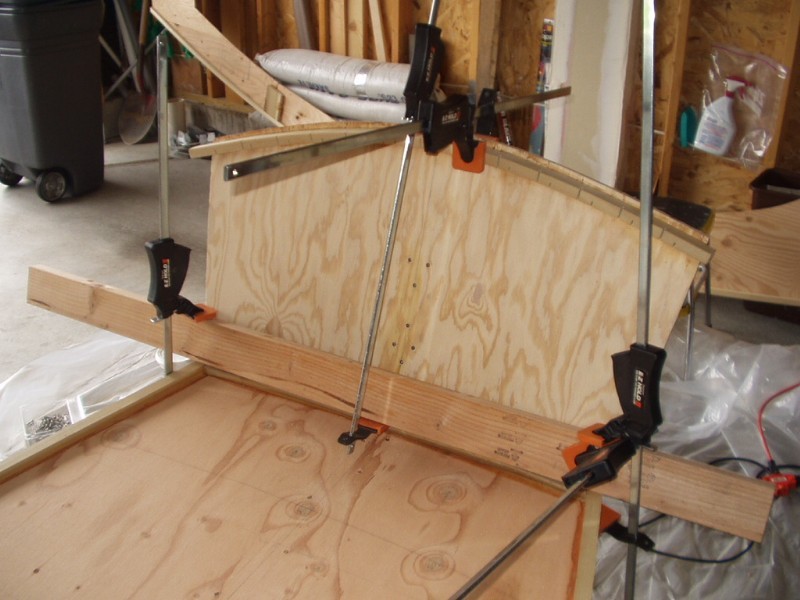
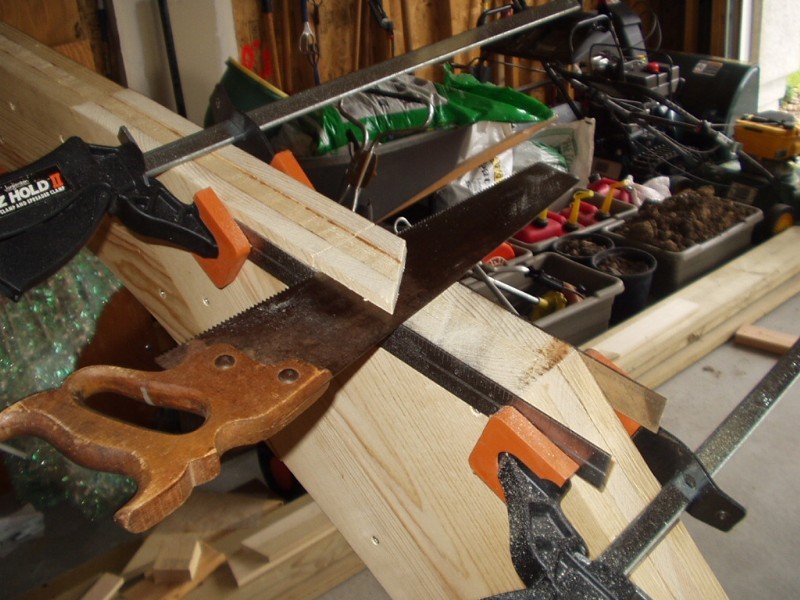
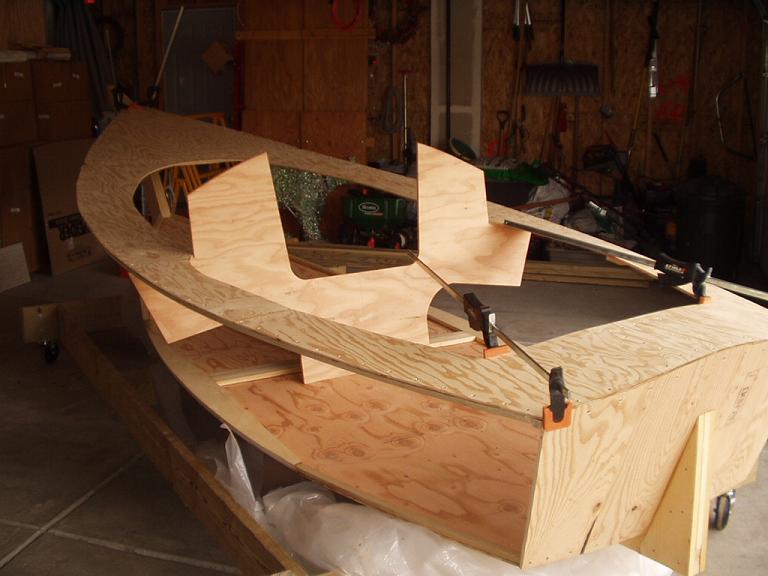
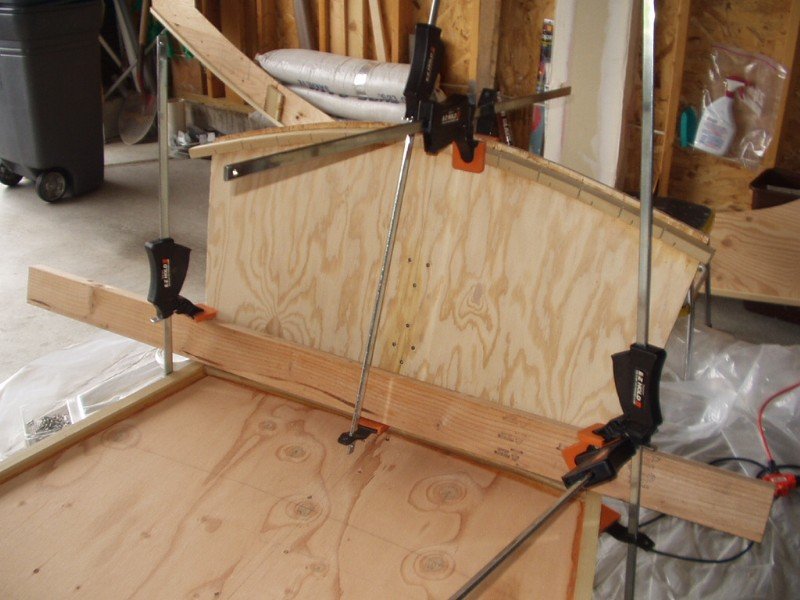
Thanks Guys! Brain: Some pix to help out...you can click on them to enlarge for cloeup view #1 the clamping scheme I used to attach the transom stringer. The 2x4 provides a rail horizontally so you have something to pull down against all the way across the stringer. Although this was taken after I was done, you can see the vertical clamp in place to do this. The clamp at the top is used to draw the stringer in tight against the transom. #2 this is the method I use to keep the saw straight when cutting notches into the stem. Those are two straight edges slid out of a combination square used as guides. #3 how I pulled the transom in against the deck. What is not shown is a clamp that went hooked on top of the deck, over the outside of the transom back, and hooked on the bottom panel - similar to the pull down clamp in #1 but placed on the outside of the transom.
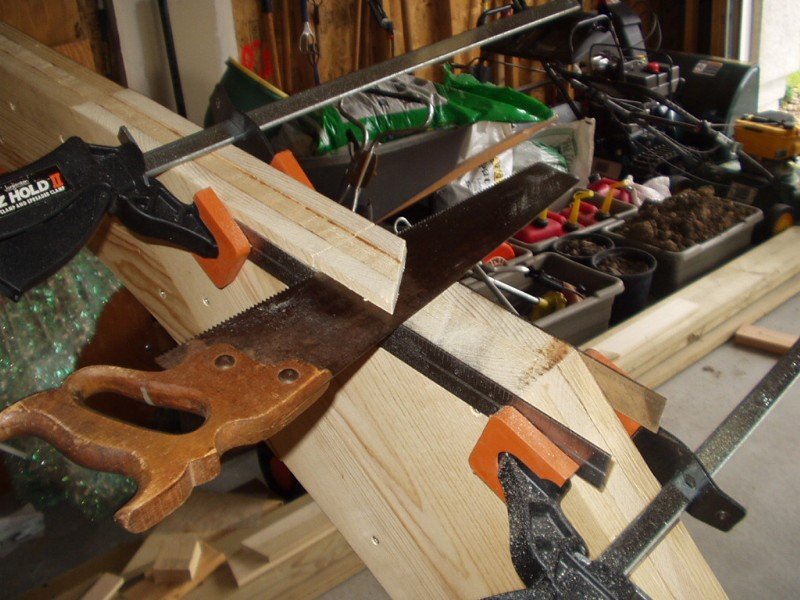
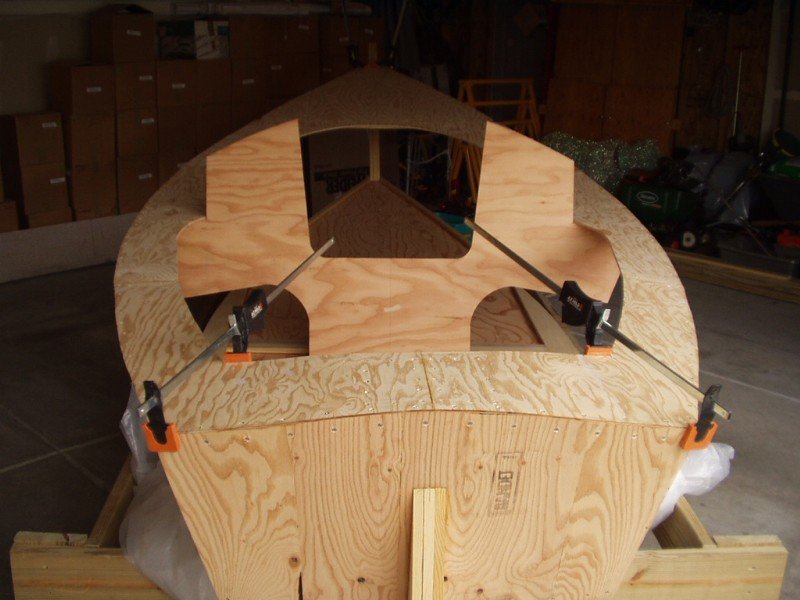
-
You got that straight! I intend to do everything I can before the sides go on. The cabin bulkhead is just there temporarily to hold up the deck. I figure I am going to put the forward bulkhead and mastbox in last so when it's set it's set!
-
Had a good day as you can see! Moving right along now and beginning to pick up some momentum. Shame I'm headed out of town for a few days. Back on it next week.....
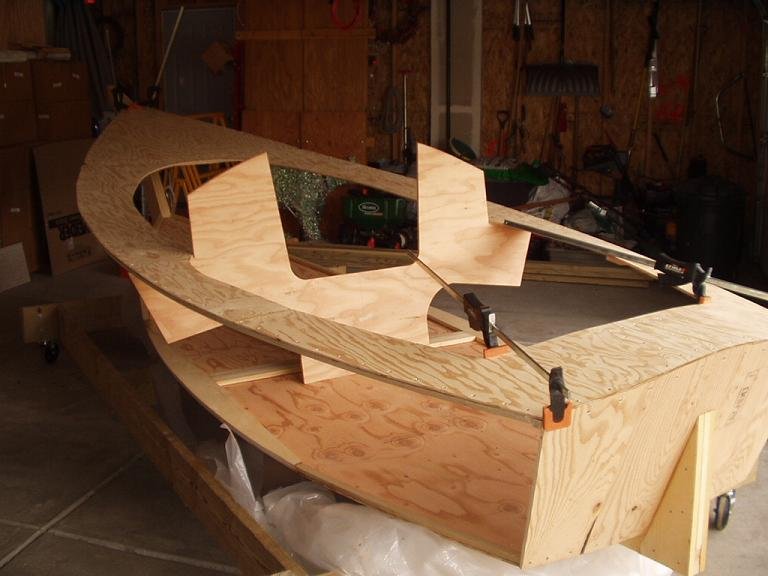
-
*ALERT* Watch For Really Old Resin Glue Date Codes!
Ken_StJohn replied to Ken_StJohn's topic in Main Forum
Don't know the answer to that one ... anyone? -
Just to keep the dialogue going ... this is not a challenge just interesting ponder points ... I recall from somewhere that a boat's speed is proportional to it's waterline length which changes as it heels. Is this also a contributing factor to speed when not in light winds?
-
Thanks, Yes, Transom is on!! Still clamped, though (see "Clamping System ..." post) to keep it stable while the glue dries. Hope to add the deck to transom stringer today and then attach the deck. I decided to save putting on the bulkhead stringers on the bottom to later so I could make sure the angles and locations of the bulkheads are correct - particularly the forward one. I want to get the mast box angle dead-on as I have been reading about "issues" others have experienced when this wasn't exactly the correct angle.
-
I purchased a 4-lb tub of Resin Glue from ACE the other day which I had special ordered since the stores don't carry that size. It came directly from the ACE warehouse to my local store. When I mixed the batch it was really weird. As the powder hit the water, it almost instantly clumped. Further stirring made it the consistancy of wood filler putty. I thought I must have measured incorrectly so I added a little water. The mix remained thick and a pale beige and didn't seem to want to accept water. I discarded the batch and started over with the same result. I mix by the recommended method - weight - using a digital scale accurate to .01Oz so I know the ratios by now are correct. I suspected incorrect storage handling at the warehouse. I contacted DAP and researched the date code which turned out to be March 2004. Considering the shelf life of only 12-months, this is just a tad over. Turns out I've been bying glue that has expired more than a year ago. It seems the issue is that it continuously absorbs moisture as it sits on the shelf. After a year DAP feels it will no longer meet the design parameters. Pretty Scary. Here's what they told me for date codes: (my "0476" code) - "The one on your product is an older code, 2004, 76th day, or March 15th, 2004, so it is over 2 years old. The recommended minimum shelf life is 12 months. The new batch coding system is month, year, and day. first digit, January thru September 1 - 9, October, November, and December, 1st 2 digits 10, 11, 12. Next digit represents the last digit of the calendar year, 5 2005, 6 2006 last 2 digits, day of month. So a 4 digit number is Jan thru Sept, and a 5 digit number October thru December 12512 December 12th 2005 2512 February 12th 2005." I also found out that the most recent format is Year/Day of Year/Daily Batch Number. So, you may see something like "6653" which means 2006/65th day/batch number 3. I went back to the store and returned the tub. I looked at the 1-lb sizes on the shelf and wrote down the "0189713" date code and contacted DAP. This is their reply: "The batch number that you provided is actually an older style batch, preceding the coding system that we had yesterday." This means it is before 2004. I am not sure what to do at this point regarding what is already on the boat except I have checked it and it seems hard enough for sure. I intend on ordering a case of 4-lb tubs (4-each per case) to get fresh stock from someone other than ACE. I am going to have to find a way to verify the date codes before I buy anything though and I suggest you do the same!
-
Clamp System for Single Handed Transom/Bottom Attaching
Ken_StJohn replied to Ken_StJohn's topic in Main Forum
Cool! Good Luck! -
Clamp System for Single Handed Transom/Bottom Attaching
Ken_StJohn replied to Ken_StJohn's topic in Main Forum
The biggest requirement for max clamping force came from pulling the bottom up because of the stringer attached to meet the transom. As I said in the post, I had to execute plan-B and kerf it after I found the dry run proved that it was too stiff. On my Weekender pulling the transom in didn't require much force at all. An alternative yielding more force would be to use C-Clamps on the vertical pull for the bottom and maybe even switching out the 2x4 for a 4x4. This would require a large C-Clamp to make the span from the bottom to the top of the 4x4 but, with your larger dimensions, it may be the way to go. I'd try the 2x4 first. Also, I am leaving the clamps in place for a few days while the glue sets just to keep things stable. -
Hmmmm ..... tempting me ay? .... I'll need to get closer to see what business issues might keep me from going .... we work weekends here!
-
Steven - Thanks for the invite! That would be a great trip even though it is a tad distant. I want to see how things are around the beginning of August and possibly try to get away.
-
Faced with having to attach the transom to the bottom panel on my Weekender, I came up with this simple scheme. I am sure this isn't the first idea for doing this job and, probably not the last! The Horizontal clamps are pulling the transom corners into the bottom stringer. The Vertical clamps are bending the bottom panel up to meet the transom. With this scheme I was able to micro adjust the joint until it was where I wanted it. Then the screws were driven without effort. A 4x4 block is placed lengthwise on the centerline butting up against the bottom stringer. Two 2x4s supply the lever arms - one across the top and one against the far end. I used a solid 1x material for the bottom stringer which needed to be kerfed on its top side in order to allow it to bend enough. I would dry test the rig first to make sure your transom and bottom have enough give to meet where they're supposed to. Other than that, this assembly step proved to be simple and effortless!

-
Looks like a great day regardless! Your dad looks like he was having a great time. Interesting note on the deadwood crack. Mine lifted too as you may recall our expoxy conversations. I did fill it full between both keel/deadwood seams and epoxy is now is the main bond. I guess it worked out for the best in light of your experience. Thanks for sharing!
-
Well, another successful operation assisted in its success by you guys! I took the time to come up with a press in anticipation of having to persuade the bottom down flush on the keel-as you guys pointed out. Had some lags ready too but, didn't need them. I was succesful in cleaning out the epoxy with a sharp chisel followed by sanding as suggested above. I took a 6-inch piece of 4x4 and set it on end on the center line just in front of the next screw. I put a 2x4 across it going side to side. It was long enough to extend beyond the sides of the trolley. I put a pipe clamp on either end from the 2x4 down to the bottom of the side rail of the trolley and tighted until the bottom pulled down tight on the keel. Then drove the screw and moved on to the next one. Worked great - we're now 3-D! Thanks, guys!
-
Count me in, Frank: Weekender
-
Today was a great day - bottom's on!!

-
Thanks all! With your info in hand I WENT 3-D TODAY - WooHoo!!
-
Thanks, Andrew, for the reply. Why the 2x4's?
-
According to the sacred manual and holy tape, the bottom panel is fastened to the keel and then the transom is attached. This has never made sense to me. Logically, at least to me, it seems as though the transom should go on first. Then the bottom can be slid aft against the transom for a tight fit before fastening to the keel. Is there a reason I'm not seeing for not attaching the transom first?? You guys have all done this before me so, once again, you're the experts!