PinoyPiper
-
Posts
106 -
Joined
-
Last visited
-
Days Won
2
Content Type
Profiles
Forums
Events
Everything posted by PinoyPiper
-
Spot the difference?
-
I used pop rivets on mine. is it better? I don't know, i used rivets for attaching hardware to the mast in my spindrift. going on 5 years now and no failure yet...
-
The hardware that came from B&B came with one of these: RF25109 Can anyone tell me where it goes? it's a 20mm block so it's really small. I think I have most of the stuff figured out except for this one.
-
Congrats on the launch... I thought we might be launching around the same time, as our progress level looked similar, but I didn't know you were in a hurry. I'm still waiting on my sails and the trailer. A Douglas Adams fan... nice...
-
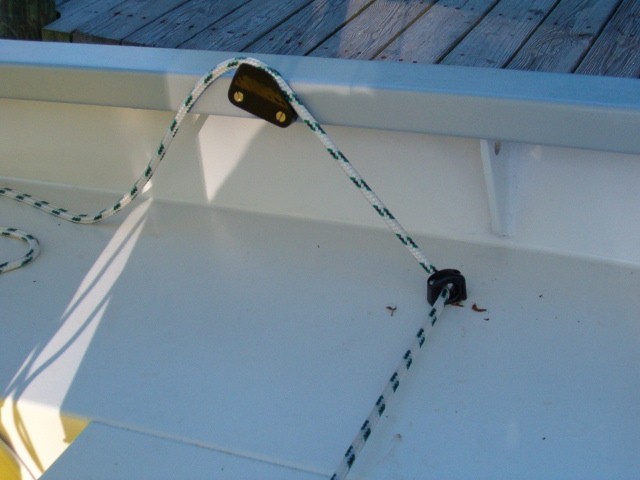
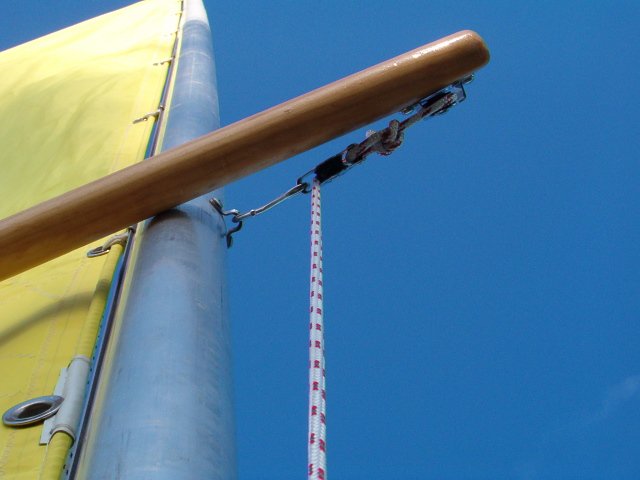
does this help?

-
it's the main sheet coming from a standup block on the thwart.
-
This should help. I mounted mine almost level as the bullseye was further forward. this pic was from a CS15. it's for the main sheet. the mizzen sheet uses cam cleats, mounted on the rear deck, though on the diagram I have it shows another pair of cl206/7 for the mizzen sheet.

-
I used 3/4 ring shank nails, spaced 3/12 inches apart.
-
I have the Tohatsu version of that motor, if you're into tinkering, you might be able up the power to 3.5hp by removing the constrictor plate behind the carb.
-
update: looked through the CS17 CD that came with my plans... the folder that helped most wasn't the one titled "rigging details" but the one titled "CS15"! It had pictures of every bit of rigging, including the aft end of the sprits... which I didn't understand until now... still don't know where the lashing block goes though
-
Thanks for the replies Alan and Wes. Your posts and website helped a great deal. Was also finally able to get a reply from Graham thru Carla, she attached a document that gives the location for each bit and that helped too. I've updated the spreadsheet with Carla's inputs and everything has a place now. except for the RF25109, which I think is a substitute for RF20141, however I'm not so sure as one is a stand up block and the other is a lashing block. Carla also said that she'll try to send an updated diagram from Graham's computer. which I hope will help a lot more as though I know now where they go, i still can't imagine how and and where some of them are installed. this is not my first B&B boat, installing the hardware on the spindrift I built a few years back was very straight forward. Cheers/Roy

-
Hi guys, Just got the hardware from Carla for my CS17. However, I'm not clear on where some of them go. My rigging diagram is from 2006, is there a more updated version of this? I was supposed to attach a spreadsheet of the list of hardware and where I think they go, and hopefully some of you who know can help fill out, but apparently i'm not allowed to that on this forum. but i'm attaching a picture of the spreadsheet instead. Hope you guys can help. I tried to email Graham and Carla but I think they're on vacation as I haven't been able to get a reply. Cheers/Roy

-
Hi John, I was wondering if you have any photos of the bimini and the sail up together? have you ever tried this? I'm seriously considering putting a bimini on the CS17 i'm building and sailing with it up, especially on longer trips. blazing hot summer days down here are pretty much everyday that's not raining. cheers/roy
-
interesting idea.. just from the picture it looks like it might just work if the rig is similar to what Peter posted... please do keep us updated... I have an 11N too and am interested to see what other alternative rigs would work
-

Spindrift 11N finished. Now what about mast and sail?
PinoyPiper replied to rotroman's topic in B & B Yachts Forum
what's NZD? New Zealand Dollars? I paid less than US$200 for a suit of S11 sails three years ago. as easy as stepping and unstepping your mast. -
Congratulations!
-
spindrift 10n inspection port placement
PinoyPiper replied to len swanson's topic in B & B Yachts Forum
here's how it is laid out on mine, note additional flotation in the forward half. forward: hatch on forward bulkhead is closed, but you should be able to see where it is. hatches on the seats were placed on top for easier access to the bolts. aft: ports were installed on the vertical, as I ddn't really want to sit on them. -
you can put in more flotation in the forward half though:
-
Hi Graham, Thanks for replying. I have the cs17 materials list alright, and it does say there to get a 16' foot length of lumber for the side stringers, however the "hull panel instruction" sheet I have says 18'6". a typo error maybe? 14'10" Got it! Thanks. I sort of figured it would be around that length. just wanted to be sure.. cheers!
-
that makes sense, but on the hull cutout sheet, it shows the stringer is less than 180". I also had a look at a copy of a friend's cs20 plans today and our hull panel instruction sheets are exactly the same, with the exception of the little bit on that right hand corner which says what boat it's for :. would 180" be a safe length for this stringer? does the length even matter? I live in the Southern Metro Manila area in Las Pi
-
Hi guys, just started on a cs17 and I think I have the hull panel instruction sheet for a cs20, as it says the side panel stringers are 18' 6" ???. how long should this stringer be? cheers/roy
-
Hi Richard, Do you have a picture of Kokako with the 2hp mounted? i'll be starting on a 17 soon and I was planning on having the recessed transom too (for a 2.5 hp), does it give room to turn the outboard around for reverse?
-
for 2-stroke outboards in the low hp range Tohatsu and Mercury are one and the same, I'm not sure about 4 stroke outboards though. I have a 2.5hp Tohatsu and a friend has a 3.5hp Mercury, once you take the cowling off you can't tell the difference between the two.
-
Thanks for that Video Rob. Great stuff! What was that song? It's been playing in my head the whole day
-
What a beauty! are those birdsmouth spars? makes me think twice about laced sails. Great work!