Tim
-
Posts
64 -
Joined
-
Last visited
Content Type
Profiles
Forums
Events
Everything posted by Tim
-
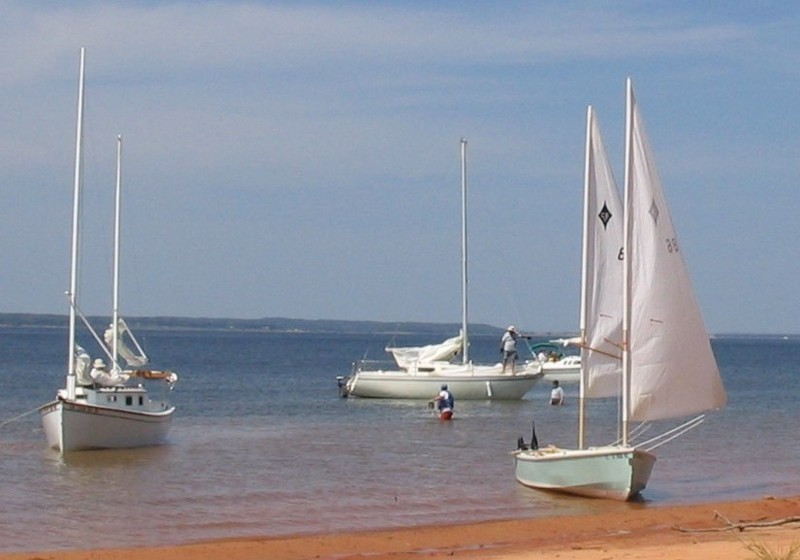
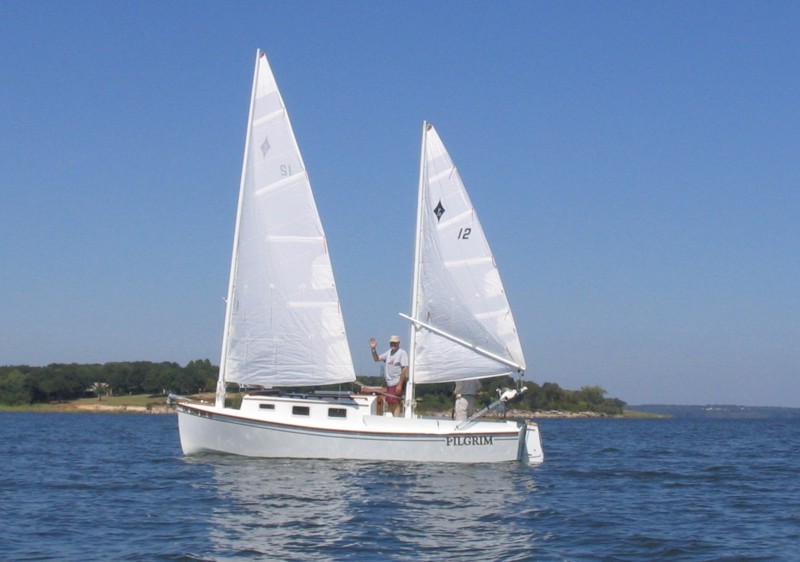
A couple of B&B boats got together at the border of Texas and Oklahoma this past weekend with many others from the Trailer Sailers group. I thought you might want to see a photo or two. It was my first real chance to sail with some bigger production boats. I followed behind not knowing it was racing until one of them jokingly told me. Of course I had to see if I could keep up and I was pleasantly surprised by the result. Probably they would do better with more wind. One time the wind died on us when we got to the middle of the lake. Several crews especially on the smaller boats got out oars. They used one oar on one side at a time. This is one area I was set-up by Graham for success. Using the standard oar set-up you can really make some progress. But when its close to 100 deg out, anymore than 15 minutes of this and your ready to die. Good thing I had my electric trolling motor too. I saw the power of a staysail on Travis's Pilgrim. When it went up Travis took off like we were standing still. Some believe this sail has the power to take all the wind off the lake because the wind died not long after it came out. For now I think I like the simplicity of just 2 sails on the CS17 I'm still humbled that I actually built something that is as good as (to me better than) store bought.


-
2 inch PVC will work. They are a little loose but you run a bungie over PVC and masts and tie them down to the deck or thwart so they wont rattle around under transport. A straight pipe a tee and two elbows is all you need for each crutch.
-
While hurricanes are hitting other parts we have the dog days of summer here which means light and variable winds. So now I have the CS 17 staysail plans from Graham but how do I make one? Where do I get the nylon material? Besides a staysail can anyone help with some light wind sailing tips especially tips that will get me up wind. Sometimes when the wind is very light I feel like I'm just sailing slowing back and forth on beam reaches. :oops: Embrassing when you have guests aboard. We did get some wind for just a little while last weekend when I was out with two Vikings. Father and son from Sweden. Viking son took the helm for a while and as the wind picked up he pointed behind him and said something in Swedish. His father, not a sailer, looked puzzeled but as the boat heeled over I knew what he was saying and I climbed onto the rail. The exicitment was just too short lived as the winds soon died again and we never made it to our windward goal before floating and rowing home. Still a good sail but I just think I could do better with some help from the group. Cheers, Tim
-
Rob, You guys have many more skins under the belt than I so I was wondering why you you always move the mizzen up to the middle when doing the mast swap reefing? It seems like it might be better to move the main sail to the middle first. This gives you more sail to power through chop when close hauled. It would also be easier to move it when you have made the boat hove-to by bringing the mizzen in and tying it down. (This ability to heave-to so easily is of course one reason you would want to leave the masts in and do the traditional reefing instead) Once the boat is hove-to you can move the main and pull out the mizzen laying it on top the deck which I have done or if you don't want to step over it on each tack you can move it to the main sail hole. The boat is very balanced sailing under the main alone and you can spill out some of the gusts if you keep the sheet at hand.
-
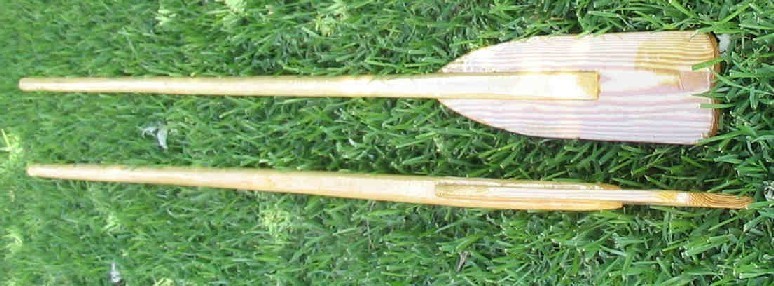
I made some quick oars based on Graham's method above. I used 1x6 boards planned down some for the blades instead of plywood; I should have taken a little more off they're a little heavy. They didn't take too long but not nearly as quick as the Grahams. I just realized when I looked at Graham's post again that I forgot about the round over on the ends. Oh well, rowing trial tomorrow. Cheers, Tim

-
Rick, Yes it will fit; I have mine in a garage that is just a few inches under 20'. I have to take off the masts and lean them up at an angle because they are exacty 20' but that operation only takes a couple minutes. Tim [attachment over 4 years old deleted by admin]
-
You should not need lubricant because the plastic wrap makes it easy to get off. I found the bottom of my tube sagged a little as it cured making the cross section a little oblong or ellipitical. It still works fine.
-
My daughter has one in the freezer. But since I live in North Texas and snow ouccrs once per 1-2 years I figure its probably only worth .92 cents.
-
On the positive side I had a chance to solo the CS 17 under some moderately windy conditions this past weekend and I was very delighted by the lack of heavy heel required to maintain speed. I was worried that I would have to sit on the rail all the time but I stayed seated, was happy with the speed, and based on this I really don't plan to improve the coaming like others have done to accommodate rail sitting. I should note that I left the mizzen on shore and sailed with the main only in the center position. On the negative side - I don't think my seat hatches will hold water long if knocked down. I only have hook and loop holding them down. I probably need a gasket and latch that I can tighten down. I couldn't find a good latch that would not be a calf scrapper. Might be easier to just use duct tape. Would it be better to have the hatches on the the vertical part of the seat? - harder to get things but out of the water completely in a knock down. I
-
I had some minor leaks at top of my centerboard case under the thwart. I have a strong attachment between thwart and case but didn't think about the need for it to be water tight all the way around. None of it was coming through the middle or forward section of the case, through the top slot as I think Rob is talking about in his post above so I can correct it by just sealing the thwart better. But then I was thinking is all this turbulence supposed to be welling up the centerboard case? There must be a drag loss here. Is there a way to seal the aft end of the bottom slot after board comes down? Can I install some flexible rubber gills that would allow the board to come down and seal most of the opening created but not get caught between board and case sides when the board is pulled up?
-
Roger, I roughed up the aluminum mast with 60 or 80 grit sandpaper the used Rust Oleum sand color spray paint. See you on the lake when you finish. I've been to two Ray Roberts and Lewisville already-they are both about the same distance from my house -about 10-15 miles. Joe, As to the your question I'm glad to be done with the build stage. It took me 1.5 years, I never had enough large periods of time to work on it consistently and was always trying to squeeze in time. My daughter accused me of escaping a few times to the boat shop and thus her name for the boat. The workmanship suffers somewhat from this lack of quality time but I really like the CS design. This is my 3rd boat. First a Stevenson's Skip Jack, then CLC kayak which was probably my best as far as the craftsmenship and now the CS 17. Now I'm ready to spend my free time sailing instead of building.
-
CS 17 #86 Escape' has been launched twice. First sail was solo in a builders shakedown launch. I had few technical issues and lots of wind. I saw the quickness of this boat in just a few minutes on the water but didn't want to press my luck until I could go back and fix my snotter and centerboard. Minor issues in the end and I wish I would have realized the easy solutions while still on the water. After fussing with folding the sails I also decided right then to glue my poles together and wrap the sails around them and carry them on top of the boat. This is really nice with the pvc holders to transport them like Gordy's pictures. 2nd launch was the public launch. A couple pictures are here. Calm wind conditions this day. None at all until I trolled out of the creek and into the main lake beyond camera shot from my photographer unfortunately. We ghosted along nicely and we were very pleased at our progress and the boats ability to sail into the wind and tack with so little available wind. My certified sailer instructor/friend was very surprised in his first sail in a cat ketch. He marveled at the safety -no boom to hit your head, excellent stability even when were both on the same side, easy to sail. We were all excited about our next launch date. Thanks Graham for a great design! [attachment over 4 years old deleted by admin]
-
Jeff, I have the CS 17 plans and it is noted at the bow "cut outside the line (1/4") so that after the bottom and sides are taped and before folding you can fair the forefoot (bottom panel) into the bow for a sweet profile". I think if you look again you may find an overall dimension length that you can use to determine the tip of the bow dimension past the last station. Tim
-
There is always the possiblity that during a capsize the boat will turtle and you will not be able to recover on your own. Although capsizes have not been reported with these boats and turtling is very unlikely you have to be prepared for the worse. But even thinking of this there is no reason you could not learn to sail single handed. You just need to follow the basics, floatation, light to moderate wind, watching weather conditions, reefing, staying in well traveled, sheltered waters, PFD, distress signal devices, etc. Also learn how to avoid the accidental jibe which is usually what gets new sailers - I know from experience :oops: . But according to the B&B web site jibing is less scary with this rig probably because there is no big boom to swing over.
-
Thanks for the replies. I think I could raise the bow roller some - I'll try this first. The paint is just home depot Glidden Oil/Alkyd. I wanted a darker color for more contrast with the white but they only offer light colors. This is what they call Opal Pearl; my daughter calls it sea froth .
-
Doing things a little out of the normal order. Bottom side of the boat is done so I bought a used trailer, replaced wheel bearings, knocked the rust off, painted, removed unwanted parts, and added lights to trailer. This weekend we loaded the trailer. Now I need to finish the remainder of the top sides while it is on the trailer. The boat is sitting off the bunks in back. I would like to lower the aft end but the sides will hit the fenders if I go much lower. The fenders could be lowered by about 3 inches but the fender brackets are welded on the frame so this would be a chore. The lowest part of the transom in the middle is sitting about 26 inches off the ground when it is connected to tow vehicle. Is this too high for easy launch and retrival? [attachment over 4 years old deleted by admin]
-
Wow thats a great shot! You should put it on your web page. I didn't expect that kind of get-up and go with 3 on board. Kind of gives me the the tingles -oh no thats just my arms from the sanding going on. My #86 is upside down, recently epoxy coated and awaiting final surfaces touches and paint.
-
You could add it like this sketch. In this way it keeps the side and bottom panels the same length and fixed at the same place as the original design. Basically you are putting a curved, raked transom over or behind the original tansom. I made one this way then realized that it would change the rudder box and that Graham knows much more about boats than I and he probably had a reason for the simple transom. So I went back to the original design without even a picture of my curved transom but heres a sketch. [attachment over 4 years old deleted by admin]
-
It looks like Gordy's set-up is so good that Graham has adopted it as the standard set-up. It's included in the hardware I just received. I had been assuming that the snotter rig set-up is the same for both sails. But after I recieved hardware for just one sail I'm not sure. Is this set-up just for the main? Is the sail shape as important on the mizzen?
-
Southern yellow pine has some rot resistance and is a heavy, strong wood. So it makes a good keel wood and can be used for structural pieces elsewhere. It's much harder and has fewer knots than most eastern white pine. However SYP is is stiffer and heavier than D. Fir so it might not be so good for rails that have to be bent onto the boat. D. Fir is a prefered boatmaking wood that can be used for the complete boat if you glass the Fir plywood. But its getting harder to find at a good price in many areas of the county. I'm using some of each along with some free wood from crates that come from Europe.
-
Building self draining hatches- Princess 22
Tim replied to Charlie Jones's topic in B & B Yachts Forum
Excellent work as usual Charlie and a fine tuturial. Not sure if I'm in for that much work but it looks like this is the best way to do the job. One question: what do you use for latches to hold the lids down? -
Roger, Do you have a launch date goal? I'm a good ways behind you in the building process but I hope to see you on an area lake this summer. What lake do plan to visit? I guess Lake Worth is the closest to you. I like to frequent Ray Roberts because its close to me and the undeveloped park lands are quite nice. Lewisville or Grapevine would be good to meet at. But these boats are really Lake Texoma go-getters. Its the biggest and with the cliffs, trees, islands, strippers, eagles, etc the best. 8) Tim
-
I can't find the dimension for the centerboard trunk mounting to hull bottom. I see some dimensions to items nearby that would get me close but can someone show me area that the exact dimension is shown? Probably right in front of my eyes. :oops: Seems like a critical dimension like this would be set from the pin or something? On a semi related question, how do you keep the cat from sitting on your plans? every time I set them down on the floor or the table, there she is right in my way, lounging on the plans.
-
I never meant to imply the there was any problem with the design or methods. I have varied from them to try to same time or cost so my extra trouble was my own fault. I think it will be ok -see photo below. I too used the blocks (not shown in the photo) and many extra wire ties but only after things fell apart. Even if you mess up there are ways to correct it. Right now I'm taking a long look to see if there is anything I want to change before gluing. Plus its too cold outside again. [attachment over 4 years old deleted by admin]
-
This weekend I attached the sides to the bottom and stitched the bottom halves down the middle. It's a quick job; the only problem is that when your done there's not much to do but wait for epoxy to cure and I wanted to finish stitching and gluing this weekend. So I waited until the glue on the tape was about 80% set then opened the butterfly. It's a little awkward trying to control the long pieces by yourself but the tape seams made it. Once I got the bulkheads in place and starting bringing the beautiful bow together that's when I broke the butterfly at the newly taped seams between bottom and sides. I took off the sides and worked and stitched the bottom into place all around then stitched on the top pieces. Theres a little gap at the front bulkhead but I think it will all work out with filler glue and tape. It would have been definitely easier to do it the right way; I really had to work to the top sides pulled in at the bow. I took some photos but it looks like CS17 number 86 has been through a war with all the extra stitches and splints. Reminds me of the time my Dad hit a Monarch and we taped its broken wing back together.