Brucel
-
Posts
82 -
Joined
-
Last visited
-
Days Won
1
Content Type
Profiles
Forums
Events
Everything posted by Brucel
-
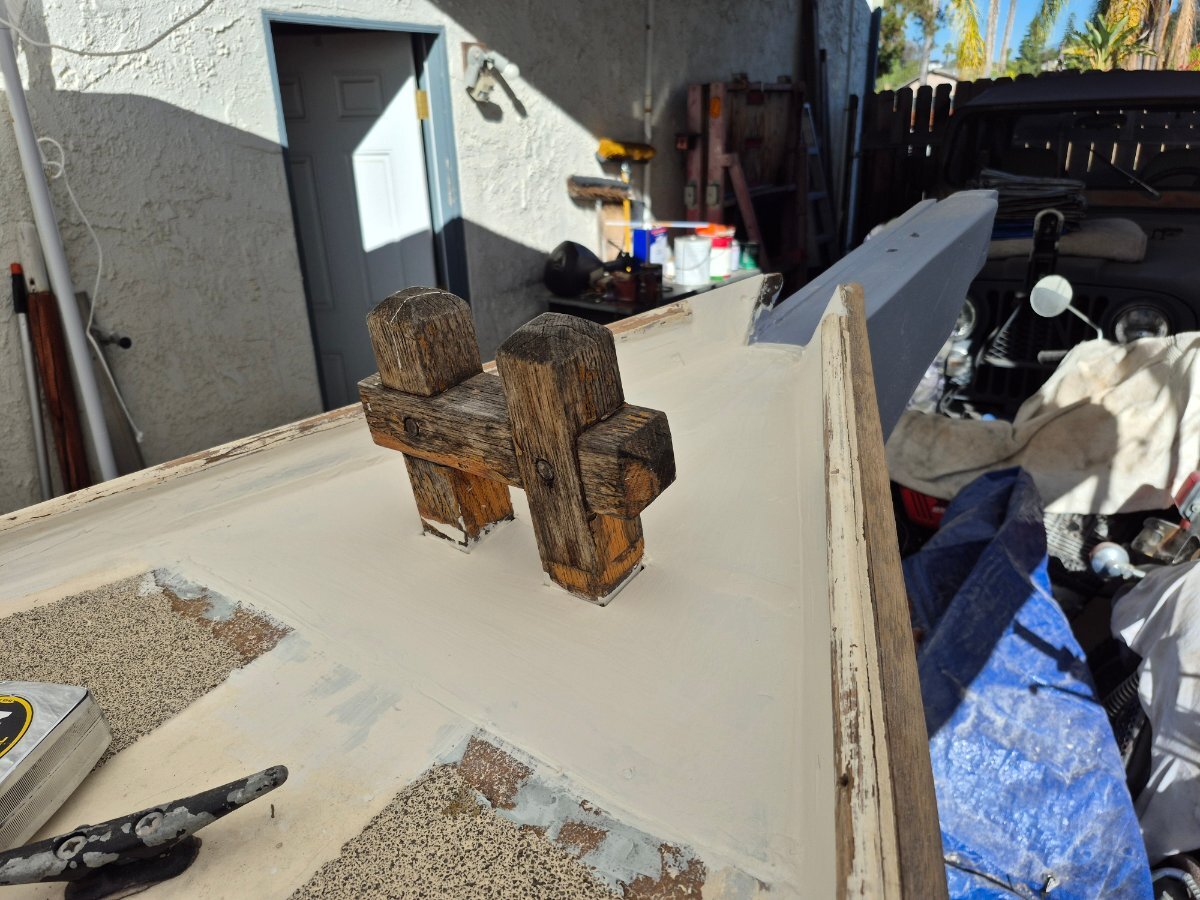
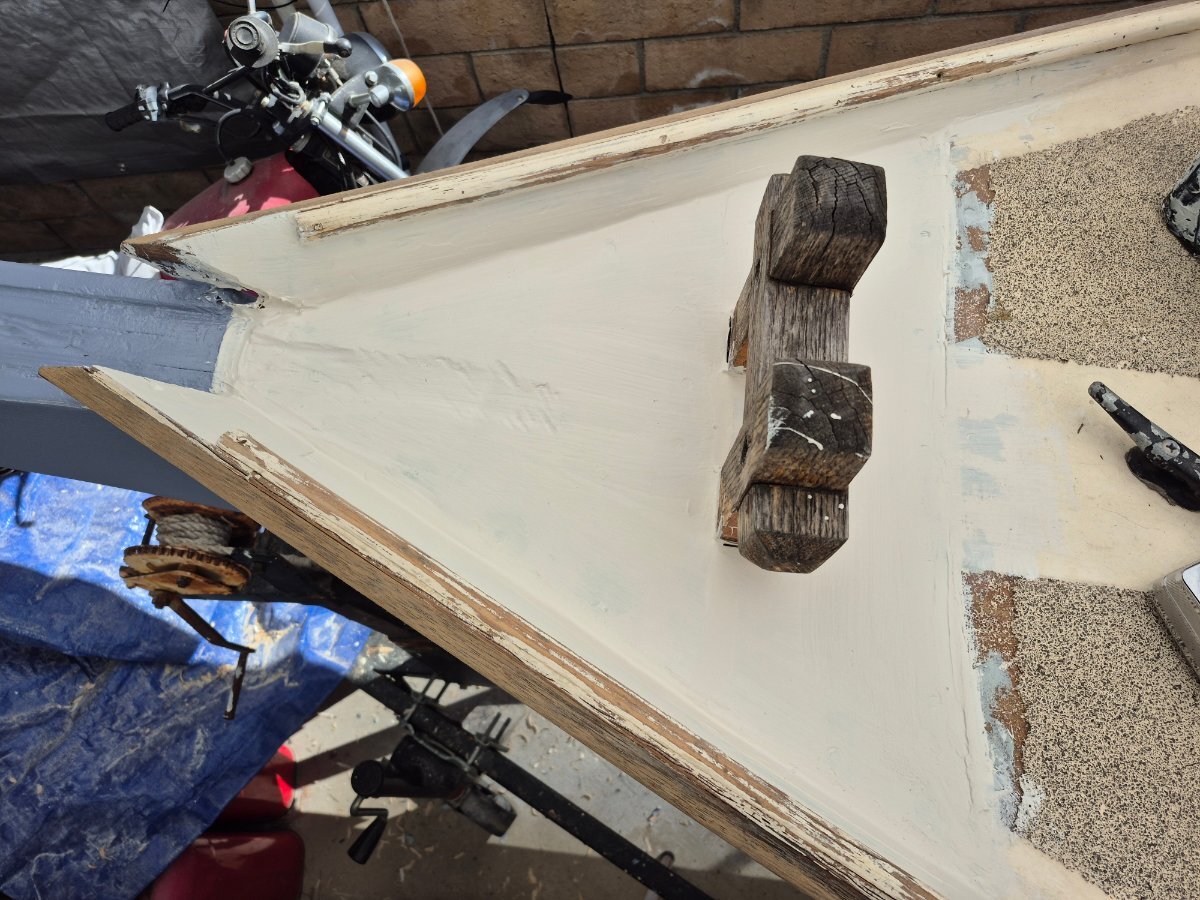
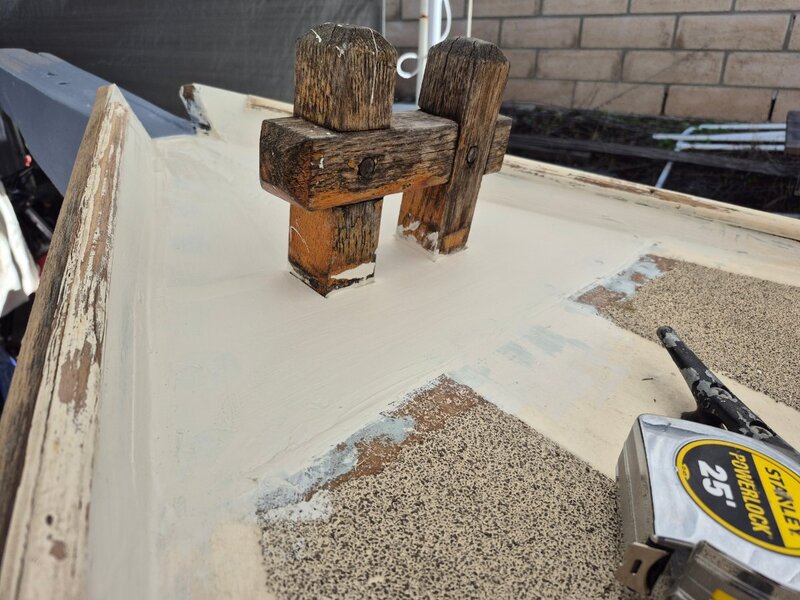
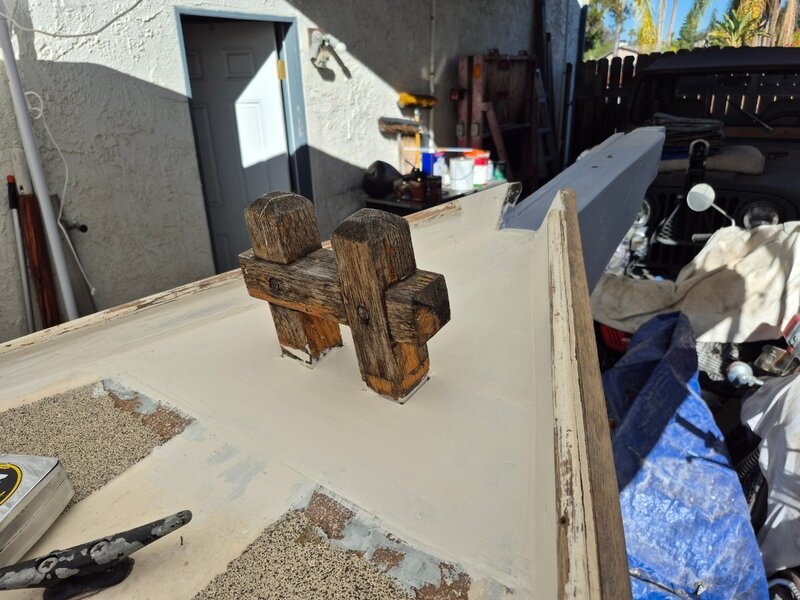
The deck patch is done and primed, ready for when I get to the point refinishing the entire deck. Still repairing the separations along the upper rub rail, side, and half round. Port side is almost done then on to the starboard side. After that repair some blisters in the deck glass, repair the non skid, do some sanding. I'll wait to do the painting until I finish repairs on the cabin since the deck and cabin will be the same color.

-
When I was looking for a 4X4 for the mast I searched all the big box stores in my area. No good wood. I went to a local independent lumber yard (they have about 5 stores in So Cal) and almost the first 4x4 I picked up was the one I used. I think all the box stores are just interested in filling their racks with any kind of wood. If you rack it, they will buy it. That tree support pole I got just doesn't look right, the original Stevenson design looks so much better. I also think tapered octagonal masts look classy and if I ever need another mast that's what I be making.
-
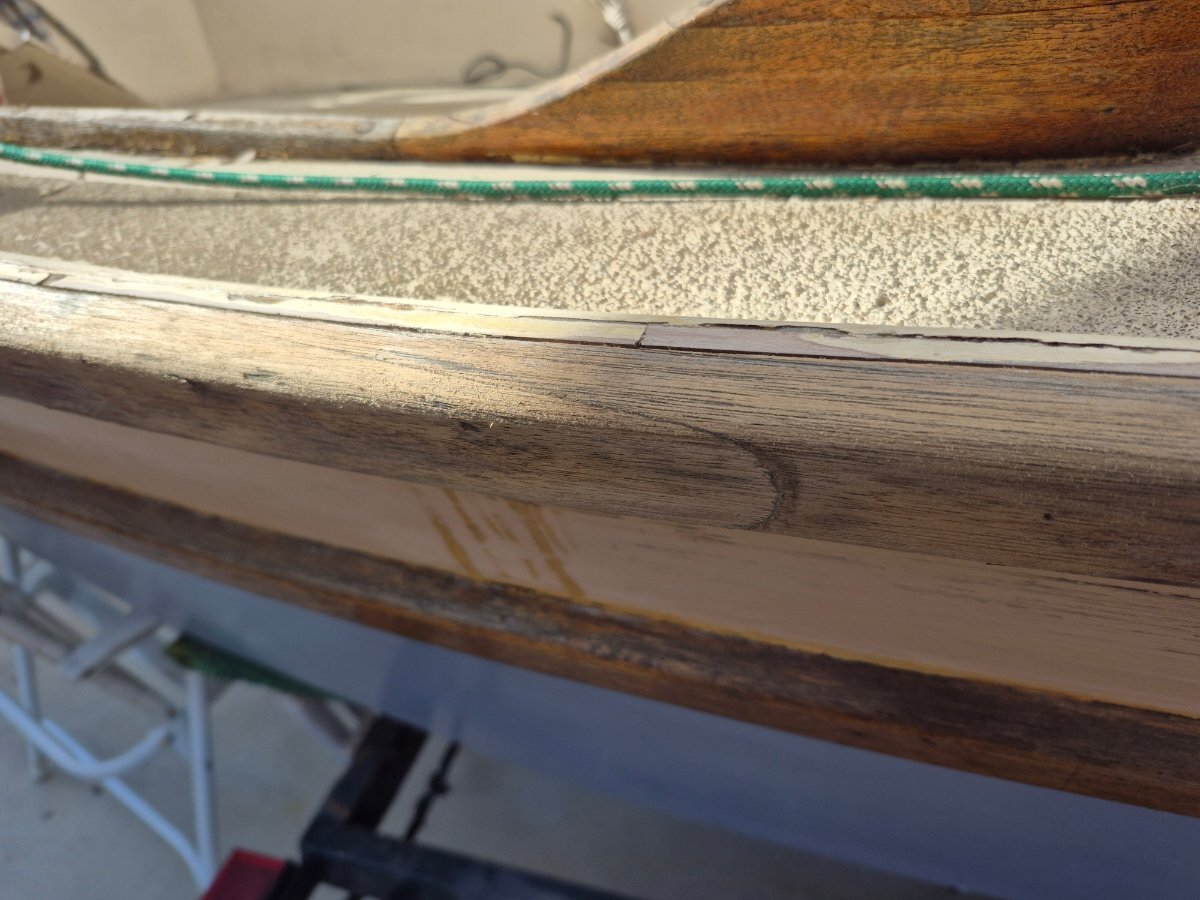
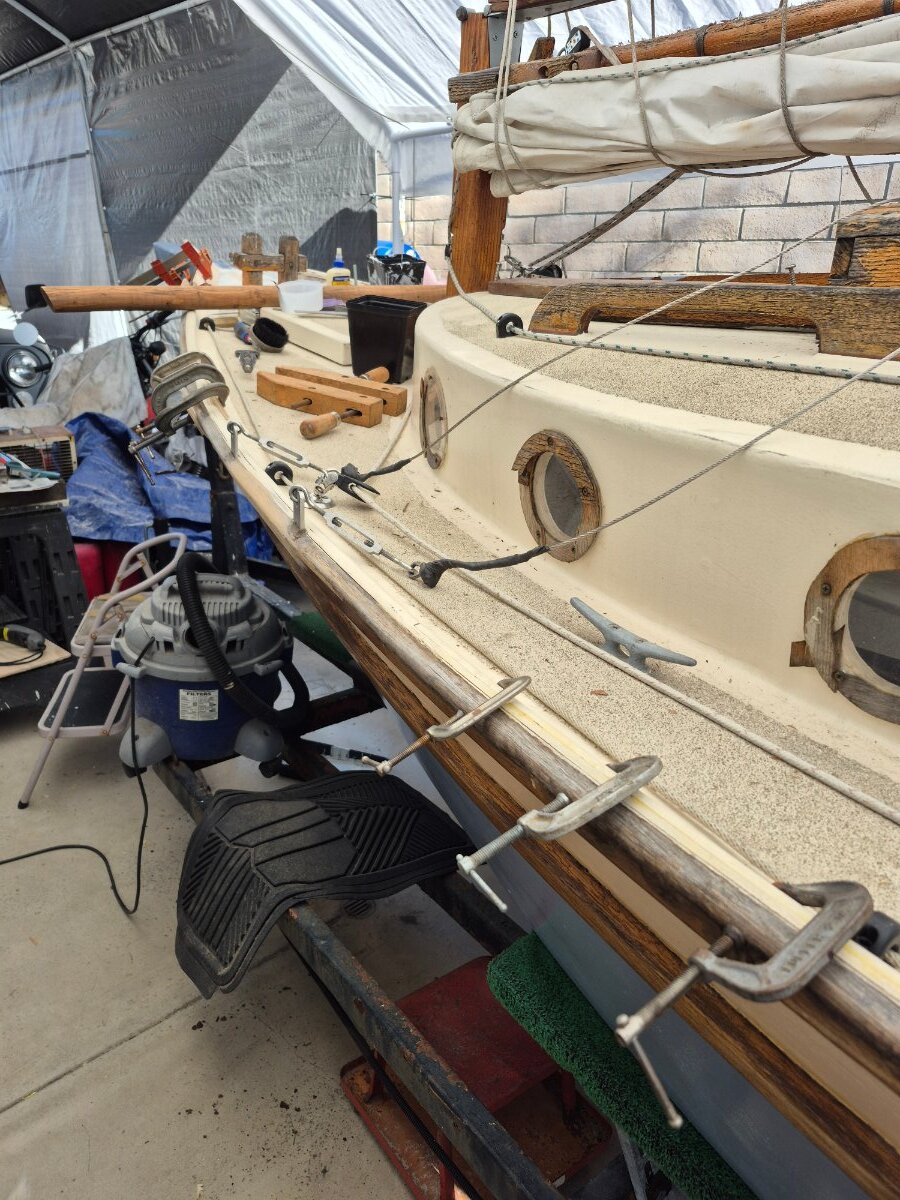
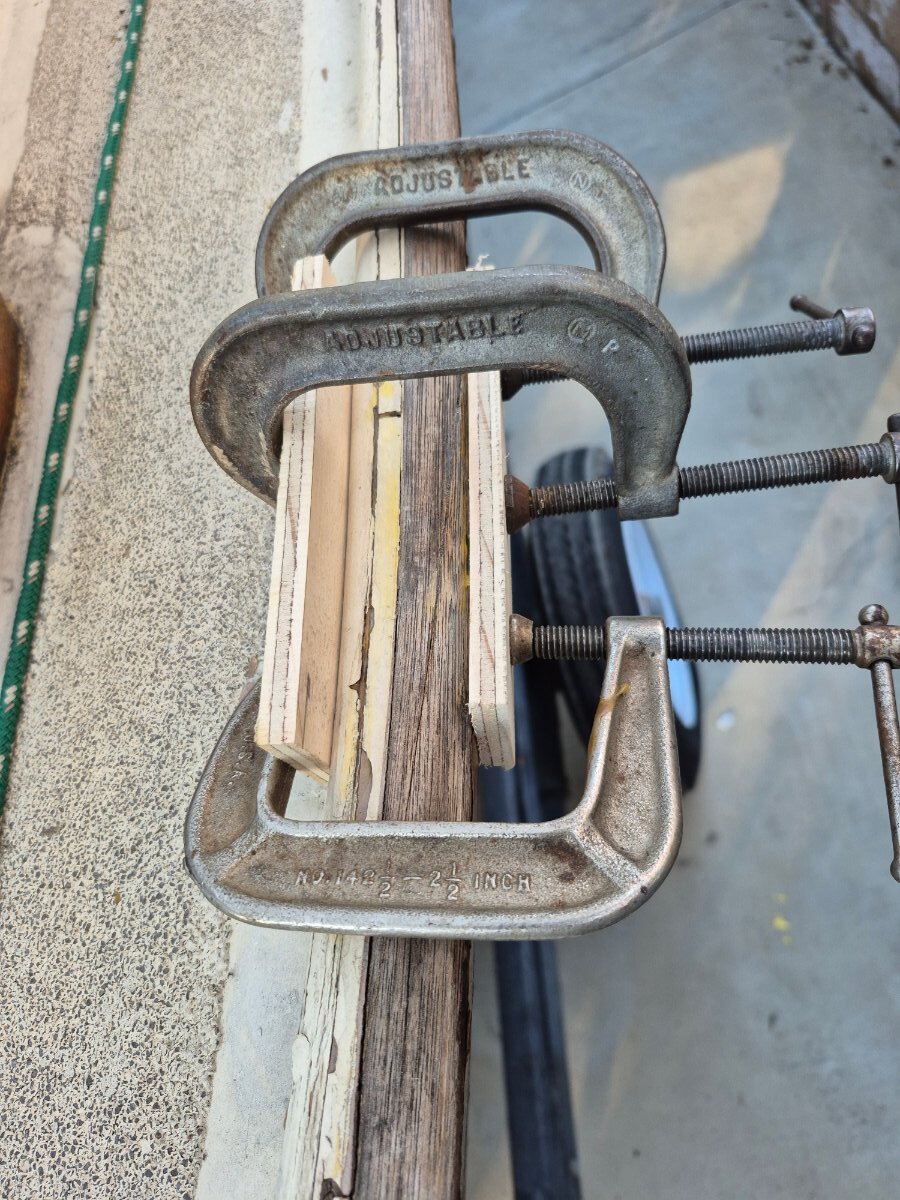
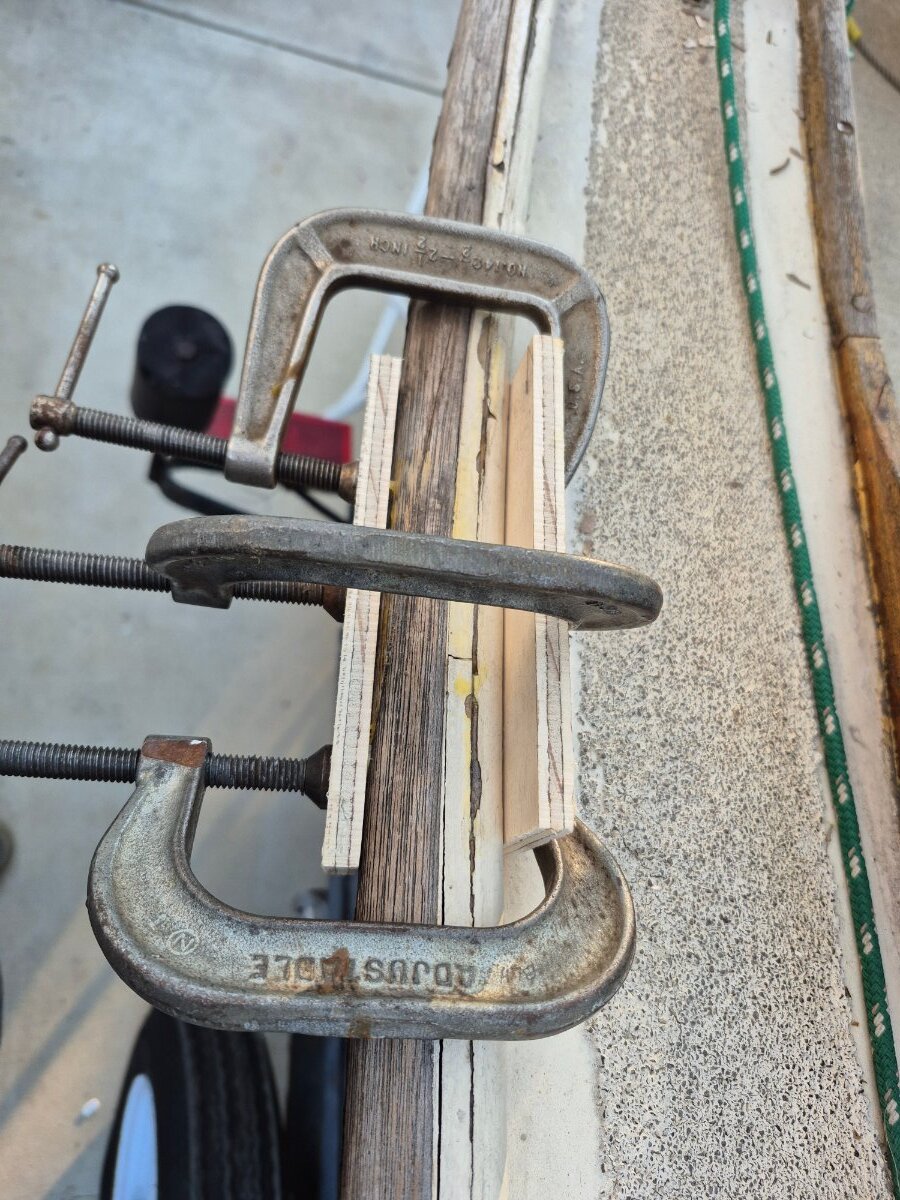
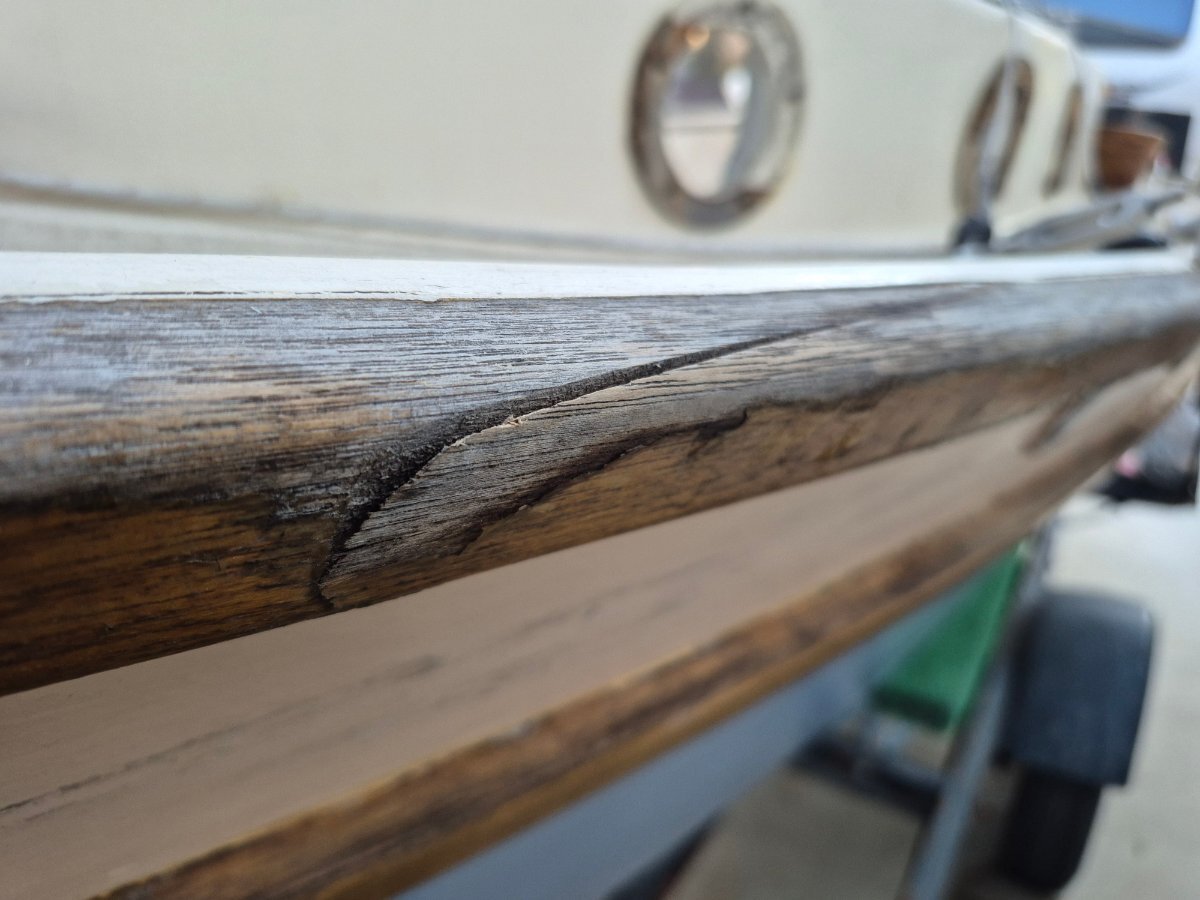
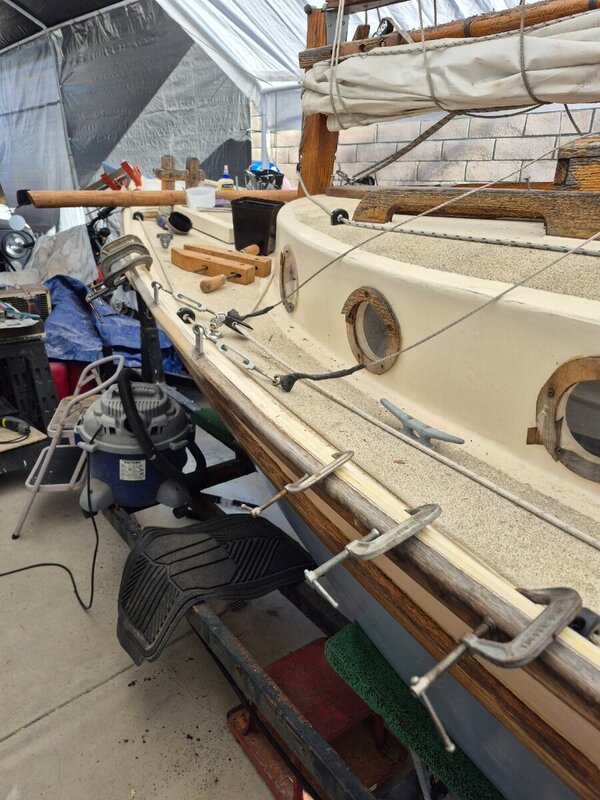
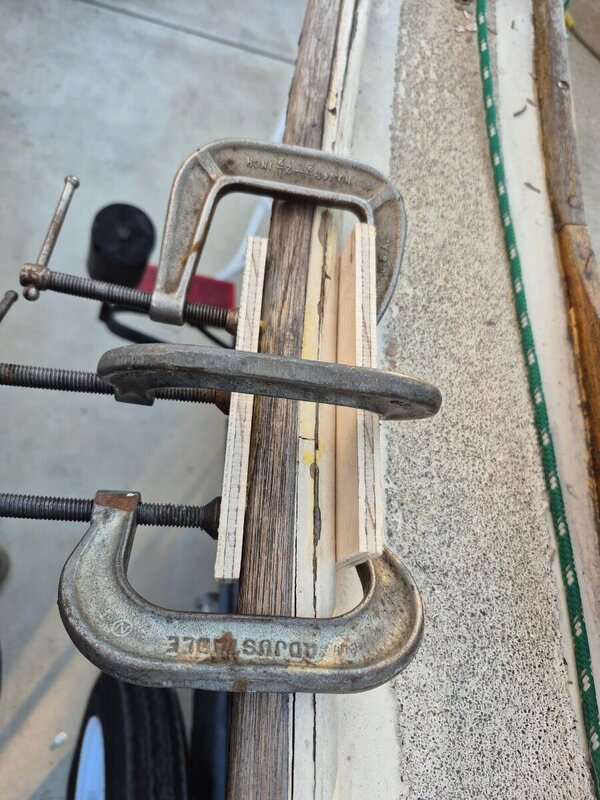
The problem with working on boats is that you need to have jobs lined up while things are drying, setting up, or hardening. While my bow patch is setting up I'm gluing up the separations between the half round, plywood, and rub rail. Also glued up one scarf joint successfully and sanded it. That is the scarf joint that was sticking out 3/4 inch. The second picture is the separations I'm fixing. I'm just re-gluing and clamping the pieces back together. Hopefully the joints will hold with paint for protection, otherwise I'll have to invest in a bunch of screws.


-
Wow Frank, that's a huge offer on the bowsprit. I may take you up on that. Basically it's 5 feet long, 2 1/2 inches across the flats, and the tip is 7 inches. I had to change the hole for the clubfoot / mounting eyebolt. It's 2 inches further forward and 3/8 inch hole. I was planing on just using a regular s.s. bolt because I don't need the eyebolt for the clubfoot anymore. I would have to transfer the hole in the bow to the bowsprit so there would be no need for you to drill holes. I think the problem with the scarf joints is the same for a lot of the joints, being left out in the rain. I'm going to be re-gluing joints on the companion way cover and the aft hatch cover. I should be an expert at re-gluing joints by the time I get done.
-
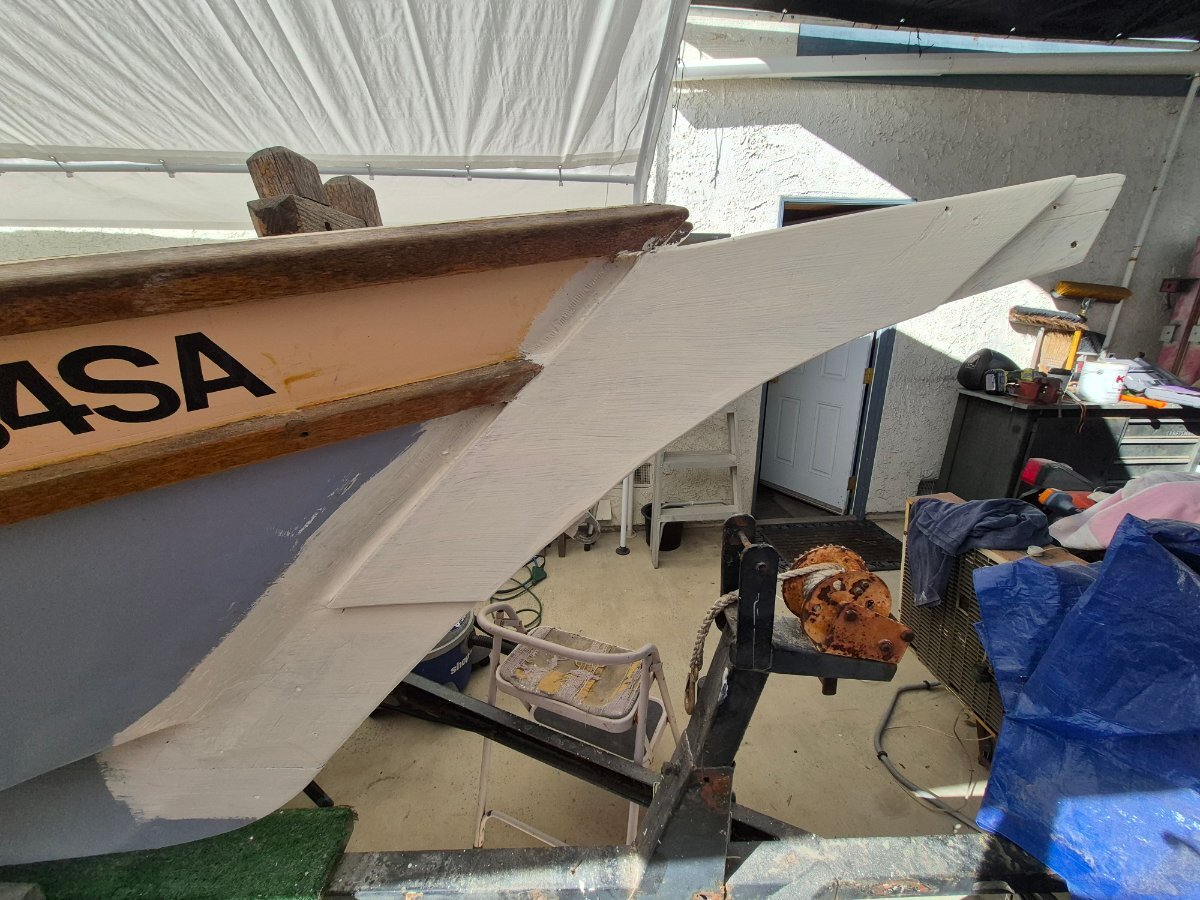
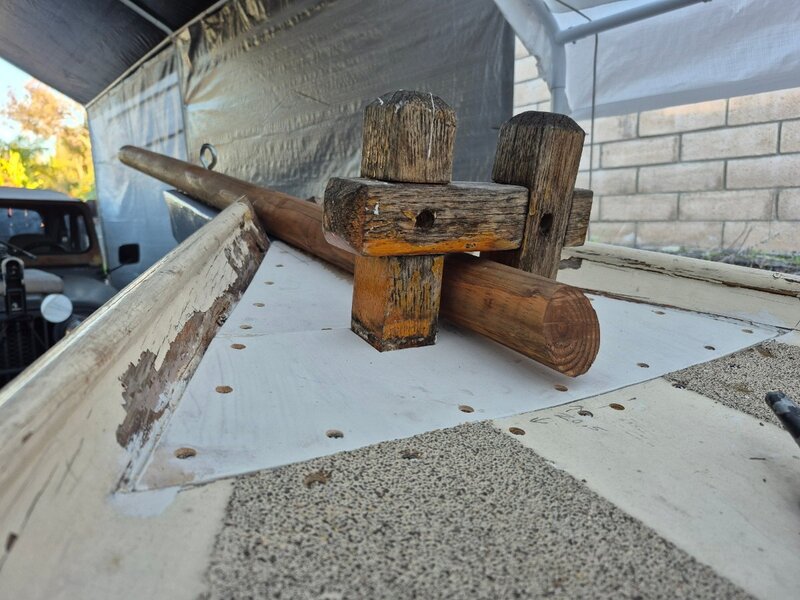
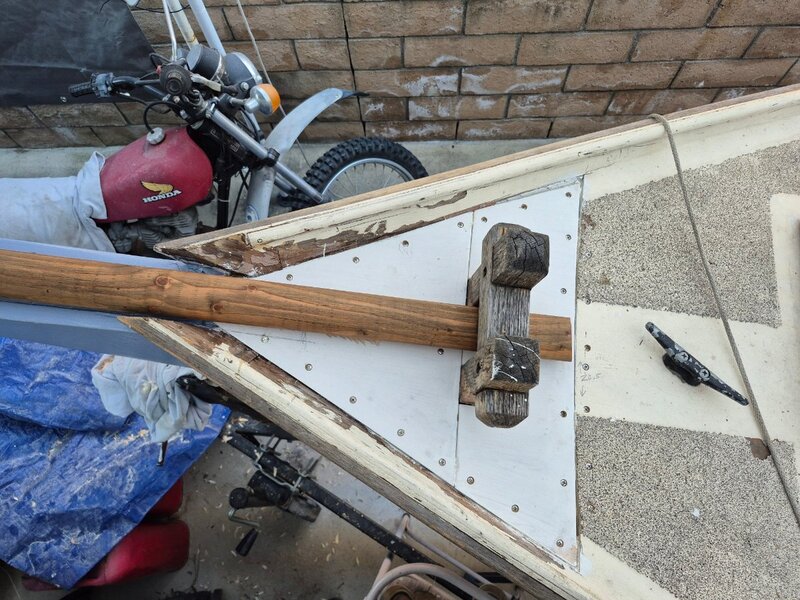
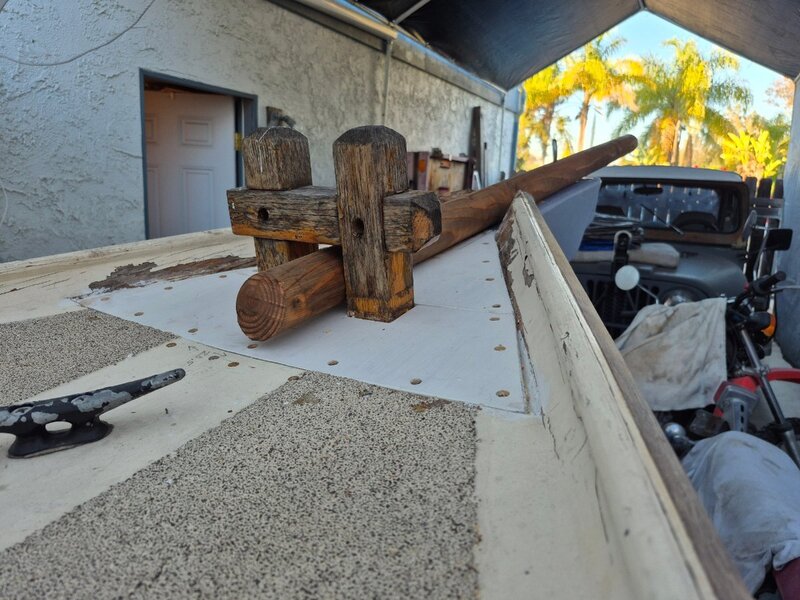
I finished the inside of the bow, I forgot to take pictures. Basically I covered the wood with Locktite PL Marine adhesive. I used the Locktite to glue and screw the joiner on to the deck, glued and screwed the aft patch, glued and screwed the forward joiner, and finally glued and screwed the forward patch. Looks like I'll be making shims for the bow point and bit. The bowsprit doesn't lie on the deck like the original probably because the forward keel extension is on a different angle since the rebuild. I'm also trying to save the scarf joint on the starboard side, it was sticking out about 3/4 inches. I glued it with Titebond II. I was afraid it was going to break when I clamped it but it seems to have survived. The scarf on the port side won't be so scary. I'm glad to be saving stuff on Aslan instead cutting off pieces and tearing stuff up.


-
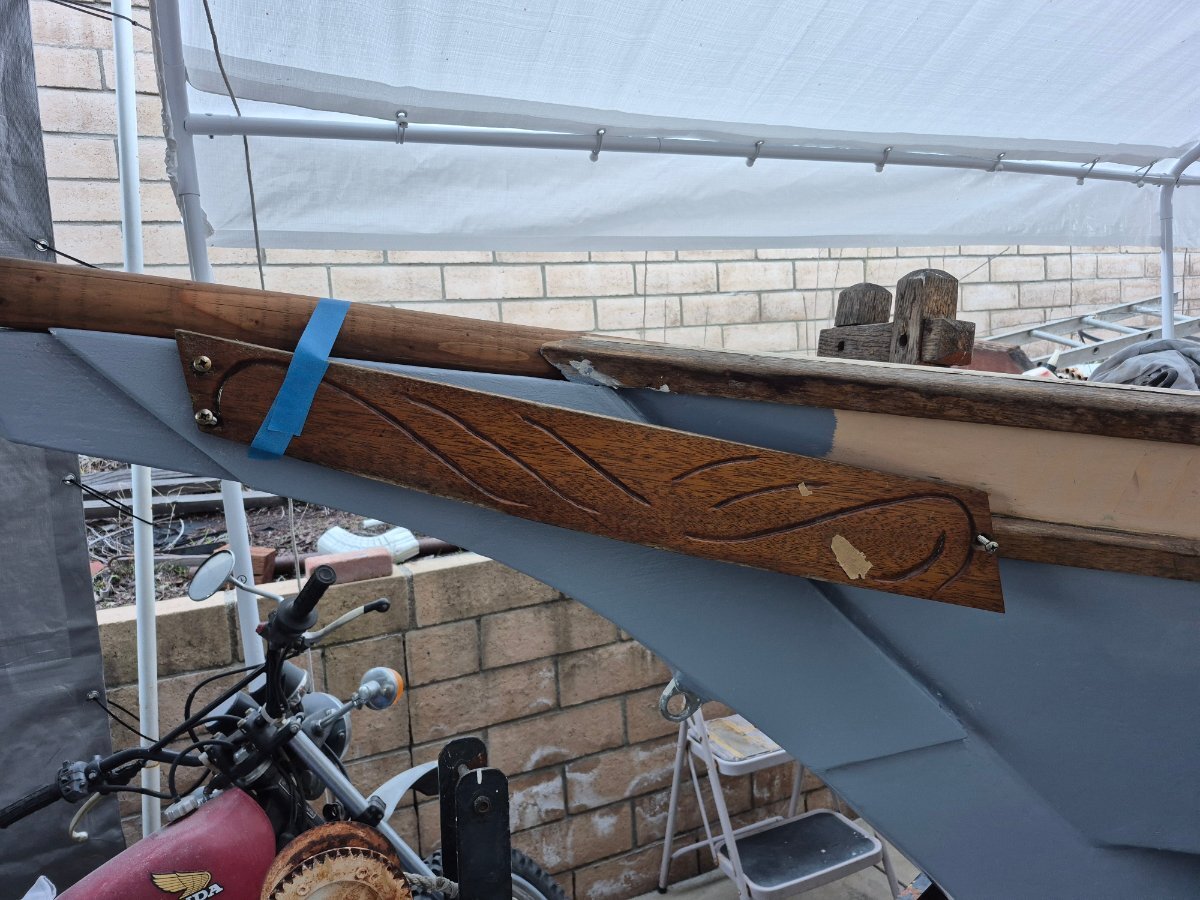
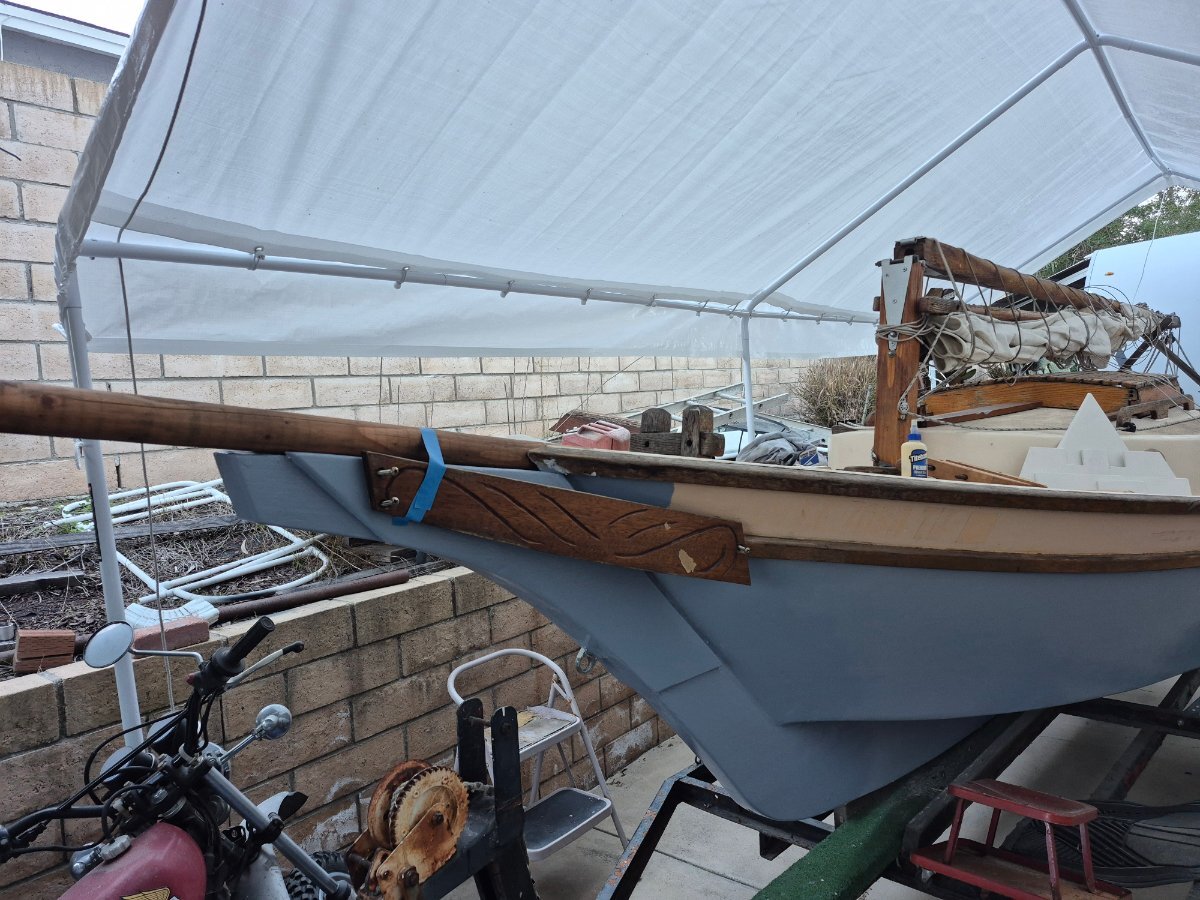
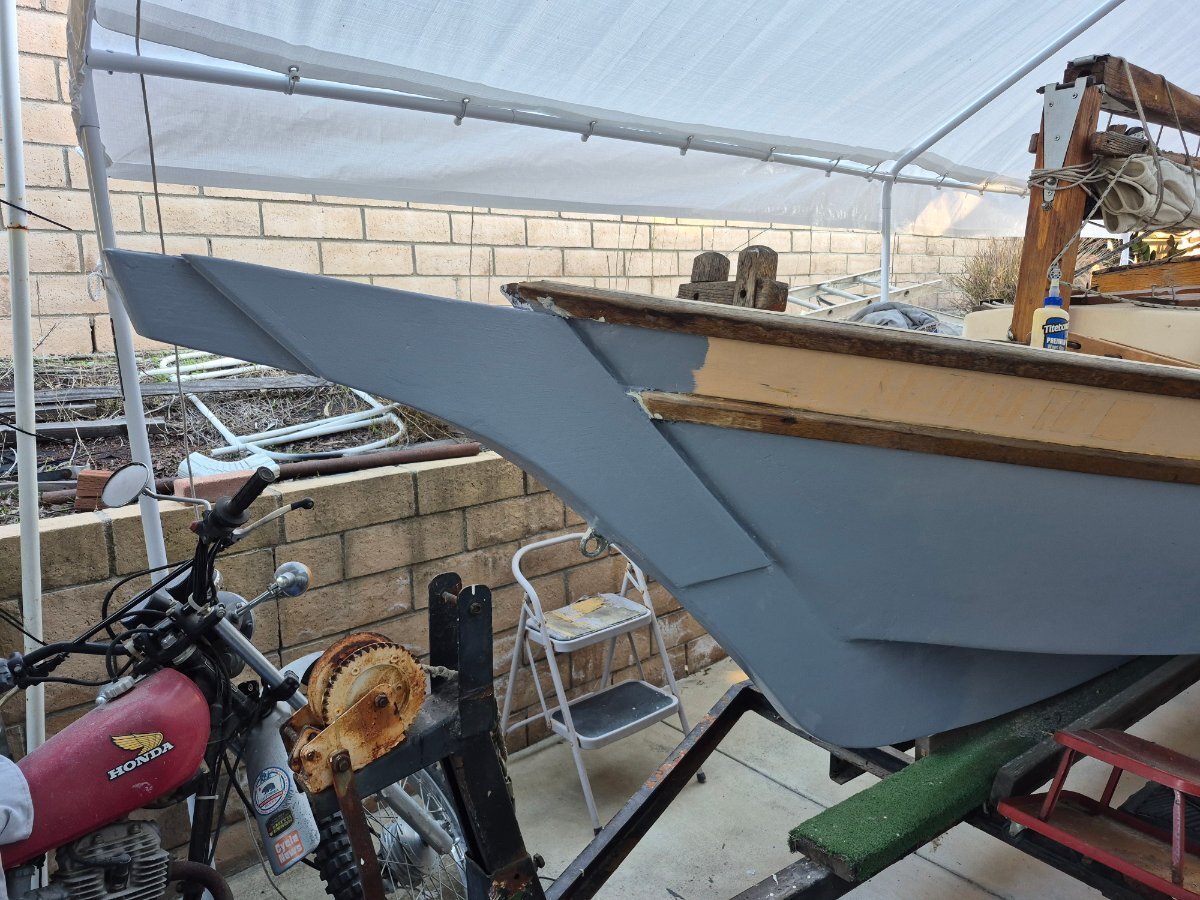
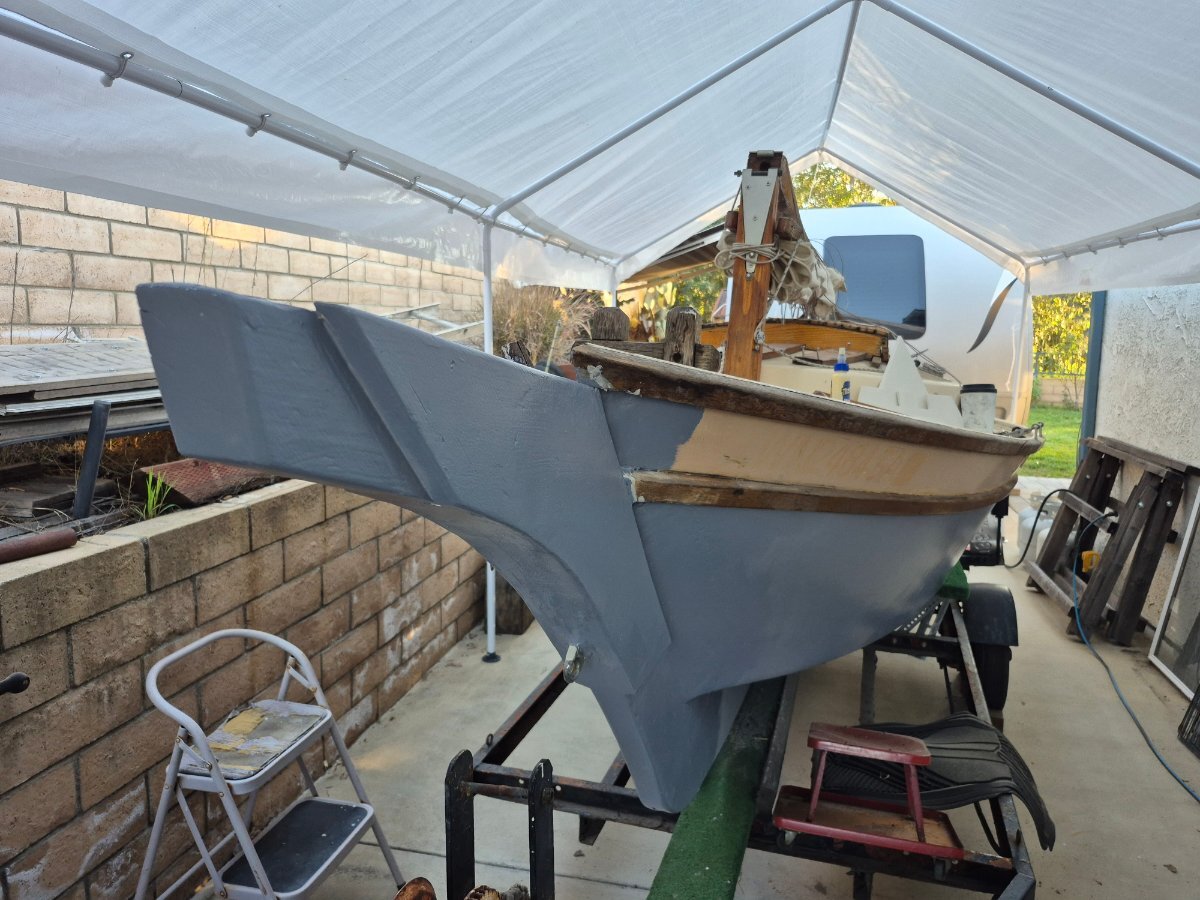
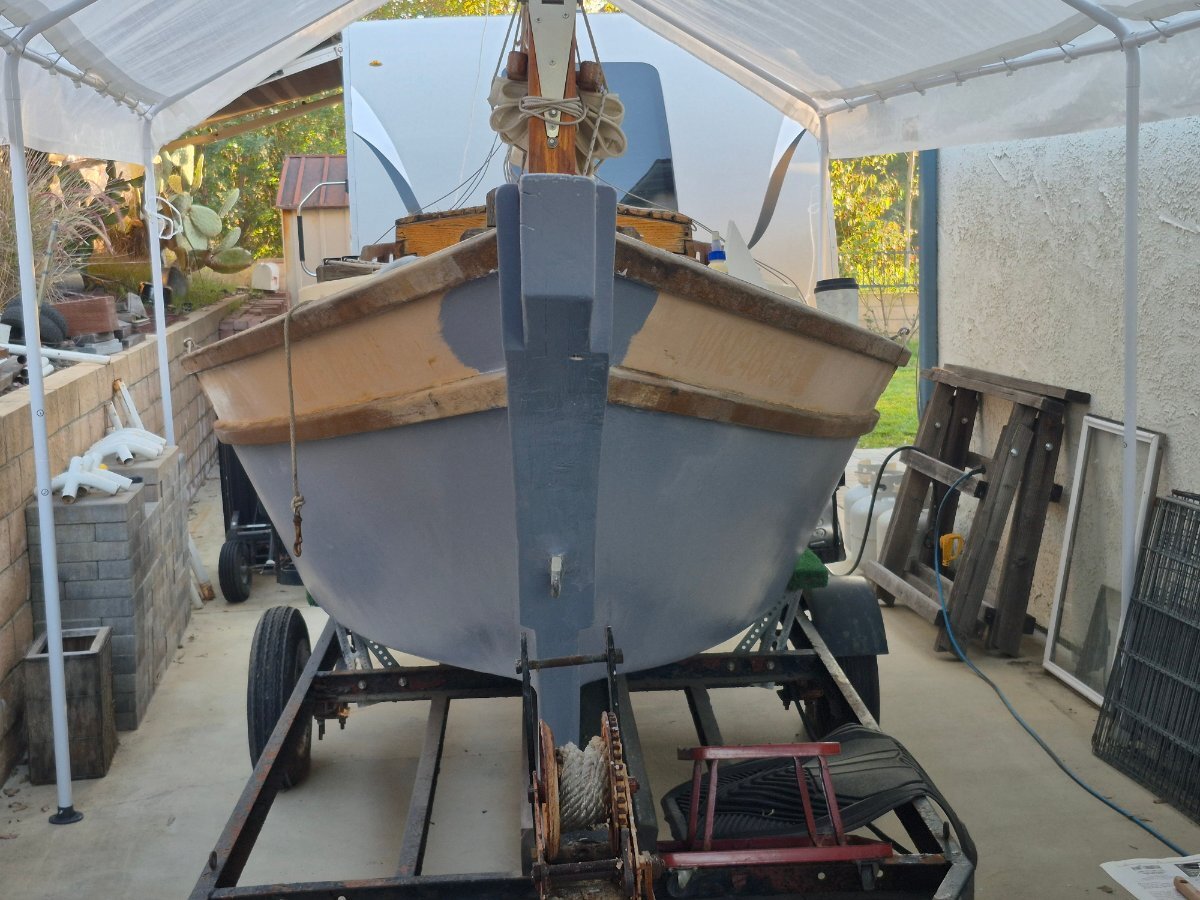
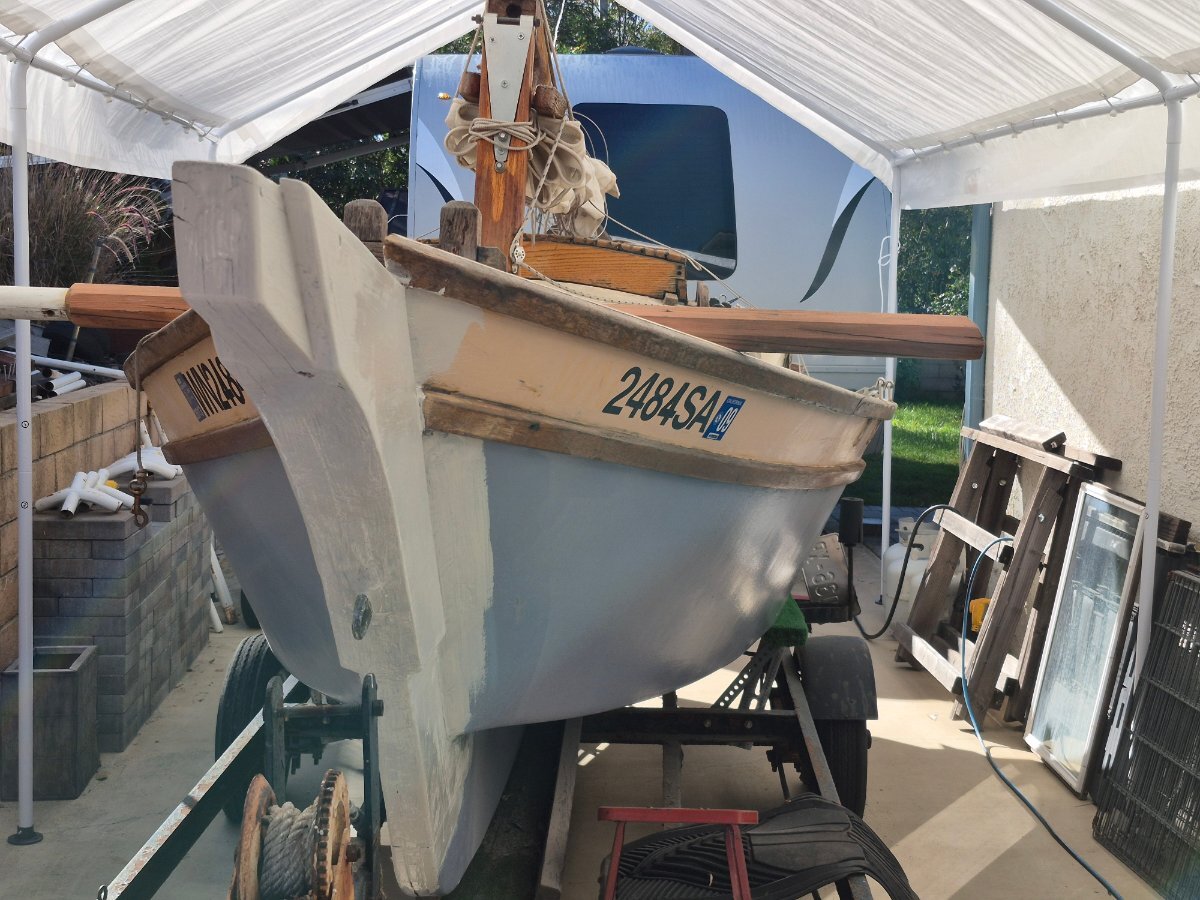
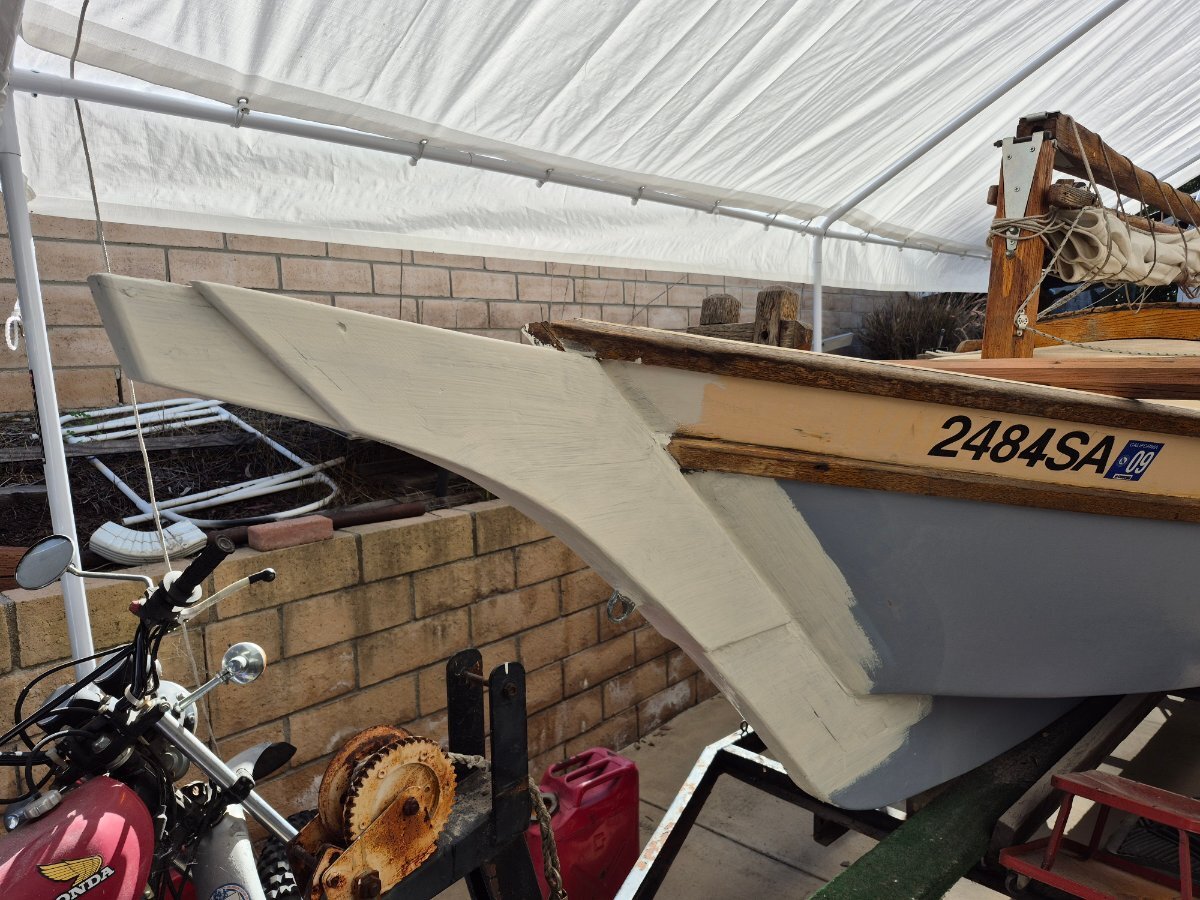
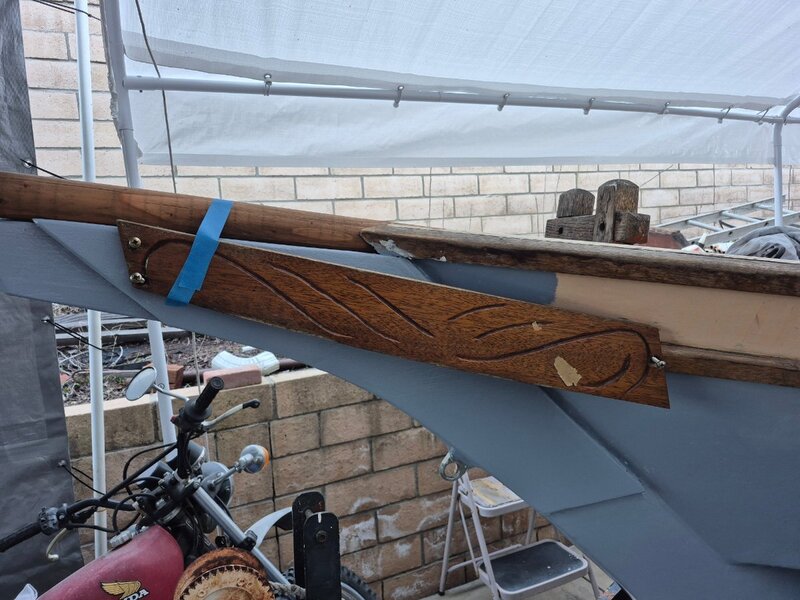
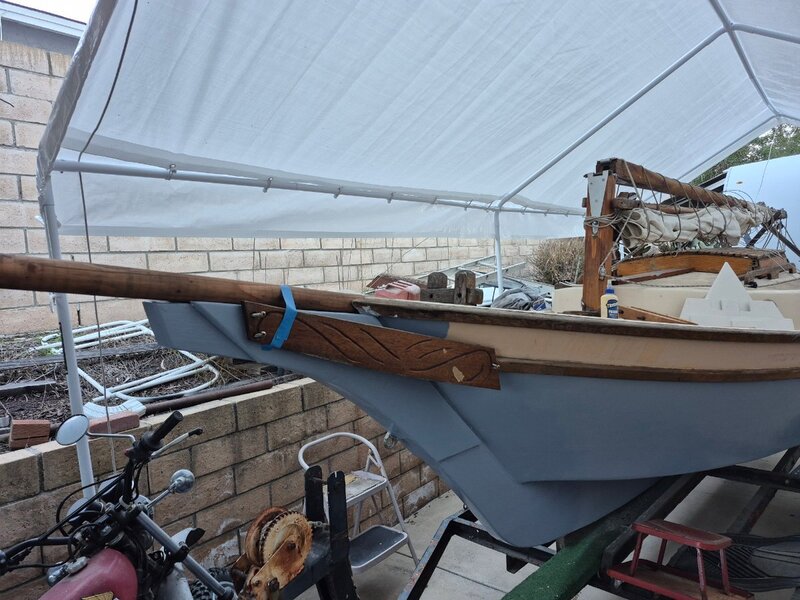
Here's how she is going to look with my "bob wire" bowsprit and the original trail boards. I don't know that the trail boards really camouflage the reinforcements on the bow. It had to be done and I'm glad my son did the fiberglass work. The fumes from resin makes me nauseous and gives me a headache. I'll never be able to do stitch and glue boats. That can be really limiting for me these days if I ever want to build a boat, so many cool boats are stitch and glue.
-
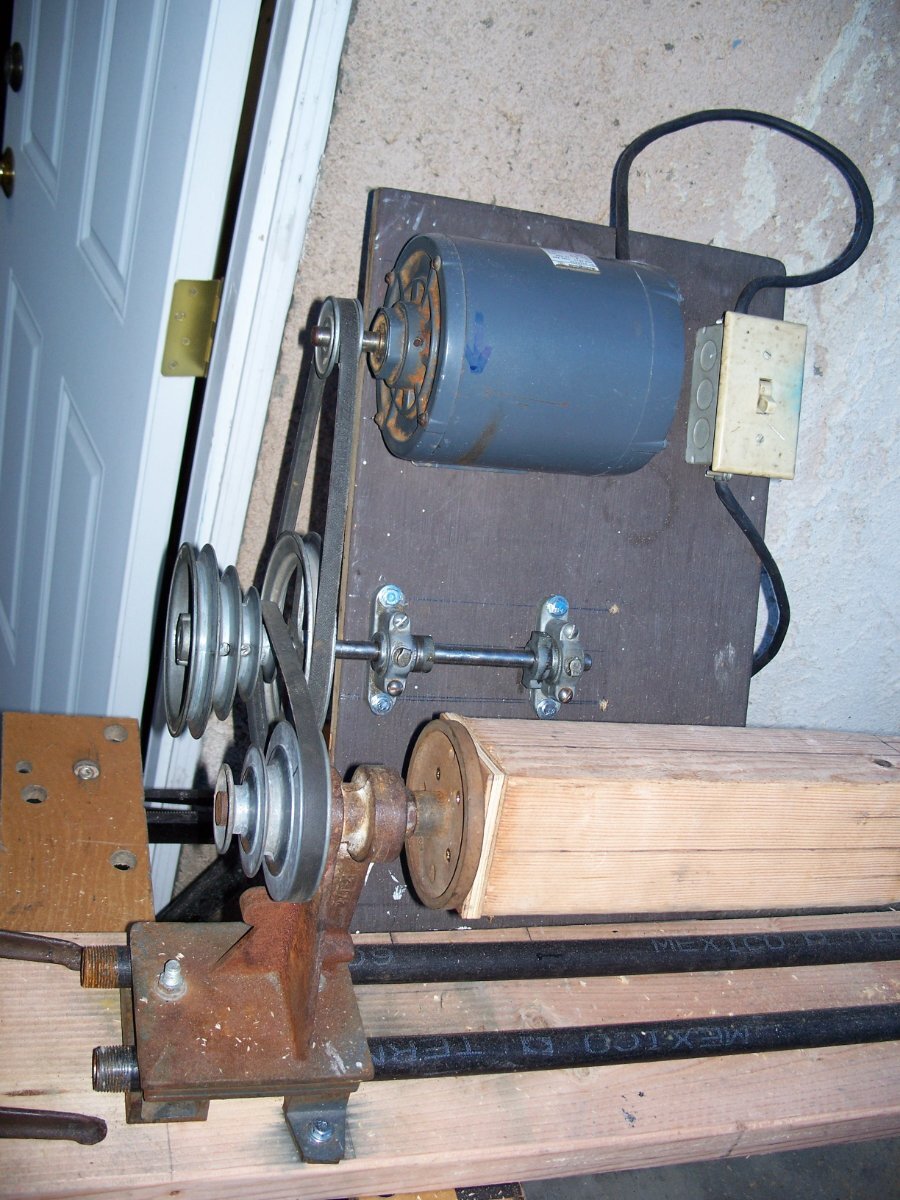
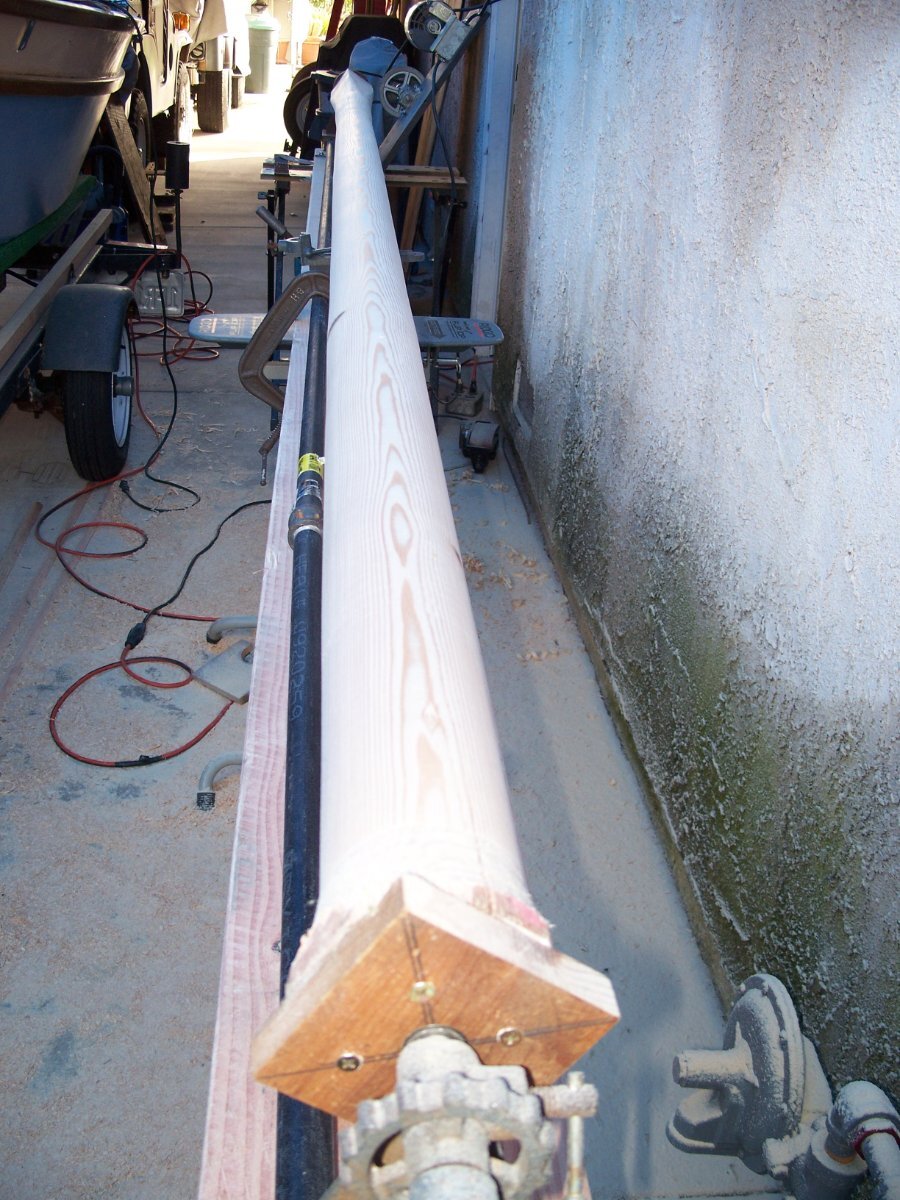
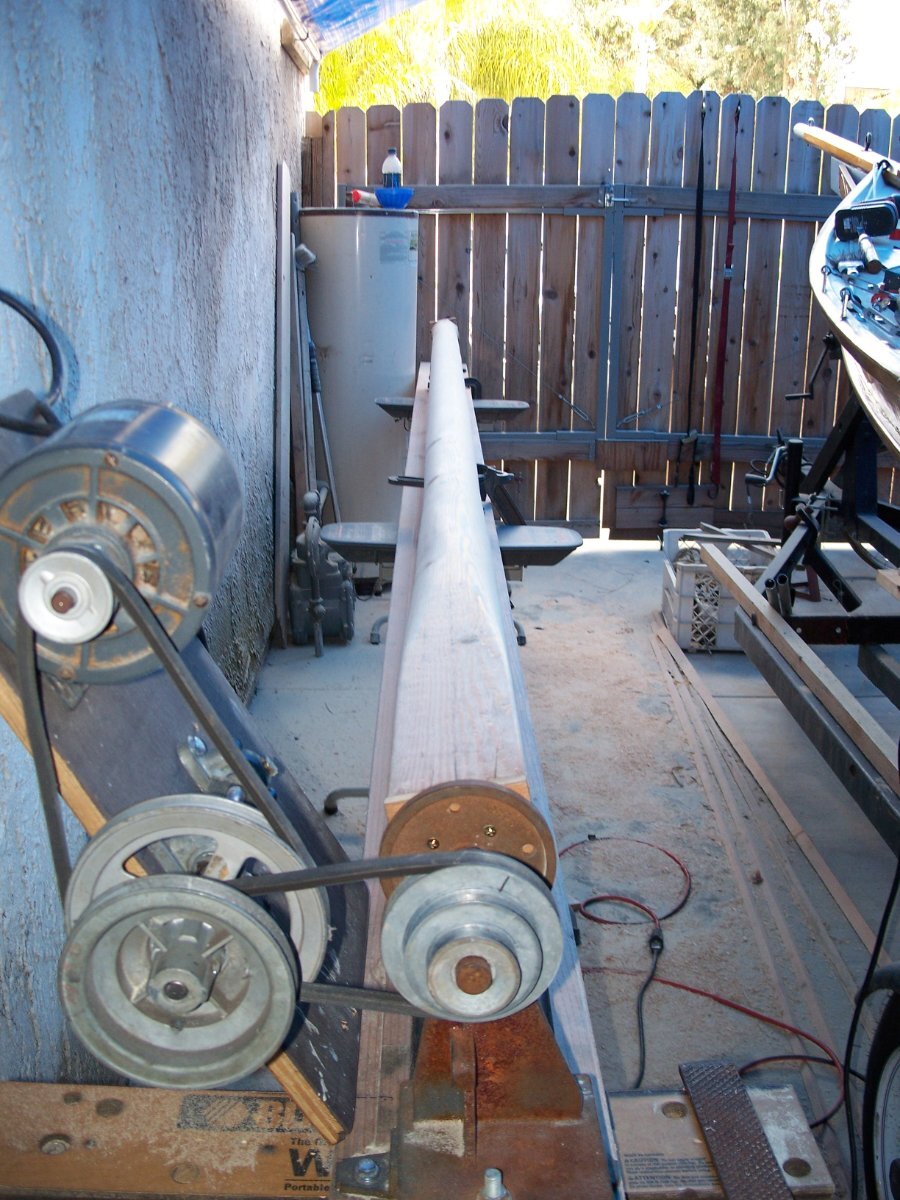
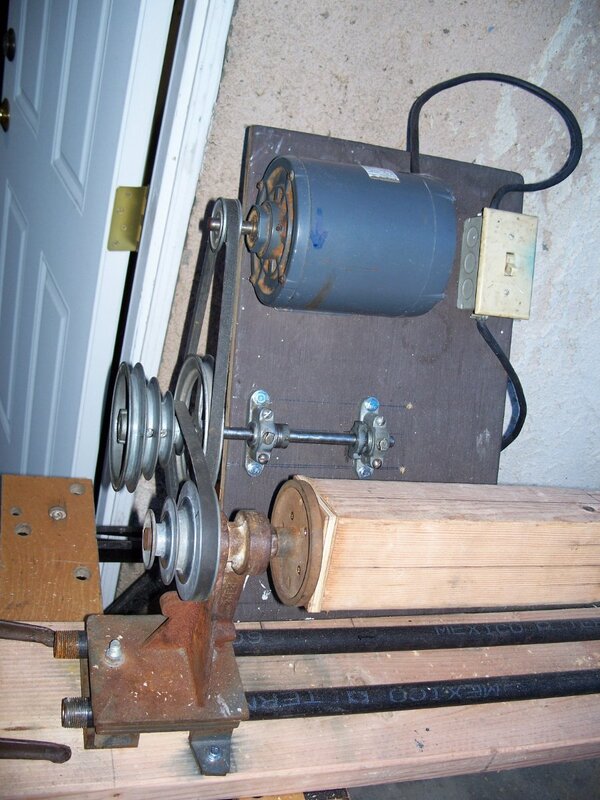
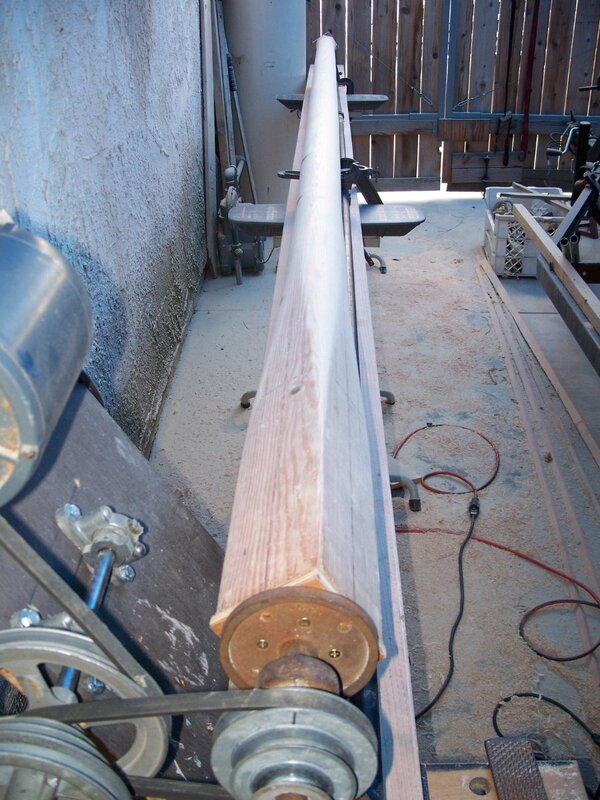
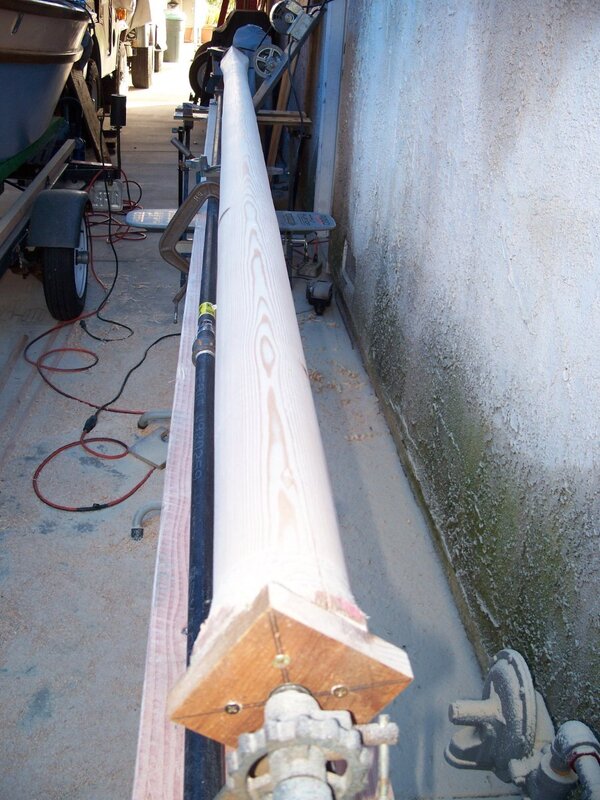
I've mentioned a few times in Restoring Aslan (Main Forum) my 12 foot mast lathe. Here's a few pics of it. Before anyone asks how I made it let me say a few words. Don't do it. This was made from basically 3 cast iron assemblies from a 4 foot wood lathe. These assemblies were designed to maybe turn a baseball bat or banisters not a 12 foot long 4x4. First problem was getting it to turn slow enough to handle a 12 foot 4x4. The result was the mess of pullys you can see mounted on the brown board. The second big problem was flexing. You cannot turn something that long without it deflecting in the middle. It ends up looking like a bowling pin. I had to spend hours turning the mast grinding away with a giant wood rasp to get it straight. The third problem was time, it took me about 3 eight hour days to get the job done. I could have used a plane and ended up with a pretty octagonal mast in a little over 8 hours. Fourth problem, fear. The whole time I was turning this mess I was afraid it was going to come loose and bean me. That stress alone will keep me from ever trying this again. Bottom line, if you want turned wooden masts pay someone else to do it. Someone who has the proper equipment.

-
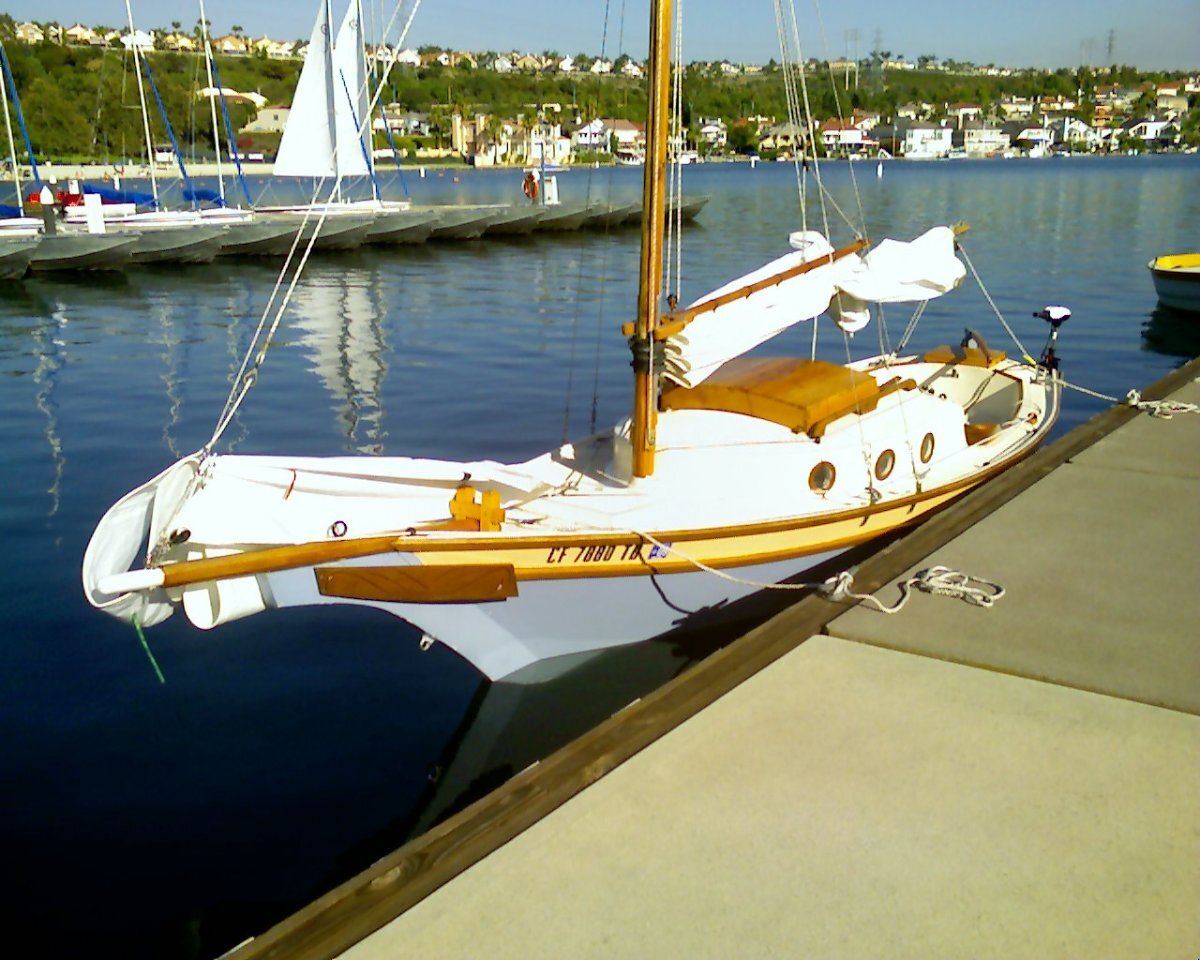
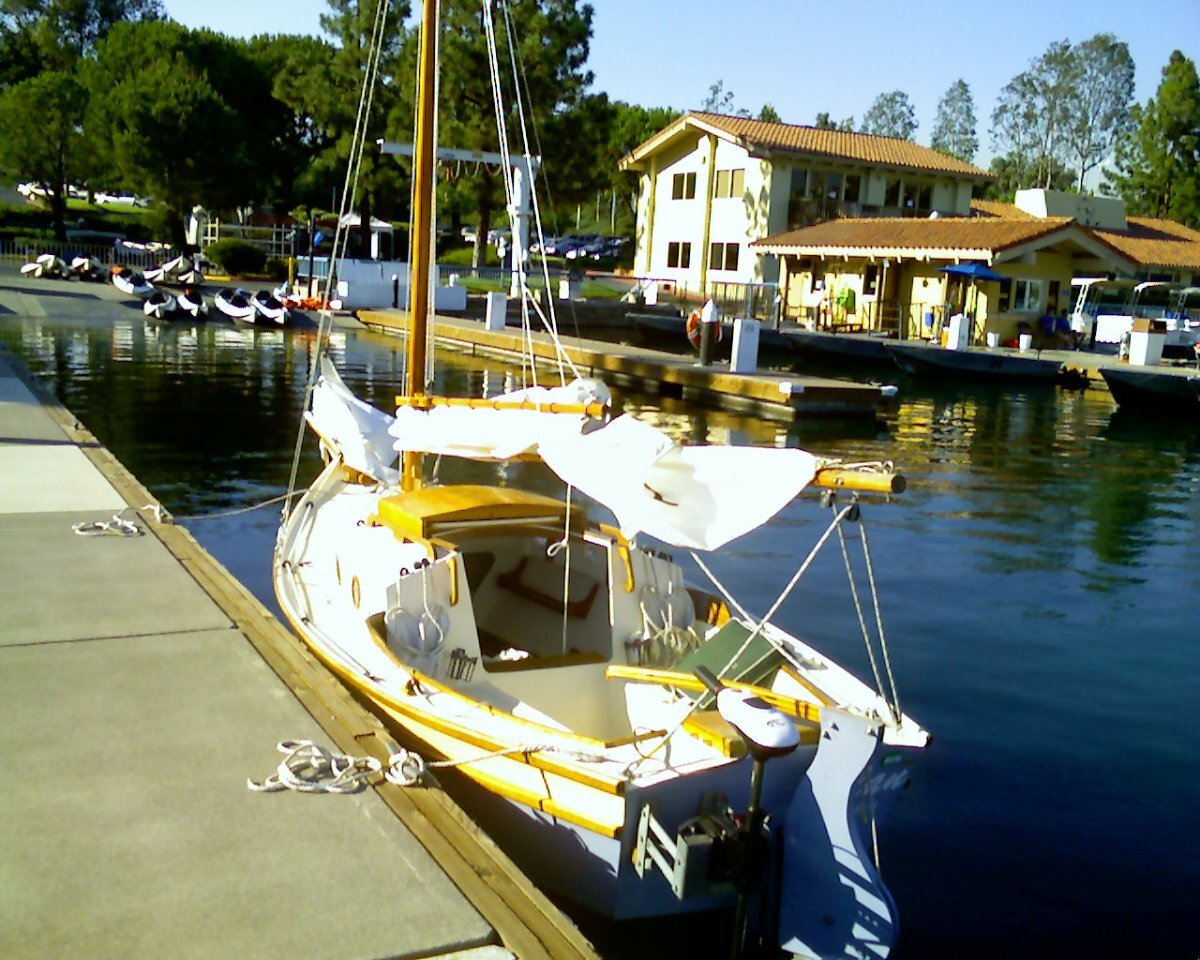
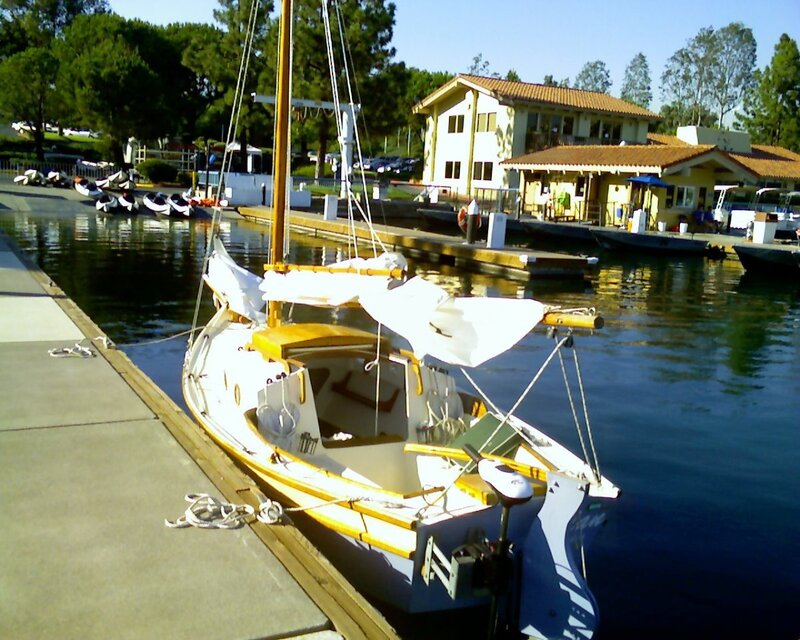
Here's a blast from the past, 8/28/2009. The lake is Lake Mission Viejo, a man made city lake almost a mile long. Had to dig through the archives for this one. You'll notice she is still wearing the hollow mast you made. I also found some pics of my mast lathe (12 feet long!) that I built to turn the solid mast. I'll post those pics when I get them loaded on my laptop. If I had to do it over I would make an octagonal tapered mast. It took me 3 days to turn that stupid mast.

-
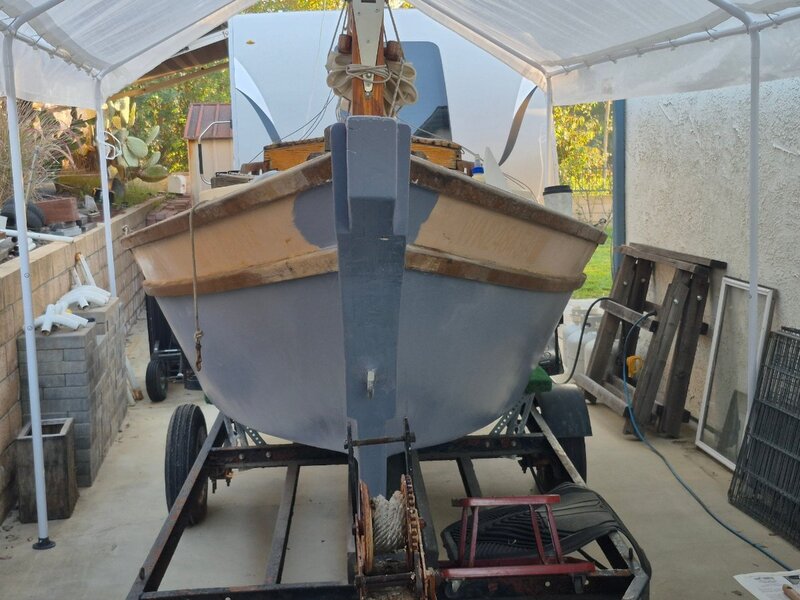
Finally some visible progress! I decided to do something other than the bowsprit. I know, I'll sand bondo! Woo-hoo! That 3M purple sandpaper is amazing, bondo doesn't clog it up like sandpaper in the olden days. Three hours later the bondo is sanded enough to put a primer coat so I can see what I need to touch up. One hour later I can see a couple of areas I'll have to re-bondo. Wonder what it would look like if she was painted? One hour and twenty later I achieved TA-DA! She looks so much better without all the fiberglass and wood showing. I'll give the paint a day or two to cure then touch up the bondo and put on the second coat. Still have to do something about the bowsprit, finish up the back of the bow, and patch the deck. Then I get to start on the bright work I let get so bad.


-
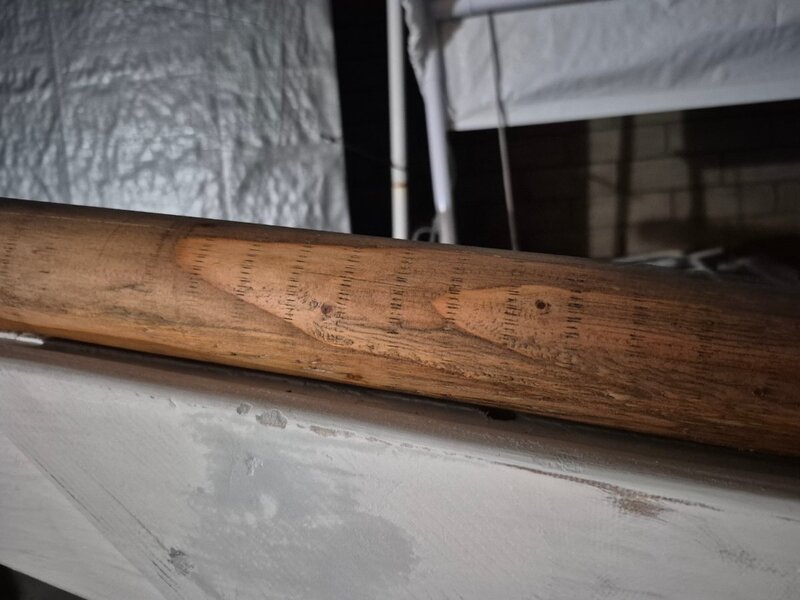
Had some successes and a fail today. Got the second coat of primer on the deck patches, spread more bondo, and did some sanding on the bow. The bowsprit is 2 1/2 inches across the flats. No wood at Home Despot is 2.5 inches square. Wait a minute, tree poles (for bracing newly planted trees) are 2.5 inches in diameter, they're 8 feet long, and they're only $ 9!!! I paw through a pile of poles and find a straight one with small knots. Score! I rush home and spend two hours sanding off the green stuff, cut it to size and put some stain on it. Dammit. To make the wood bug resistant they cut a million little slits so the green stuff will soak in. Those slits were not visible until the stain penetrated them. Now it looks like my bowsprit was wrapped in bob wire (barbed wire). Sigh. My choices now are paint it a solid color, laminate something up and trim the corners, cut down a 4x4, or build a 6 foot lathe and machine 1/8 inch off the diameter. Trimming off corners or cutting down a 4x4 will require a table saw. My table saw is under that pile of stuff over there in the corner, I can't even see it right now. Guess I should have cleaned up the garage before I started all this.

-
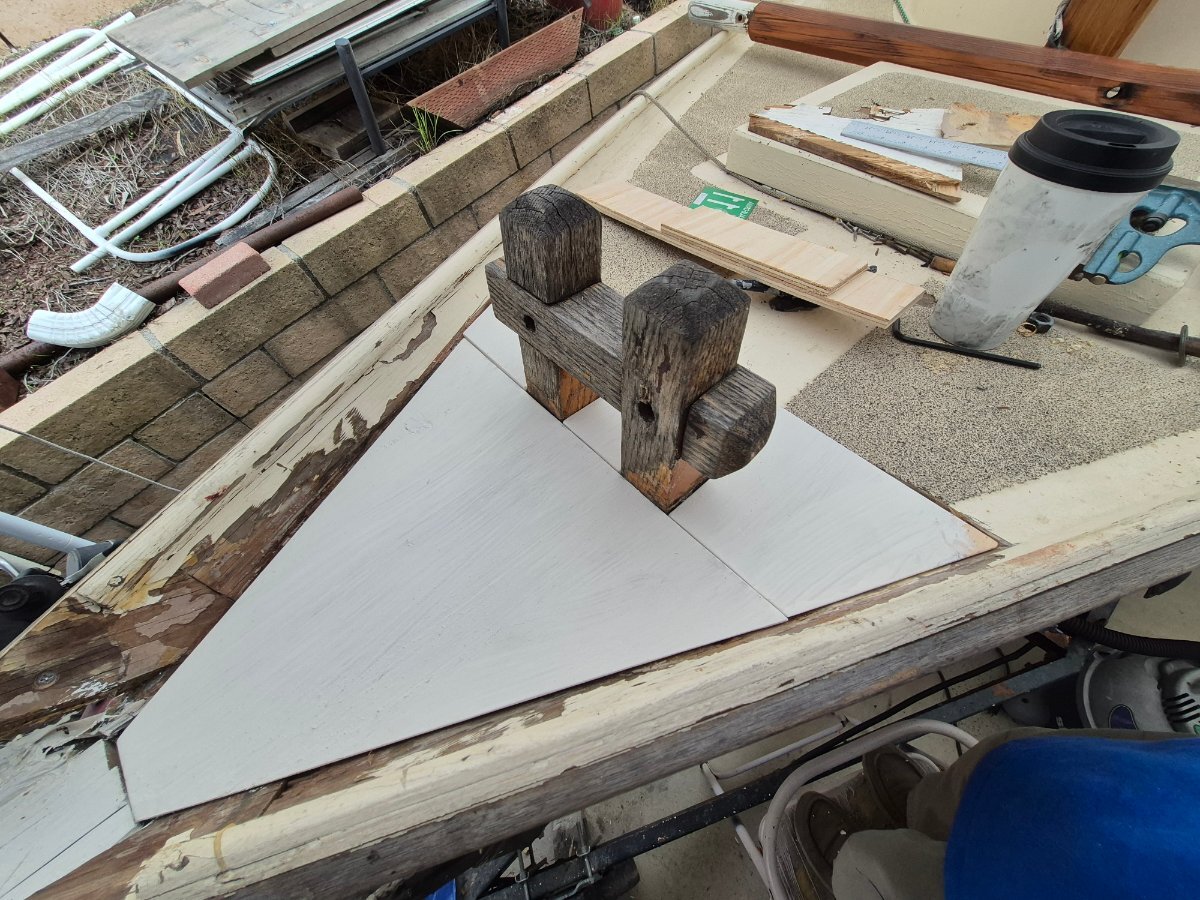
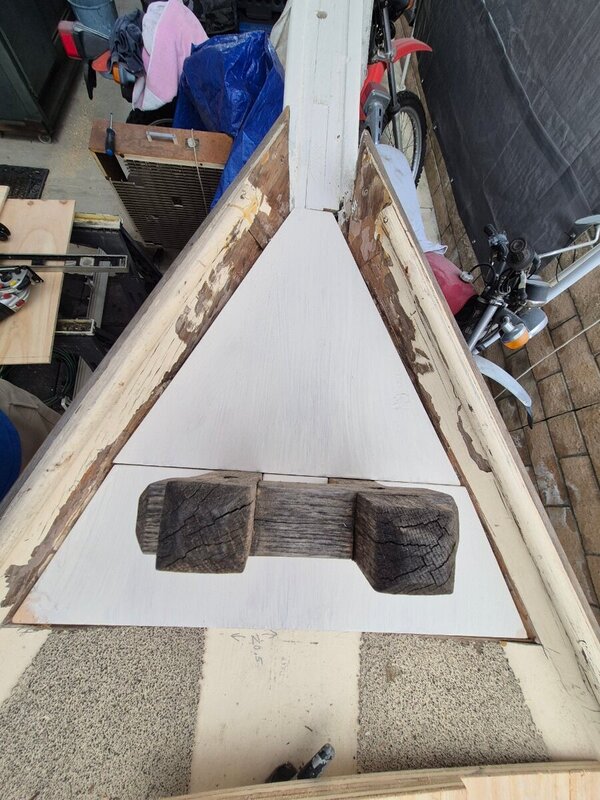
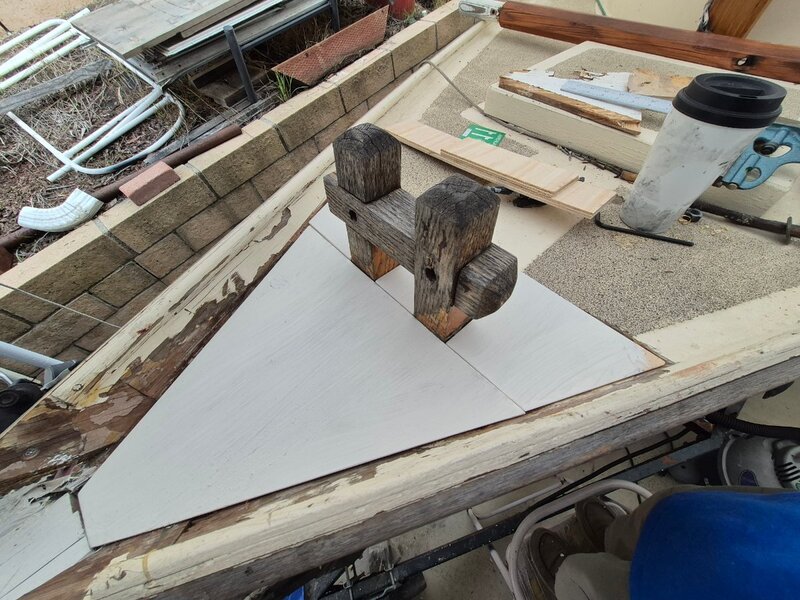
Ok, deck patches are fitted and first coat of primer is on. The two strips in the second pic are going to be joiner pieces, they'll be primed times two also. They'll be screwed to the existing deck and three pieces screwed to the patch under the bit, then screws all around. Still have to do the repair work on the backside of the bow and paint before the patches get installed. Also spread some bondo on one side of the bow to see if I remember how to do it. I do remember, but mainly I remember how much I hate sanding bondo.
-
In looking at the pics you can see the the damage I've inflected on the bright work. The portholes is why I was looking for 6 inch wooden rings (see my post in mast hoops). Wood rings are measured on the outside diameter, 6 inch OD equals 4 inch ID. I thought I could stand the rings up and slice them in half for porthole trim rings. My better judgment kicked in and I bought a 4 inch hole saw. Cut a 4 inch hole in a board and trim the OD with my bandsaw, much safer.
-
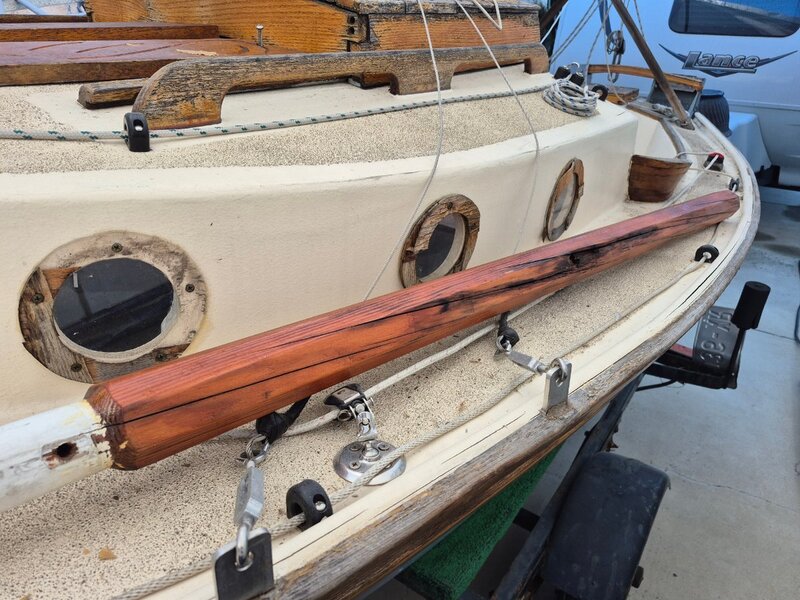
I'll take anything Aslan related, can't wait. I might have to replace the bowsprit. I used the old spar varnish on the bowsprit to test it and it really magnified the rot right in the middle. The end hole (white area) is for the jib stay and the middle hole (rotted area) is the hold down (club foot) point. I'm worried that if the jib stay is stressed the bowsprit will break. I could use more bolts on the sprit and make more water ingress points, or maybe make a new sprit. I do have a full size model.

-
Oh-oh, I didn't think of the sandpaper aspect of that. Think I'll just stick with walnut shells as the boat is already covered with it. The real bad spot is the cockpit floor. I think I'll use slightly thinned paint on those walnut shells so I don't loose too much texture. On the back of the bow I think the wood is in pretty good shape, I've just got some delamination between the three original keel boards. I'm planning on re-gluing and sistering a permanent wooden clamp around the three keel boards. I need to find a good bedding compound that will glue and water seal the deck patch. Something flexible and paintable. With the possible flexing of the bowsprit I think glassing the bow under the deck patch would be too brittle. I intend to make leaks around the bowsprit and bow impossible; this is the only area that has water damage.
-
I can't believe my luck. I was looking for a piece of 3/8 plywood (for the deck repair) in my garage and found an almost full gallon of hull paint. Not sure when you bought it Frank but I stirred it up and it seems to still be good. I had to test it for color correctness and here's the result. There is a swatch on the blue part of the hull next to the lower swatch in the white area; you can see it in real life. I'll test the swatches after it dries but it looks to me like I'll be able to touch up the bow without having to repaint the whole hull. I also found a pint of spar varnish and the trailer spindle you gave me. I'm going to test the spar varnish also. It was a never opened can of varnish so hopefully the self life is as long as the Behr hull paint.

-
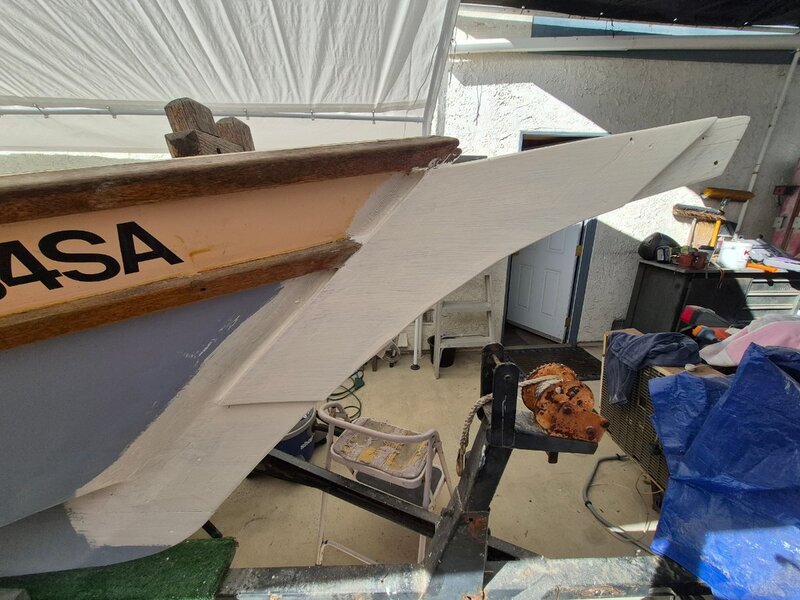
I couldn't stand it any longer, I had to paint the bow. I used Kilz primer and a chip brush. I wanted to see how the bow would look with those two boards attached to the sides. I think I can live with that look. When I remount the tail boards it might not seem like such an obvious patch. On the backside of the bow the wood that looks rotted is still hard as a rock. I can't really dig it out with my little oscillating saw; I would have to use my 4 inch grinder. I think I'm just going to cut off the peeling fiberglass and re-glass it. It's above the waterline and under the deck so it won't be visible or exposed to weather.


-
That's the disadvantage of walnut shells; the particles of brown walnut shells shows as the top paint wears out. Aslan's non skid is all walnut shell so I'll have to use shell to match the existing. I imagine you could use the white play sand that they sell at the big box stores. Mix it with paint and paint it on, you might get away without putting a top coat over it.
-
I should do this in the two piece dingy I built. I painted the bottom without nonskid of any kind. You can hardly stand up without slipping all over the place. I designed it to fit on the bow of a Catalina 22 to be kind of a lifeboat. You would throw both pieces of the dingy over board, jump in the water, put the boat together, climb in and paddle away. I tested it in a swimming pool and it could be done without too much trouble. I'll post a picture when I get a chance.
-
BTW Frank, I can get crushed walnut shells at gun stores/reloading suppliers. We use it for cleaning and polishing pistol/rifle shells before reloading. And you typically get it in lot smaller quantities than 50 pound bags. Take note anyone getting ready to non-skid their decks.
-
That walnut shell would come in handy as some of the original is peeling off. The forward hatch cover and the decking at the low points before the transom are separating. Probably peeling in some other areas that I haven't found yet. I'll have to switch gears and do some maintenance on our camping trailer, I've got to seal a skylight on the roof before winter really begins. It's about three hours work, stripping silicon, sanding, cleaning, and finally taping the skylight with RV tape. After that I'll start digging into the back side of the bow and see how bad it really is. I'll post pics of what I find on the backside of the bow.
-
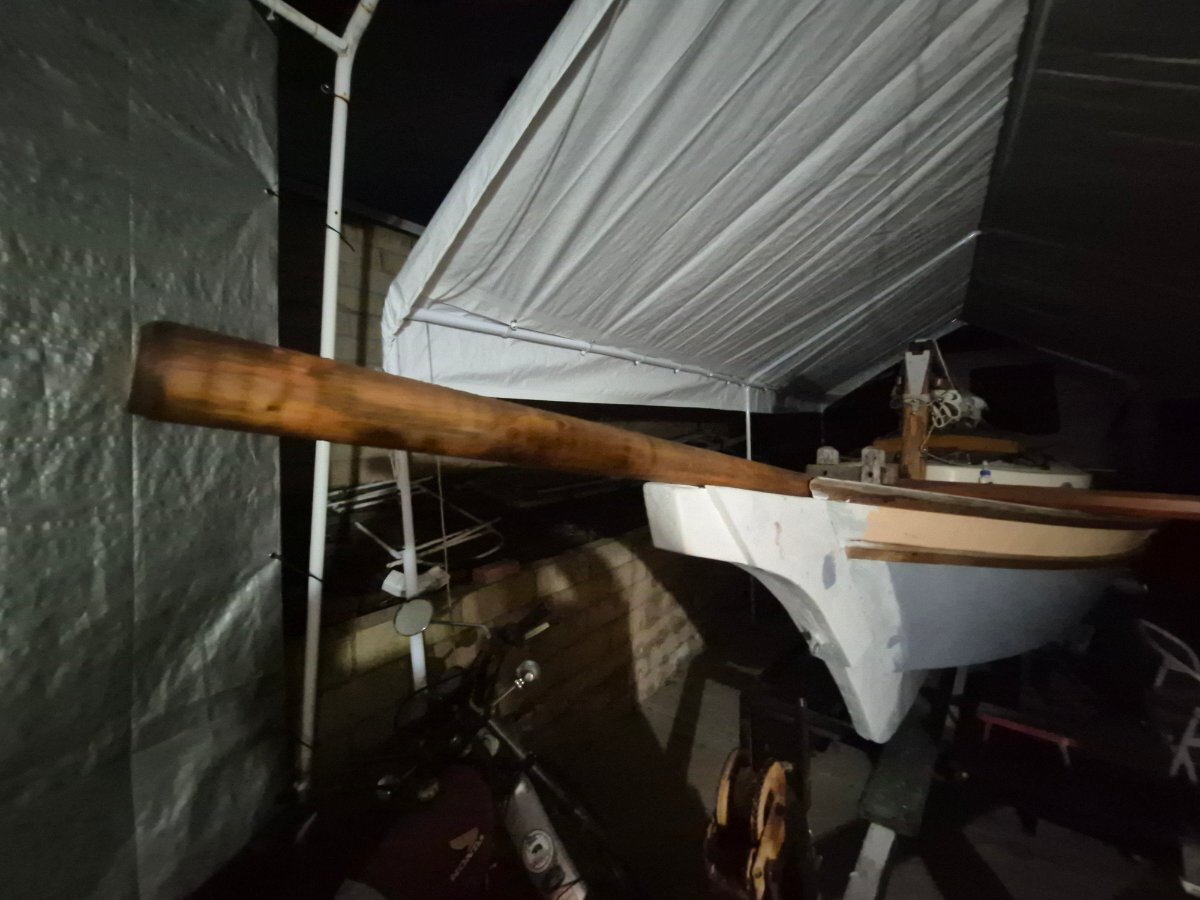
The bowsprit is fitted! My son tried to lay in a bed of fiberglass and resin on the bow. It wasn't exactly flat and the bowsprit had a 3/8" gap at the end. I had to chisel out the glass/resin back to the wood pieces he laminated in. The 3 middle pieces are now clean wood and ready for paint. I'm planing on using Kilz primer if that's acceptable for marine use; it's above the water line so I think it will be ok. I still have to clean out any punky wood on the back of the bow. If I don't have to remove too much of the bow I may just glass over it inside the forward storage locker. After the bow is finished I'll be able to patch the decking.


-
BTW Frank, I may have a new used trailer lined up. Dale in the desert has a boat trailer his neighbor gave to him. It seems to me it was in better shape than the one under Aslan. I'll be going out to the desert after Thanksgiving and will check it out then. Come on out if you want there's plenty of room. Text me if you want dates of when we will be out there.
-
That would be great, I'll consider it a Christmas present. I still haven't heard from Steven but I'm afraid he sawed off the front of the bowsprit. In the first pic you can see 5 pieces of new wood laminated together. The original keel wood doesn't seem as rotted as the deck was. The deck was powder from the point to about where the original keel ends then it became de-laminated plywood to the spot where I cut the deck. I'm planning on making Stevensons joiners at the deck cut and fore and aft of the bit. I''ll also have to puzzle piece the deck under the bit because someone I know made the bit impossible to remove or disassemble. I also want to rebuild/restore the companion way cover and door. That was a great idea but it's got a lot of de-lamination on the cover. I think I can save the mast I turned with my homemade 12 foot lathe. It's got some cracks in it but I think I can bondo the cracks then refinish or maybe paint it. Going to be a lot of refinishing going on.
-
Do a search for 6 inch wooden rings. Wooden rings usually used for crafts might be strong enough for mast hoops. I've found the best thing for attaching the gaff rig on my Weekender is rope lacing. I think the zig-zag lacing works best. As the gaff falls it loosens each lace in turn and it comes down quickly. Especially useful when coming up to the dock. Google mast lacing and switch to images and you'll see lots of ways to attach the sail with nothing more than a 1/4 inch rope.
-
Trying to discover what the damages to the bow I accidentally pushed my hand through the deck. Using a hammer I found where the solid wood began and cut out the rotted and delaminated section. I don't think patching that small section of deck will be to much of a problem. The bow under the deck looks like trouble, I might have to do some digging to get to good wood. I'll have to get in touch with my son and find out what he was doing on the front side of the bow before I start ripping wood out.