Andrew_Butchart
-
Posts
189 -
Joined
-
Last visited
Content Type
Profiles
Forums
Events
Everything posted by Andrew_Butchart
-
Thanks Frank - that's very helpful. I'm going to be using a wheel, but have installed a transom hatch. I'm hoping to be able to put the pulley for the mainsheet on the taffrail.
-
Thank you all for the input. I was planning on nylon for the mainsheet, but the price "looked too good" on the polypropylene which is why I thought of it for halliards. Given that it has a stretching problem and might seize up in the blocks (both bad things for halliards) I'll look further. I'm still trying to figure out where to run my lines and what sort of cleats/where to place them for the halliards and the jib sheet (going with the jib boom to start). Since I'm "larger than the average bear" I'll want to stay in the cockpit whenever possible so want them to be convenient to there but still not in the way. Perhaps an oxymoron in a small boat like a Weekender.
-
I'm starting to browse around for rope to use for the running rigging on my Weekender. I've found what appears to be some nice polypropylene braided rope in various colours. Most of the nylon braided rope I can find is all white. Is there any disadvantage to using polypropylene for halliards etc? I'm figuring on using nylon for the mainsheet. AndrewB
-
If you read the fine print on the current form it can be done without a HIN. To do that, you need a sworn declaration (they don't have a form but the nice lady at Service Canada made up one for me) that I took to my lawyer to be notarized. She then was able to process the license form right away. She also mentioned that it was unclear as to whether Service Canada employees could witness the declaration but to be safe had it done by an external notary.
-
Nope - here they're national rules. You still are expected to build according to TP 1332 Construction Standards for Small Vessels, but getting a single vessel label is no longer required. It used to be that you had to first apply to Transport Canada for a hull number, and then Canada Customs for a license.
-
After a very long (but expected wait), Transport Canada sent me back my cheque for a Single Vessel Label and informed me that the rules have changed (and the change back-dated) and that one is no longer required - http://www.tc.gc.ca/BoatingSafety/news/discont-single-vessel-label-prgm.htm After some headscratching, I took my Application For Pleasure Craft License to my local Service Canada outlet http://www.servicecanada.gc.ca/en/sc/boats/how.shtml#1 where a very nice person checked the rules, had me get a declaration notarized saying that I owned the boat and issued me my License number. Good thing I'm on vacation with all the running around I've had to do. I've now got my license number and just need to figure out the best way to apply it to the hull. I'm glad that it's so much easier here than it is in other jurisdictions. Getting closer to launch!!
-
The Everglades Challenge with cannon? Woo Hoo!
-
Through some rather odd internet surfing, I came across the "musical" group Captian Bogg & Salty and have ended up with their song "Scurvy" stuck in my head. Please help me! Or at least send rum! http://www.boggandsalty.com/hold/scurvy (the start button is hard to see so I included an alternate link) Or http://www.boggandsalty.com/files/Scurvy.mp3
-
We're probably all aware of the "moaning chair" that each shop needs and probably has where you can have a sit and consider how you could possibly have managed to make your most recent mistakes. Last weekend though, I built a "moaning stool" out of scraps. It acts much like a moaning chair, but has other uses and is easier to store. I found the plans at http://www.factsfacts.com/MyHomeRepair/stool.htm and thought that others might benefit from it. As the author describes, it is about an ideal size for whatever you would consider using a stool for, from standing on it, using it as a saw-horse, tool tray, and after all that - if you feel the need - to have a sit on. Making it is probably the most useful hour I spent in the workshop in months.
-
Clever. I'm hoping to go to the Toronto Boat Show in a few weeks. I'll have to look for something like that.
-
The down-haul should help keep the boom close to the mast, but there's an unavoidable gap between the jaws themselves that will allow the boom to move side-to-side.
-
I'm just about to start the jaws for the boom and gaff on my Stevenson Weekender. I'm working through some "back of envelope" drawings though and have a concern. The mast at the point where the boom jaws will meet it is pretty much square. In order to ensure that the boom can pivot around this square mast, I'll need to make the jaws wide enough to pass the corner - to - corner dimension of the mast. According to my rough drawings, this means at least a 3/4" gap between the jaws and the mast when close-hauled which I would expect would make them bang around (and possibly break). Am I missing something? I suspect that I may have to go back to the "drawing board" and come up with a method for a gooseneck. My original problem is that I've run a wiring chase up the middle of the mast and can't through-bolt it for the gooseneck according to the plans.
-
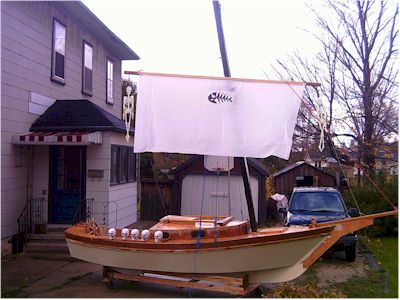
I built it out of some PVC pipe and scrap lumber. It's powered by "BangSite" (calcium carbide) which when mixed with water off-gasses acetylene. The BangSite is available through mail order from http://bigbangcannons.com/ It was an afternoon's project and only a couple of bucks. There's a bunch of samples around the internet. I set up a page for mine at http://www.floatingbear.ca/Cannon.htm Since the barrel is just plastic I strongly suggest not using any sort of projectile. You see some people on YouTube who've done that (search for carbide cannon) but I can't see that being safe.
-
A picture astounding like this one Jim?

-
Sorry - the server that hosts my site (and the cannon picture) is turned off overnight (long story).
-
Mike: I understand your concerns - safety is THE most important thing for us. That's why the cannon is never loaded with a projectile, it just makes a bit of a bang. It's also powered by Calcium Carbide which is makes it difficult to over-charge.
-
I've done the basics I think. Sadly I can't sit out in the boat drinking rum and firing the cannon off at all the trick-or-treaters (Have to use the car later) So while the rum is off, the cannon may well be used.....

-
There's a number of parts of the MiniCup that don't lend themselves to being filled with water. If it were me (and a few years ago it was), I just turned the hose on the boat while upside down. Mind you that was when I was cleaning the sanding dust off it anyway.
-
Depending on why you're having to sand, you may want to consider getting an auto body shaper. It's a big rasp / cheese grater thing - like the small surform shapers. It can get rid of mistakes almost as fast as you can make them.
-
The barrel bolts worked well for me for many years on my MiniCup. Just make sure the screws are into something solid on the transom, not just the 1/4" plywood. This part is subject to a fair bit of force. Also, take the "knob" out of the upper one (I think that was the fixed one) and use another screw to hold the pin up. Finally, you'll probably find that you'll need to cut a notch in part of the rudder case to allow for you to operate the lower barrel bolt.
-
I don't know about that, there's a video on his site showing him rocking it around pretty vigorously. It looks as stable as my 6-hour canoe.
-
I came across this tiny boat after some random surfing. Looks like an ideal tender for a Weekender The designer definately suggests that this NOT be a person's first stitch & glue project so that lets me out. It's surprisingly stable looking though. http://www.saunalahti.fi/~hvartial/dinghy44/dinghy4.htm
-
I'll have to get that book one of these days. As far as the tar bleeding through the pain, it's on the "fish side" and I'm sure they won't care ;D Mind you, I've got the strip covering the entire keel ... I may have to consider painting that part of the keel brown.
-
Even a hairline joint would allow water to get between the keel and your strip, possibly causing hidden rot or other problems so I would suggest some sort of bedding compound. For me, (I'm cheap) I used roof patch compound to bed the steel strip I put on my keel. After a year sitting in my garage I've had no problems When I paint the bottom (hopefully very soon), I'm just going to slather paint over everything.
-
Jim: Actually the picture on my avatar is a shot of the pirogue under sail with your prospective son-in-law in the bow. I haven't had it out yet this year :'( but the push-pull steering I have works pretty well. I ran a line from the rudder up to the aft bulkhead, through a couple of pulley's and back. A hockey stick (I am Canadian after all) with an eyebolt on it tied to one side works as the tiller. To keep the tiller from flopping around, I have a U-bolt that it runs through also attached to the aft bulkhead. The pulleys are attached using shackles that are easy to remove and the whole rig lives in the cockpit for storage (love that about this boat). If you're interested I'll try to take a could of pictures of it - but here's the best one I have - http://www.floatingbear.ca/sailingfiles/csdpirogue/bearpielaunch010.JPG