Mike John
-
Posts
39 -
Joined
-
Last visited
-
Days Won
1
Content Type
Profiles
Forums
Events
Everything posted by Mike John
-
Here's a pic. I have more scaffolding on it than the Sydney Opera House would have had but I am having fun and as my mother would have said, "leave him alone he is happy". The top stringers are on. see pic. The stringers so far are not too bad and just a little rasping on the slots and they fit. This seems to me to be real craft and great fun with hand rasps and Japanese pulls saws http://www.duckworksbbs.com/tools/shinto/index.htm and http://www.duckworksbbs.com/tools/pullsaws/index.htm I am sharing these links because I don't use hand tools much and I would be making a horrible job without these. I was surprised how easy I cut the bevels. It's starting to look like a boat and nice shape Jeff. Mike John

-
Here's a progress pic. Sorry about the quality. I just don't have enough room to get further back to take the photo but it kinda shows you the shape of Tangerine. I made the slot in the mounting brackets a bit deeper in relation to each other so I could clamp the frames easier and I put a bracket at every frame. I did not consult with Jeff on this. I have bothered him enough for now. The problem I have is that my stringer slots in the frames vary slightly in size as do my stringers due to cutting them with a circular saw. I will have to check the fit of every stringer at every slot. Cutting a small piece of stringer will not work accurately enough. I just imagined the difficulty I would have trying to fit the frames without brackets into the stringers so I made the frames solid and I will bring the stringers to it frame by frame. It's a bit more traditional lapstrake in setting up method. Worse case scenario I just take the bracket away again. I have to screw the frames to the brackets next and then shorten the top braces so I can move around the boat a bit easier. Mike John

-
Jeff, There's a simple outrigger system in this video Mike John
-
Stongback built today. Here's a video because pictures never really show me these things because they are so long.: http://youtu.be/Ira3JcXY_BU It's 16' and I just have enough room to move around it with the horses angled. It is screwed to the end saw horses and levelled. They belonged to my deceased father-in-law (well I wasn't drilling into my own). I just tied the strongback to my saw horse in the middle. I used a 3/8" bolt at the end with a screw which was most likely not necessary. It won't pull apart. The stringers are now 1/4" rounded all round. I worked out I did about 650' of rounding at the rate of about 238' per hour. I am not sure what made my brain numb - rounding or working out how much rounding. The stringers are still fuzzy and need a sand. When scarfing make sure you run the grain the same way in both lengths. Hand electric planing thin Paulowina is not easy and I really needed a thicknesser but the worst faces will go towards the skin. The fuzzy bits do sand out. Tomorrow the frames go on. I can only work on this half days as I spend the other half preparing articles for Duckworks http://www.duckworksmagazine.com - if you have not seen it. Mike John
-
Pressure - so far so good - it's pointy at both ends. Mike John
-
I finished rounding the edges on all the frames. pic attch. I woke up with a bug today so that is my limit. I will sand the notices later as I fit the battens. I found some 17' lengths of timber to make the strongback Bjorn Thommasson style. That's next and I still need to finish rounding the stringers. I was not happy with the 1/8" rounding - it doesn't look or feel right to me so I am going to 1/4". 1/8" is quite small when you look at it. The frames are 1/4" and look good. We have the right to change our minds I guess. Mike John

-
Someone asked me how I held the frames together while stack cutting. Just three small nails top left, bottom middle and top right in the batten slots. This leaves no holes in the frame itself. Mike John
-
I finished cutting the frames. I just have to sand them and round the edges. I stack cut the 2nd and 3rd and the 5th and 6th frame. Twice the value for the same effort. I used a combination of bandsaw and a scroll saw with a no 7 blade for the tight curves. I also cut the batten notches with the scroll saw. Good idea to stack cut Jeff and a great time saver - thanks. Mike John
-
Some of you would have realised but after I cut the first frame I realised that it's a canoe and that the fore and aft frames are the same so I only need to cut the pattern for frame one and two once. My first tip would be to use a scroll saw to cut the smallest frame - much easier. I am going with 1/8" rounding all round on the stringers. Thanks for answering that one Jeff. Mike John
-
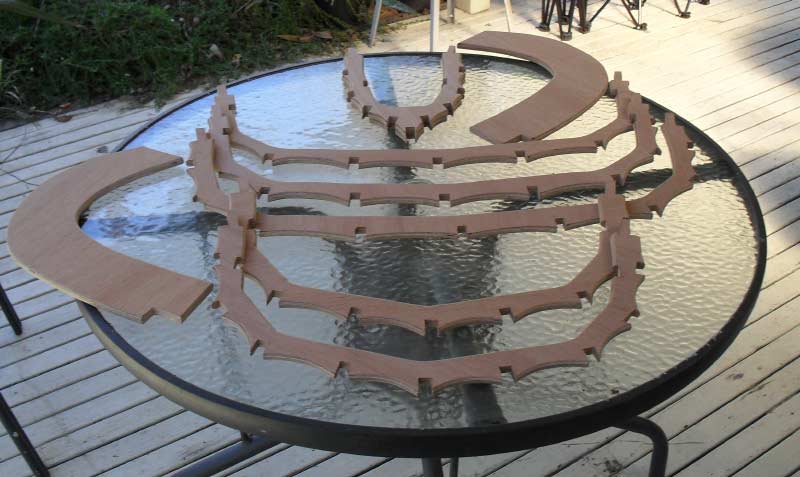
I finished cutting the stringers and gunnels. Bad weather has held me up a bit. I have to round them on the router but I think I will make it a 1/8" rounding on all four sides. Just checking with Jeff. Paulowina is weaker and lighter than WRC and I am cautious to make the stringers any smaller for fear of making them too weak. This will also make it easier to choose the best side to face inwards as I go. I laid out the paper patterns on thin plywood for cutting. The patterns take up an area about 48" x 55" and I've got a picture to show how I laid them out. I got enough materials to build two of these to offset the cost of shipping so I need ply patterns of the frames. I will send Jeff the money for the second when I start it. Mike John

-
I've got all the materials now and I have started scarfing the Paulownia timber I went with. Mike John
-
Found it. Selleys All Clear is very similiar. Mike John
-
Sure I'll post pictures so you can follow. Mike John
-
I am getting the materials together to build Tangerine. I'm in Australia and I can't get Lexel Caulk for between rub rails etc. Any Aussies - what do you use? Mike John