Jason Klett
-
Posts
22 -
Joined
-
Last visited
-
Days Won
2
Content Type
Profiles
Forums
Events
Everything posted by Jason Klett
-
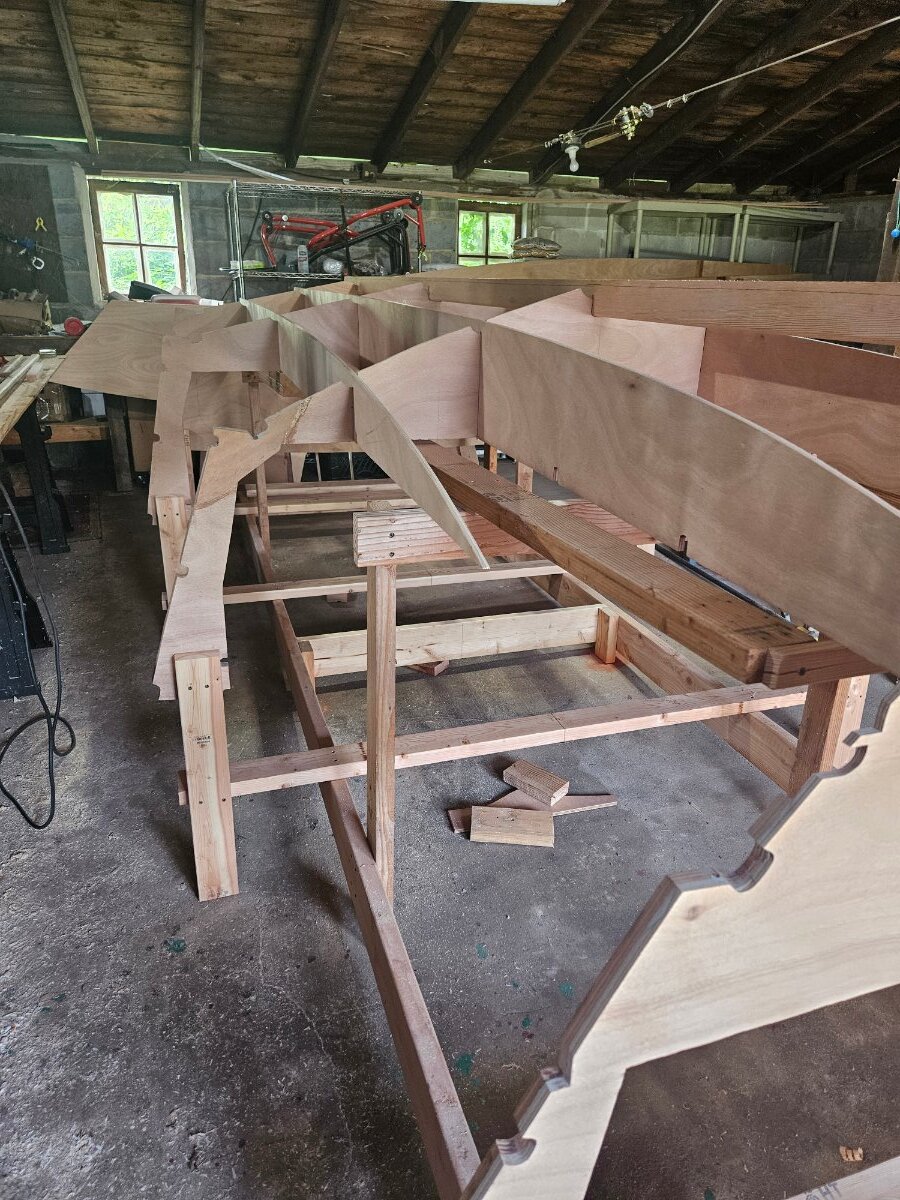
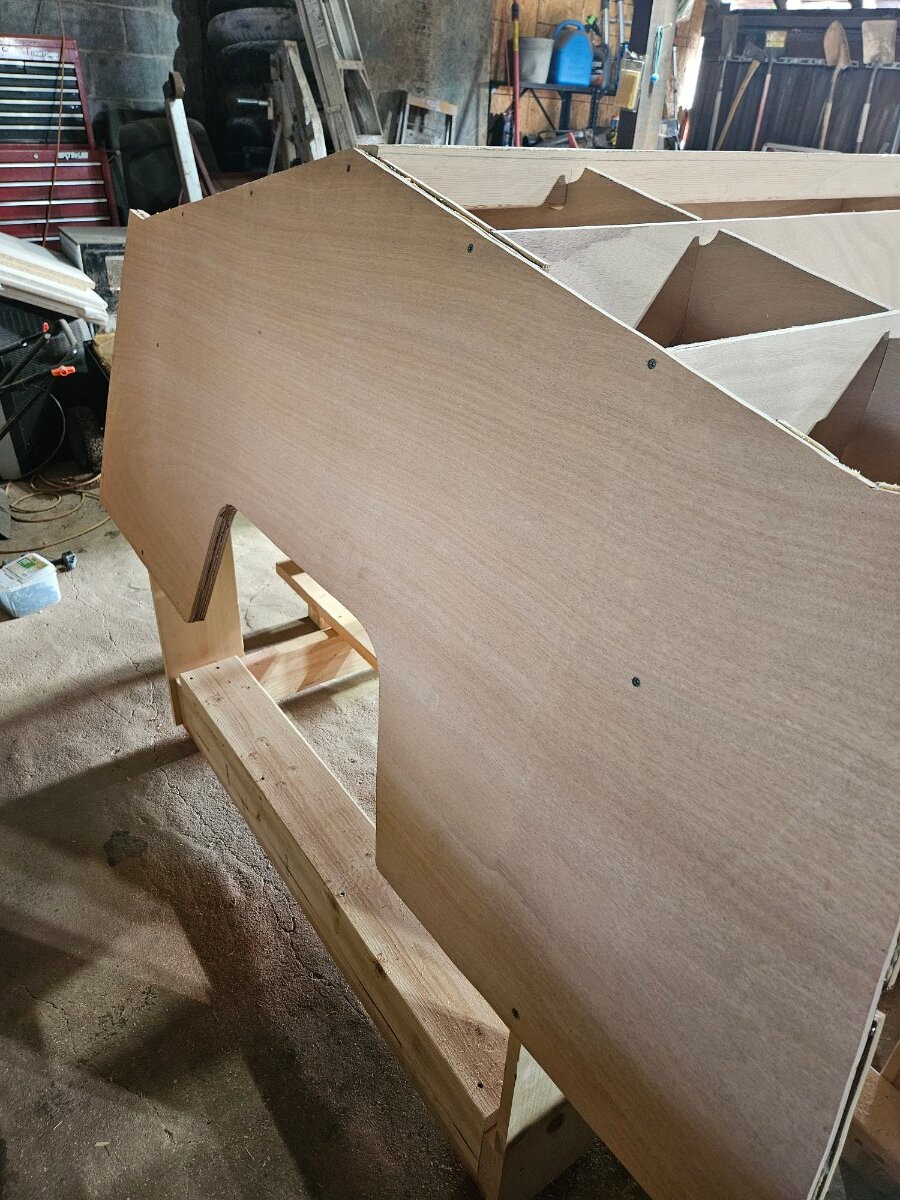
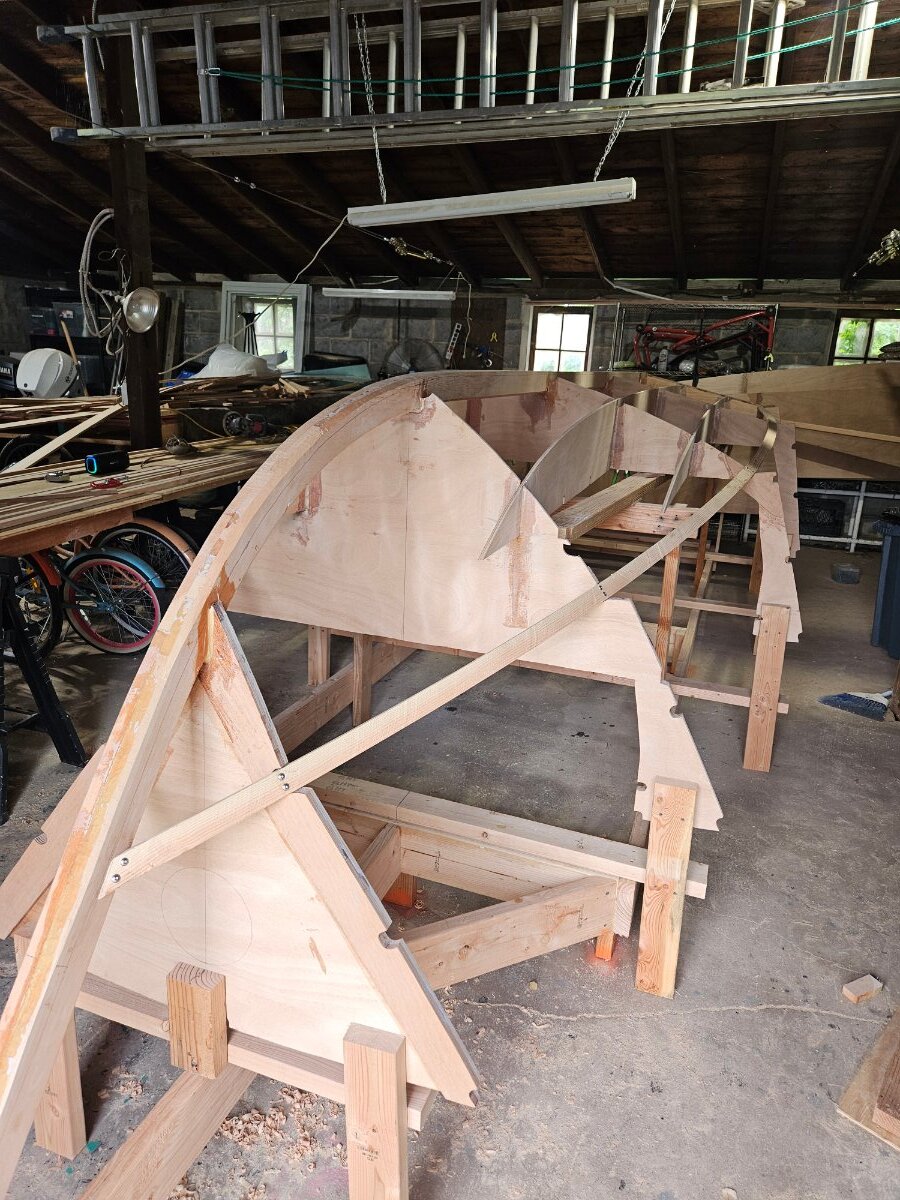
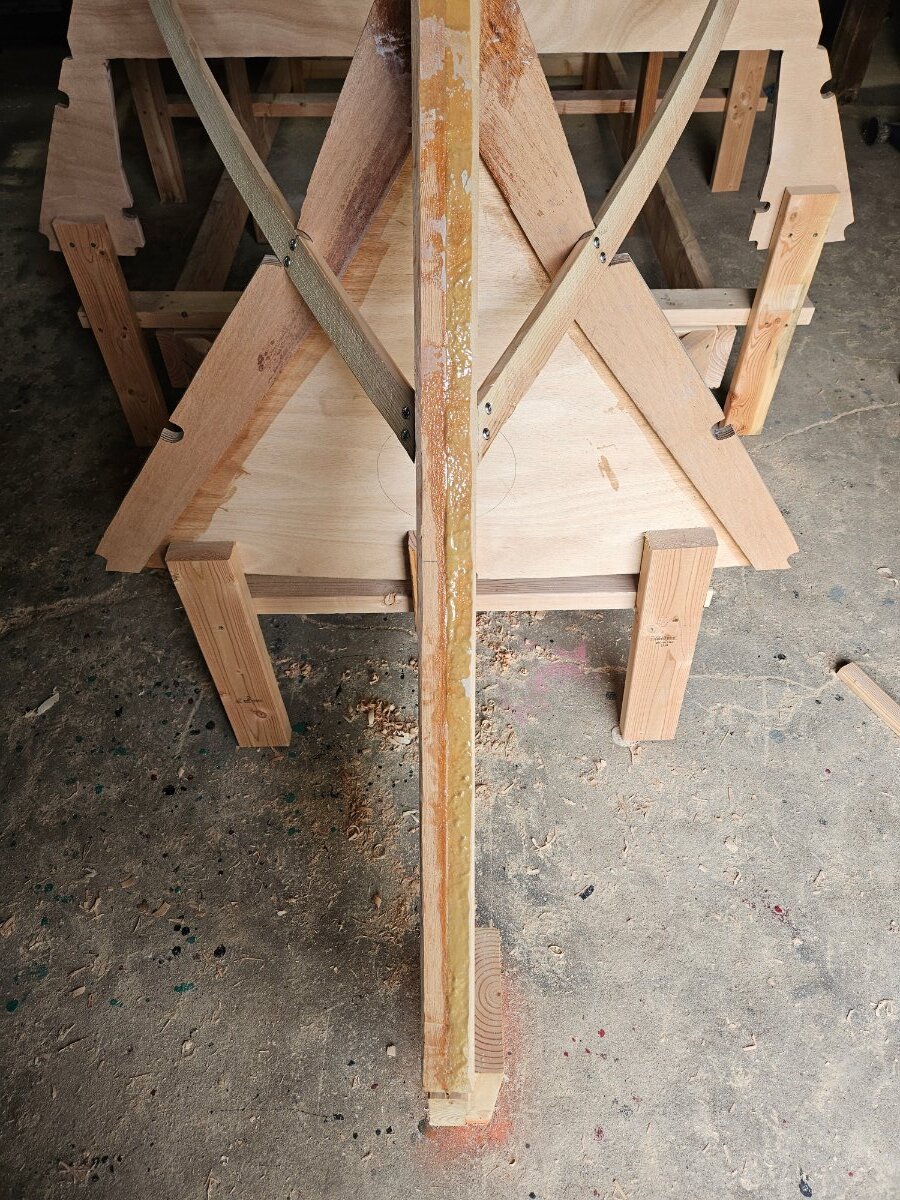
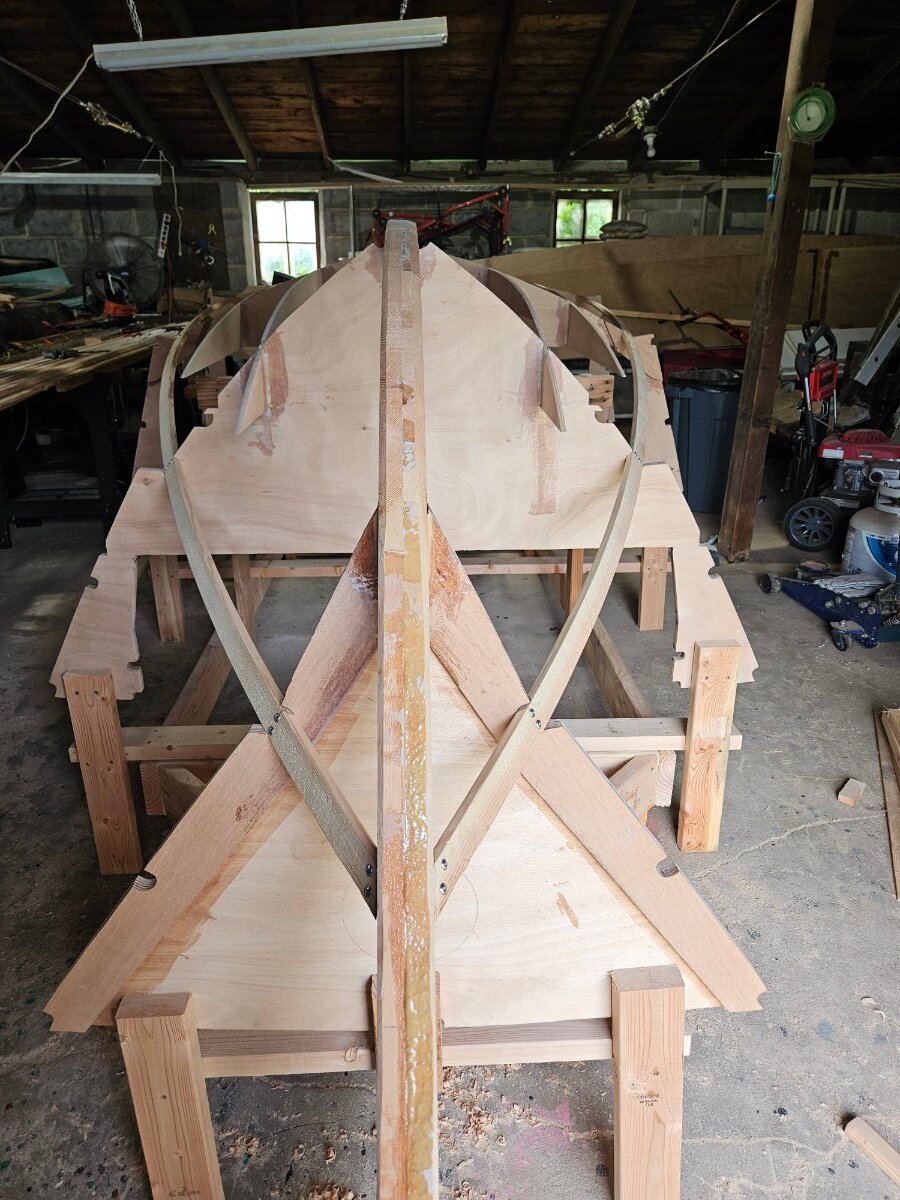
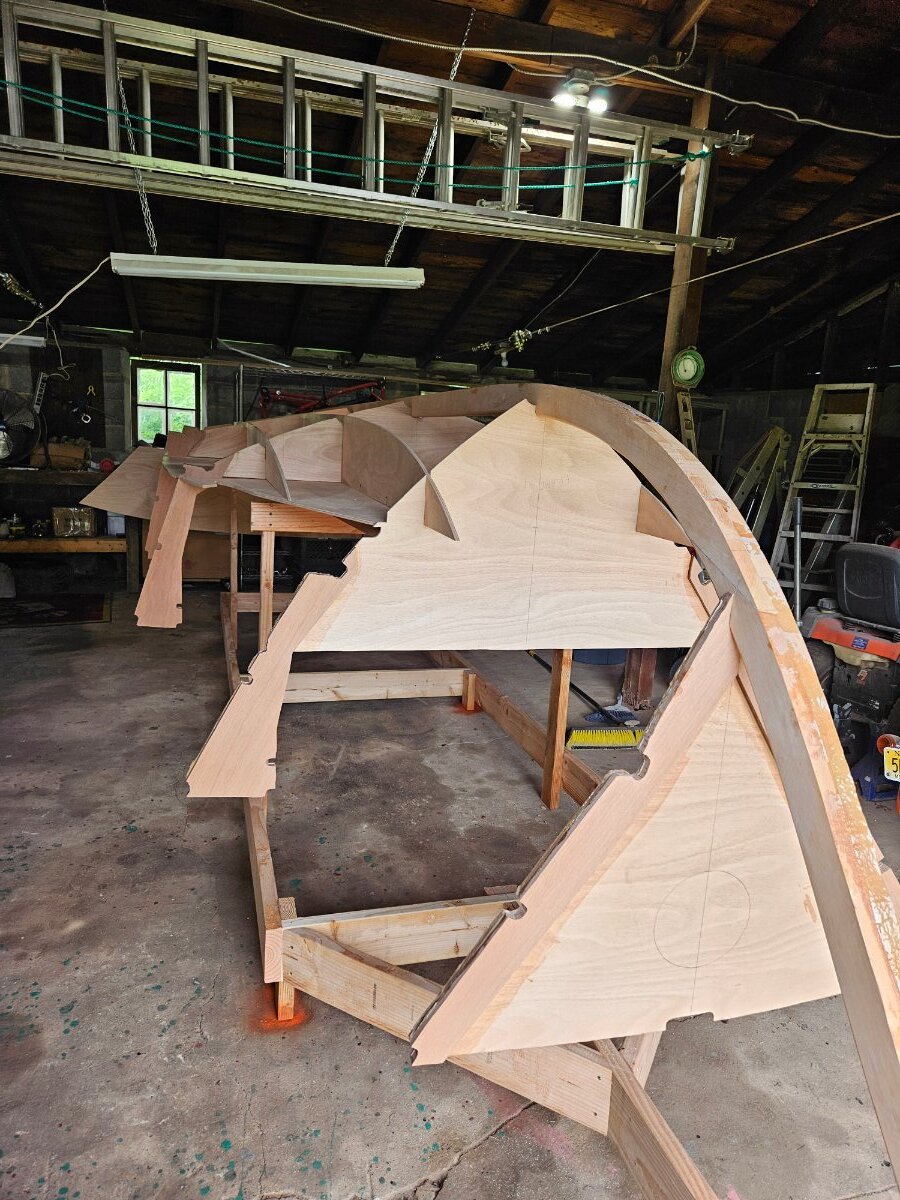
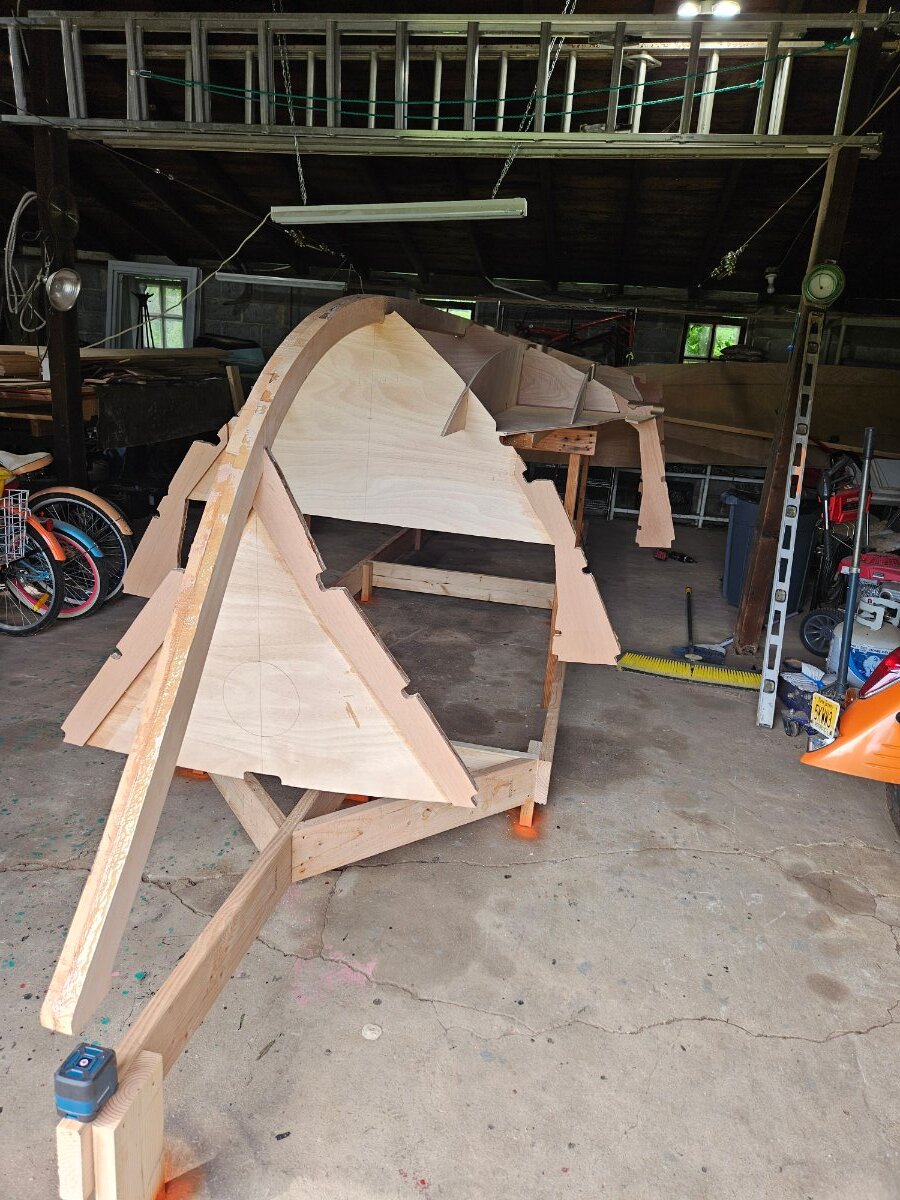
Thank you Frank for your tireless work on the forum, it is greatly appreciated! Bit of an update. The way I had things set on the strongback set things a touch too high for me (I'm short) so I lowered everything a bit so I could reach better. I got everything squared up and leveled and added some more support to the frames. I had some difficulties hanging the transom until I asked for tips and used some temporary screws. I got that fitted and glued, did some fillets on the fames and stringers, and fitted the chine battens. I will glue those on Thursday and start shaving down the keel. I didn't have any problems with those battens, even with using douglas fir. Maybe it was because I used 2x stock and the way I ripped them made them pretty much quartersawn. Or I just got lucky. Either way, I'll take it!
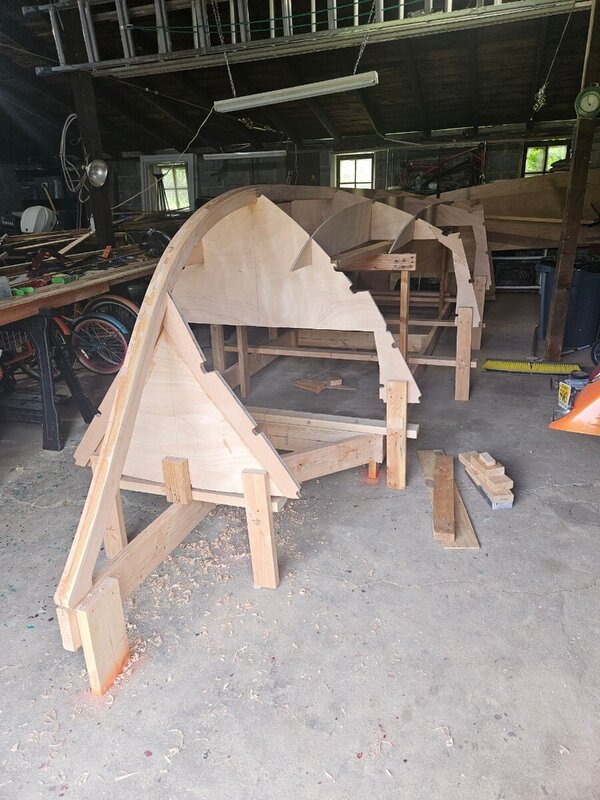
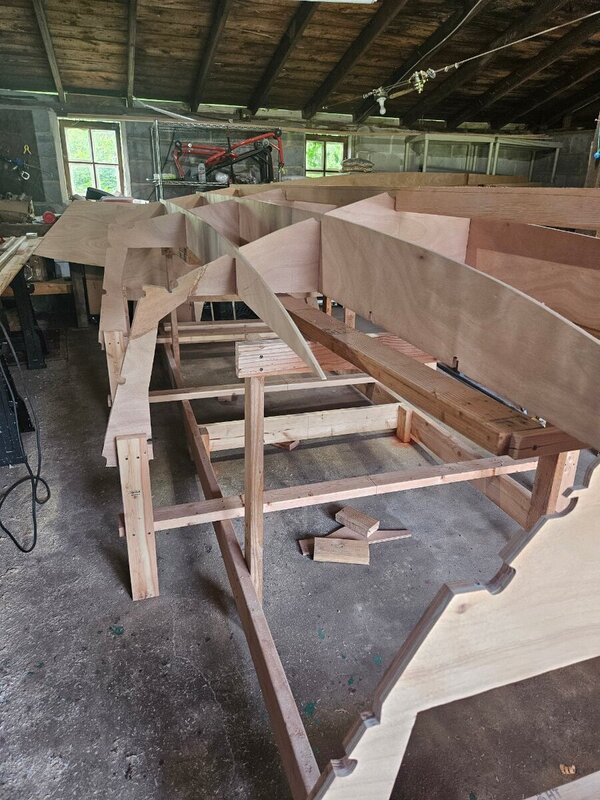

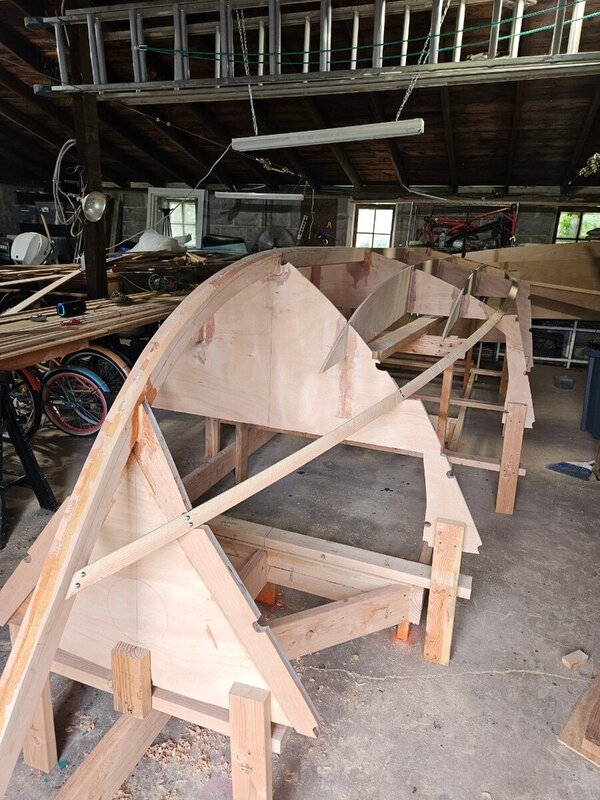
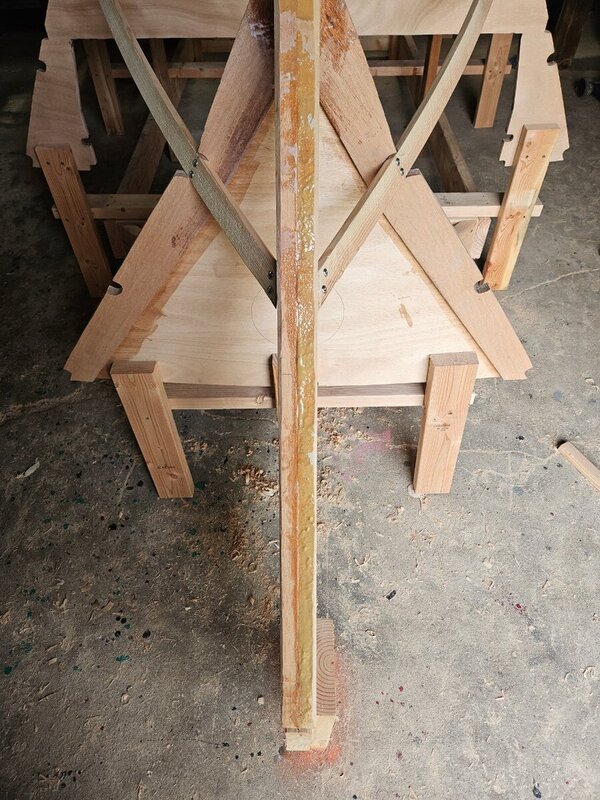
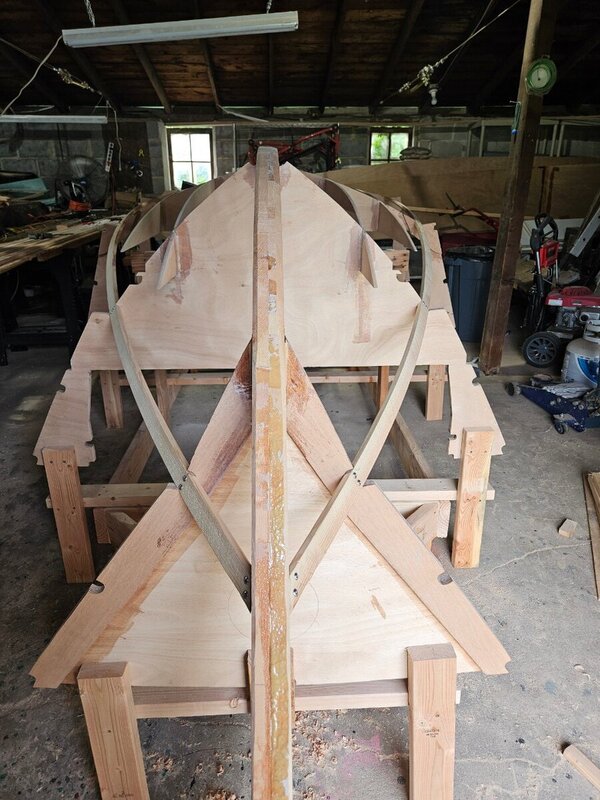
-
No real progress to report other than ripping and scarfing a bunch of strips. As of tonight, I have 6 20' strips and 2 12' strips all at 1.5" x .75" which I will process to the chine and side stringer dimensions. I may attempt to keep the inwales at .75" but we'll see after they all cure for a week. Epoxying all those strips was a challenge but it went pretty well. The only real troubleI had was the limited space to do that in so I got creative with my workstation which was far from level so a lot of shims were used. Hopefully by this time next week, I'll have something photo worthy to show, we'll see how it goes.
-
After calming down from discovering my mistake, I went back out and looked things over again. I will have to cut the relief in the sole, it is bending the frame between the outboard stringer and the cutout since everything was cut correctly. That's why the frame isn't sitting right on the keel. I'm glad I looked it over again, it's an easy enough fix. At least I didn't start gluing up the framework, that could have made the corrections much more difficult. I have heard it said that the hallmark of a master craftsman is not avoiding mistakes, but knowing how to skillfully fix or conceal them. I sure ain't no master but I'm really good at fixing my screw ups and making them look pretty in the end.
-
I ripped a mess of Douglas fir for the chine batons and stringers today and found another screw up when I was looking things over. I glued the extra reinforcement for frame 2 on the wrong side. It is on the opposite side of the doubler instead of on top of it. I don't know why I thought it should sandwich the 9mm frame instead of being stacked but that's what I did. That will place the centerline of the frame 1/2 inch aft of where it is supposed to land on the keel. Will that have a big effect on the hull shape? If so, I am thinking the best way to correct it (short of getting more ply and recutting everything for that frame which I'd rather not do since I don't have a local source for Okoume and would have to order it and get it shipped at an astronomical cost) is trimming that 1/2 inch from the slot in the sole so it can shift forward and just tabbing in a chunk of scrap to fill the gap when I glue it down. Thoughts?
-
This thread got me thinking, would the 4oz help with overall durability? I am now considering using it in exposed cockpit areas that just call for epoxy coating for my Marissa build as well since I will be using the boat for fishing and know that can beat up finishes like paint and gelcoat (hooks, sinkers, fish spines, etc...). I know it will add a little weight but I think the tradeoff would be beneficial if it means less likelihood of penetrating that waterproof seal during use. If it won't make much of a difference I'll stick with just epoxy where it's not calling for fiberglass.
-
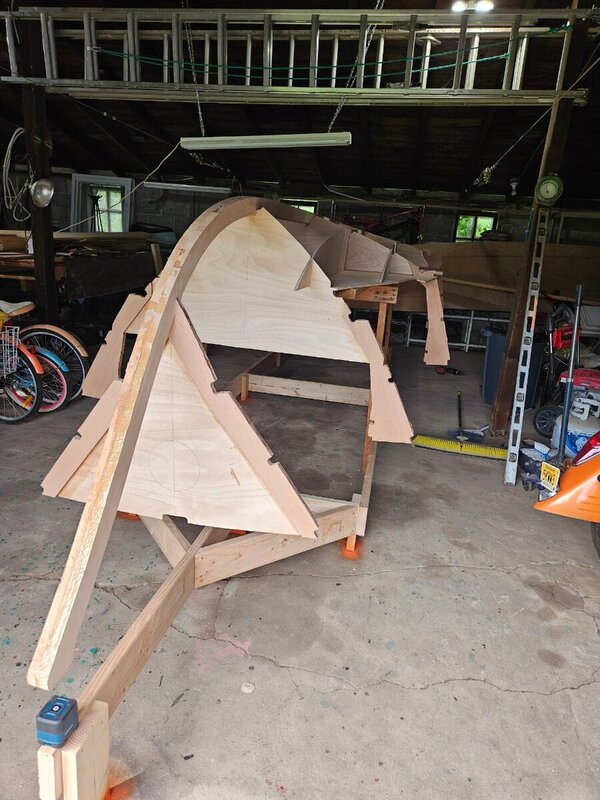
I got a little impatient and wanted to see how everything fit together. I do have to clean up some edges and fine tune a couple of areas but it slotted together nice and square. It may be a little bit before I start gluing things together but seeing a bunch of plywood look like this really got me going! I wish I had more time to devote to this build but it is what it is. She'll get finished eventually.

-
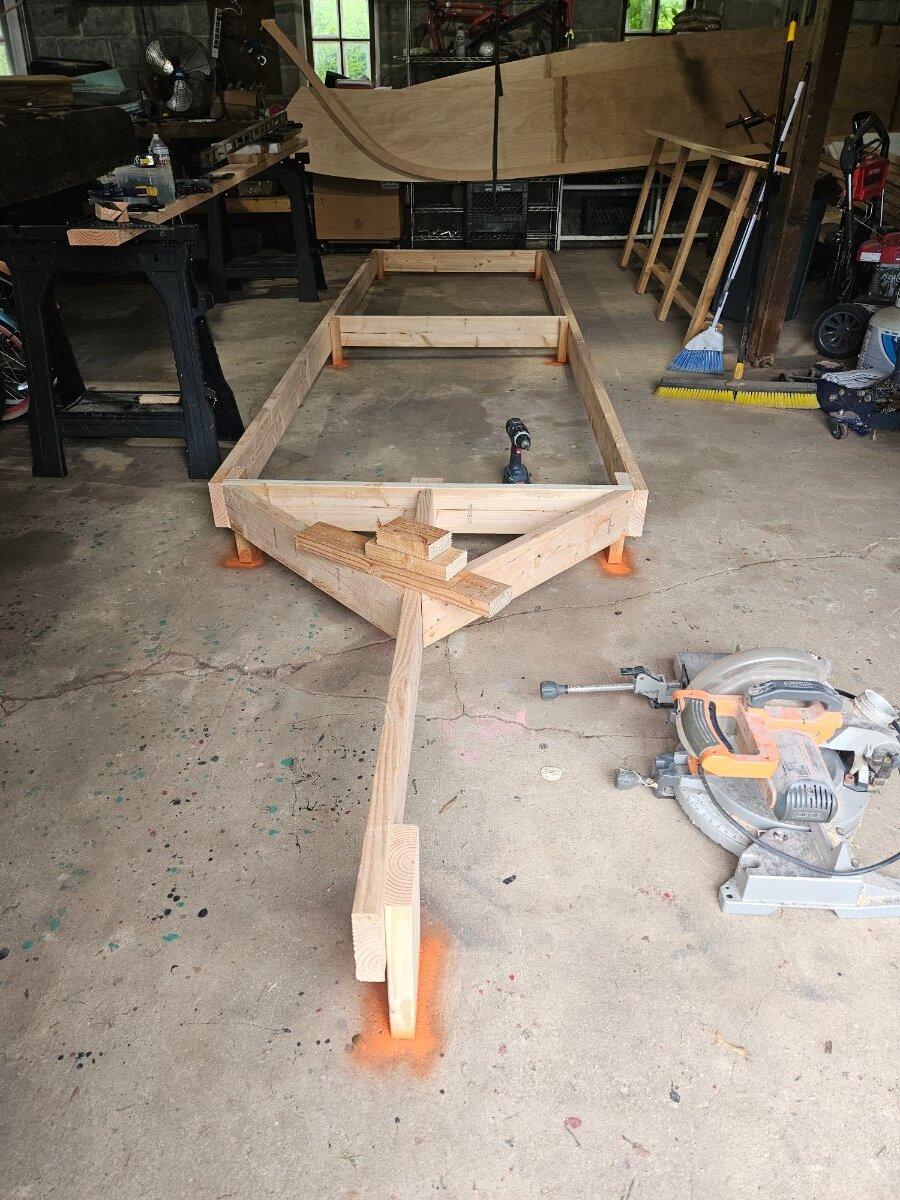
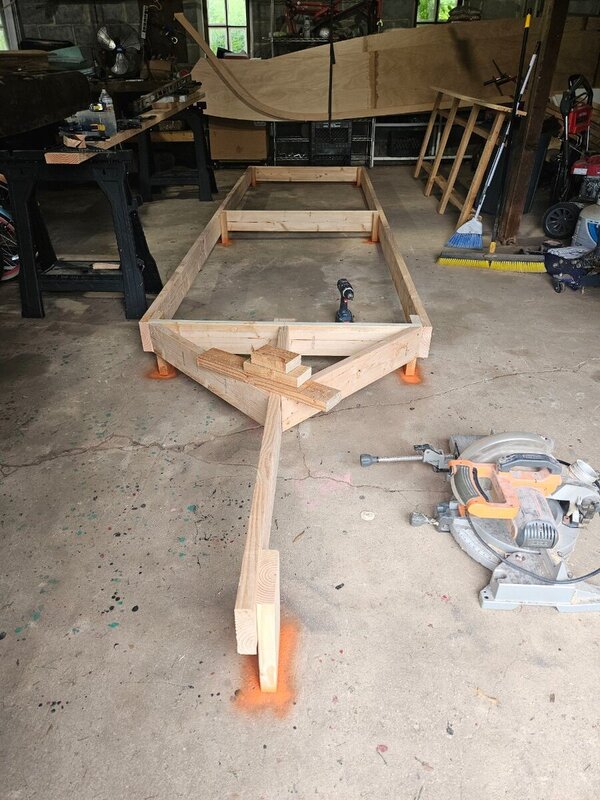
Got a strongback knocked together squared and leveled. I threw down some spray paint on the floor so if I need to move it, I can put it back in the same location and maintain level. I will be putting a few more legs on it once the uprights for the frames are in but I can walk on the edge without deflection so it'll work as is. One step closer...
-
I used the West scarffer. I temporarily removed the guard on my circular saw and used an 8" blade with it, that gave me the 3 inches with my saw. I practiced with some scrap to get it set up (it is a little fiddley getting the perfect angle) and only had one that I had to trim back and redo. If I was to do it again, I would have just used planes but it was too hot in the shop so I went the "easy" route. On a side note, I got all of the long panels glued and also the doublers on the frames. I have to laminate the transom up and clean up some squeeze out then I can start putting things together. Tomorrow I will be giving the barn a deep cleaning and building a strongback, I will have pictures soon. Ain't much to see at this point. Tip to the wise, do as much cutting and sanding as you can outside. Or at least move the motorcycles and other boat out first. I should know better but had a window to work on this project and just got after it. I know there will be a ton more sanding in the future so I will be thinking a little before I act. I need to get some covers or at least drop cloths.
-
I came up with a way to glue up the long panels indoors, it just prevents me from doing much of anything else while I'm waiting for the epoxy to cure. I just have the sides which I will be doing later today then all of the long panels are done and I can start making the strongback/jig. The scarfs came out really good except one which I must have placed a little over the mark when I glued it, there is a step up in thickness that can't really be seen but you can feel it when you run your hand across. I should be able to fair it out easily once it's installed. I clamped and screwed everything together before cutting things out and planed to the lines so everything is mirrored nicely. I did make a mistake when cutting the stringers, I cut slots on the upper edge for the floor carlins not realizing they got blocks glued to them for the sticks to slot into instead. I was thinking I could just make the ones that run along the top edge of those stringers 1.5" x .75" instead of .75" x .75" to add back any lost strength. Does this sound like a good correction?
-
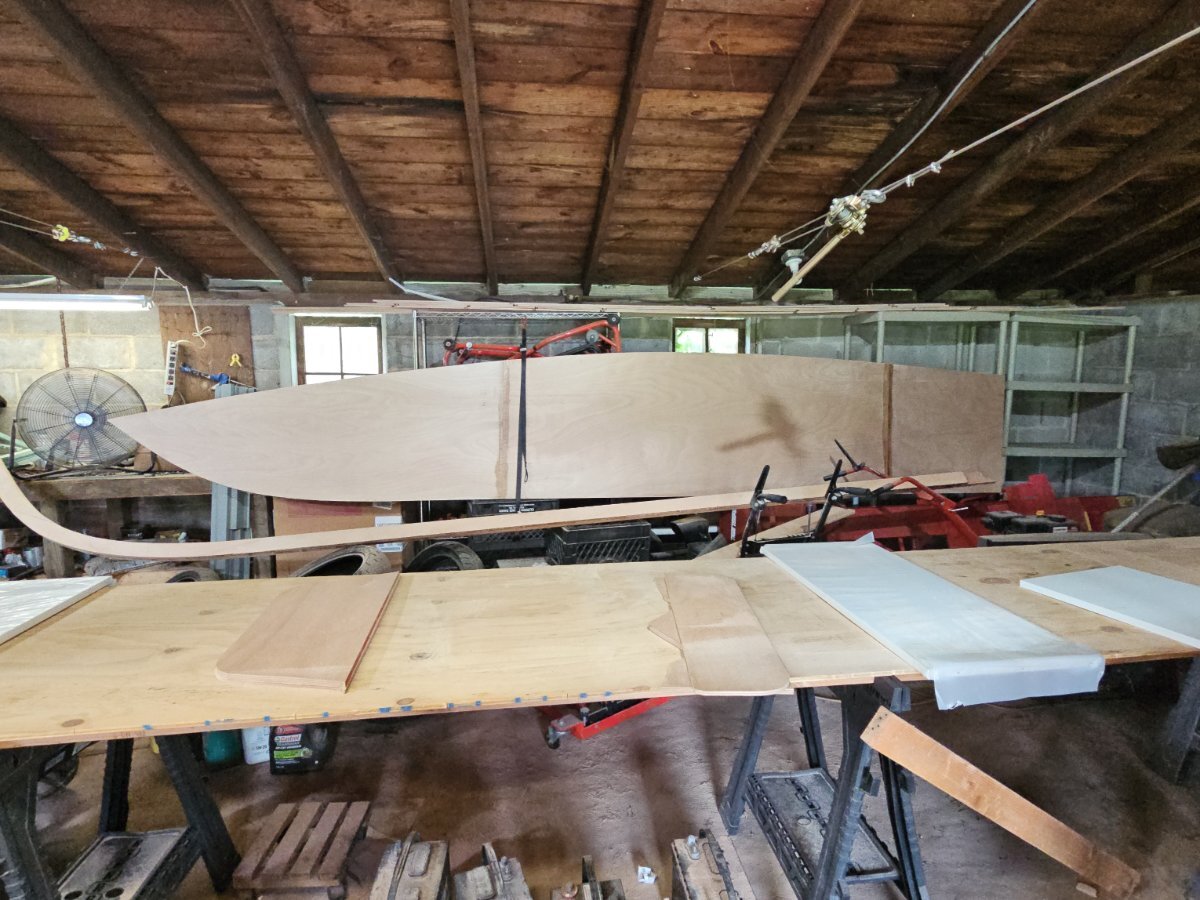
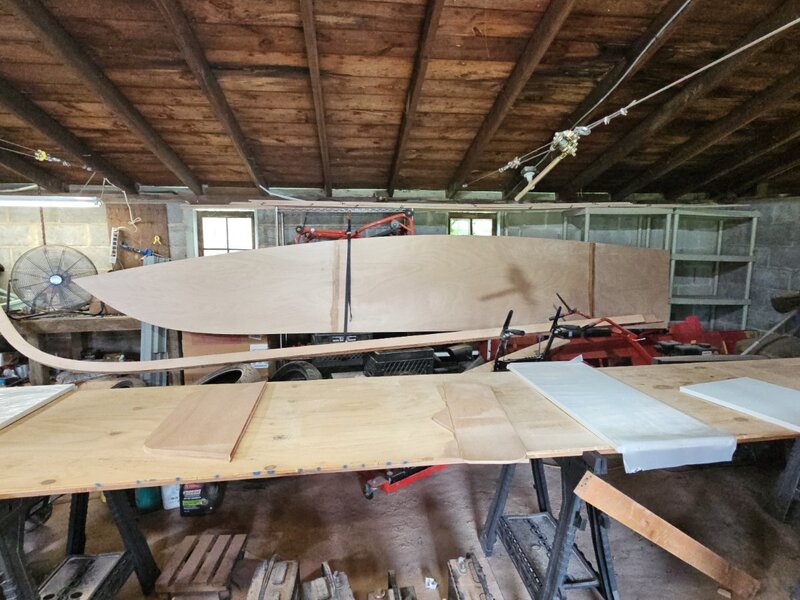
It's been hard to find time for this build lately but I finally made some headway. I have all the parts cut out and the long panels scarfed so they can be marked and cut out. I have some fine tuning of the edges to do and I can start gluing up the frames. There sure are a lot of parts to this boat! Since I have limited space to work, I am going to do the long panels in stages. The plan is to line them up on that 24' long frame I showed earlier (this time with some plywood screwed down on top to make it a big table) as if I was going to glue them up, fit 1/4" dowels to locate them, mark and cut them, then disassemble them to be glued up at a later time. I've used dowels to locate parts when machining but have never done it with wood. I can't fit a full 24' in my work area so this marking and cutting will be done outside. Once they're cut though, I can bring them inside to glue. Does this sound like a sold plan? Some pictures of the progress. Disregard the mess, I have some other projects I'm waiting for parts to come in for and will be able to reorganize things once they're finished. I figured that if I waited for everything to be done I'd never work on this boat.


-
I haven't given up on this project, just that life has thrown me a bunch of curve balls lately so the boat is on the back burner for the time being. Doing roof repairs in the summer isn't my idea of a good time but that's the last major job before I can get back to building this boat. Hopefully I'll be back in the game in a few weeks and can start posting progress pictures.
-
I do have a couple of questions about some modifications I'd like to do while I wait for spring. The first is about the cutouts in the stern bulkhead. I see that there are cleats in the top centered going to the transom, I'm wondering if having that top part solid is structural. What I would like to do there is keep the bulkhead itself solid and put hatches on top instead so I can install a baitwell in one side and the batteries in the other (I plan on running dual batteries). I can draw up what I am talking about if this doesn't make sense. The second is regarding the bow top. I want to build an anchor well there with a cover so I can use the casting platform hatch as storage rather than keeping the anchor in there. The plans have a board on the centerline so I'm wondering if that's structural as well. I attached an image of what I'm wanting to do there.

-
Just wanted to give a quick update, this project had to be put on the back burner but will resume in the spring after I rebuild the roof on my outbuilding that will serve as the building space. The past few storms did a number on the old framing so I just have it temporarily shored up until the snow all melts and I can rebuild/reinforce it. Not really possible to work in there with the way I had to jack things up, there are lolly posts and 2x4s all over the place. One of the drawbacks of owning an older property that wasn't maintained before I got it, there's always something that needs to be fixed. I also had some vehicle issues right after my last post that had to be addressed and then it got too cold for epoxy work so not much progress. All that's done so far is the non-scarfed panel parts are all marked out and the keel parts are cut. I can't wait for warmer weather so I can fix the roof and get going with this build! On a positive note, the roof problem is forcing me to pull everything out of the building so I will be able to organize and clean it out well before really getting into the build. That will open up another bay so I will be able to have more room for scarfing and preparing the long panels. I will also be able to put in better lighting so I won't be relying on 2 100w bulbs screwed into the ridge board that it has now. Silver linings.
-
I am really enjoying this build, it has a lot of firsts for me and I'm learning new things. Advice, feedback, and criticism are always welcome, that's why I started this thread. I like how supportive everyone is here and I look forward to every post. Good to hear that butt blocks will work for the hull panels and bottom stringers, that would make things easier for sure. I might still scarf the sides though, just so you won't see the blocks when the boat is finished. I have some time to decide which route I'll go down, I want to get all the smaller parts marked and cut out before I get to that part. And there are a lot more smaller parts than I realized, I know why the pre-cut kits are so popular. Good thing I don't have a deadline for this one!
-
I'm curious about that myself, I haven't built the strongback yet. The frame I posted is just for marking and cutting the panels, a makeshift workstation from scrap lumber to make it easier to use the long patterns. I wouldn't want anyone thinking I was planning on building off of it, it's temporary.
-
I knocked together a quick and simple frame so I could unroll the mylar and tape it together. I laid 3 sheets down as a base so I could have some room to keep the templates unrolled while I marked parts out. It isn't level or super square but it doesn't need to be for what I'm using it for. I was able to mark out all of the frames before I ran out of daylight. Tomorrow's plan is to finish marking the soles and start cutting some parts out. If I have time I'll make a jig for my saw so I can scarf the long panels. Just seeing things marked on the plywood was a good feeling!


-
Alan, Thank you for the idea about cutting the smaller parts out first to reduce the overall size. That will make the handling and glue up a lot easier since I won't have to worry about rain or dew causing any issues with leaving them overnight to cure. It's also reassuring that mistakes are somewhat correctable to a degree, hopefully I can minimize any of that. I also wasn't aware of the dimensional differences between manufacturers, I thought they would all be 96" and didn't consider the metric conversion. I just went out and measured mine and it is 98 7/16". 2500mm makes a lot more sense manufacturing wise than 2438.4mm. My plan of attack this weekend is to knock together a 4' x 24' frame outside so I can lay out 3 sheets on top. Use that to roll out and tape the templates then mark and cut out all of the smaller parts (at least from the long panels). Once that's done I can scarf the long panels and glue them together. Hopefully I'll have some time left to mark and cut those as well, I'll just have to see where things lie. Once everything is cut out, I will be able to put in an hour or so daily instead of having to wait for my days off to do anything. I really only have to wait when power tools are needed, hand tools and epoxy work don't wake the neighbors.
-
Thank you, I am definitely overthinking this. I will just build a simple frame and level it out then just that as the base to measure up from. The only obstacle remaining is how to keep the 24' sheets out of the weather for a day or 2 until the epoxy sets up and I can mark and cut. I have a few days to think this one through, I won't be able to do much until Thursday due to my work schedule.
-
I cleared out the area to build this boat so at least one thing is out of the way. I'm suffering from a little paralysis by analysis though. The floor of the barn is nowhere near level so I'm wondering if I should build a strongback to bring the keel to level or just use the sawhorses and deal with it that way. I have a bunch of scrap 2x4s if the strongback is the way to go, I just don't know how critical it is besides for the DWL for the boot stripe. I will still make sure it's level side to side and square either way. Maybe I'm just overthinking it, I have too much invested in plywood and epoxy to screw this up so I'm a little apprehensive about starting. Another question is for the scarfed panels. Do I scarf and glue up the whole sheets before marking and cutting or can I cut them as 4x8s and do that before assembly? I'd prefer to do the latter so I don't have to muscle around 4x24 sheets of 9mm plywood (not to mention my work area is only 22 feet). My last boat didn't have full size templates so everything was lofted, I was able to cut close and plane down to final dimensions. Just not sure if this one will work that way too since I don't have offsets to work from, first time with templates. Last question, I ordered the plywood based on the BOM listed on the website before my plans came in and that didn't include the console so I'm 2 sheets short. Can I do that from foam or exterior plywood since I don't have a source local for marine ply? Again, I'm probably overthinking it since it isn't strucural but I figured I'd ask an opinion.
-
Hello all, I'm about to start down a long road building a Marissa 18. I got the plans a few weeks ago, the epoxy last week, and just got the plywood delivery. I haven't picked up the glass yet but I have plenty of time before I'm at that stage. I work 12 hour nights so the updates will be slow and not too frequent so bear with me. A little about my experience: I have built 2 smaller stitch and glue boats, a plywood on frame jonboat, and a plywood pirogue. I've done my share of fiberglass repairs and decked out an aluminum skiff. I also turn saltwater plugs, tie flies, and make bamboo fly rods. I have a machine shop background and have done everything from framing to masonry, roofing, plumbing, electrical, kind of a jack of all trades. I also have rebuilt a couple of outboards, a handful of car engines and transmissions, and restored a few motorcycles. Basically if it was broken, I fixed it. It has always been more of a necessity than a past time though, that's what this boat is for. Well, here's the first post. Time to finish cleaning out the barn so I can really get started.

-
Thank you so much for the detailed explanation of it, I really appreciate that! That answers everything I was getting confused about.
-
Good morning. I just got the plans for a Marissa 18 and am a little confused on the fiberglass. The materials list says 300' 12oz bi-axial tape. Is this the same as 1208 biaxial ? What width would I need? I saw the fiberglass kit on the website shows 70 feet of 6" 1700 Bias tape which is throwing me off even more. I have built two small stitch and glue boats and a plywood on frame jonboat so I'm not totally new, just that this is my biggest(most expensive) one yet so I don't want to screw it up. Thanks in advance for any help.