nopoe
-
Posts
13 -
Joined
-
Last visited
nopoe's Achievements


-
Yeah, that's definitely ideal, but I forgot and I'd rather do this than reskin it. The sea trial went pretty well. I just went 100 yards out from the launch ramp and 100 yards back then went in circles for a while. I used a storm paddle today and I don't have a spray skirt yet so I honestly don't know if it leaked or not since there was around a half inch of water in the cockpit afterwards anyway, but there was definitely nothing major since it didn't get any worse when I wasn't paddling. I'll get a spray skirt and try again. Also, I finally understand the difference between initial and secondary stability. The Ravenswood feels pretty tippy compared to a sit-on-top when I'm just paddling around (or getting in and out) but it feels solid as you tip it past like 20 degrees or so. One thing I'll miss from the sit-on-top is how easily it turned. But the tracking is much better on this boat, so that's to be expected. Overall I'm really happy with how it handles. Huge thanks to Jeff for making this all possible! I've wanted to build a kayak for a few years now and this summer since I'm not taking classes I decided to go for it. And I'm really happy I did!
-
Thanks. I think it should float. The seam at the stern below the waterline was leaking like crazy but I sealed it up and then painted over the sealant. Should be dry tomorrow, so I'll do a sea trial then assuming I can secure it to my truck well enough for me to be confident driving to the harbor. I'm really excited to see how it paddles! I've only ever paddled an Ocean Kayak Scrambler so I think I'll probably be pleased.
-
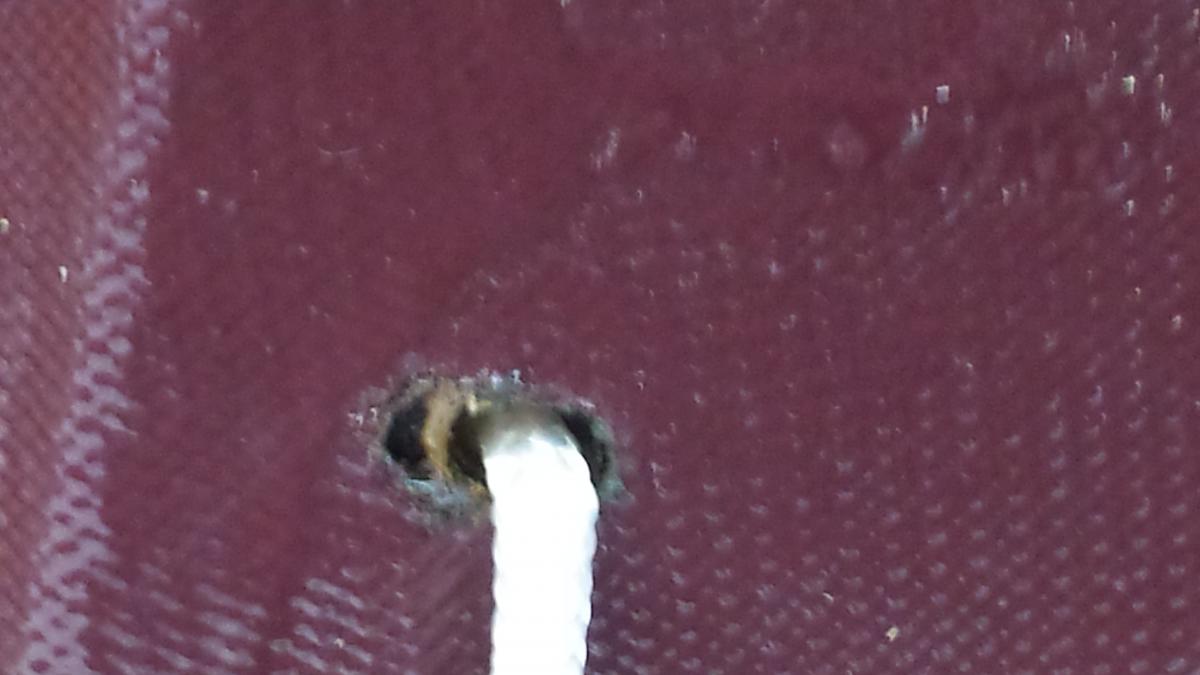
I managed to drill the holes without much damage. The drill bit snagging the skin wasn't the problem. The drill bit walking along the surface and stretching the skin was. As a result, one of the holes is a bit of an oval as pictured. The rest look great. What I did for the one painter that I didn't mess up was to burn a hole, use an awl to dent the wood so the drill bit doesn't walk, then drill the hole, feeling continuously on the other side for the drill bit to break through the stringer. Slow down to make sure you don't go right through the skin, because I can't imagine that would end well. It's not like you can't let the drill bit touch the skin or anything (the skin is pretty tough), but don't push it. Once it broke through, I pulled the drill out and used the awl to go all the way through and mark the center on the other side. Then I burned the hole on that side, finished the hole with the drill and then fed the line through. Your milage may vary.

-
How do you transport the kayak without painters? If you don't mind, could you let me know which rack you have? If I can get away without them that would be nice. I do a lot of launching from docks so being able to tie up is nice, but I could aways just tie a bowline around a frame member and keep the line under my spray skirt. I like that idea even more than painters actually since I won't have to secure like 20 feet of line to the deck somehow.
-
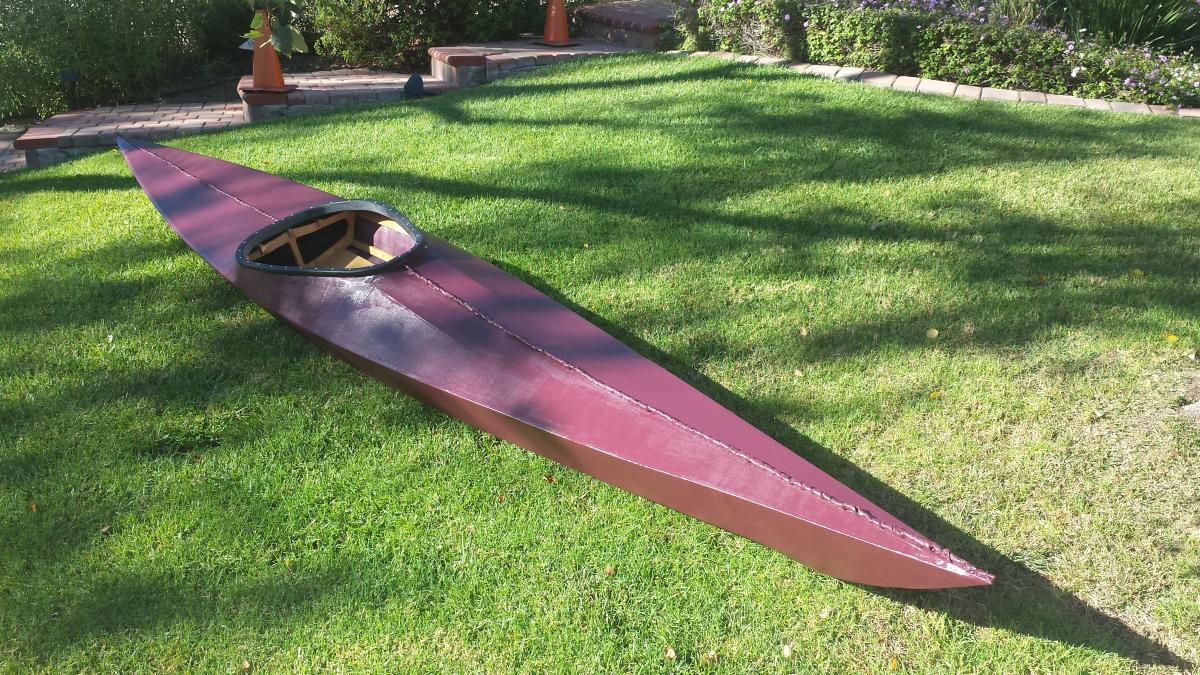
I eventually convinced myself everything was good enough and started painting. Here it is after 2 coats. I wanted something a little more regal for the color but it'll do. I just mixed equal parts Rustoleum royal blue and sunrise red. If you look closely you can see my whip stitch at the bow is garbage. But overall the boat doesn't look half bad. I realized after reading the rigging section of the manual that I didn't drill holes for the painters. I'm thinking of getting a soldering iron tip into the shape of a cylinder with the same radius as the rope I got for the painters and using that to burn a hole in the skin, then getting an appropriate sized drill bit and very very slowly drilling a hole in the gunwale. What's the danger of this? In the manual it says it's difficult to do without damaging the skin, but I feel like if i drill slow enough the danger of the drill bit catching the skin is pretty manageable.

-
After around 2 weeks of being out of town, I started working again on Sunday. I'm currently shrinking the skin and I'm wondering how tight is tight enough. I almost have all the wrinkles out, but there are a few stubborn areas that I'll keep working on. The skin as a whole is moderately tight, but I can easily push down on it and deform it. For example, pushing the skin until it's touching the seat plank is really easy. If it's ok to leave it as-is I might want to do that (after the wrinkles are out), because I don't want my pull-holes getting any larger. They're already pretty bad. Definitely going to need caulk. If I could go back and do it again, I think I'd spend the extra money for the 11.6oz polyester skin. Also I ended up driving the screws in from the top. I decided I'm going to have a spray skirt covering the coaming most of the time so looks aren't too important, but it ended up looking pretty good. I painted the coaming black so the screws give it some contrast. Other people on the forums have set the standard for quality pretty high and to be frank this doesn't even compare. But it'll float, which is the main objective anyway. I'll post pictures after I'm done ironing.
-
I filed down a soldering iron tip into a knife-ish shape. Works well enough, but it needs a lot of time to heat up. It barely worked at all before I modified the tip.
-
I'm thinking just the tung oil for the coaming and floor should look fine. Tung oil doesn't yellow or darken like boiled linseed oil if I remember correctly. I'd probably paint it if I wasn't a bad painter. I'm probably going to invite a friend over to help me paint the skin. Oddly enough out of all the things required for the build, that's what I'm the most apprehensive about. Also wow, I had no idea all the screws on the paper pattern were required. I removed the paper from the plywood but saved one just in case the hole pattern was necessary. Glad I did! I'm going to need some screws I suppose. And I'm really pleased I have access to a drill press for the pilot holes. I'd hate to break through the top ring on accident with a hand drill. I'm also thinking it's probably a good idea to re-drill the pilot holes for the 5 that had screws in them already, because I don't think the top two rings line up quite perfectly and I feel like driving a screw through there could shear my glue joint since the screw will want to re-align the pieces. Re-drilling it should prevent that though.
-
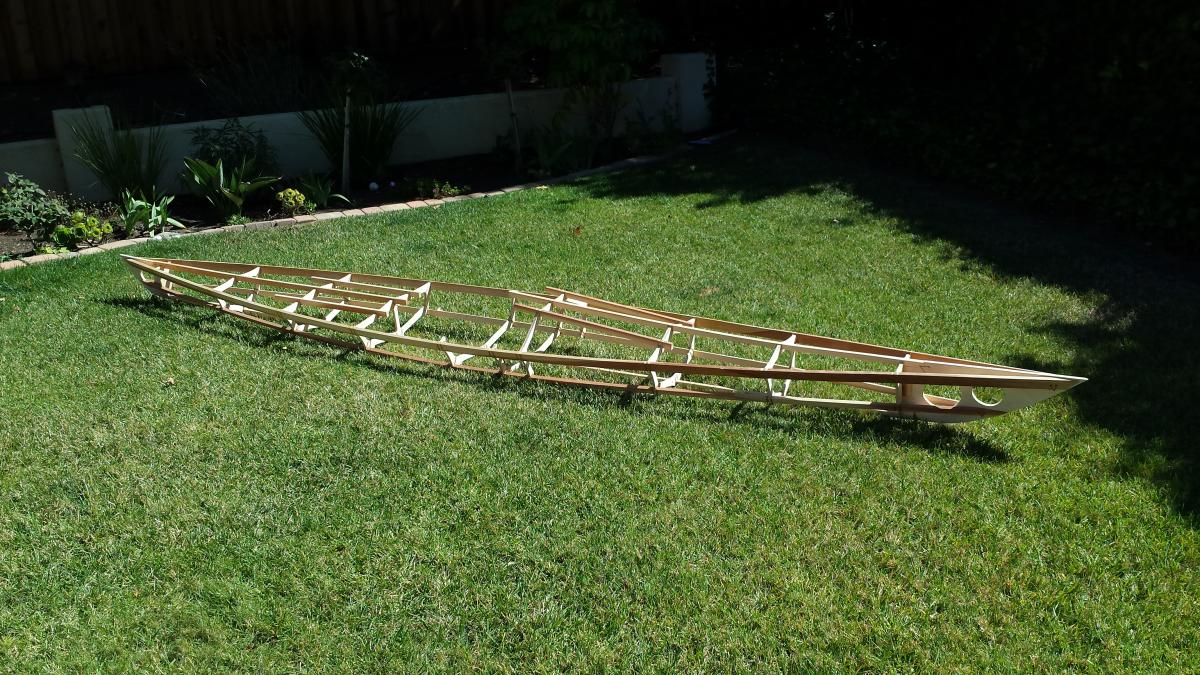
I'm almost done with the frame for my Ravenswood. Things have been moving along pretty quickly. I'm going to finish up the frame today and oil it. Floorboards and footrests still need to be attached, and I haven't yet trimmed the deck stringers to their final dimensions. I have a question about the plywood coaming though. I'd like to avoid a laminated coaming. It seems like a lot of work considering the plywood coaming is just as functional, though certainly not as pretty. The plywood coaming came as 3 pieces of plywood screwed together with 5 screws. Before I unscrewed them to glue two of the rings together I noticed that 5 screws wasn't enough to keep them clamped tightly throughout the circumference. Will I need more screws? If so, how many?

-
I tried Chrome and Internet Explorer on my computer. Both gave the same message.
-
Weird. If it works for other people it's not a big deal I suppose. It may have been looking at the message I was trying to submit and deciding it was spam.
-
I think I may be missing something from an order and I tried using the email form on the website, but I got a page saying "Do NOT try that" when I went to submit it. I'm not seeing any other contact information on the website. Hopefully this can get fixed. In the meantime I'm going to send Jeff a private message on the forum. Hopefully that will work.

-
Hey everybody, I ordered a Ravenswood deluxe kit a few days ago and I'm hoping to get building as soon as possible after it arrives, so I have a few questions. I have a local source for Western Red Cedar for stringers, but there's a bit of lead time because they have to special order it. So I was wondering if somebody could give me the dimensions of the stringers I'll need. That will probably help me get finished sooner seeing as they're needed for the first phase of the build. I'm not in a huge rush, but if I could avoid that extra lead time that would be awesome. Summer doesn't last forever! I'm also wondering about seats. The deluxe kit says it comes with a backband and I remember reading somewhere all the frame kits come with planking for the cockpit area. But I checked in the store and couldn't find any proper seats so I thought I'd ask here what people typically do about that. Obviously this isn't as critical as getting stringer sizes since seats tend to be stocked items and I could always wait to fit it until later, but it would still be nice to know now so I can think about what I want. Thanks!