striperick
-
Posts
54 -
Joined
-
Last visited
-
Days Won
2
Content Type
Profiles
Forums
Events
Everything posted by striperick
-
I am so happy Carla is making progress. Graham and Carla are great people, Great people deserve great things.
-
Started to add outer layer to the area that is started towards the stern. I had a few fall offs of 4mm material that were too small to be useable so I ripped them into 2 1/2" strips. Ran a test and arrow T50 1/2" staples do not protrude through 3 layers of 4mm material (1/2" = 12.7mm) I also gauged the Bruynzeel Okoume plywood and each layer is a hair thicker than 4mm so that helps also. After the epoxy is dry the 4mm sacrificial strip peels easily away from the outer layer(see left hand side of picture I probably overkilled the amount of staples I used but they are cheap $3 box . I have yet to snap a single staple . As a side note arrow sells a T50 pneumatic stapler for 32 bucks at Lowes. But I passed on that. Dads old hand stapler works just fine (see Picture A) The process of stapling, removing ( I actually removed the old staples from the sacrificial strips and reused old strips further down the line) goes pretty quickly.I would think different staple lengths and sacrificial strip thickness can be adjusted. We will see how this works near the bow.


-

fractured plywood bottom panel ..... help
striperick replied to striperick's topic in B & B Yachts Forum
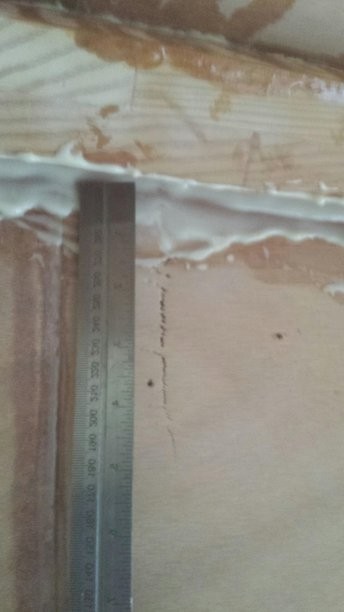
The chain of events is that my dad an I scarfed and glued up 2 each 20' long panels. We templated the boat and shaped the starboard side and glued down no problem . We then shaped the port side and started working fore then aft and saw we were over stressing the panel. We already had the fore 4' clamped up and had a pretty good area all epoxied epoxied aft (panel and stringers) and moved forward right or wrong. It is a 4" crack running perpendicular from the stem that goes through the thickness . I have filled the exterior of the crack during fairing process and haven't touched the interior. The crack has not spread but is this a weak point that will be an issue later on?
-
I have a 4" fracture that goes perpendicular to the stem that happened during gluing the bottom on the port side on my OB 20. It is below the waterline and is roughly 4' aft of the bow it is on one side of the scarf joints I did on the the bottom . It did go completely through but I did epoxy the outside of crack to fill. This does not have glass yet (inner or outer). Will this be ok or I am looking for trouble to continue to glass both faces ?
-
Wish you our best. Technology is amazing these days and some prayers wont hurt as well. Take it from me ... have had 2 successful back surgeries. The worrying is the hard part. They will take great care of you.
-
Finally got back at it today after not touching the boat for 3 weeks. Started to lay the inner layer of 4mm plywood w/ 3/4" truss head screws. I have found a 7/16" truss head screw in a woodwork outlet store. Will try those (with washer ) on the outer layer (between side stringers) and post my results. If it fails I will use staples and pull them out. I am using 2 different drill bits w/ drill bit stops attached to bits One larger diameter bit to for plywood and a smaller diameter bit for the screw shank in side stringer or bulkheads . I have the clutch set on the cordless gun to get what i hope is the proper tourque. Not stripping screws and not squirting all the epoxy out either. Does anyone have any input on the "recipe" for the epoxy fillers between the the 2 layers of planking? Is just cabosil adequate or should some glass fibers be added for additional strength?

-
Ron Your build was most instrumental in starting my 0B 20 endeavor. Is it me ????? Ronnys raft looked good indoors. It looks GREAT outdoors. You are a man after my heart. I love your selection in OB20 plans I also love your selection in a tow vehicle. Congrats on a job well done.
-
Using Grahams recommendation of southern yellow pine for the side stringers. I purchased, scarfed, glued for length, and the ripped the side stringers. I snapped 3 of the 12 pieces but the material seemed very dry. they are cut to length and I am gluing them to each bulkhead fore then aft. Thankfully that is an optical illusion where the keel appears to be curved port/starboard . It is very straight. I was able to get sons car out of garage and centered the boat re leveled frame so I can begin side planking next week.


-
Fishman been following your thread w/ great interest. Coming from someone going through similar trials and tribulations ...... good work and nice job staying at it
-
Have the chines glued up for length and scribed to the bottom.Cut them to width tomorrow. Ran out of epoxy arghhhh. Side stringers up next. I could always go under the boat and sand up the awfull mess I made under there. I tried to be diligent and clean up as I went along...... but still a mess.

-
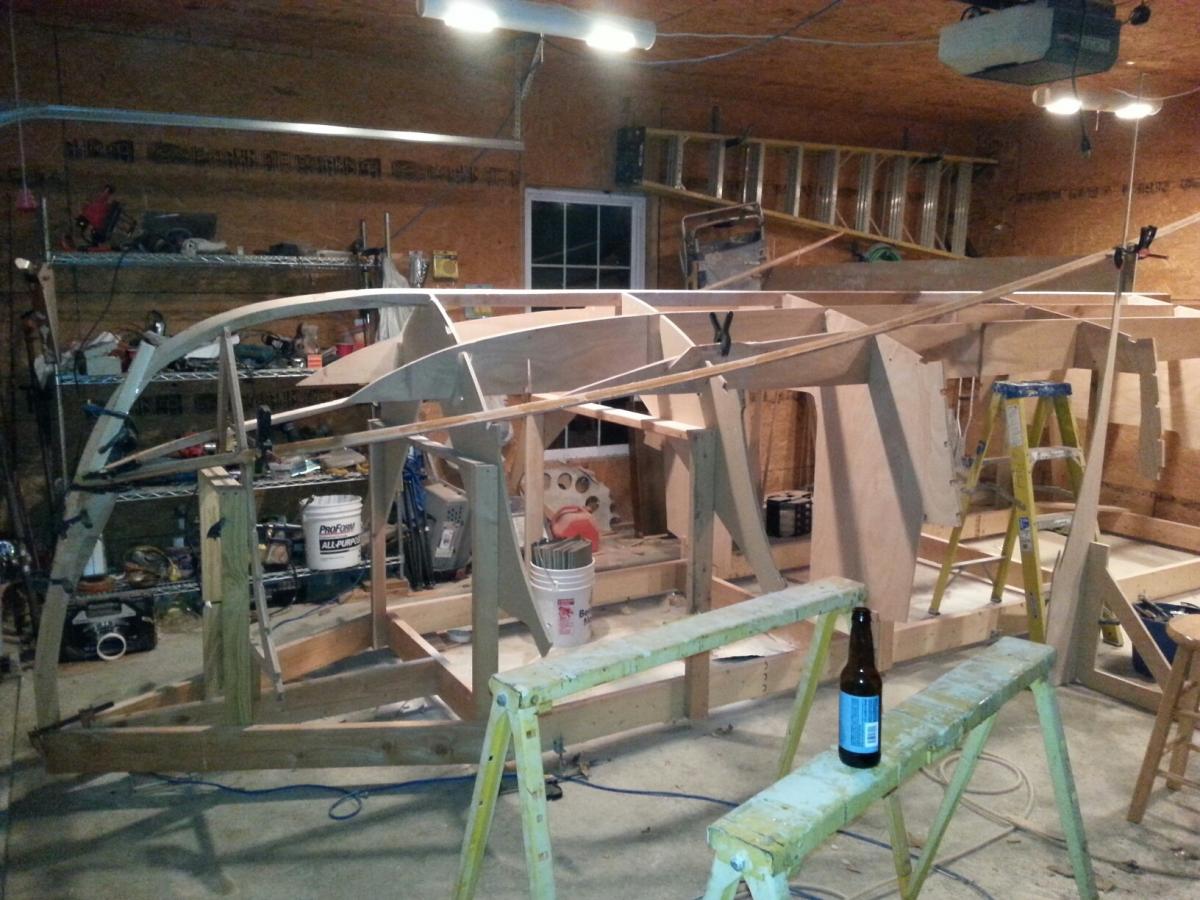
I am building the Outer Banks 20 and batting around a plan of attack. I have all the bulkheads, transom, chine battens,stem and keel in place. I will in the next couple of days have both bottoms and chines glued in . I have purposely left out the solid wood side stringers so I can have access clean up messes between inboard ,outboard stringers, bulkheads and bottoms. My concern breaking the bond of inboard/outboard stringers bulkheads and bottoms during rollover. I will probably do the tires on ground and every man woman and child available type flip. I have on hand Cabosil,Glass Microspheres and 1/32 milled glass fibers. I see 2 options. A) Do all my vertical and horizontal fillet work now before side stringers and plywood sides. I know this is working against gravity . I am comfortable mixing thick enough working upside down. Upside I see is a stable unit during rollover. Downside will I lose the "wet on wet " strength when I eventually epoxy and tape interior months from now. Do the fillet work later and hope for the best during rollover. Does anyone have a mixture for fillet they would like to share? My supplier recommends 1 part milled glass fibers/ 2 part glass microsospheres and cabosil. Sound Right? Thanks
-
Moving slowly along. Great to get the bottom planking underway.

-
Wanted to post something that is "out of the ordinary" that happened today on my build. Family members who have seen my up side down jig contraption in garage have been pretty skeptical of building a boat.At least one that would float.Not because of my skills mind you. I think its more of a thought that if you want a boat .....purchasing a production Clorox bottle white production boat is the only way to go. Backround history .....My dad is a finished carpenter who taught me how to properly run power tools, set ladders and basically any thing to do with carpentry long before my adulthood. Mind you NEITHER of us are boat builders and cant pretend to be. Dad who is now 79 years old and is very strong and feisty and still works 30 hours weekly remodeling and odd jobs. Dad asks what I am doing today and I respond that I intend to glue the bottom down on the OB20. He says he will come over to "watch'. After showing him Grahams drawing and methods for assembly WE jumped right in slinging epoxy, ratchet clamps and any thing we could reach. There was some apprehension in his part on how the heck the 3/8" ply was going to bend , then as we were both working can see this taking shape. As the bow is all clamped up dad stands back (and has the same thought that has run through my head hundreds of times) and says " wow look at the curve on her" It finally hit me..... It wasnt about how much we got done or when it will be ready (if at all ) it was about enjoying the journey.
-
Ronny Looks great. "ronnies raft" me motivation to attempt my build. I like your idea for vertical hatches for batteries instead of horizontal. Can I ask you what you used for your windshield gasket, sliding track and portholes?
-
Popped the transom on today. I have attached pics how the weep holes are set up in the bulkheads and stringer. I am going to seal the edges of the weep holes a few times before bottom goes on. Wanted airflow and drainage to the bilge. Been reading about pros and cons of foam flotation. Dont think I will be using foam for my build. Thank you Miyot. I have followed your thread and am totally impressed.


-
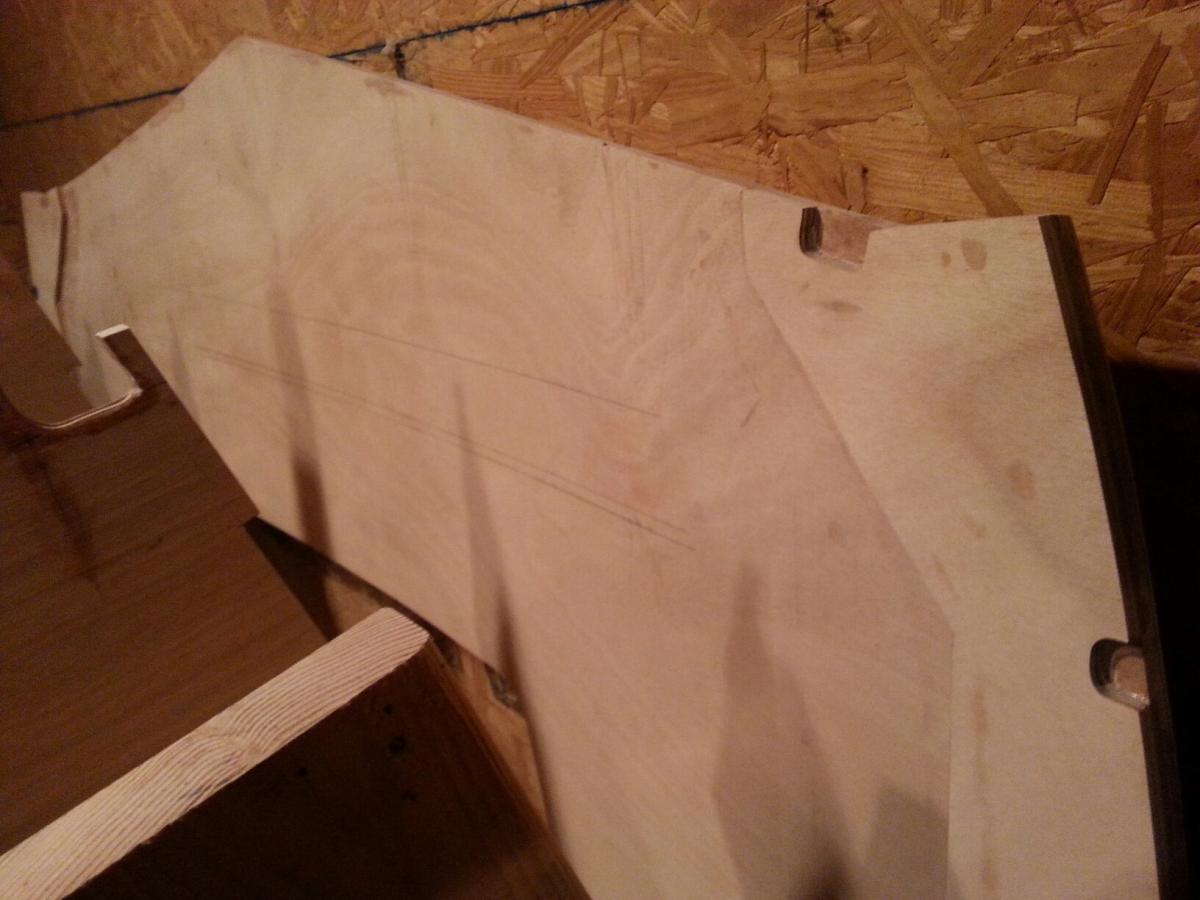
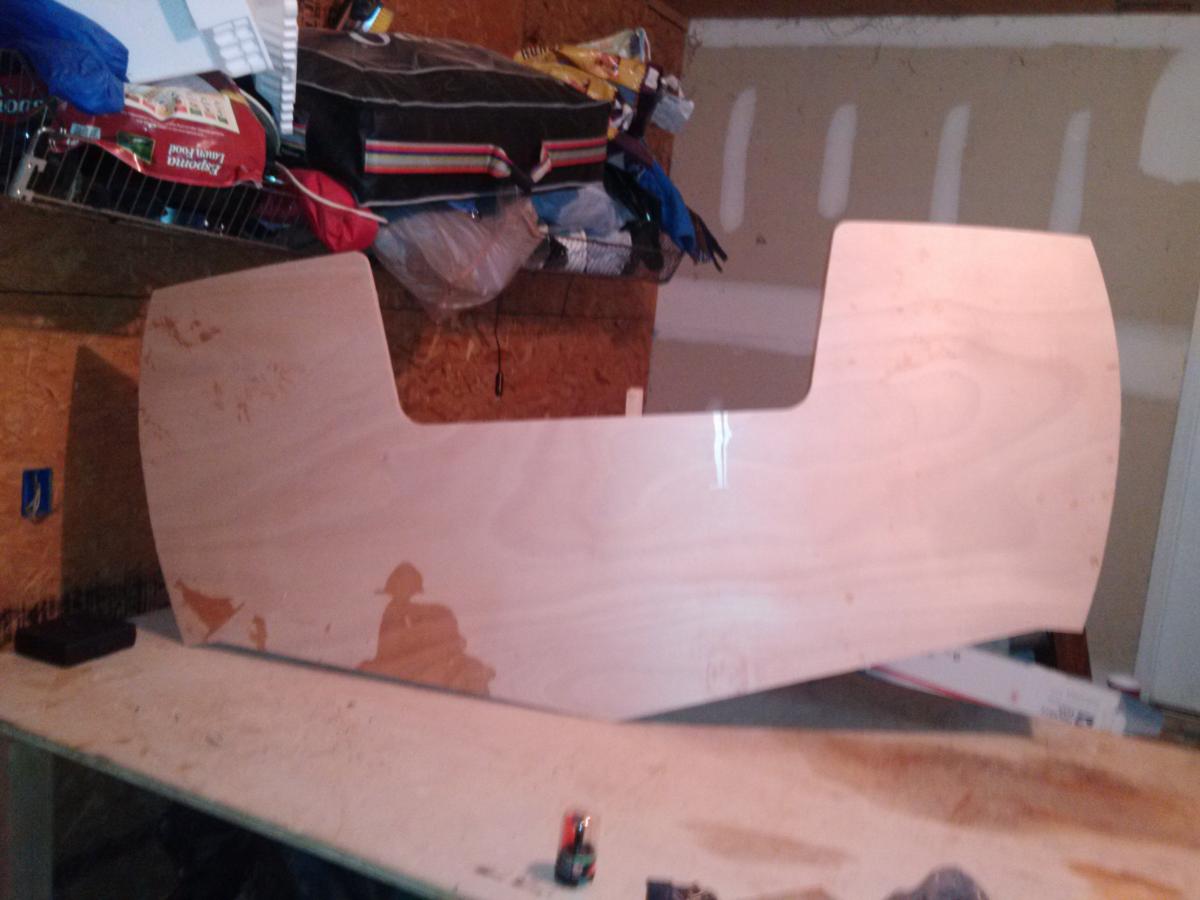
keen2build again I promised to give a picture of the transom. The transom is finally closer. 9 total components ( 7 layers & 2 doublers) , 16 cutouts (5 @ each doubler 4 for stringers 1 for keel 1 for outboard notch) I think i strayed from the drawing a little . Not because I wanted to add strength or weight.... and I DO NOT want to make a habit straying from the plans. I know only enough to get myself in trouble sometimes. I left material to capture the outboard stringers also for the fact I am working alone and I want to glue the transom in and capture all the stringers and be done w/ it. I will probably be sorry as it may cause conflicts that I have not yet discovered. I retained the cutoff for the outboard and may use it as the sacrificial piece between the outboard and the outside of the transom. It already has the correct radius. What I cant figure out is when to attach the sacrificial piece to the transom and how. I assume it goes in after the transom is glass and epoxied? Maybe just 5200 around the perimeter? Does anyone have any ideas that they want to share?

-
Spent some time in the garage. Added 4 layers of 6mm okume to the interior of the transom and will notch for the keel and stringers when dry .I didnt want to put back in vacuum bag as I had to locate the pcs accurately. I layed aft face of transom on my bench supported it and put full bags of wood pellets for clamping pressure. I honestly thought it worked better than the vacum bag at the shop. I cant believe how rigid the transom has become. Pic to follow. I glued the chine battens to the stem and the 1st bulkhead. Even though I laminated the solid chine battens in 4 equal layers there is a considerable amount of torque required to twist the fore end of the chine batten with it totally in place . I decided to lift the aft ends of chine batten and I could then hold the fore end of chine batten w/ no pressure. This could be an epic failure when I drop the aft end later and I hear the epoxy pop but I hope it will be fine . Again I did not use temporary or permanent fasteners. I scarfed the aft end of the chine batten before I glued into place. I can see the bottoms going on shortly.

-
http://messing-about.com/forums/topic/8854-phishunt-ok20/?hl=%2Btransom+%2Bdrawing#entry76897 keen..... look in this link it has a drawing that graham produced for another design of his. I had same question and graham directed me to do the same thing. 4 layers of 6 mm between the well. I have to get more epoxy and I have the sheet of 6 mm waiting so I will do this late this week.Anyway here is the picture of my transom and the transom doublers as shown in the drawing. http://messing-about.com/forums/topic/8854-phishunt-ok20/?hl=%2Btransom+%2Bdrawing#entry76897 keen..... look in this link it has a drawing that graham produced for another design of his. I had same question and graham directed me to do the same thing. 4 layers of 6 mm between the well. I have to get more epoxy and I have the sheet of 6 mm waiting so I will do this late this week.Anyway here is the picture of my transom and the transom doublers as shown in the drawing.

-
Worked on the chine batten. My options were yellow cedar (expensive) southern yellow pine ( locally the quality was iffy) and clear vertical grain doug fir (quality good and reasonable) . Ended up w/ the doug fir. Working alone I decided to use 4 layers of 3/8" x 3/4" and laminate them together. Grahams recommendation of pvc pipe cutoffs for clamps works well here.


-
Progress has been slow. Holidays along w/ polar vortex has made it difficult to get into garage. I have kerosene heater that could keep up however the fumes would be pretty tough. Got the interior keel glued up. I was able to find a 1" x 5 1/2" x 18' long clear vertical grain doug fir plank at local lumberyard so I wont have to scarf that. Lennie G come on over anytime.
-
Thought I would update the progress of OB 20 hull # 24. Not as far as I would like to be but moving foward . I am really getting the feel as to how strong (and light) this hull is as designed. Stem is done and will be getting the keel material this week. I used straight grained doug fir CVG on the stem. The material was very very good quality w/ a very tight and very straight grain.( I am thinking old growth ) however this material for 1 5/8" x 3 5/8" S4S was about $5 a linear foot. Buying S4S (surfaced) material was actually cheaper than buying5/4 in the rough.Will be using southern yellow pine for the material that will be bent.

-
Ron I couldnt have said it better. Even though I am in the early early stages of my 1st build I feel the same way. I enjoy thinking ahead on what the next "goal" will be even if its glueing up a few components. It has been slow going for me as I am trying to set up "shop" as I build ( and have picked up tools from craigslist along the way) .
-
Spent some time working on the boat this weekend. I have a blank of straight grain Doug fir glued up for the stem pieces.Going to rough cut the stem pieces and see if it "relaxes" some before the finish cut. Took the transom out of the vacuum bag shaped it and beveled the edges (did a ton of research and emailed graham and decided to make the transom notch now ) . Pretty happy on how that came out. Spun the boat around and re-leveled the frame in the garage. The available length is tight in the garage so I figured needed more room to work the bow than transom. You can see in the pic I use a laser to level the frame and some furniture leveling feet at the frame for floor adjustment (I am nuts about level,square and plumb when I build something). Surprisingly the frame doesn't move when you lean against it.Its been my first time working w/ epoxy doing the transom lamination's and the stem glue up.Got to learn not to be wasteful in that department. Humidity was 92% here in the northeast this weekend which is really uncomfortable and my best friend is bug spray from those pesky mosquitoes working late afternoons in the garage.


-
Got sidetracked with remodeling a room in the house so the boat project was idle for a week. Produced a shaped form for the transom and put all 3 sheets of Okume and the form in a vacum bag tonight at the shop. Will remove from bag late tomorrow or Sat and trim perimeter to shape later this weekend I hope. I do have access to a shop but I dont want to overstay my welcome and not use up all my "favors" early in the process. If you look to the back of the picture you can see the form waiting for the laminations. Turned the pump down not to overclamp the epoxy.

-
Manolis Will look foward to seeing the progress of your build as well. I think it will take me north of 800 hours to build this (based on a pure guess) and reading Rons thread over and over again. Ron have I said lately how impressed I am with your build? Anyway with the time availible to me 40 hours a month at best I see about 20 months barring any serious setbacks. It is what it is, I cant control the amount of time it will take but I can control the quality I want to dedicate to this boat.I will have this boat a long long time and I dont want to go in cutting corners. I have read about plastic staples, straps and screws to hold the exterior ply.I am going to try something outside the box.I have hand routered the two temporary ribs using bendable hardwood strips, rubber molding and anything i can get my hands on. This gave me a outer rerverse mold that i will use to clamp againt the inner ribs. I will screw blocks in between the "outer ribs " where the horizontal rails exist. I will use shingles to push the ply away from outer ribs and against the inner ribs.I will bascilly end up with a outer "mold" when it is all said and done.I think its the way to go working alone.